Integrate Firebase with App Live
Firebase is an app development, testing and distribution platform. The App Distribution feature of Firebase enables you to distribute your apps with your testers for testing.
You can integrate Firebase App Distribution with App Live to test your apps on App Live. After you integrate Firebase with App Live, you can add your Firebase projects in App Live and share them with your team members. Your team can then test your apps in the shared project on App Live.
In this page, we will see:
- Supported app formats
- Prerequisites
- Integrate Firebase and add a project on App Live
- View projects
- Share projects
- Synchronize or unsynchronize projects
- Launch a session with a Firebase app
- Other actions such as adding more projects, refreshing, and deleting projects
- Troubleshoot OAuth expiry when using Firebase integration
Supported app formats
The following app formats are supported:
-
Android:
.apk -
iOS:
.ipa
Prerequisites
Before you begin, complete the following on Firebase:
- (Recommended) Create a separate project for the apps that you want to test on App Live and add the apps.
- Ensure that you have at least
Vieweraccess to the project that you want to integrate. - Set up OAuth for your project. To do that, on Google Cloud Console, create credentials for OAuth Client ID. For Application type, select Web Application and add this authorized redirect URI:
https://app-live.browserstack.com/firebase/oauth.
For detailed steps, see Setting up OAuth 2.0. To read more about Google OAuth, see Google’s documentation. - Download the OAuth client config JSON file or keep the project ID, client ID, and client secret key handy.
If your Firebase refresh token is expired or revoked, App Live will prompt you to re-authenticate. Tokens are issued and managed by Firebase, BrowserStack does not control the validity period of these tokens.
For troubleshooting expired or revoked tokens, see Troubleshoot OAuth expiry when using Firebase integration.
Integrate Firebase and add a project on App Live
To integrate Firebase and add a project on App Live, follow these steps:
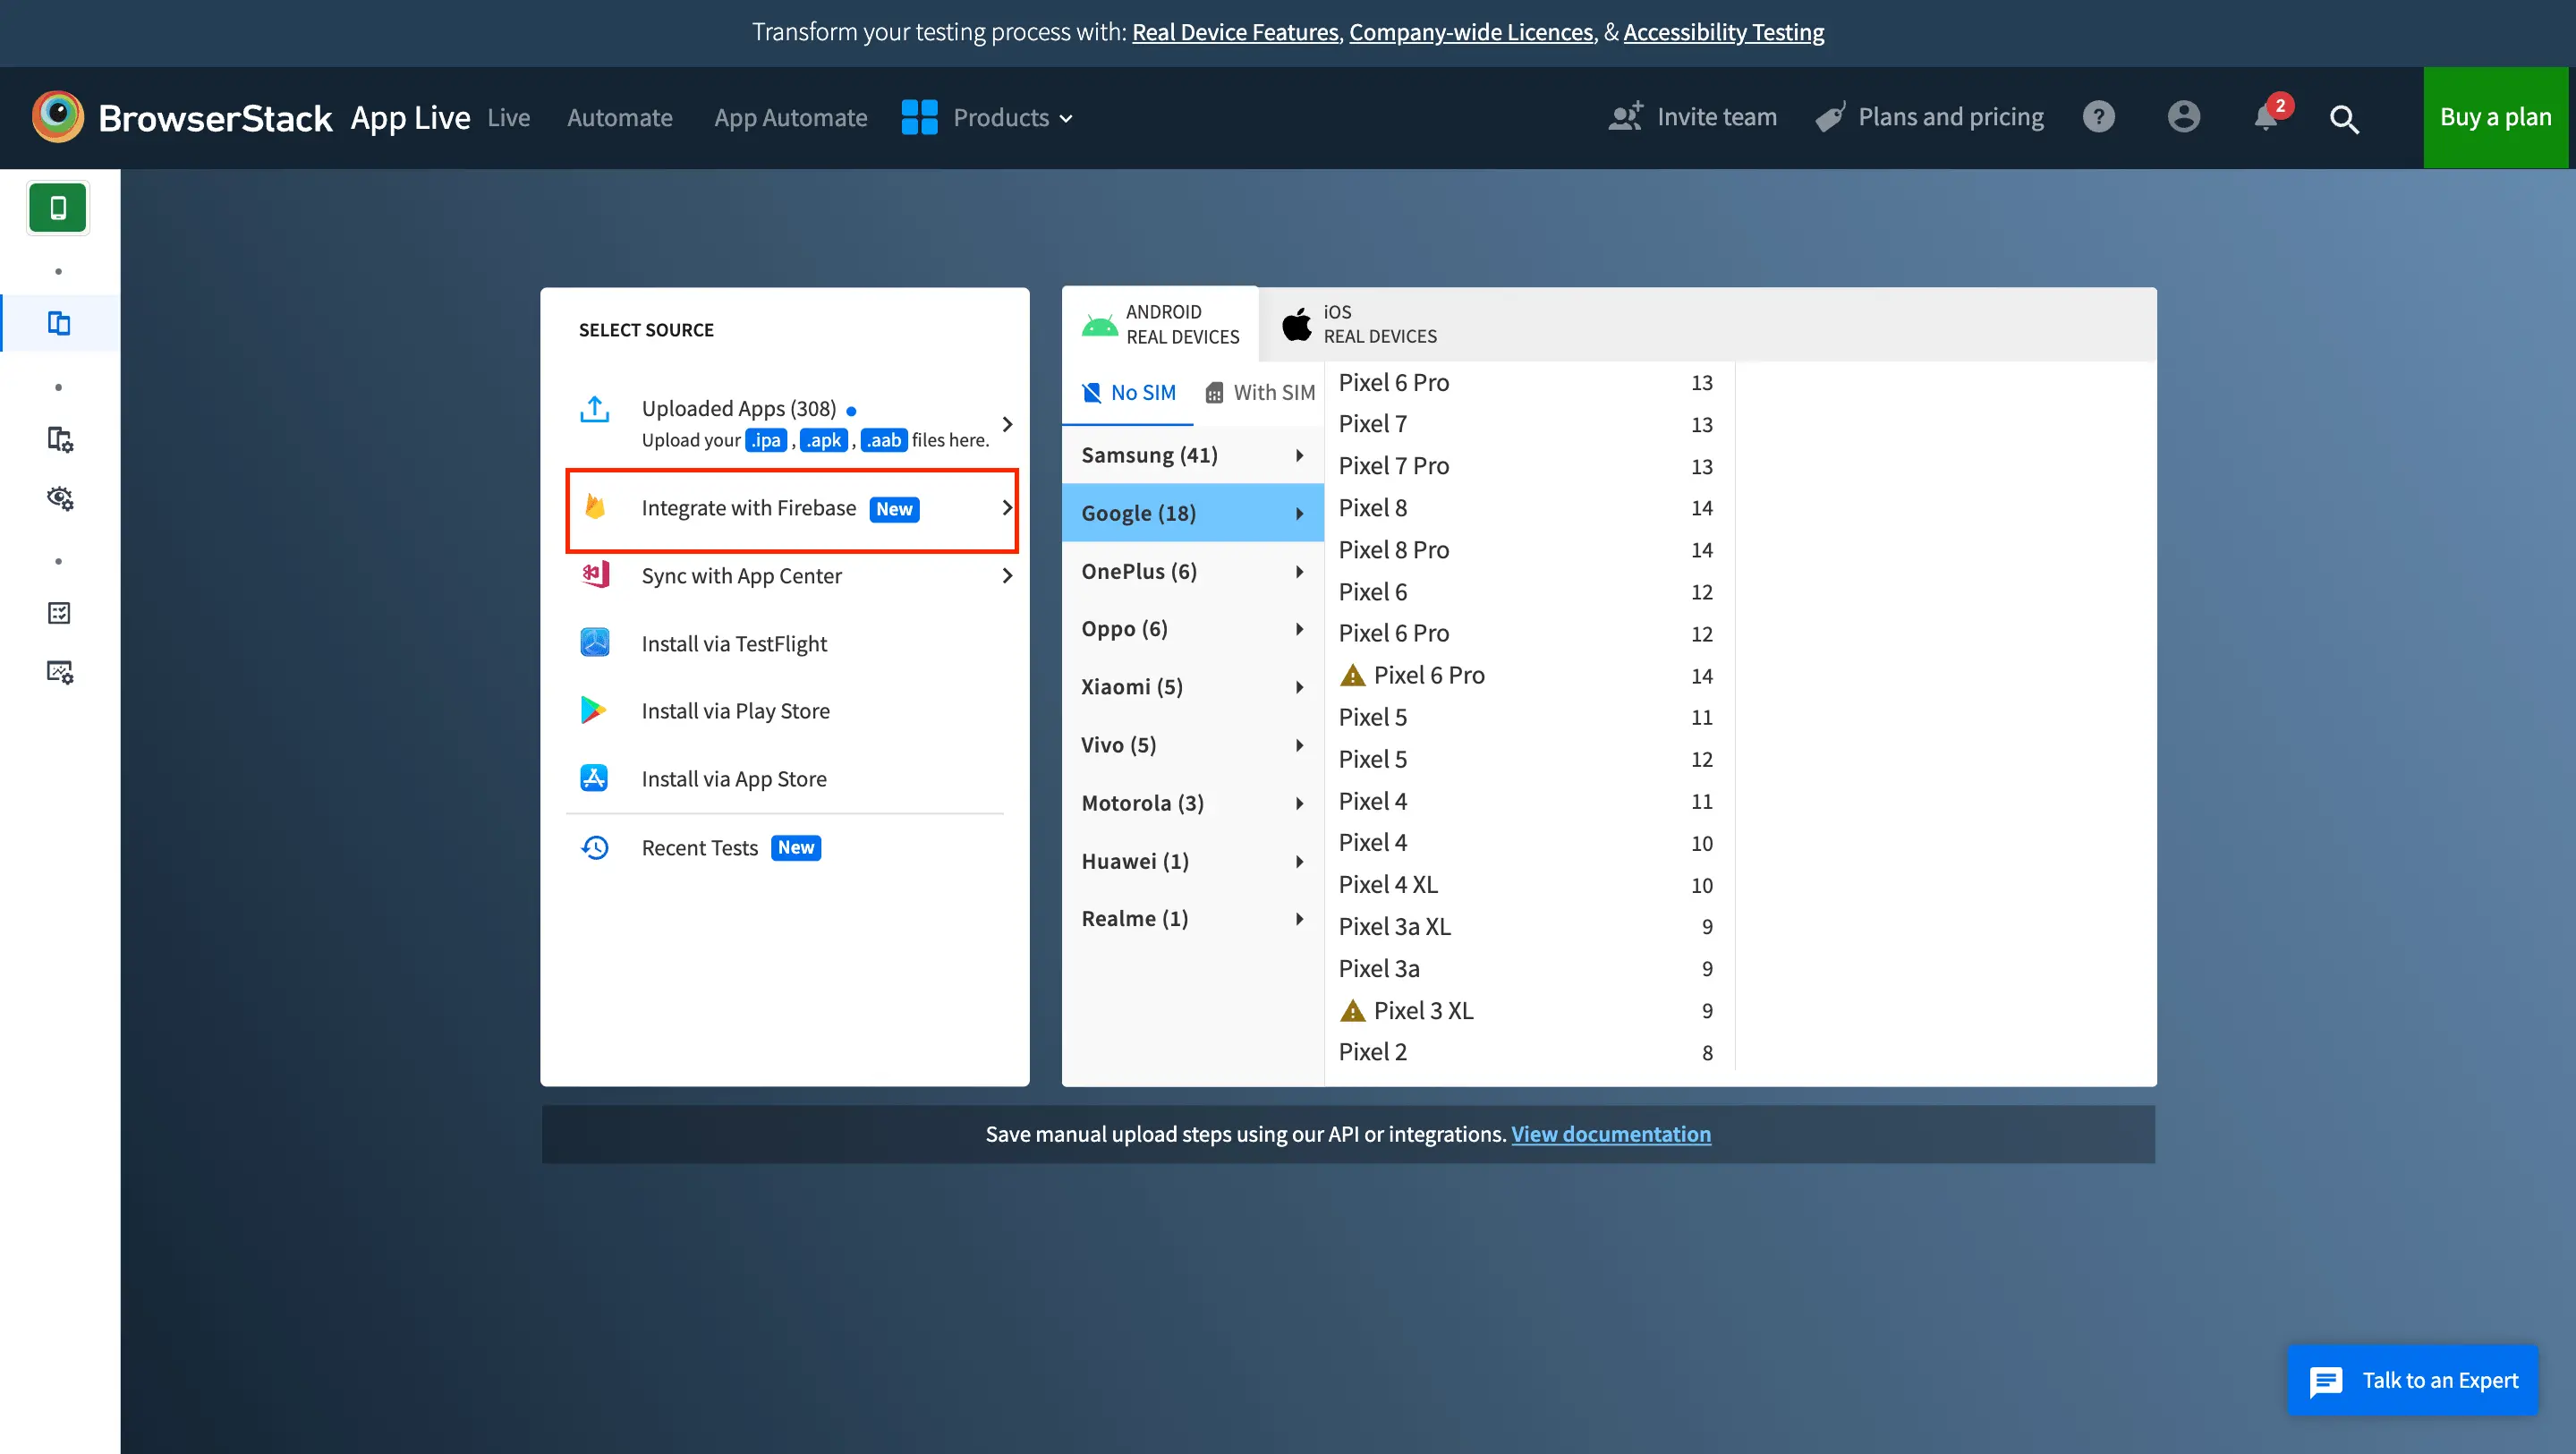
- Log in to the App Live dashboard.
- On the Select Source panel, click Integrate with Firebase.
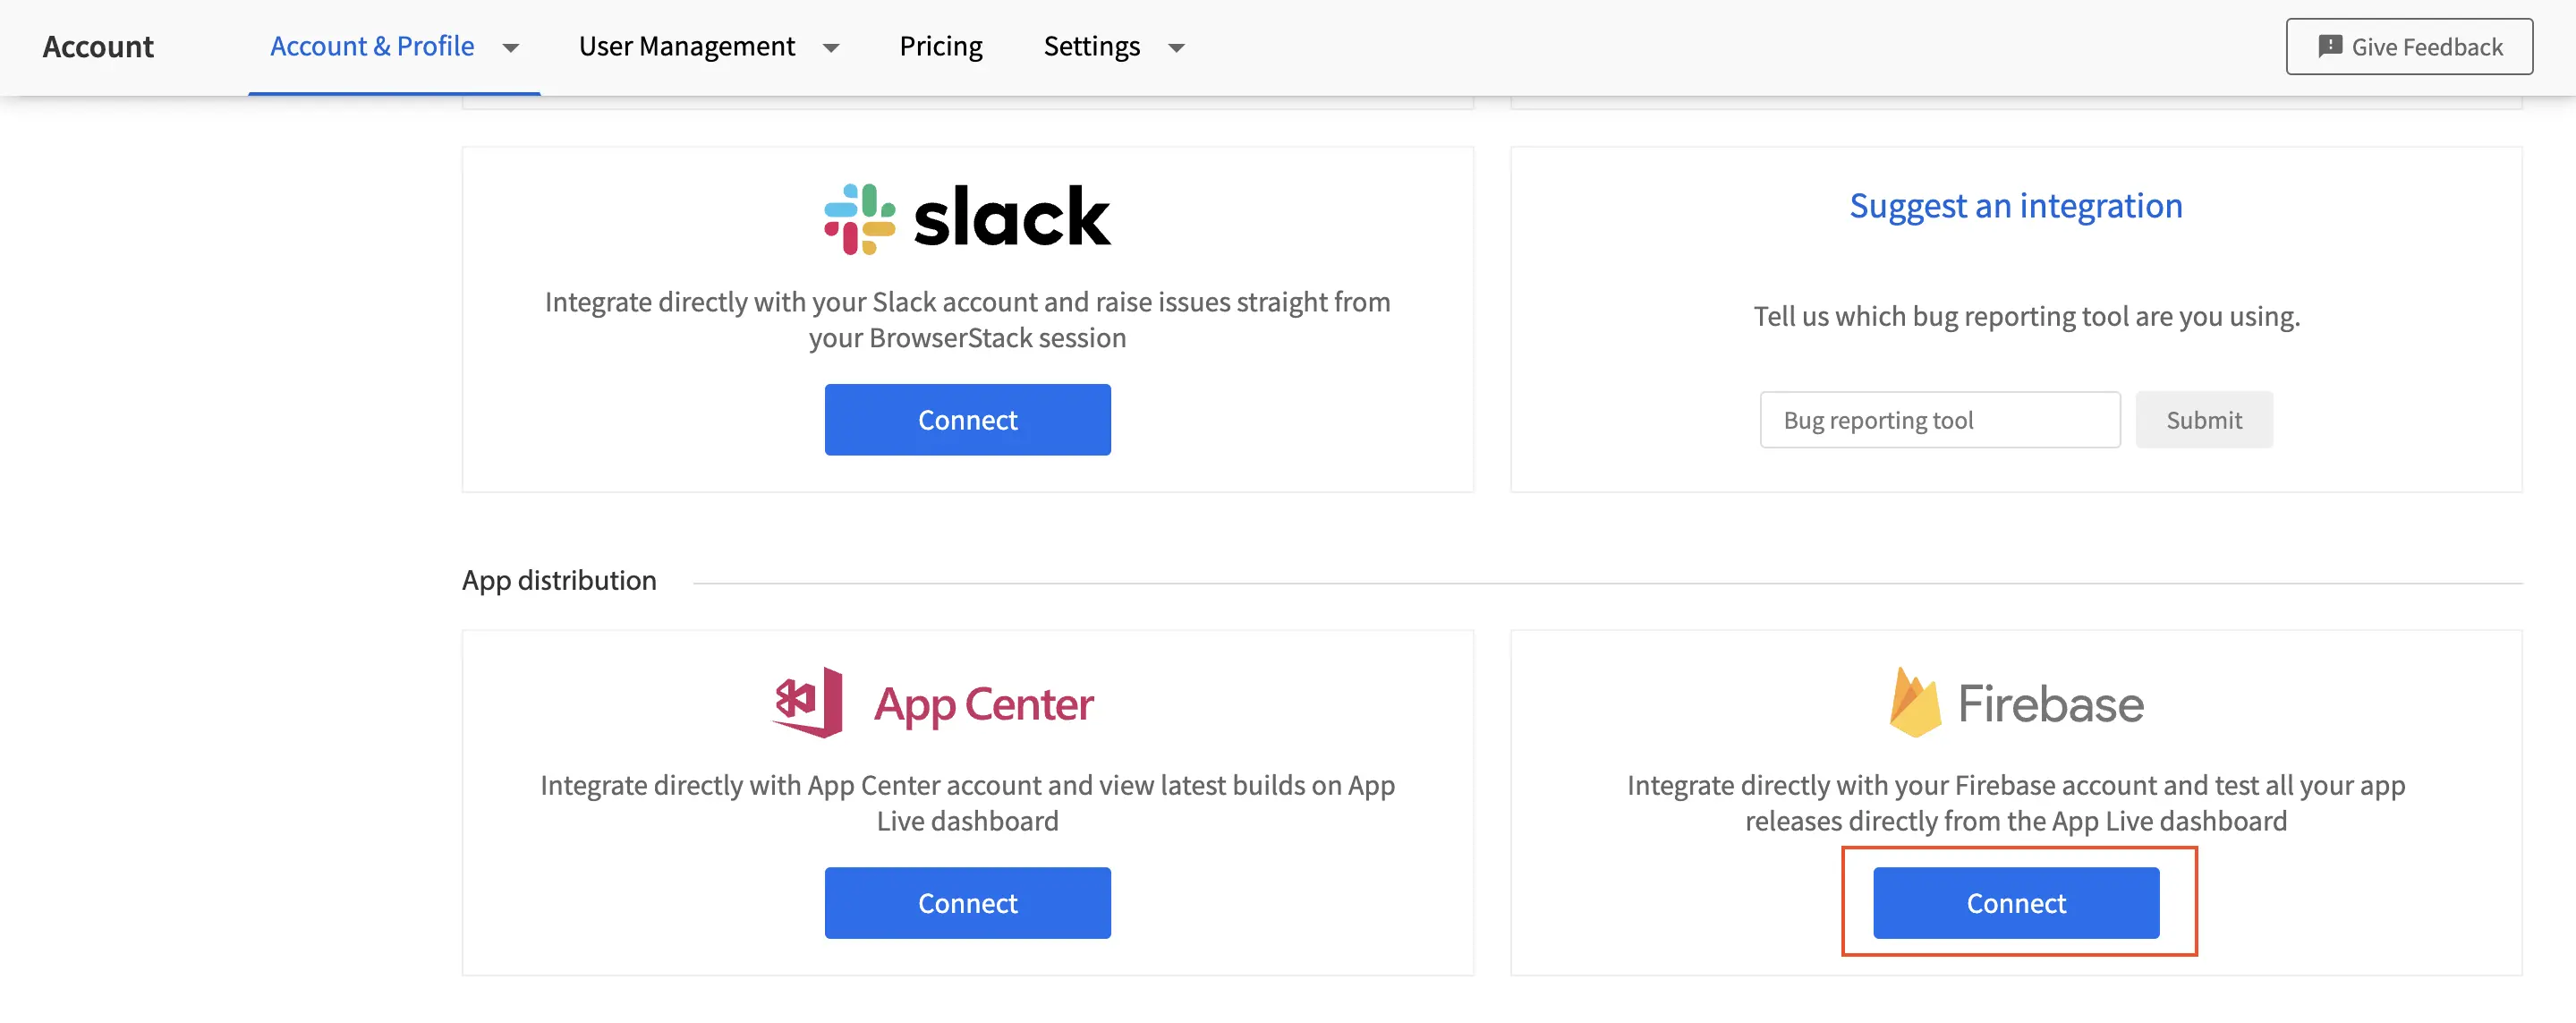
 Alternatively, go to the Integrations page. Scroll down to the Firebase tile and click Connect.
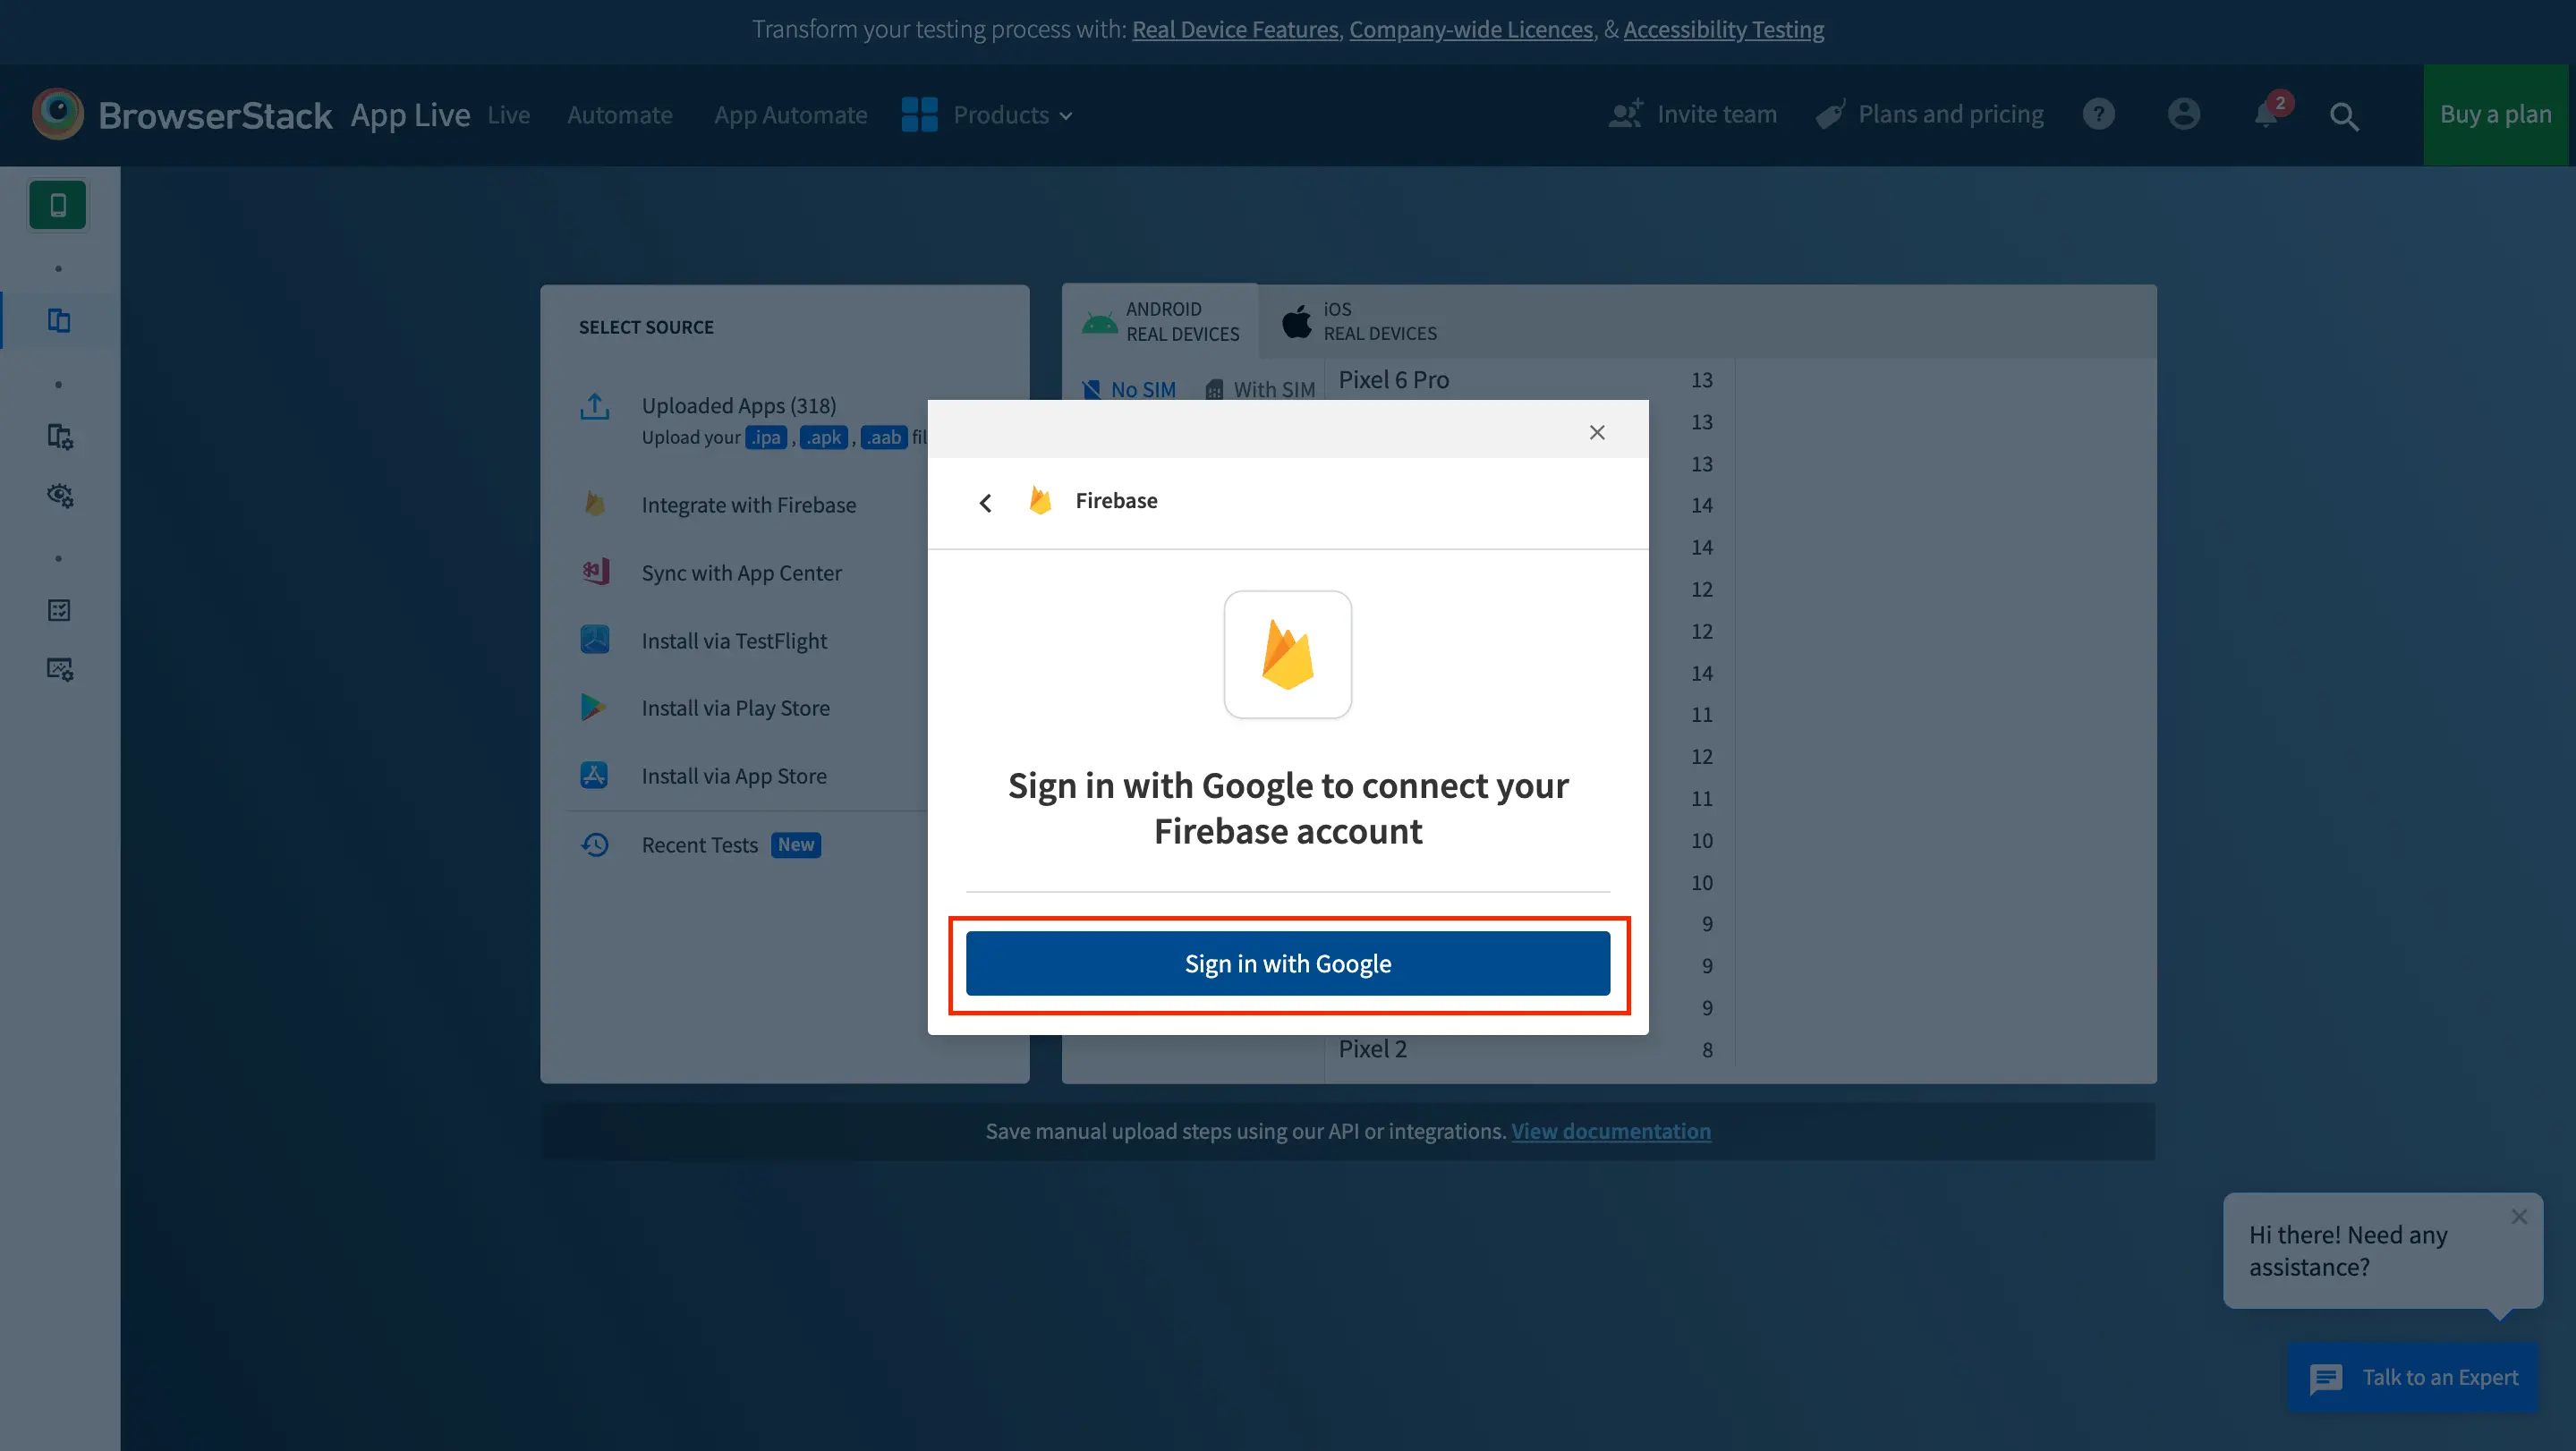
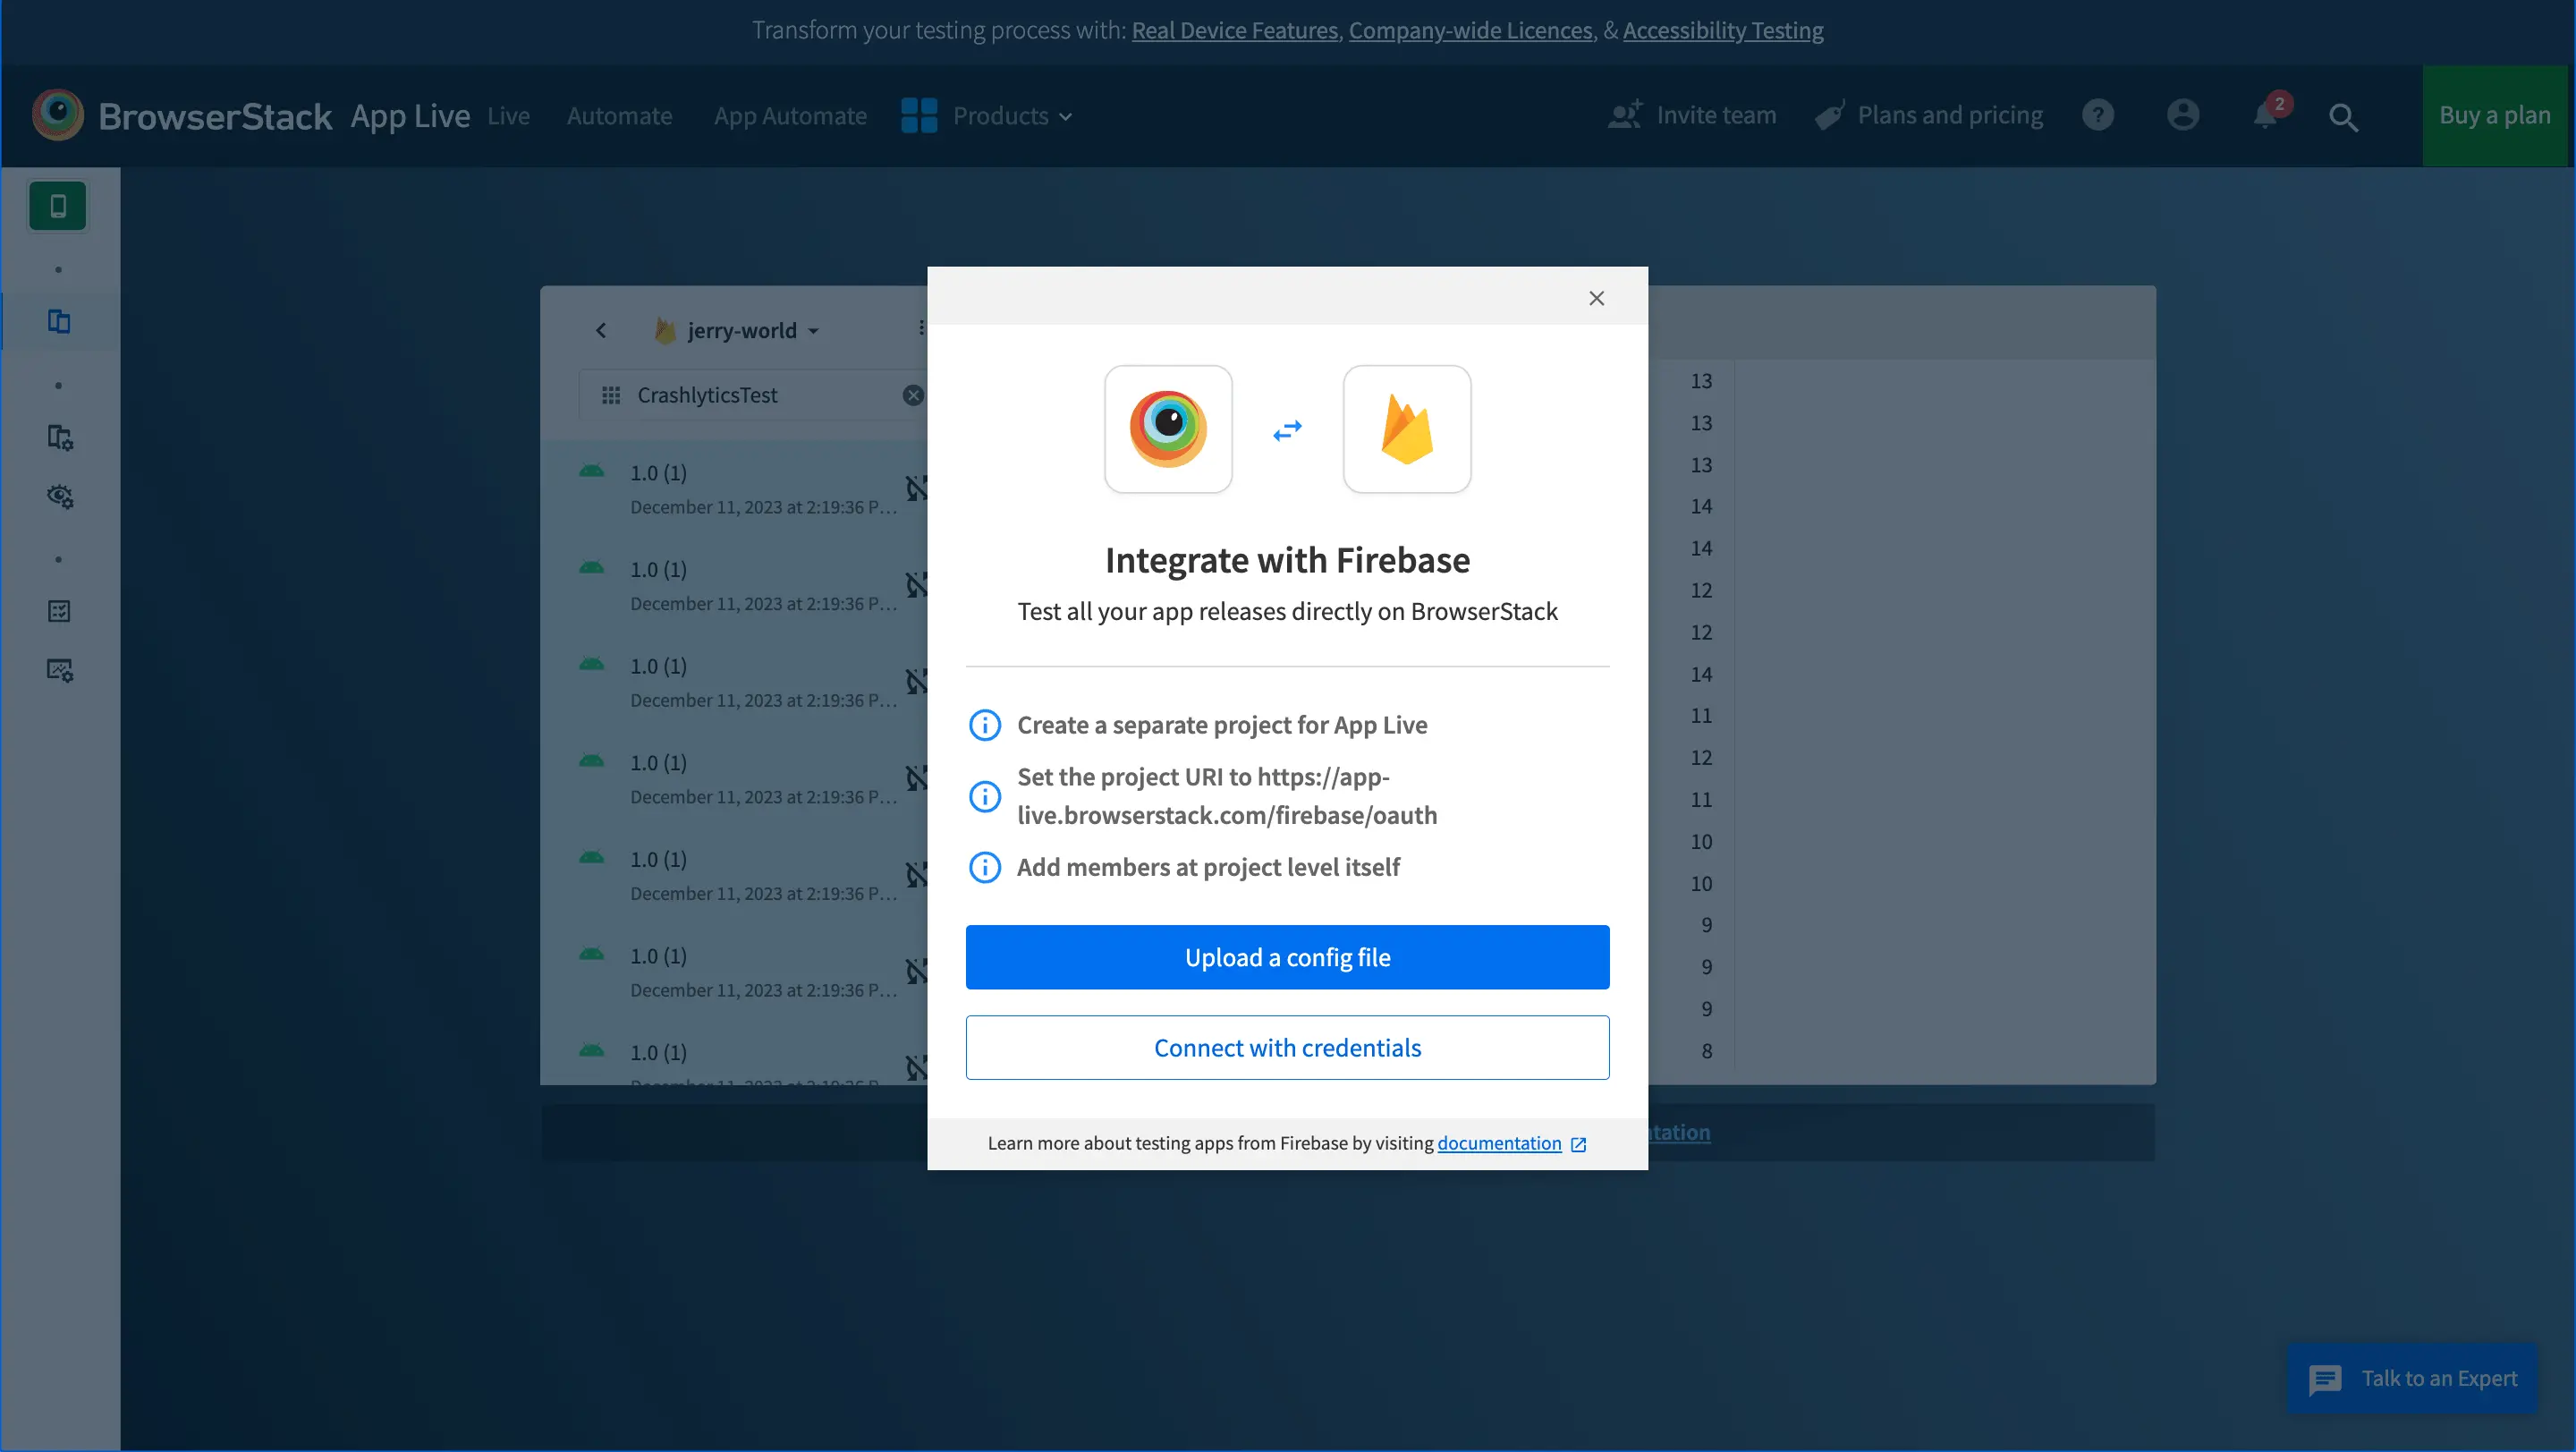
- On the Integrate with Firebase prompt, you can use one of the two authentication options to add the authentication details for your project:
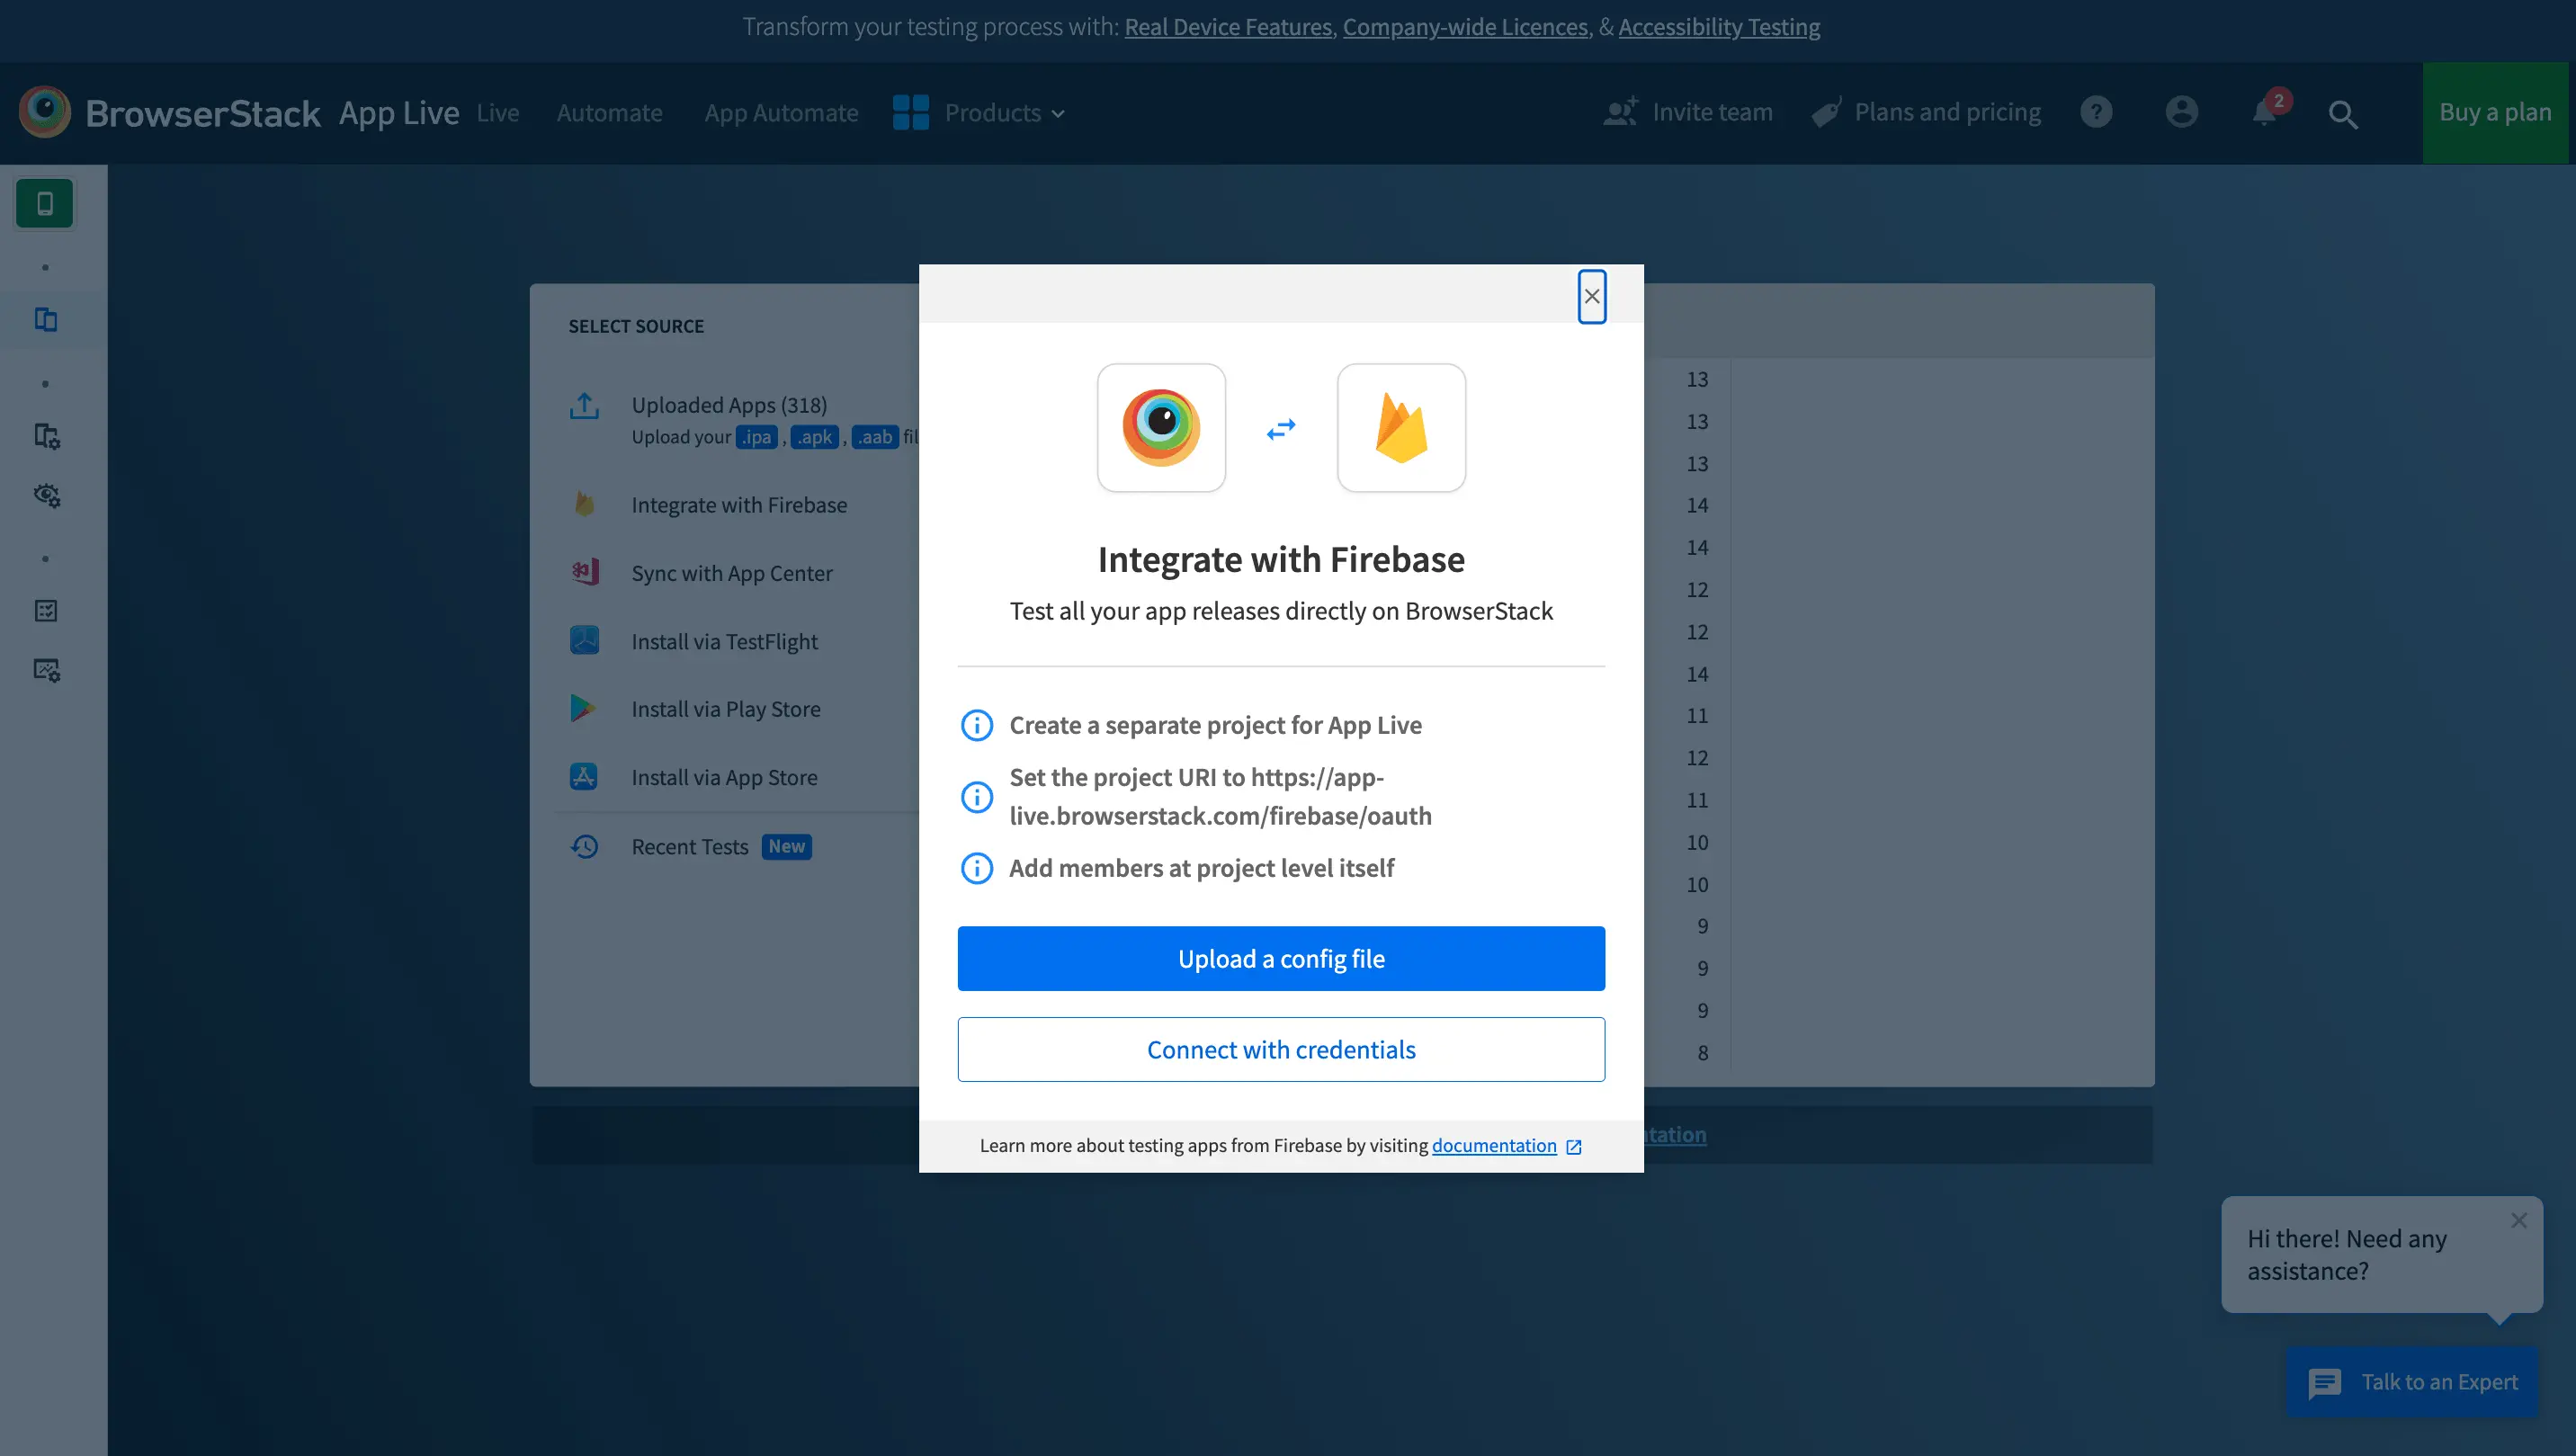
-
Upload a config file: Use this option to configure authentication using the project config file.
Click Upload a config file. Browse to the location where the config file is stored. Select the file and click Open.
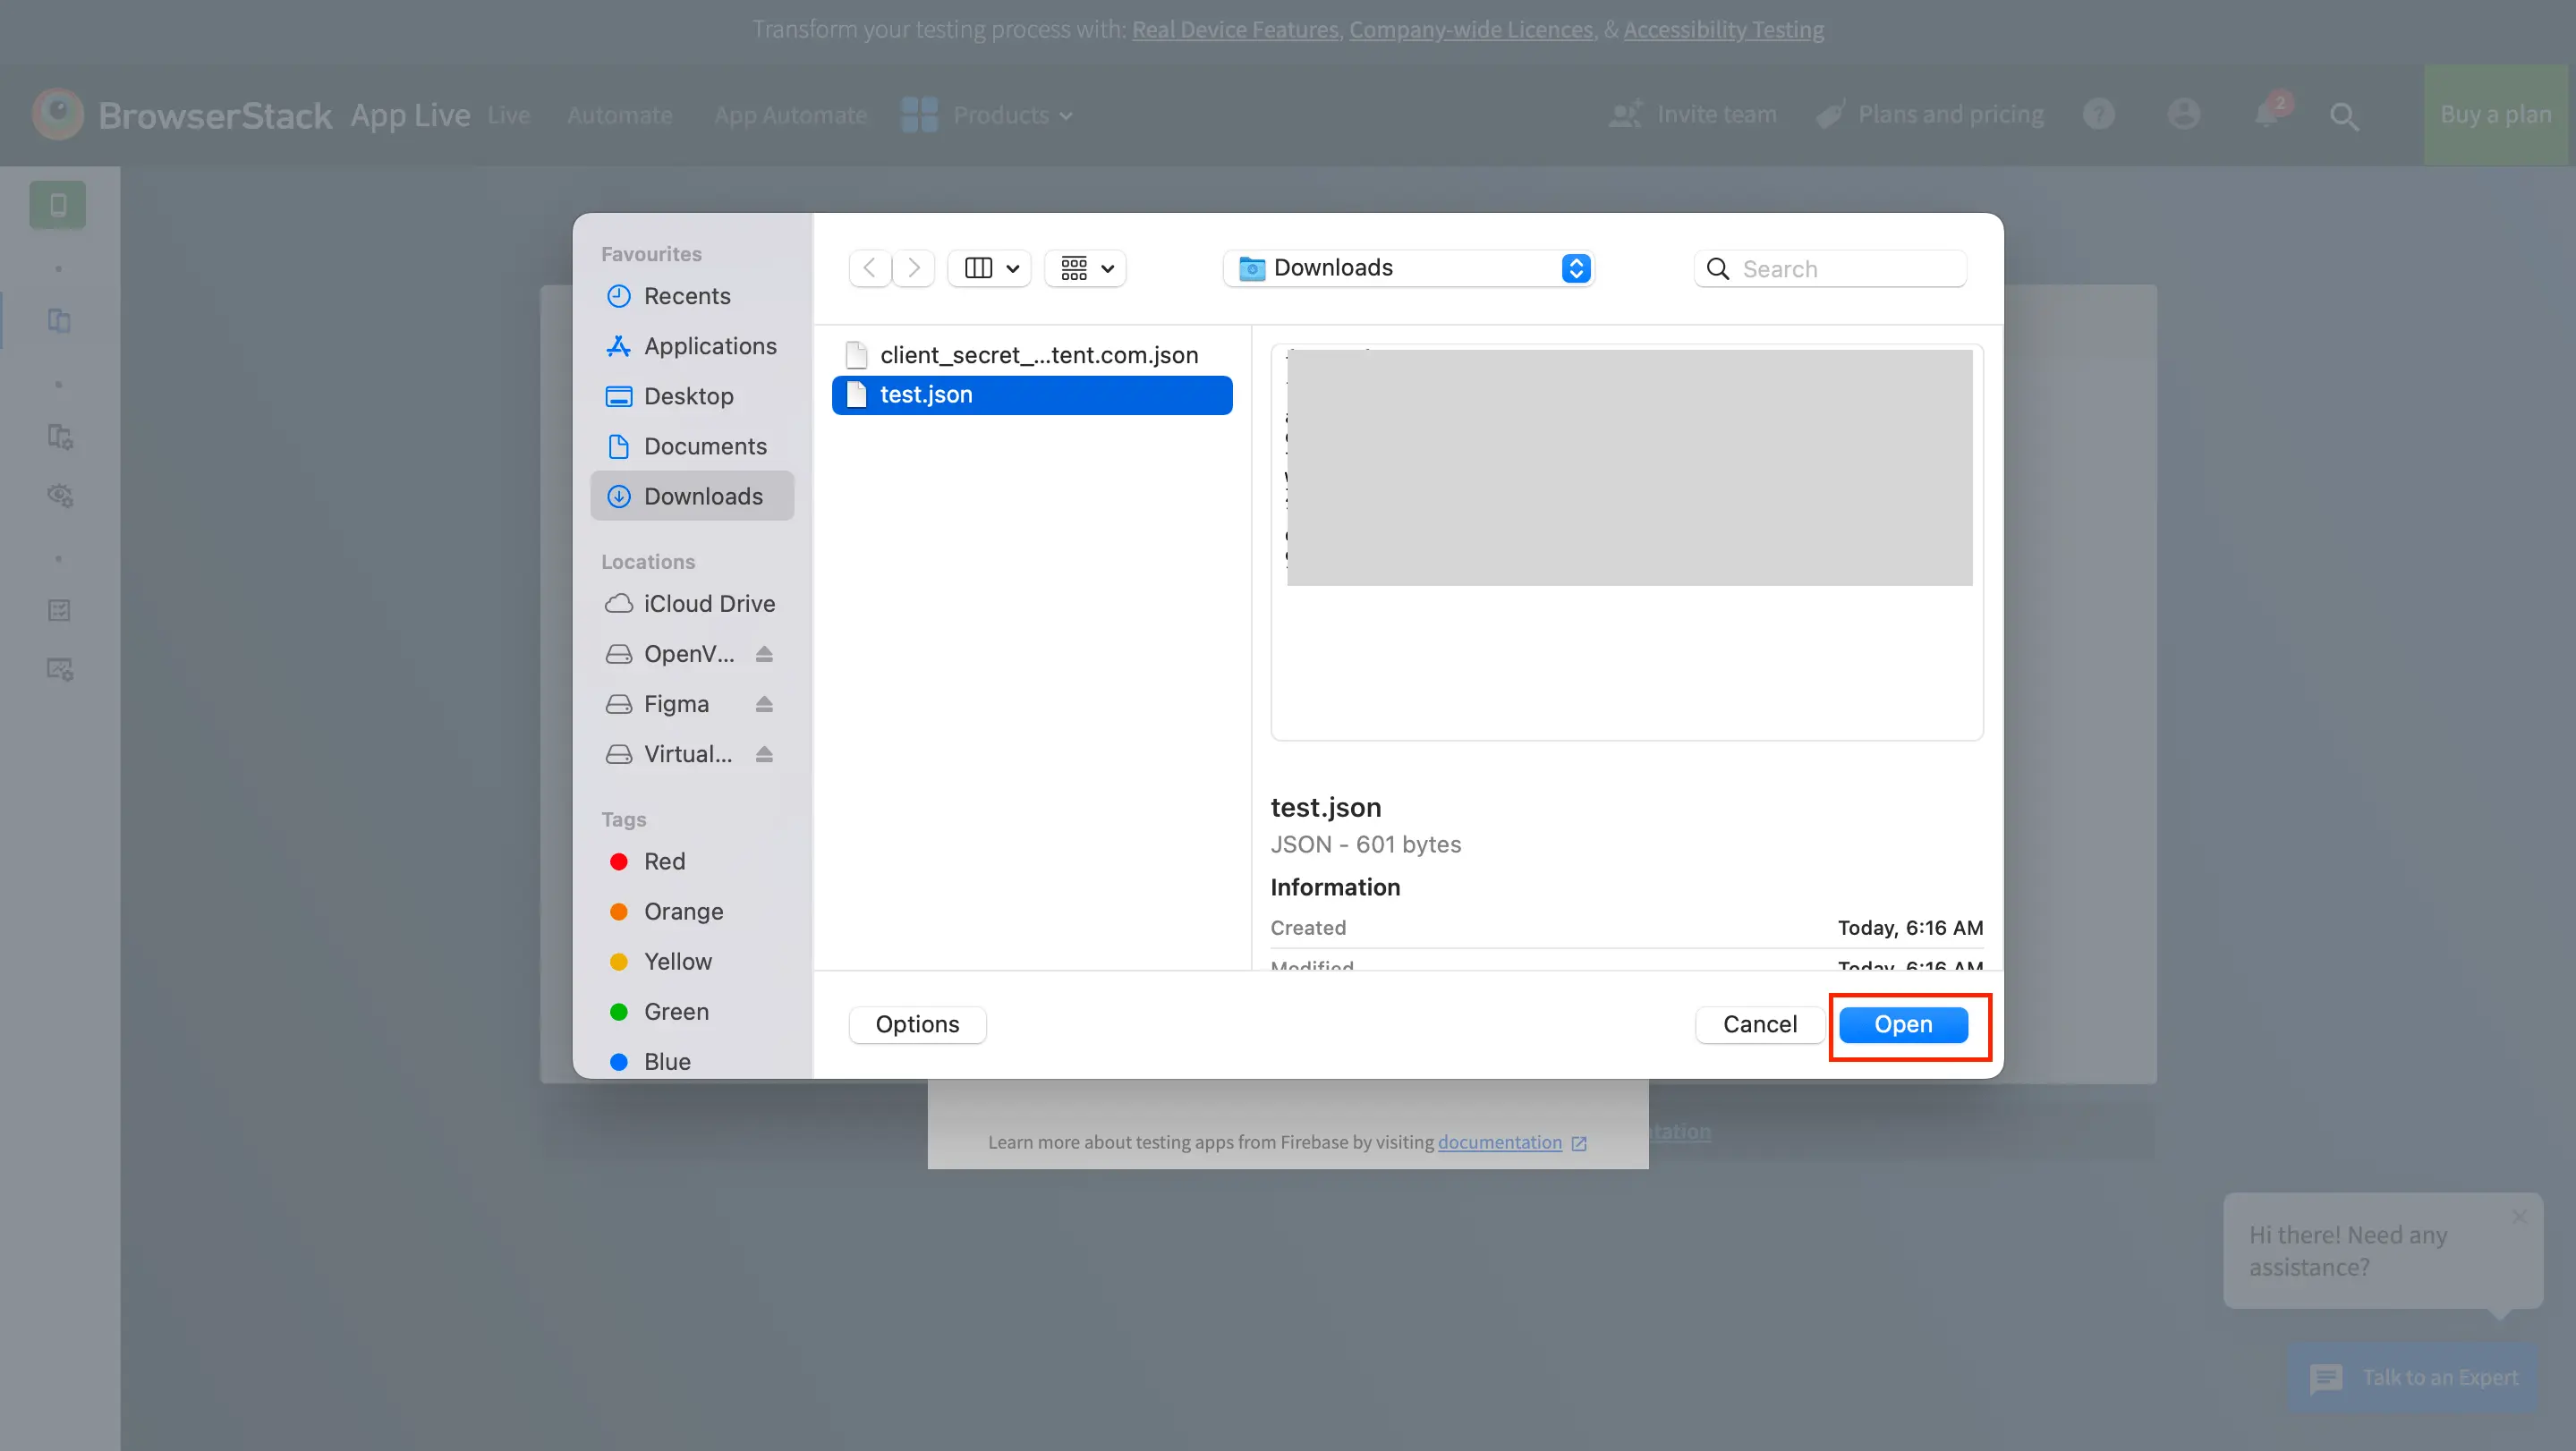
App Live automatically reads the project ID, client ID, and secret key from the config file. Next, click Sign in with Google.
-
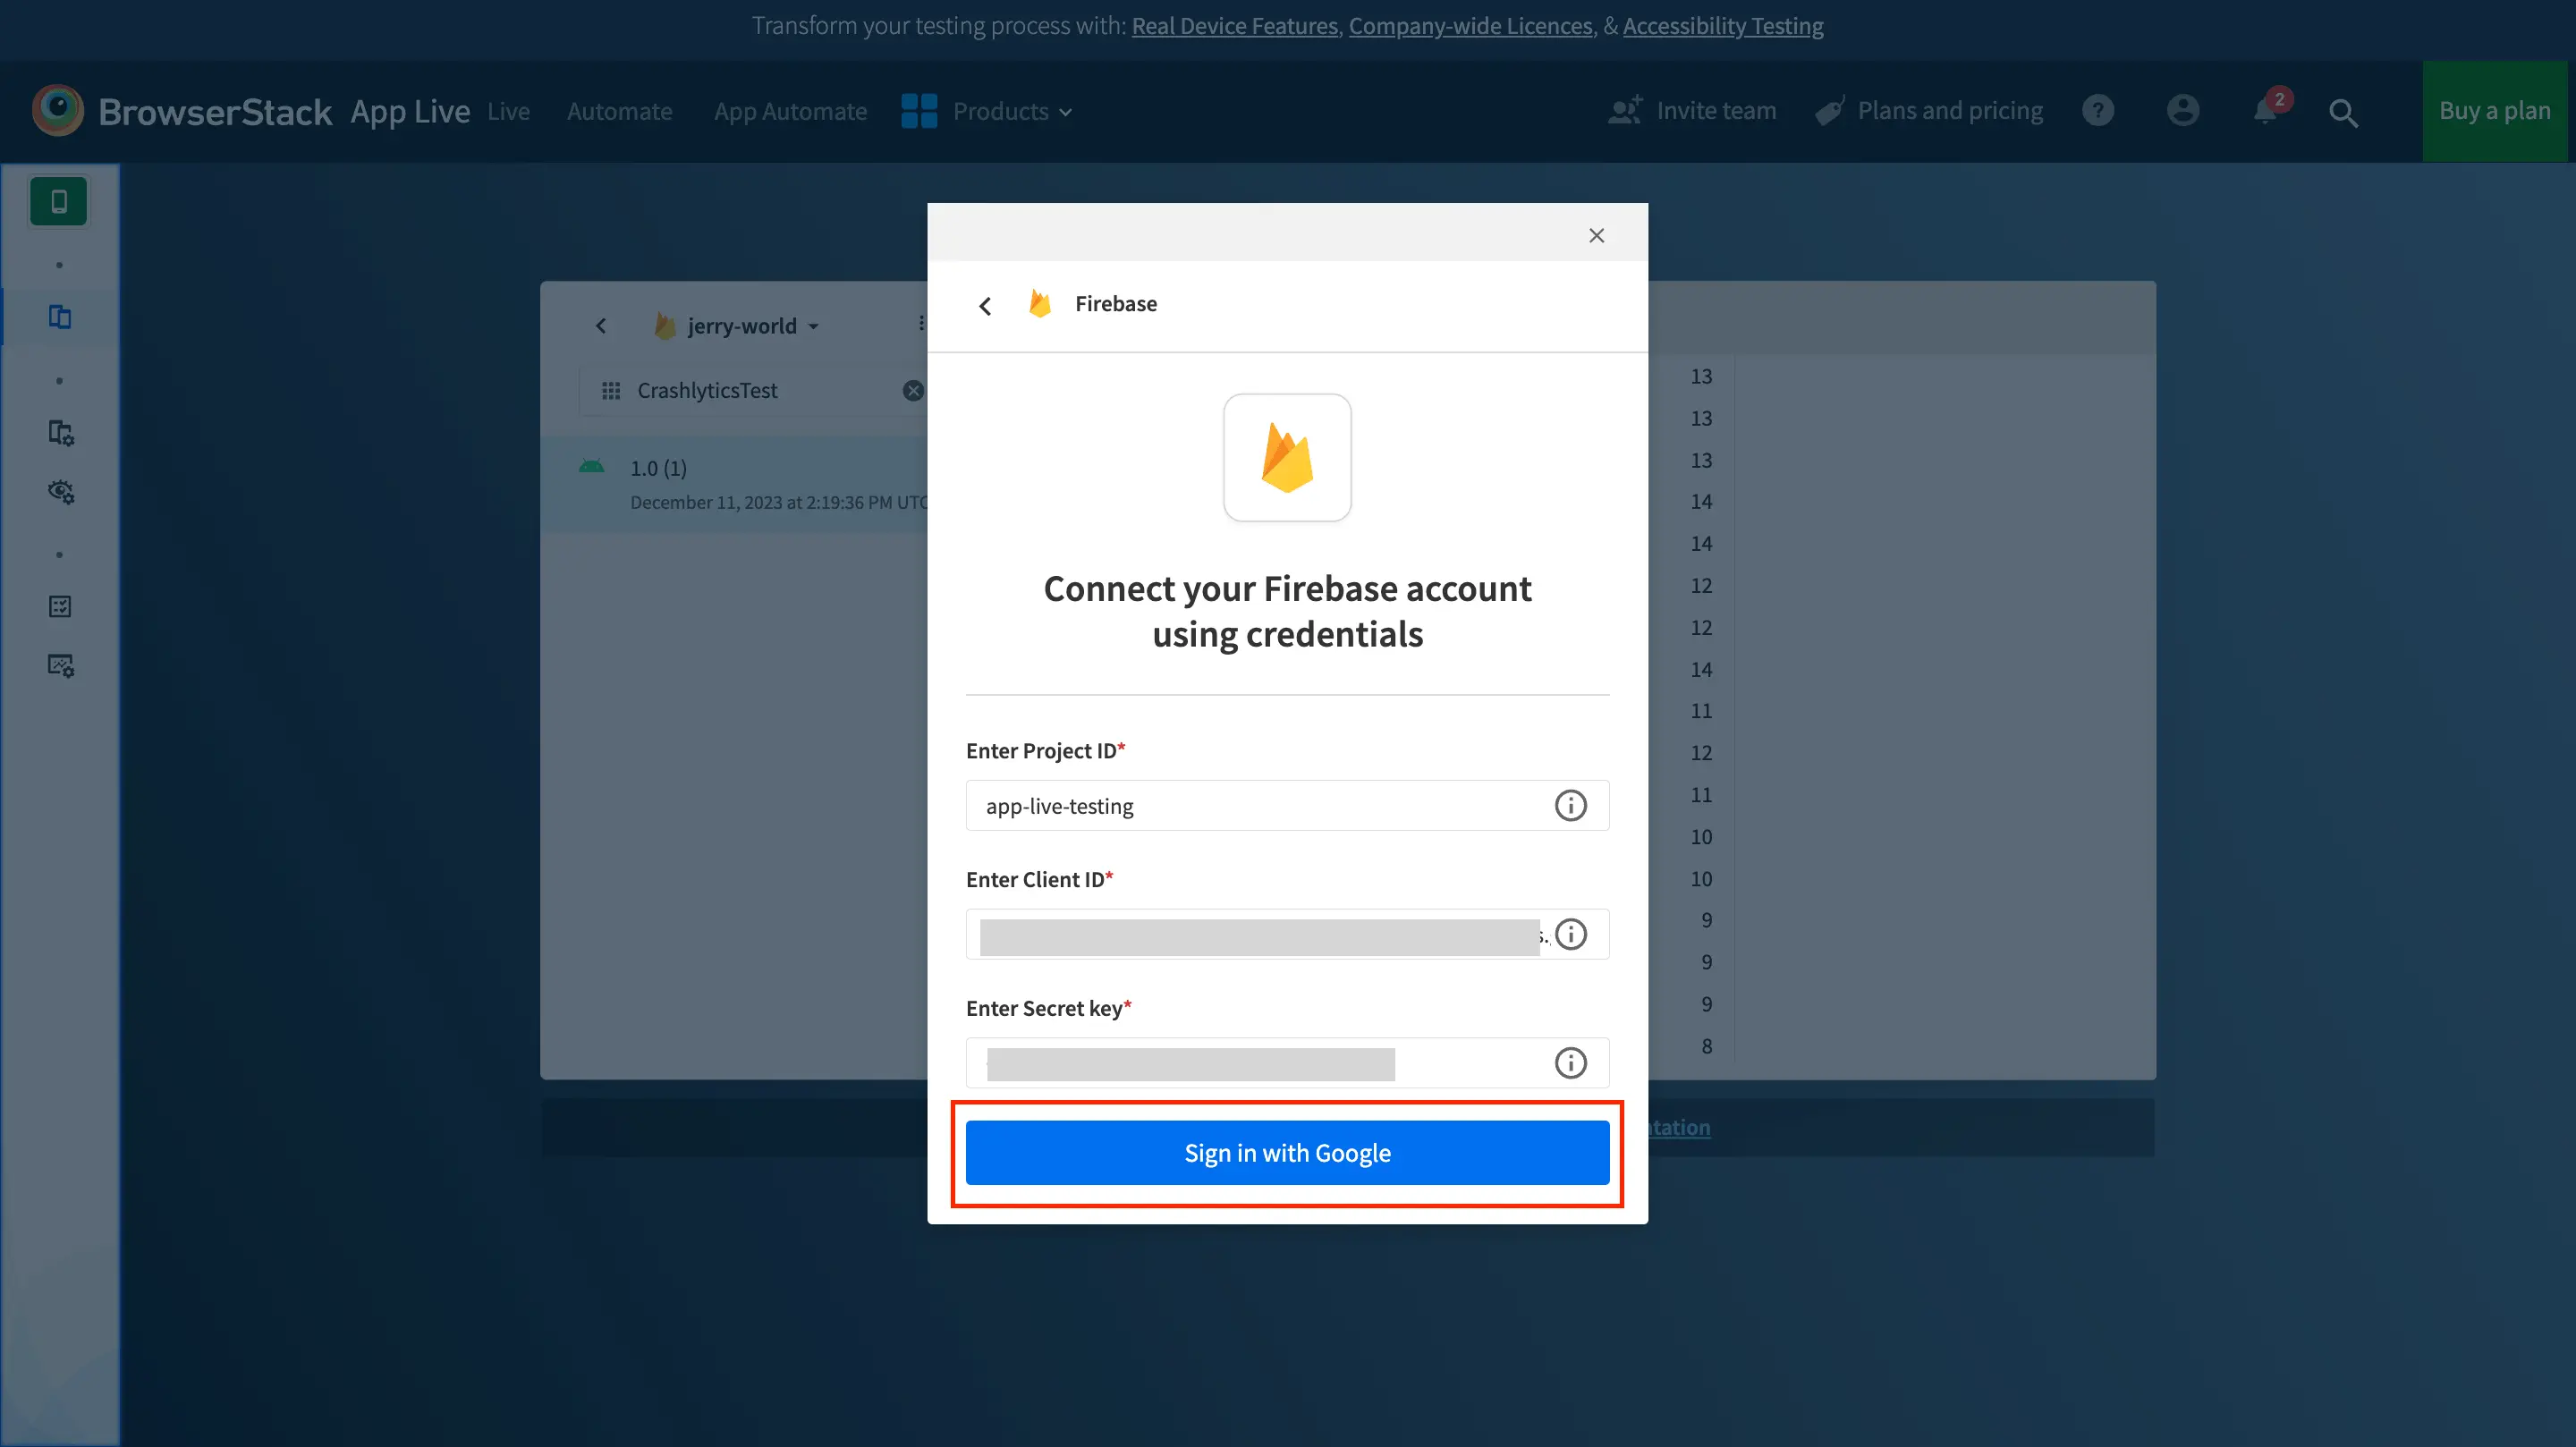
Connect with credentials: Use this option to manually enter the project authentication credentials (project ID, client ID, and secret key). Next, click Sign in with Google.
You are redirected to Google’s OAuth page.
-
Upload a config file: Use this option to configure authentication using the project config file.
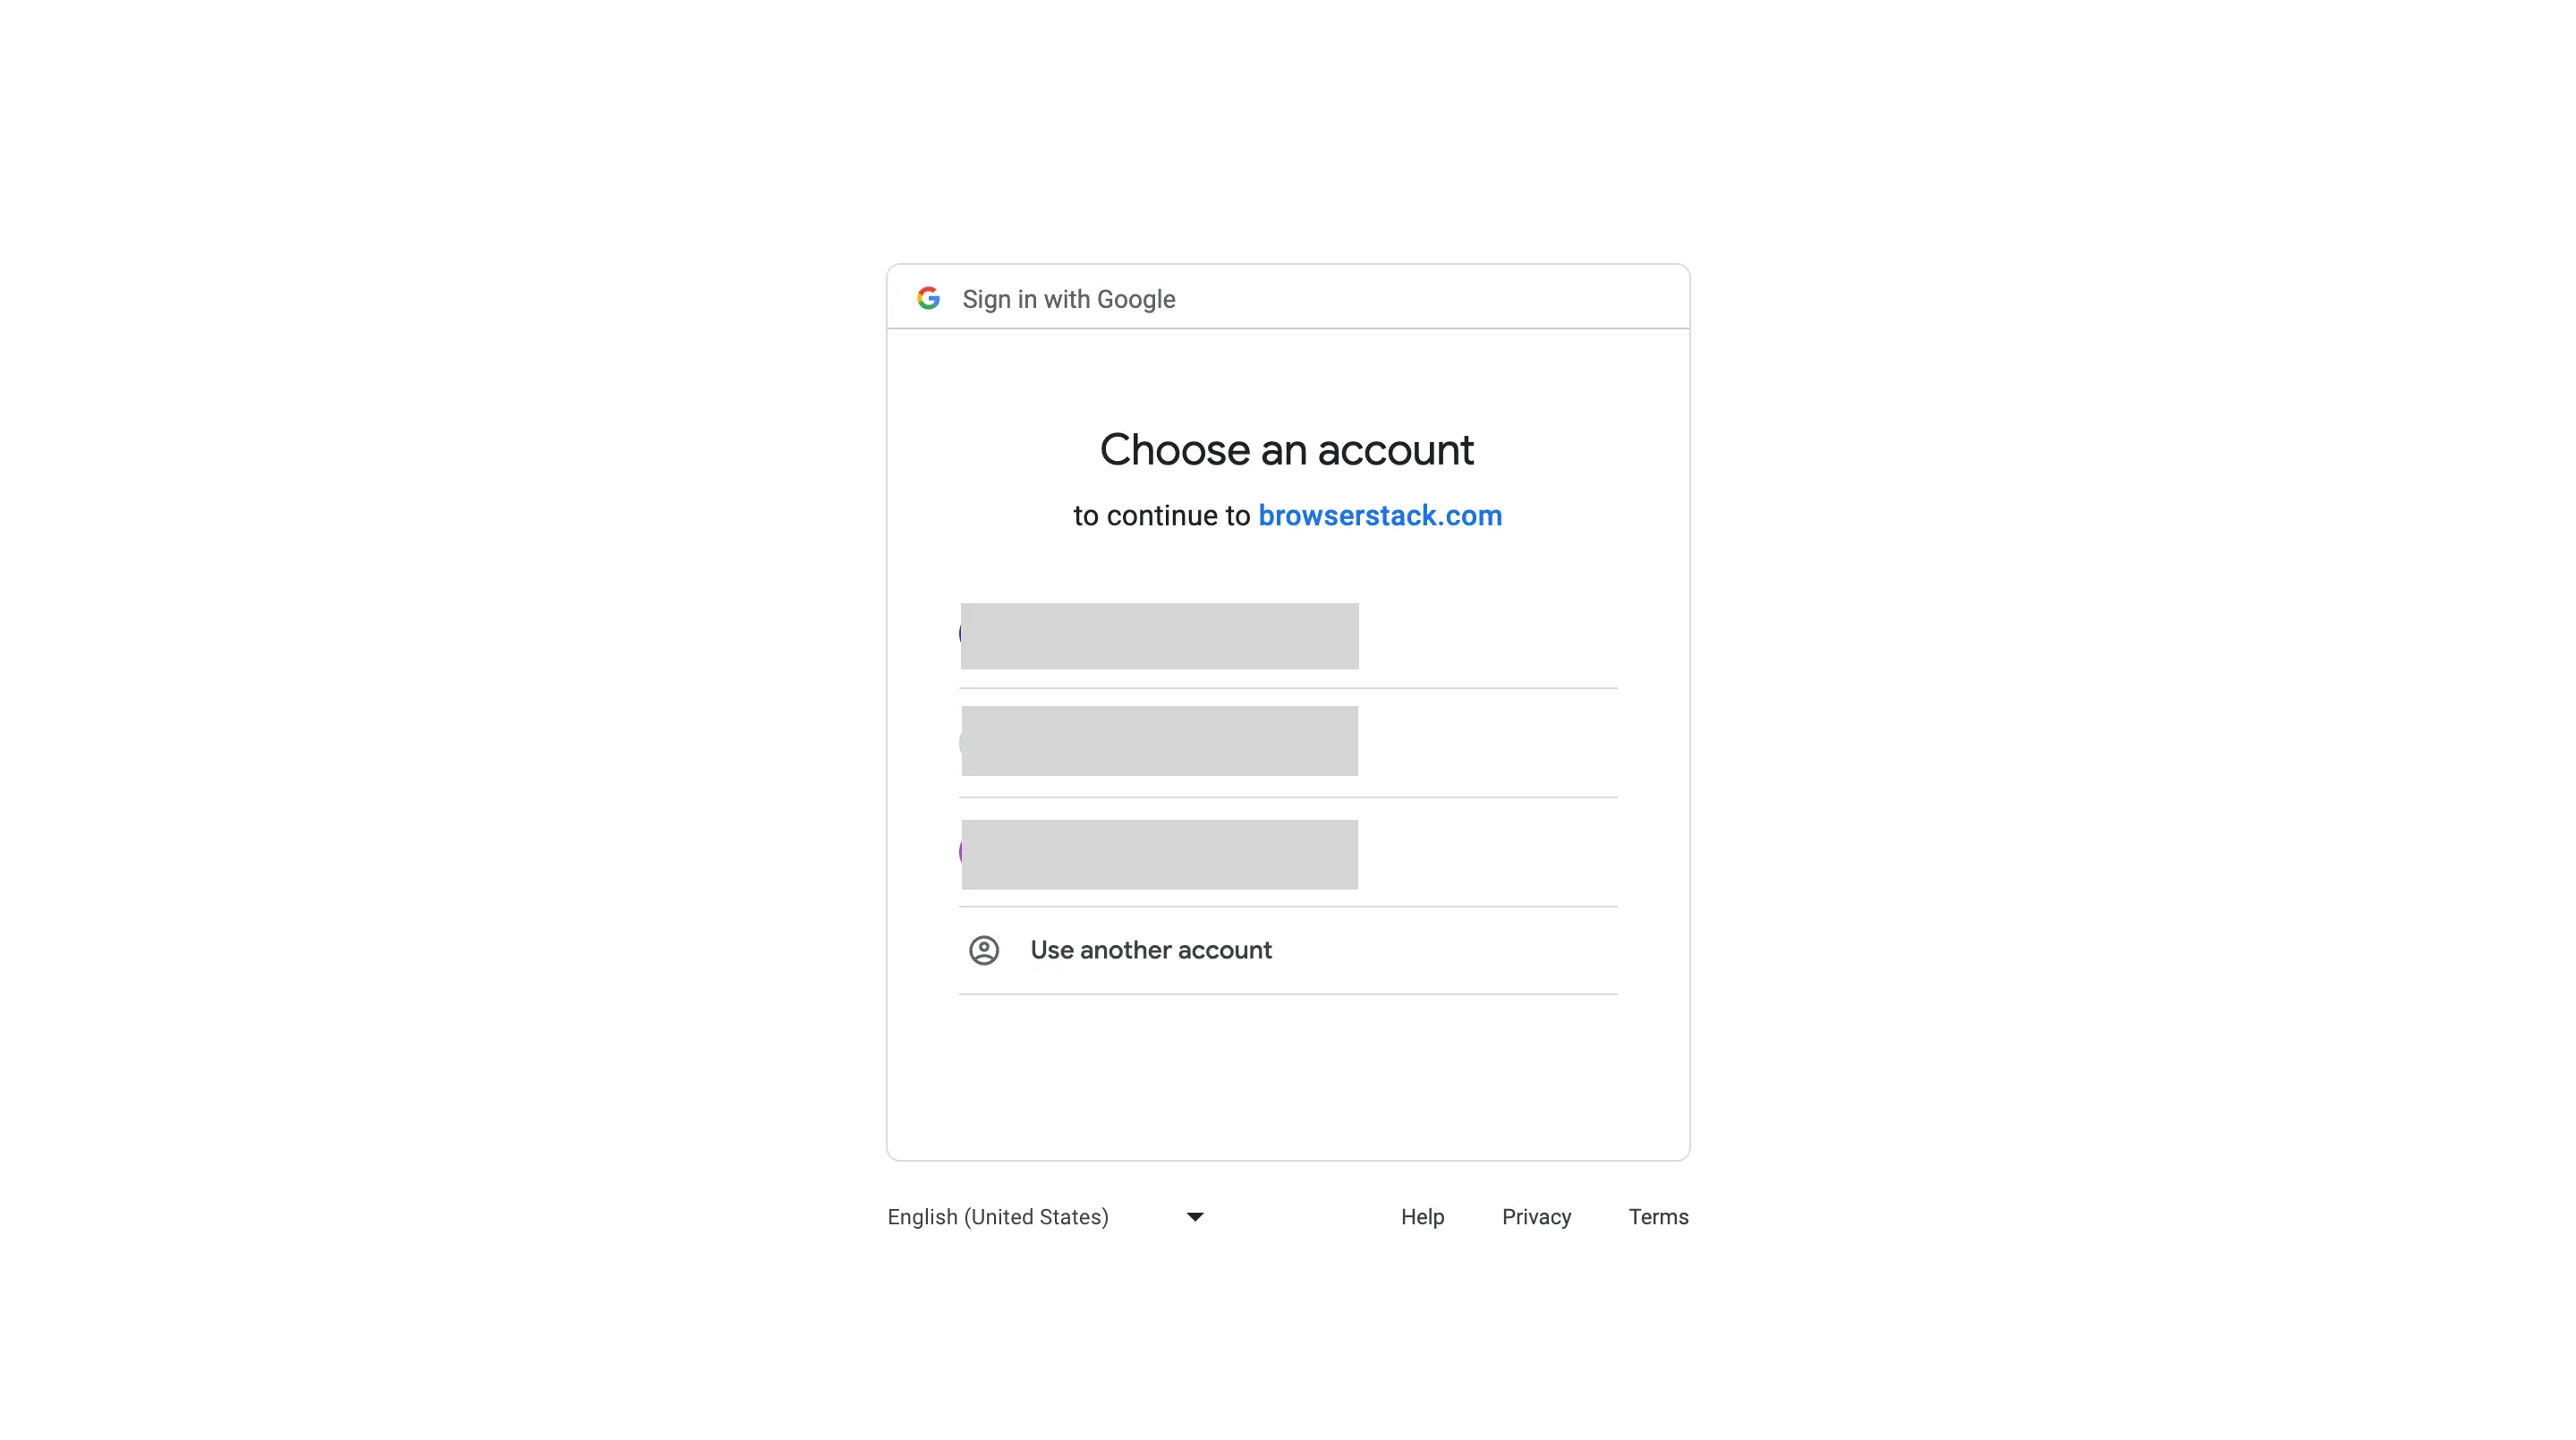
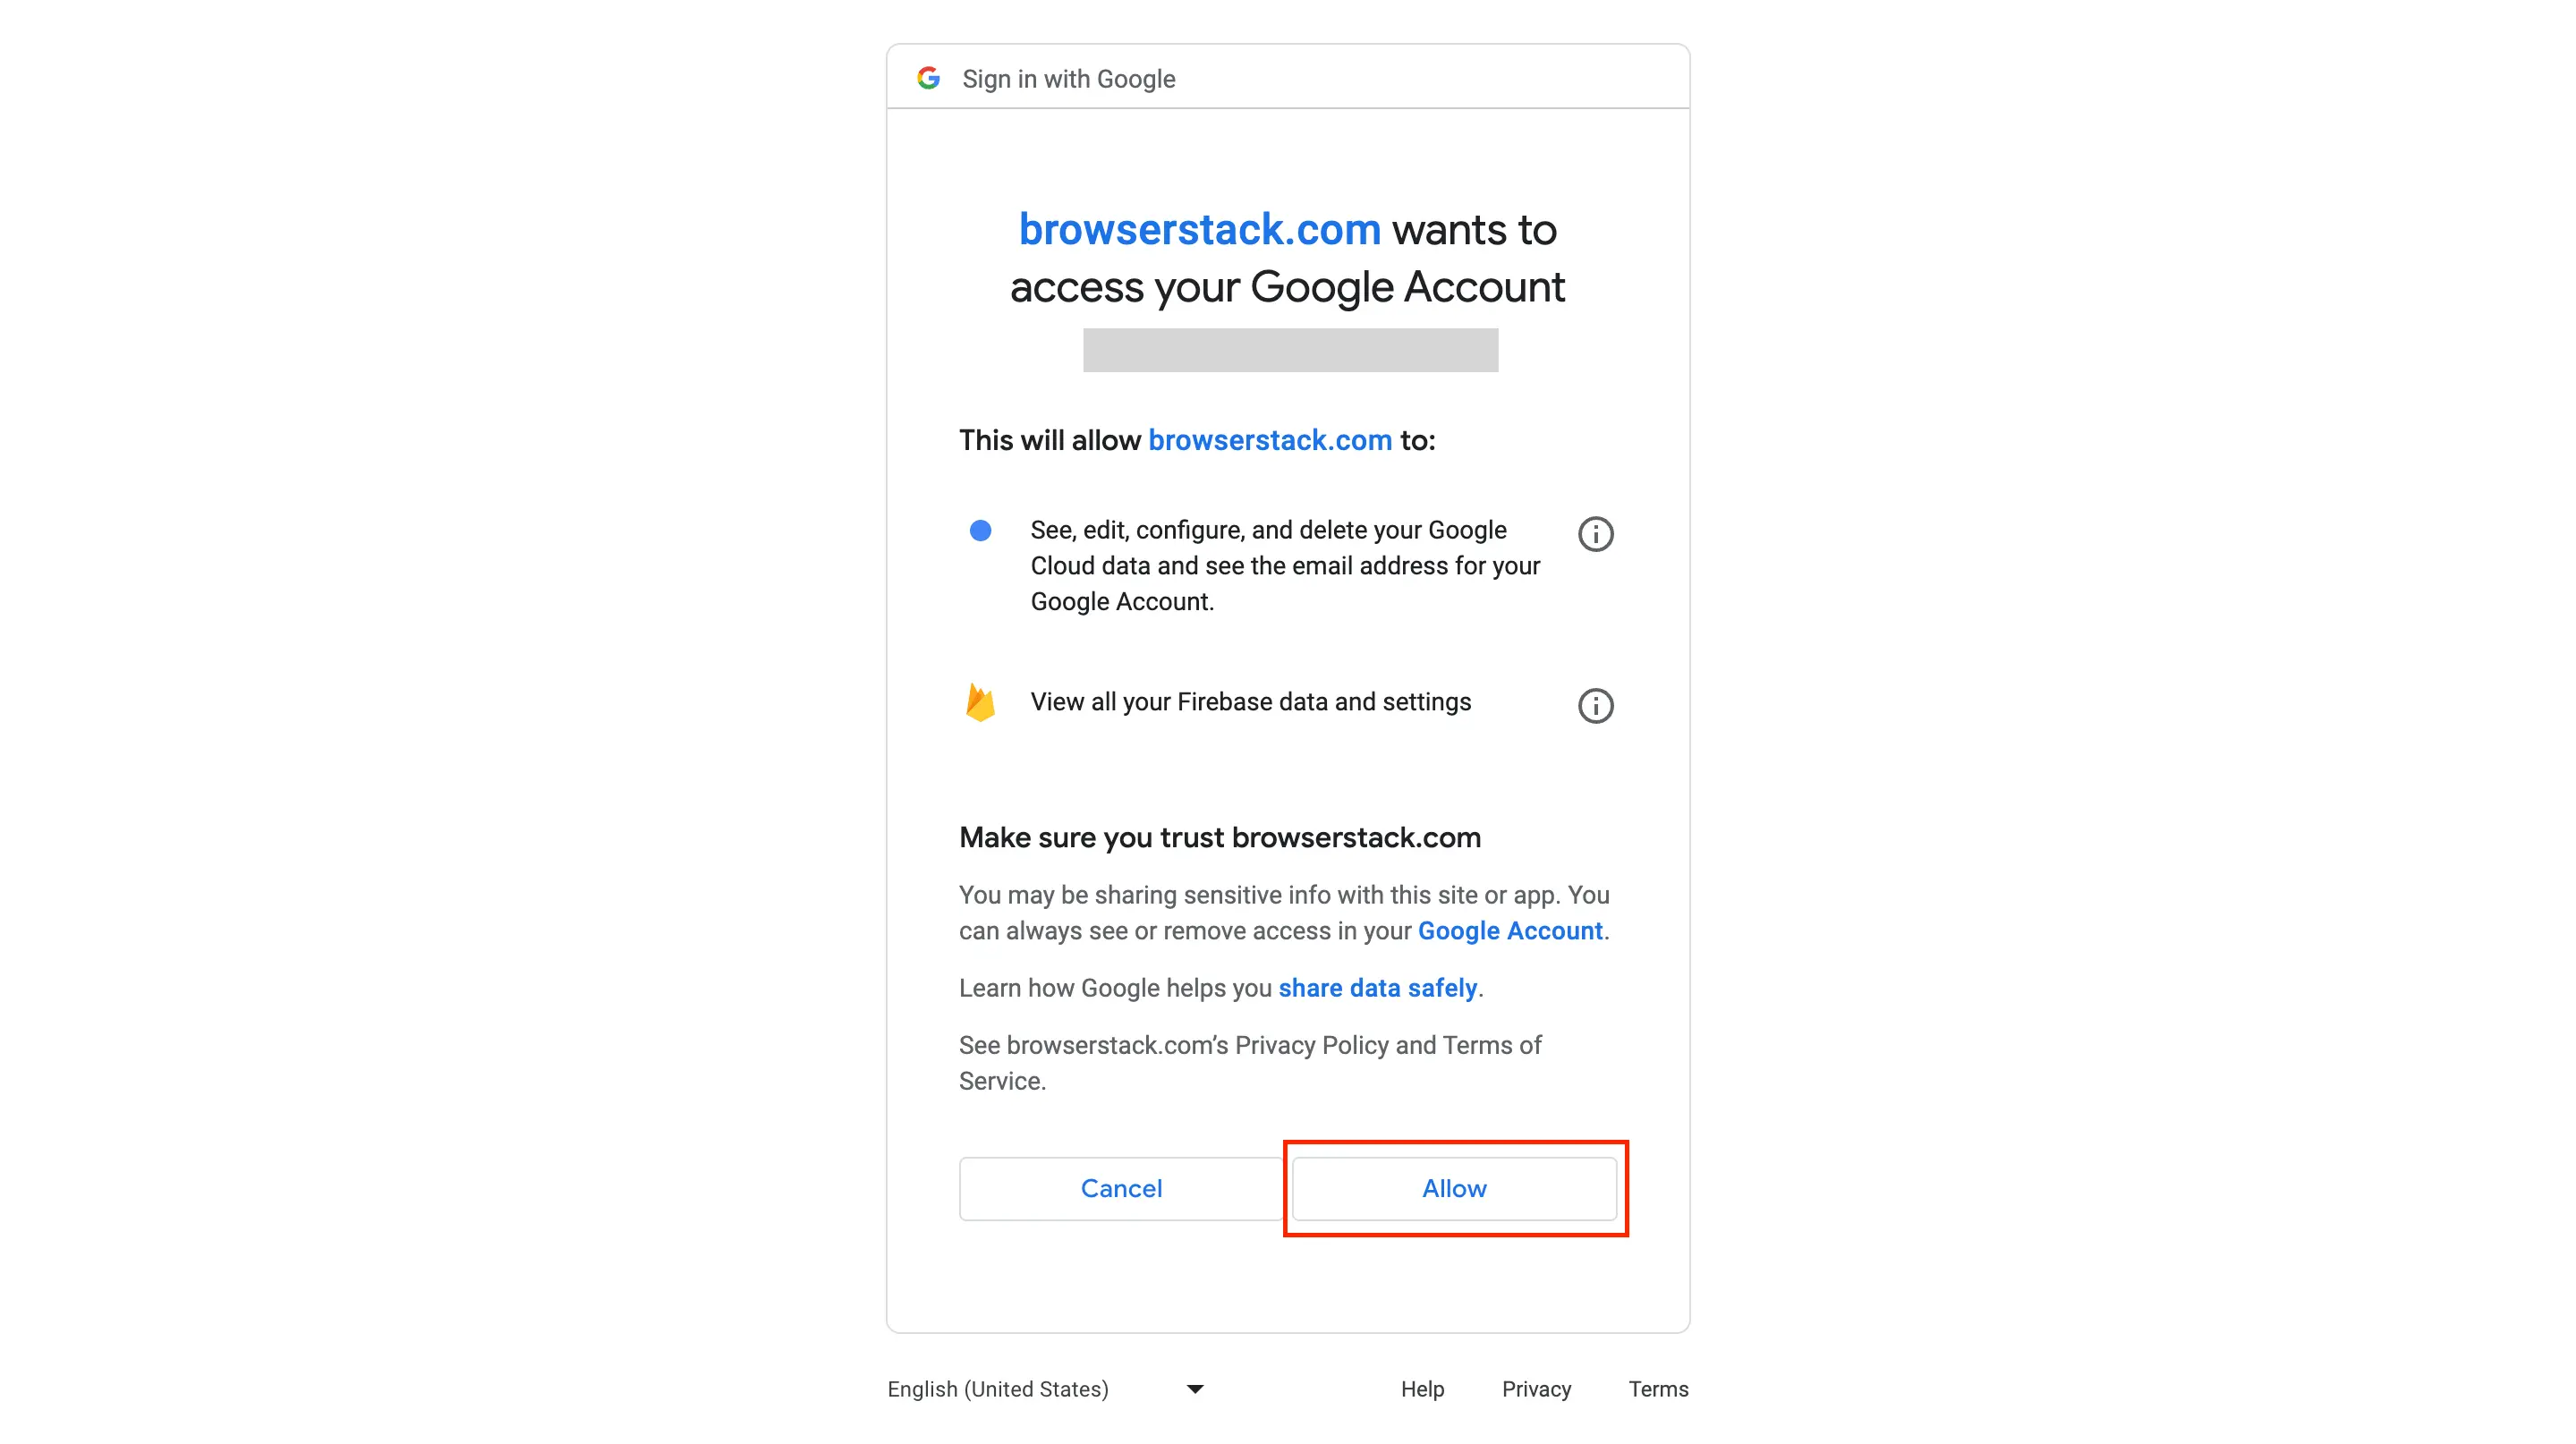
- On the Google OAuth page, select the account you want to log in with. A prompt appears asking for permissions to allow App Live to access your Firebase project details.
- Click Allow to provide the necessary permissions. App Live makes read requests to Firebase to get the name of the project, the names of the apps within the project, and app releases.
You are successfully authenticated and redirected to the App Live dashboard.
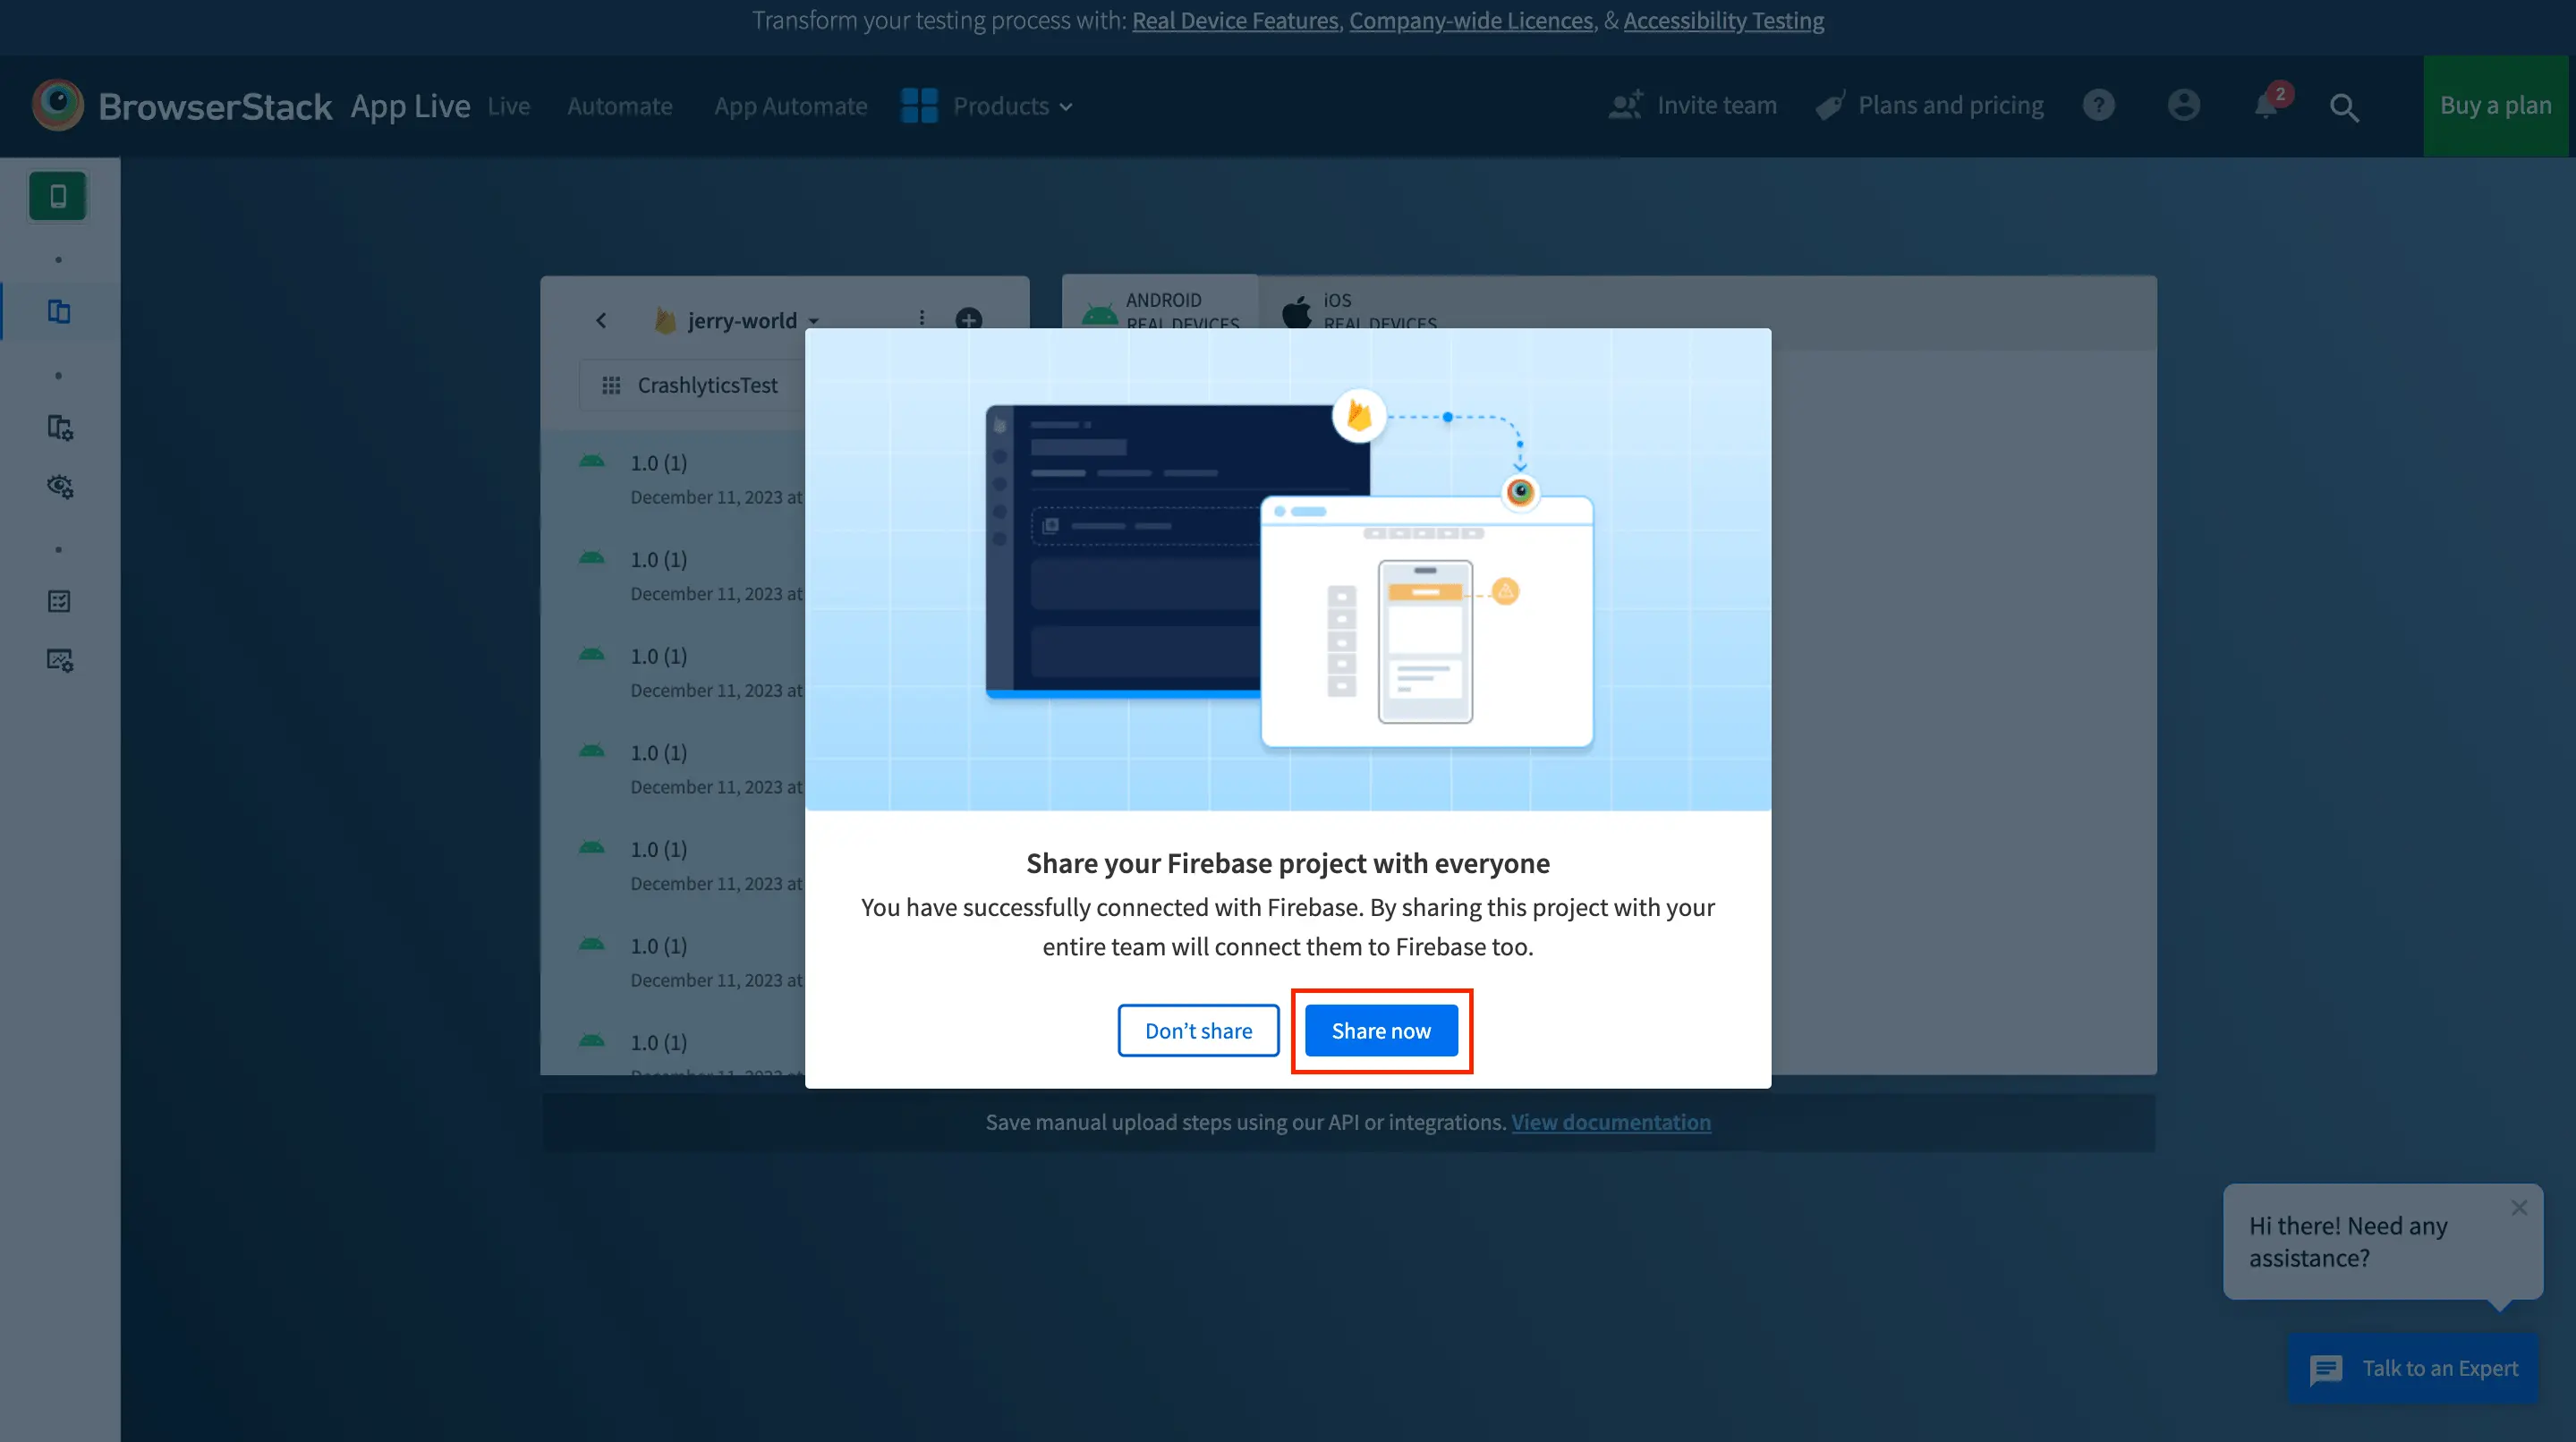
- On the dashboard, click Share Now in the open prompt if you want to immediately share your project with your team members on App Live.
View projects
After you add the project, the project is listed on the Select Source panel of the App Live dashboard.
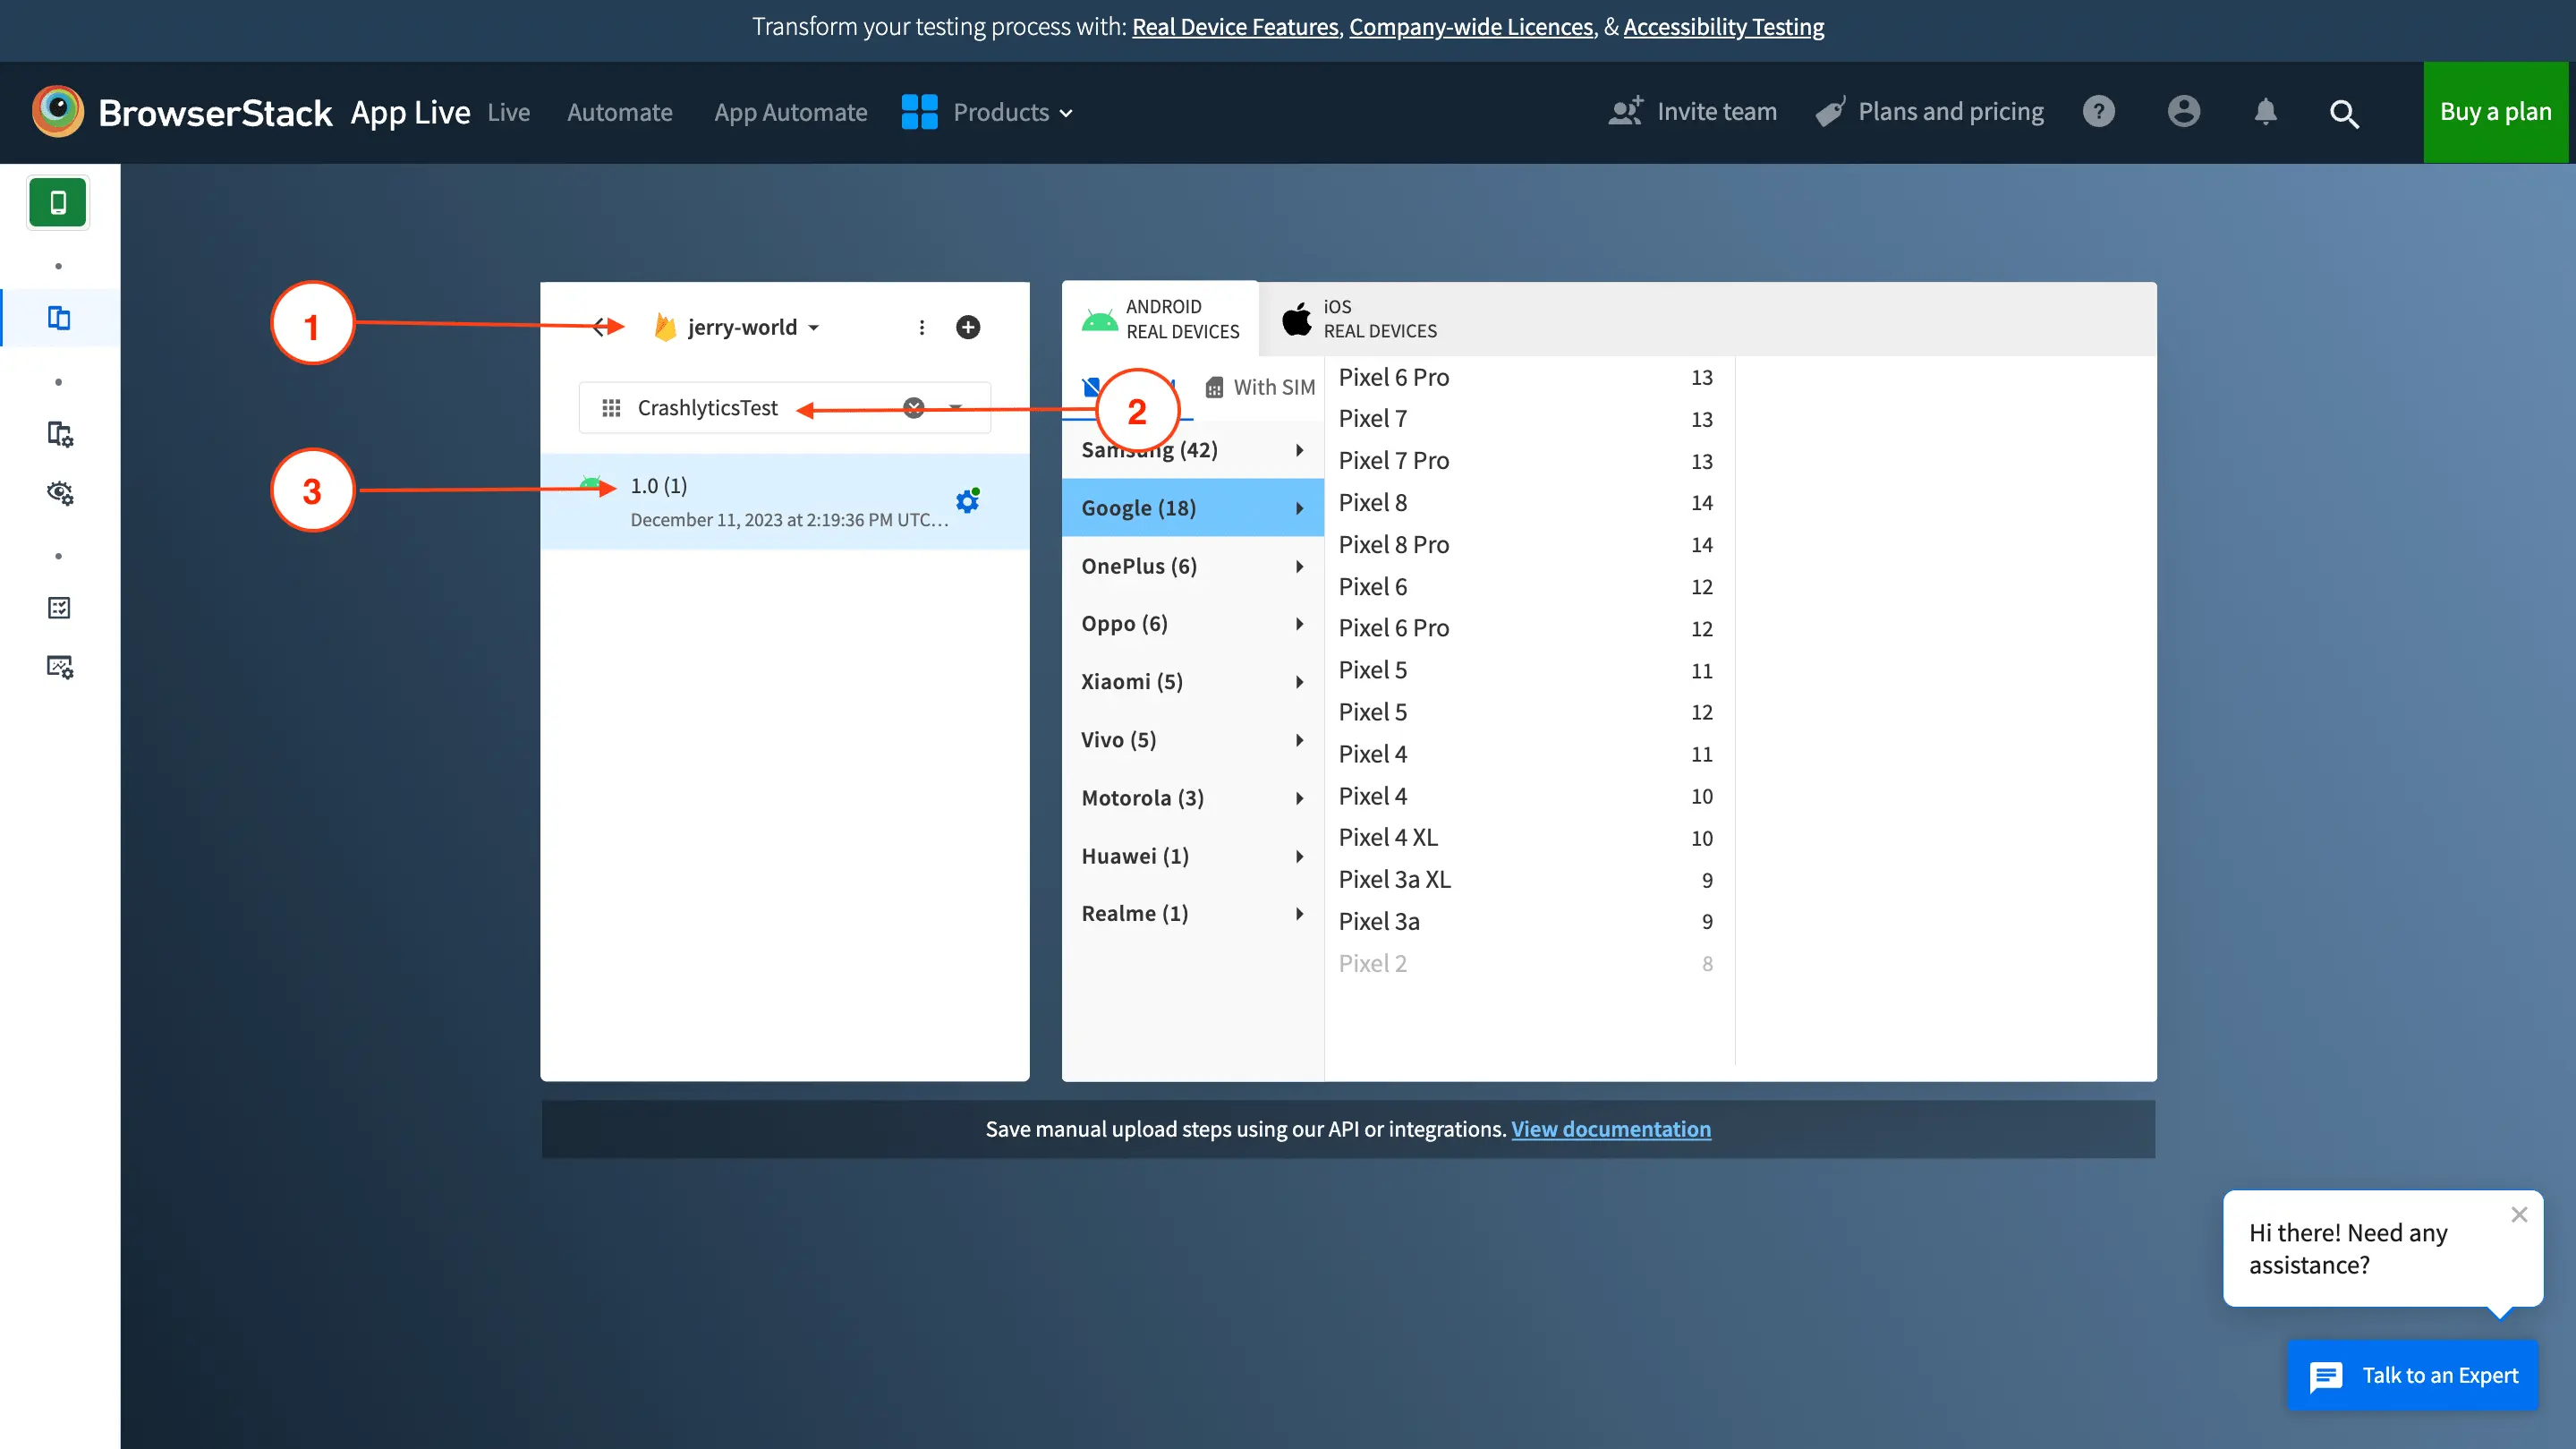
App Live follows the project structure hierarchy similar to Firebase, which is project > apps > releases, as explained here:
- Project list: This drop-down is the project list. It includes the projects added by you and the projects shared with you by your team members.
- App list: This drop-down is the list of apps in the project.
- Releases list: This list includes the app releases.
Share projects with your team
After you add a project, a prompt is shown to share your project with your team. Click Share now to share the project with your team on App Live. After you share the project, the project starts appearing on your team member’s App Live dashboard.
You can only share a project that is added by you.
Alternatively, to share your Firebase project with your team from the project list, follow these steps on the App Live dashboard:
- From the Firebase project drop-down, select the project that you want to share with your team.
- Click the three-dot menu beside the project name and click Share.
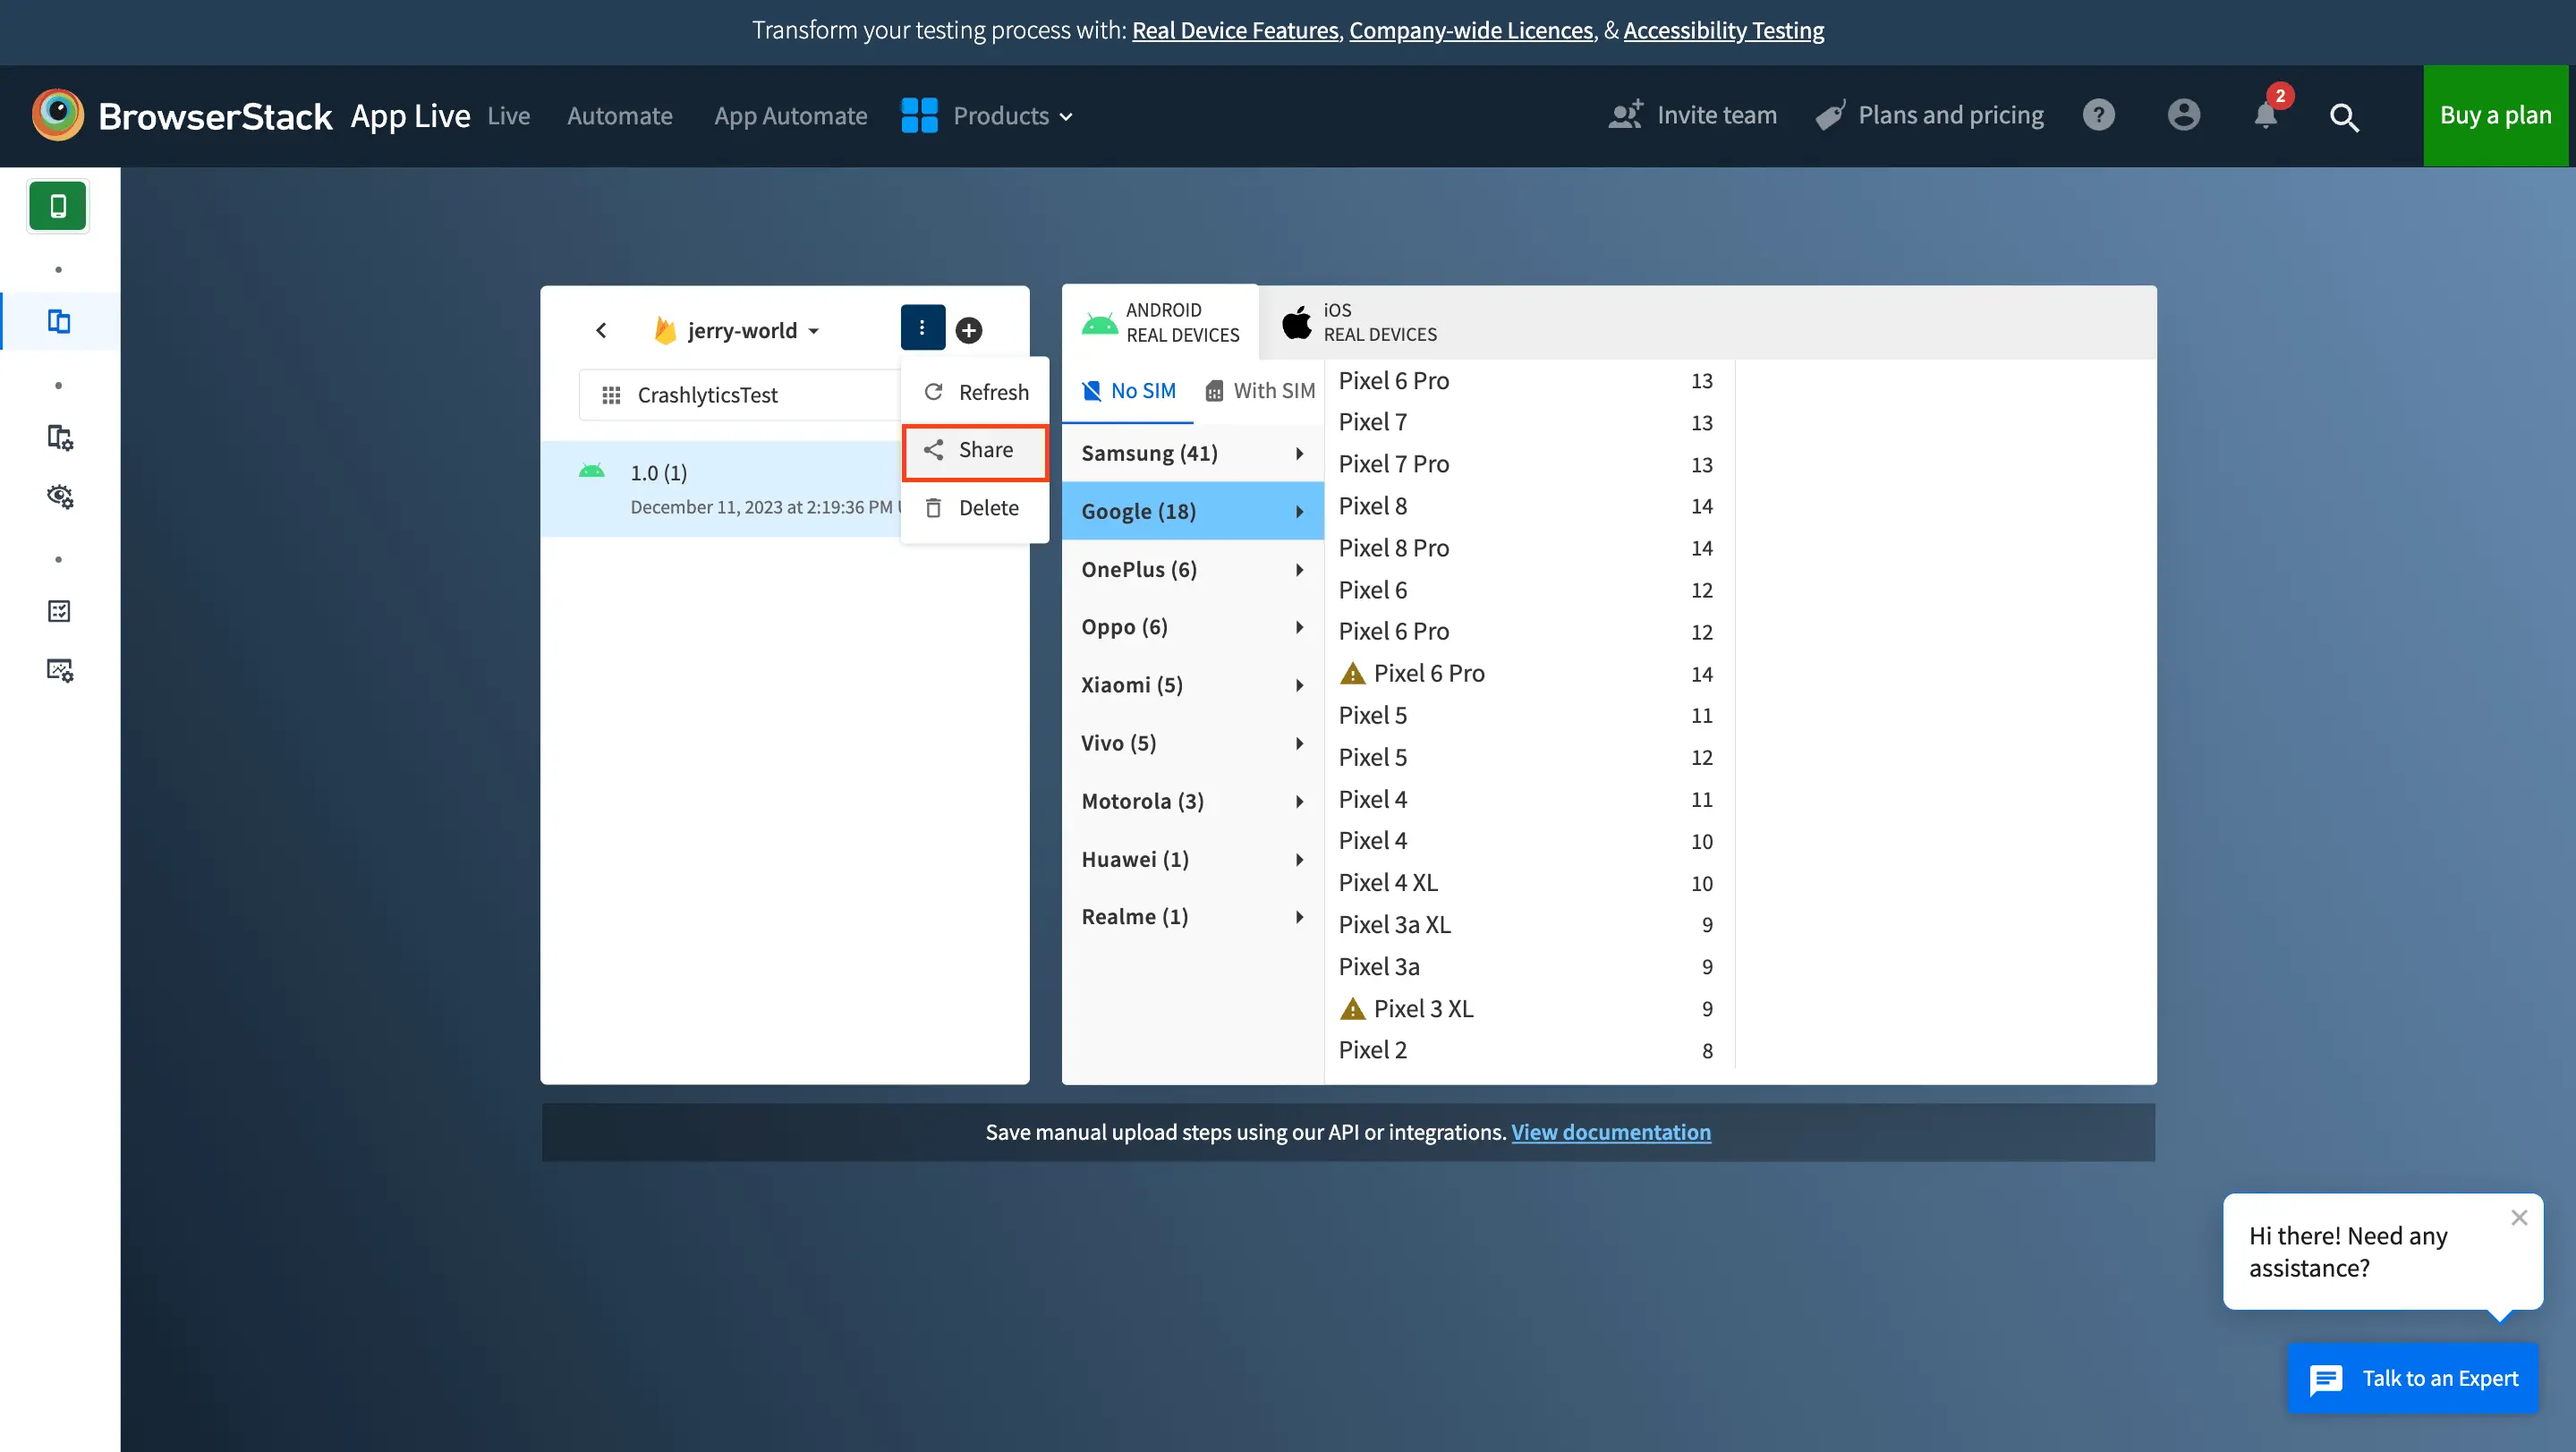
On the confirmation message that is shown, click Share.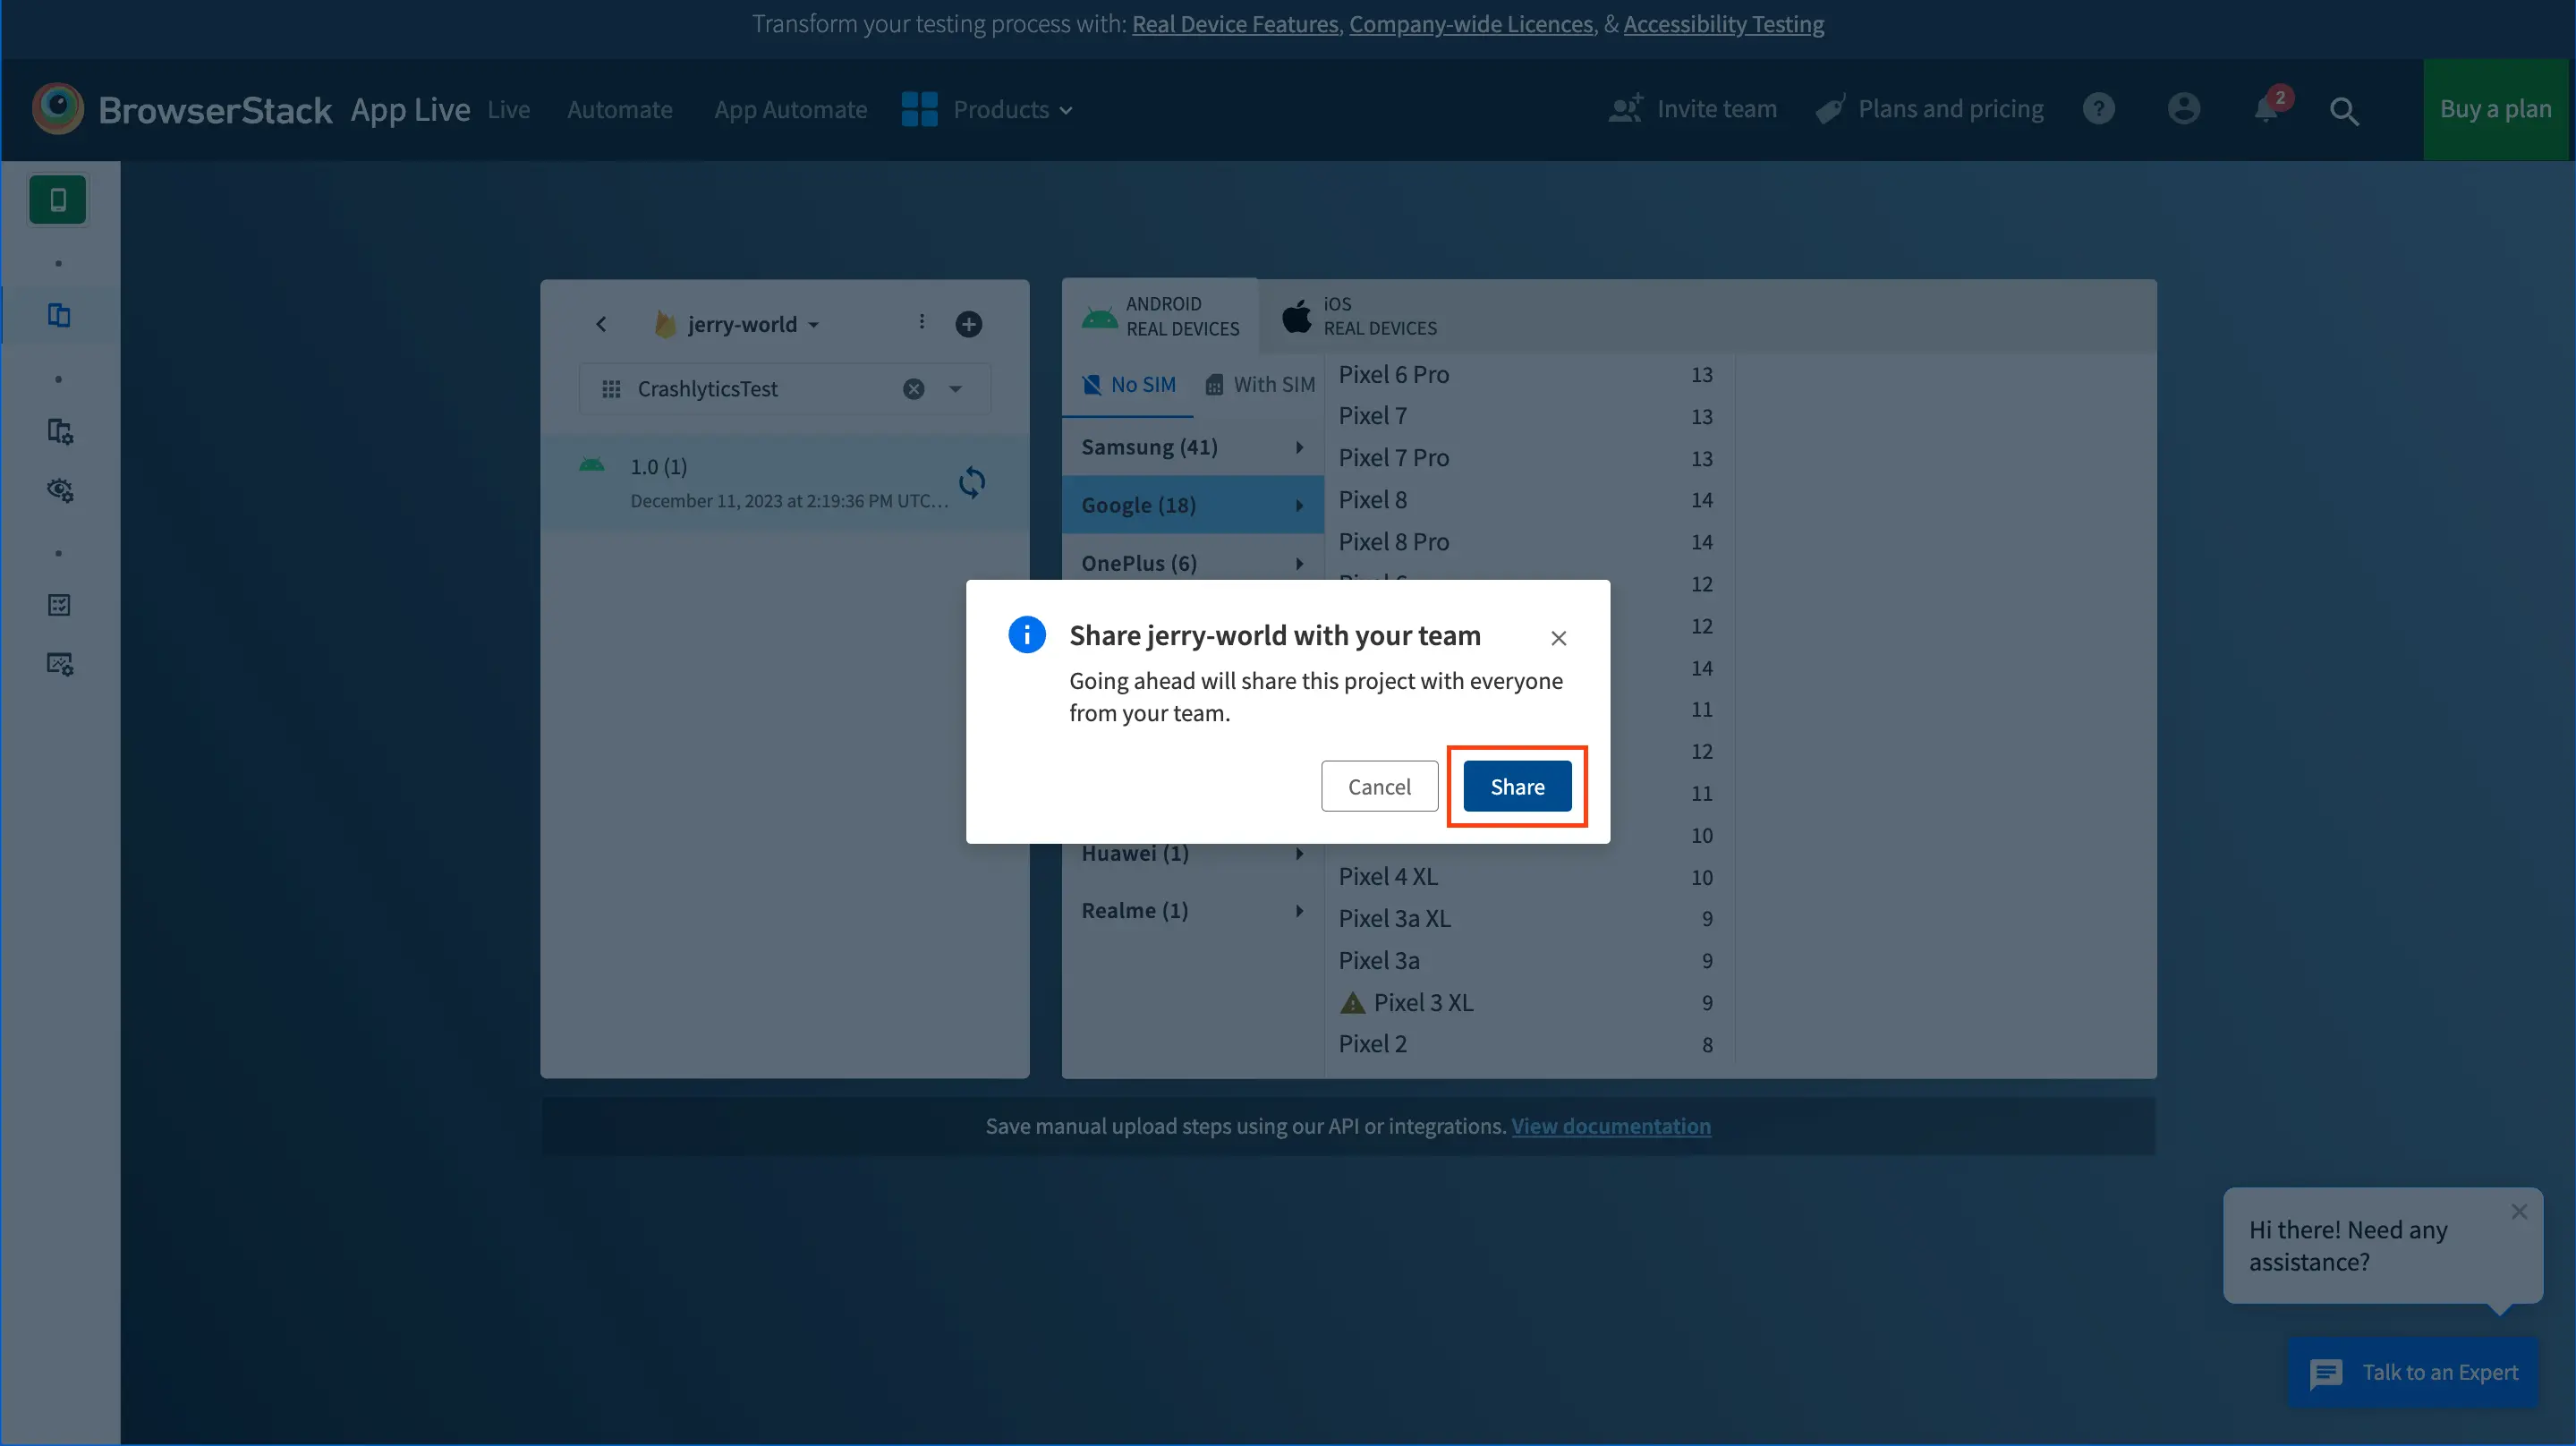
The project is shared with your team members on App Live.
Synchronize or unsynchronize app release
Synchronizing your app releases ensure that the app releases on BrowserStack Cloud and on Firebase are in sync. You can synchronize your app release for the following purposes:
- Uploading your app release on BrowserStack Cloud before hand.
- Keeping the app release in BrowserStack Cloud in sync with the app release in Firebase.
- Enabling App Configurations such as Large App Support, Video Injection, and more.
You can unsync an app release to delete it from the BrowserStack Cloud. After you unsync the app release, it will no longer be available on BrowserStack Cloud and cannot be tested on App Live. Also, you cannot apply app configurations to the app release.
To sync or unsync app release:
- From the project list, select your project.
- From the app list, select the app.
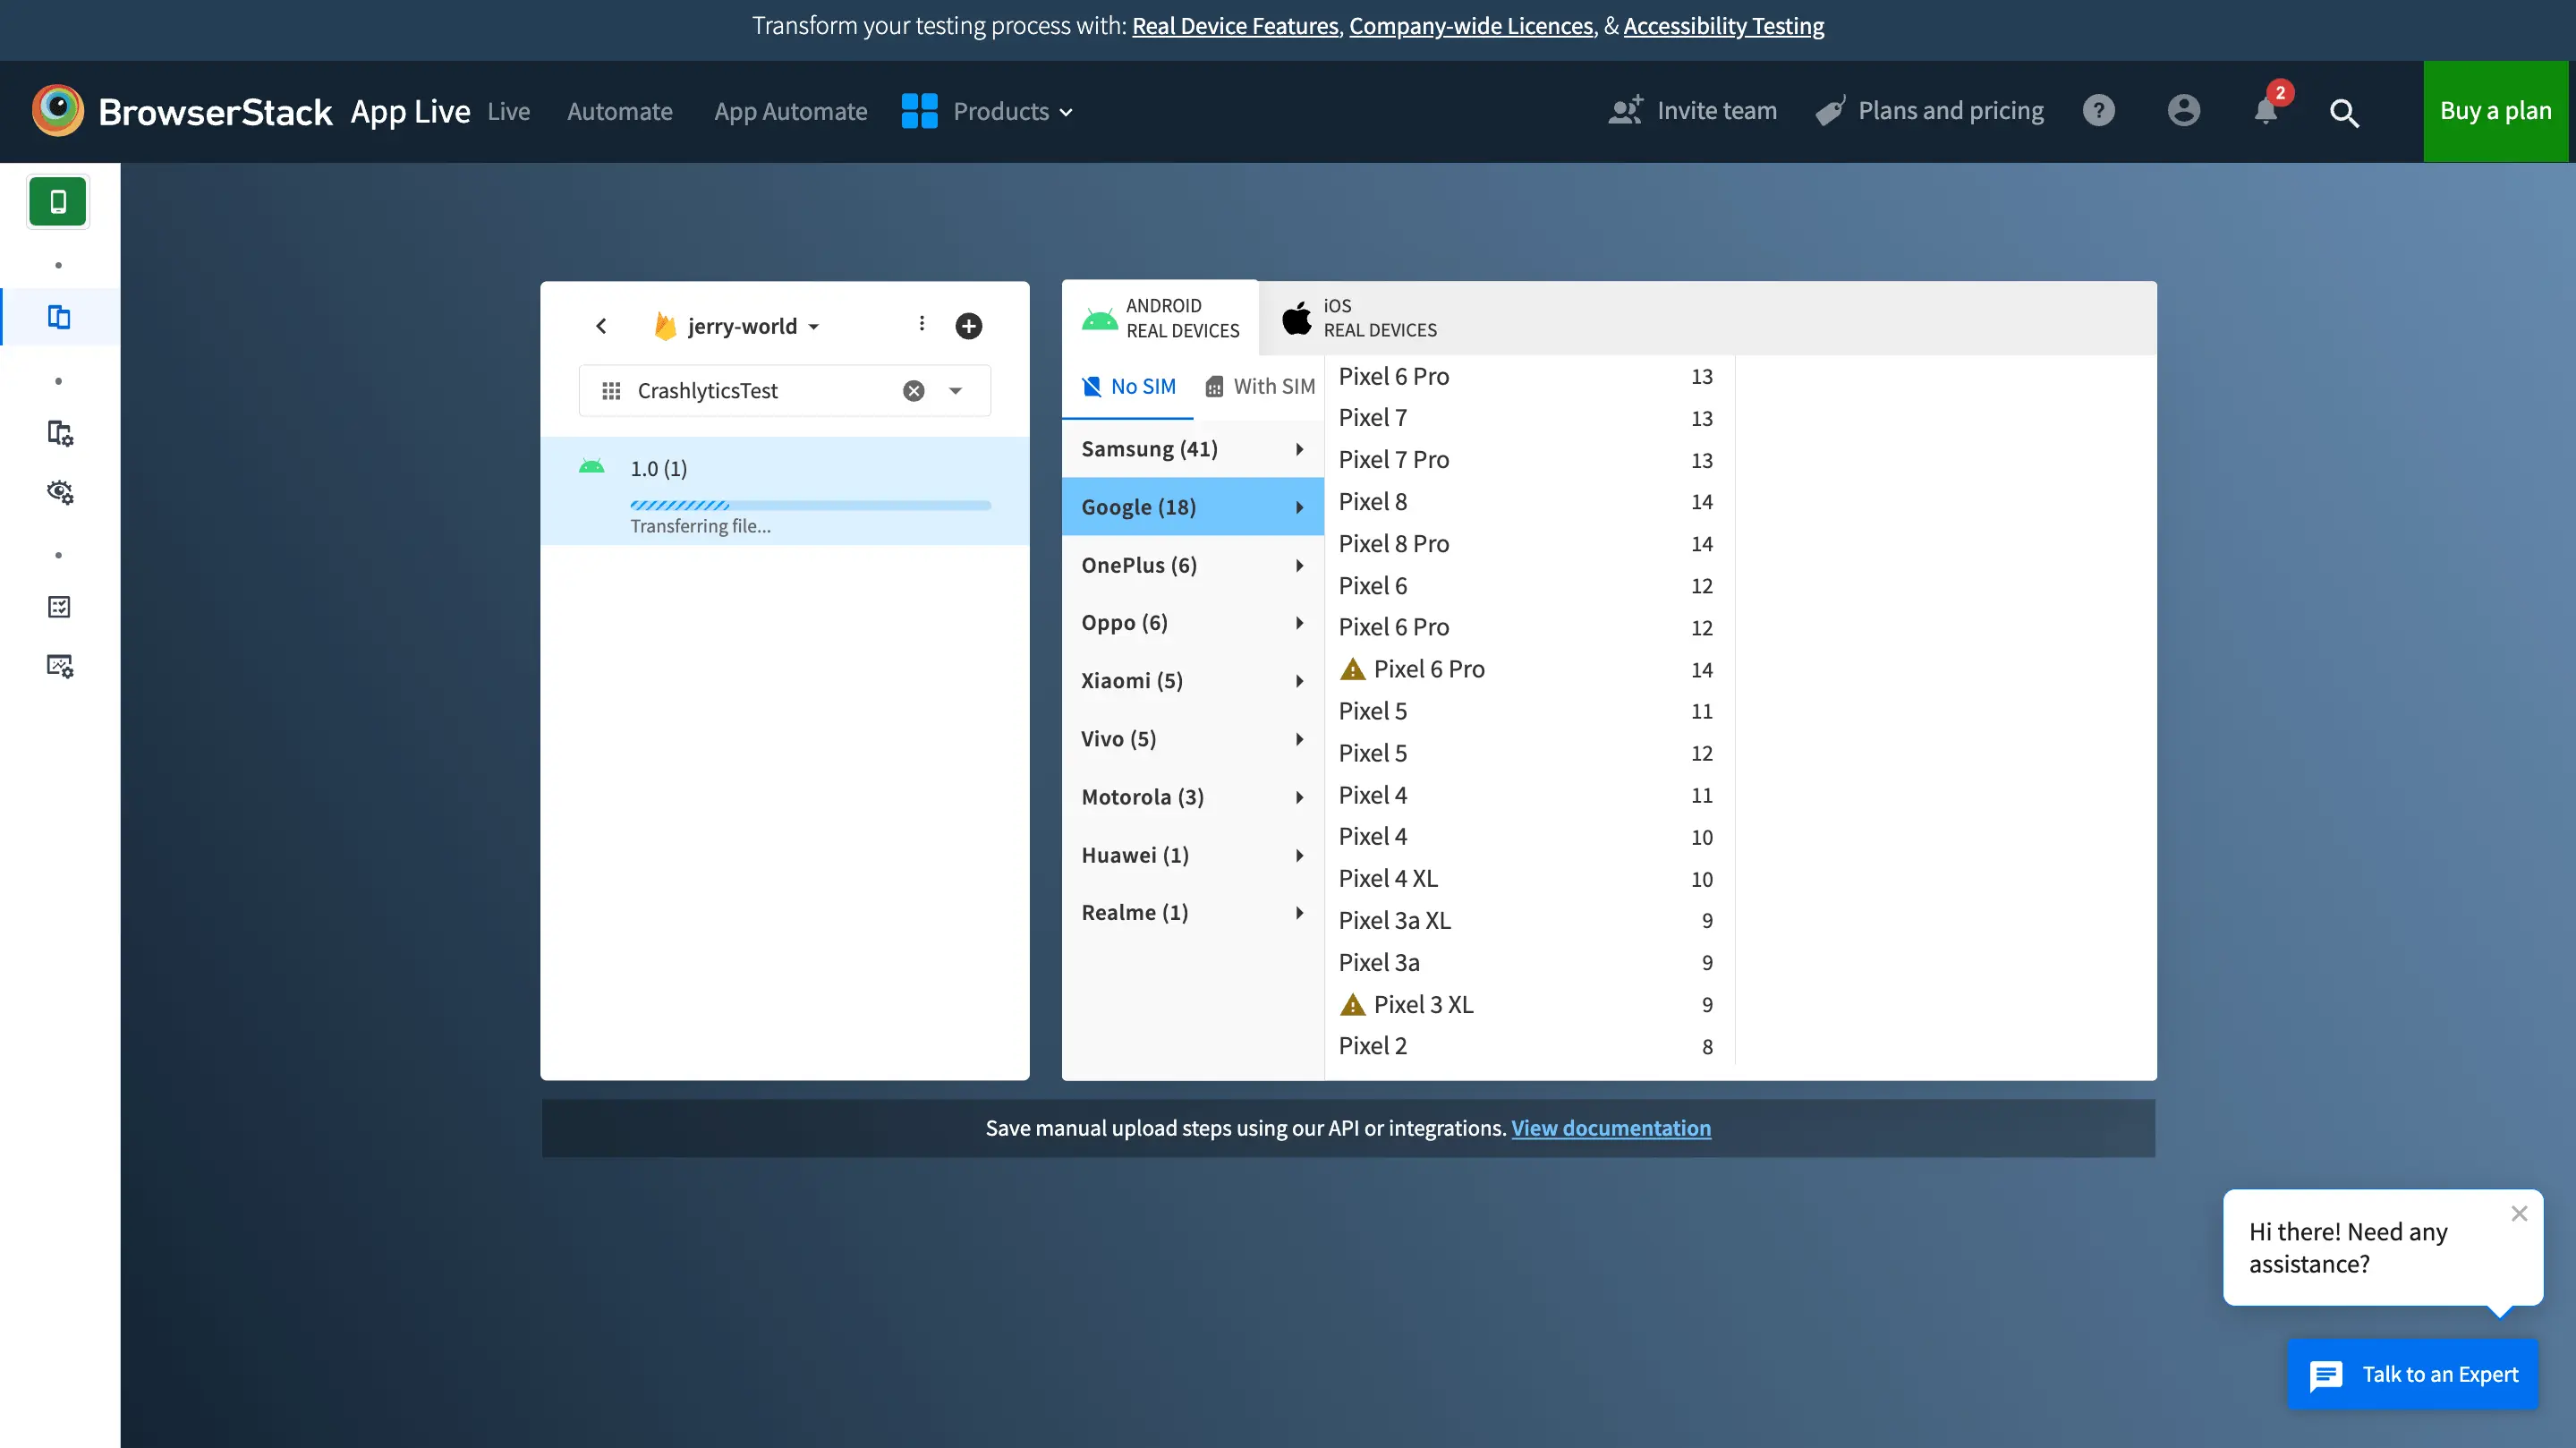
- Click the sync icon beside the app release.
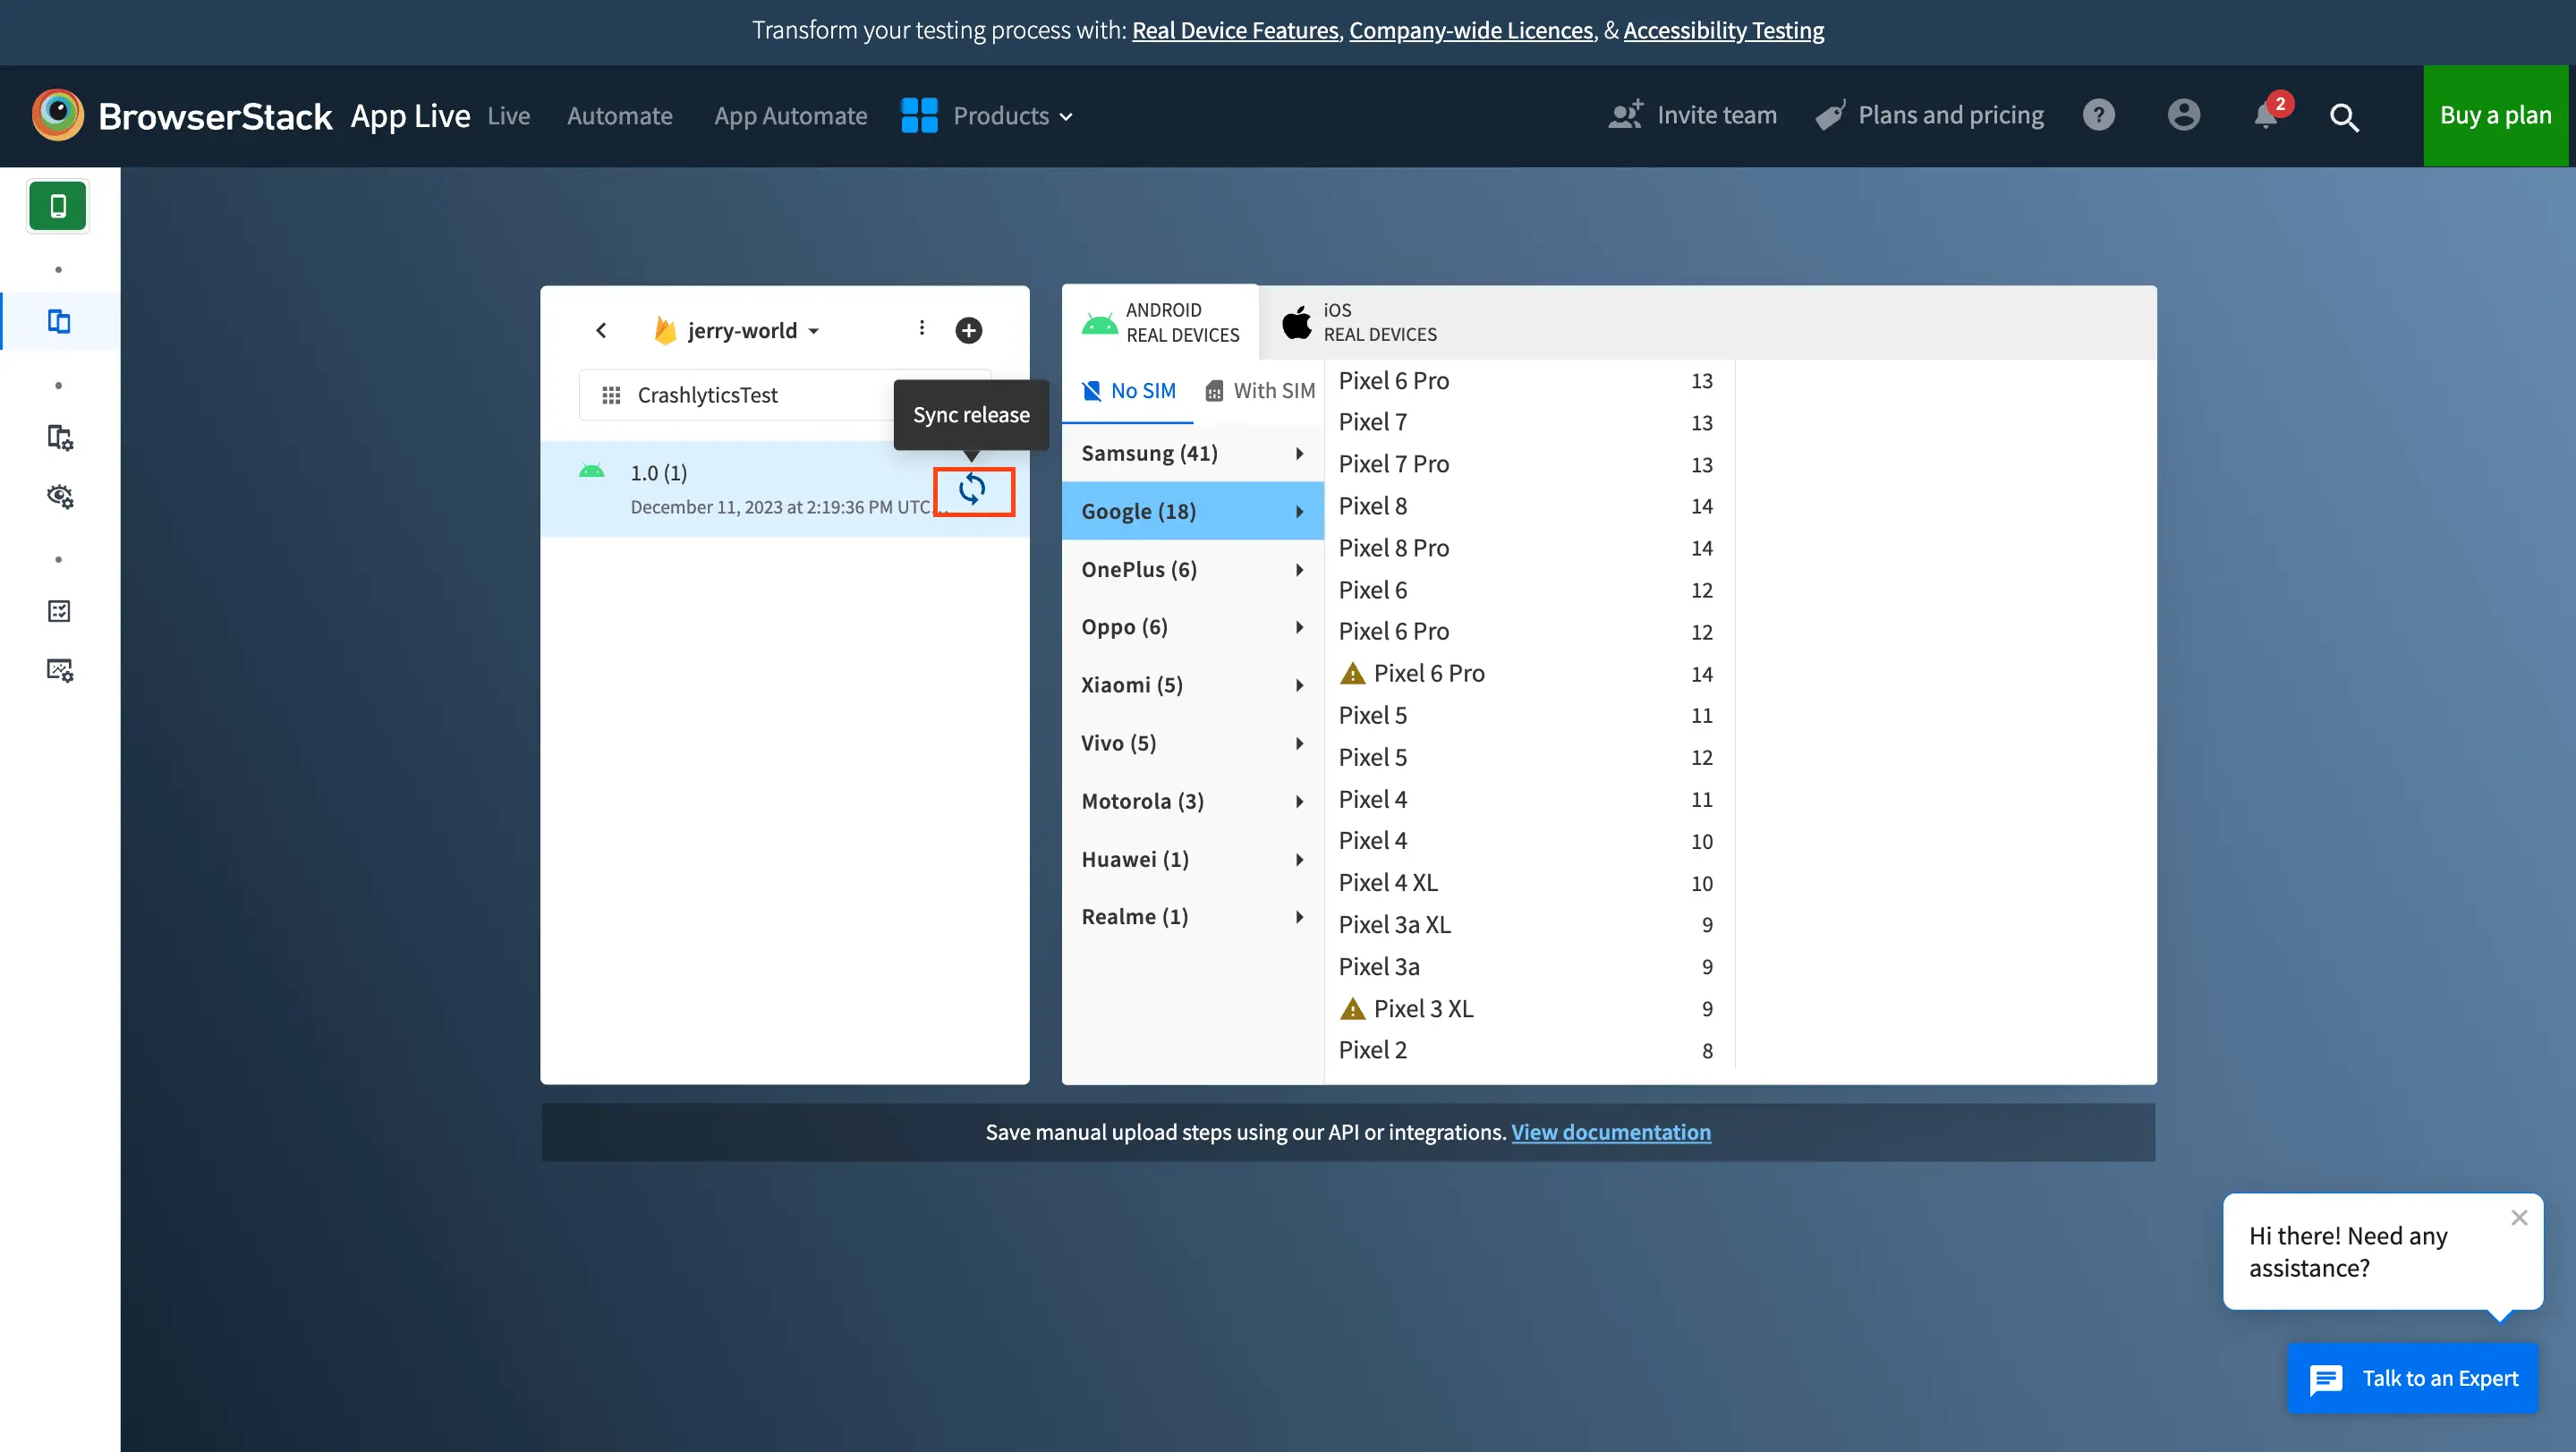
The synchronization process starts.
After you synchronize the app release, the app configurations are enabled that you can apply to the release. These configurations are persisted for your subsequent sessions as well.
The sync button changes to unsync. You can unsync the app release to delete it from the BrowserStack Cloud.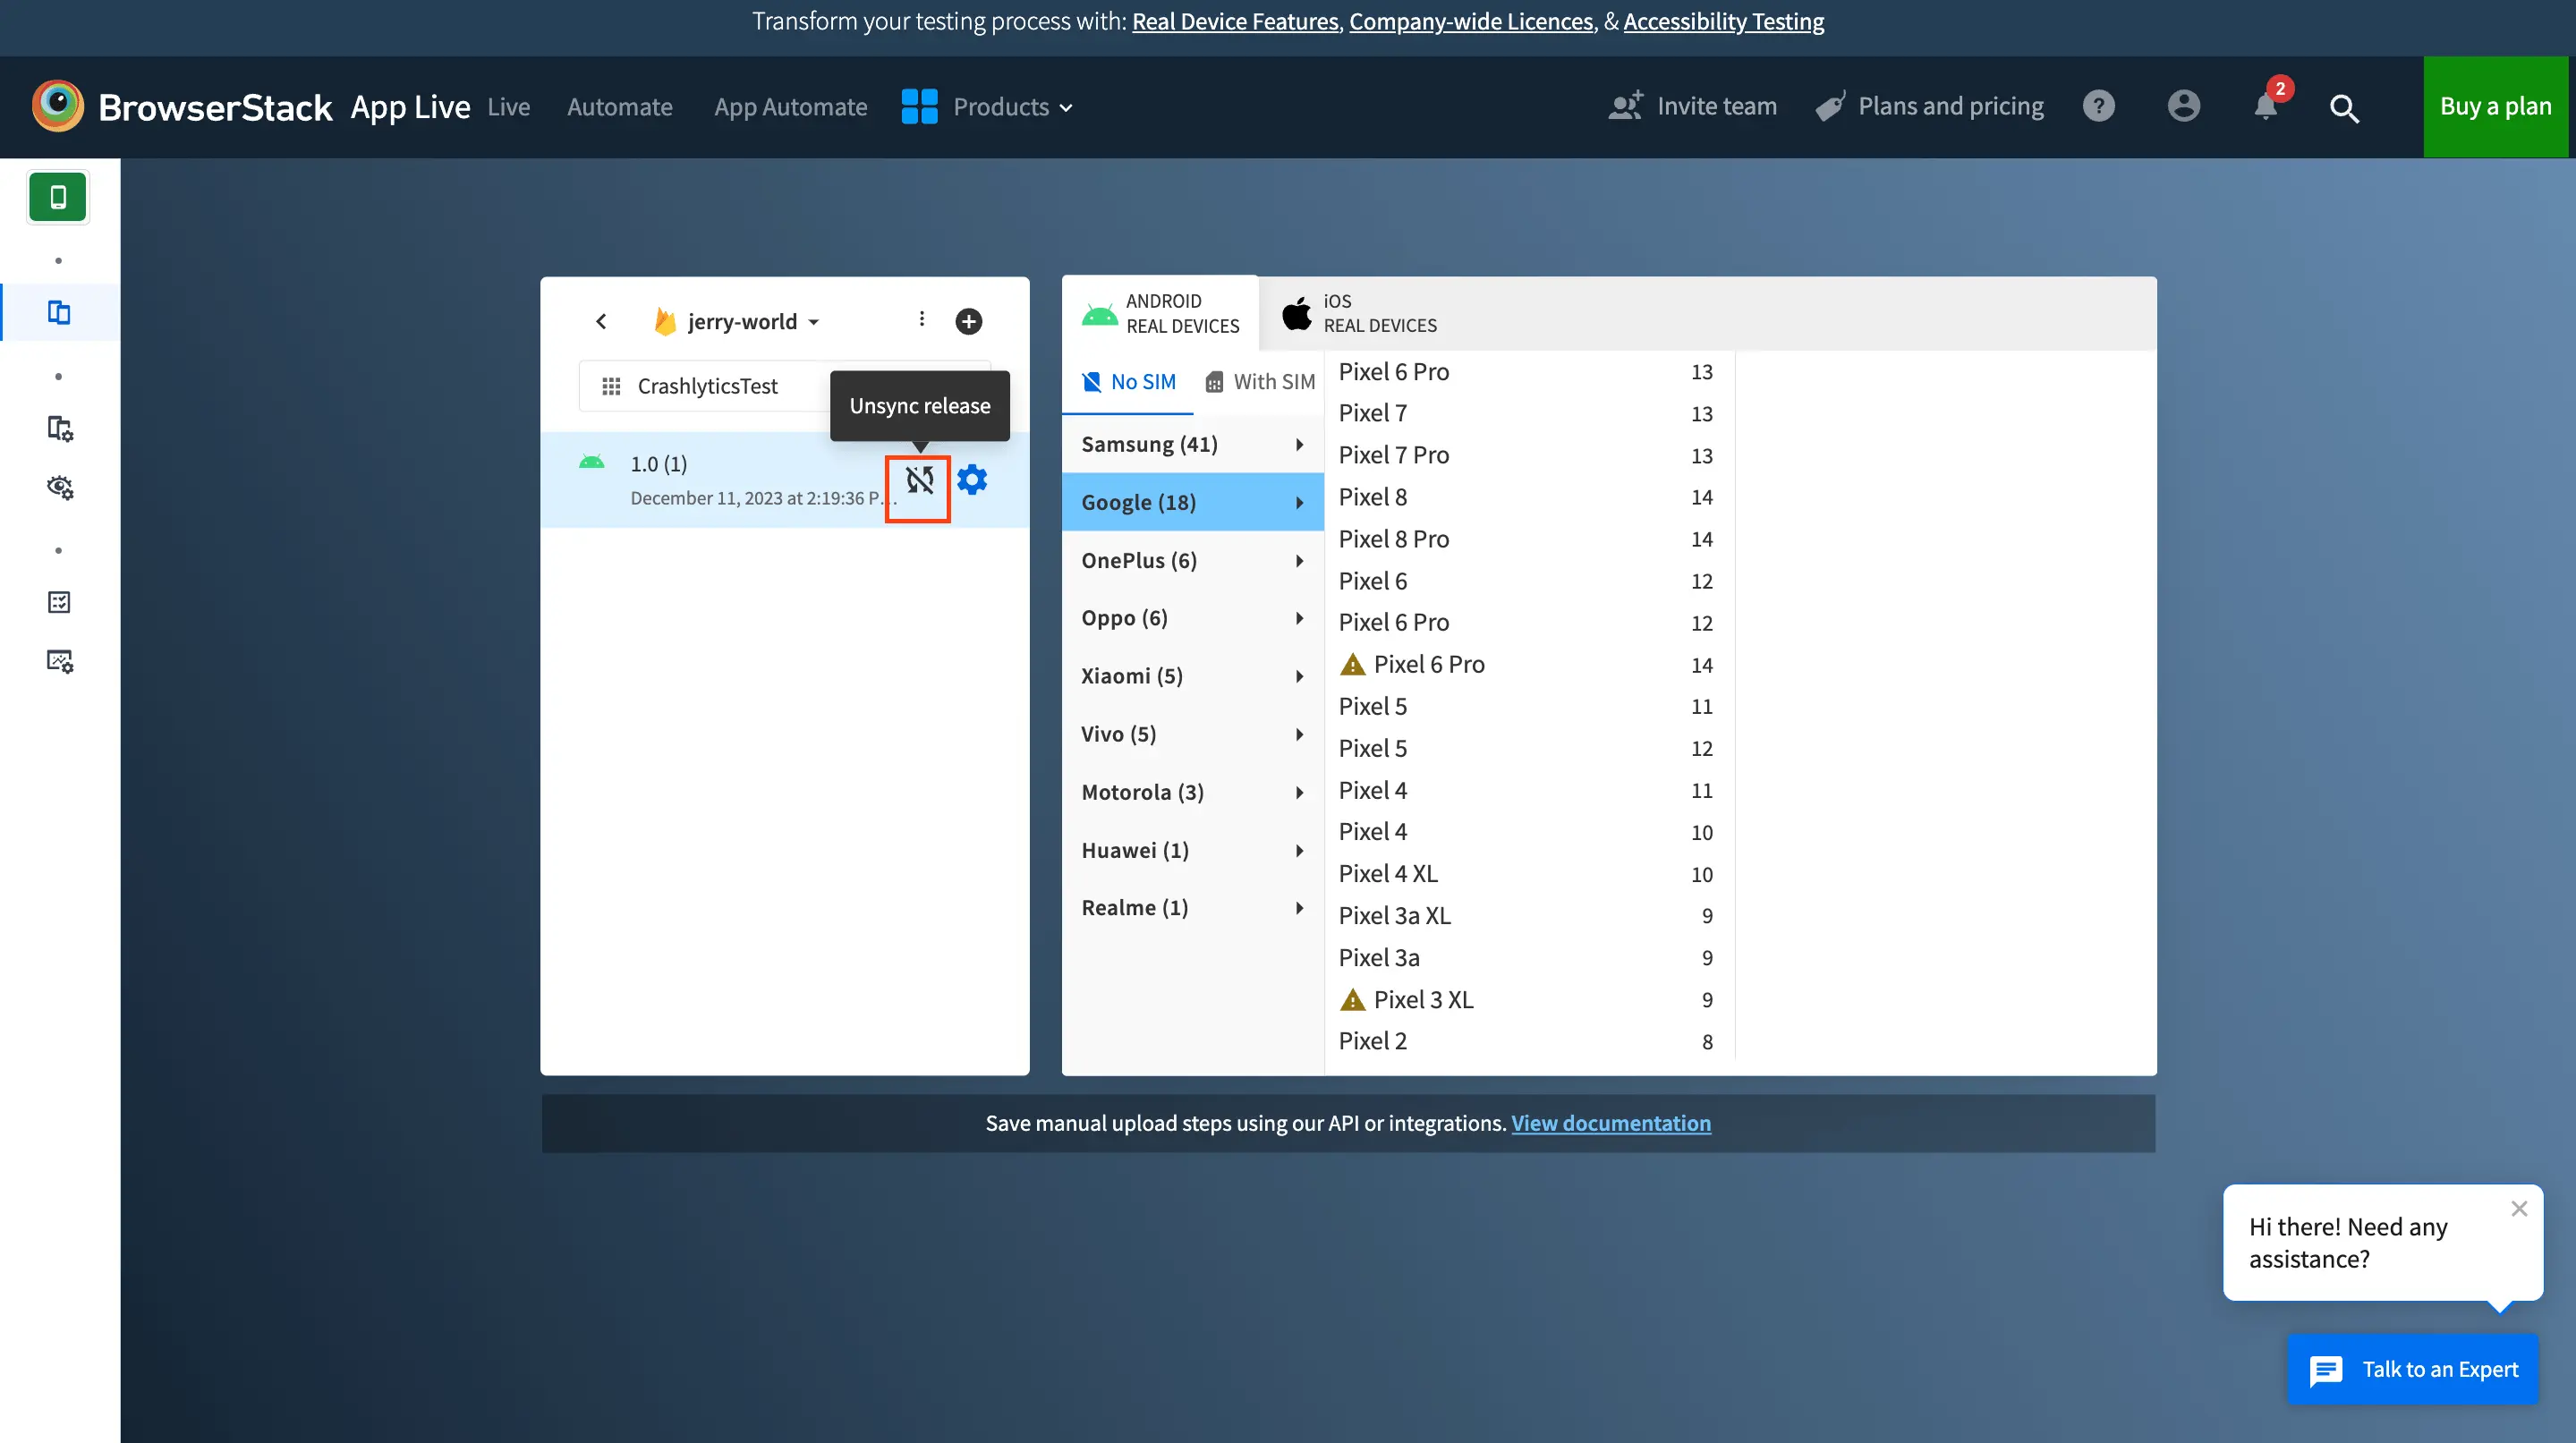
Launch a session with a Firebase app
To launch a session with a Firebase app, on the App Live dashboard:
- From the project list, select the project that includes the app you want to test.
- From the app list, select the app that you want to test.
- Select the device from the device list.
After you select the device and app, the app is synchronized automatically so that it is the latest. An App Live session is started with your selected app and device.
Other actions
You can perform other actions such as adding more projects, refreshing an existing project, and deleting a project.
Add more projects
To add more projects, follow these steps on the App Live dashboard:
- Click the
+icon beside the project list.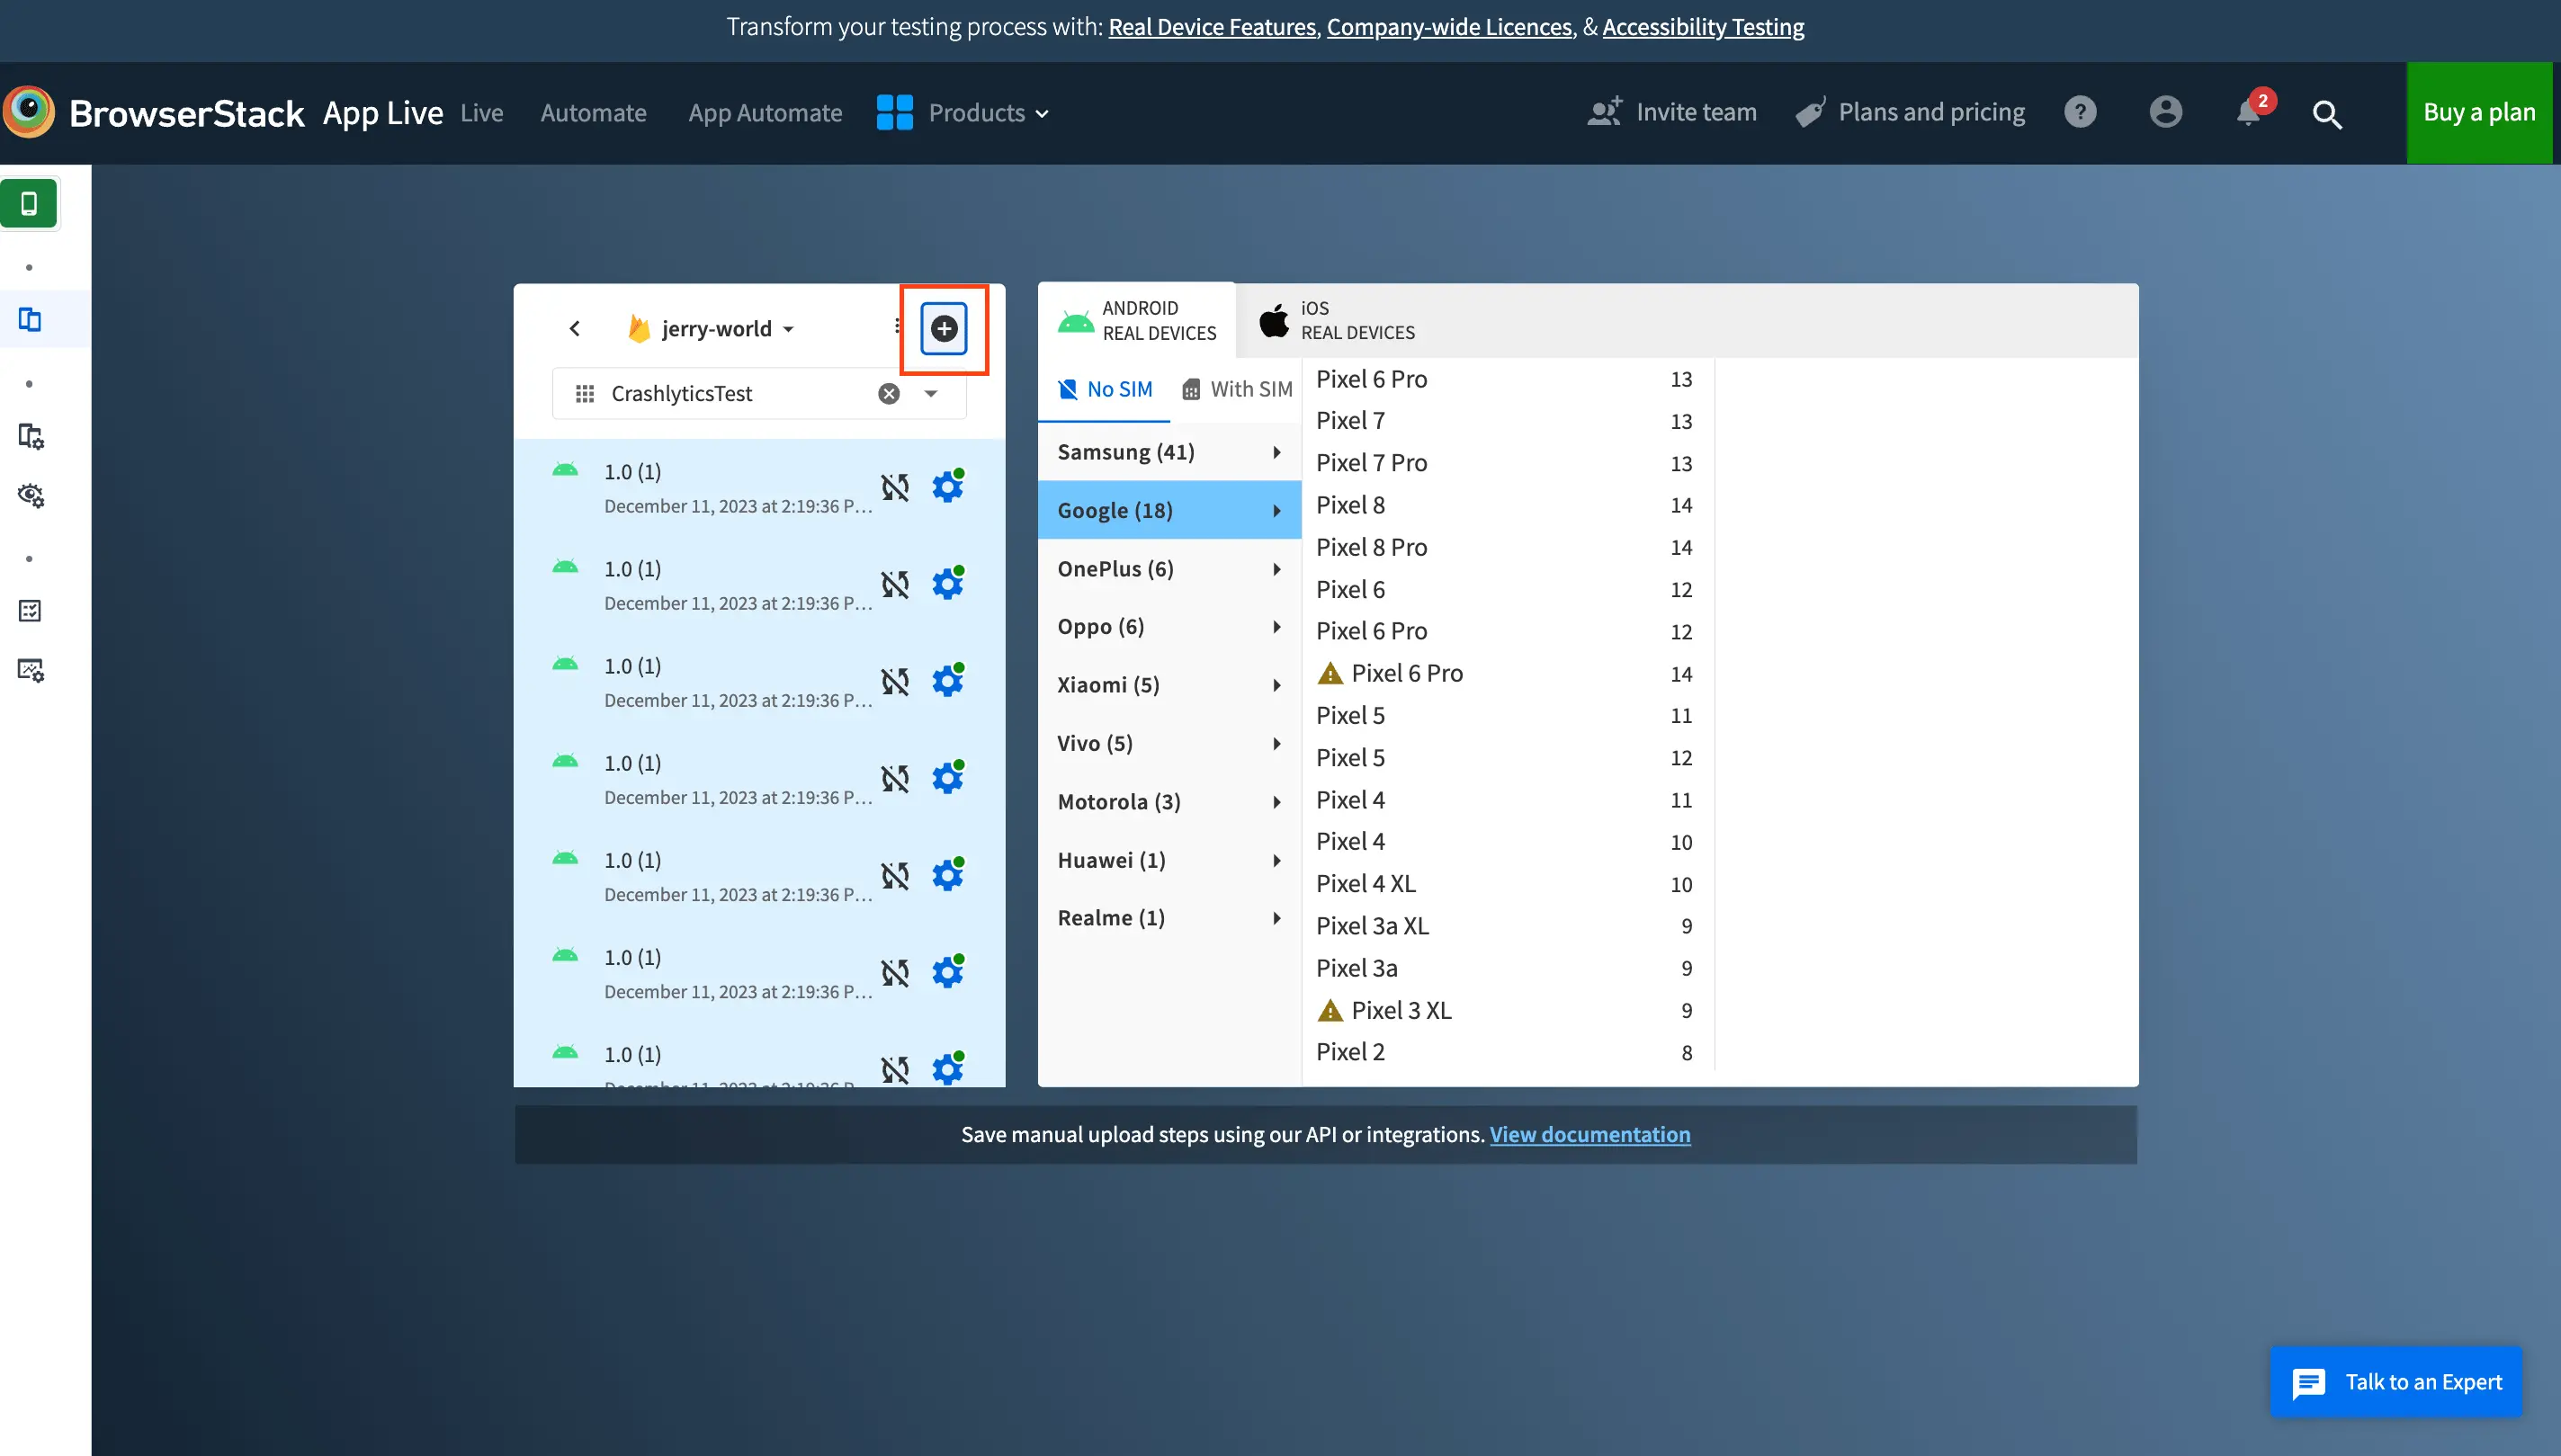
The Integrate with Firebase prompt opens.
- Follow the steps in Integrate with Firebase and add a project section.
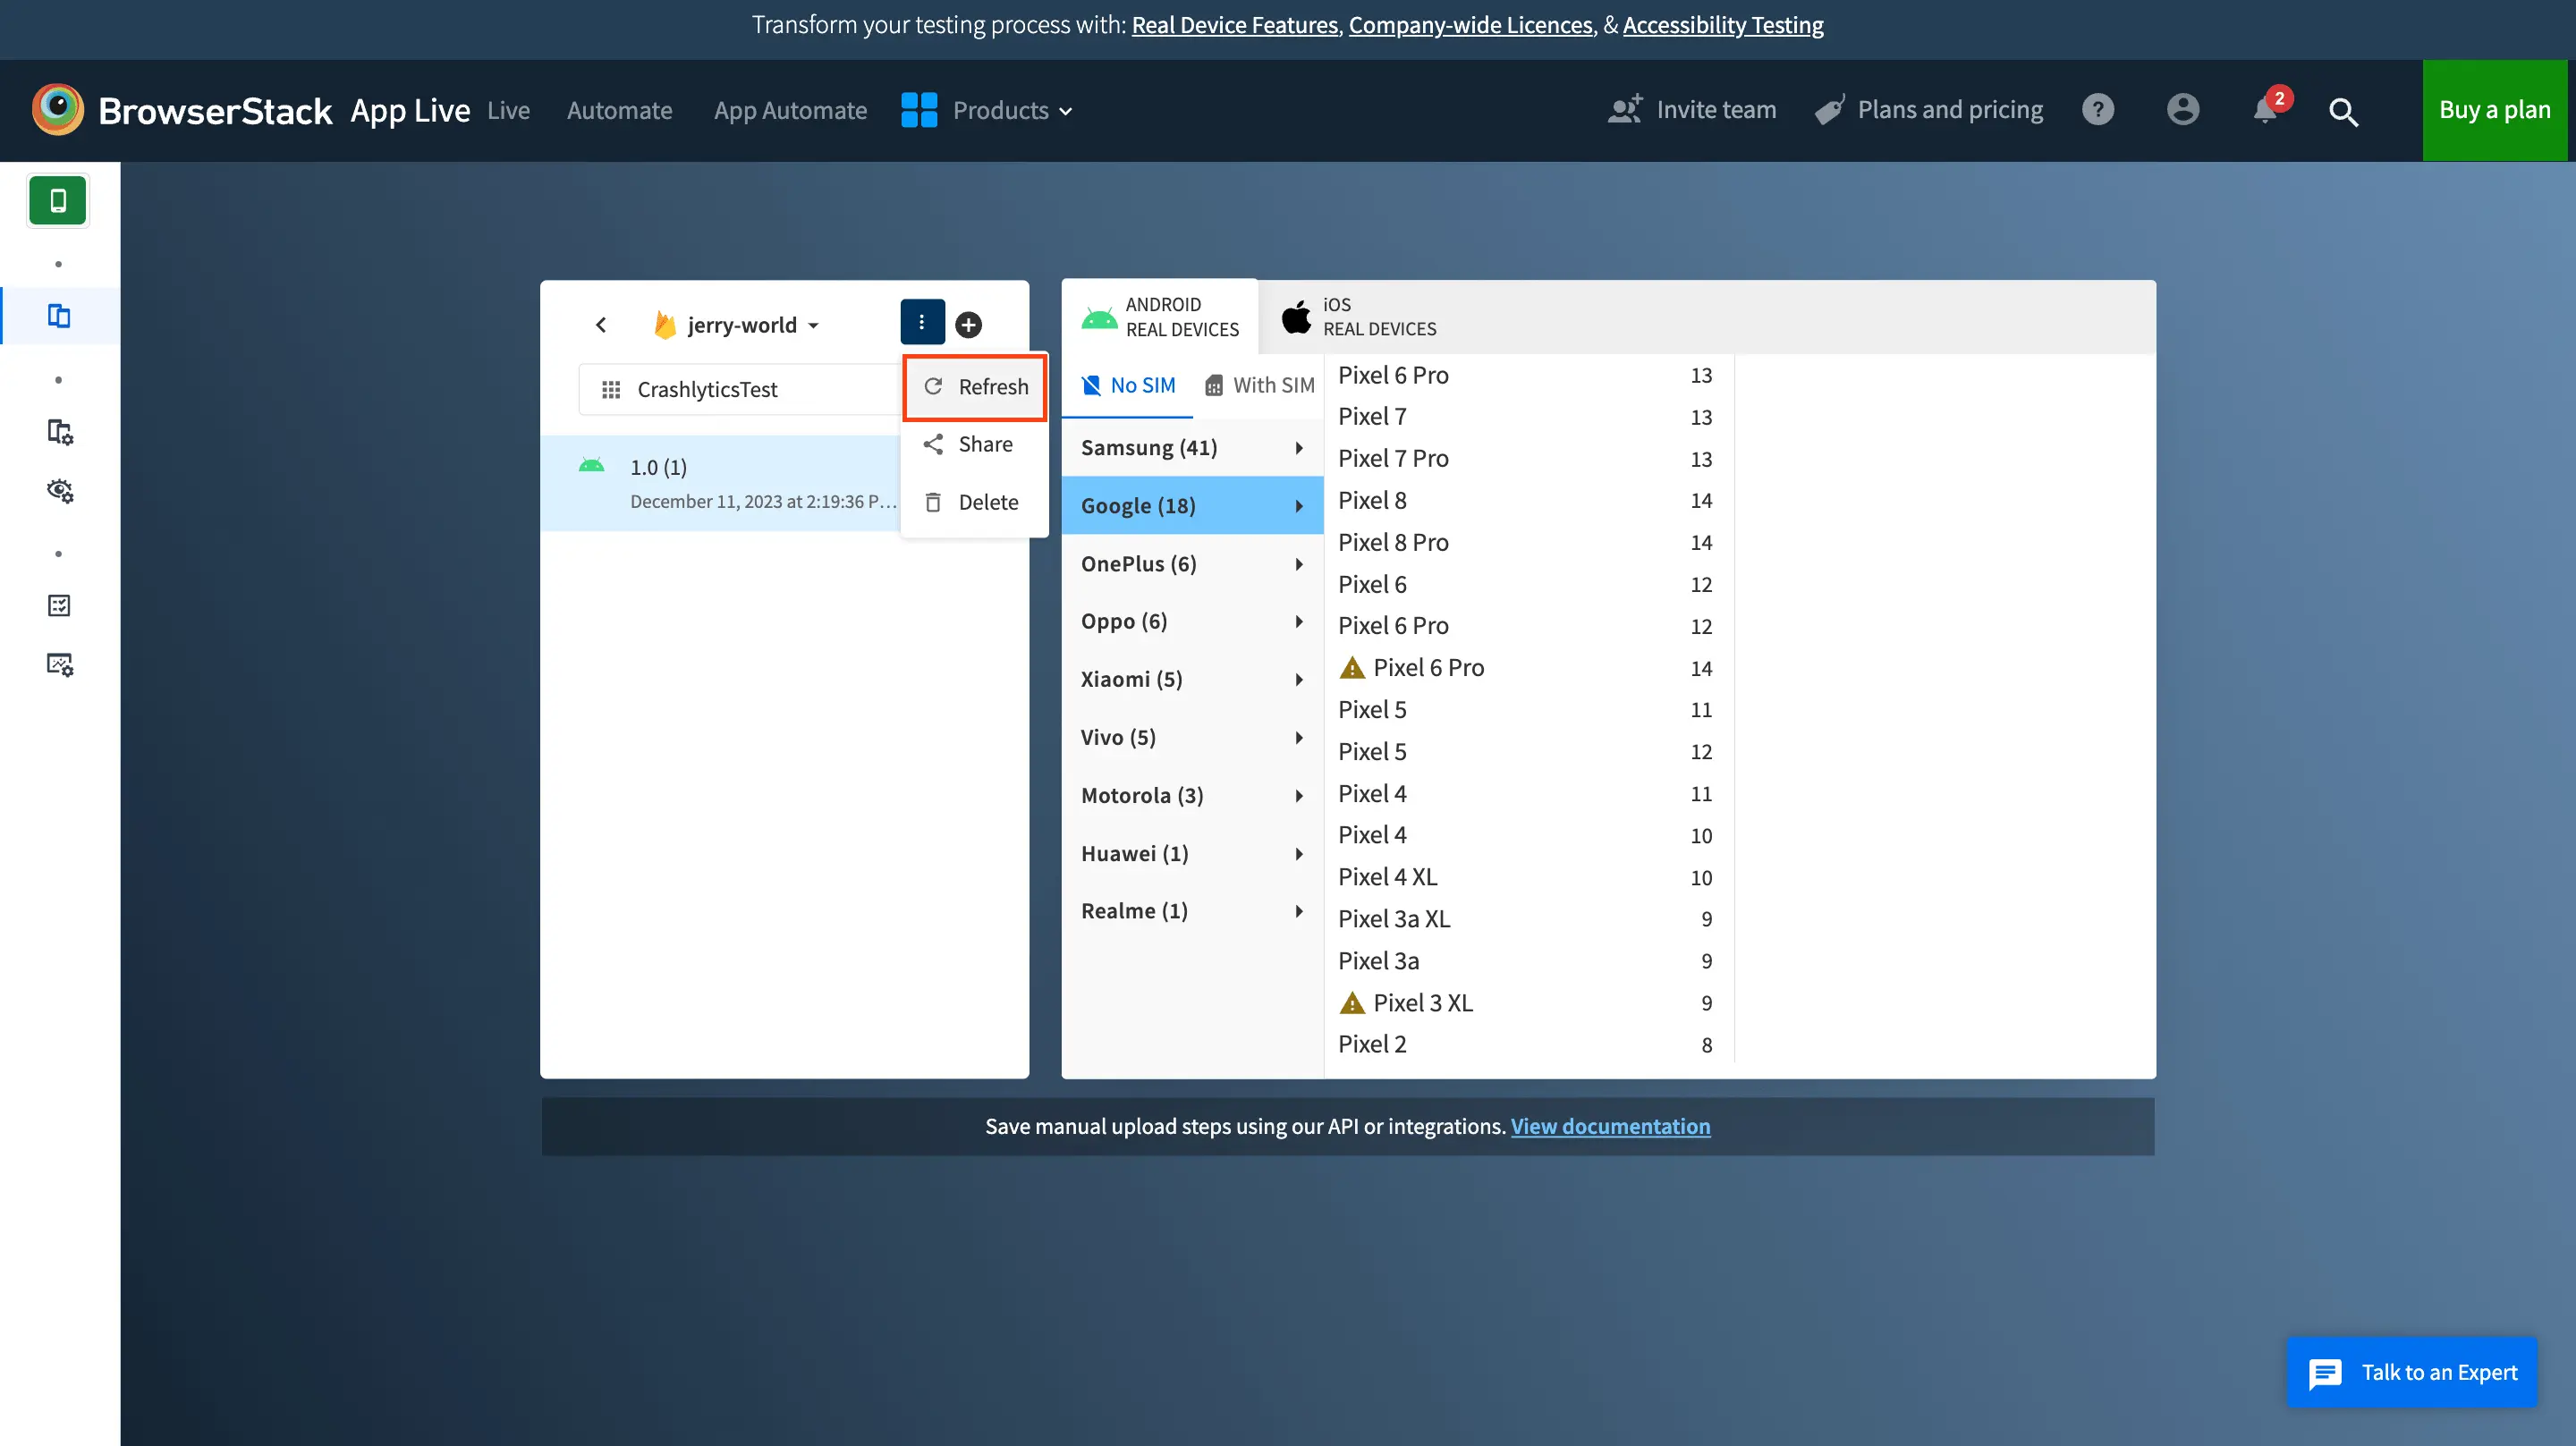
Refresh project
Use this option to refresh the project. This will fetch the latest apps and releases from Firebase.
To refresh a Firebase project:
- From the project list, select the project that you want to share with your team.
- Click the three-dot menu beside the project name and click Refresh.
Delete project
You can delete a project that is added by you on App Live. The project is also deleted for everyone with whom the project is shared on App Live.
The project is deleted from the App Live project list. Deleting your project from App Live doesn’t have any impact on the project in Firebase.
To delete a Firebase project:
- From the project list, select the project that you want to delete.
-
Click the three-dot menu beside the project name and click Delete.
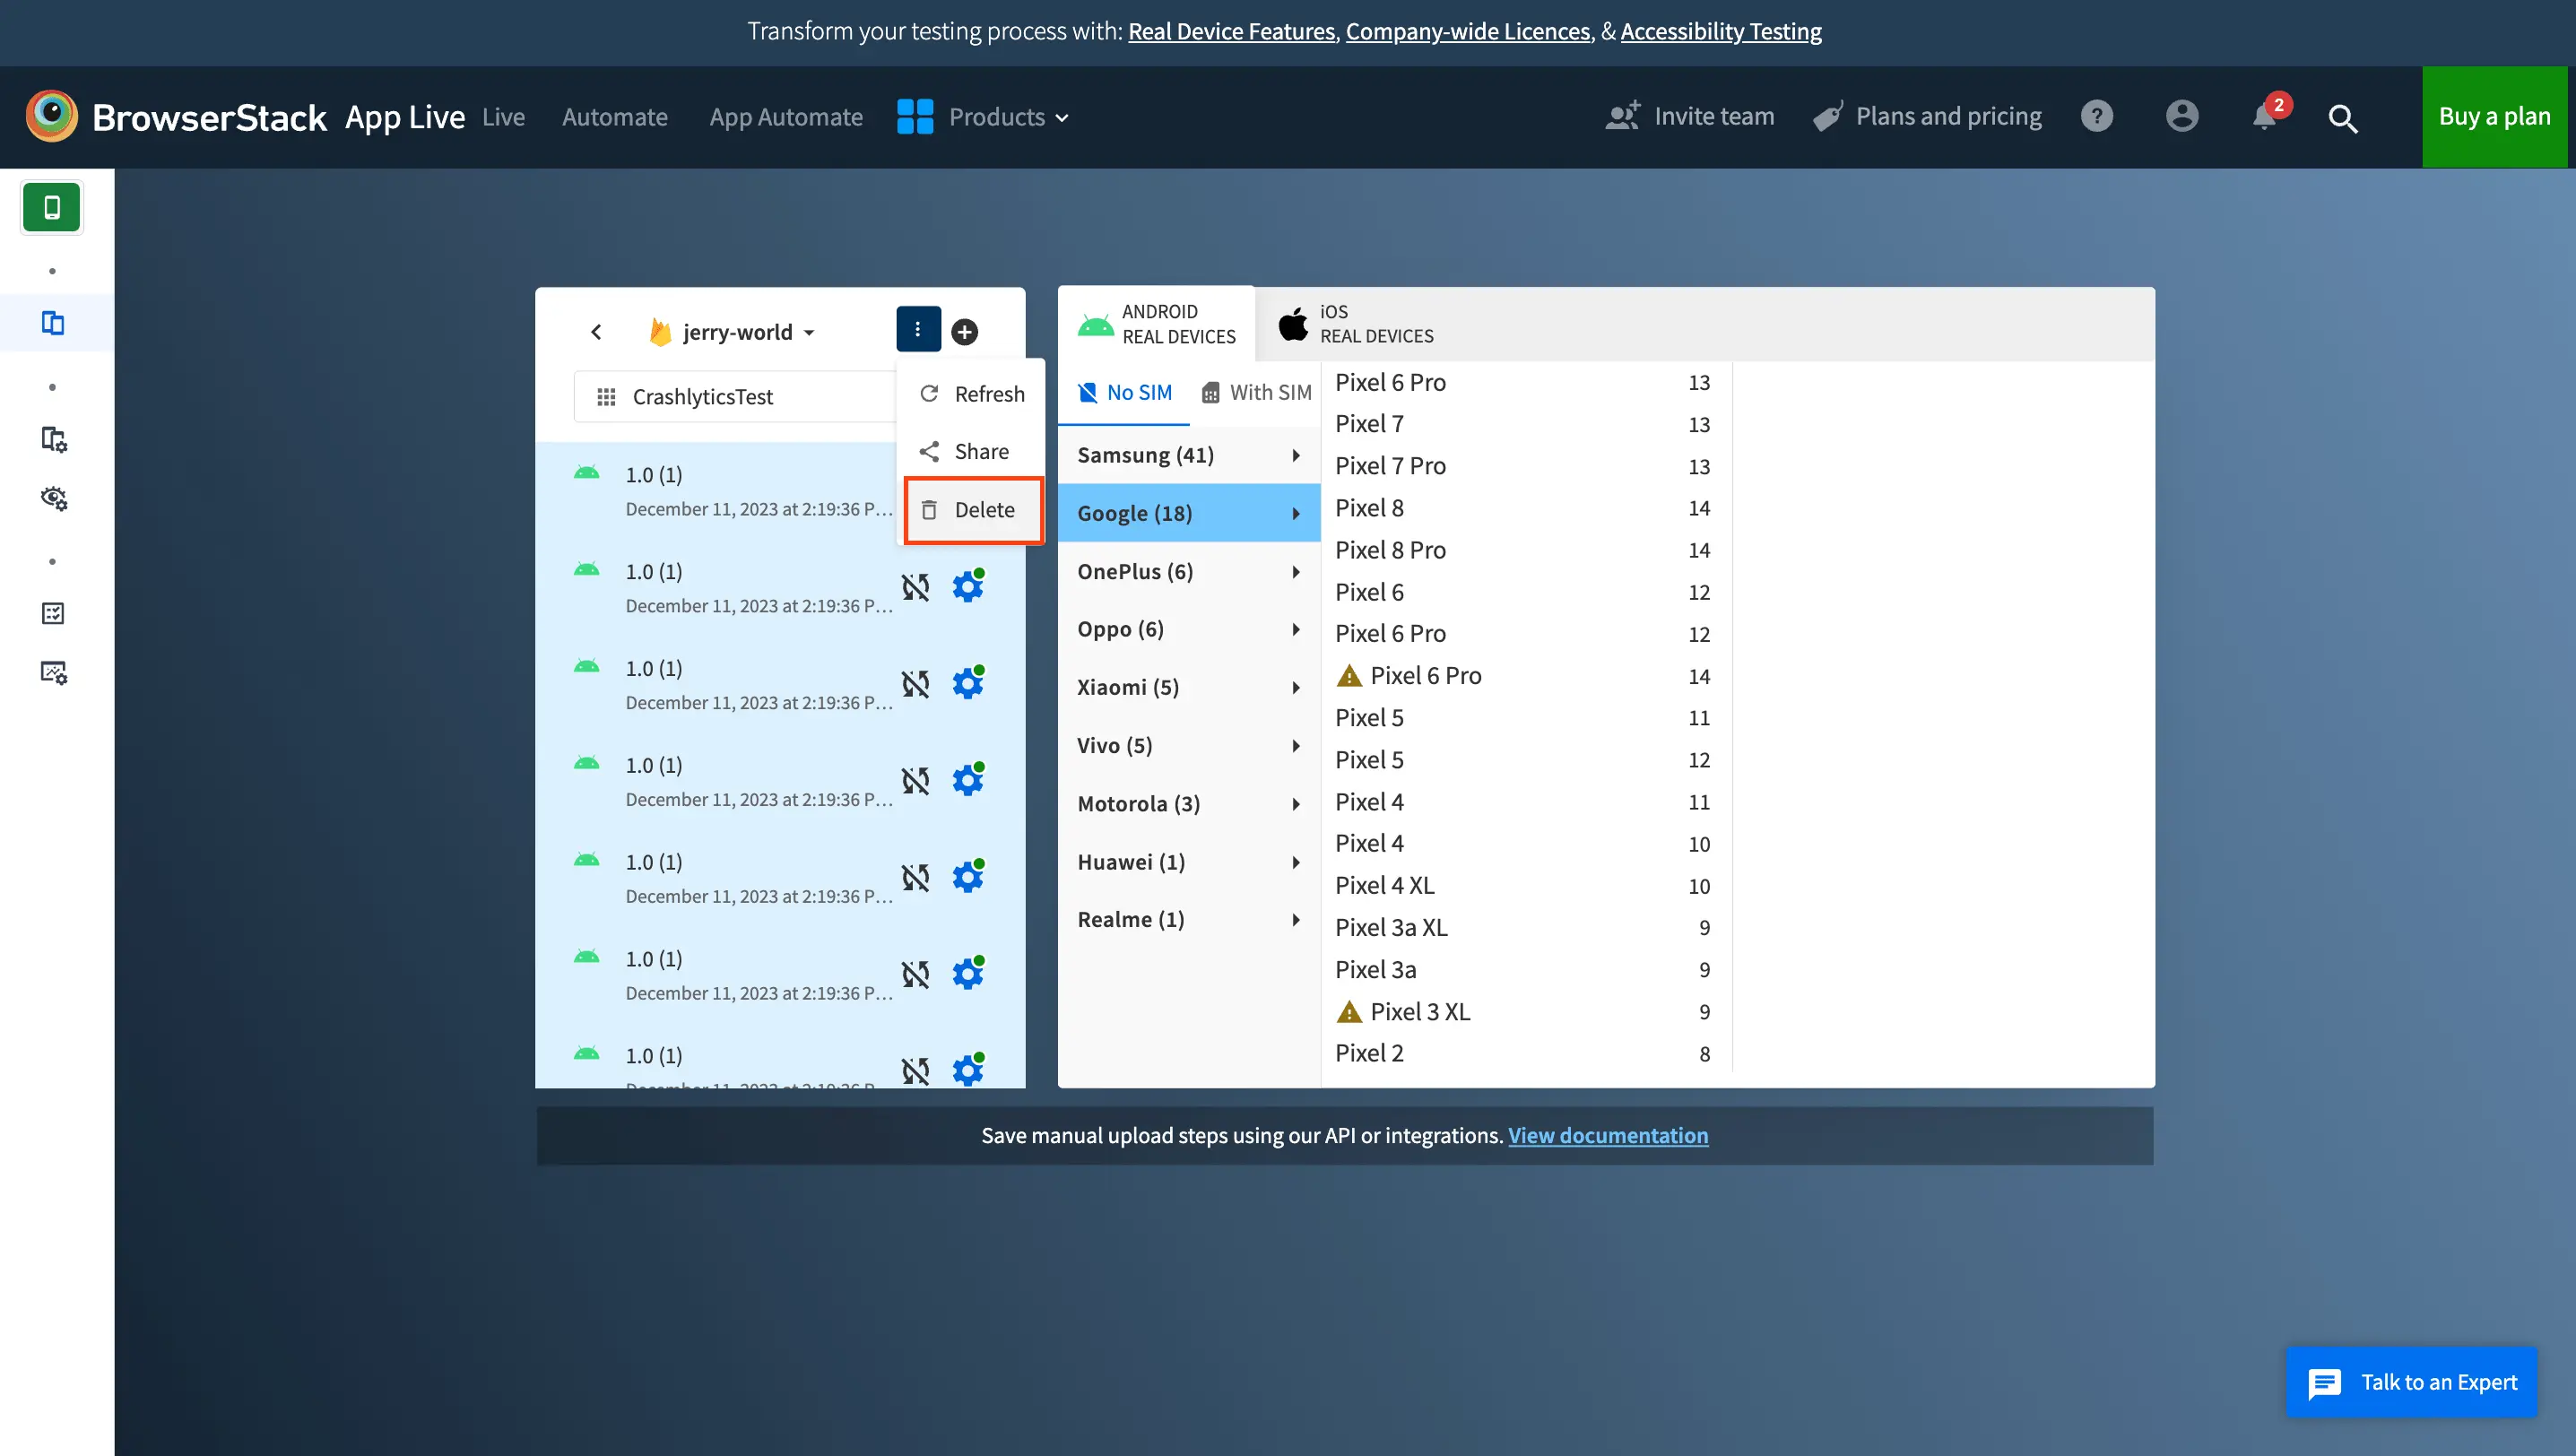
A confirmation message is shown to confirm whether you want to delete the project from App Live. Click Delete to confirm.

To delete all projects added by you at once, follow these steps:
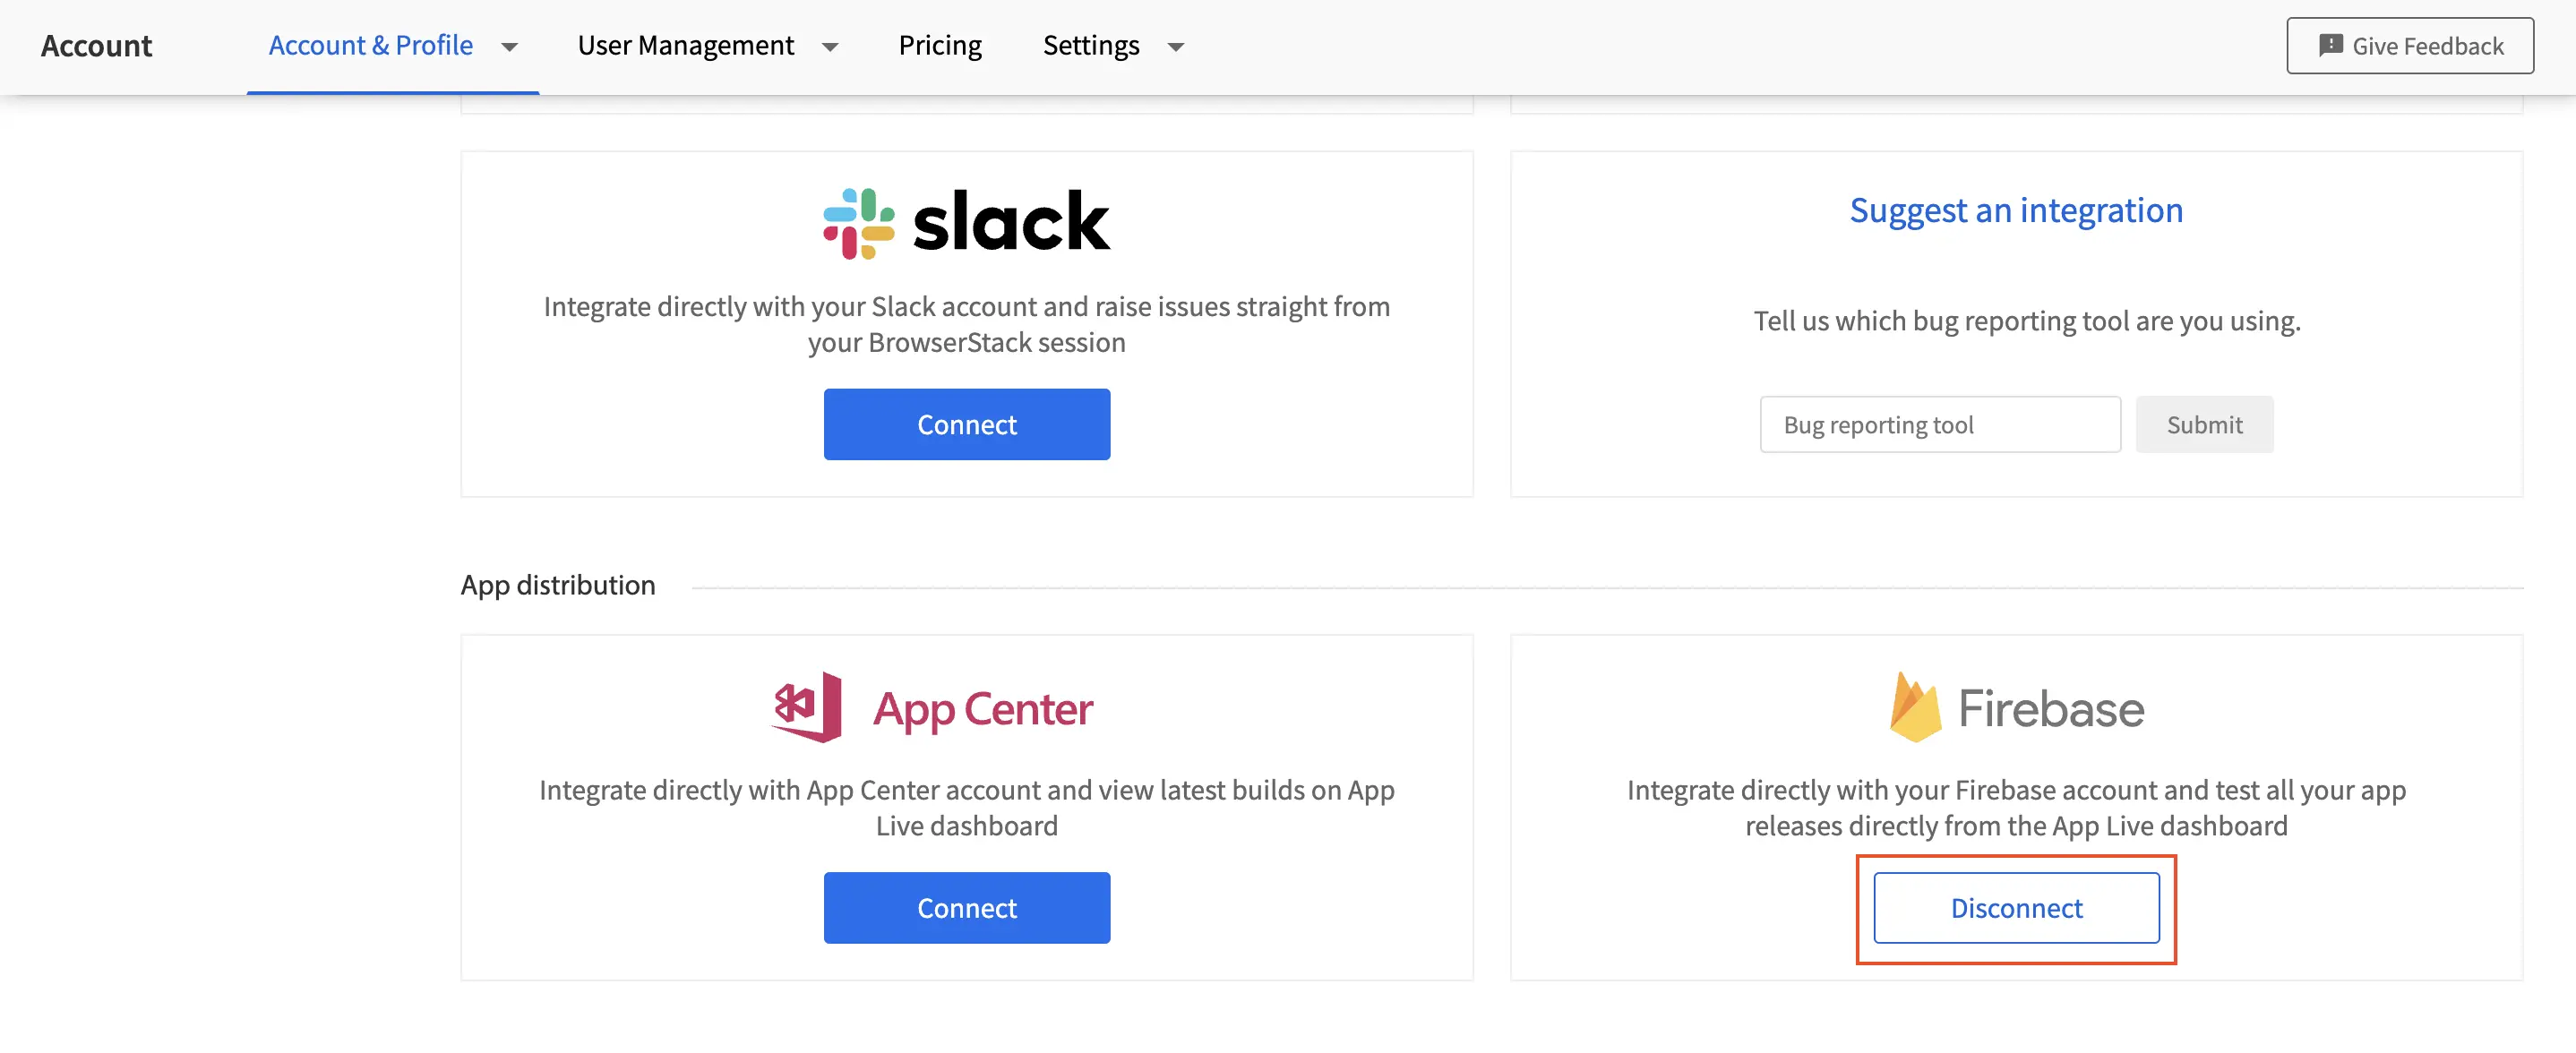
- Go to the Integrations page.
- Scroll down to the Firebase tile. Click Disconnect.
After you click Disconnect, all the projects added by you are deleted. However, the projects that are shared with you by your team members are not deleted.
Troubleshoot OAuth expiry when using Firebase integration
After integrating Firebase with App Live, you may encounter an error that the Firebase connection has expired or that the refresh token is revoked. These errors occur when Firebase invalidates the OAuth refresh token used by App Live to read your project details. These tokens are issued and managed by Firebase, BrowserStack does not control how long refresh tokens remain valid.
To fix this issue, you need to re-authenticate your Firebase project on App Live.
The following are some common reasons why Firebase might expire or revoke OAuth refresh tokens and how to debug them:
- Access is removed by user actions: Firebase removes access if the user signs out of their Google account, changes their password, or revokes access in their Google account settings. To fix this, confirm that the user has not revoked access and is signed in with the correct Google account.
- Account is updated or disabled: Tokens are invalidated if the account is deleted, suspended, or disabled by an administrator. To fix this, verify that the user account is active and not restricted by an administrator.
- Token expires: If a refresh token is not used for more than a certain period (for example, 6 months), Firebase may revoke or expire the token. To fix this, re-authenticate the Firebase integration to generate a new, active token.
- Multiple refresh attempts with an invalid token: If you repeatedly attempt to refresh with an expired token, Firebase may block further refresh attempts. To fix this, stop retrying and re-authenticate your project on App Live.
- Changes to the project or API keys: If project credentials or the API keys are changed, it may invalidate existing tokens. To fix this, download the latest OAuth client configuration file and reintegrate your Firebase project.
- Publishing status: Firebase issues refresh tokens that expire or are revoked after 7 days for certain publishing statuses, such as Testing. To fix this, set your OAuth publishing status to Production.
- Domain-level policies: Domain or Google Workspace policies can also cause tokens to expire. For example, if the global auth expiry setting is enabled. To fix this, check with your Google Workspace or domain administrator to confirm whether any auto-expiry rules are applied.
We're sorry to hear that. Please share your feedback so we can do better
Contact our Support team for immediate help while we work on improving our docs.
We're continuously improving our docs. We'd love to know what you liked
We're sorry to hear that. Please share your feedback so we can do better
Contact our Support team for immediate help while we work on improving our docs.
We're continuously improving our docs. We'd love to know what you liked
Thank you for your valuable feedback!