Integrate BrowserStack Automate with CircleCI
Learn how to integrate CircleCI with the BrowserStack device cloud to run all your Playwright tests.
Introduction
CircleCI uses .circleci/config.yml for configuration, and it can be used to integrate your tests with BrowserStack. For successful integration, you need to set important variables such as, grid config, username, access key, and so on.
In this guide, you will learn how to:
- Integrate CircleCI with your existing Playwright test suite
- Integrate CircleCI to test your locally hosted websites
Integrate existing test cases
With existing test cases, integrating BrowserStack involves editing your test cases to add BrowserStack capabilities, credentials, and remote URL.
Though your existing test scripts include capabilities, BrowserStack expects specific capabilities such as browser version, that help determine how tests are run.
Project Setup
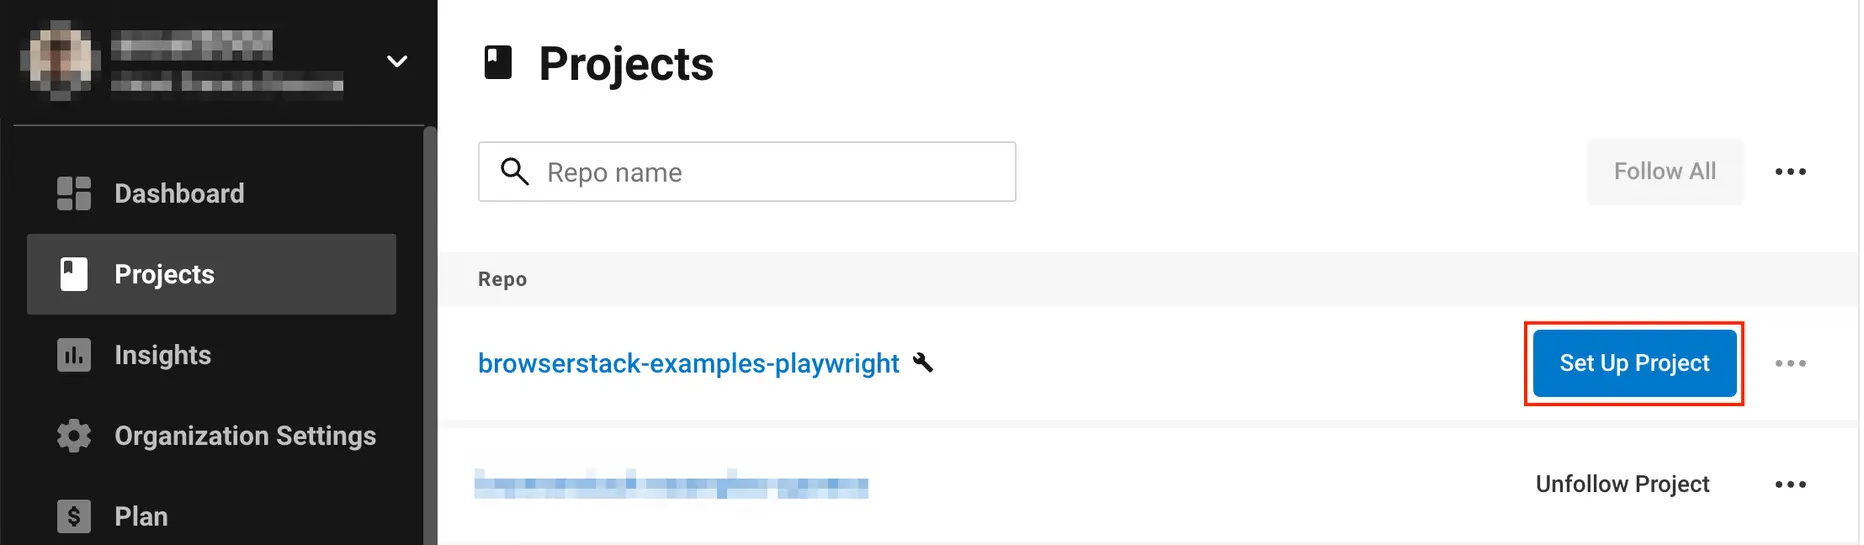
- Log in to CircleCI.
- Choose the desired repository, and click Set Up Project.
- Select Add Config (or Use Existing Config). This creates a new branch in your project named
circleci-project-setup. - The ‘.circleci/config.yml’ file will be created in the project’s root directory. To create the
YMLfile, refer the CircleCI Language Guide. - Update your
config.ymlas per your project requirements. Following is an example configuration which can be used to run your Playwright tests:config.ymlversion: 2.1 jobs: build: docker: - image: mcr.microsoft.com/playwright:v1.29.0-focal working_directory: ~/app steps: - checkout - run: npm i -D @playwright/test - run: npx playwright install chrome - run: name: "Run the test on BrowserStack" command: npx playwright test --config=./playwright.config.js build: jobs: - build -
Navigate to the CircleCR dashboard once your pipeline runs successfully. You will see that the build has passed.
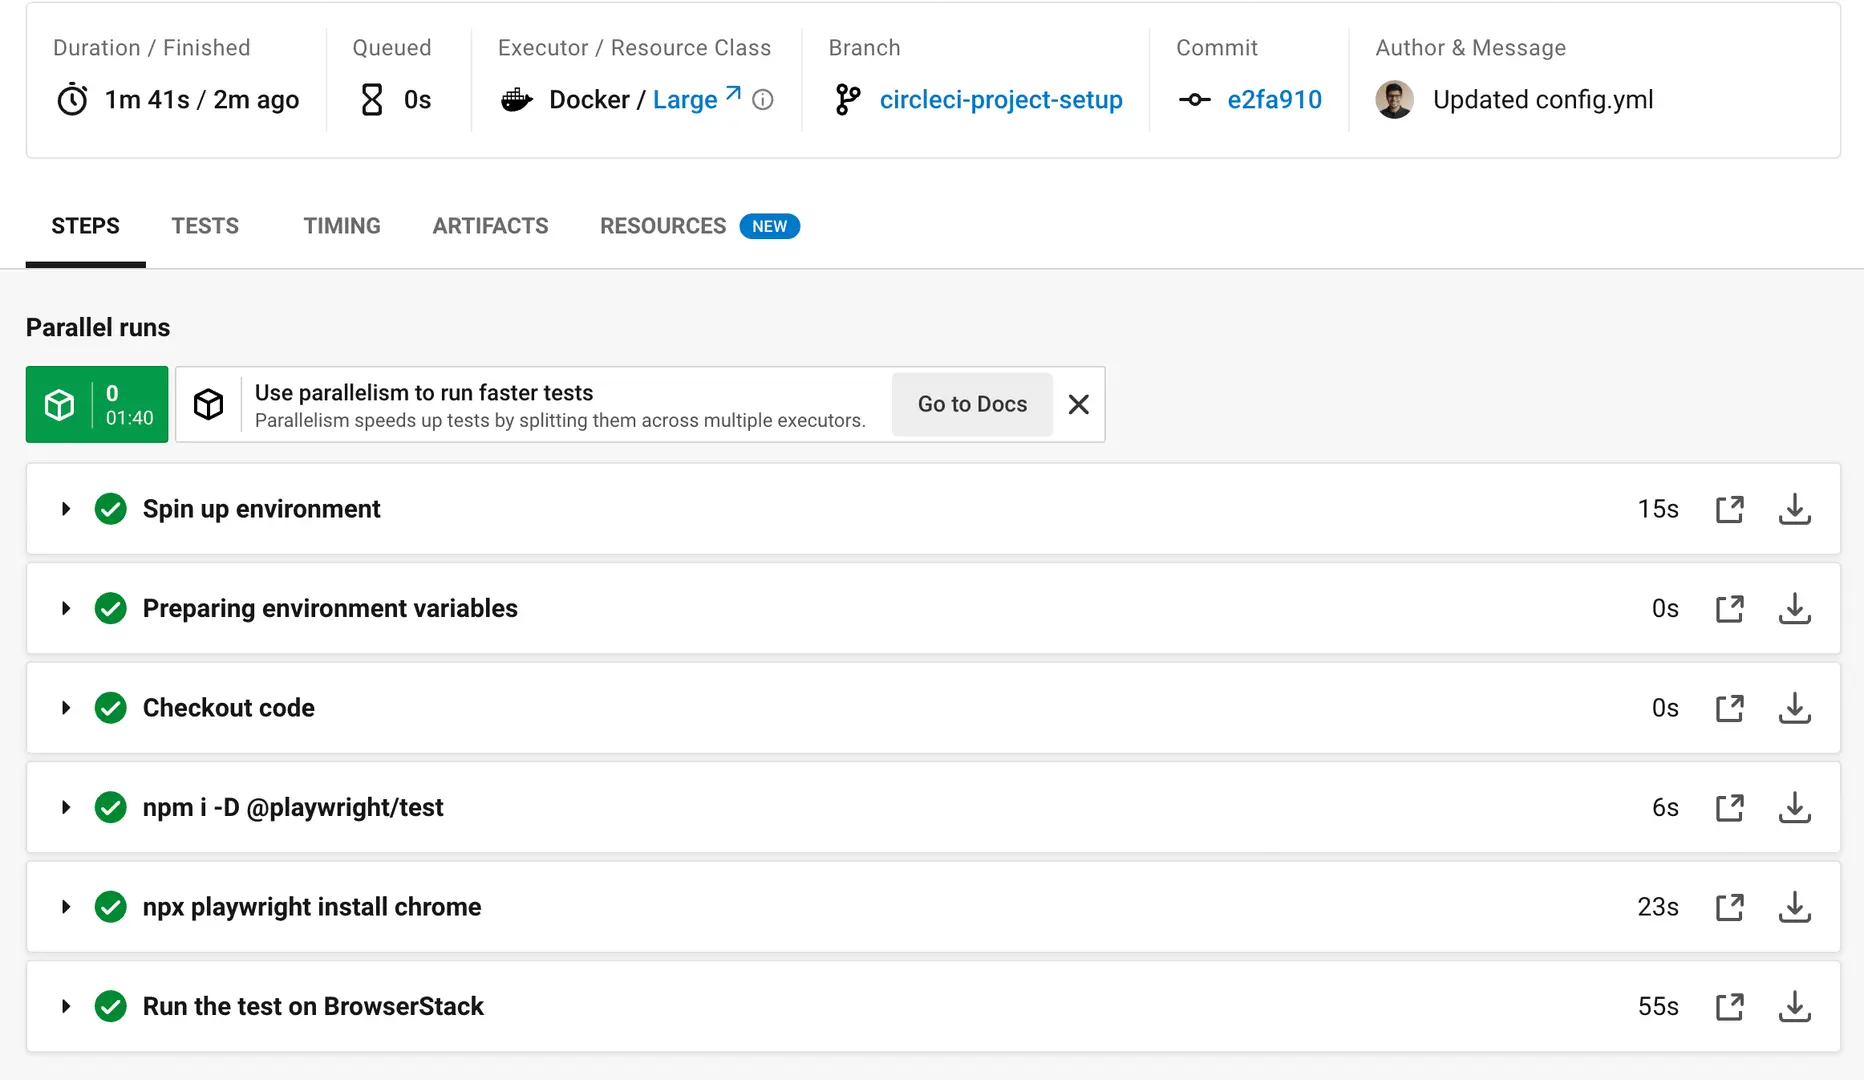
- View the executed test results on the BrowserStack Automate Dashboard.
Set the variables
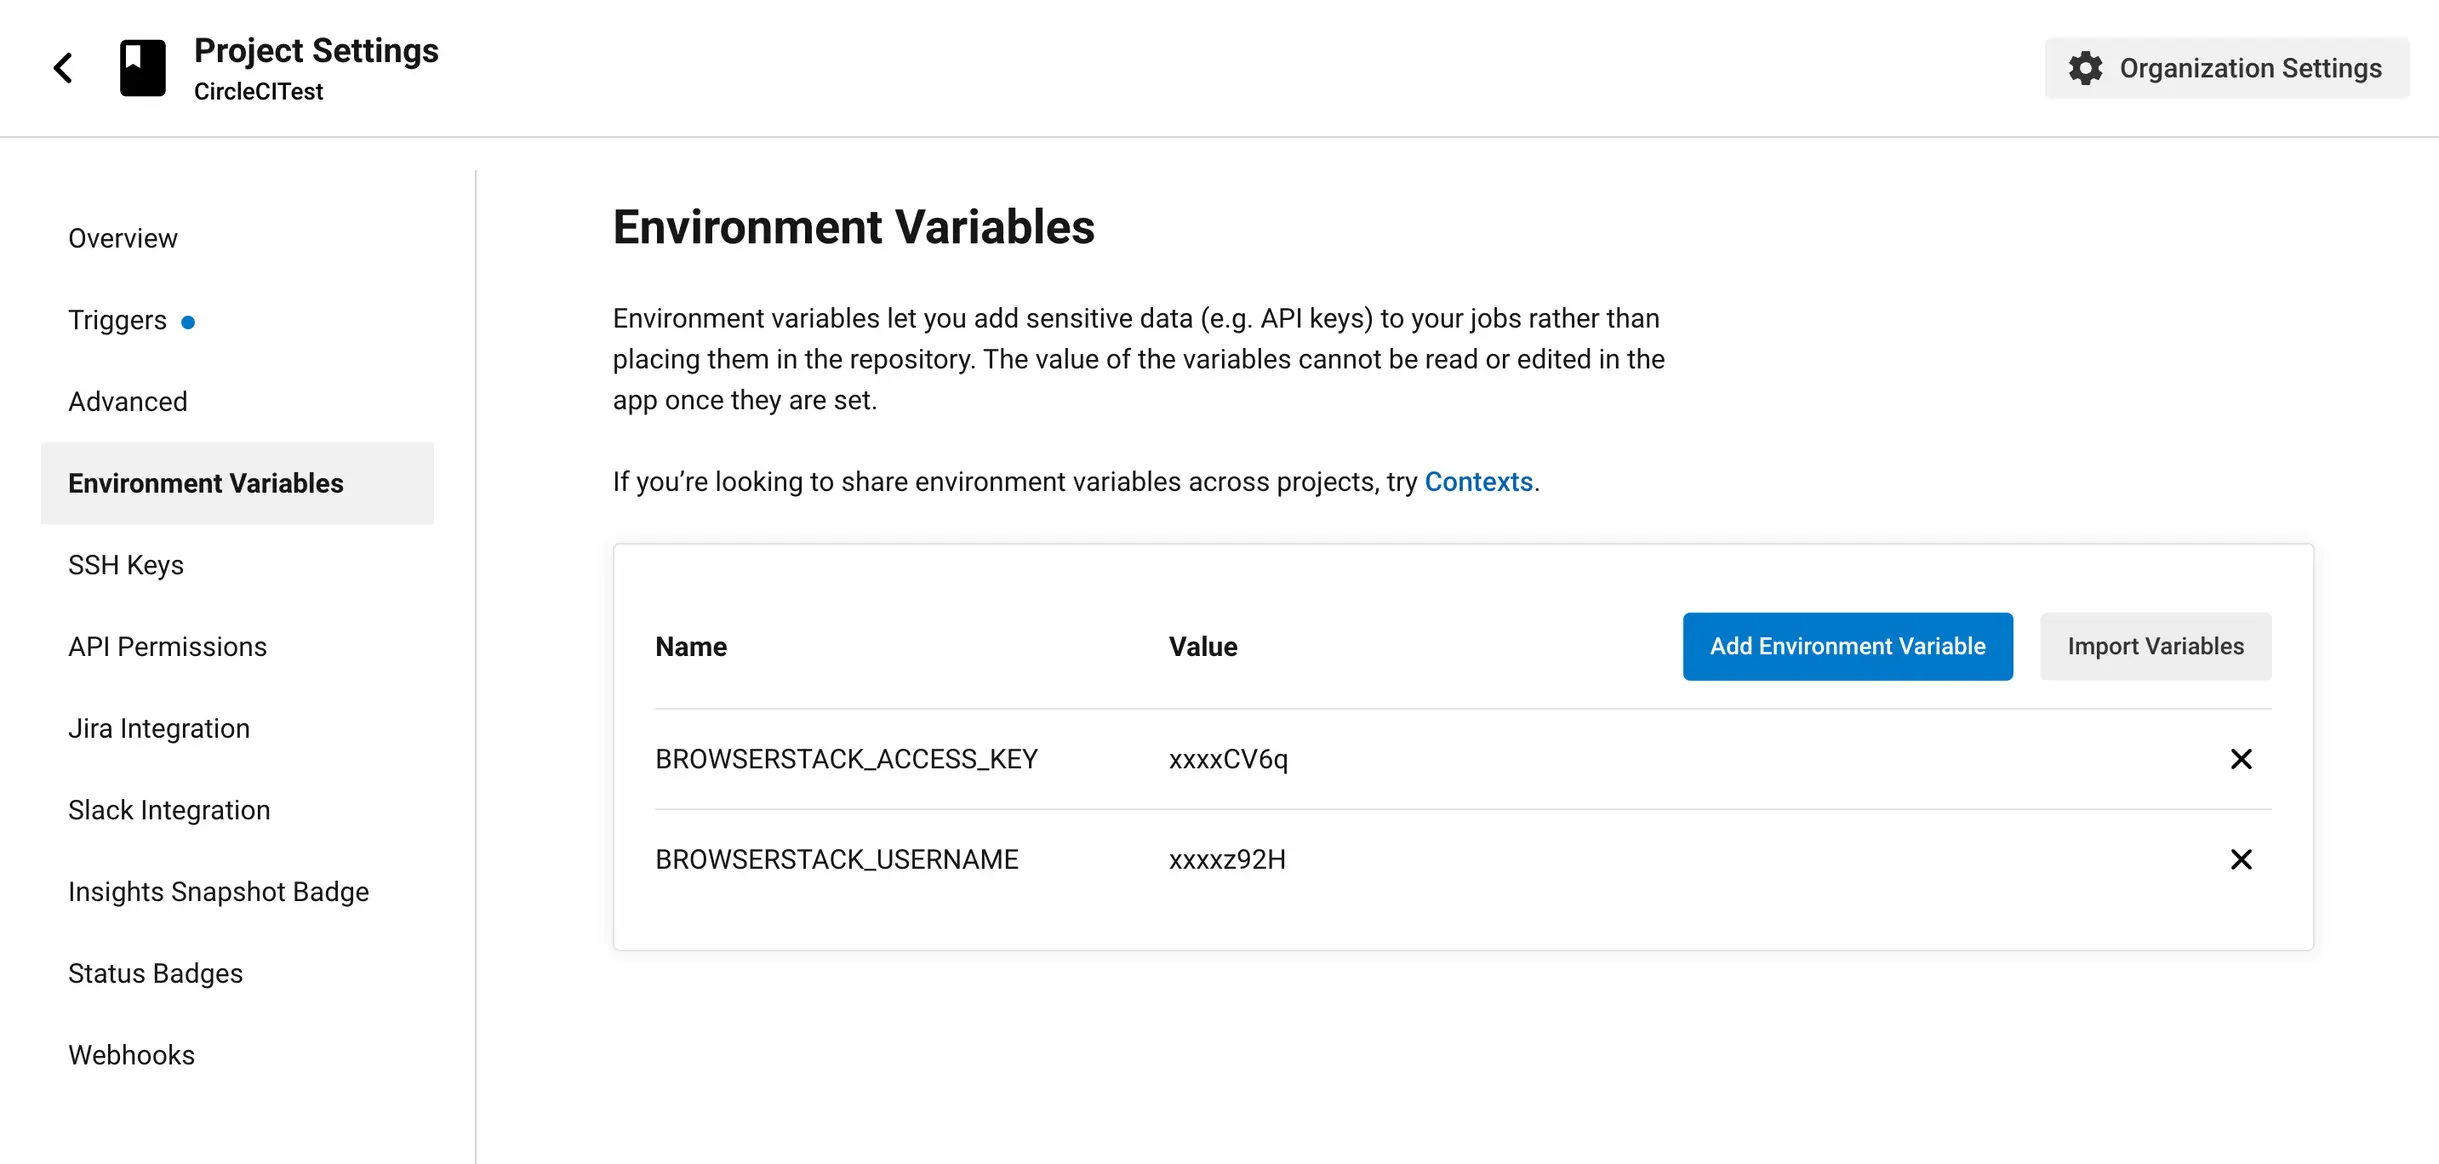
BrowserStack recommends you encrypt variables like username and access key. CircleCI enables the user to secure environment variables via their web interface. This functionality allows you to keep the contents of the secure variable private.
The key-value pairs are set in the project settings, which can be found under Project Settings, in the Environment variables section. Here you can add the variables as BROWSERSTACK_USERNAME and BROWSERSTACK_ACCESS_KEY
Public environment variables can be set directly through circle.yml under environment.
Following is a sample configuration for the circle.yml file:
build:
  environment:
    BROWSERSTACK_LOCAL: true
    BROWSERSTACK_LOCAL_IDENTIFIER: "identifier"
Test your locally hosted websites
Use BrowserStack Local Testing to test your web applications hosted on private, development, and internal servers. With the BrowserStack Local Testing binary, you can create a secure, private connection between the BrowserStack and your internal servers.
While testing on development or staging environments, you can do the following:
- Configure CircleCI to automatically download the latest version of the BrowserStack Local binary.
- Instantiate the binary before your test starts.
- Enable Local Testing by setting the capability
browserstack.localtotruein your test script.
Refer the sample code below:
version: 2.1
jobs:
  build:
    docker:
      - image: mcr.microsoft.com/playwright:v1.29.0-focal
    working_directory: ~/app
    steps:
      - checkout
      - run: npm i extract-zip
      - run: npm i -D @playwright/test
      - run: npx playwright install chrome
      - run:
          name: Download BrowserStack Local binary, start the binary and run the test.
          command: |
            wget "https://local-downloads.browserstack.com/BrowserStackLocal-linux-x64.zip"
            npx extract-zip BrowserStackLocal-linux-x64.zip
            ./BrowserStackLocal $BROWSERSTACK_ACCESS_KEY --daemon start
            npx playwright test --config=./playwright.config.js
            ./BrowserStackLocal --key $BROWSERSTACK_ACCESS_KEY --daemon stop
workflows:
  build:
    jobs:
      - build
You can initiate a local testing instance directly from your code. Here, you’ll need to start a local testing instance before the test starts and stop the instance once the test is completed. For this, you will need to install the browserstack-local node package and import it in your code to create a BrowserStackLocal instance.
Make sure that you have set the browserstack.local capability to true.
You can start and stop a local testing instance through language bindings.
...
{
  "connection_settings": {
    "local": true,
    "local_identifier": <your-local-identifier-string>
  }
}
...
Upon completing these configurations, you should be able to run Playwright tests on your locally hosted websites on BrowserStack Automate.
We're sorry to hear that. Please share your feedback so we can do better
Contact our Support team for immediate help while we work on improving our docs.
We're continuously improving our docs. We'd love to know what you liked
We're sorry to hear that. Please share your feedback so we can do better
Contact our Support team for immediate help while we work on improving our docs.
We're continuously improving our docs. We'd love to know what you liked
Thank you for your valuable feedback!