BrowserStack SSO with ADFS | SAML
Integrate your ADFS directory with BrowserStack to set up Single Sign-On.
Single Sign-on (SSO) integrates an external user directory with your BrowserStack Group. This document describes how to configure Single Sign-on when Azure Directory Federated System (ADFS) is your identity provider.
In this tutorial, you’ll learn how to integrate BrowserStack with ADFS (ADFS). When you integrate BrowserStack with ADFS, you can:
- Control in ADFS who has access to BrowserStack.
- Enable your users to be automatically signed-in to BrowserStack with their ADFS accounts.
- Manage your accounts in one central location - the ADFS portal.
Prerequisites
To set-up and use ADFS and BrowserStack Single Sign-on (SSO) feature:
- An ADFS Server Access.
- You need to have administrator access to your organization’s ADFS Server.
- Enterprise plan on BrowserStack.
- By default, a user account with Owner permissions can setup SSO on BrowserStack.
Supported features
The OneLogin & BrowserStack Single Sign-on integration currently supports the following features:
- SP-initiated SSO
- IdP-initiated SSO
Configuration steps
A. BrowserStack setup
-
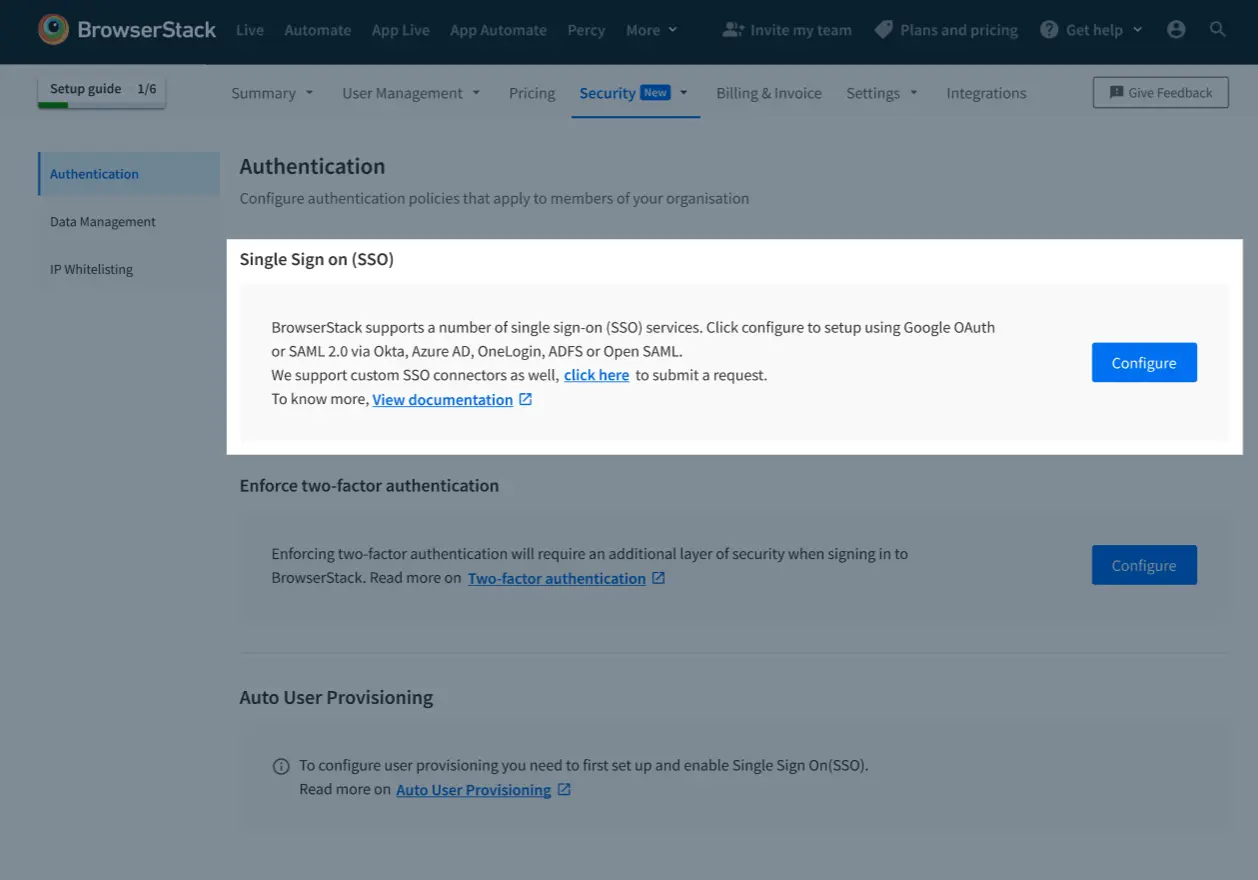
Sign-In to BrowserStack account as Owner.
-
Go to Account > Security and select Authentication from the side-nav menu. Click Configure under Single Sign On (SSO).
-
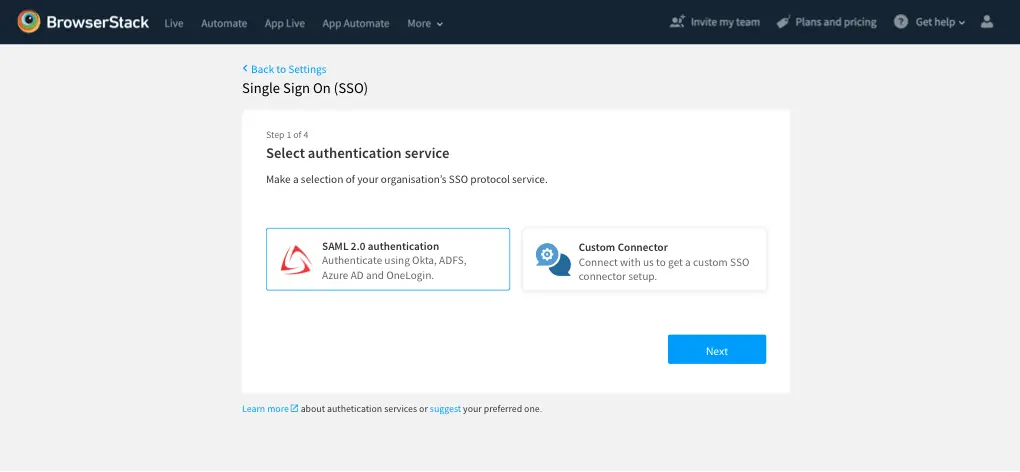
On the next screen, you will be shown all the Authentication services that BrowserStack supports, select SAML 2.0 and click Next.
-
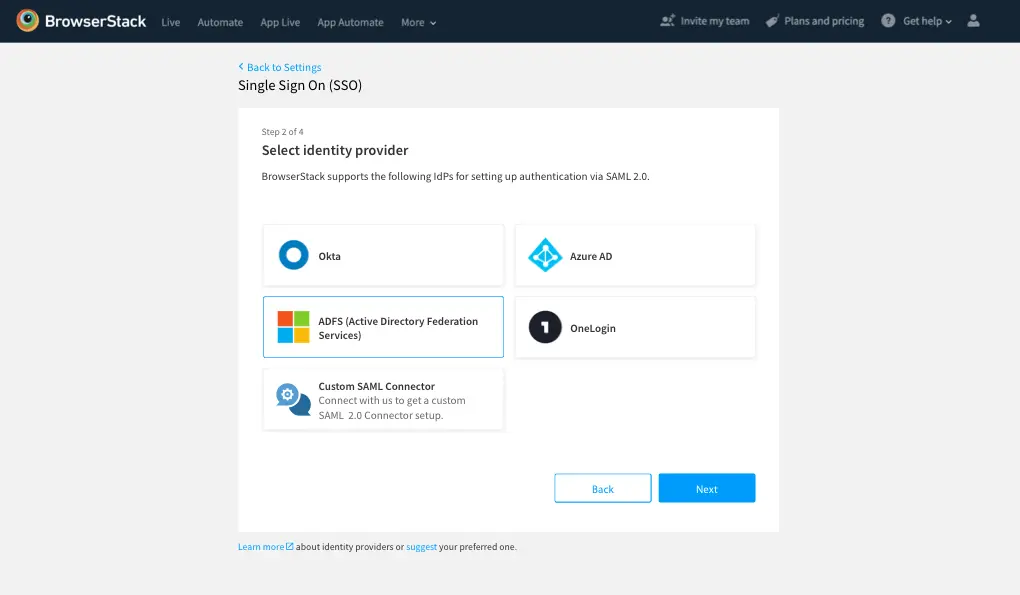
Choose ADFS from the list of Identity Providers, and click Next.
-
Copy the following, will be needed for the next steps on ADFS server
a. SP initiated ACS URL
b. IdP initiated ACS URL
c. Entity ID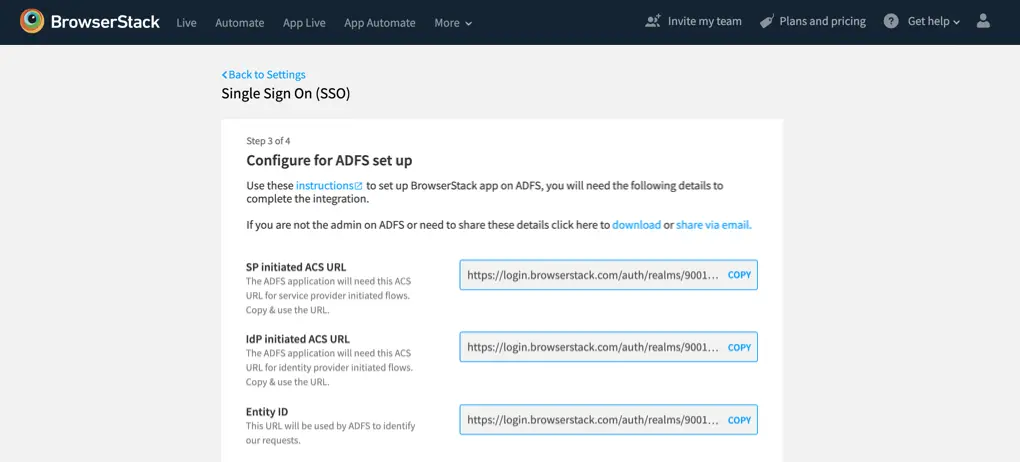
B. Configuring ADFS server
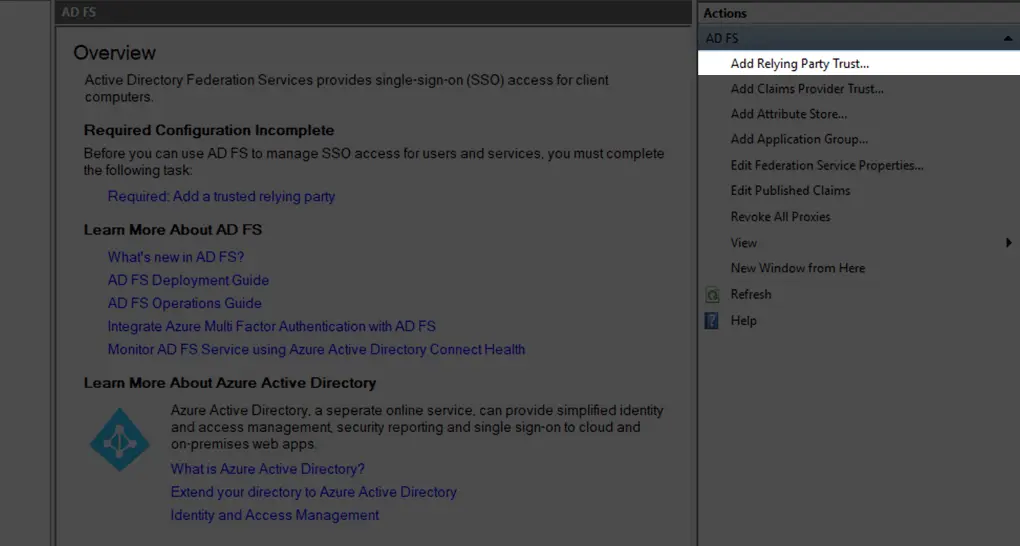
- Go to your ADFS machine and add new Relying Party Trust.
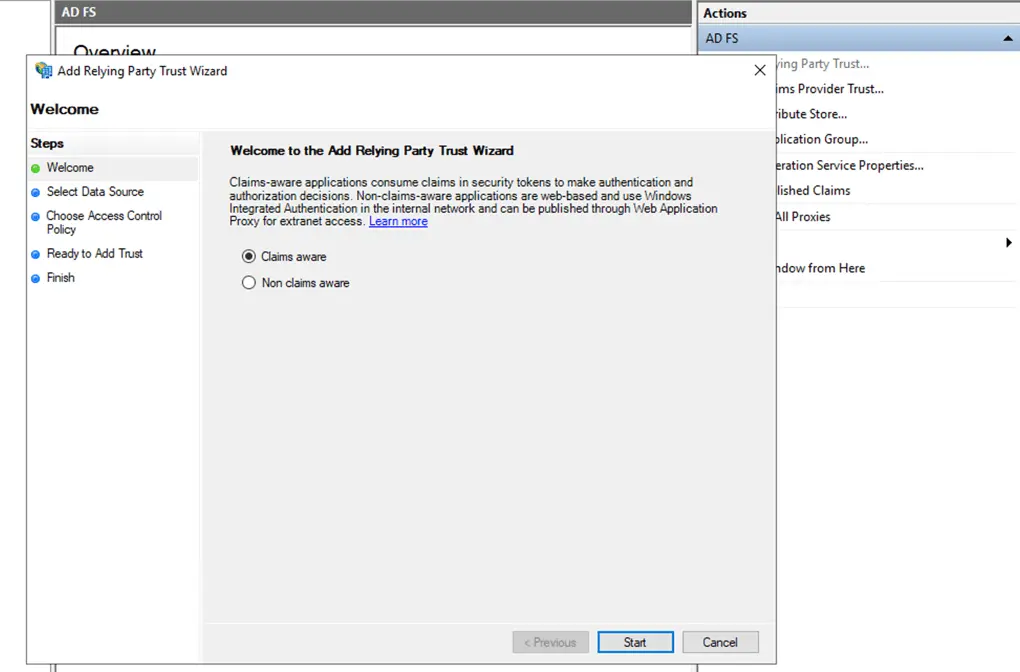
- Select Claims Aware.
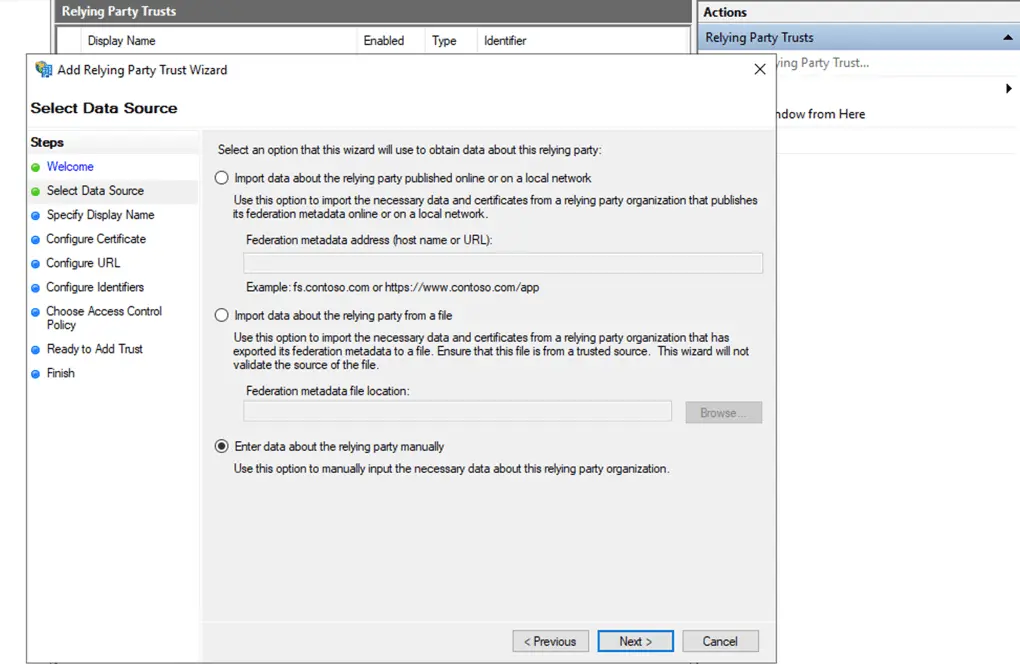
- Check Enter data about the relying party manually and click Next.
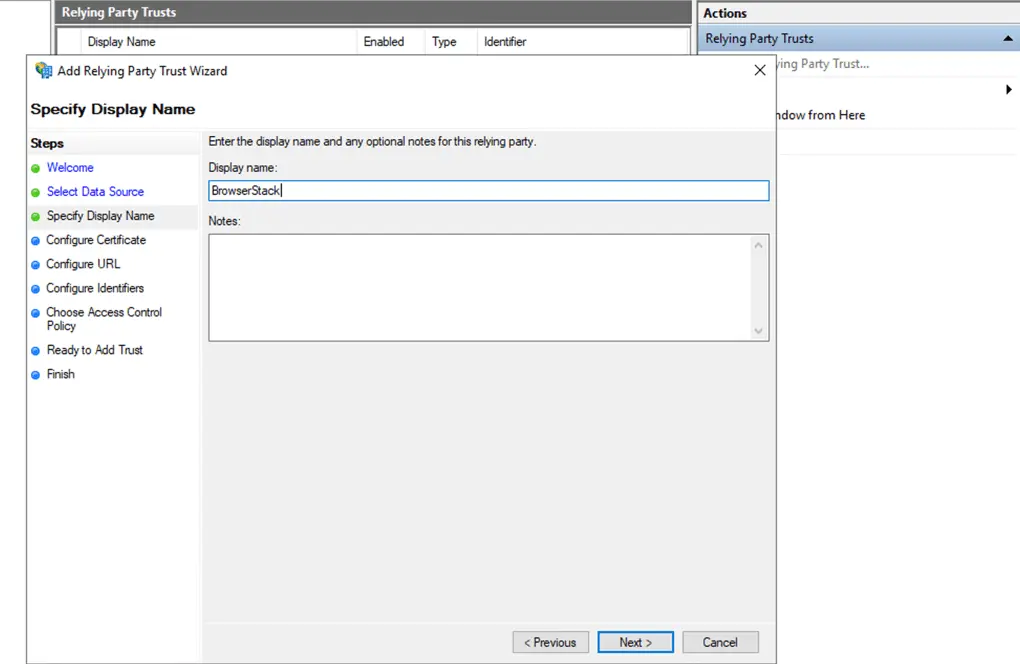
- Give the relying party a Name and click Next.
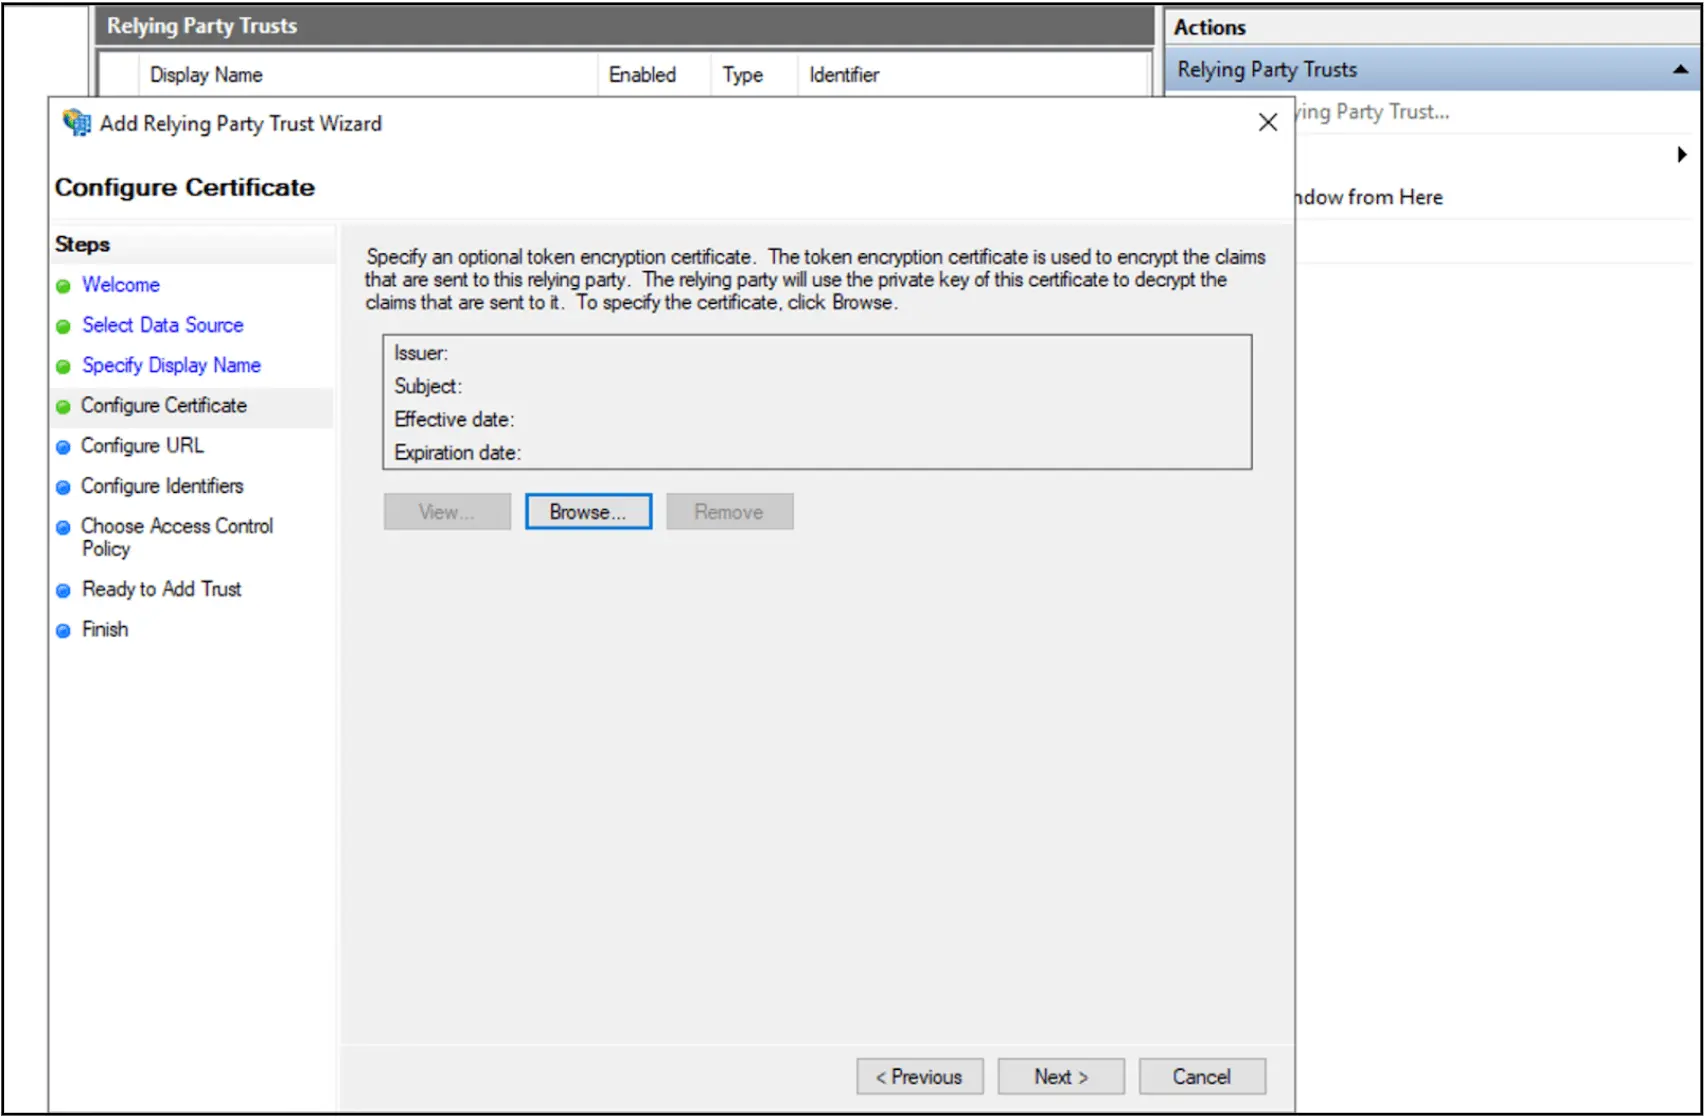
- Click Next on Configure Certificate.
- Check Enable support for the SAML 2.0 WEB SSO Protocol
- Paste the copied IdP initiated ACS URL in the text box and click next.
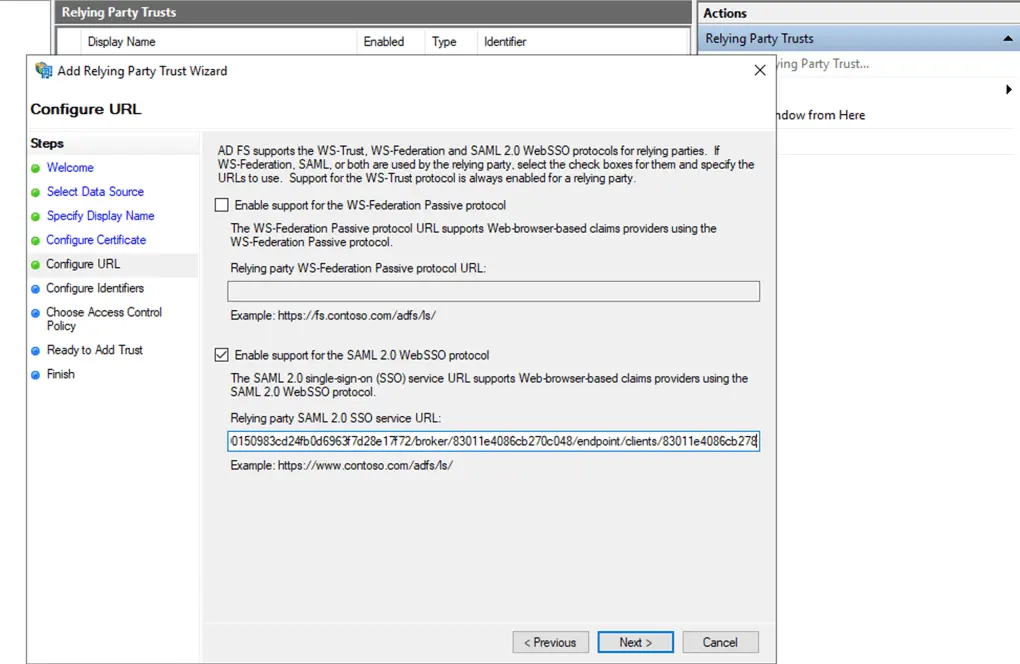
- Paste the copied IdP initiated ACS URL in the text box and click next.
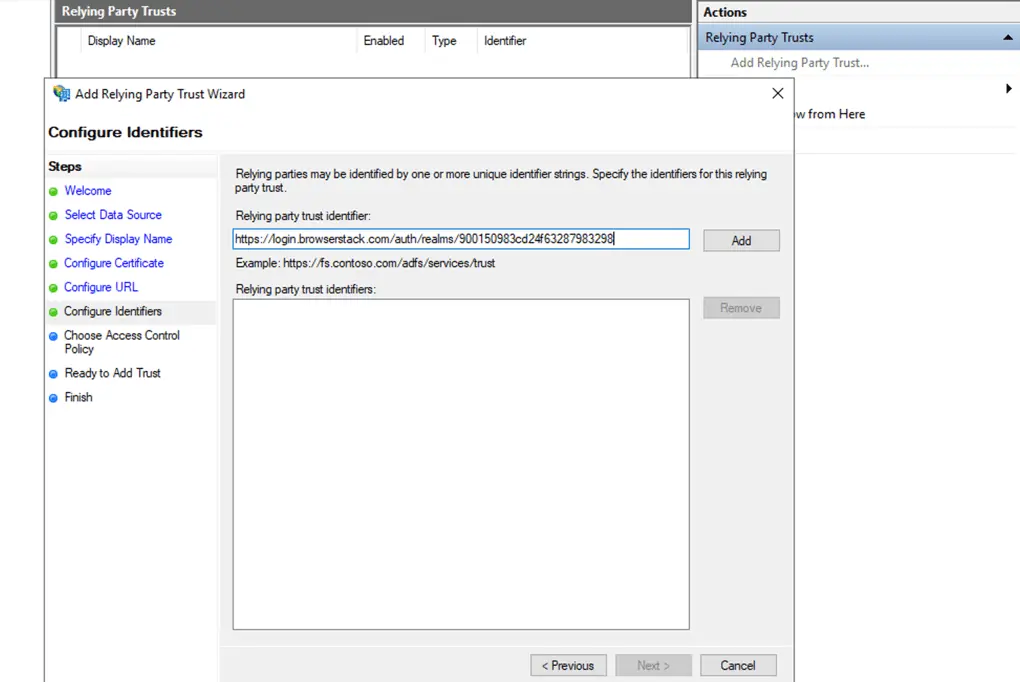
- On Configure Identifier, enter the copied Entity ID in Relying party trust Identifier. Click next.
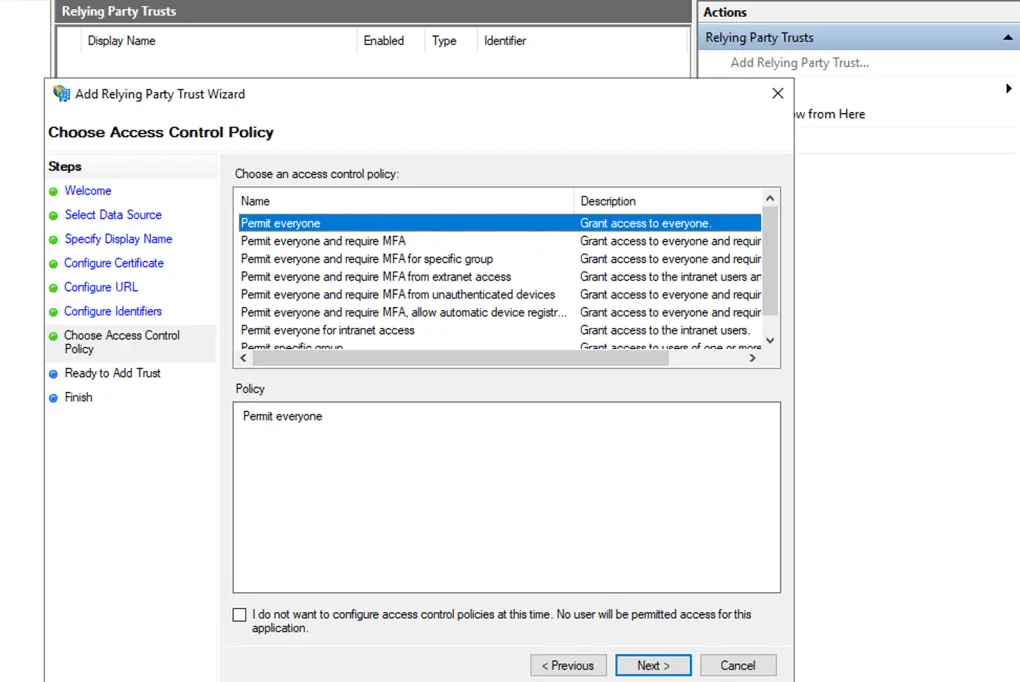
- Choose your Access Control Policy, and click Next.
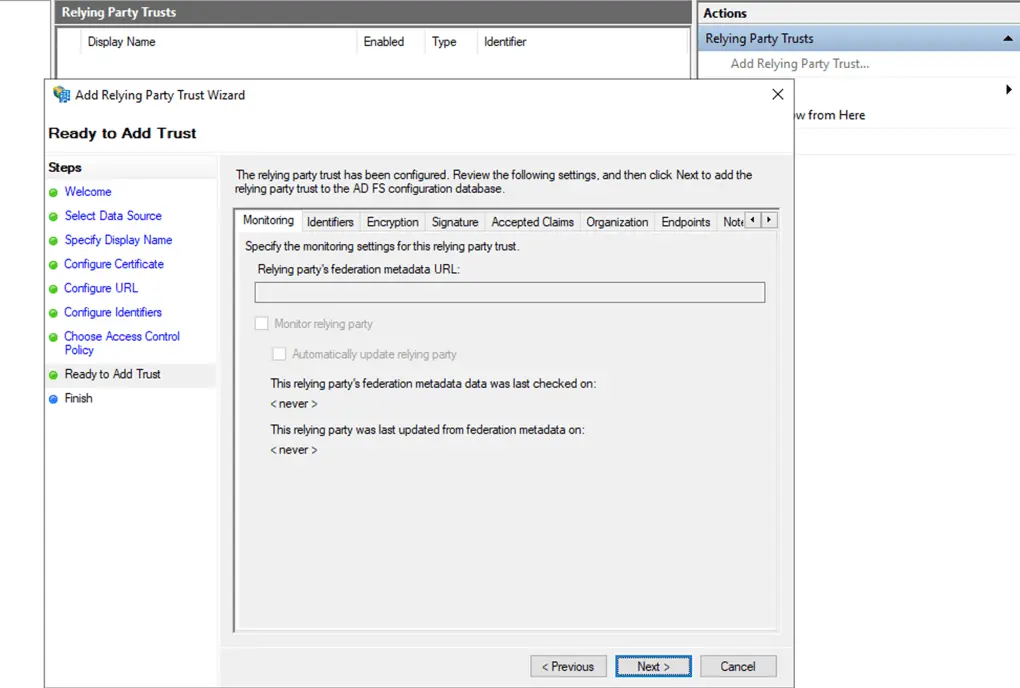
- Click Next on Ready to Add Trust.
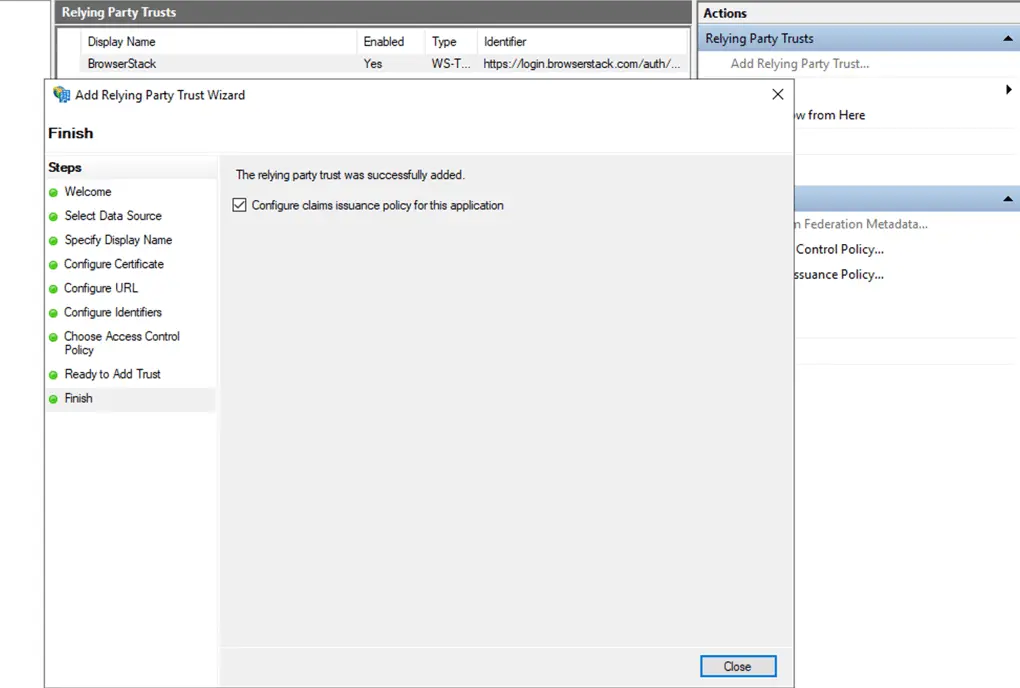
- Click Close on the Finish tab.
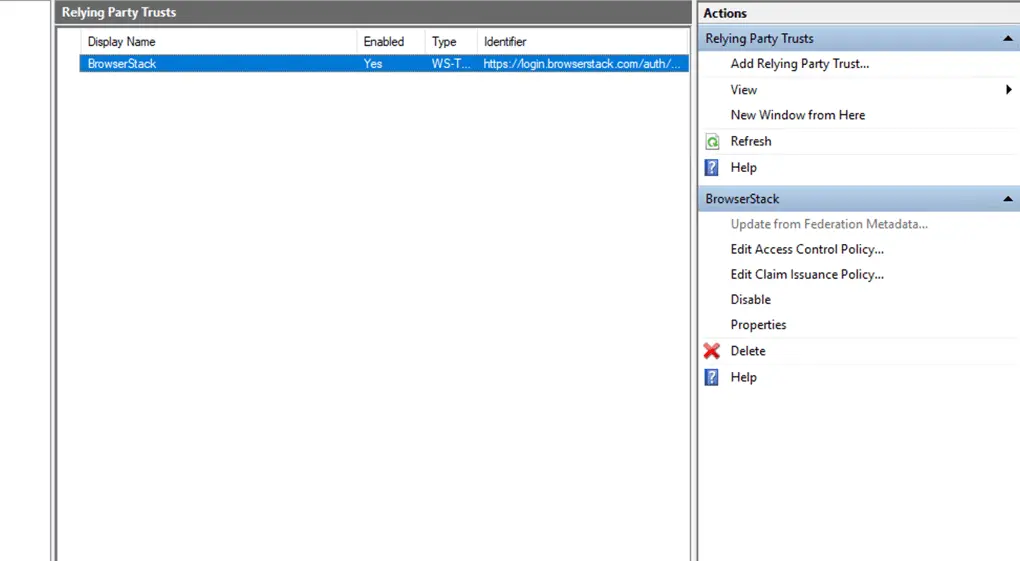
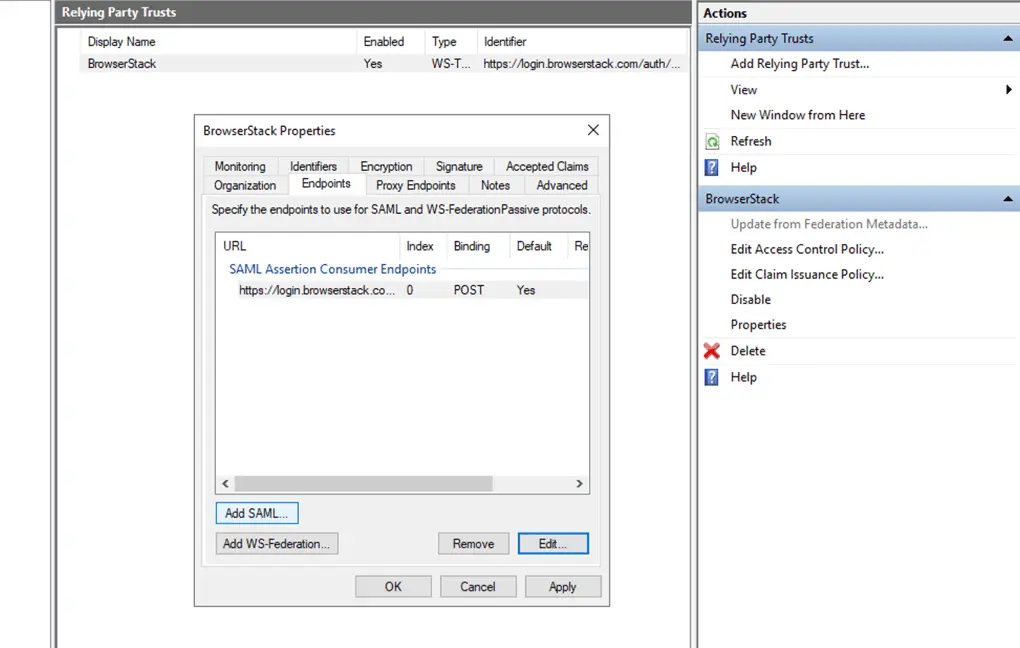
- Choose your added Relying Party Trust (list will contain the name you gave to the connector) and double click
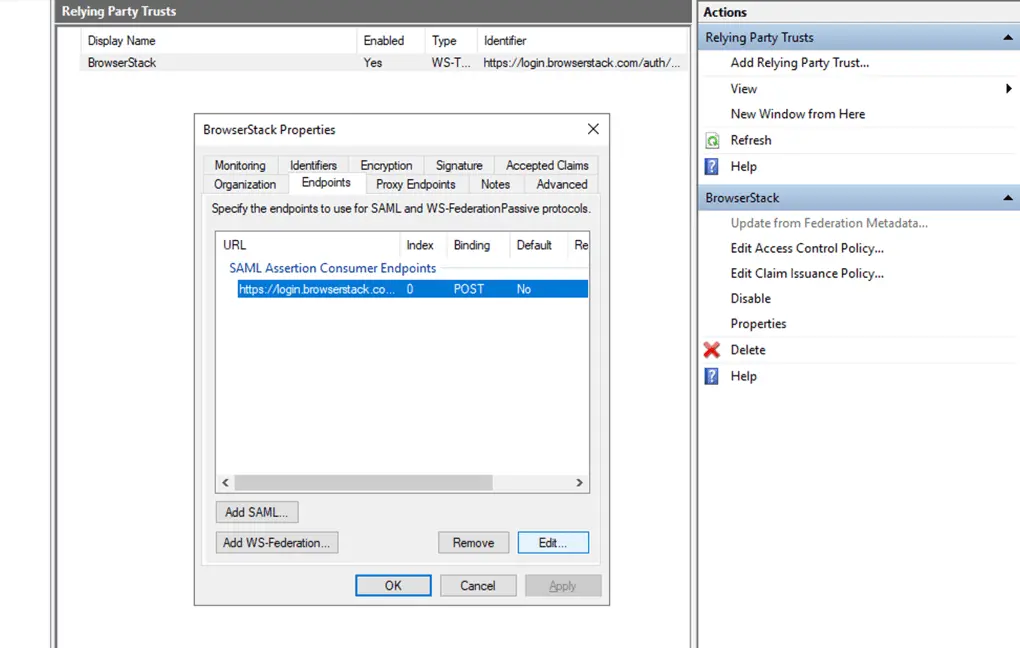
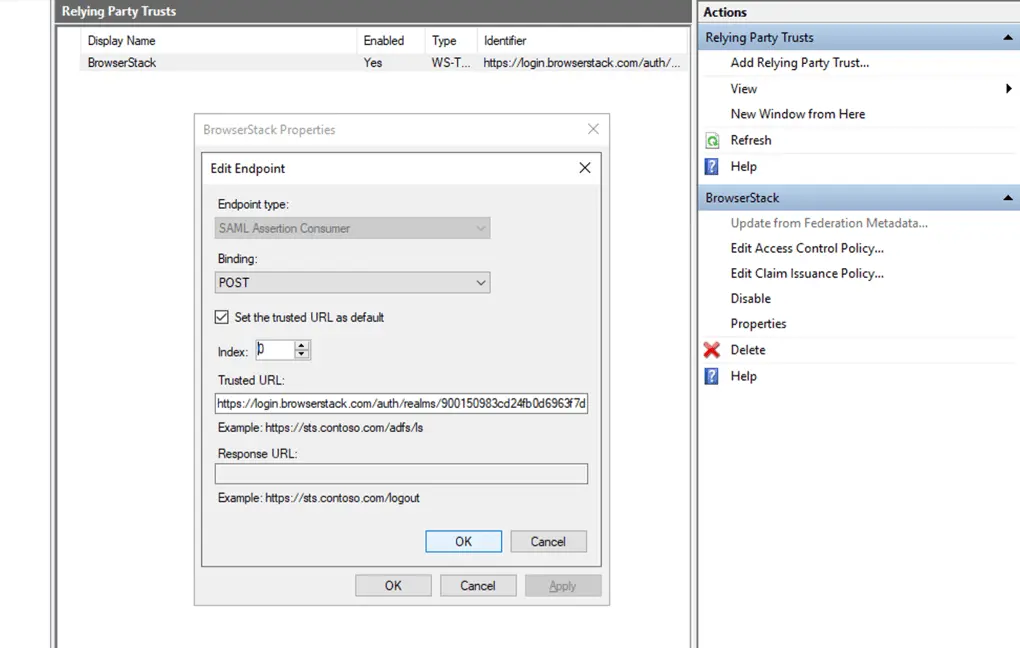
- Go to Endpoints tab and Choose the URL added and click Edit
- Check the “Set the trust URL as default” and click OK
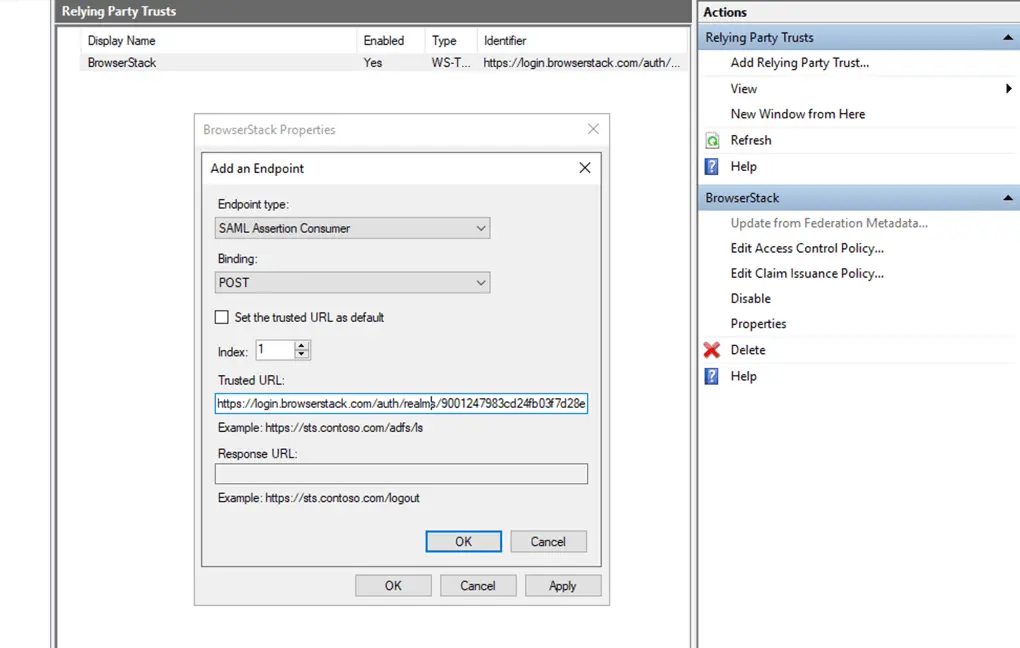
- Click on Add SAML to add another URL.
- Choose Bindings as POST, index 1, paste the copied SP Initiated URL in Trusted URL and click OK.
- Click on Apply.
- Check the “Set the trust URL as default” and click OK
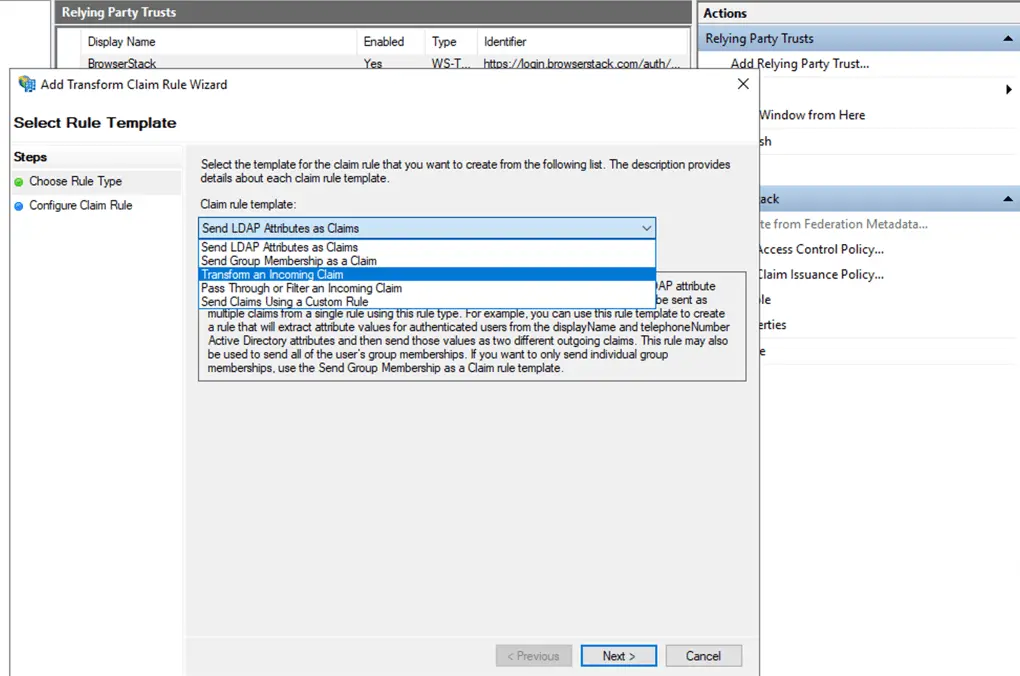
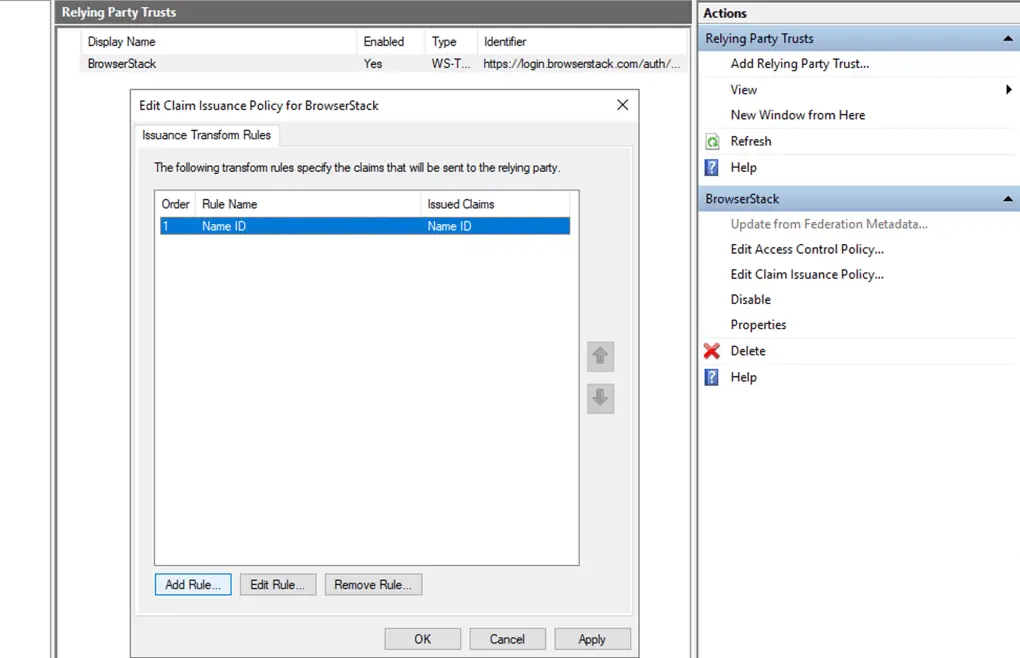
- Click on Edit Claim issuance Policy on right sidebar.
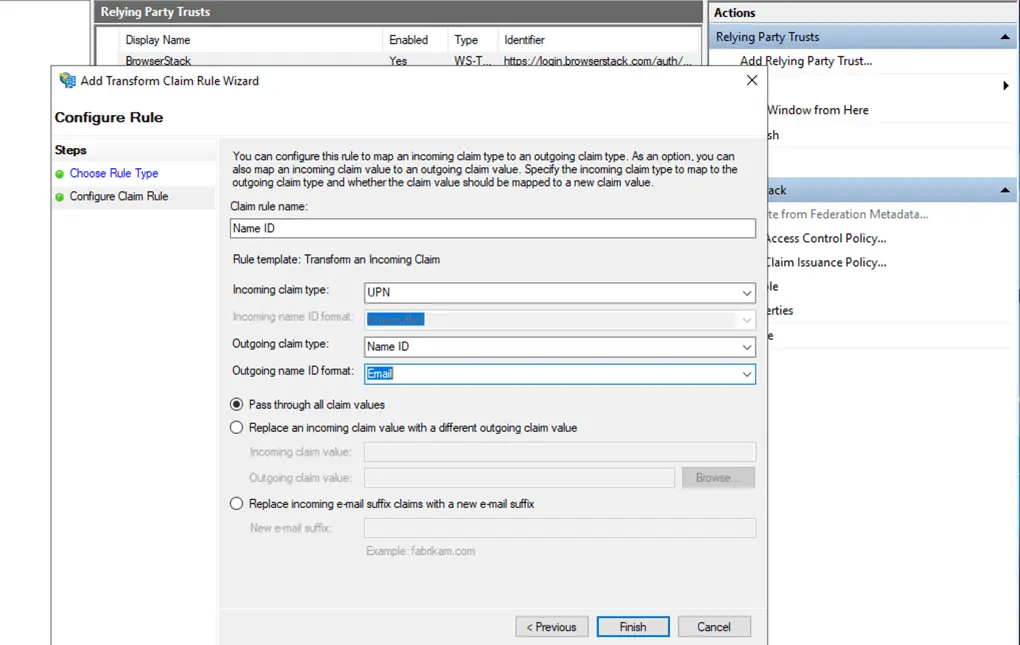
- Click on Add Rule and choose the Claim rule template as “Transform an Incoming Claim” and click next.
- Fill the form as following.
- Claim rule name should be
Name ID - Incoming claim type should be
UPN - Incoming name id format should be
Unspecified - Outgoing claim type should be
Name ID - Outgoing name id format should be
Email - Select
Pass through all claim values - Click Finish.
- Claim rule name should be
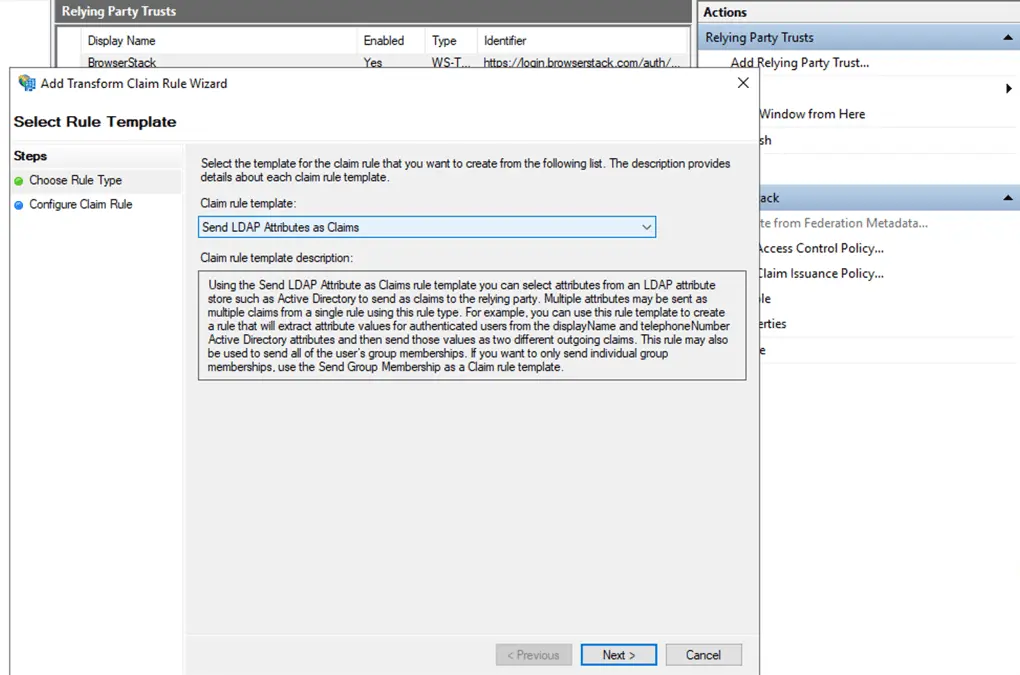
- Add another Rule. Select Claim rule template as Send LDAP Attributes as Claim and click next.
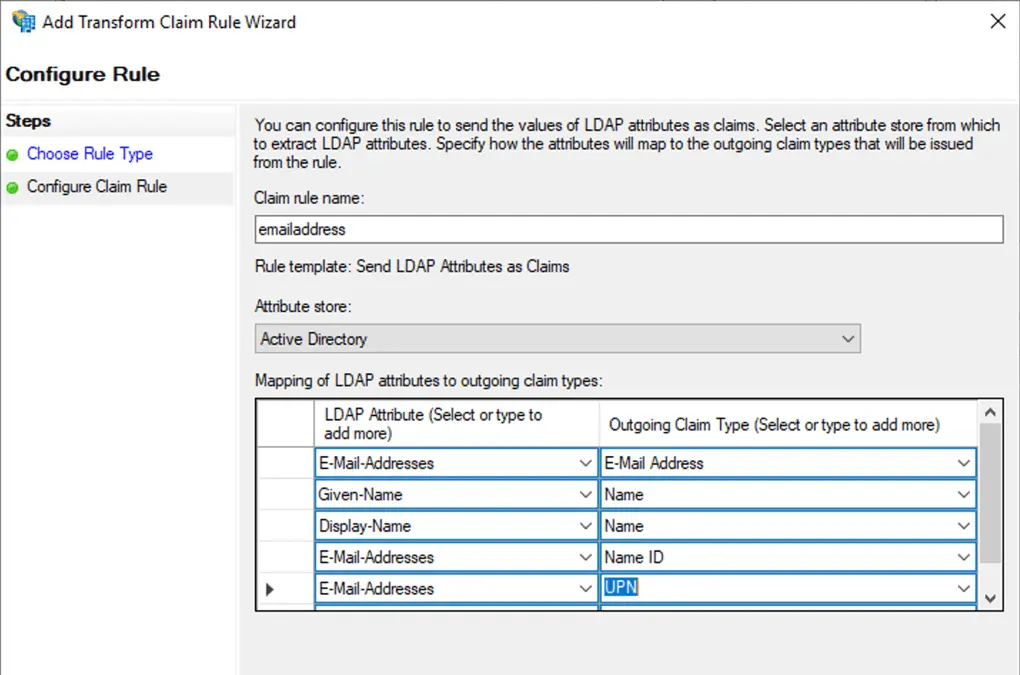
- Fill the form as follows:
- Claim rule name should be
emailaddress - Attribute store should be Active Directory
- Map the LDAP Attributes as following
- Claim rule name should be
- To get metadata from ADFS machine.
- Go to YourADFSmachineURL/FederationMetadata/2007-06/FederationMetadata.xml
- Download the Metadata file
-
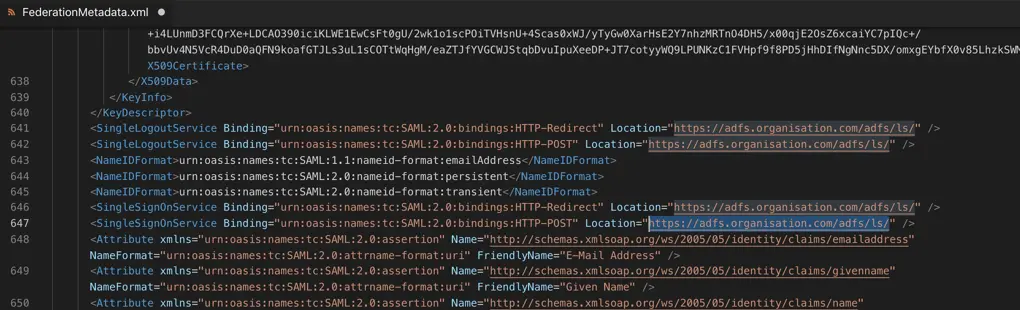
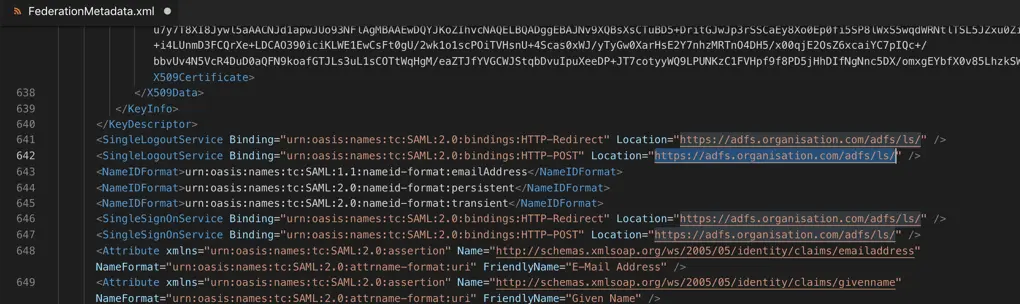
For Sign-in URL search for the SingleSignOnService: Copy the Location attribute of this tag. (Make sure that Binding attribute value should be HTTP-POST)
-
For Sign-out URL search for the SingleLogoutService: copy the Location attribute of this tag. (Make sure that Binding attribute value should be HTTP-POST)
-
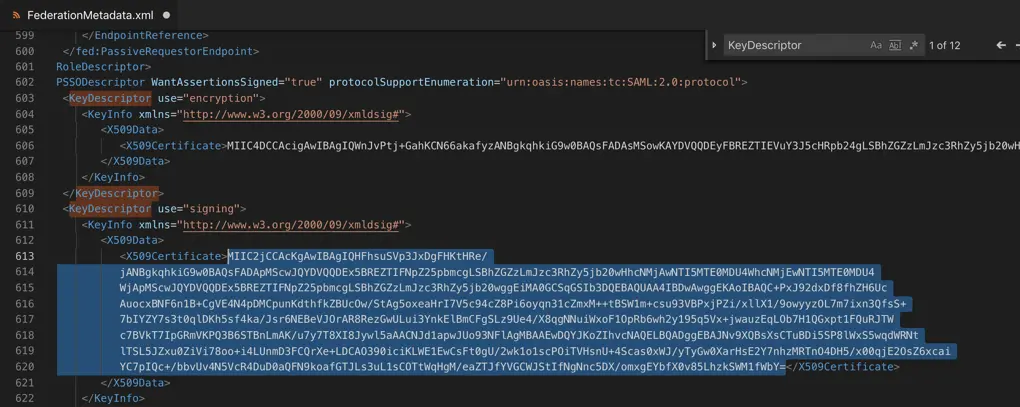
For Public Certificate search for the KeyDescriptor with use attribute as signing: Copy the X509Certificate tag value
- Click on Add Rule and choose the Claim rule template as “Transform an Incoming Claim” and click next.
C. Finishing setup on BrowserStack
- Paste these values in the corresponding fields on ADFS configuration screen on BrowserStack

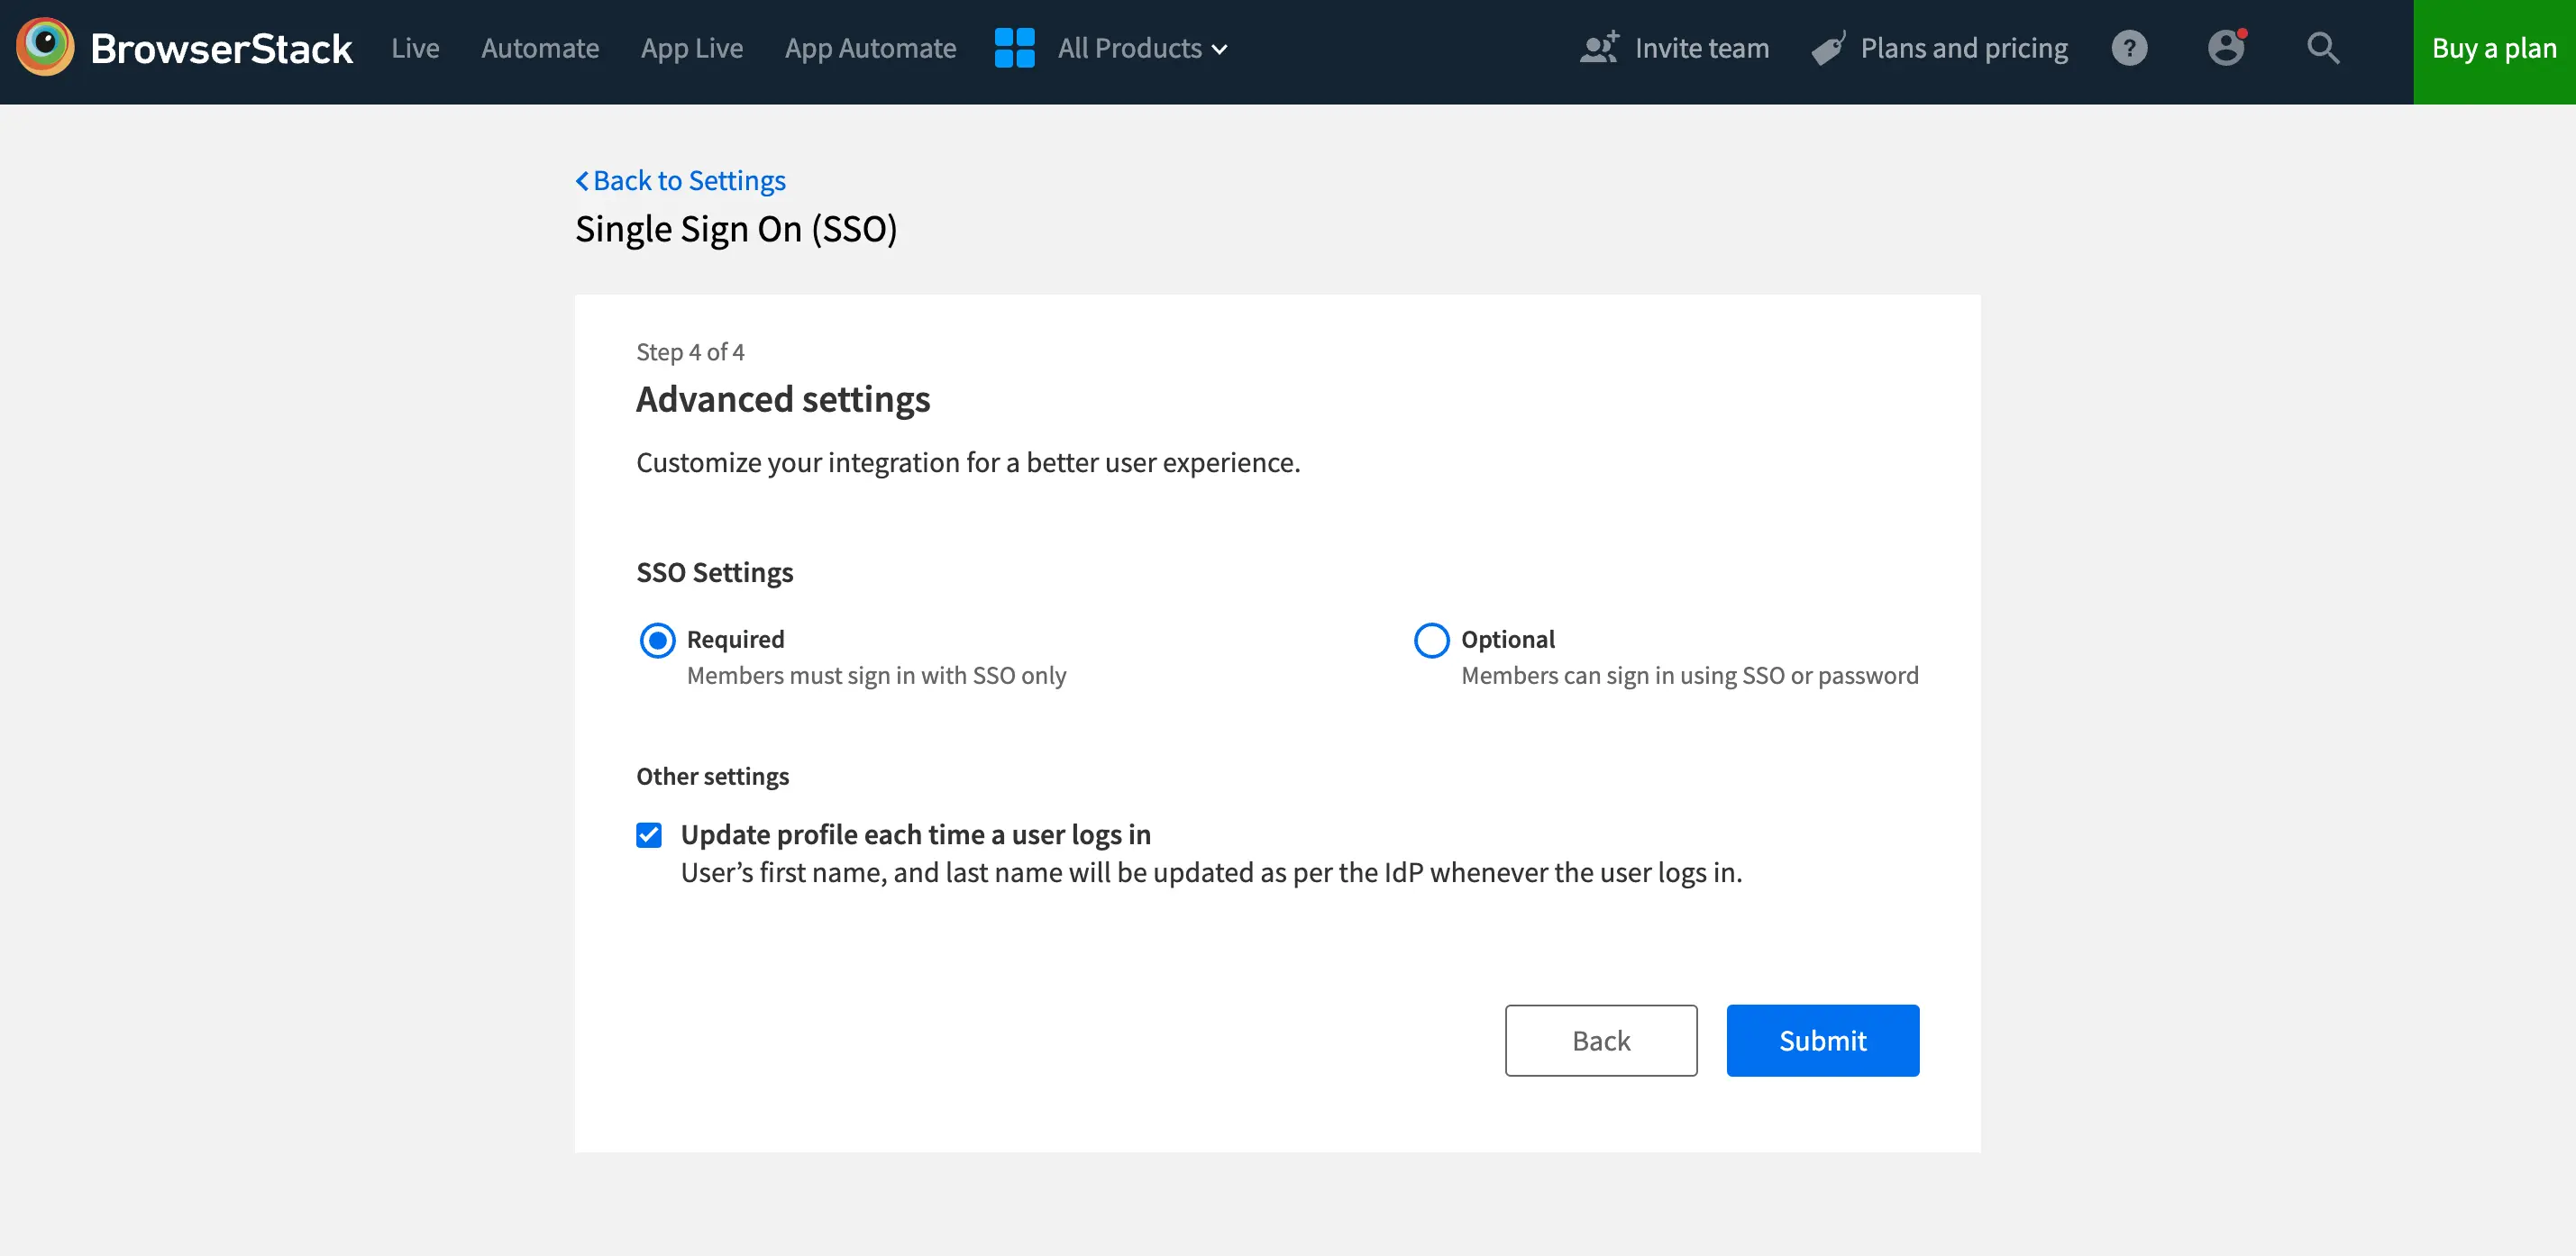
- Click Next to proceed to the Advanced options section. Here, you will be able to configure your SSO settings as either Required or Optional. This allows you to choose the level of SSO enforcement that suits your organization’s needs.
-
Required (default): Choose this option if you want to ensure that your team members must sign in to BrowserStack using SSO. Their BrowserStack credentials will no longer work. However, owners can still sign in using either of their SSO or BrowserStack credentials.
-
Optional: Opt for this setting if flexibility is your priority. With SSO configured as Optional, your team members can sign in using either their SSO or BrowserStack credentials. Additionally, you can choose to extend this flexibility only to some team members. Simply specify domains of members to exclude from Optional setting and all users from those domains will be required to login using SSO only.
-
- Click Save.
Test and enable
- Test the integration via Test Setup
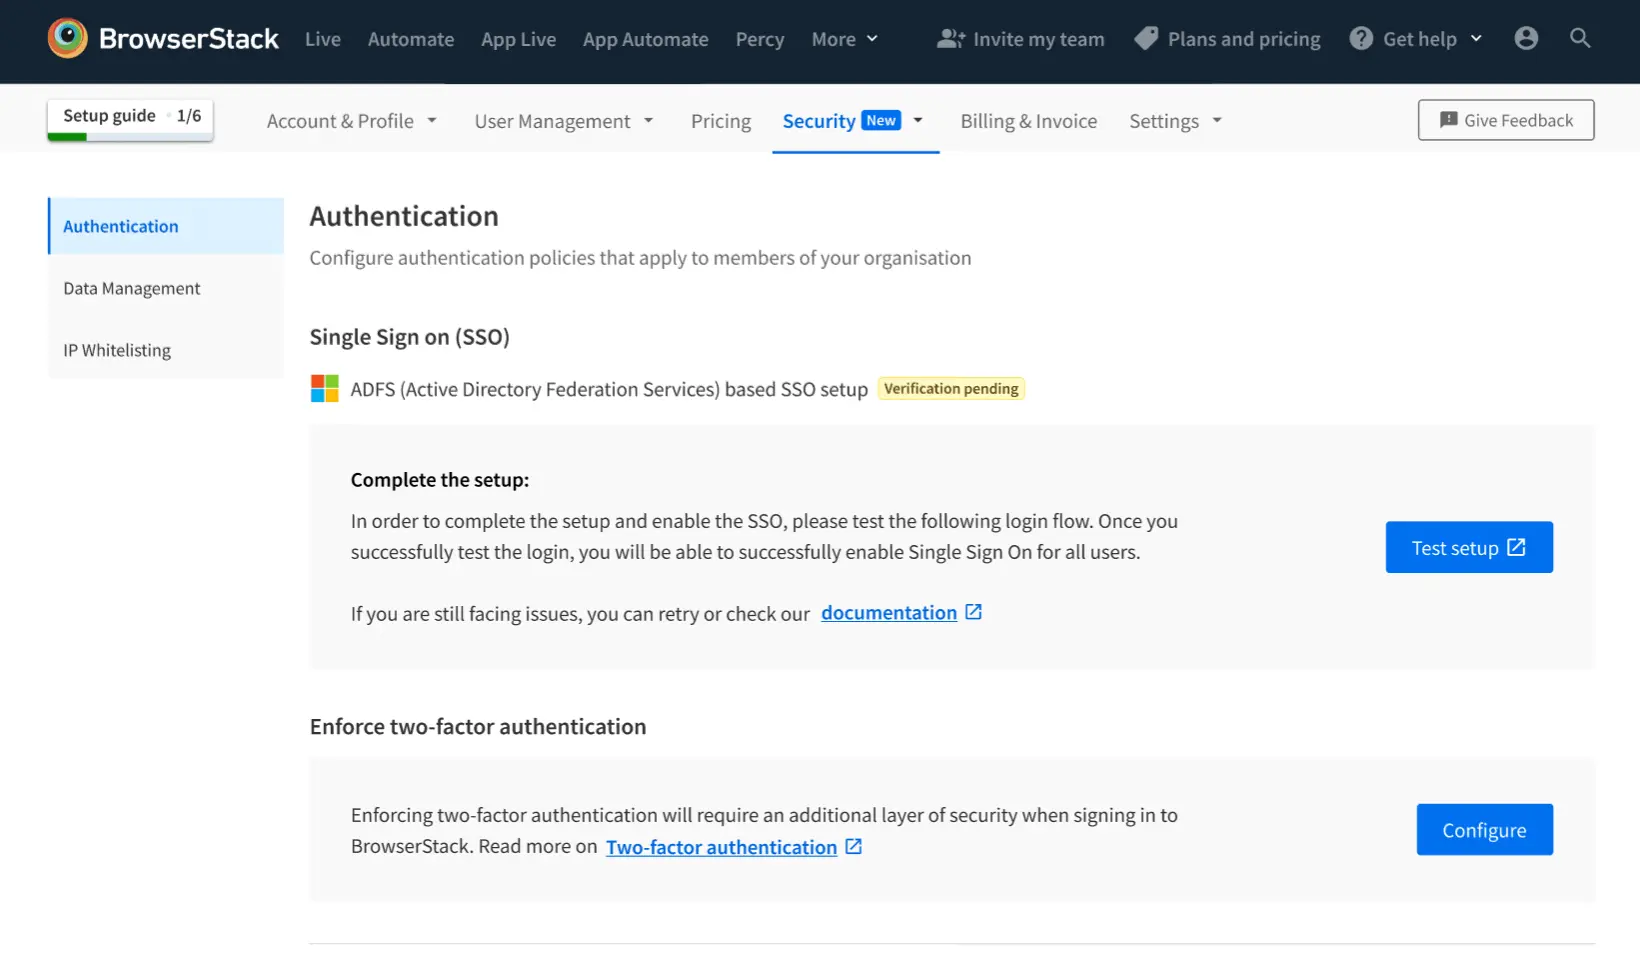
- You will be prompted towards Service Provider flow and your user will be authenticated via ADFS. The test is successful upon completion of the SSO Authentication flow.
- Upon a successful test, you can enable the Single Sign-on feature for your Organization.
You have the option of sending out a mail to all Group members on BrowserStack, to inform them about this change, and link to the new login URL.
Click Enable to enable the feature.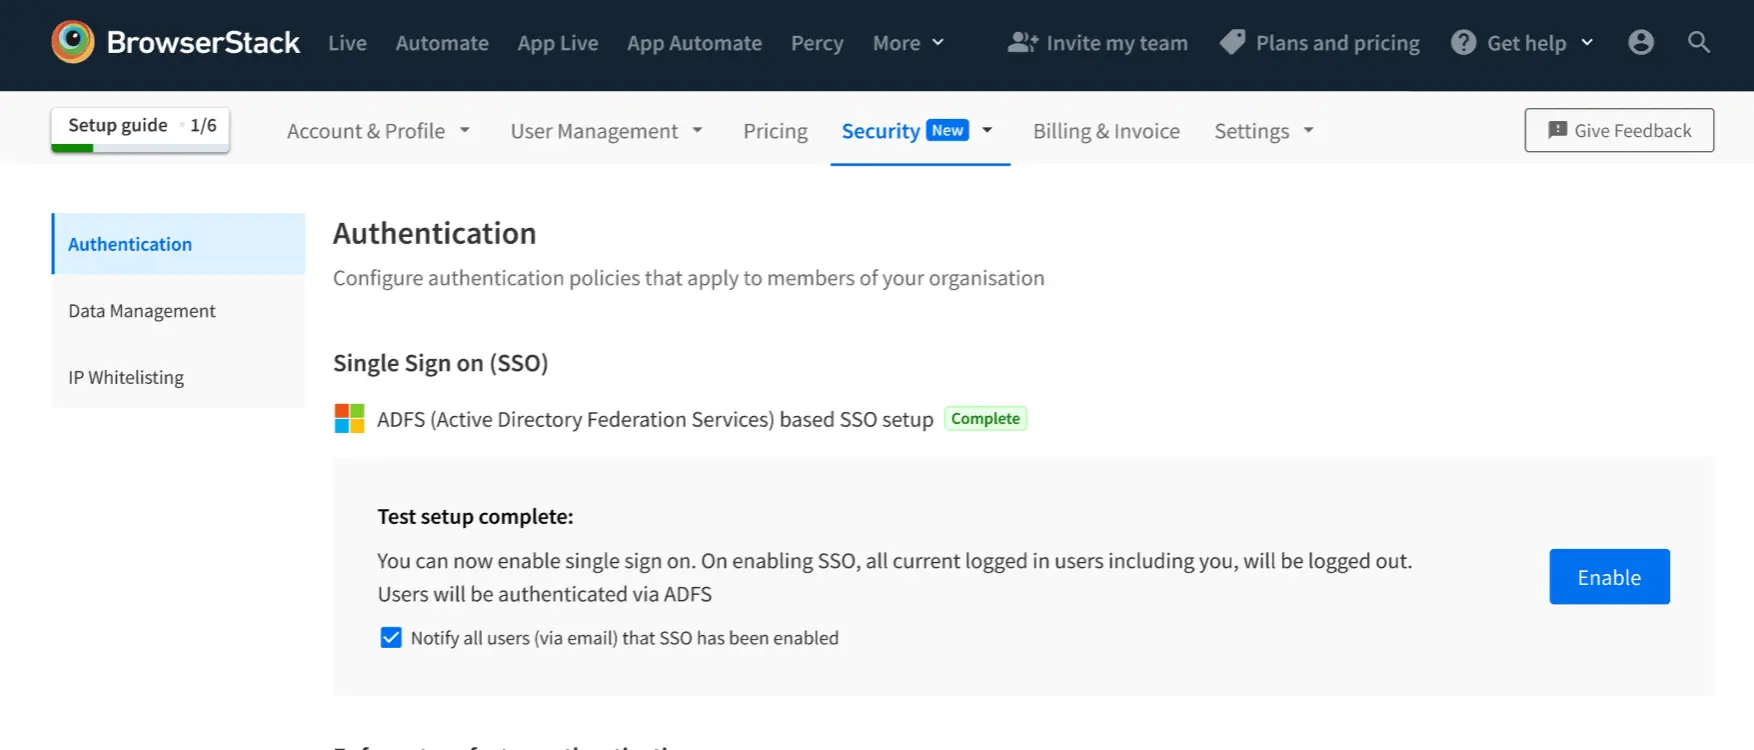
- You will automatically be logged out of the BrowserStack, and redirected to log-in via SSO.
Troubleshooting
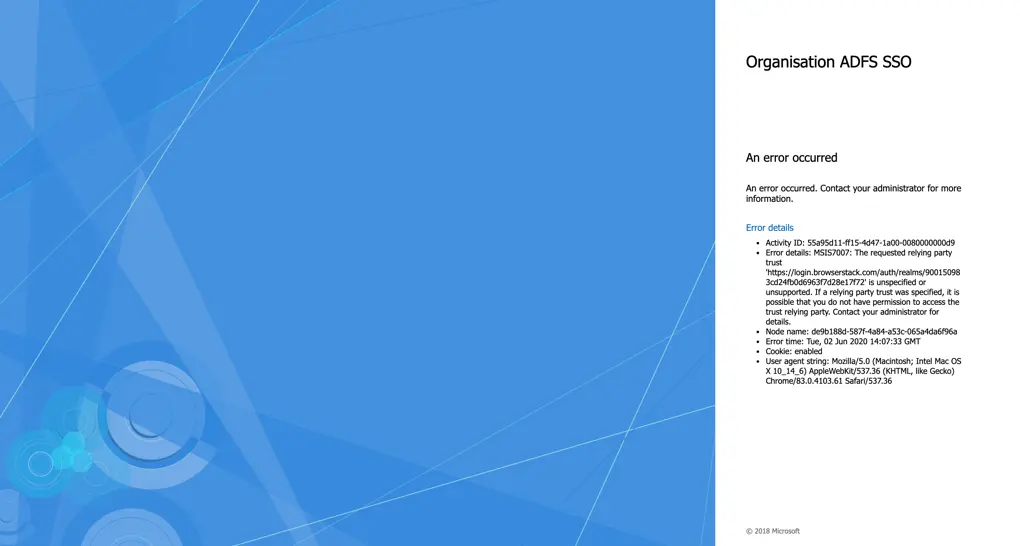
Incorrect ACS URL or Entity ID URL
If you are facing this error this means you configured wrong ACS URL or Entity ID URL in Relaying party trust SSO request is not able to find the correct configuration to complete.
Resolution: Please make sure that you configured the correct ACS URL and Entity ID in ADFS Relaying party Trust.
Incorrect ACS URL
If you are facing this error this means you configured wrong ACS URL Relaying party trust.
Resolution: Please make sure that you configured the correct ACS URL in ADFS Relaying party Trust.
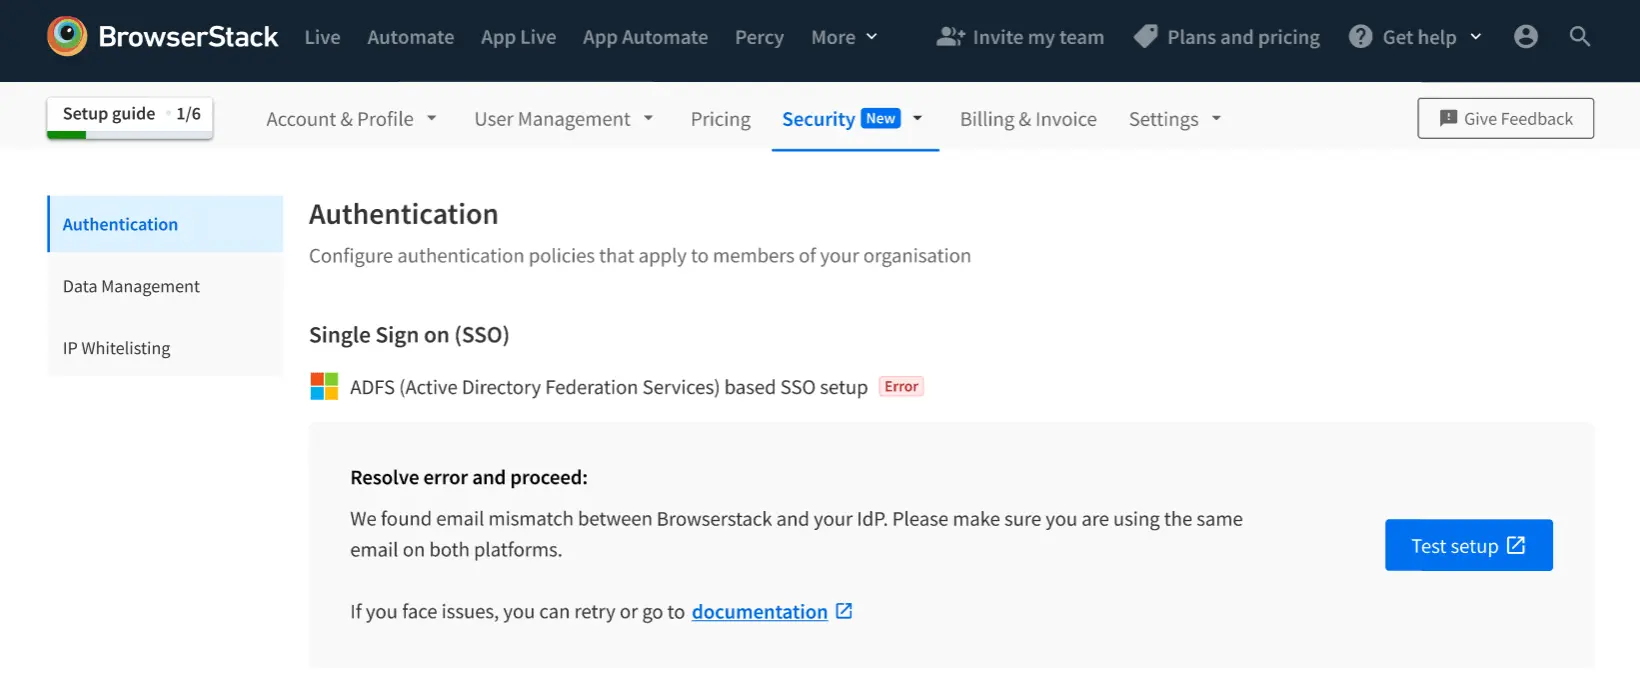
Email ID mismatch
If you are facing this error means you are logged in ADFS with different email Address and testing the setup with a different email.
Resolution: Please make sure that you are logged in with same email ID in ADFS and BrowserStack.
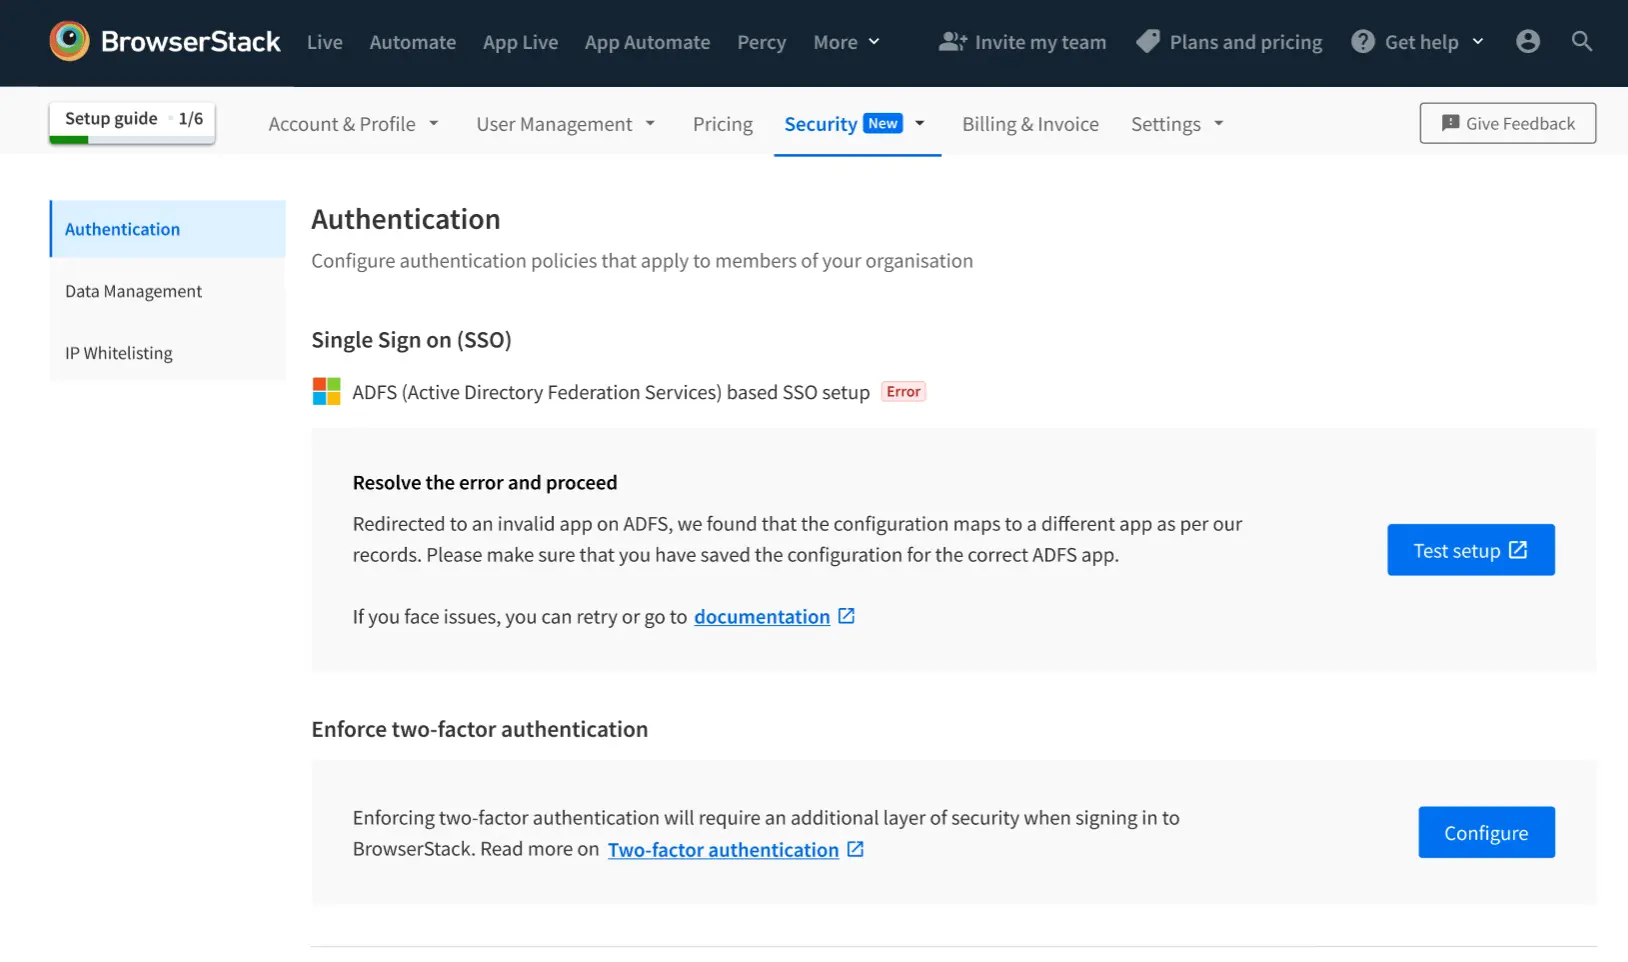
Incorrect configuration
This means you have misconfigured the app. ADFS is redirected to a different configuration. Please check the configuration on ADFS.
Resolution: Please check the configuration.
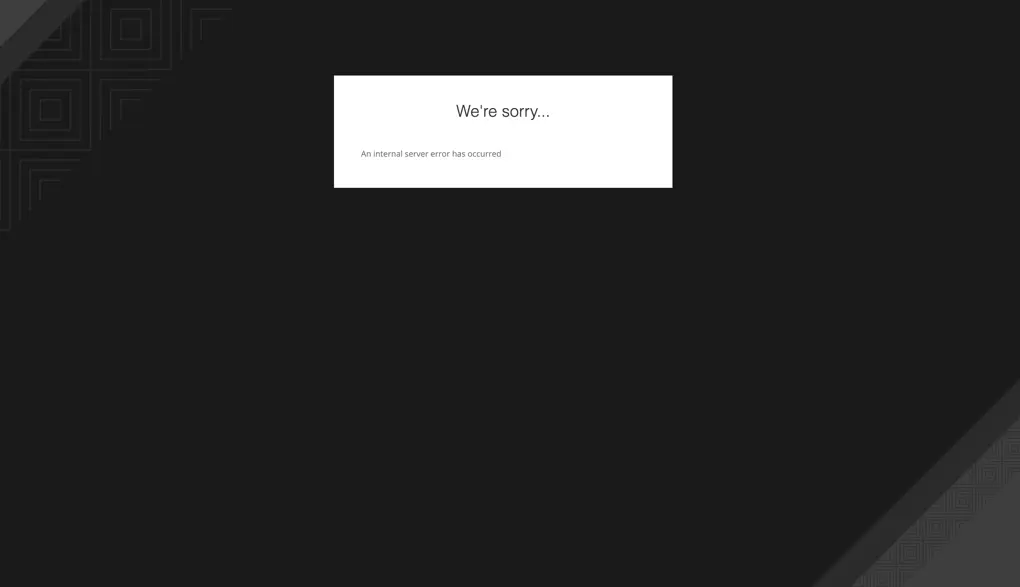
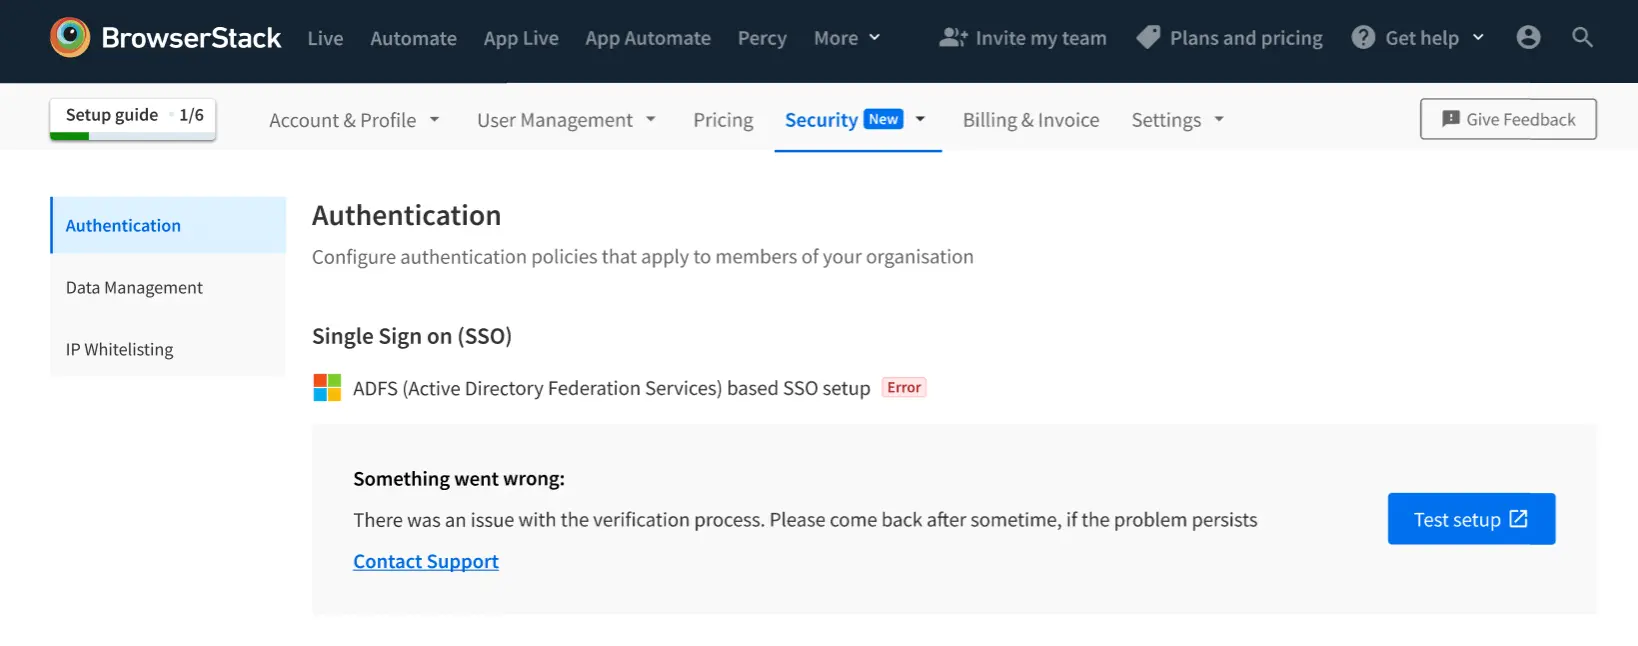
Internal error
This means we found an internal error.
Resolution: If this problem persists, contact us.
We're sorry to hear that. Please share your feedback so we can do better
Contact our Support team for immediate help while we work on improving our docs.
We're continuously improving our docs. We'd love to know what you liked
We're sorry to hear that. Please share your feedback so we can do better
Contact our Support team for immediate help while we work on improving our docs.
We're continuously improving our docs. We'd love to know what you liked
Thank you for your valuable feedback!