BrowserStack SSO with Okta | SAML
Integrate your Okta directory with BrowserStack to set up Single Sign-On.
Okta’s integration with BrowserStack enables end-users to enable Single Sign-on for their BrowserStack account. Single Sign-on integrates an external user directory with your BrowserStack Group. This document describes how to configure Single Sign-on when Okta is your identity provider.
Prerequisites
To set-up and use BrowserStack’s Okta Single Sign-on (SSO) feature:
- You need to have an Enterprise plan with BrowserStack.
- You need to have administrator access on your organization’s Okta instance.
- By default, a user account with Owner permissions can setup SSO on BrowserStack.
Supported features
The Okta & BrowserStack Single Sign-on integration currently supports the following features:
- SP-initiated SSO
- IdP-initiated SSO
- Group Assignment via Groups on Okta
For more information on the listed features, visit the Okta Glossary.
Configuration steps
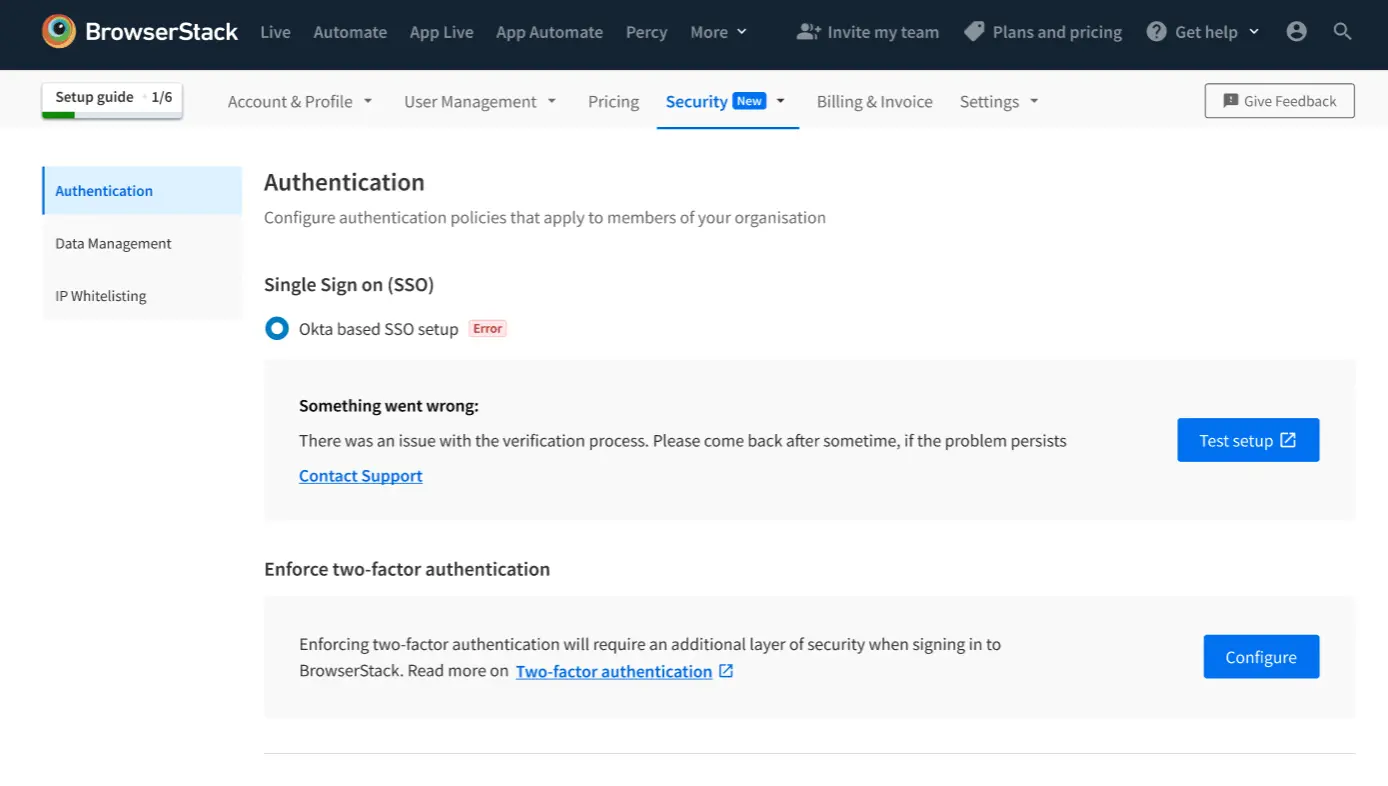
A. SSO setup page
-
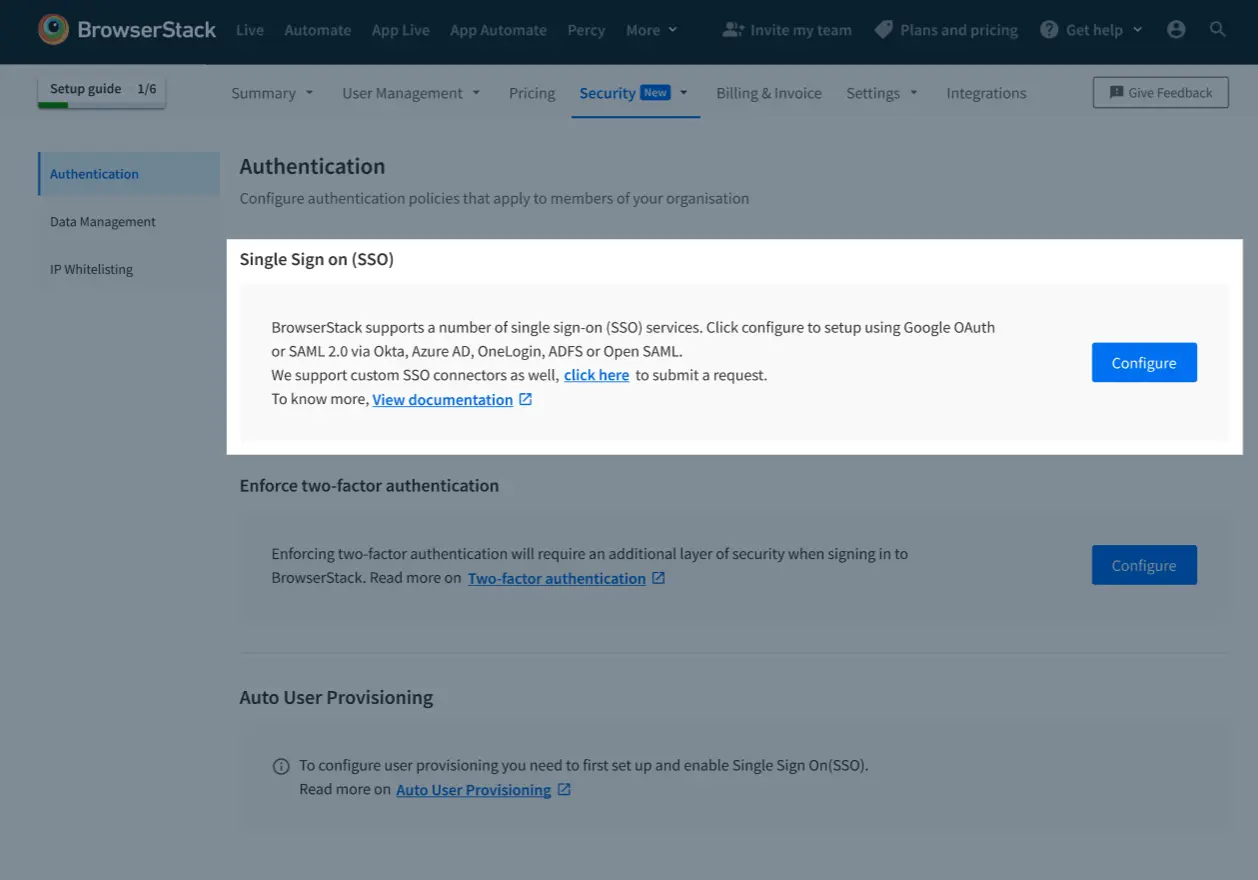
Sign-In to BrowserStack account as Owner.
-
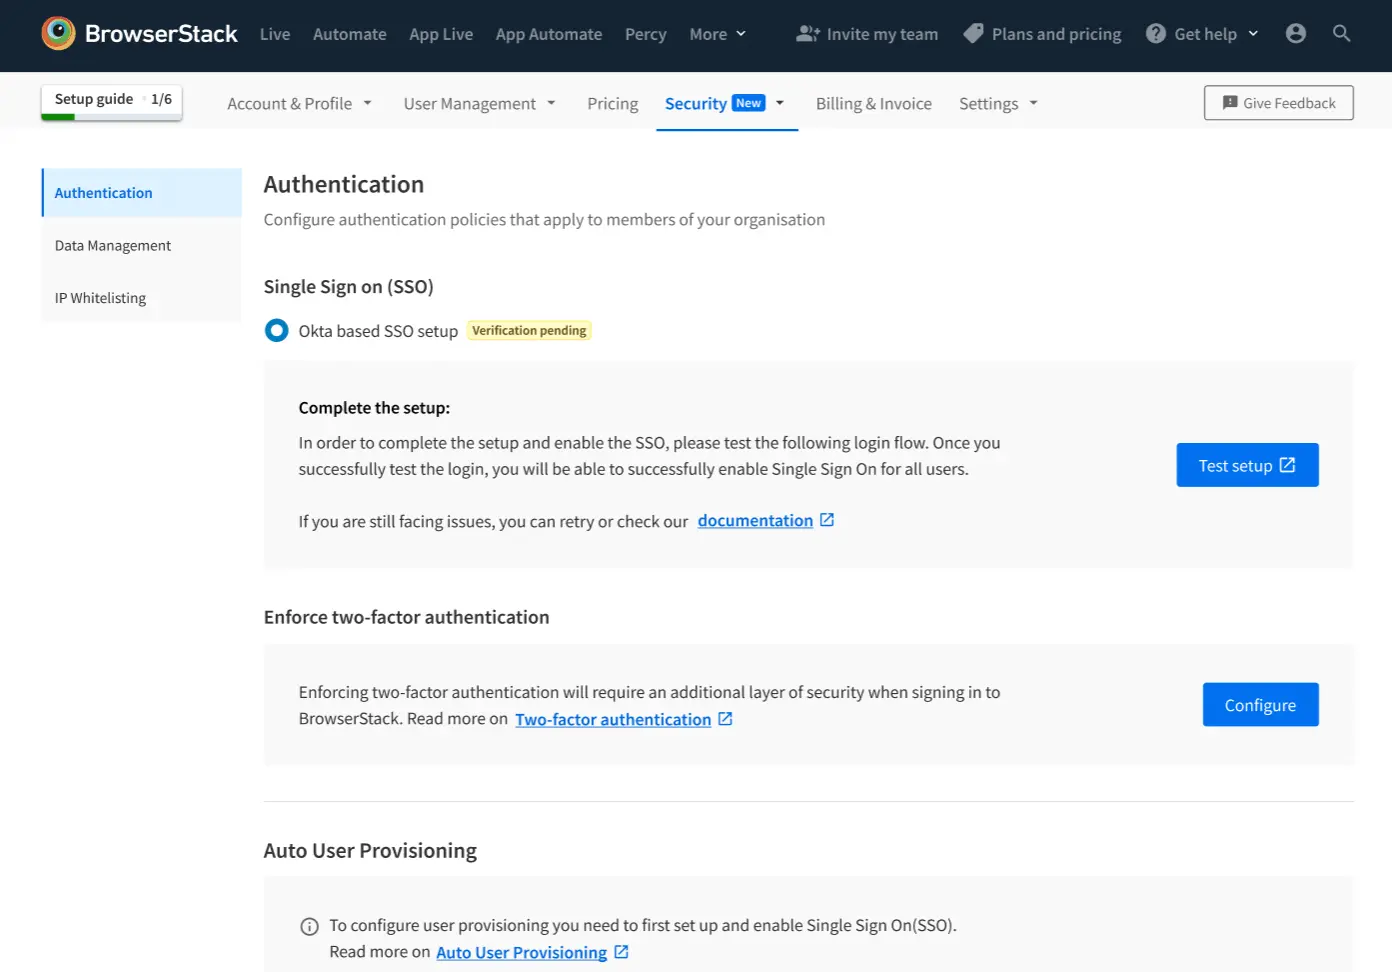
Go to Account > Security and select Authentication from the side-nav menu.
B. Initiate the set-up on BrowserStack
-
Under Single Sign On (SSO), click Configure.
-
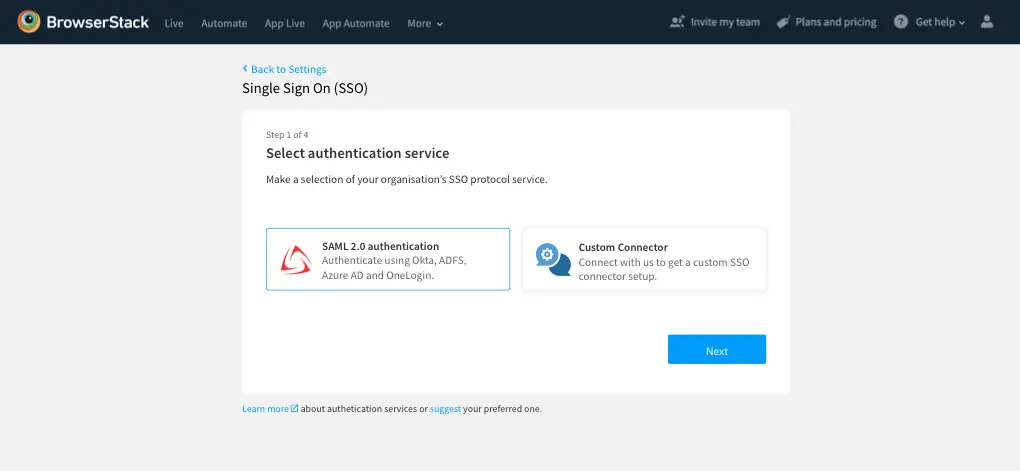
On the next screen, you will be shown all the Authentication services that BrowserStack supports, select SAML 2.0, and click Next
-
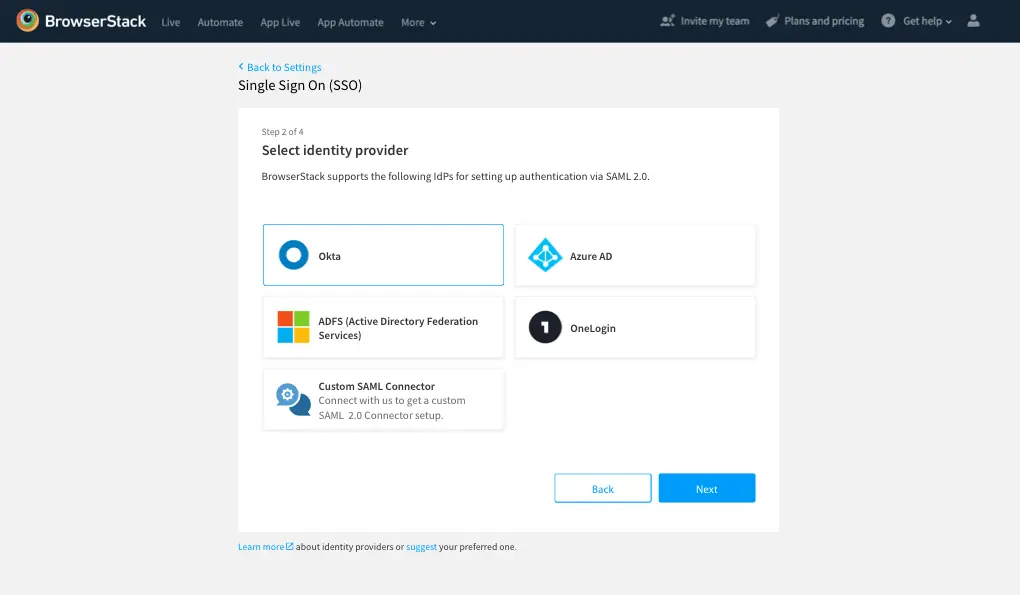
Choose Okta from the list of Identity Providers, and click Next.
-
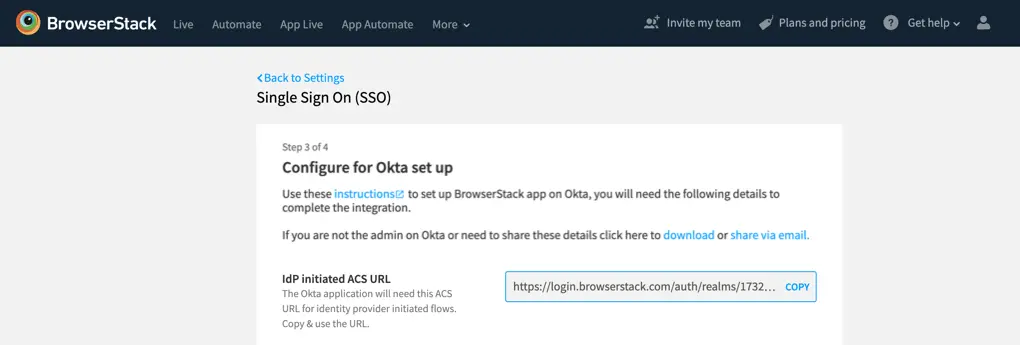
Copy the IDP initiated ACS URL. Keep this for next steps.
-
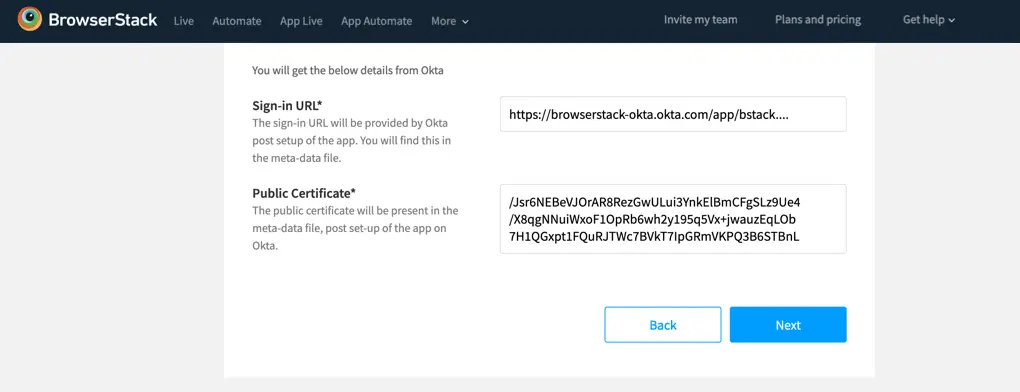
For the next steps you will need the following details, which you will get from Okta (in the next steps):
a. Sign-in URL
b. Public Certificate
C. Initiate the set-up on Okta
Adding BrowserStack application on Okta
- Go to Applications on Okta
- Add New Application
- Find BrowserStack, select the one with SAML.
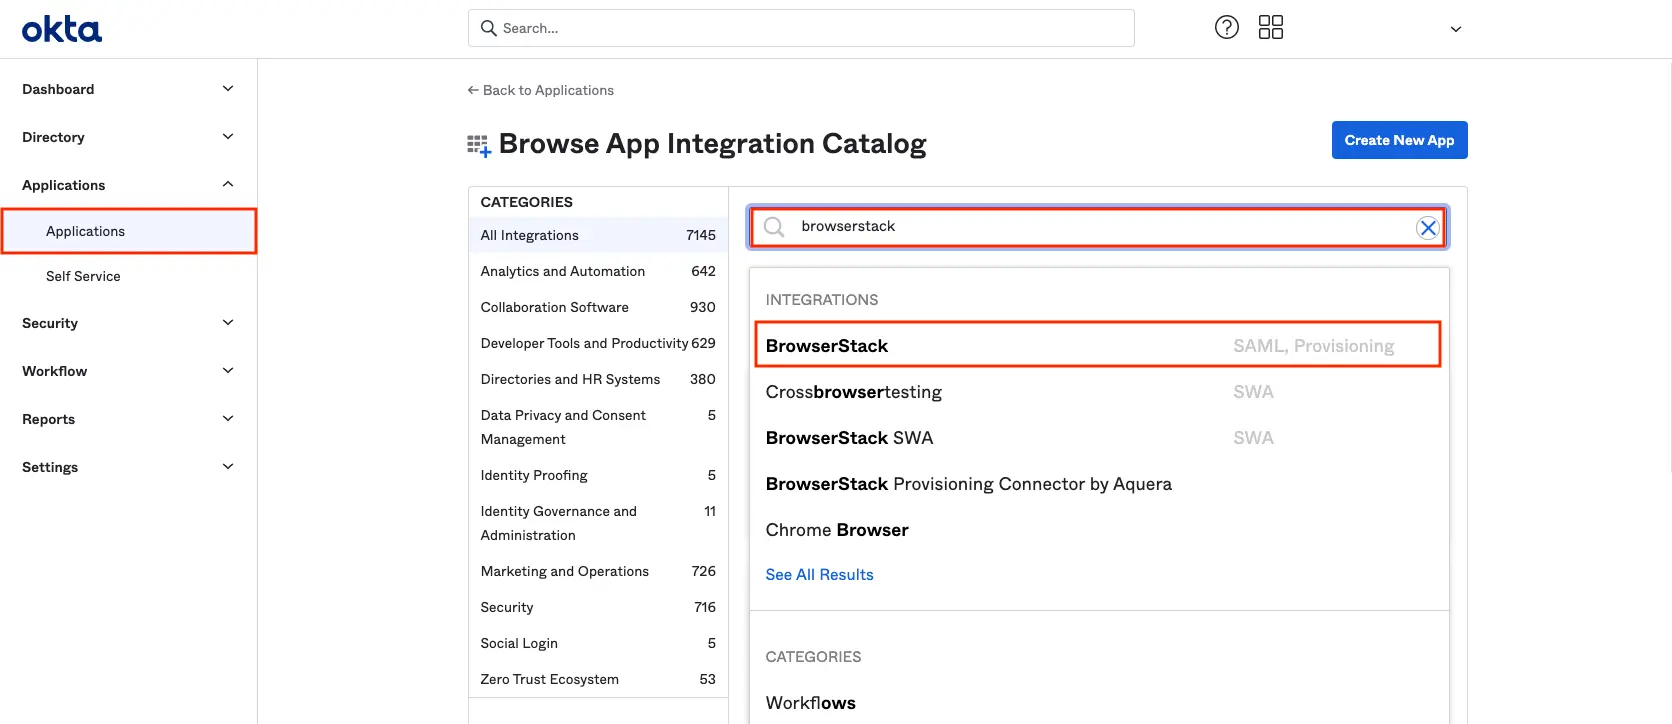
- Click Add

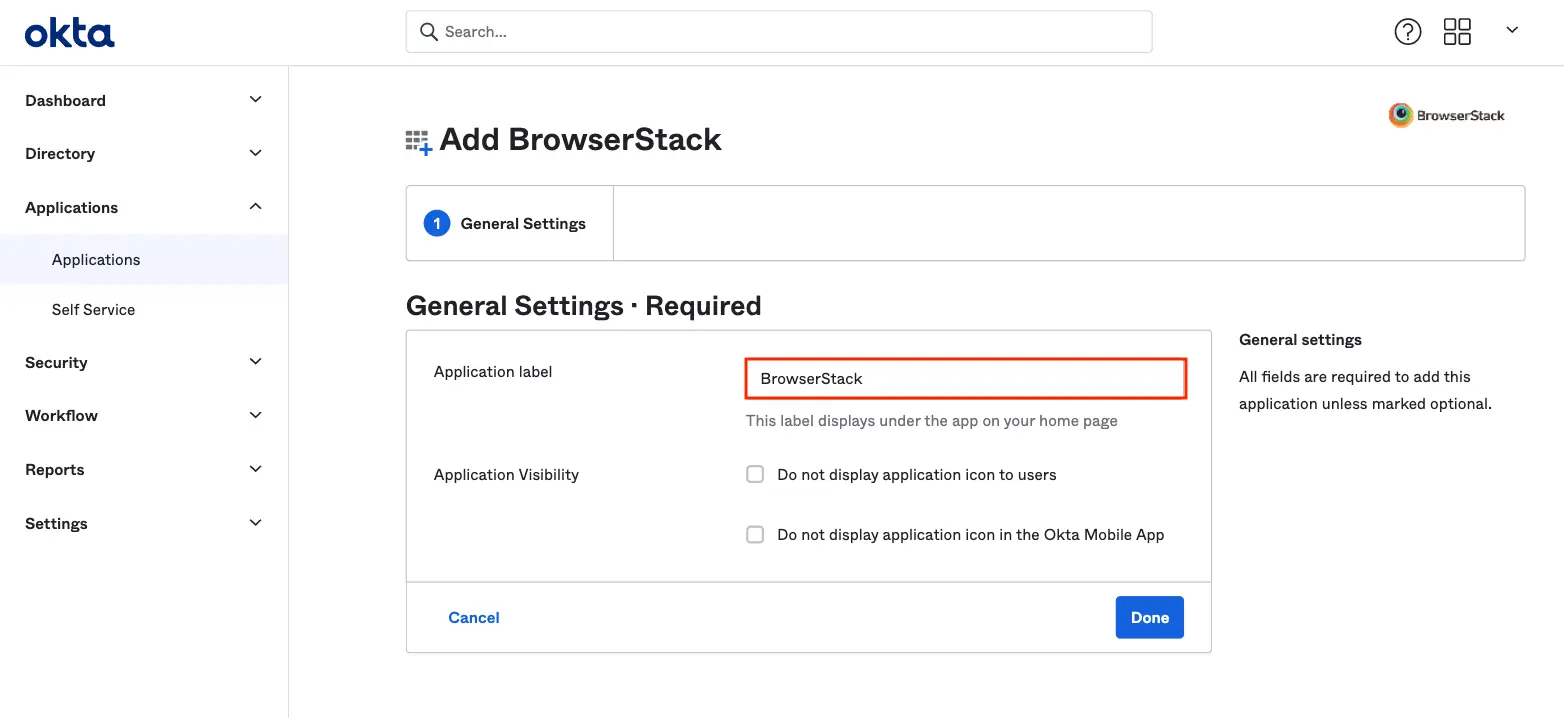
- Give this application an Application Label
- Keep Do not display application icon to users unselected if you want to use IdP initiated SSO flow
- Click Done
Configuring BrowserStack application on Okta
-
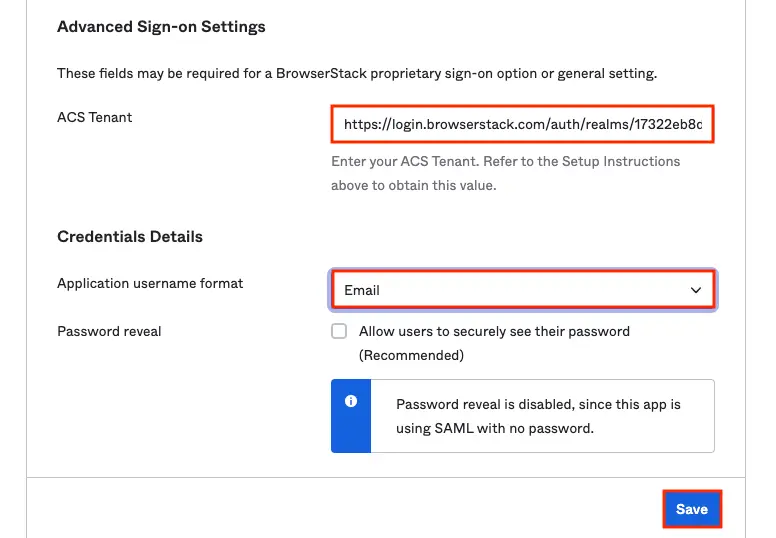
Go to Sign on tab > Click Edit.
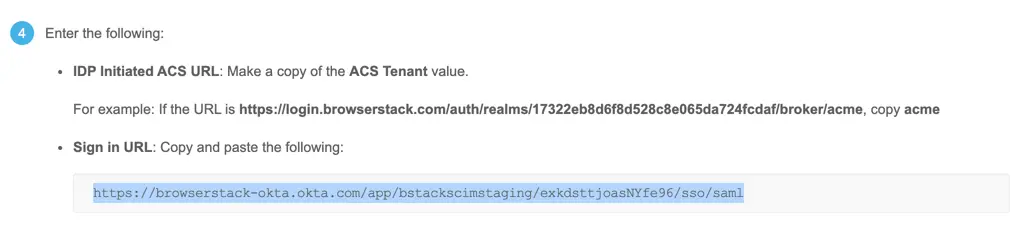
- Paste the IDP initiated the ACS URL (copied at Step 4 in the previous section above) in ACS Tenant text field. Select Email under Application username format field.
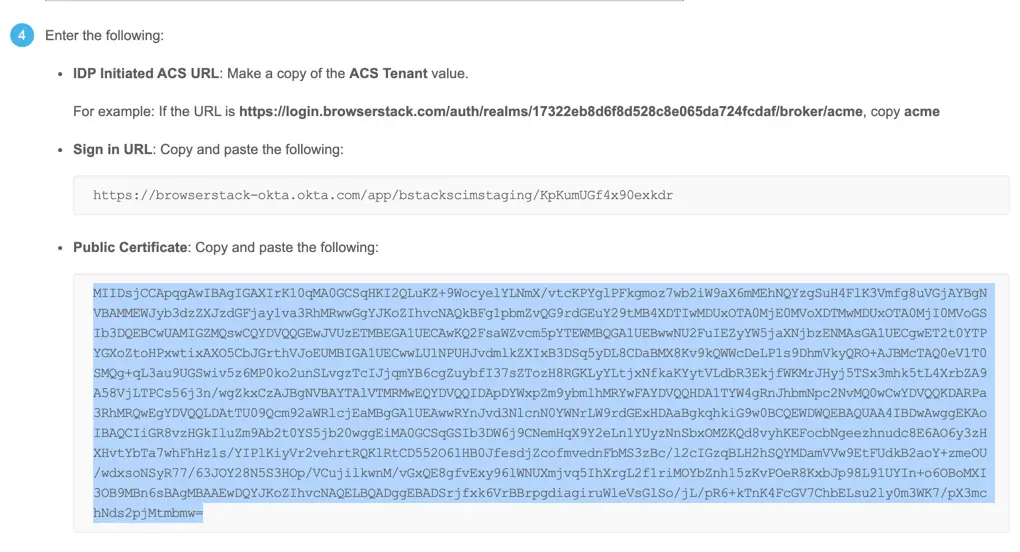
- Click on View Setup Instructions.
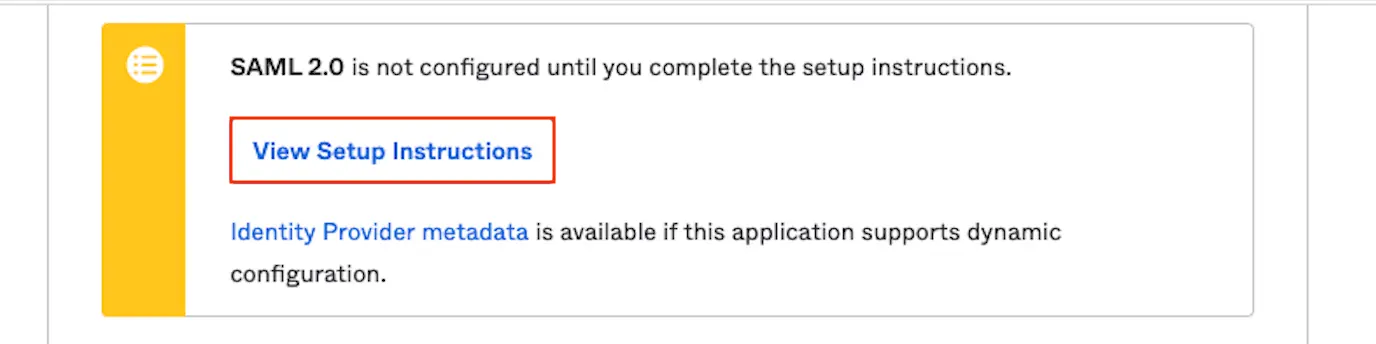
- Copy the following, for submitting on BrowserStack:
-
Sign in URL
- Copy Public Certificate (Please copy only the certificate, and ignore the begin and end comments).
- Provision the app for BrowserStack Group Owner. Will be used to test the set-up before enabling Single Sign-on
-
Sign in URL
- Paste the above values on BrowserStack configurations page:
- Sign in URL in Sign-in URL text filed.
- Copy Public Certificate. Please copy only the certificate part and ignore the begin and end comments.
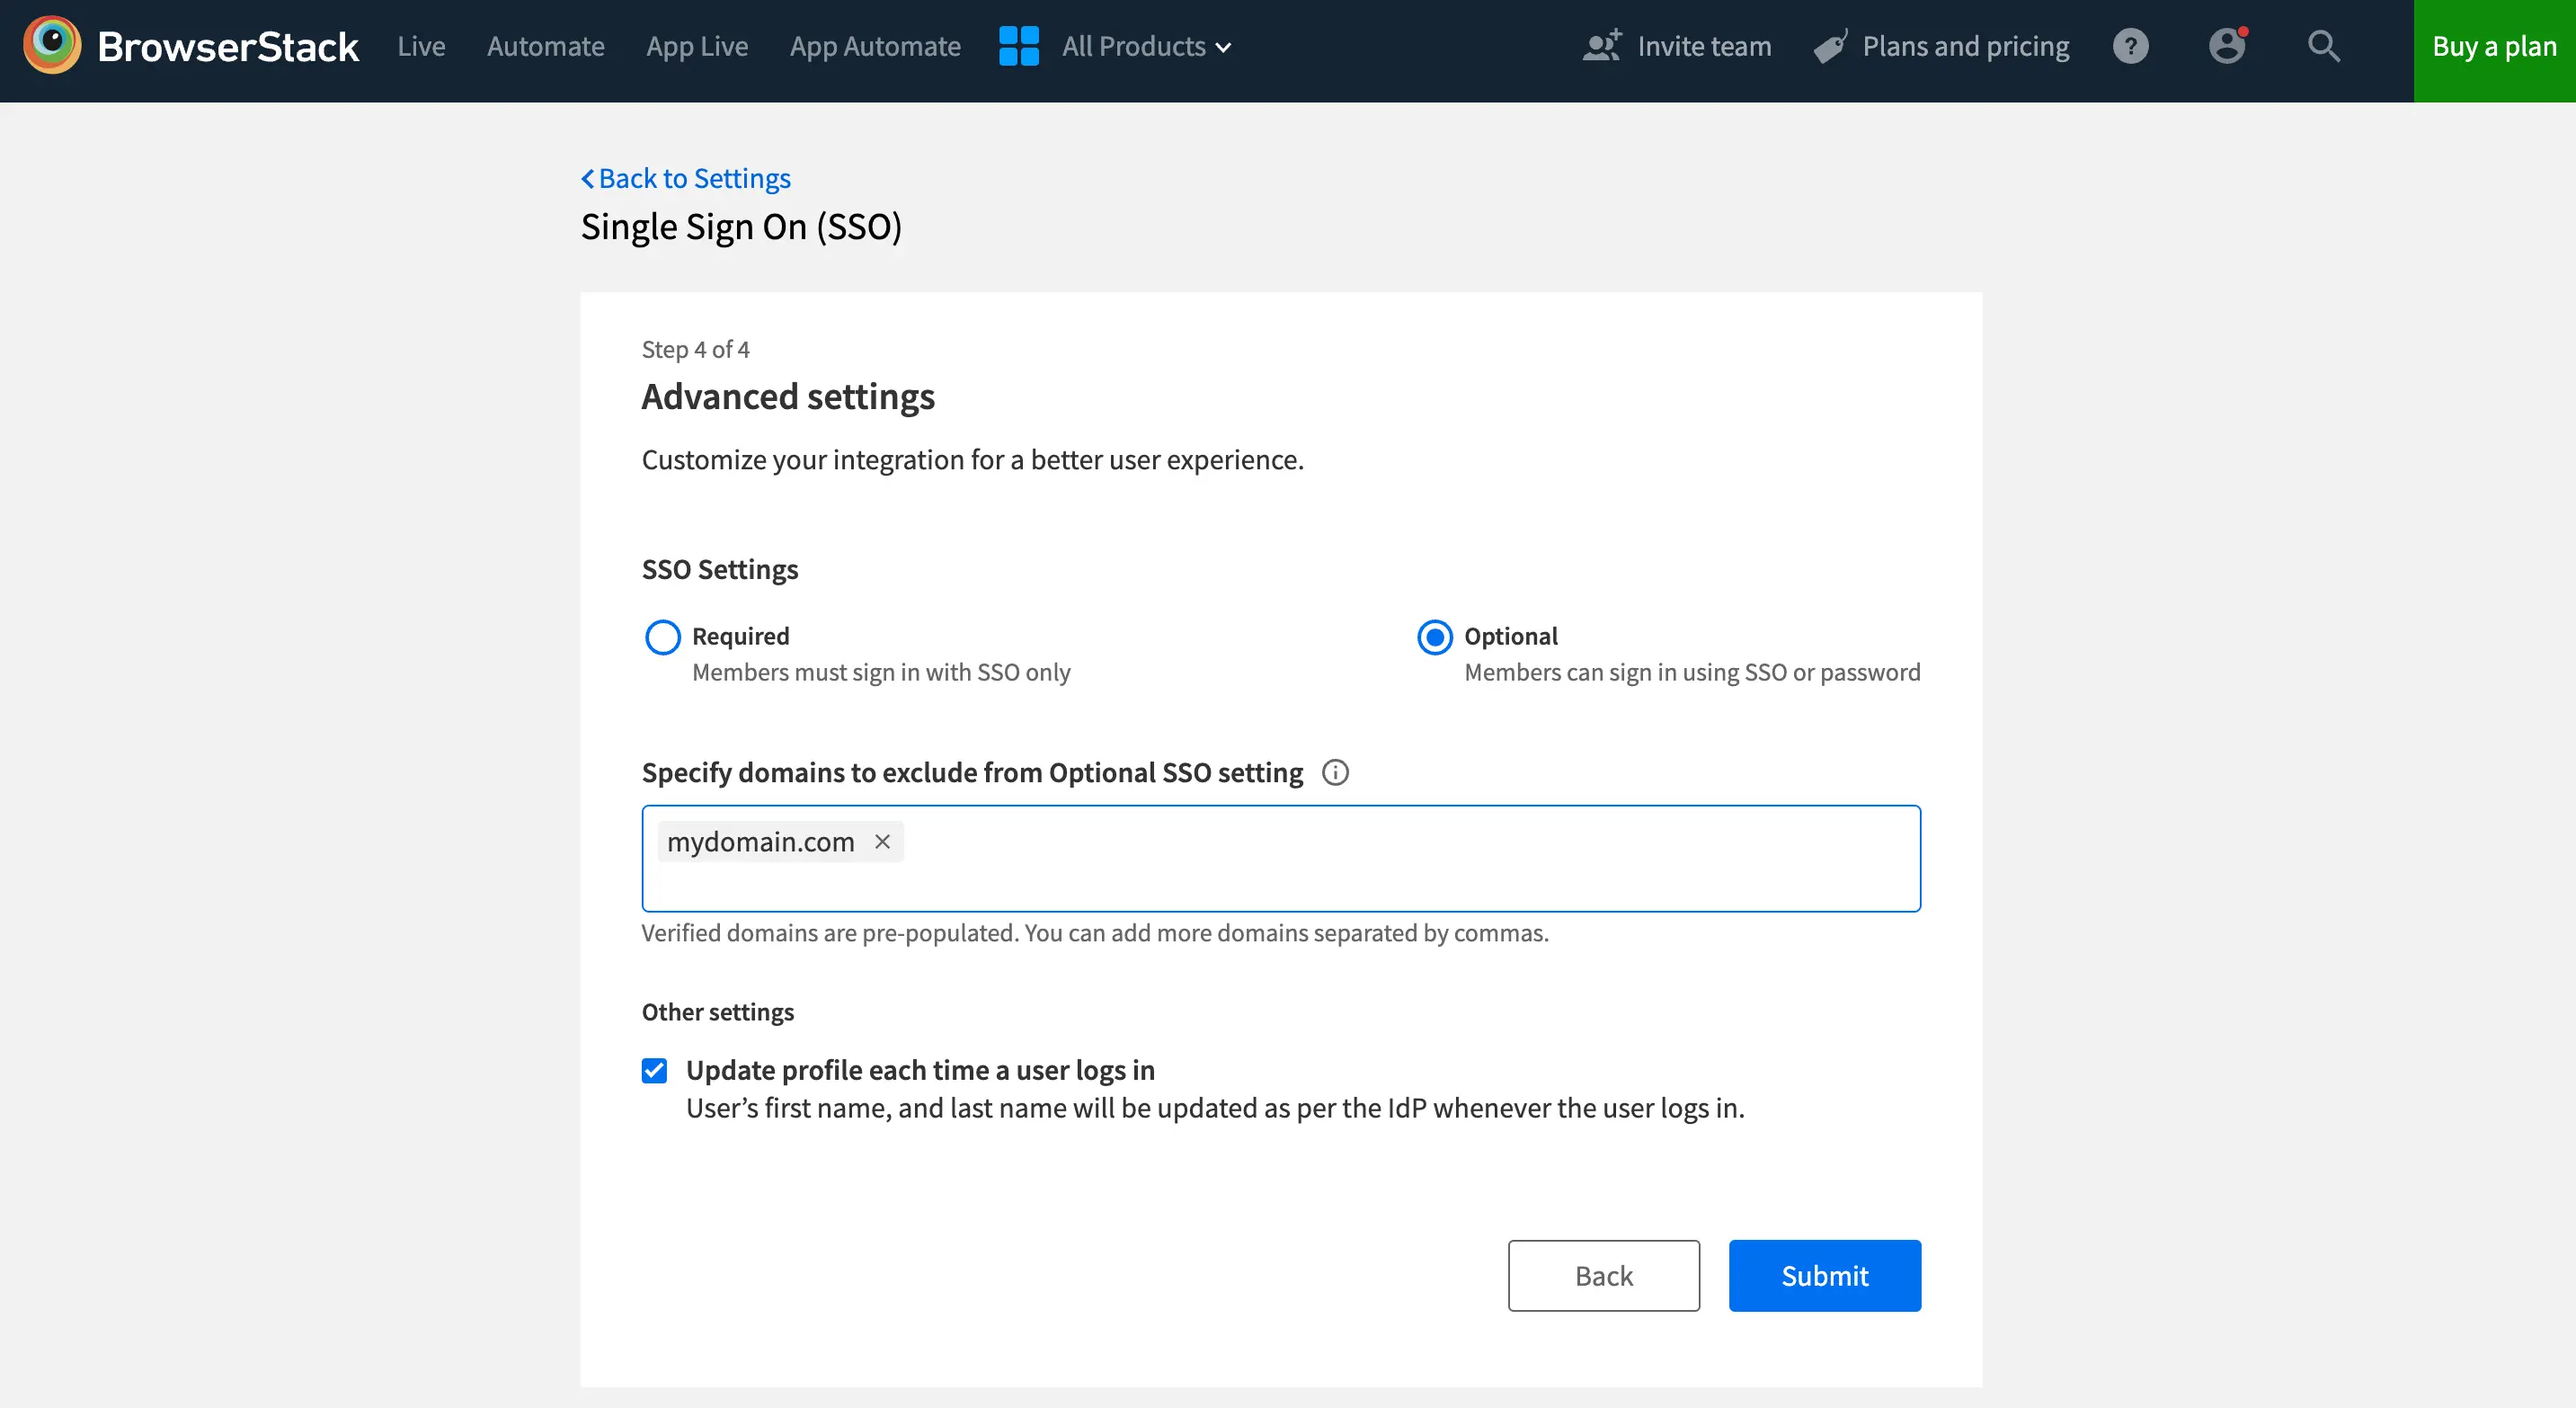
- Click Next to proceed to the Advanced options section. Here, you will be able to configure your SSO settings as either Required or Optional. This allows you to choose the level of SSO enforcement that suits your organization’s needs.
-
Required (default): Choose this option if you want to ensure that your team members must sign in to BrowserStack using SSO. Their BrowserStack credentials will no longer work. However, owners can still sign in using either of their SSO or BrowserStack credentials.
-
Optional: Opt for this setting if flexibility is your priority. With SSO configured as Optional, your team members can sign in using either their SSO or BrowserStack credentials. Additionally, you can choose to extend this flexibility only to some team members. Simply specify domains of members to exclude from Optional setting and all users from those domains will be required to login using SSO only.
-
Test and enable
-
Click Test Setup to test the BrowserStack and Okta SSO integration.
-
You will be prompted towards SP-Initiated flow and your user account will be authenticated via Okta. The test is successful upon completion of the SSO Authentication flow.
- Upon a successful test, you can enable the Single Sign-on feature for your Organization, by following the steps below:
- You have the option of sending out a mail to all your team members on BrowserStack, to inform them about this change.
- Click Enable to enable the feature.
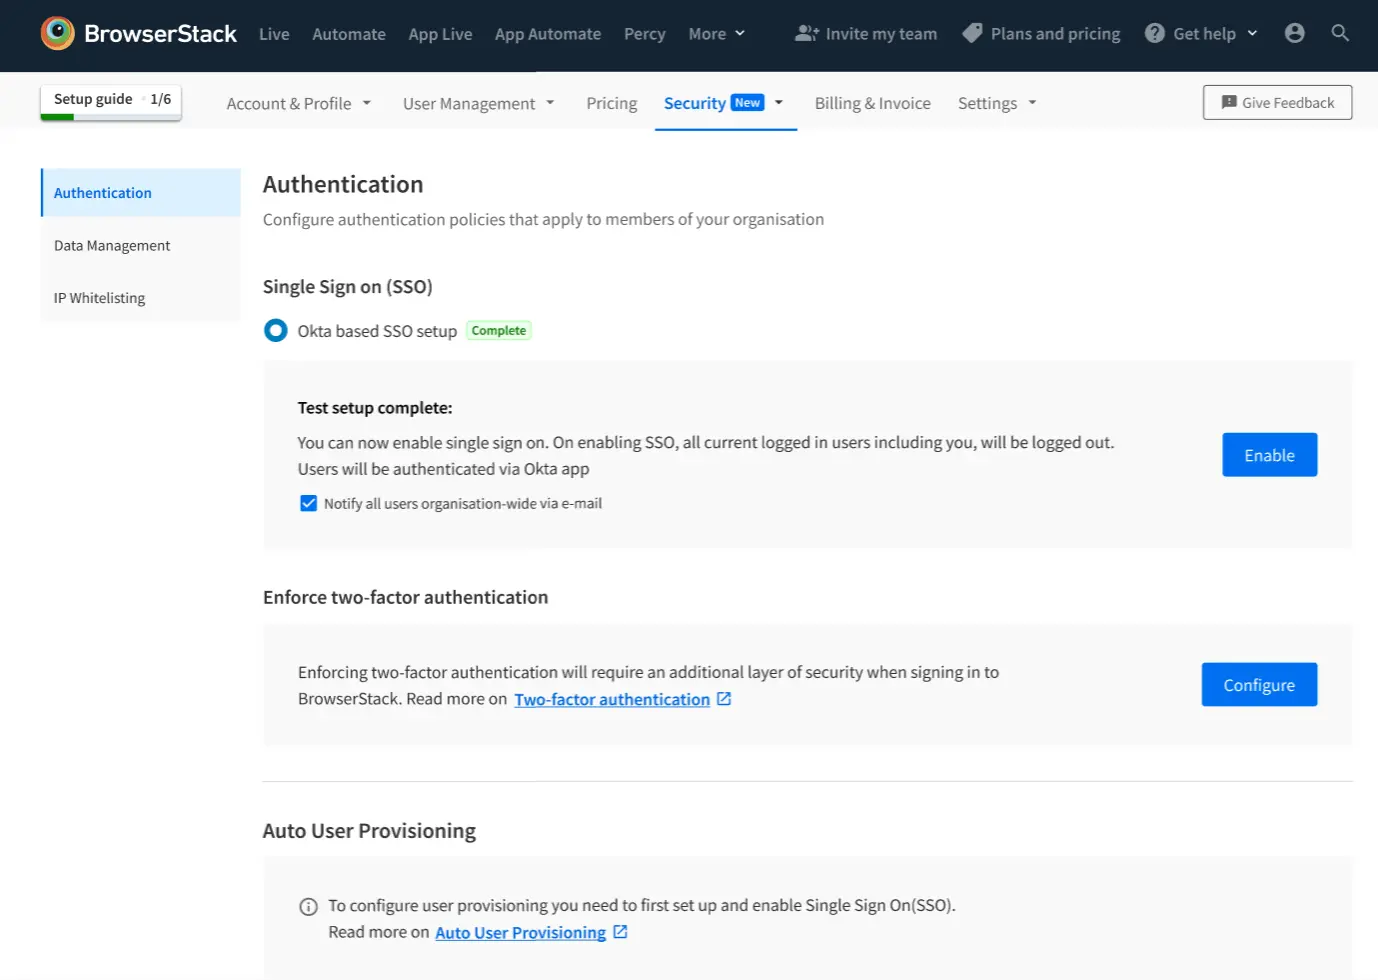
- You will automatically be logged out of the BrowserStack, and redirected to log-in via SSO.
Troubleshooting
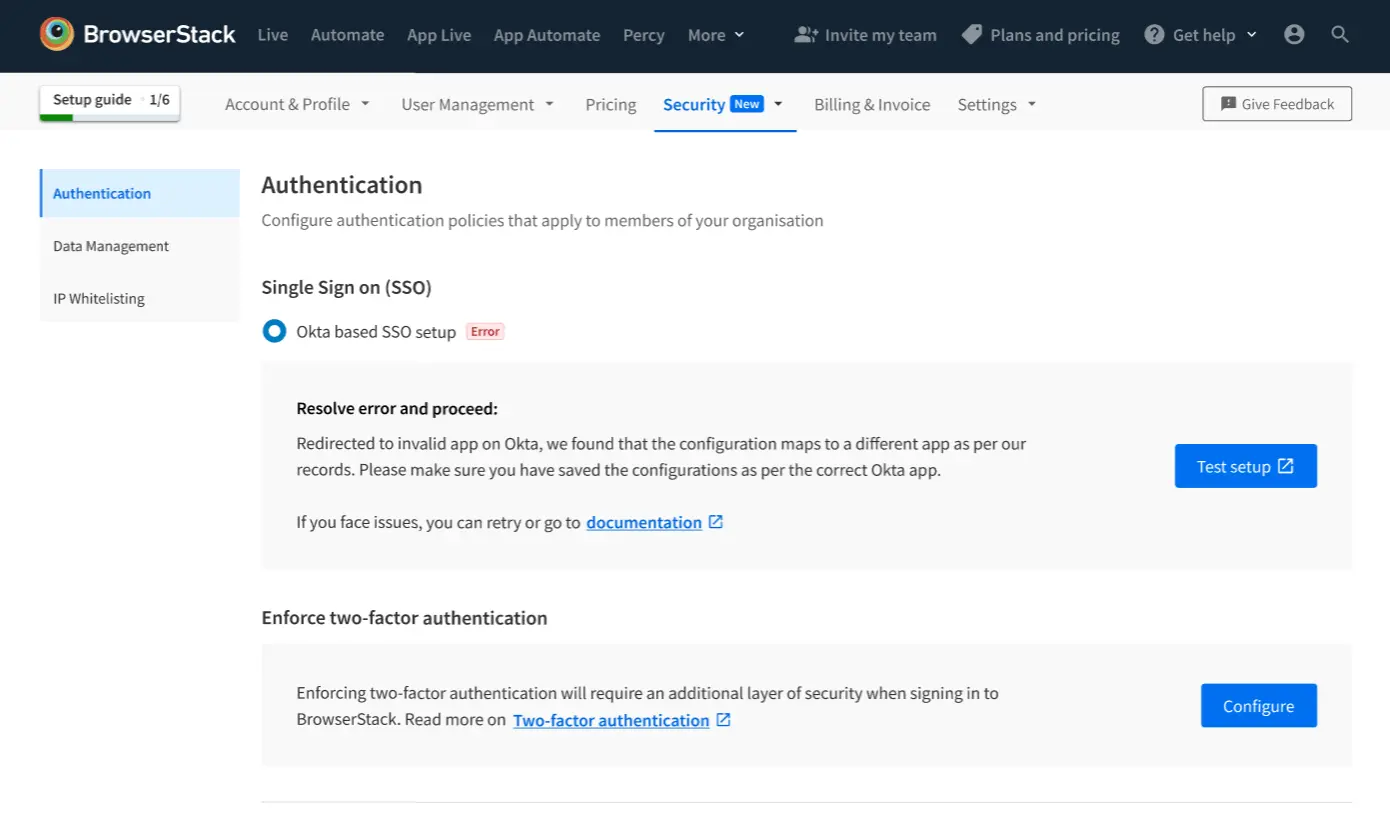
Error while testing (Type 1)
The BrowserStack/Okta configuration for this Group has been saved by a different application.
Resolution: Please make sure that the correct configuration is saved on Okta app.
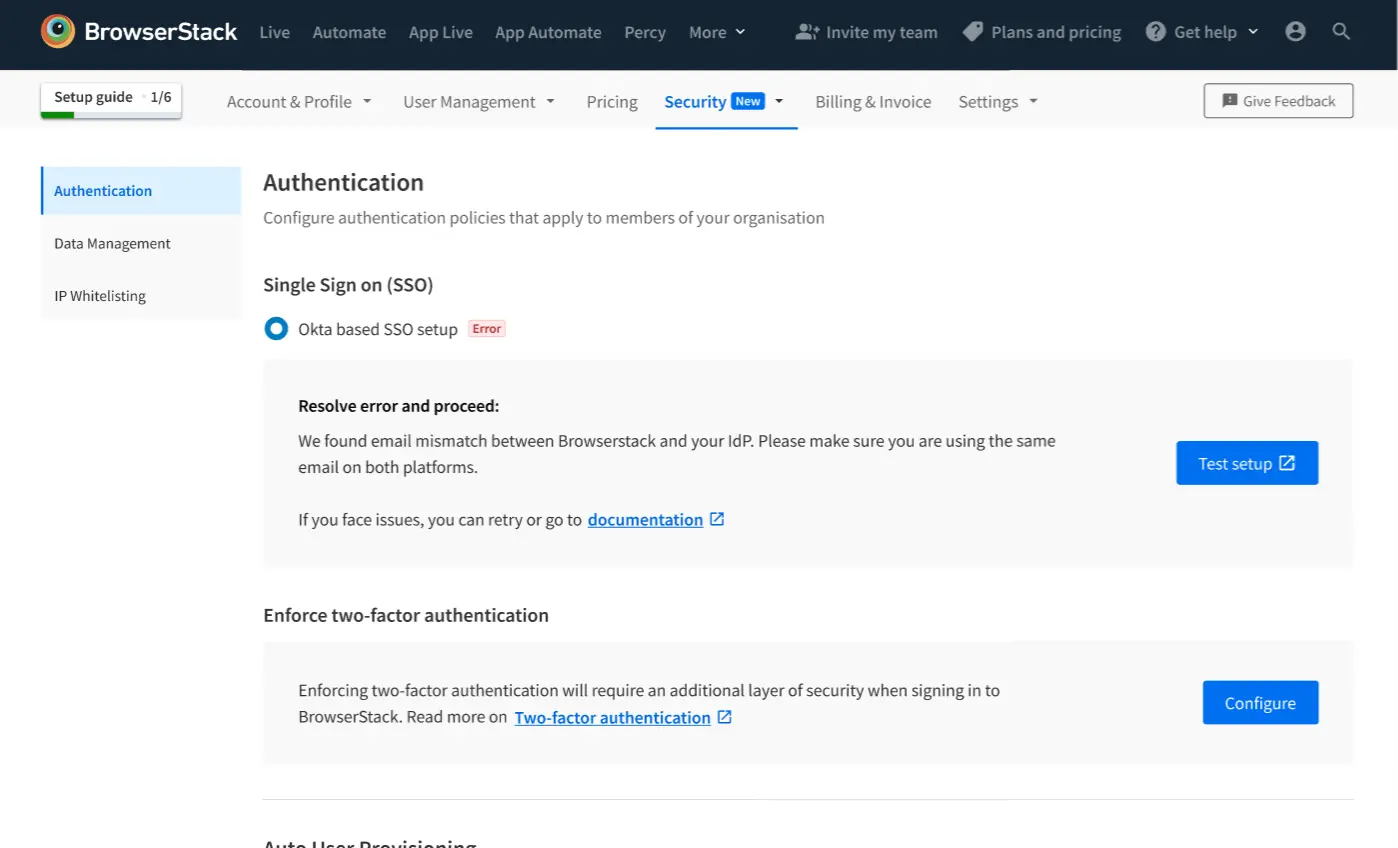
User mismatch
The user provisioned on the Okta App does not have the same email as BrowserStack’s Group Owner.
Resolution: Kindly make sure that the Okta’s provisioned user is the same as BrowserStack’s Group Owner.
Internal error
This is an internal error, please connect with Support/AE/SE team
Incorrect ACS URL on Okta App
Resolution: Please check the ACS URL submitted on Okta
- User provisioning: Integrate Okta via SCIM to manage users. To configure, visit documentation.
- Contact us for any escalations or support.
We're sorry to hear that. Please share your feedback so we can do better
Contact our Support team for immediate help while we work on improving our docs.
We're continuously improving our docs. We'd love to know what you liked
We're sorry to hear that. Please share your feedback so we can do better
Contact our Support team for immediate help while we work on improving our docs.
We're continuously improving our docs. We'd love to know what you liked
Thank you for your valuable feedback!