
 Join our Discord
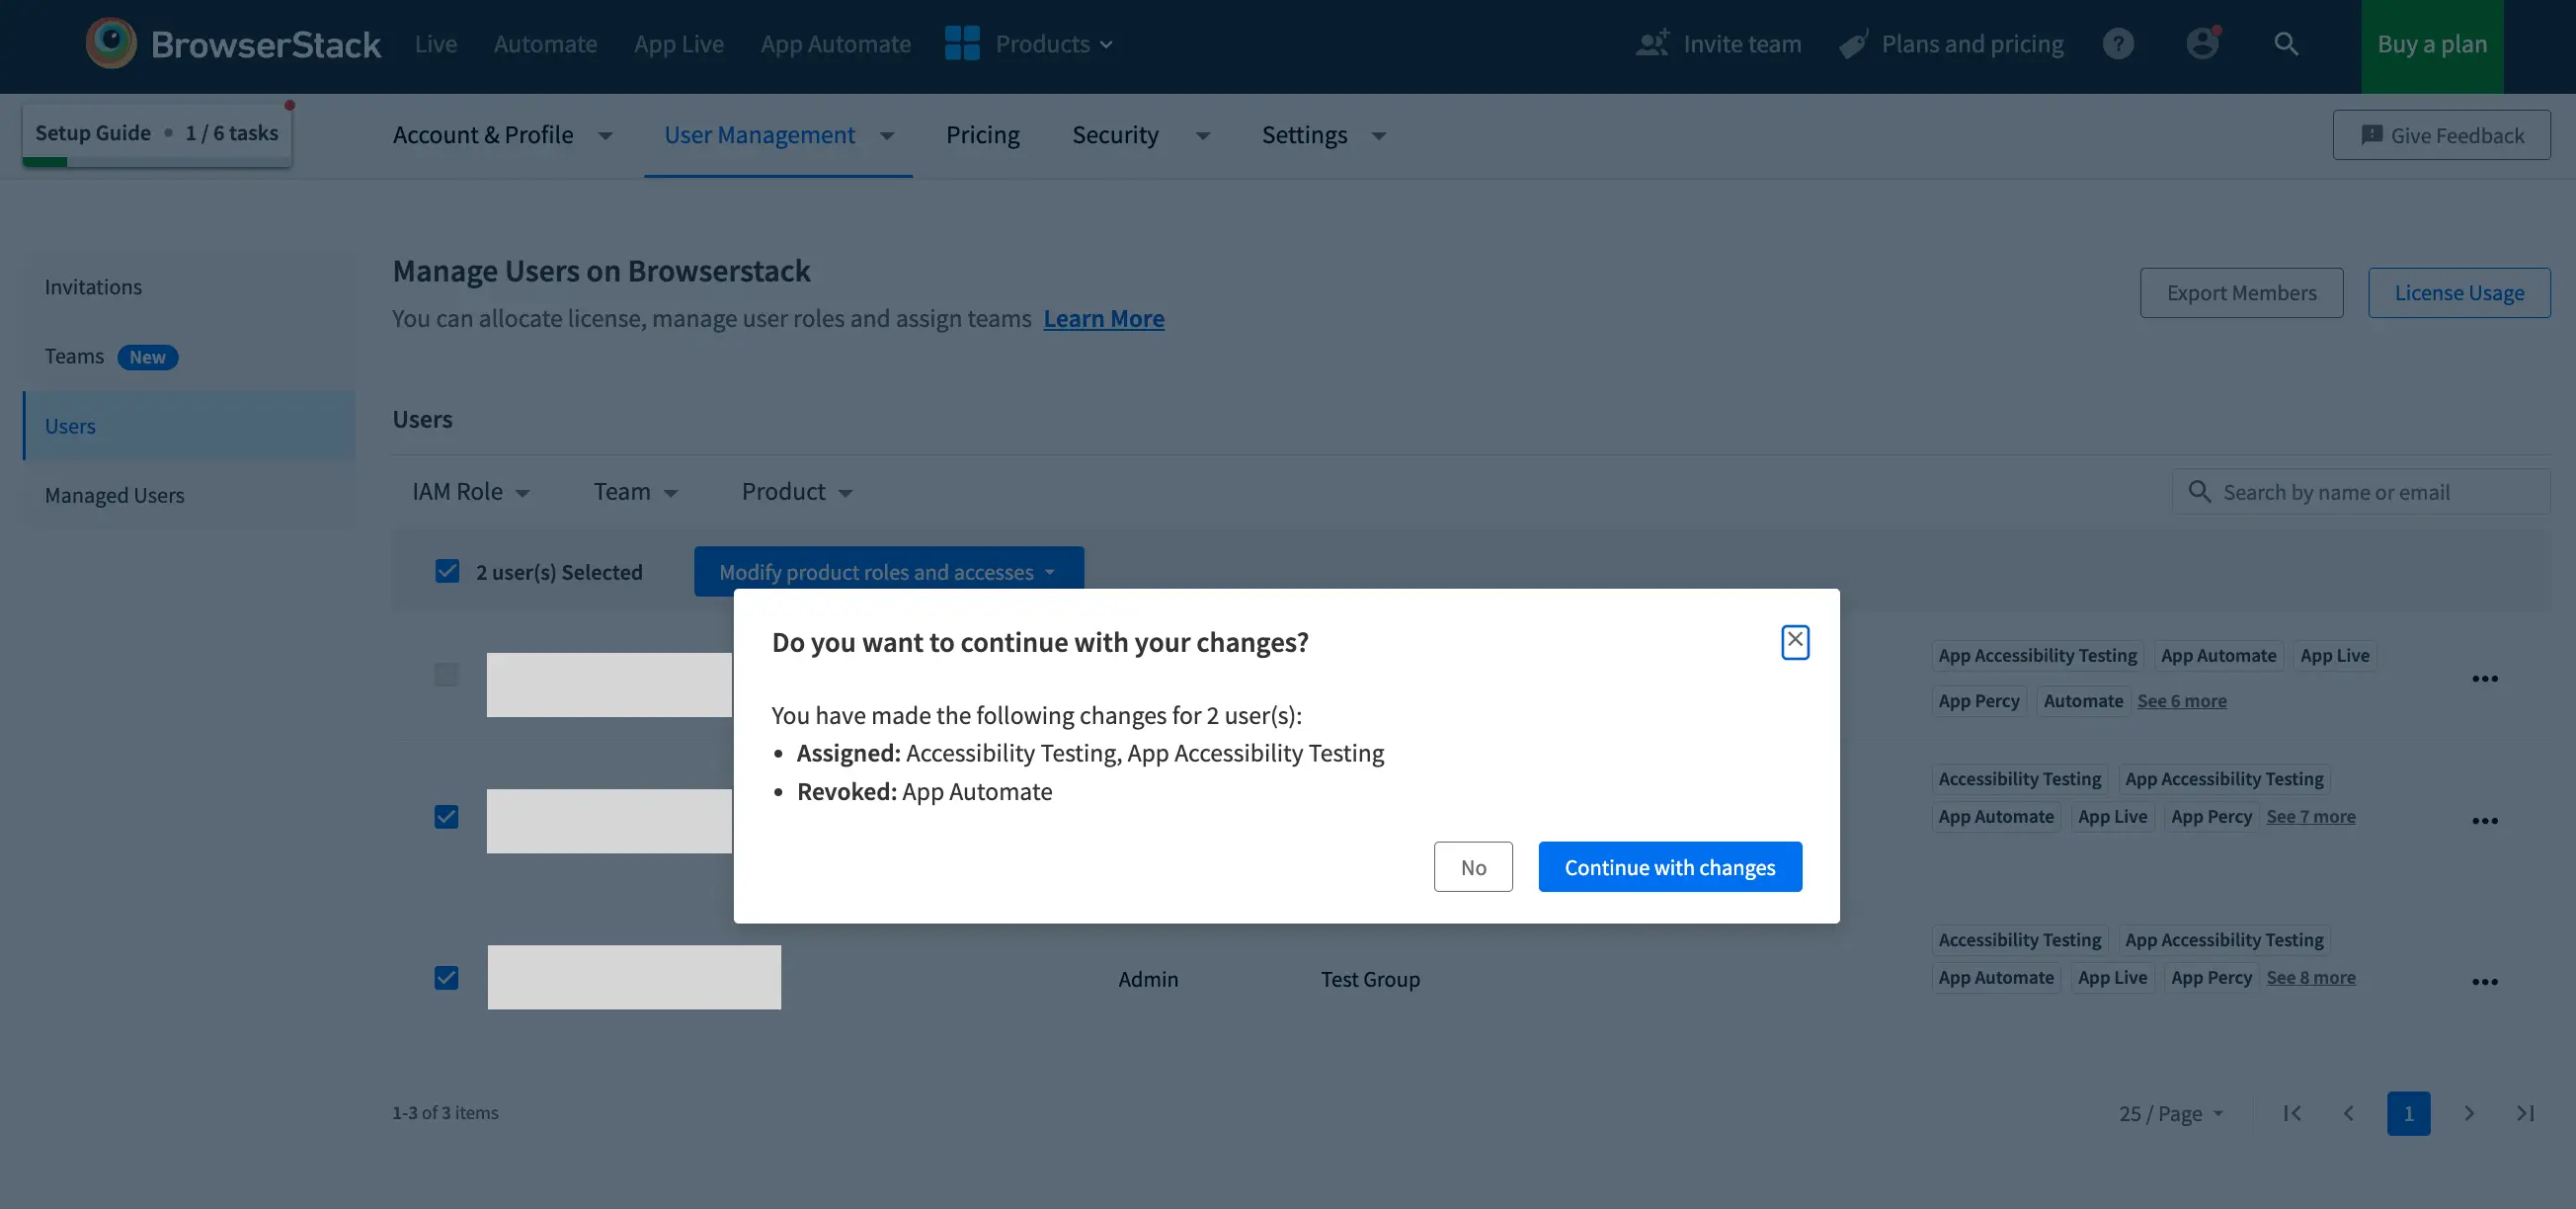
Manage product roles and accesses
View and manage product roles and accesses for members on BrowserStack
Easily manage and control product roles and access levels across BrowserStack products.
- Currently, product roles apply only to App Percy, Percy, Test Management and Test Reporting & Analytics products. Check out Product roles.
- This page applies to organizations on the legacy RBAC model. If centralized RBAC is enabled for your organization, see Centralized RBAC.
Permissions to modify product roles and accesses
Ability to modify product access for members of the organization is restricted to members with an IAM role of Owner and Admin.
| Role | Can modify product for |
|---|---|
| Owner | All members |
| Admin | All members (except Owner) |
| Team Admin | All of their team members |
| User | None |
Modify product roles and accesses
Updates to product access and RBAC roles may take a few minutes to take effect across all products.
Below are details on how to view and manage product access for members in the organization:
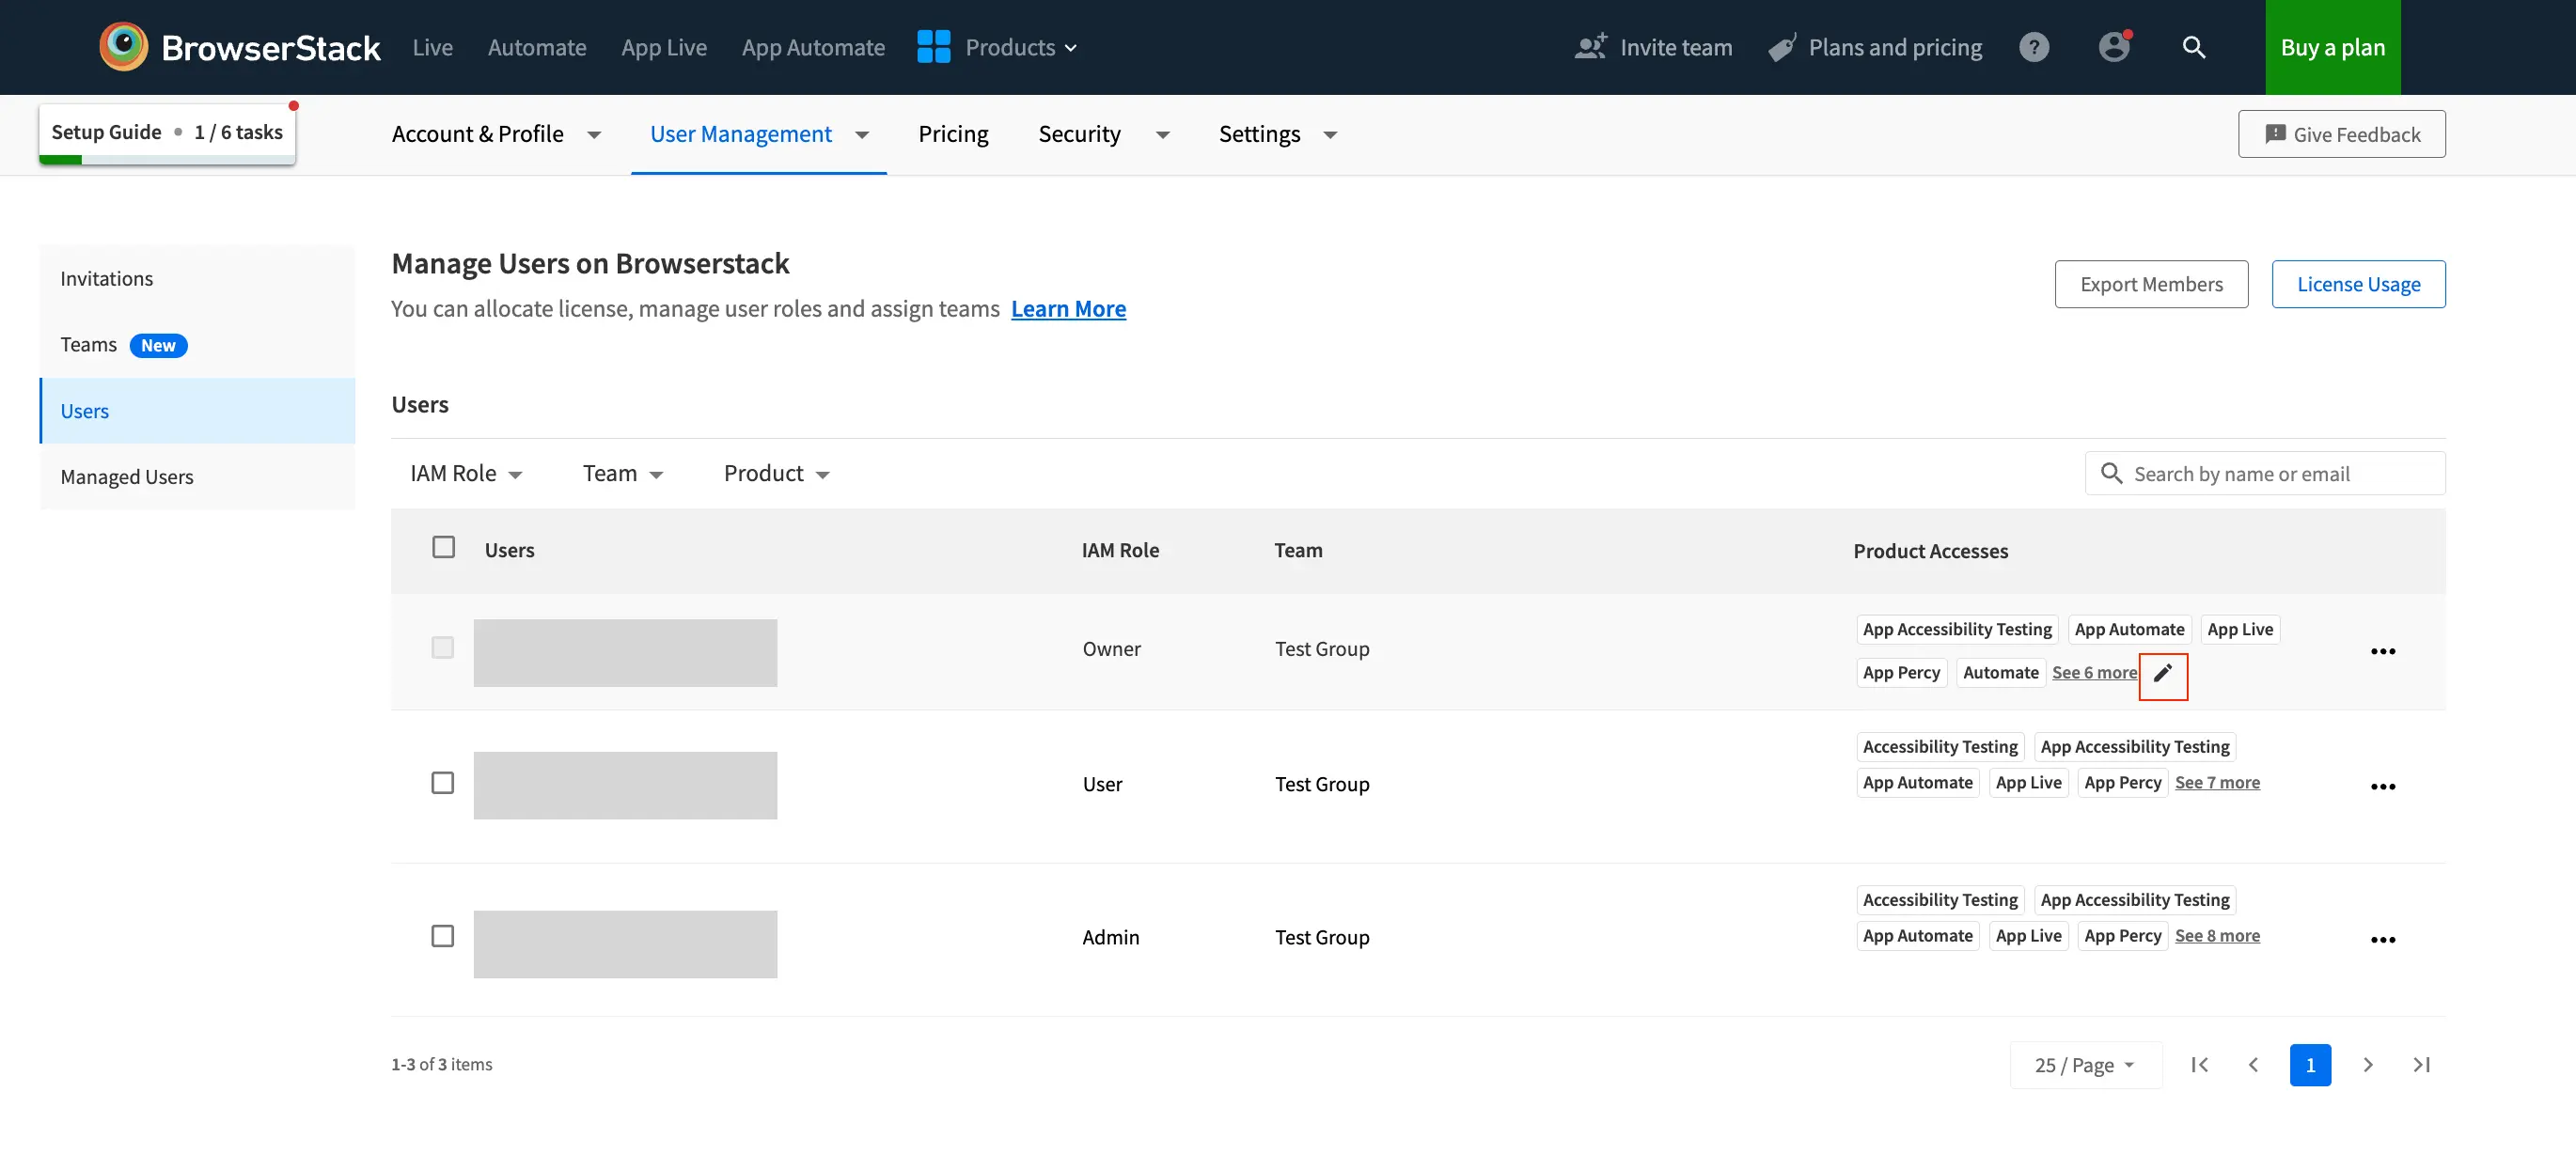
To view the product access of any member:
- Log in to your BrowserStack account.
- Click the User Profile icon in the top-right corner, then select User Management and click Users.
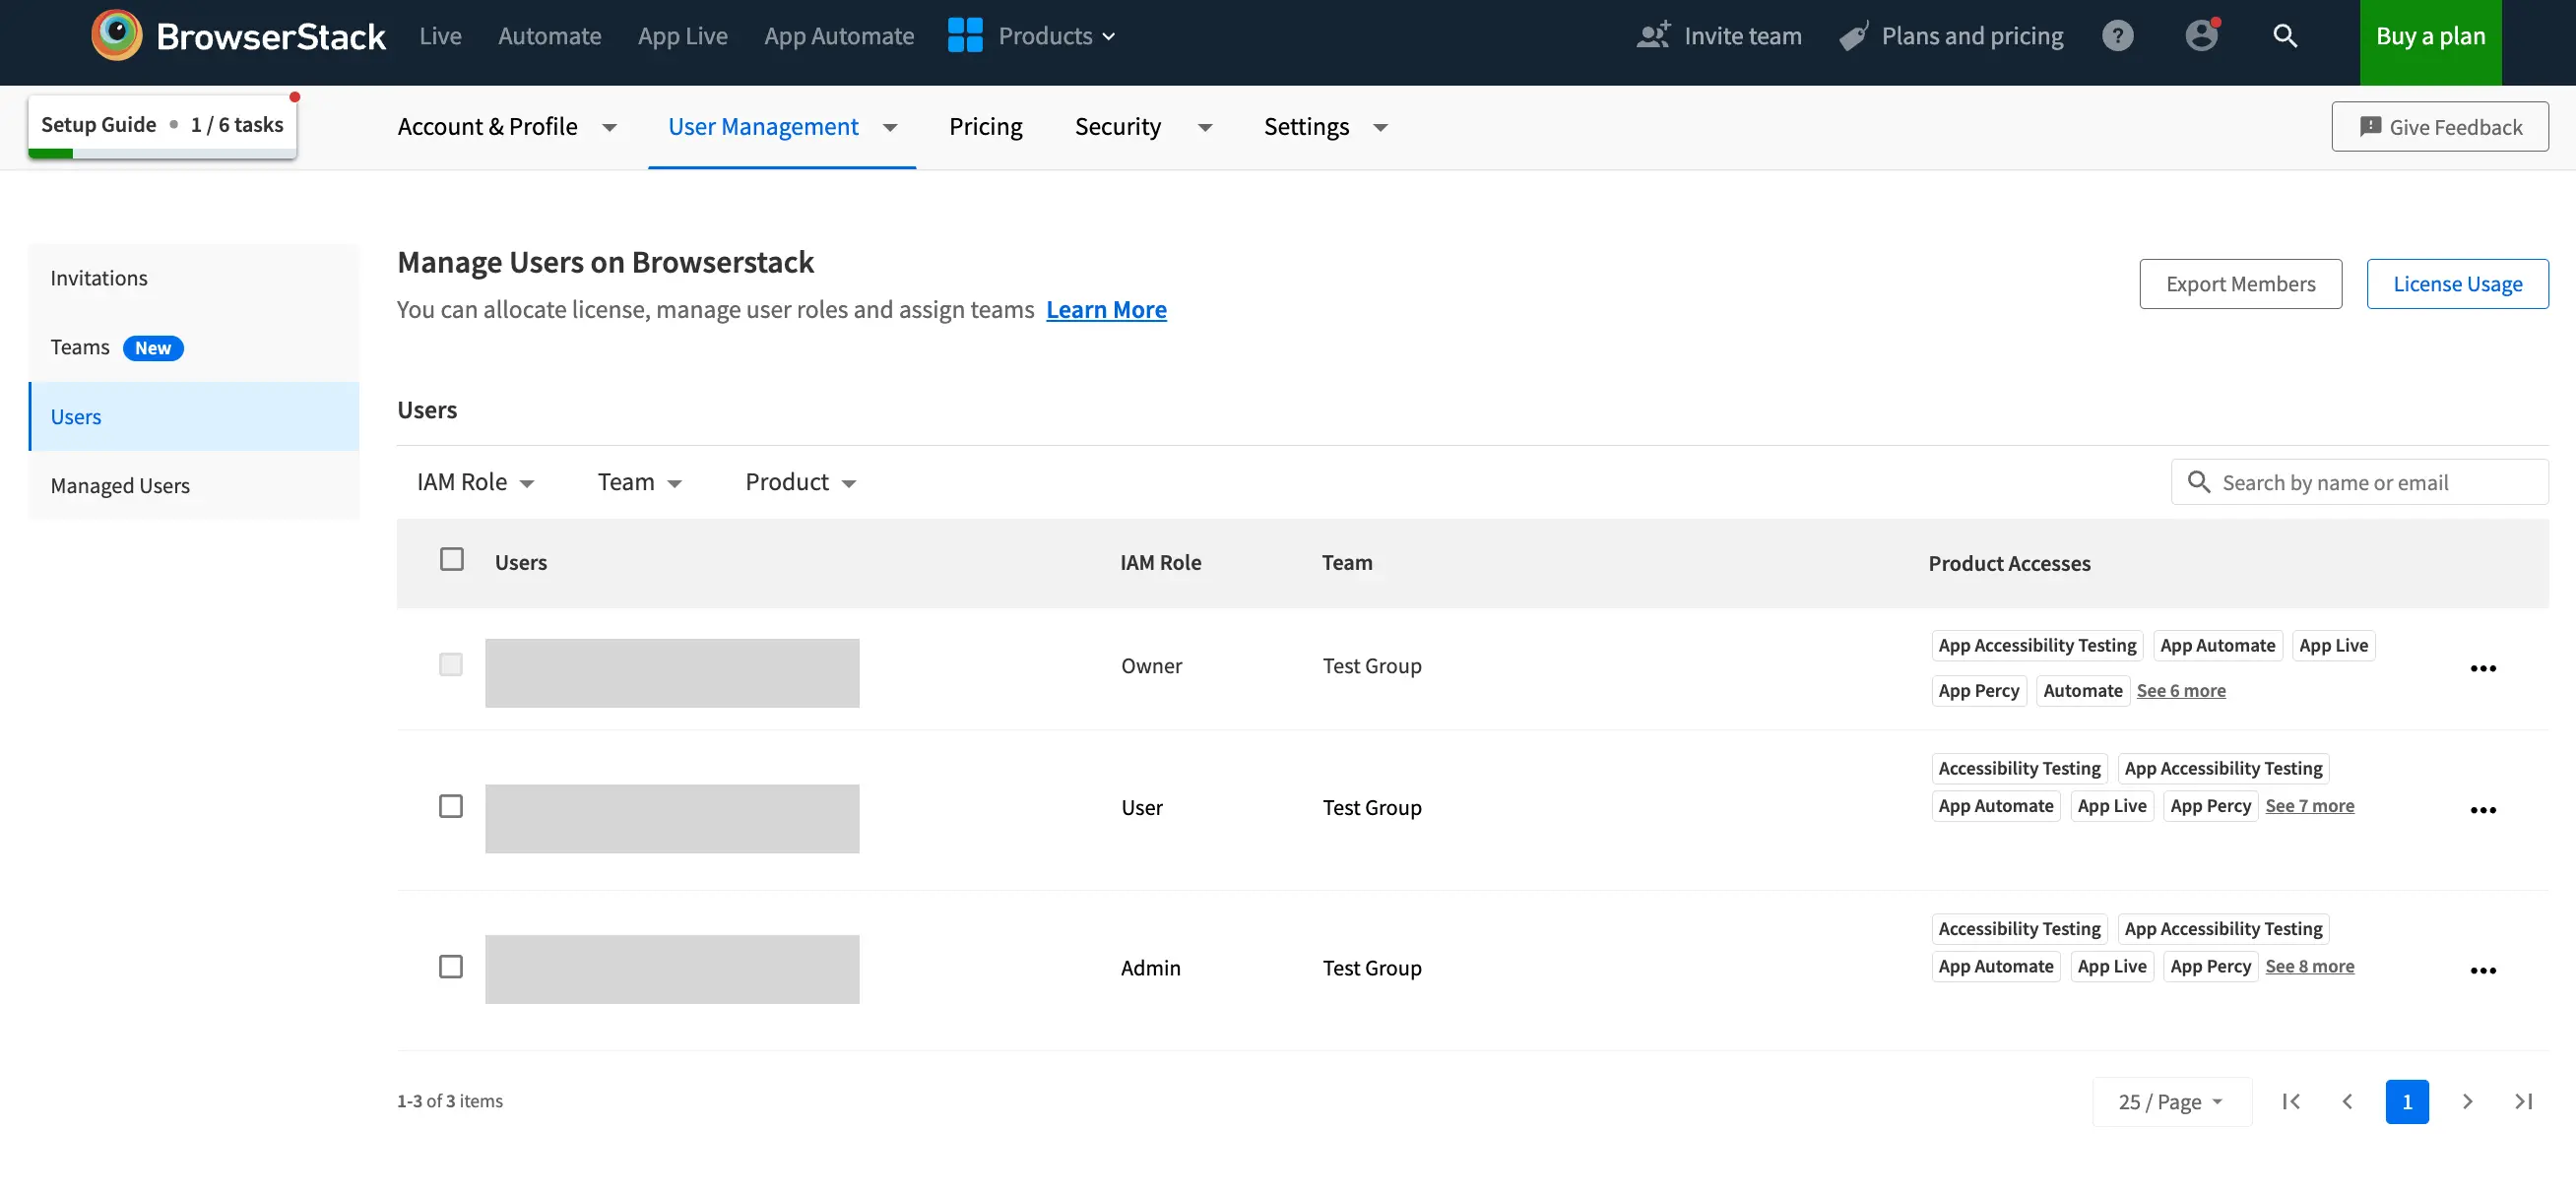
- Find the member in the user list.
- Click the 3 dots (…) icon in the users row and select View details option.
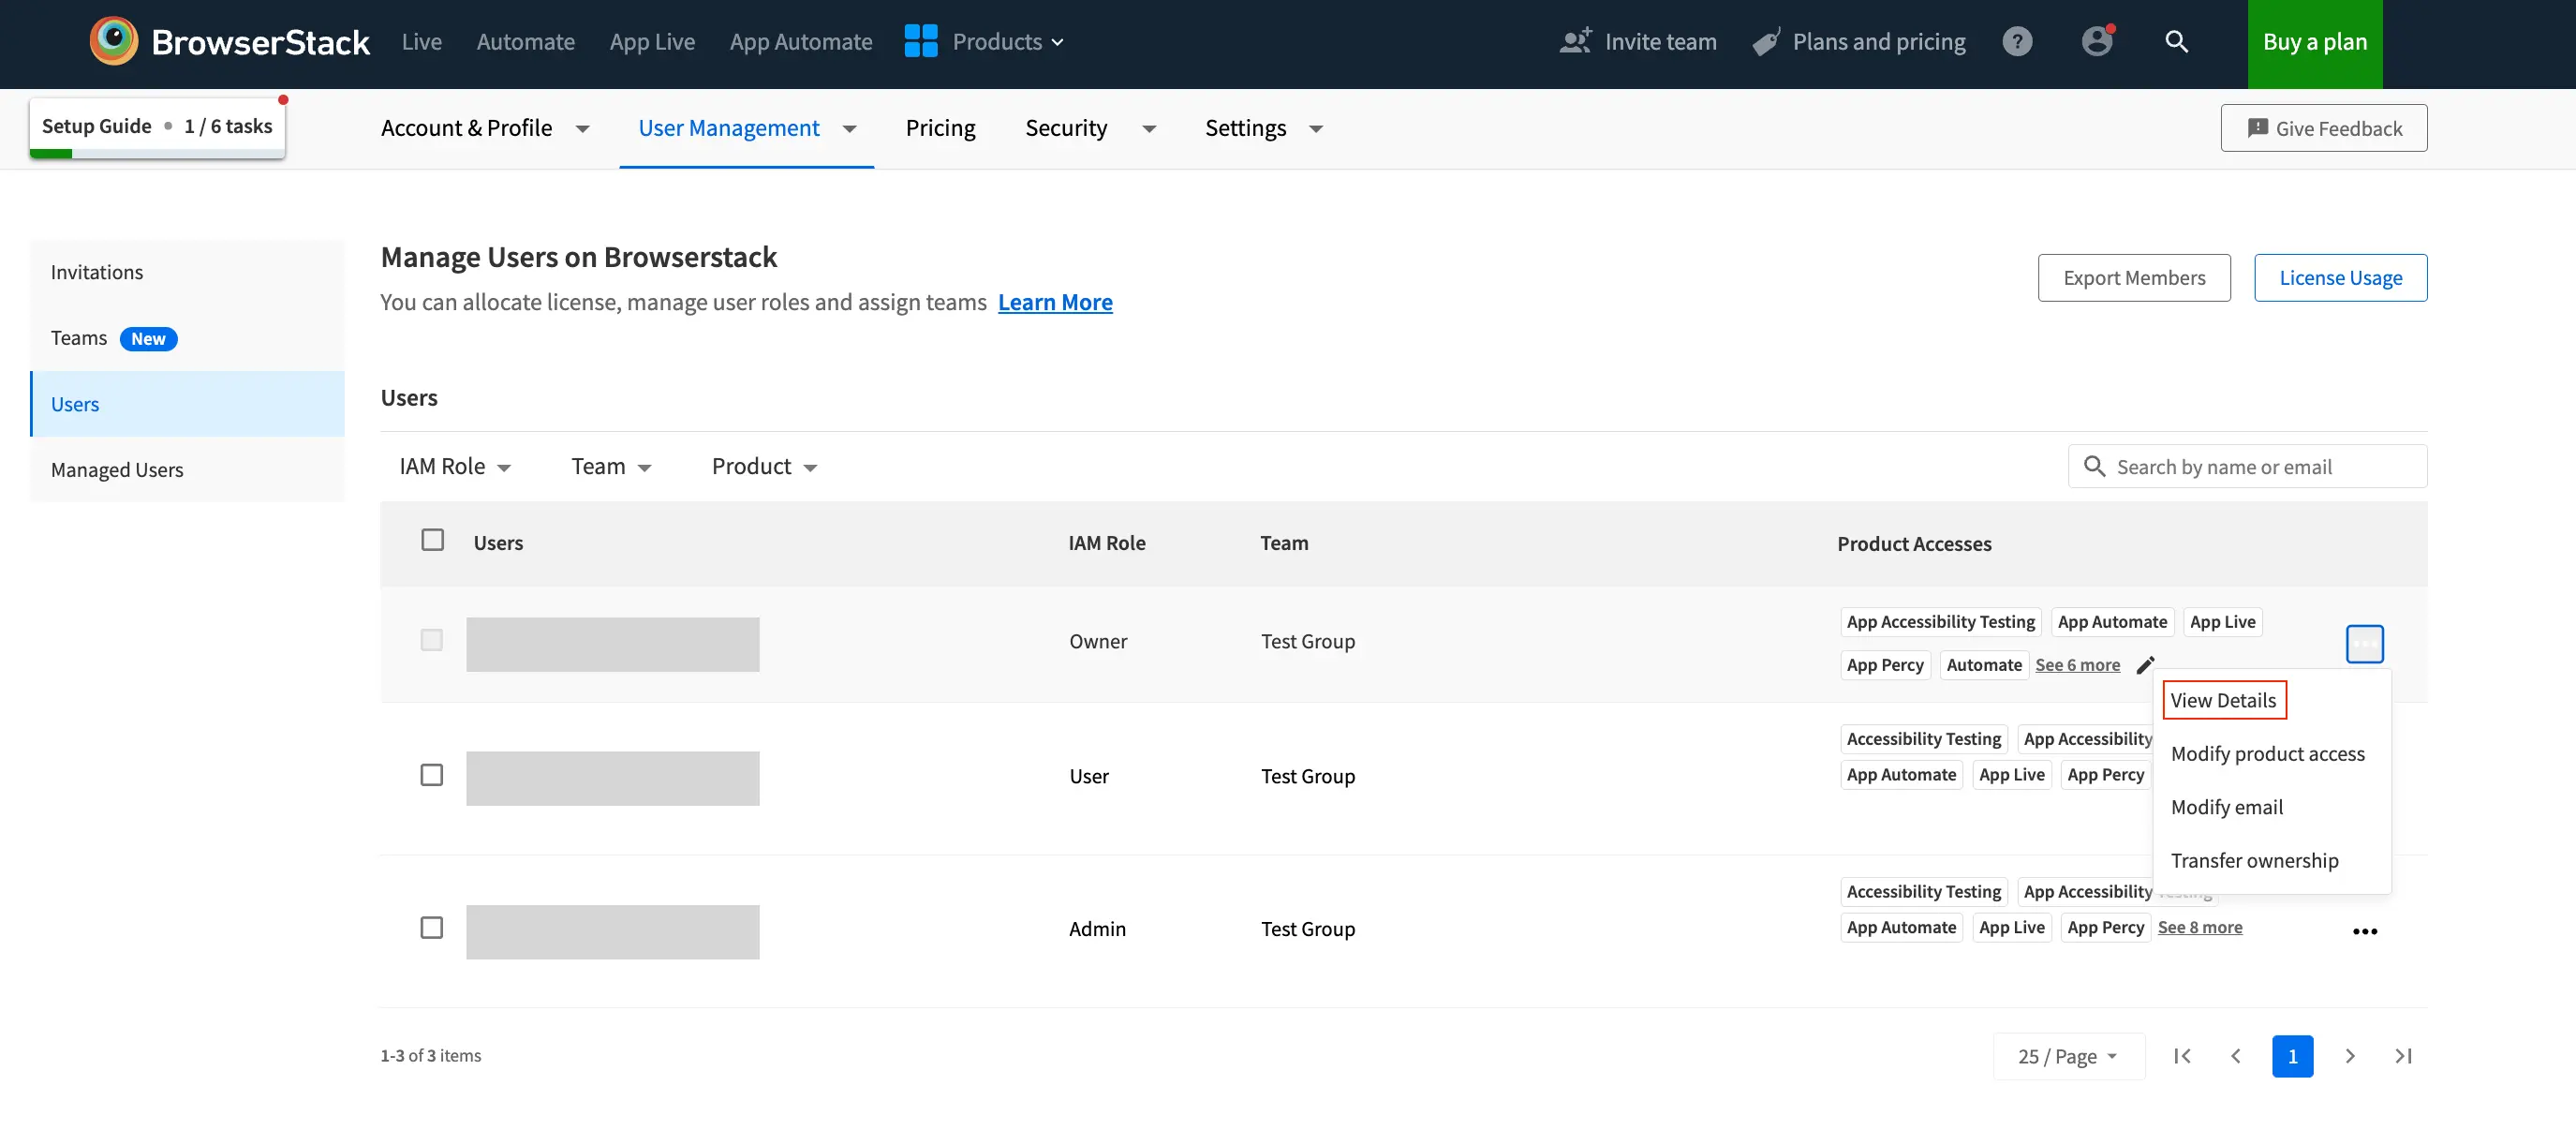
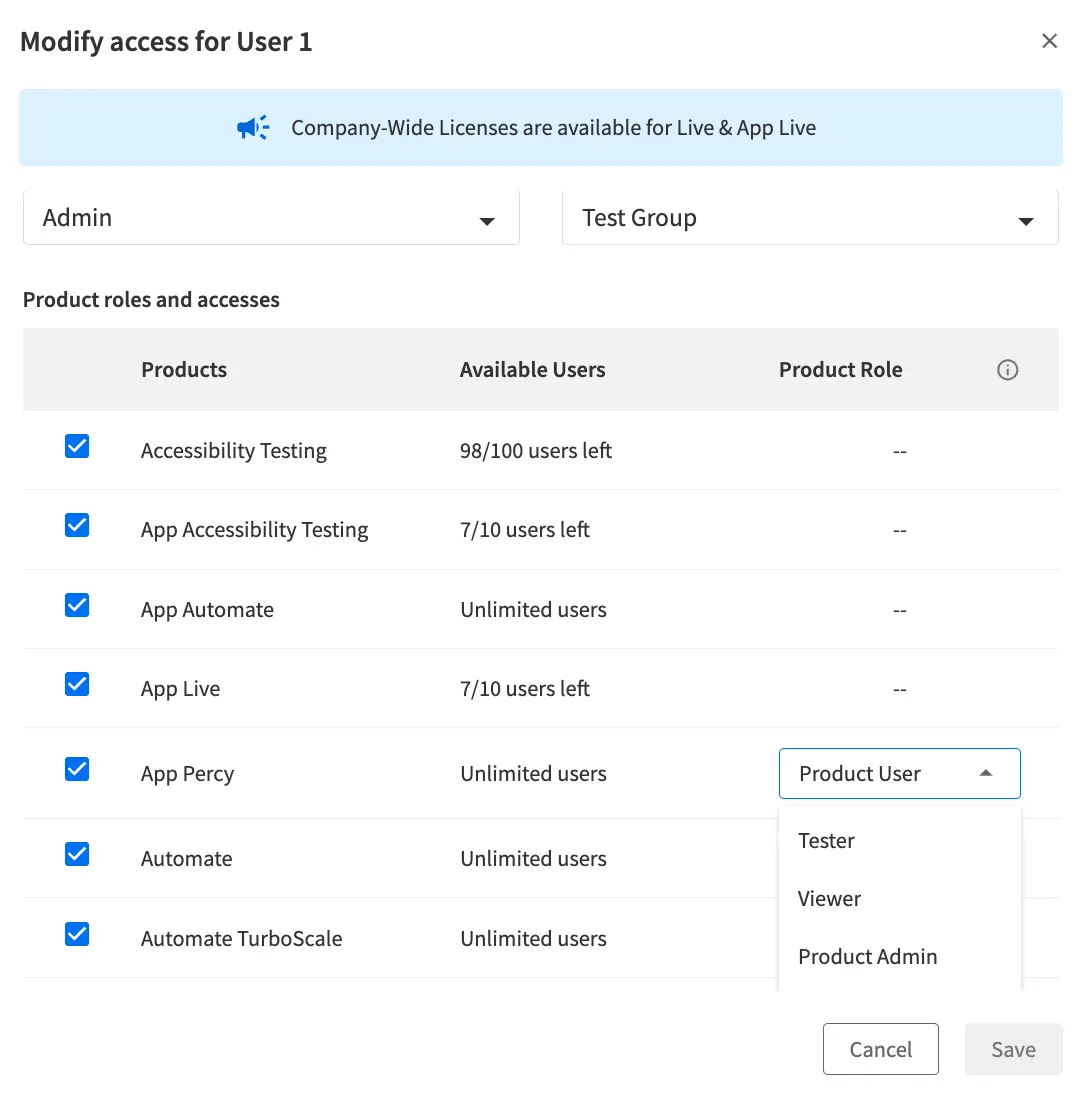
- A dialog with the details about the user’s current access will be shown.
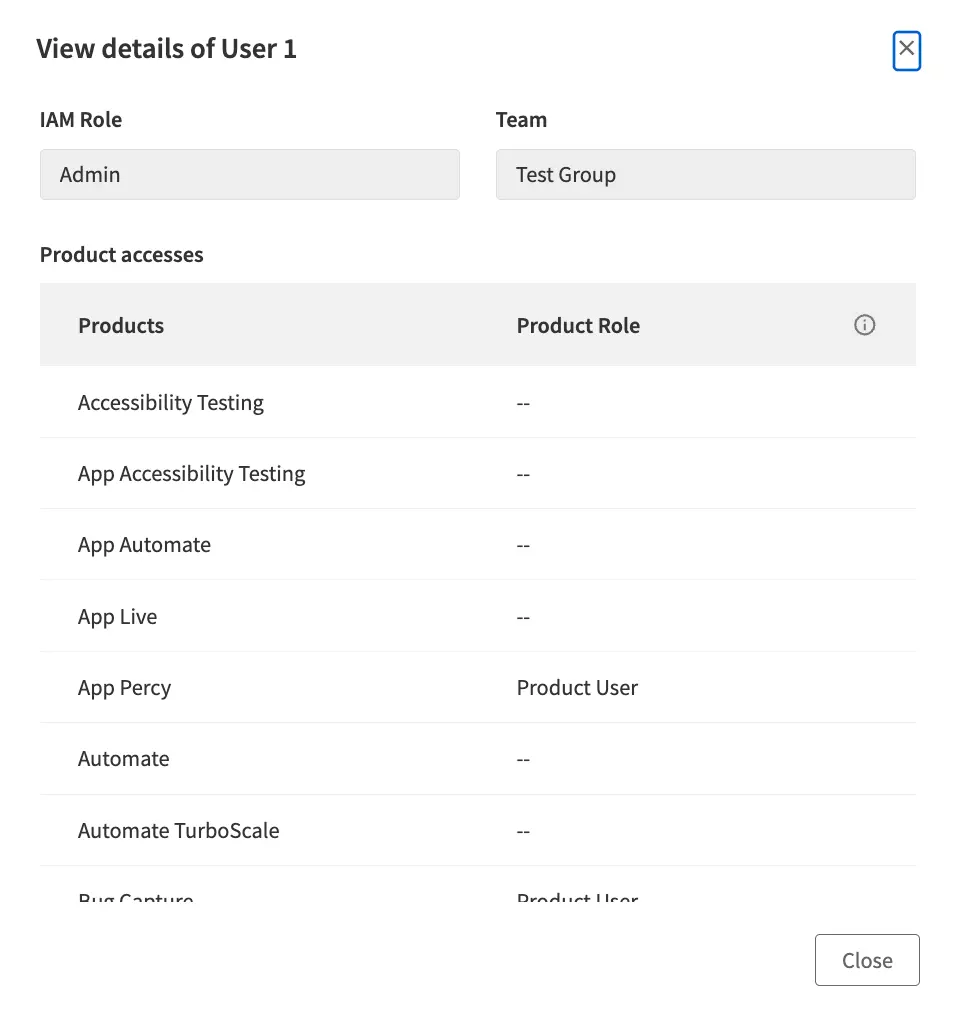
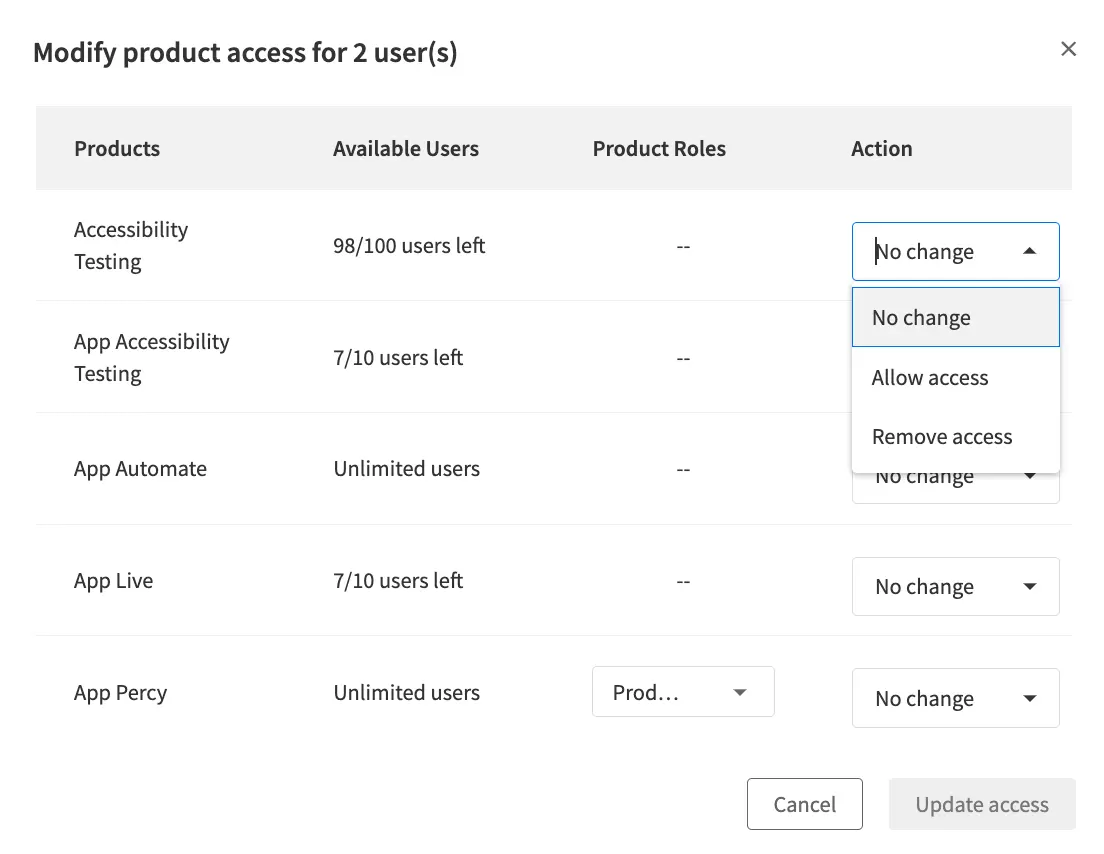
Product Role will only be applicable for products that support them.
Update email for SSO-enabled accounts
On SSO-enabled accounts, users cannot change their email from the My Profile page. An account Owner or Admin must update the email.
You can:
- Change a user’s email to a new address.
- Move a user to a different domain (for example, when their organization migrates from
@example.comto@example.onmicrosoft.com).
To update a user’s email for an SSO-enabled account:
- Log in to your BrowserStack account as an Owner or Admin.
- Click the User Profile icon in the top-right corner, then select User Management and click Users.
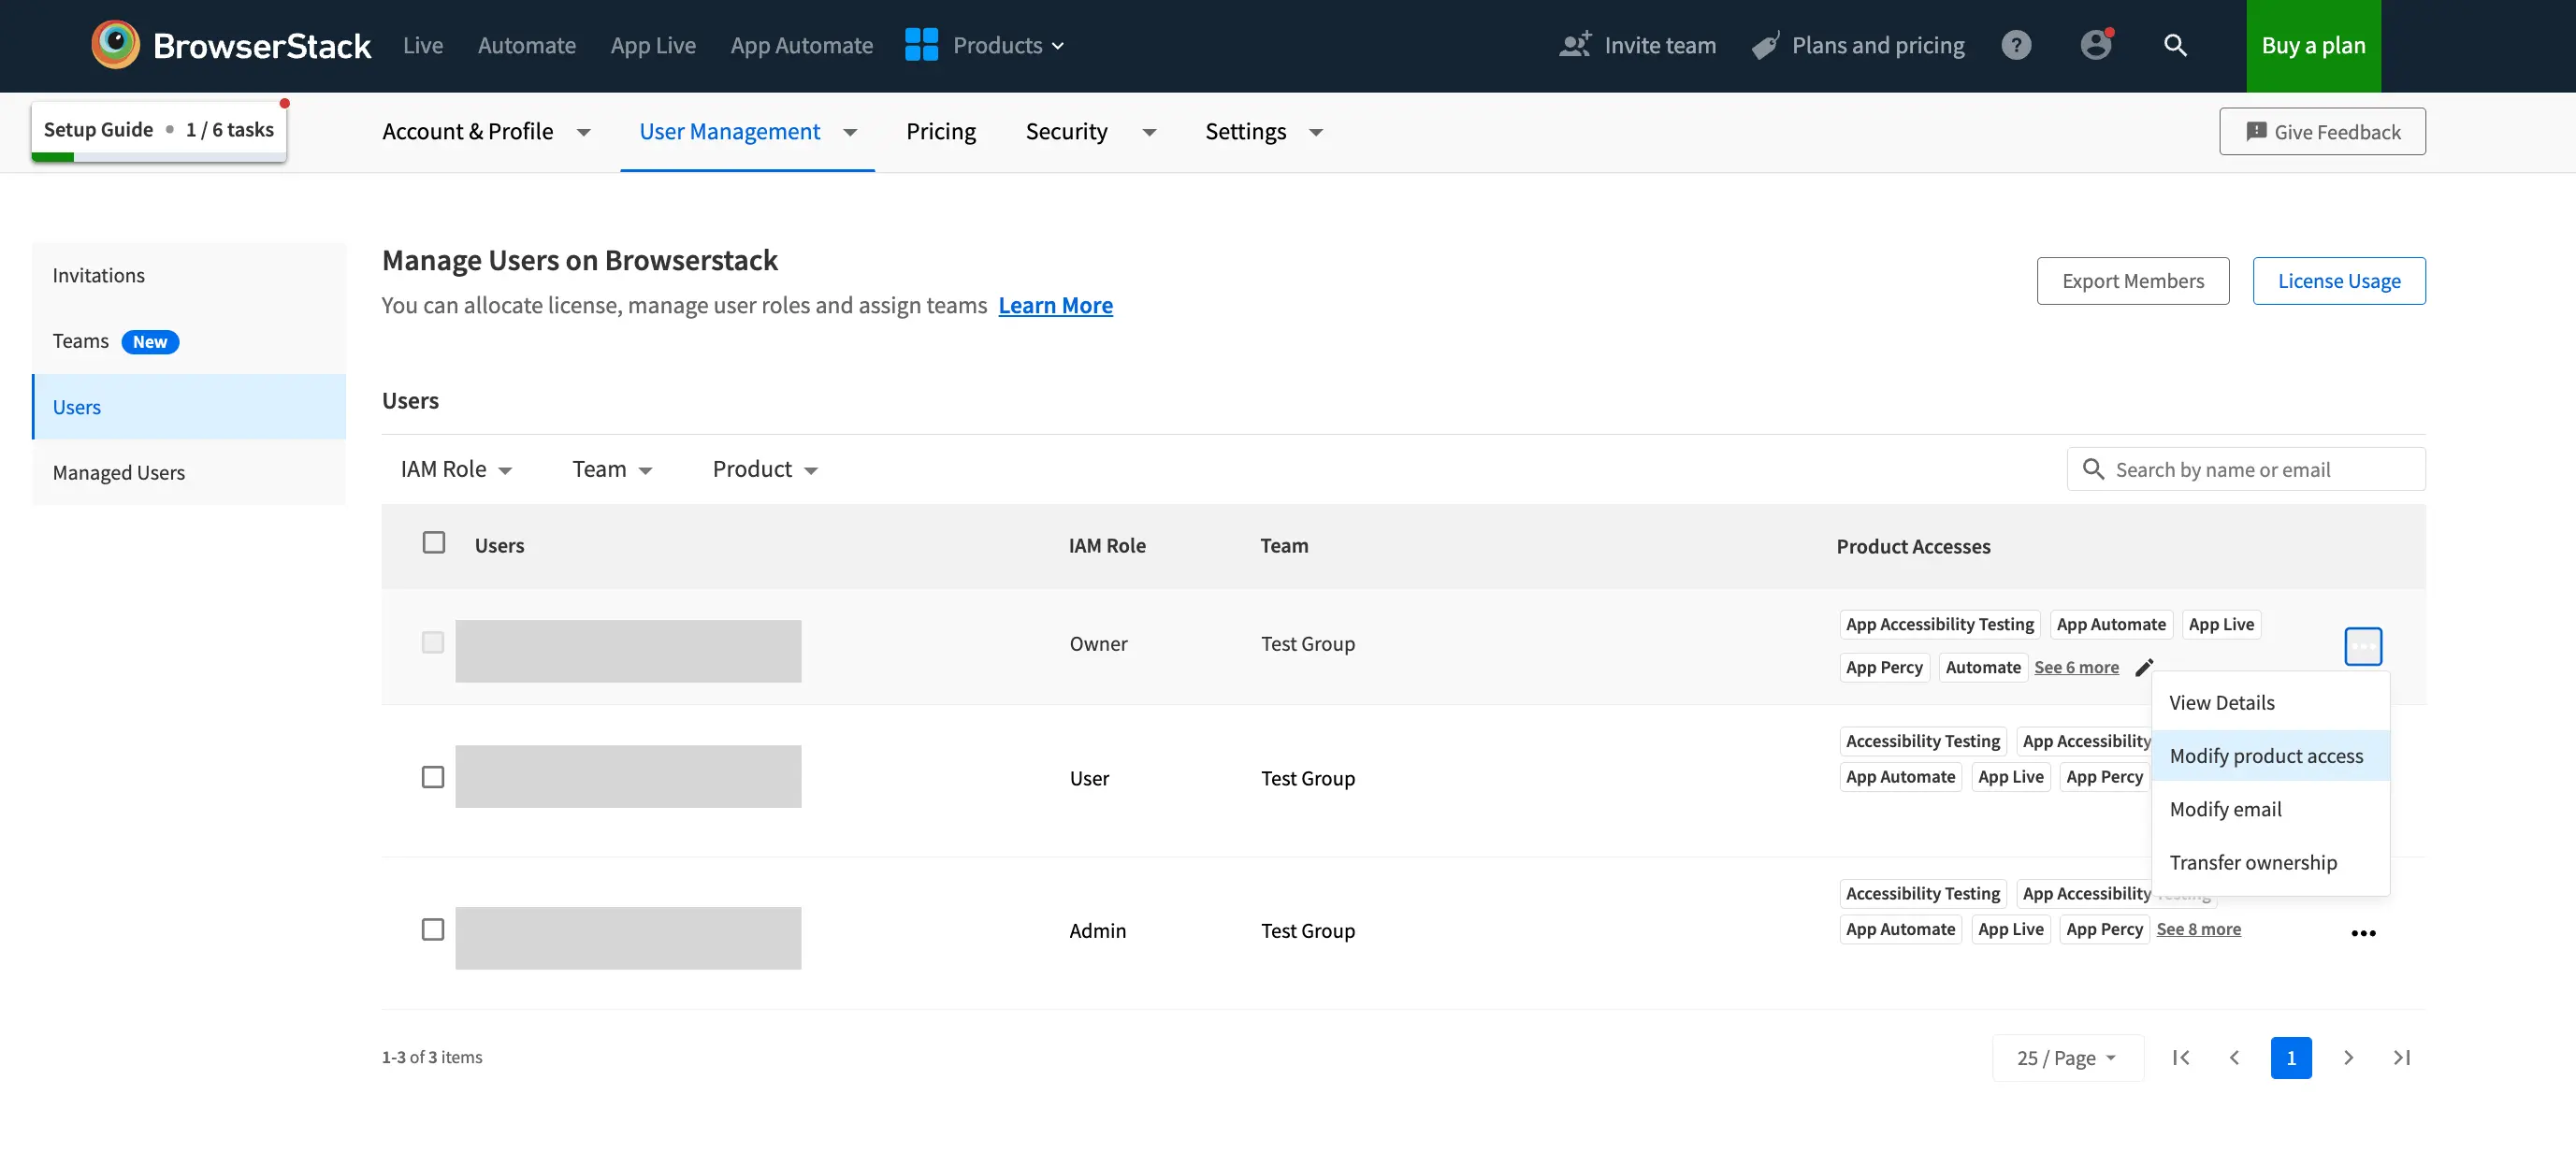
- Locate the user in the user list, click the 3 dots (…) icon in the user’s row, select Modify email.
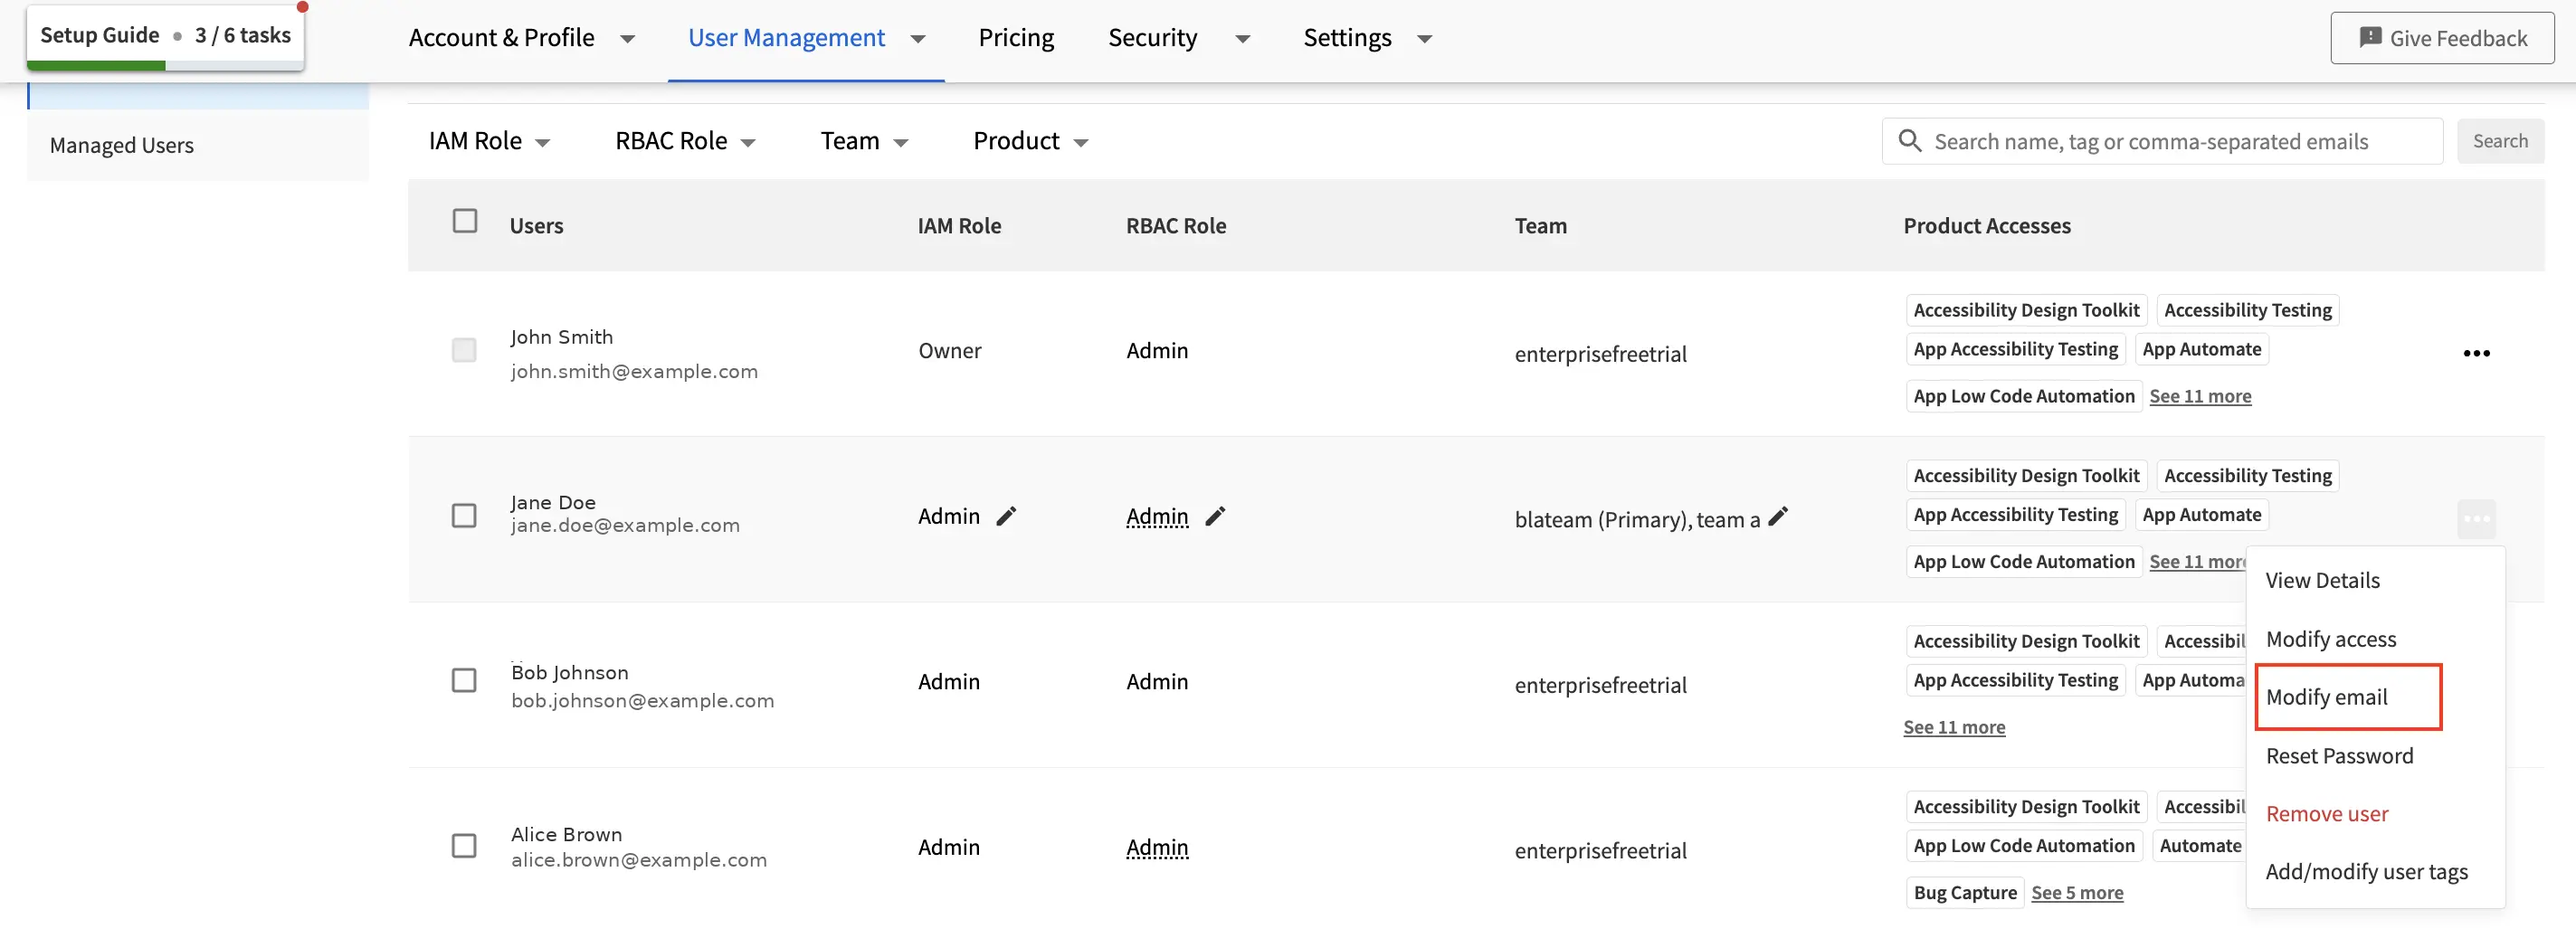
- Enter the new email address and click Update Email. The new address can be on the same domain or on a different domain that the organization owns.
Update domain for SSO-enabled accounts
- Log in to your BrowserStack account as an Owner or Admin.
- Click the User Profile icon in the top-right corner, then select User Management and click Users.
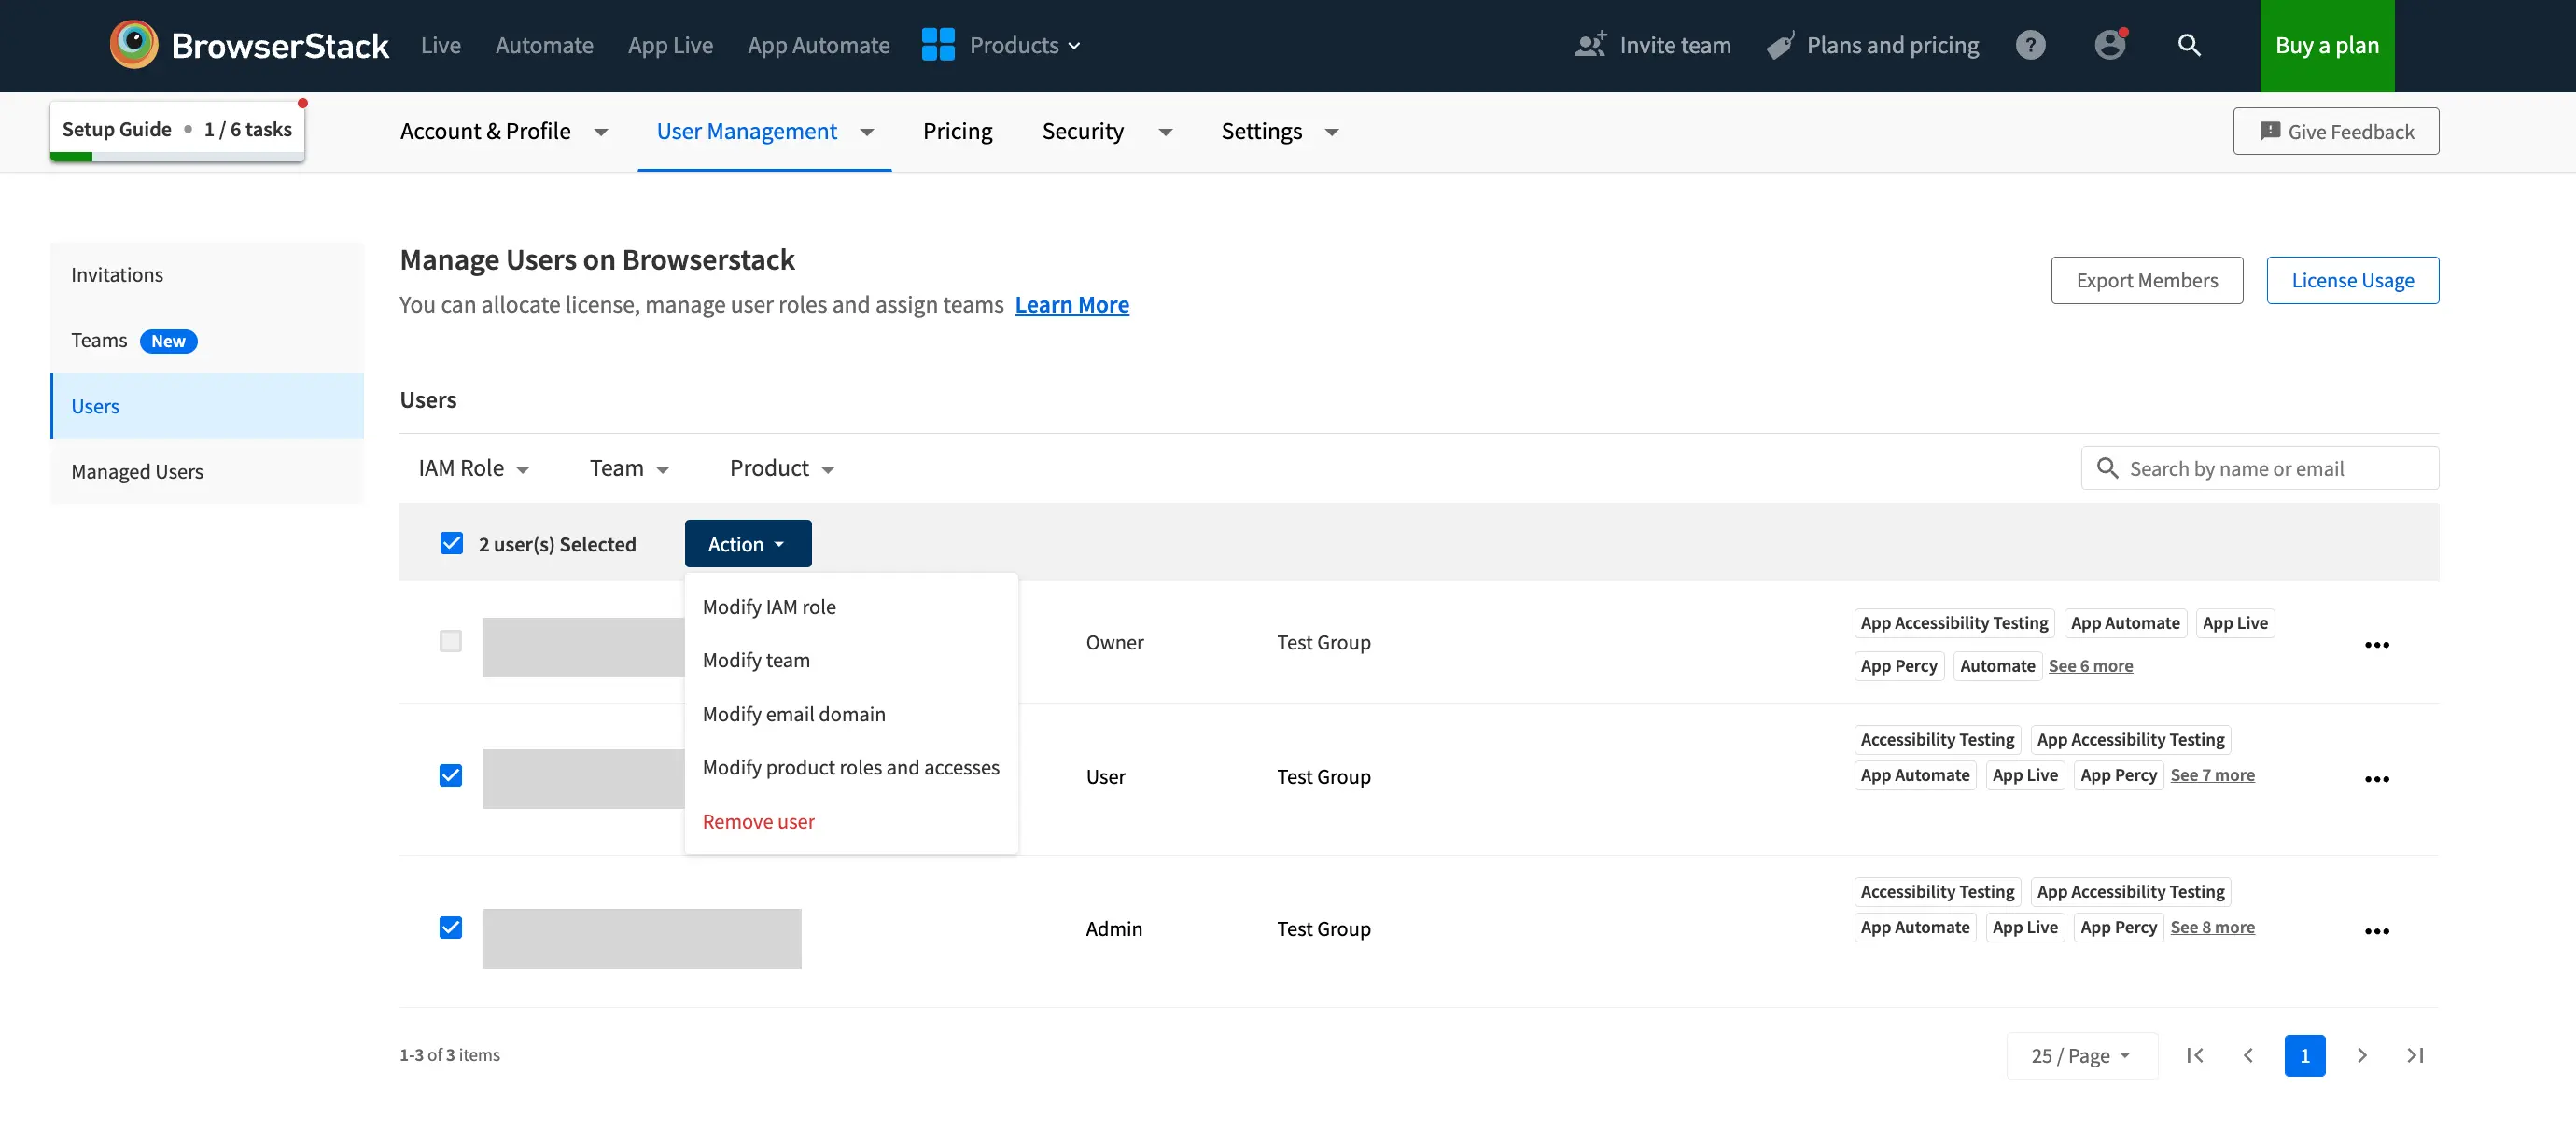
- Select the users using the checkboxes, click the Action dropdown, and select Modify email domain.
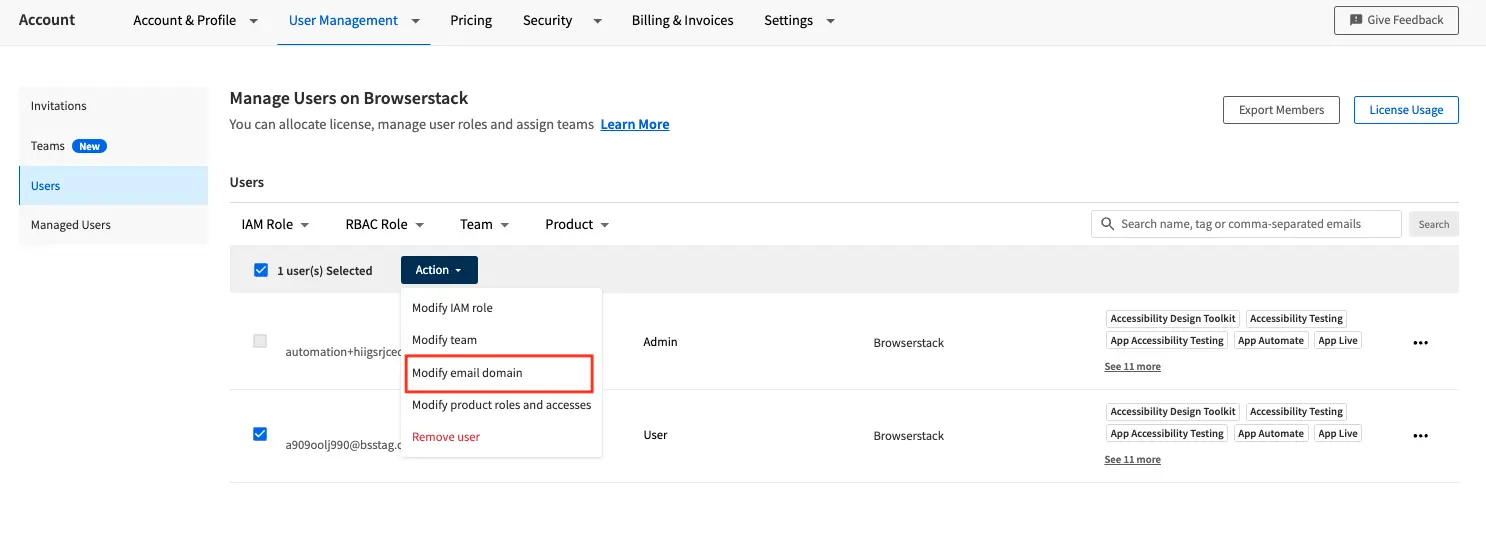
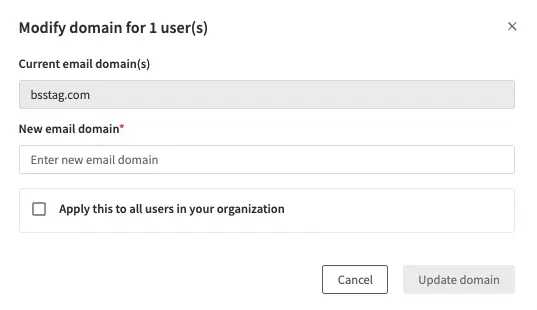
- In the Modify domain dialog, the Current email domain(s) field shows the existing domain(s) for the selected users.
- Enter the New email domain, optionally select Apply this to all users in your organization to update every user in the organization, and click Update domain.
The change applies immediately. If the new domain is outside the mandatory SSO list configured under Account Settings → Single Sign-On, affected users can sign in with a password instead of going through the IdP.
We're sorry to hear that. Please share your feedback so we can do better
Contact our Support team for immediate help while we work on improving our docs.
We're continuously improving our docs. We'd love to know what you liked
We're sorry to hear that. Please share your feedback so we can do better
Contact our Support team for immediate help while we work on improving our docs.
We're continuously improving our docs. We'd love to know what you liked
Thank you for your valuable feedback!