Report bugs using Jira integration
Live enables you to report bugs or issues while testing your websites or web apps through Jira integration. With Jira integration, all metadata about your test session such as the browser and its version, OS and its version, device, resolution, etc. are automatically added. You can also annotate screenshots while reporting an issue by using the Live annotation toolbar.
Prerequisites
Ensure that you have an Atlassian user account and have access to the Jira account you want to integrate.
Integrate Jira with your Live session
You can use any one of the following ways to integrate Jira with Live:
- Integrate using your BrowserStack account Integrations page
- Integrate from ongoing Live test session
Integrate Jira from the Integrations page
To integrate Jira from the Integrations page, follow these steps:
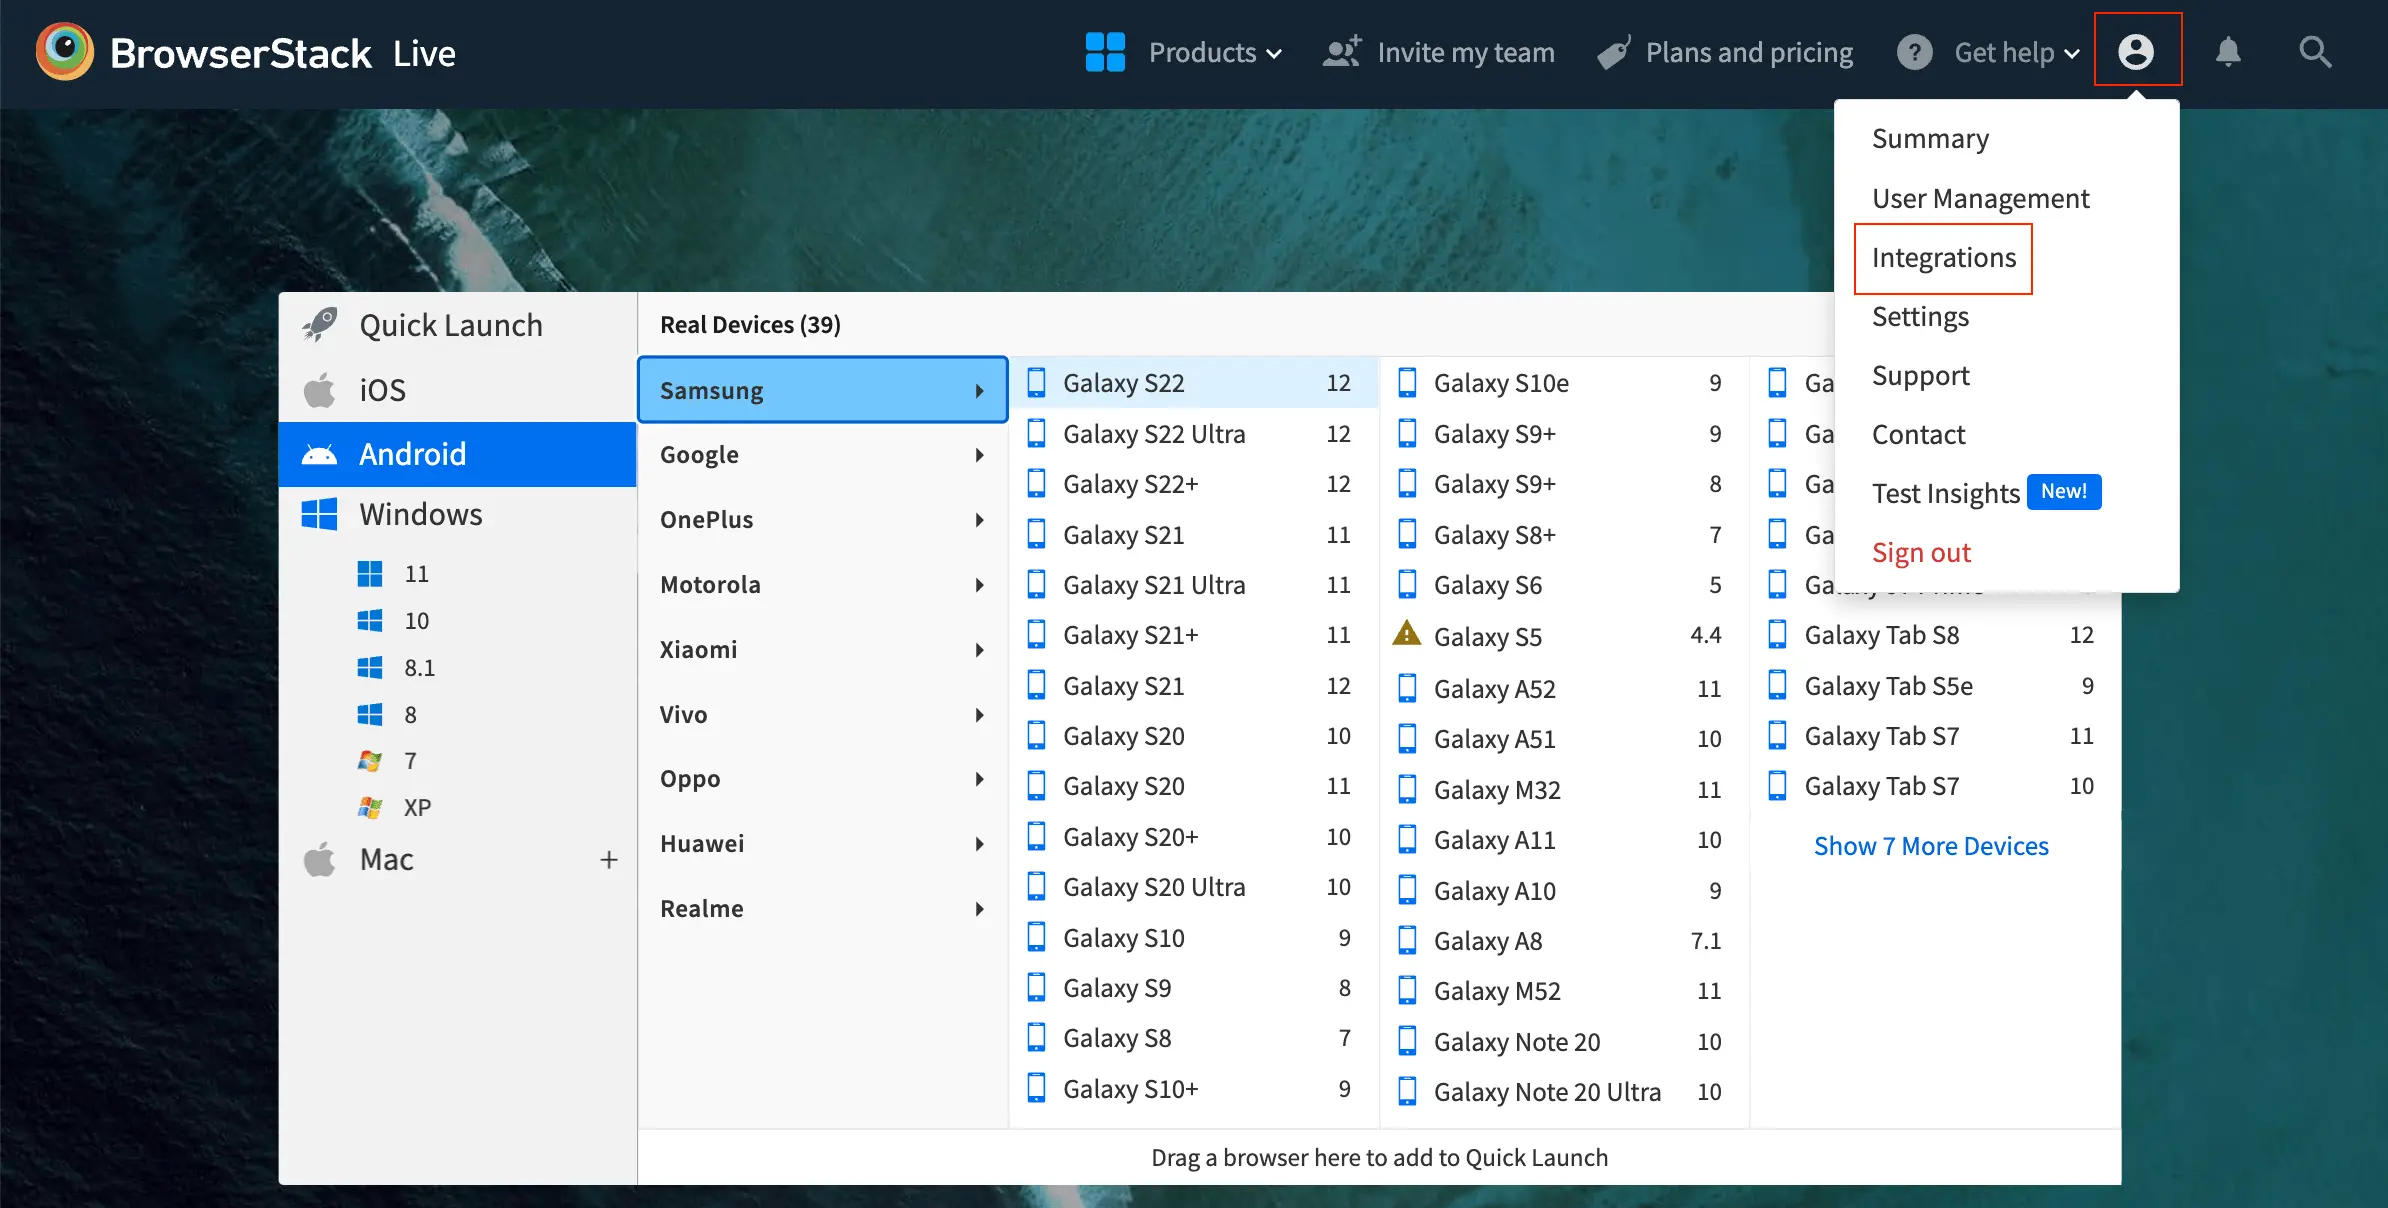
- Sign in to BrowserStack Live.
- Hover your cursor over the Profile icon on the top navigation bar, and click Integrations from the drop-down list.
- On the Integrations page, select Jira Software > Connect.
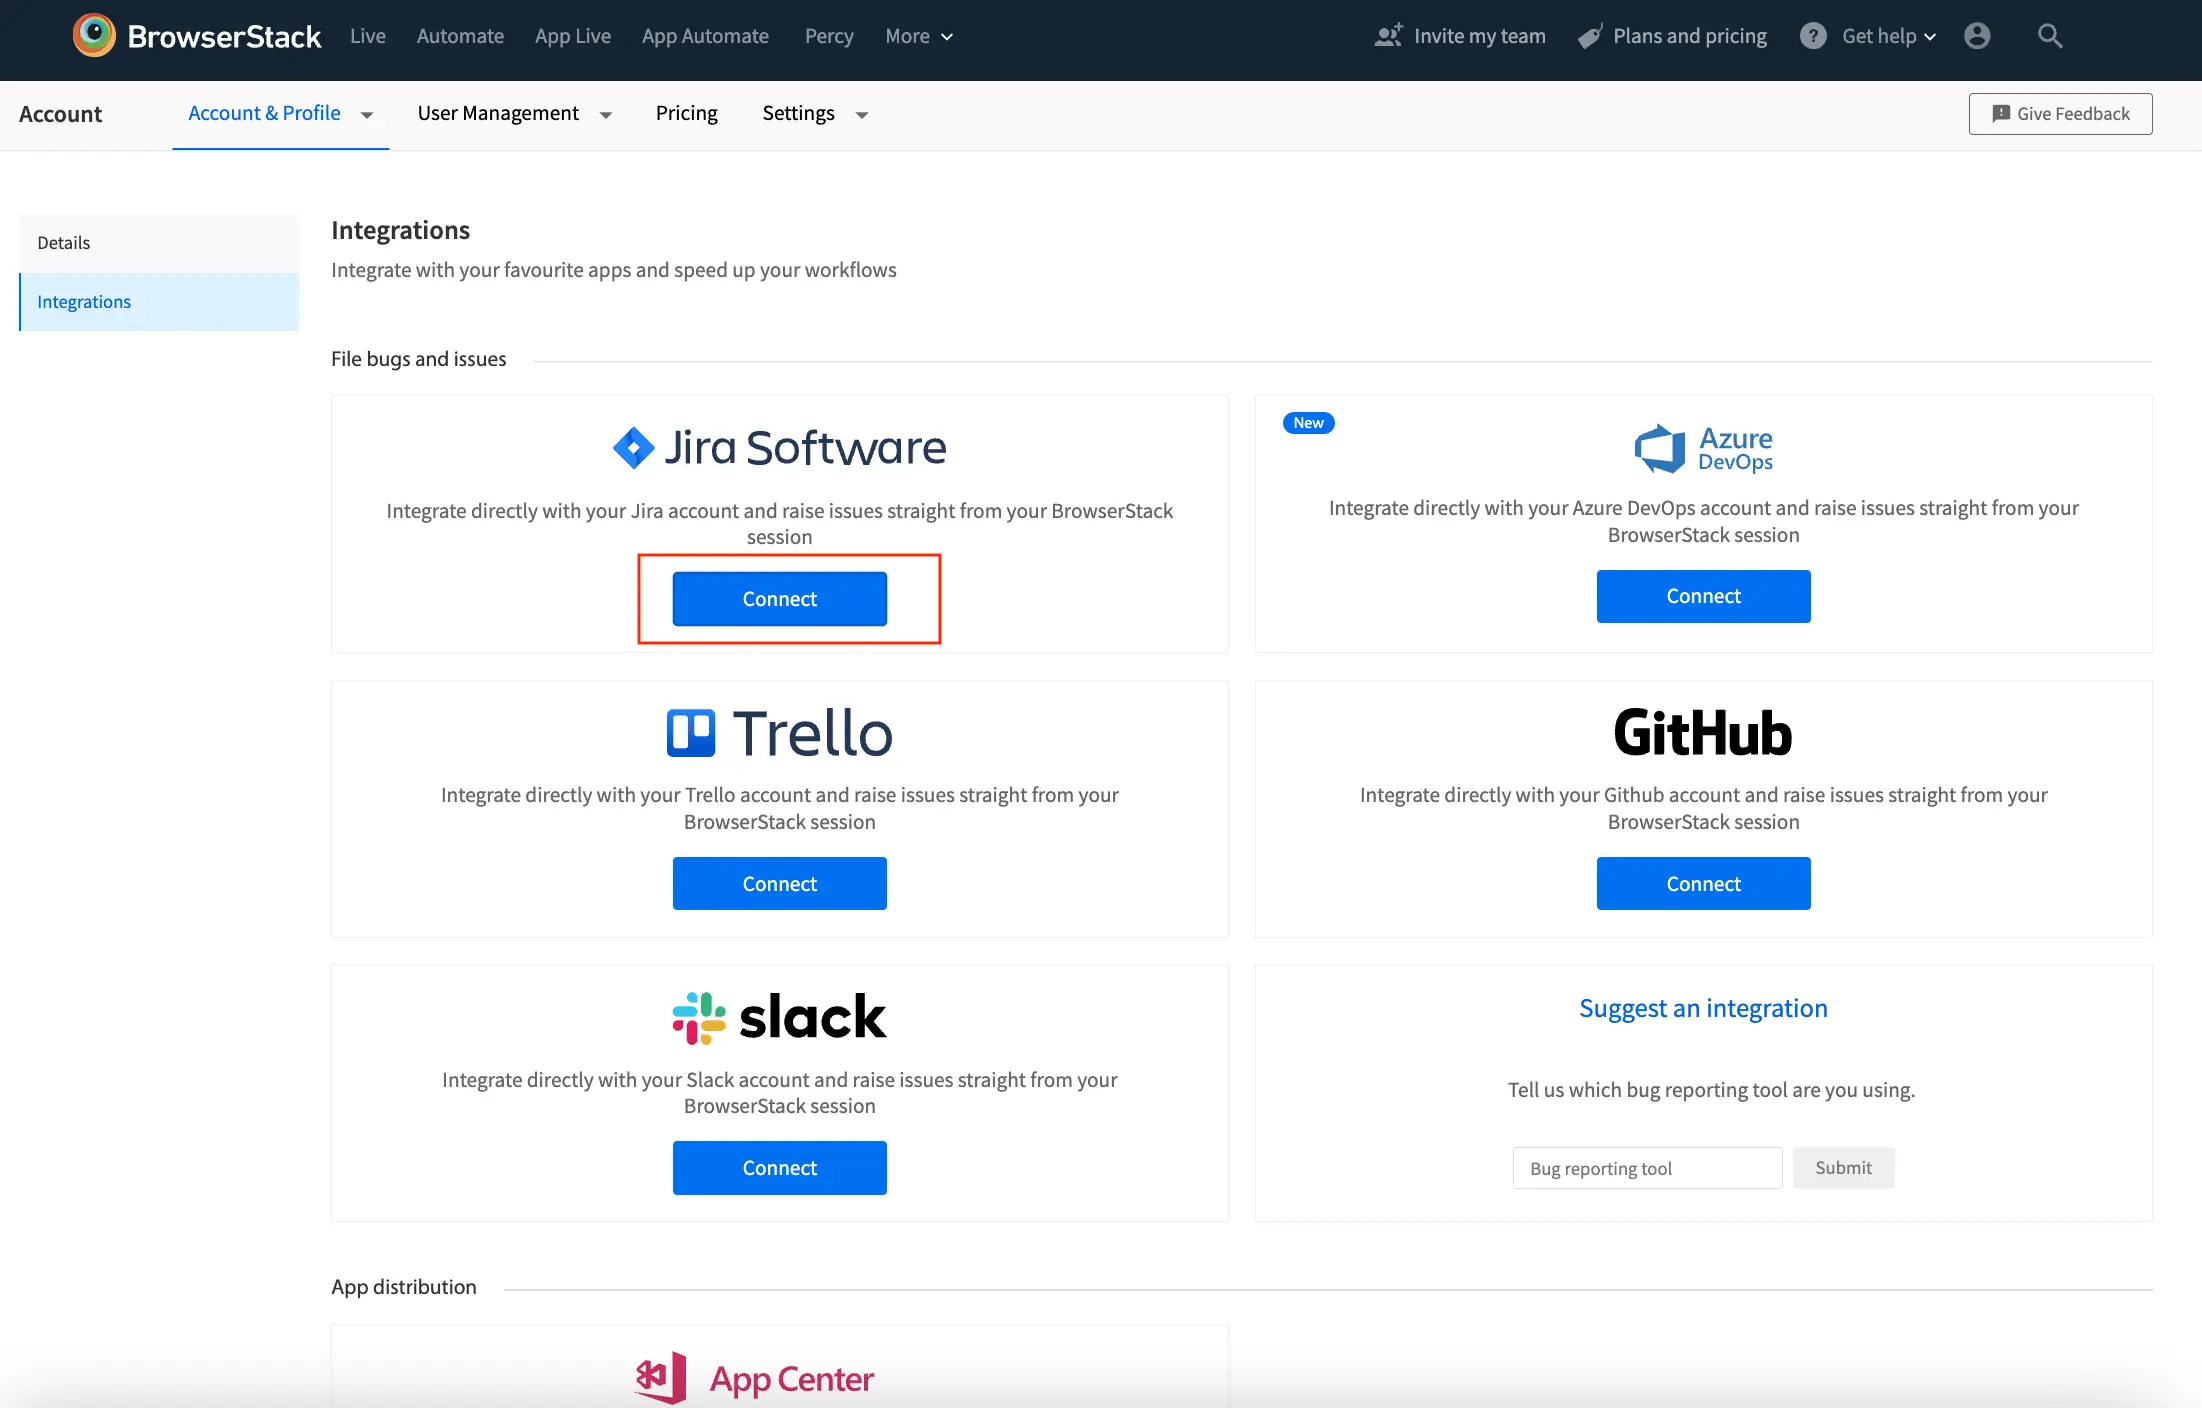
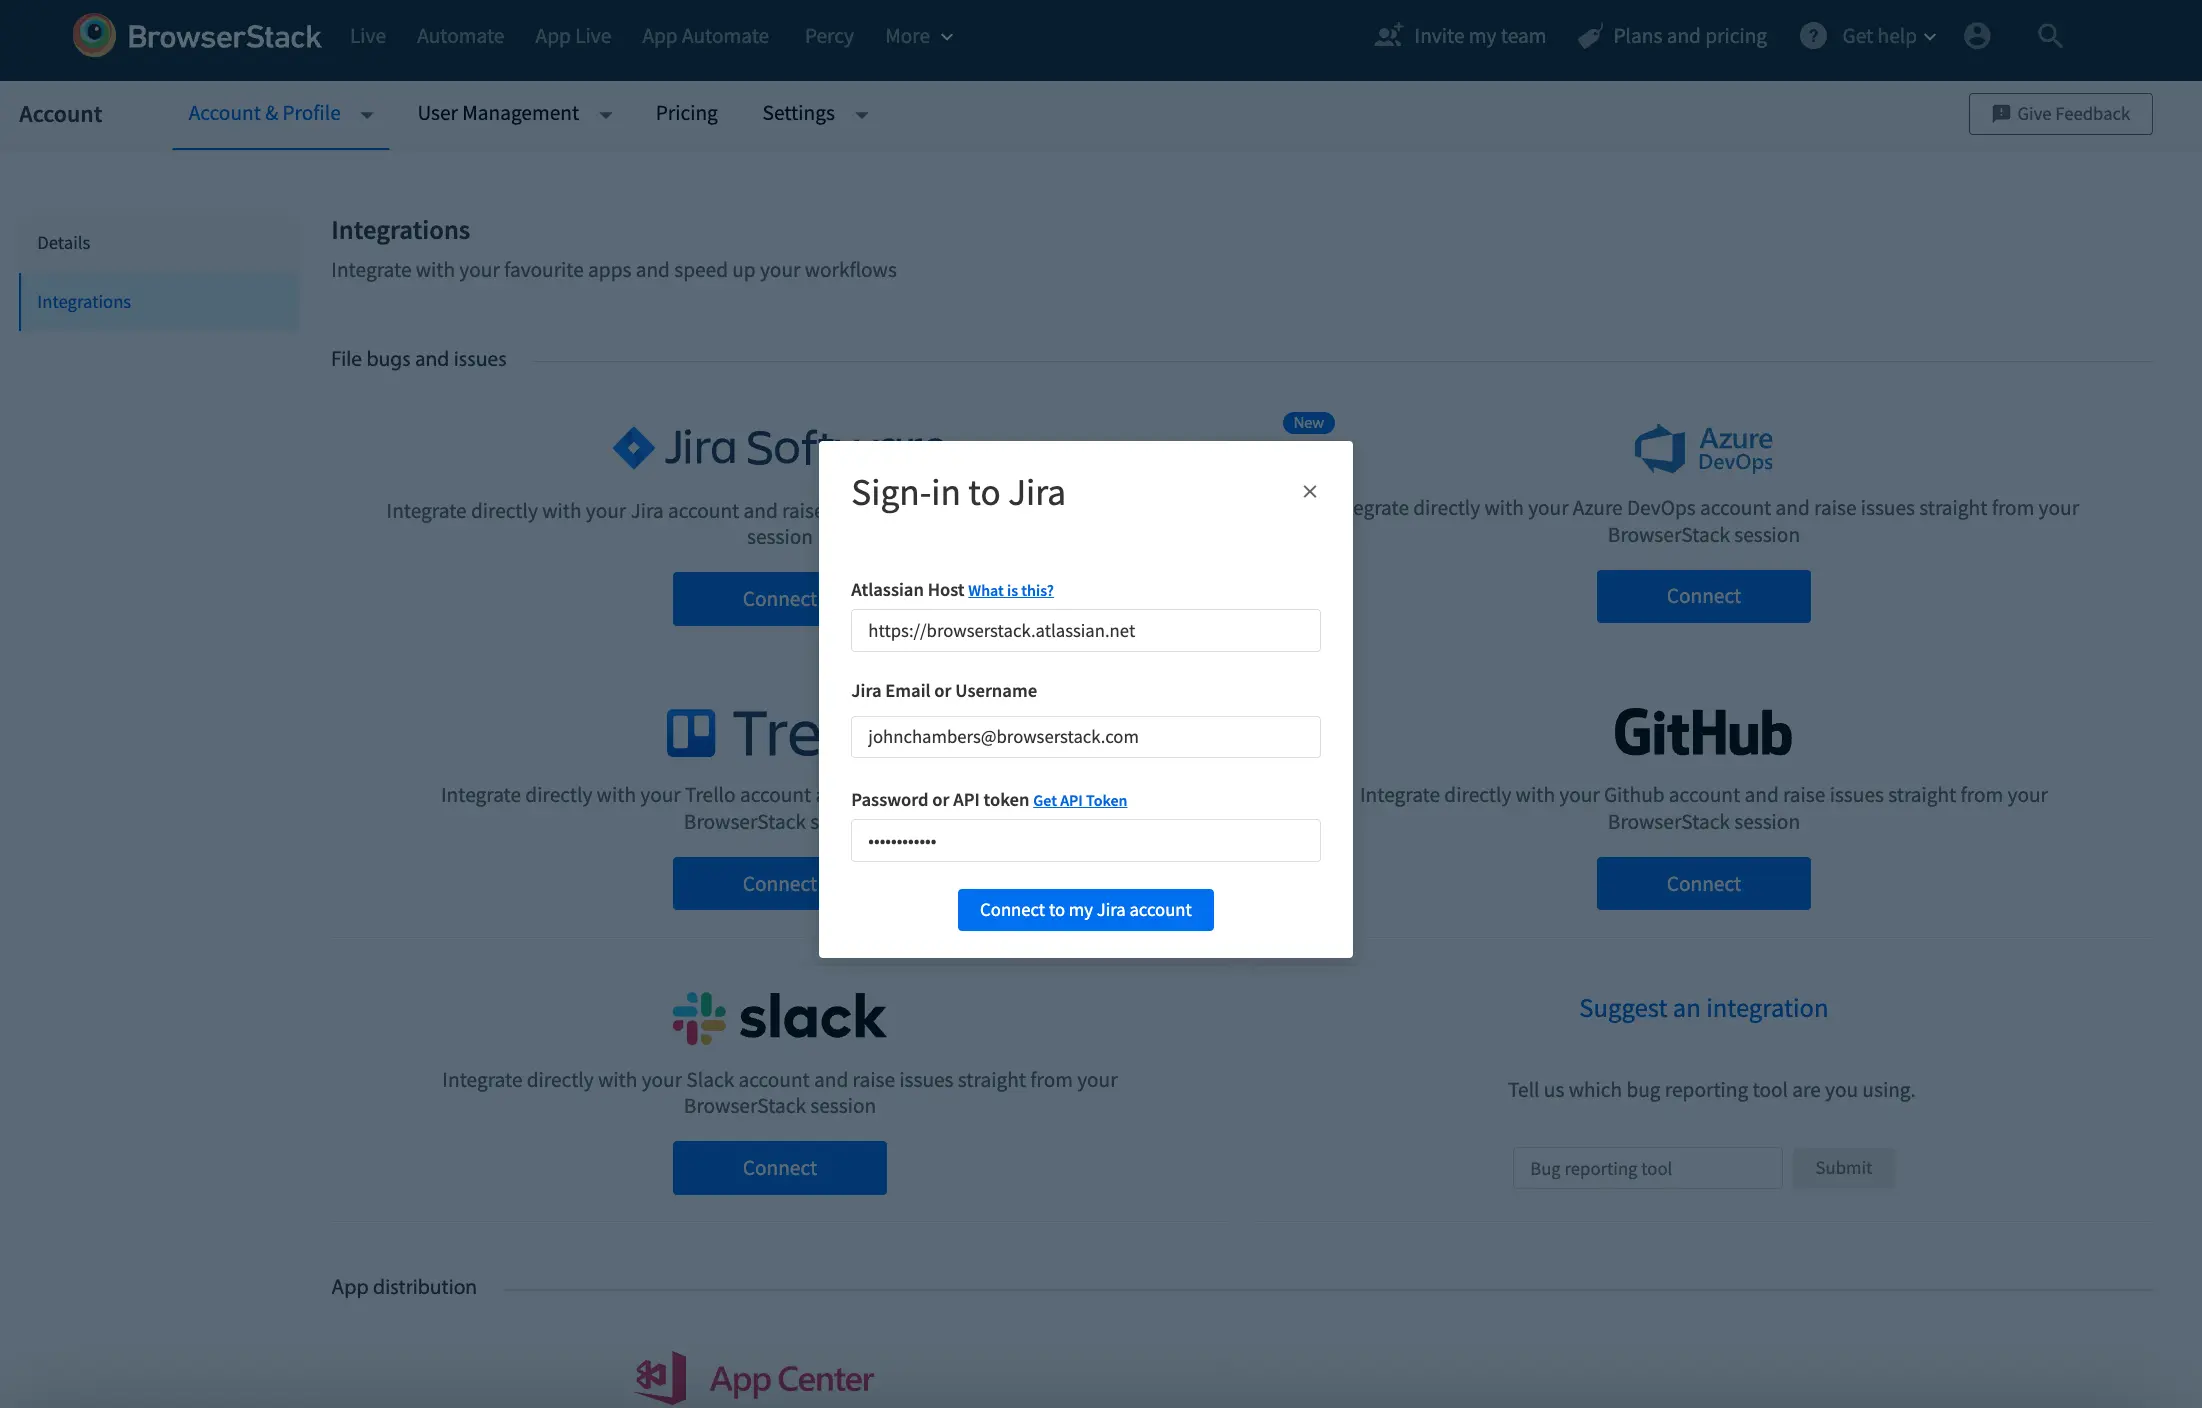
The Sign-in to Jira prompt is displayed. - On the Sign-in to Jira prompt, enter the following Jira credentials:
-
Atlassian Host: The Atlassian or Jira server URL you use to access Jira. For example,
company-name.atlassain.net. To know more, see FAQ. - Jira Email or Username: The Jira email ID or username you use to access your Jira application.
-
Password or API Token: The password you use to log in to Jira or an API token.
If you use two-step authentication for Jira, you can use a password or an API token. If you use Single Sign-On to log in to Jira, then you must use an API token.
To generate an API token:- Click Get API Token. The Atlassian API Tokens page opens.
- Create and copy the generated API token. For detailed steps, see Atlassian’s documentation.
- Paste the copied API token in the Password or API token field on the Sign-in to Jira prompt.
-
Atlassian Host: The Atlassian or Jira server URL you use to access Jira. For example,
- Click Connect to my Jira account to integrate Jira with Live.
On the Integrations page, the Connect button becomes Disconnect. This indicates that Jira is now integrated with Live. You can now report an issue on Jira.
Integrate Jira from ongoing Live session
To integrate Jira from an ongoing Live session, follow these steps:
- Log in to the Live dashboard.
- On the Live dashboard, select the device-browser combination to start your test session.
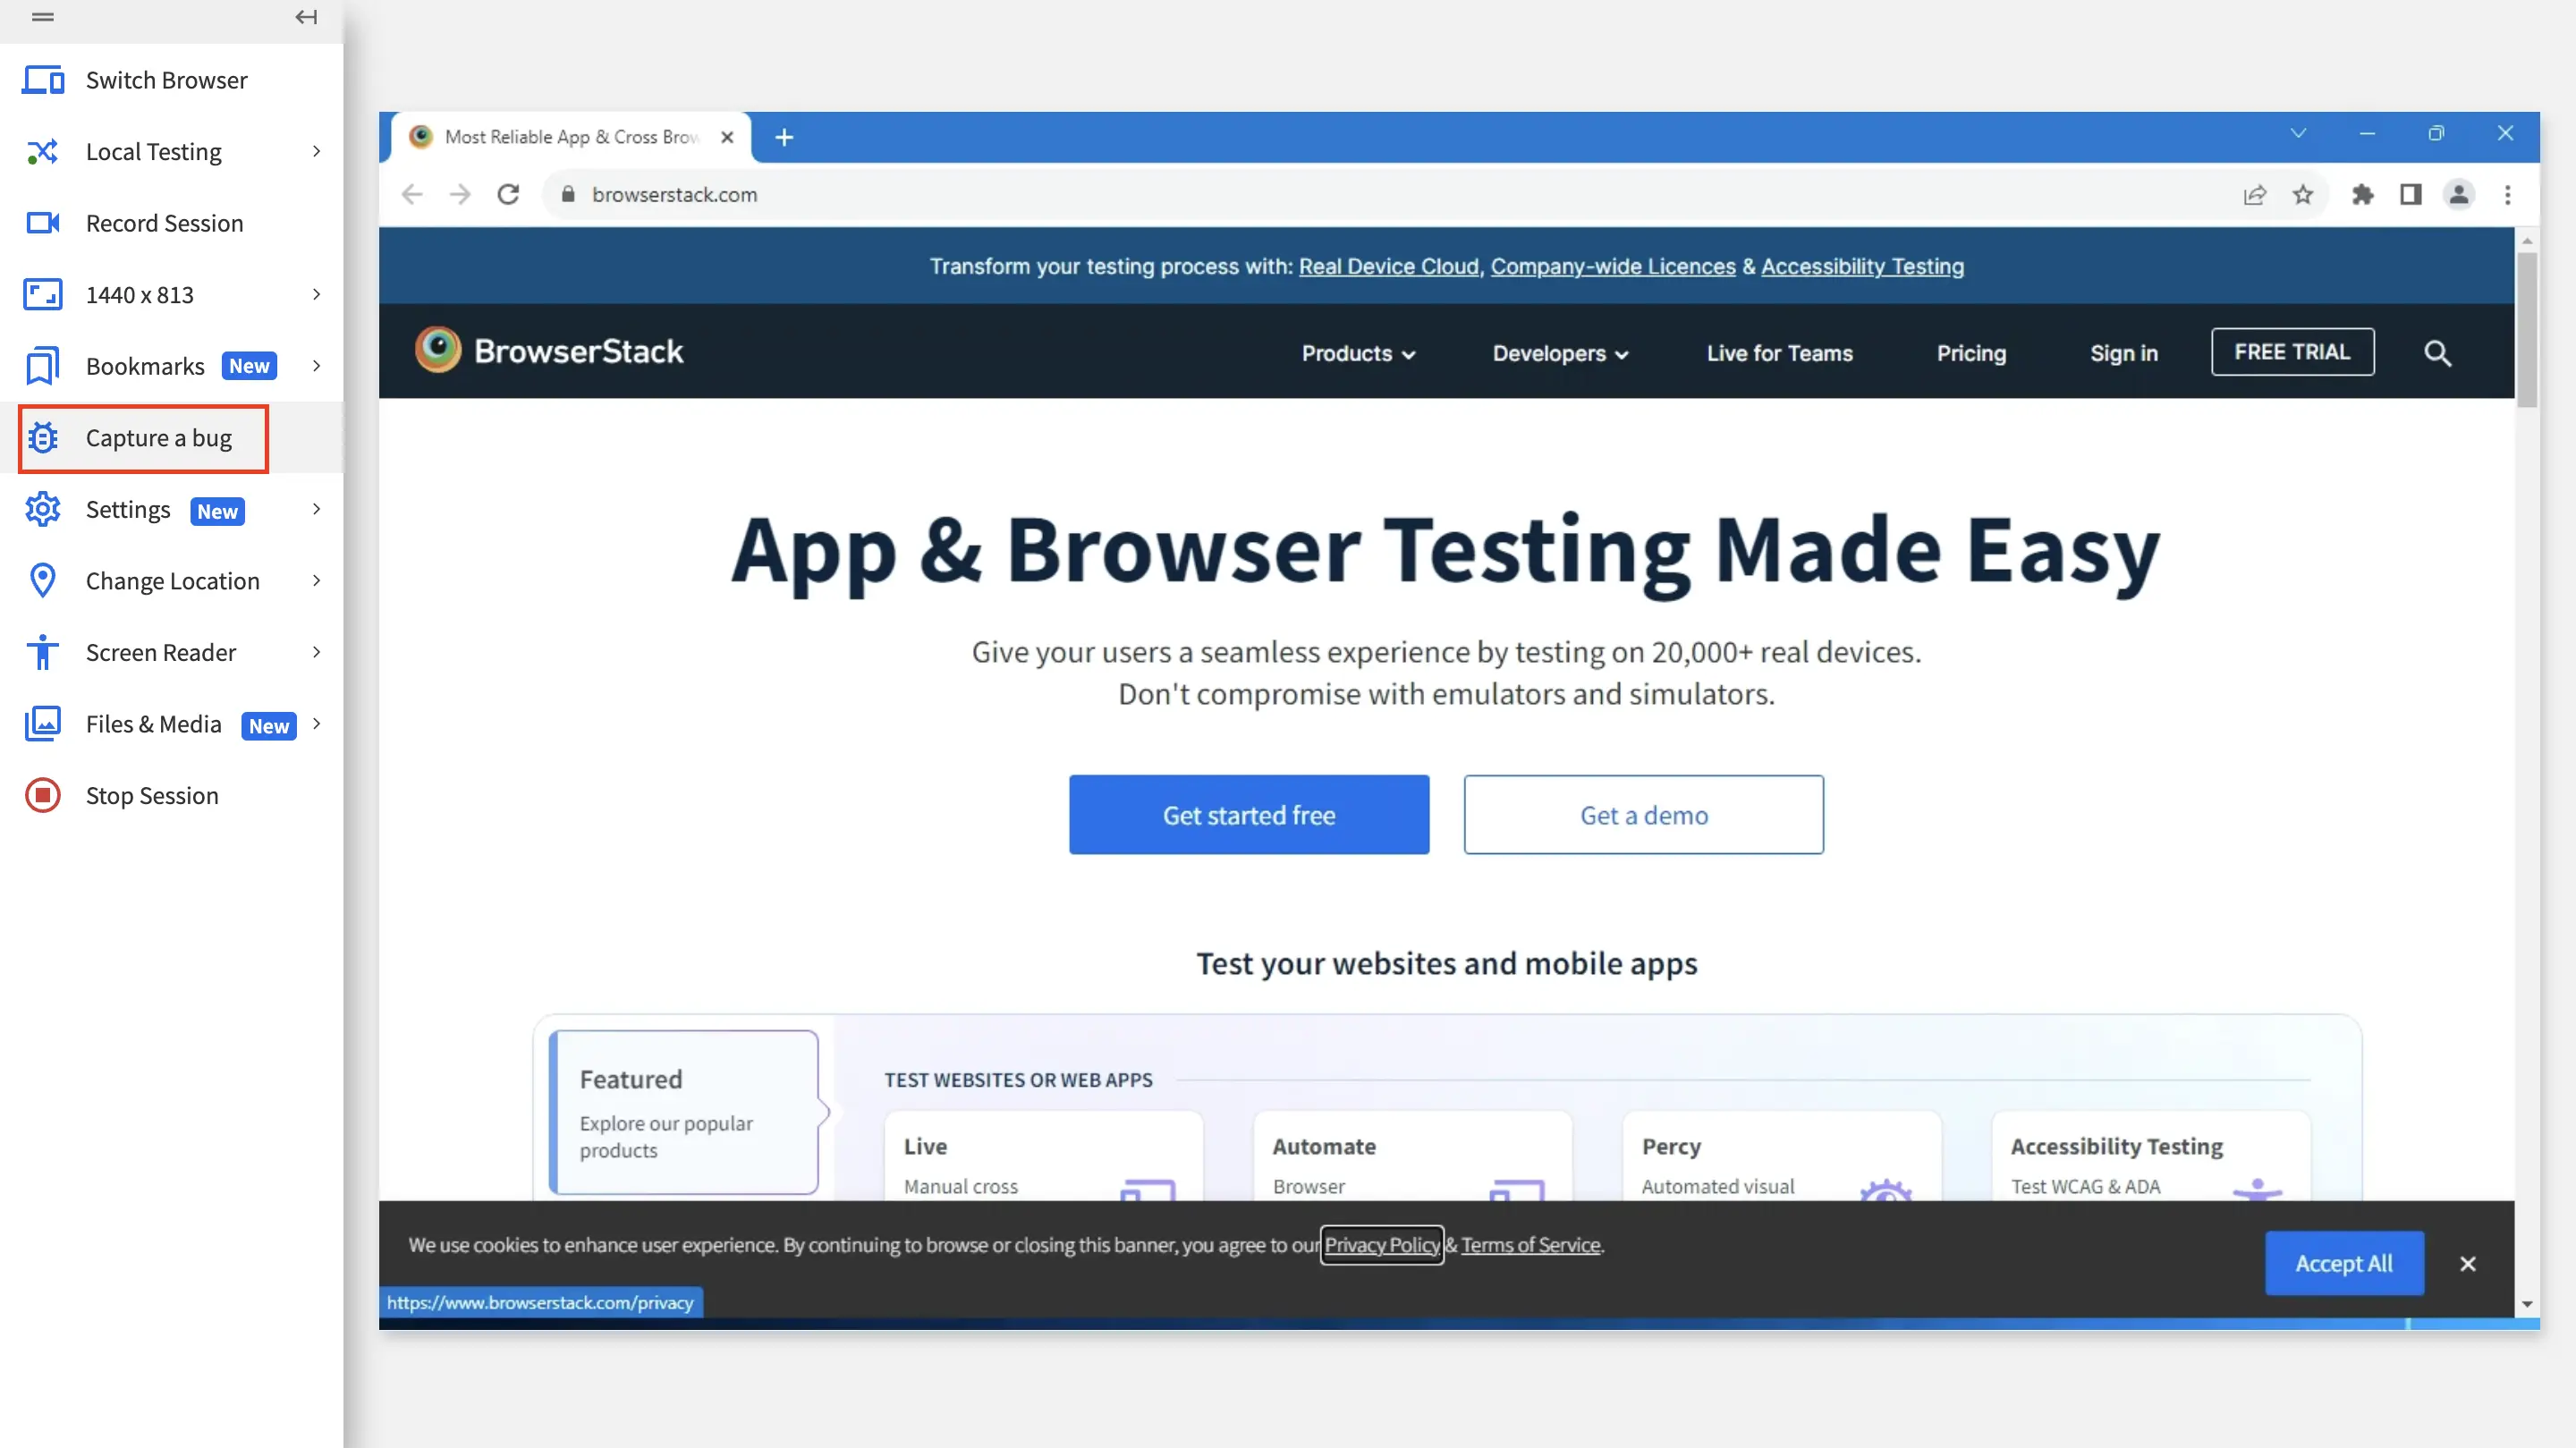
- On the Live toolbar, click Capture a bug to capture a screenshot of the bug or issue.
- On the Integrations and share bugs seamlessly pane, select Jira Software.
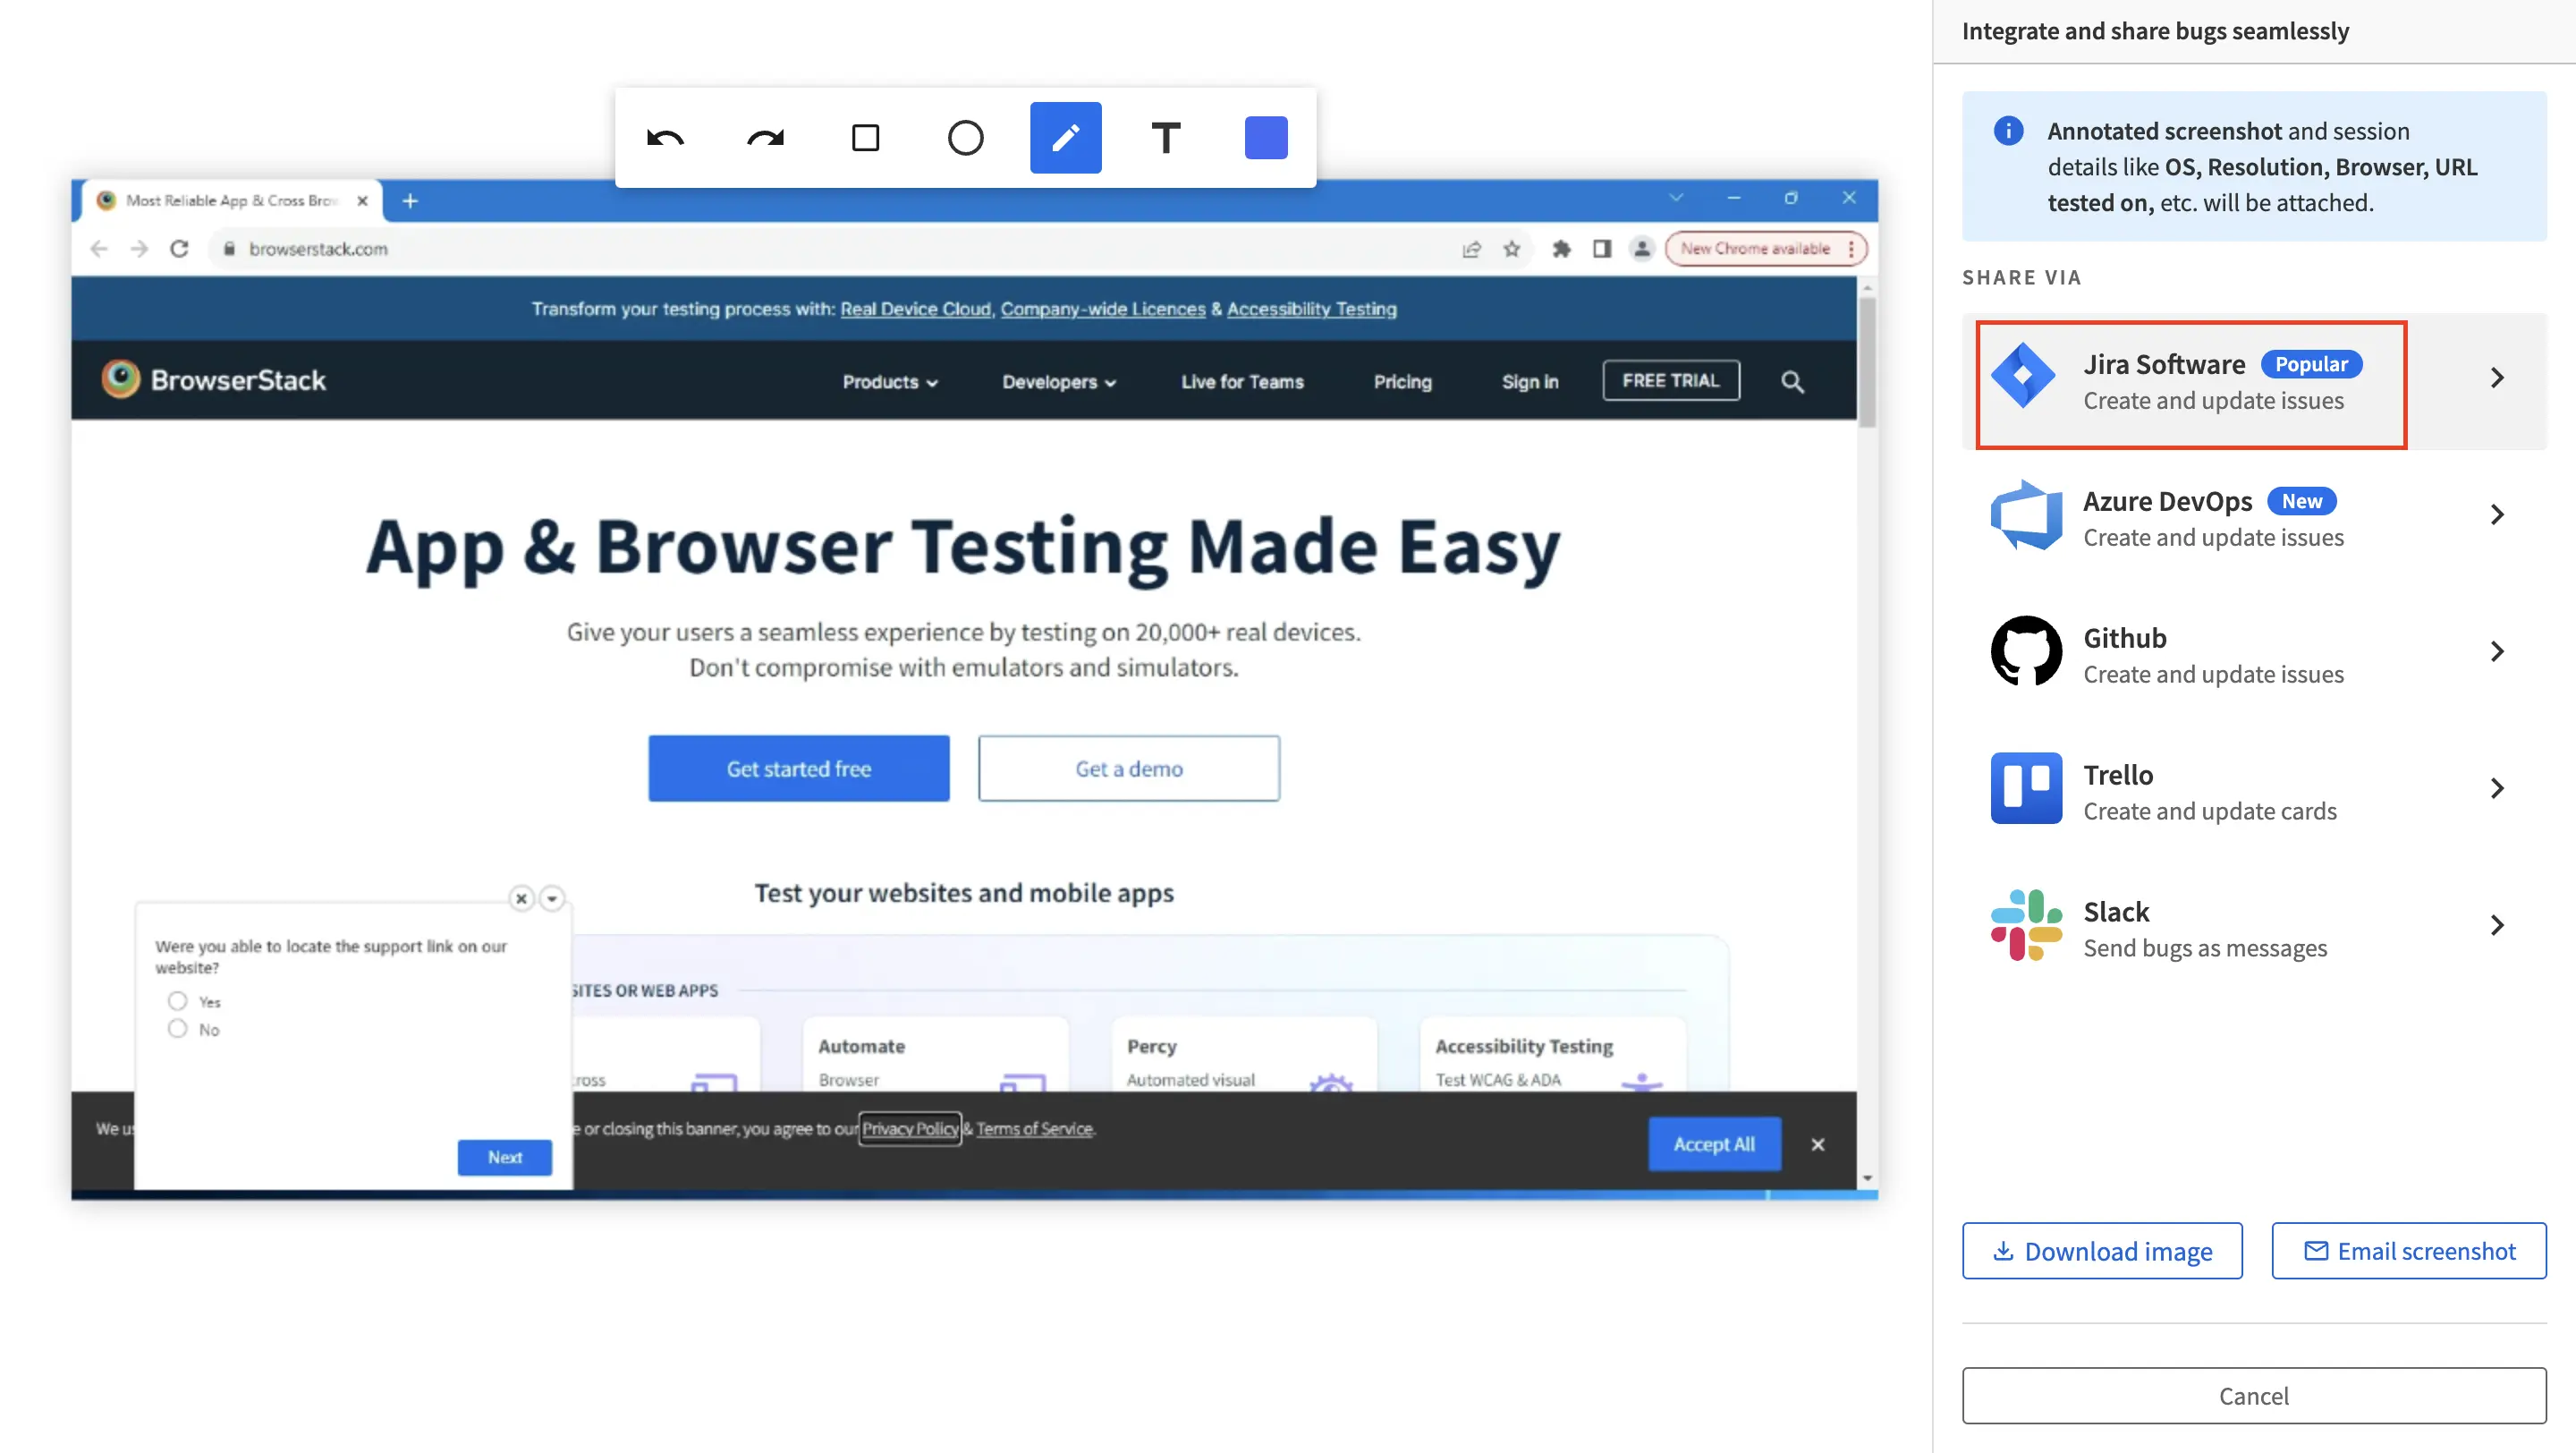 You are redirected to the Atlassian authorization page.
If you use Single Sign-On to log in to BrowserStack and Atlassian, the authorization page opens successfully.
If you do not use Single Sign-On or are logged out of Atlassian, the page might show an access denied error. In such a case, you can followstep 6to manually enter the Jira credentials. - On the Atlassian authorization page, click Accept to grant the necessary permissions to BrowserStack.
If the authorization is successful, you will be redirected to the Live test session.
A success message is displayed, confirming that Jira is integrated.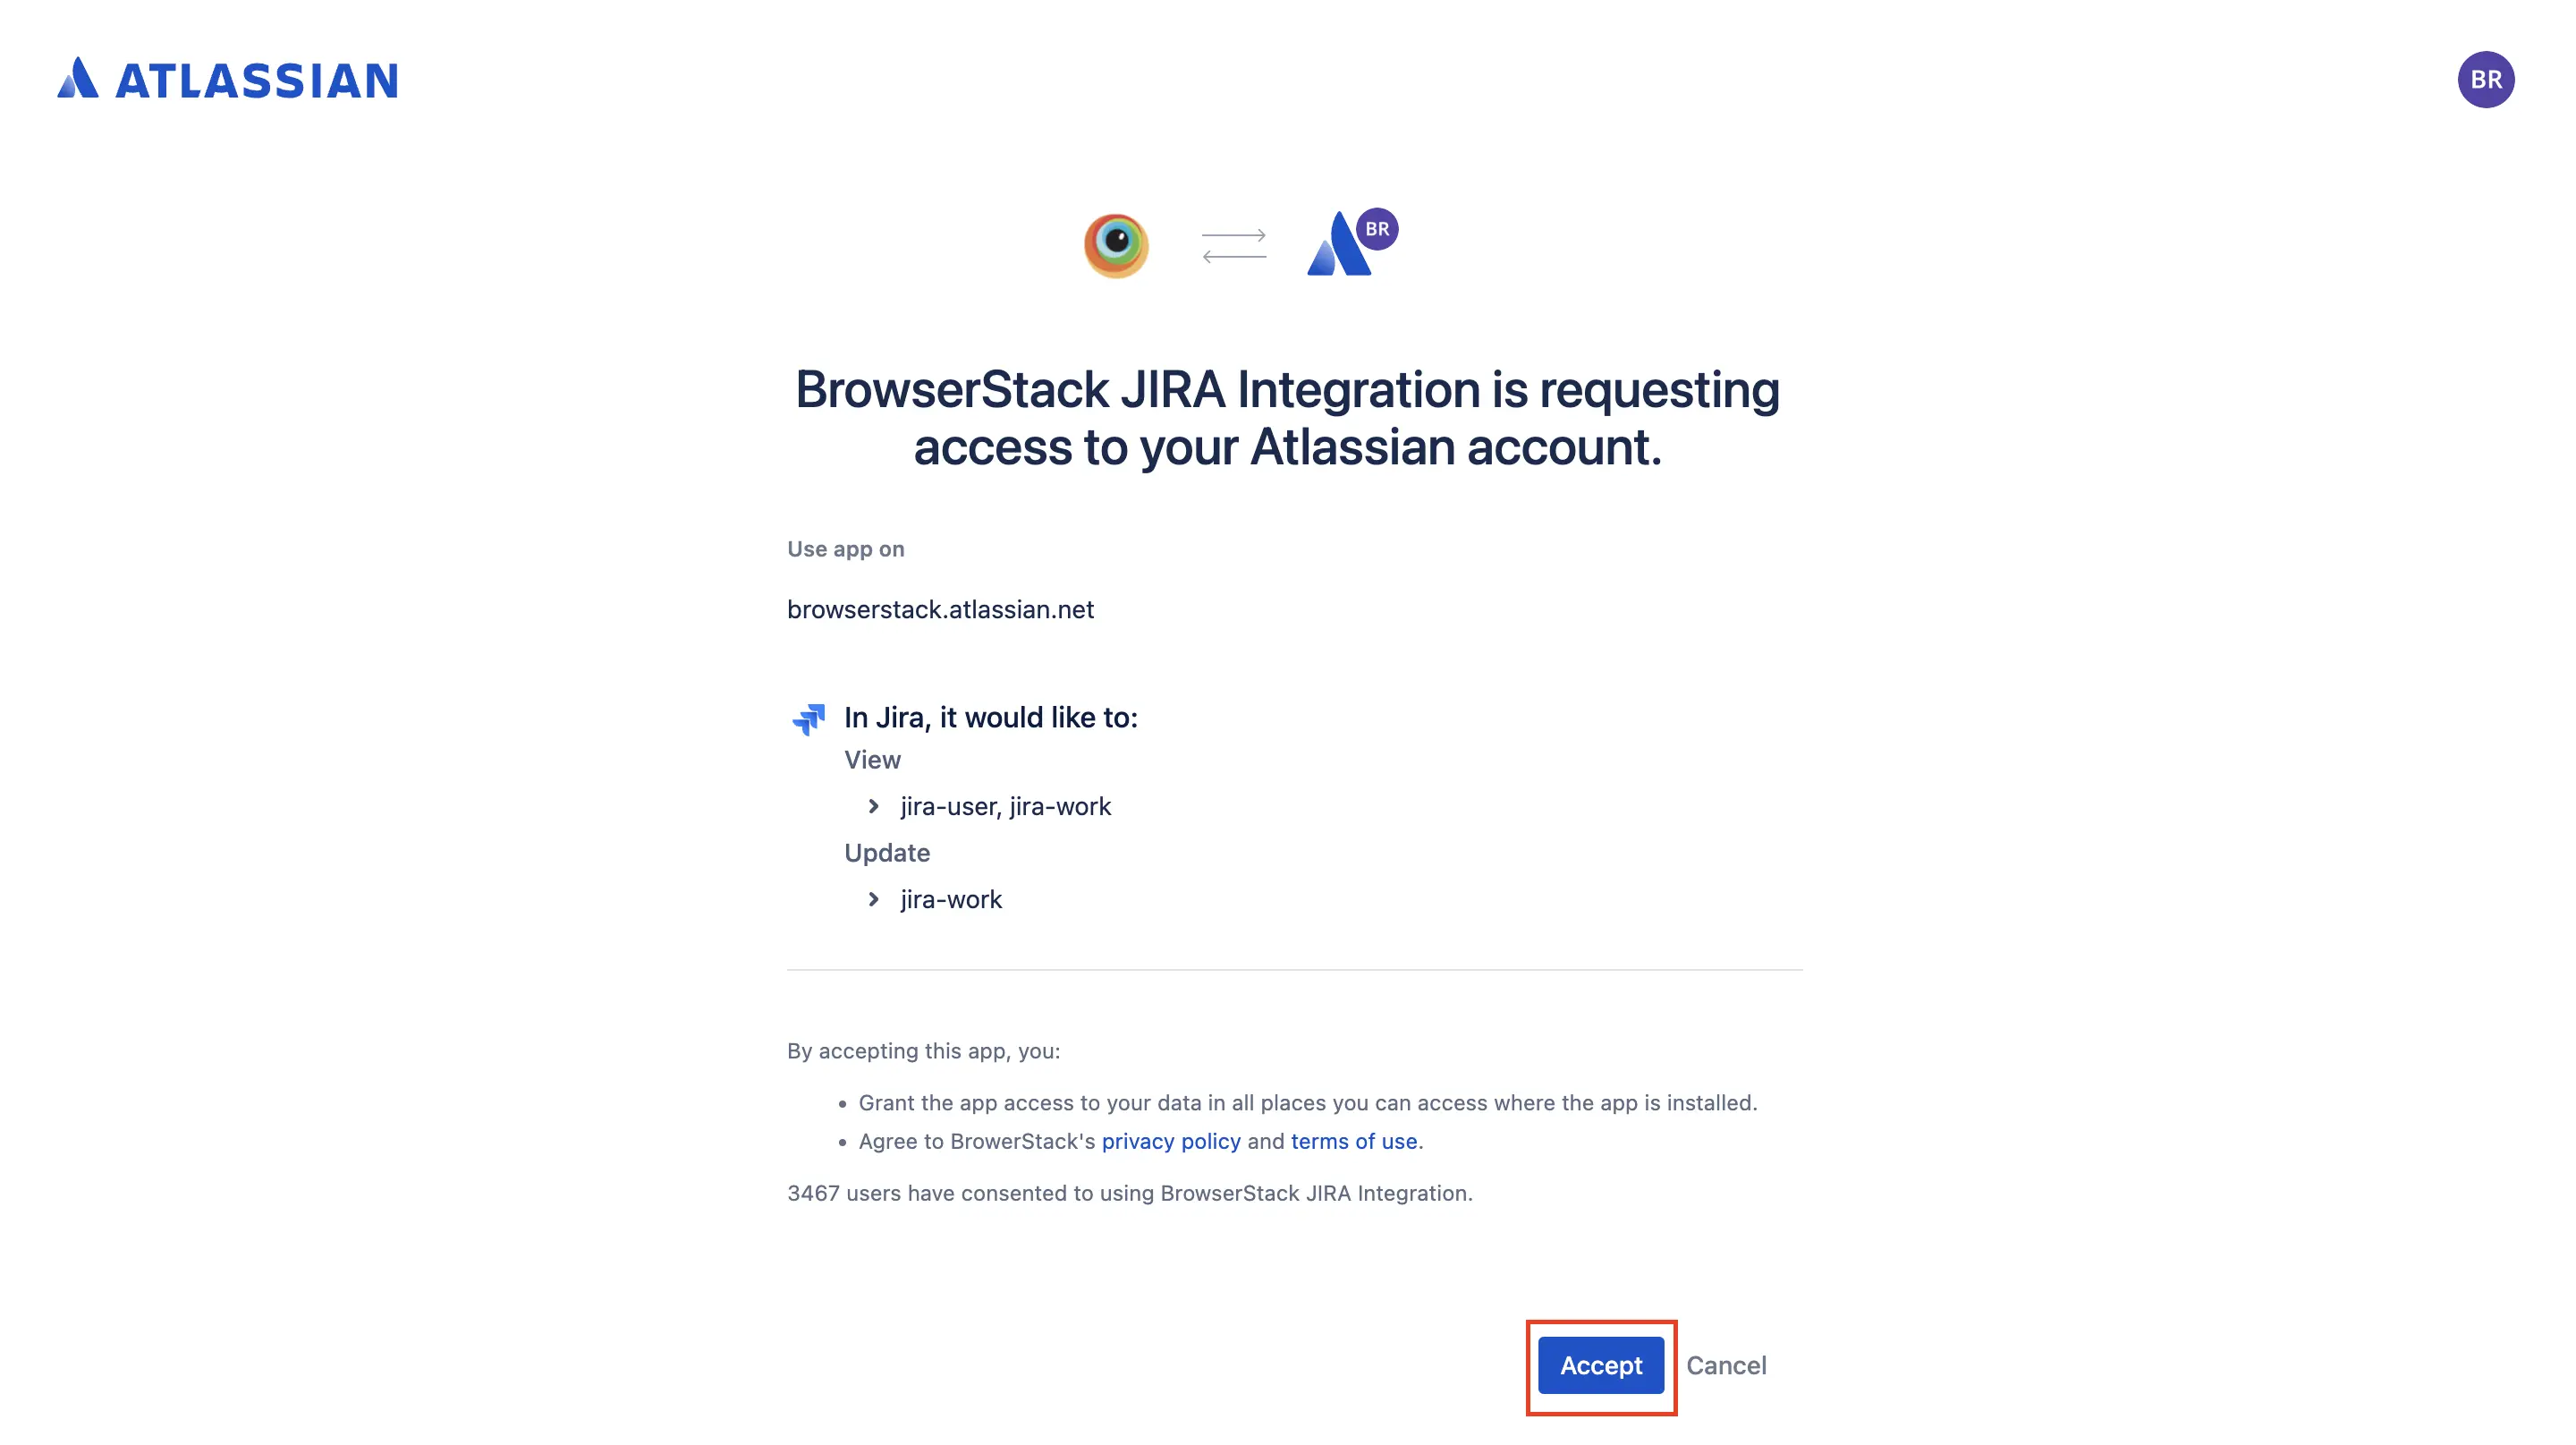
- If the previous step fails, close the Atlassian authorization page and return to the Live test session. In the Live test session, the Sign-in to Jira prompt is displayed.
On the Sign-in to Jira prompt, enter the following Jira credentials:-
Atlassian Host: The Atlassian or Jira server URL you use to access Jira. For example,
company-name.atlassain.net. To know more, see FAQ. - Jira Email or Username: The Jira email ID or username you use to access your Jira account.
-
Password or API Token: * Password or API Token: The password you use to log in to Jira or an API token.
If you use two-step authentication for Jira, you can use a password or an API token. If you use Single Sign-On to log in to Jira, then you must use an API token.
To generate an API token:- Click Get API Token. The Atlassian API Tokens page opens.
- Create and copy the generated API token. For detailed steps, see Atlassian’s documentation.
- Paste the copied API token in the Password or API token field on the Sign-in to Jira prompt.
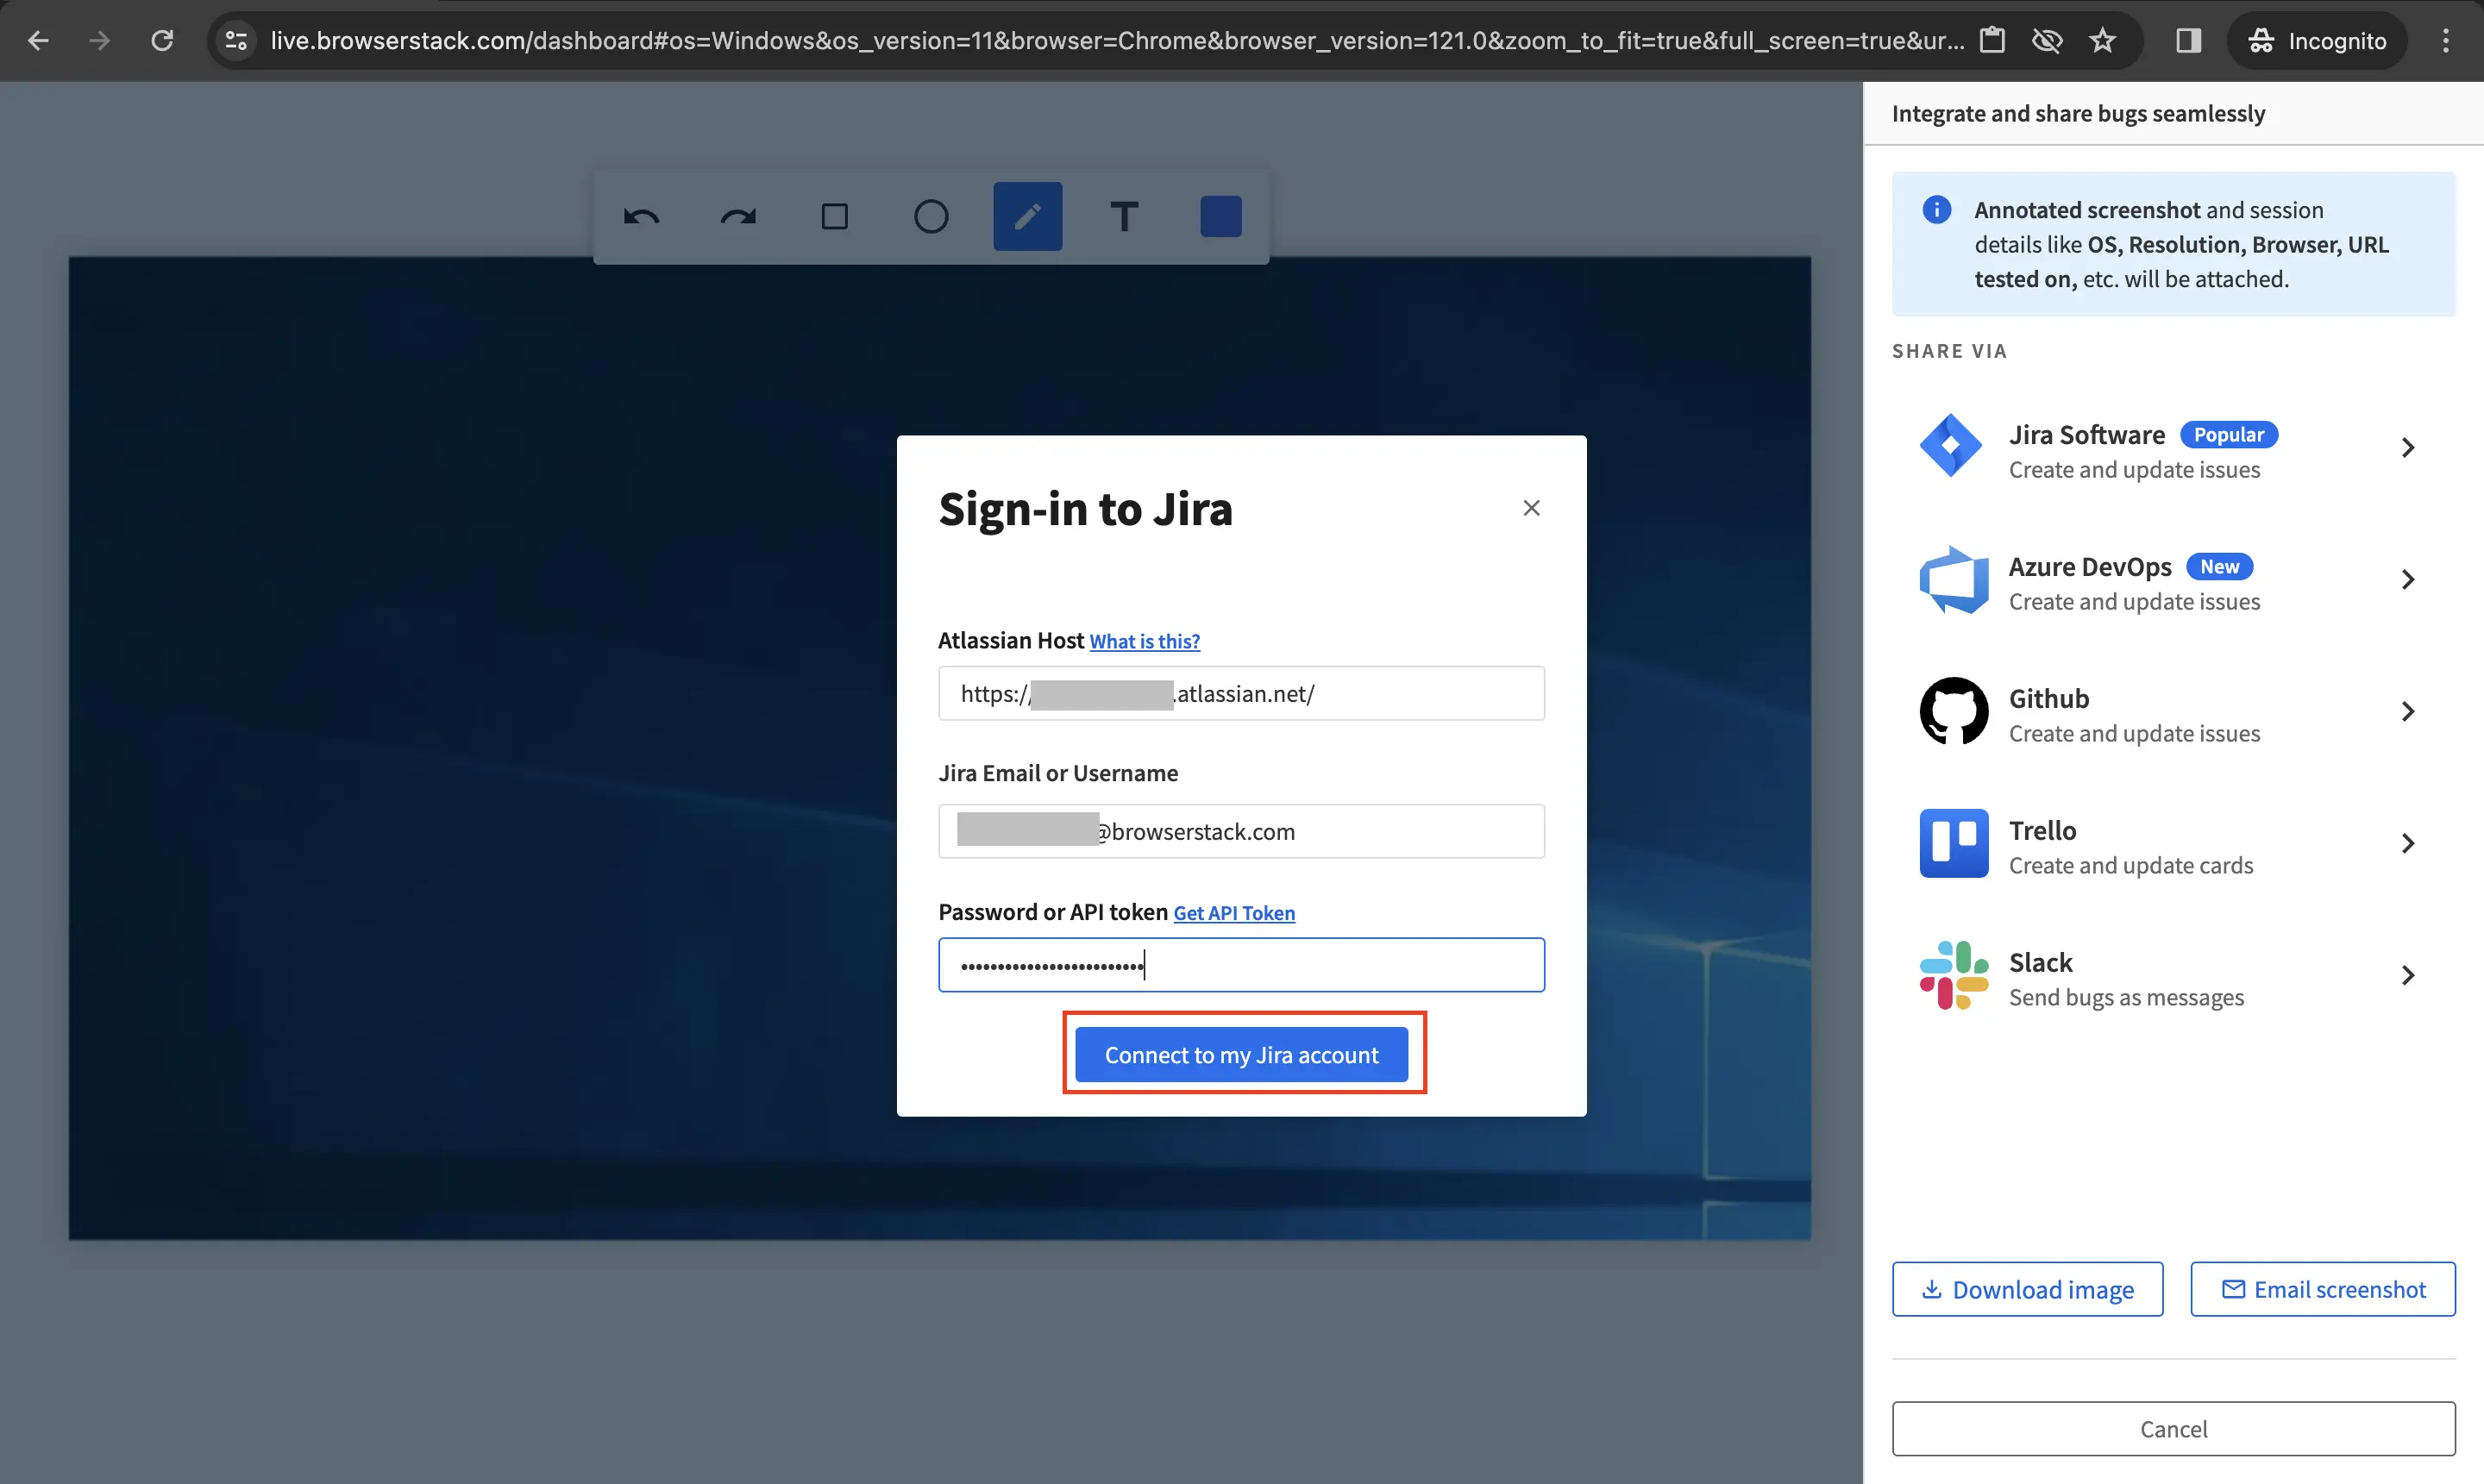 After you enter the credentials, click Connect to my Jira account to integrate Jira with Live.
-
Atlassian Host: The Atlassian or Jira server URL you use to access Jira. For example,
A success message confirms that Jira integration is successful. You can now report an issue on Jira.
Report an issue on Jira
Prerequisite
Integrate Jira with your Live session.
You can either create a new issue or update an existing issue while reporting an issue on Jira during your Live test session.
- On the Live toolbar, click Report on Jira to capture a screenshot of the bug or issue.

- If required, annotate the screenshot using the Live annotation toolbar.
The annotated screenshot is attached in the REPORT ISSUE ON JIRA panel.
- In the REPORT ISSUE ON JIRA panel, enter your Project name.
- Click the Create Issue tab, and select the Issue type as Task, Sub-task, Story, or Bug, and Assignee details.
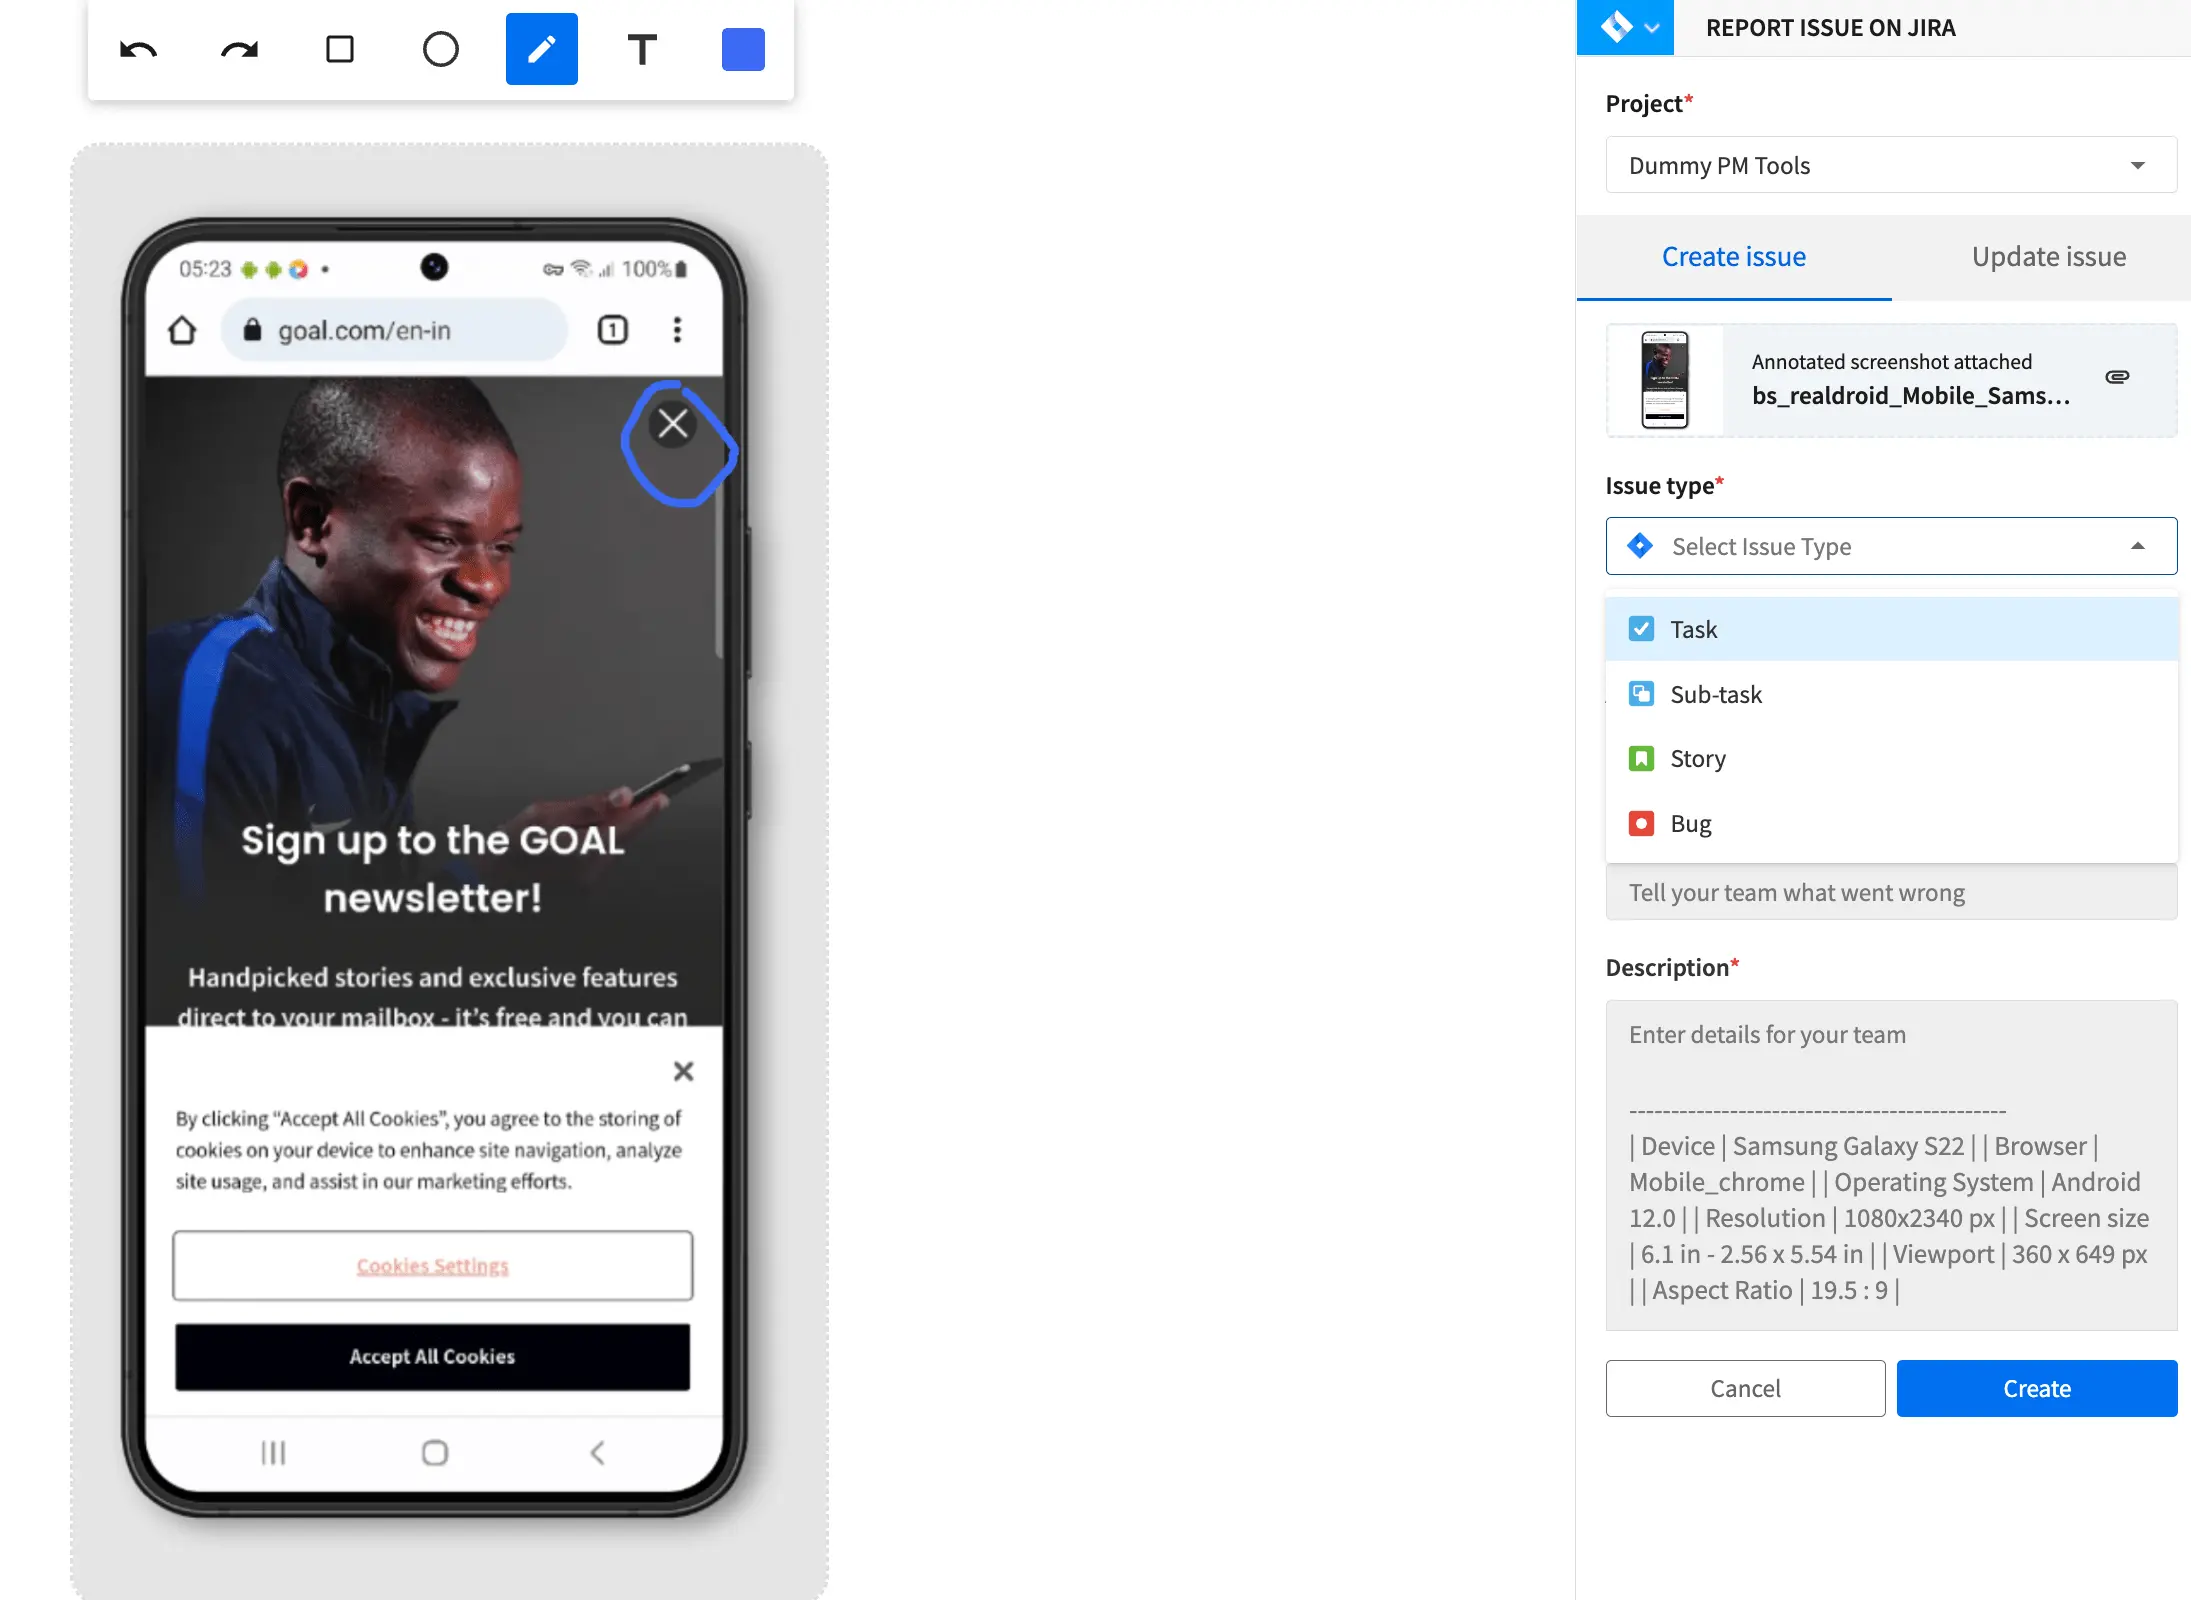
- Click Show all fields to fill in essential details like Summary, Description, etc., and additional details with the custom fields that your organization has created in Atlassian.
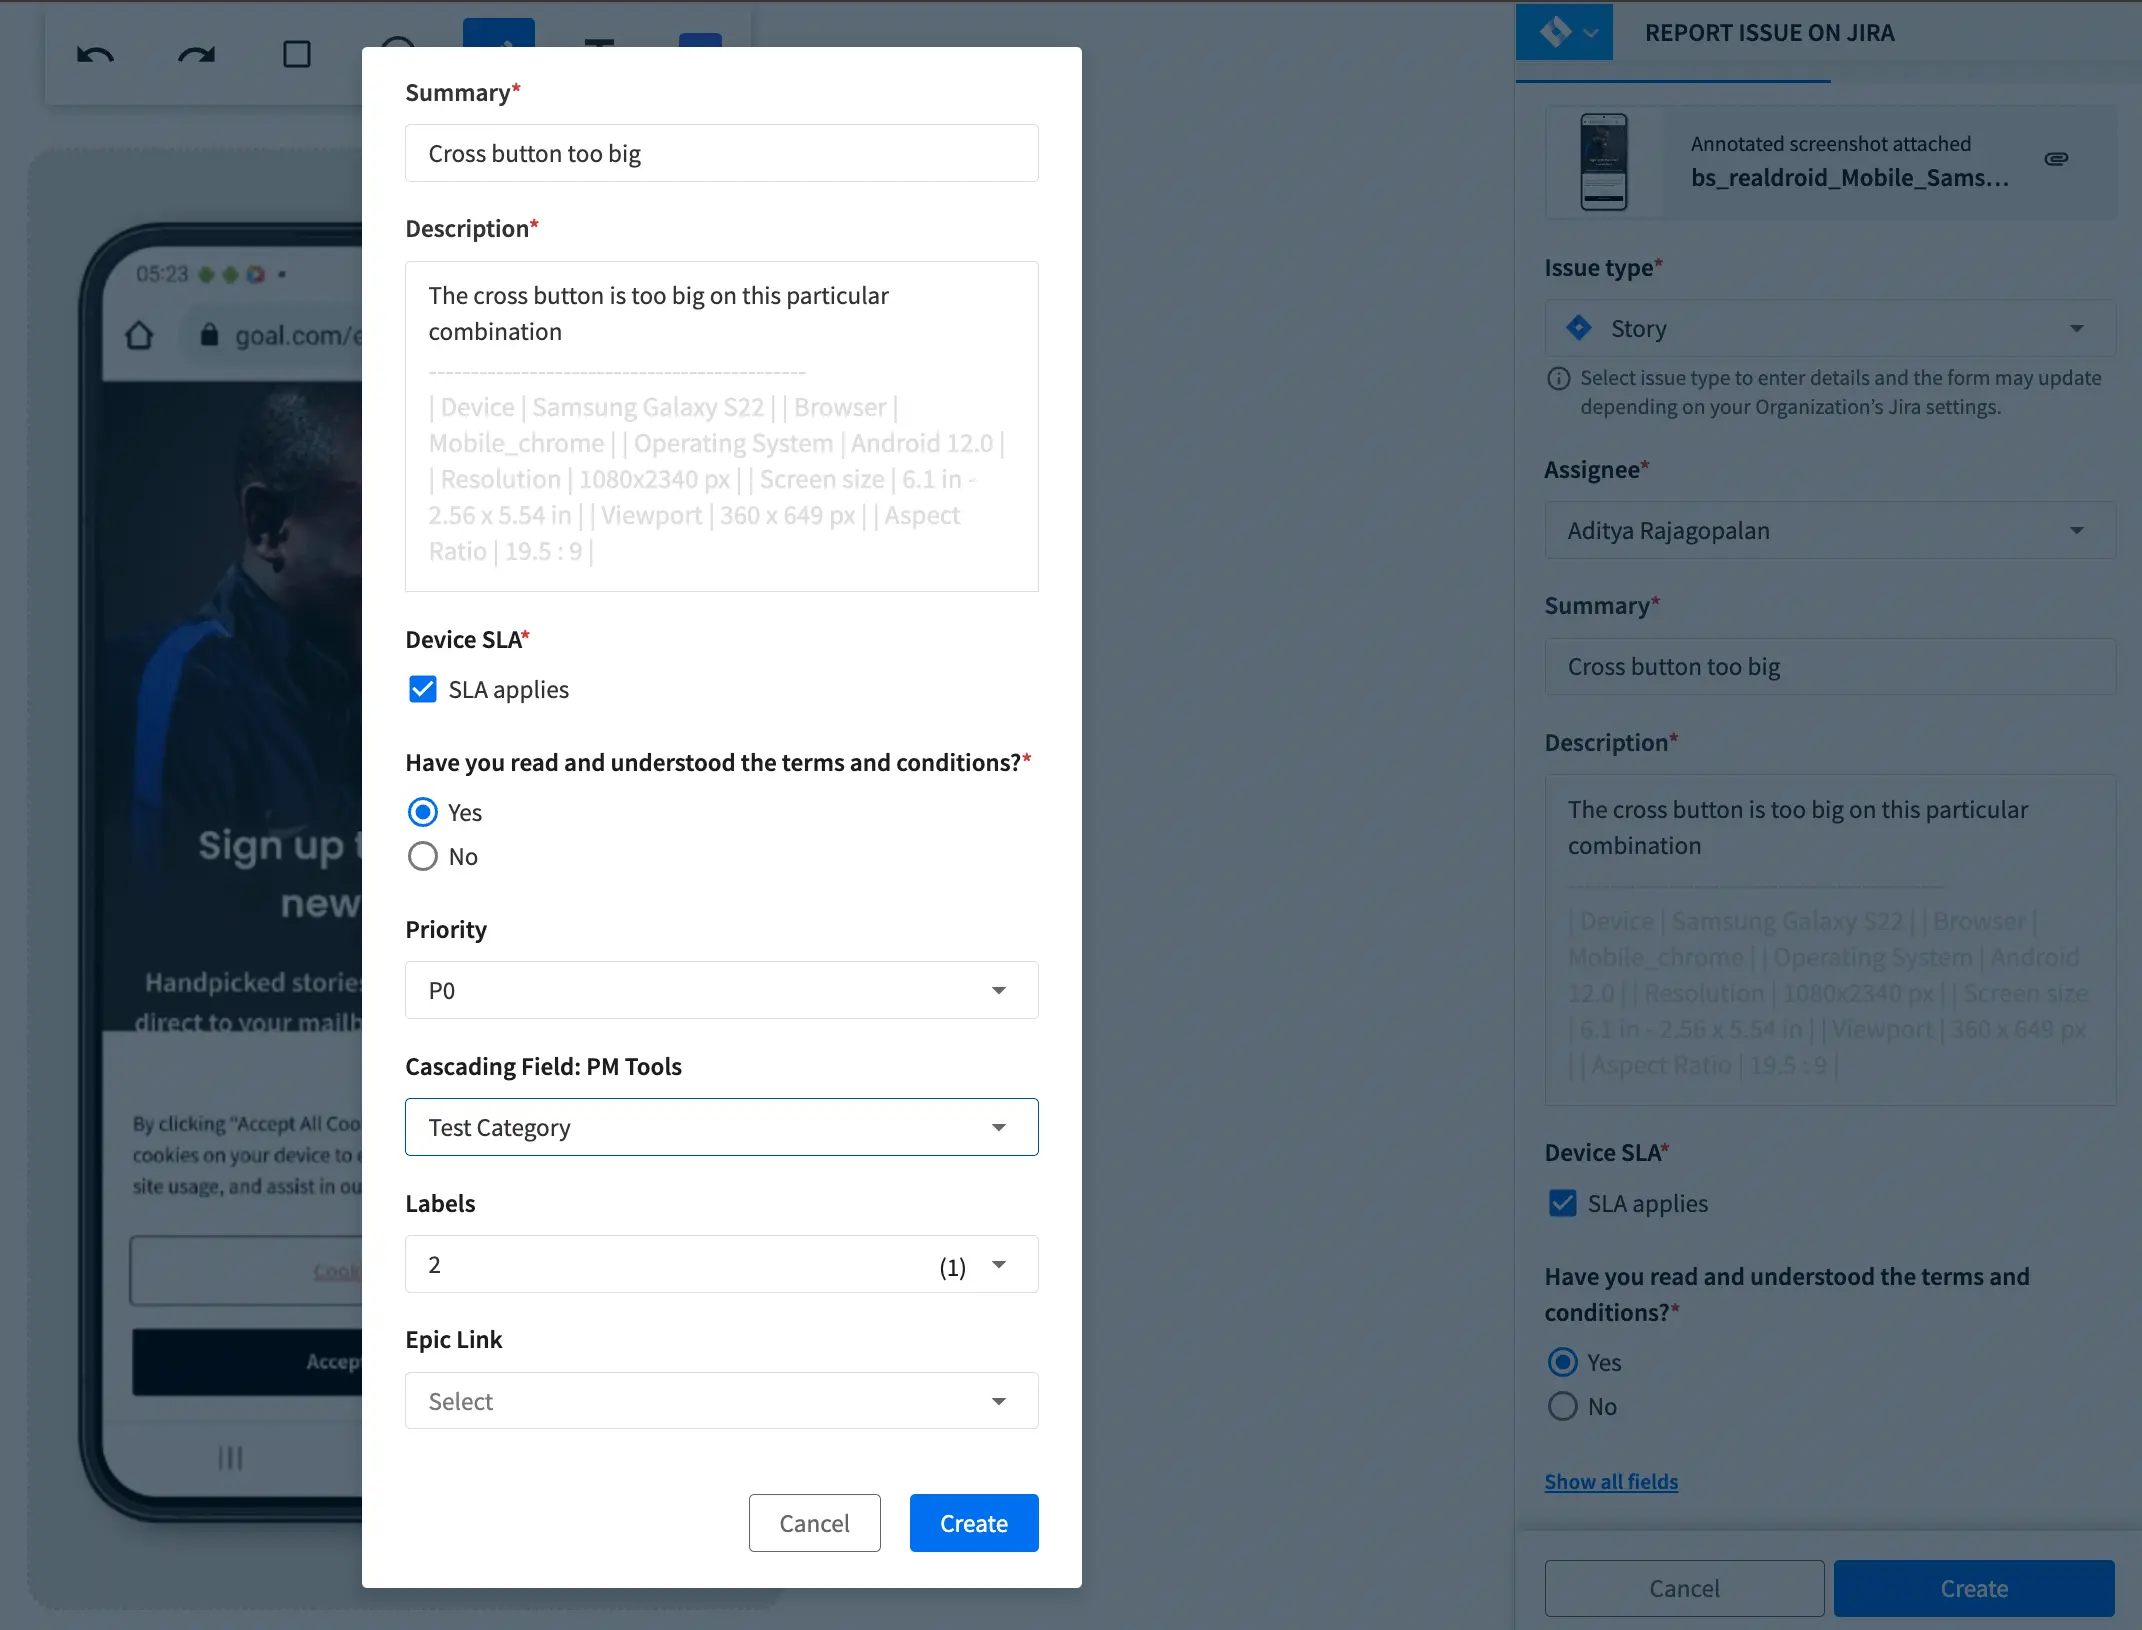
- After you have filled in all the details, click Create to create a new issue.
You see a message that the issue is successfully created. Click View issue on the message prompt to see the created issue in Jira.
- Click Report on Jira on the Live toolbar.
- If required, annotate the screenshot using the Live annotation toolbar. The annotated screenshot is attached in the REPORT ISSUE ON JIRA panel.
- In the REPORT ISSUE ON JIRA panel, select your Project name.
- Click the Update Issue tab, and fill in details such as the Issue Number, Assignee, and Comment.
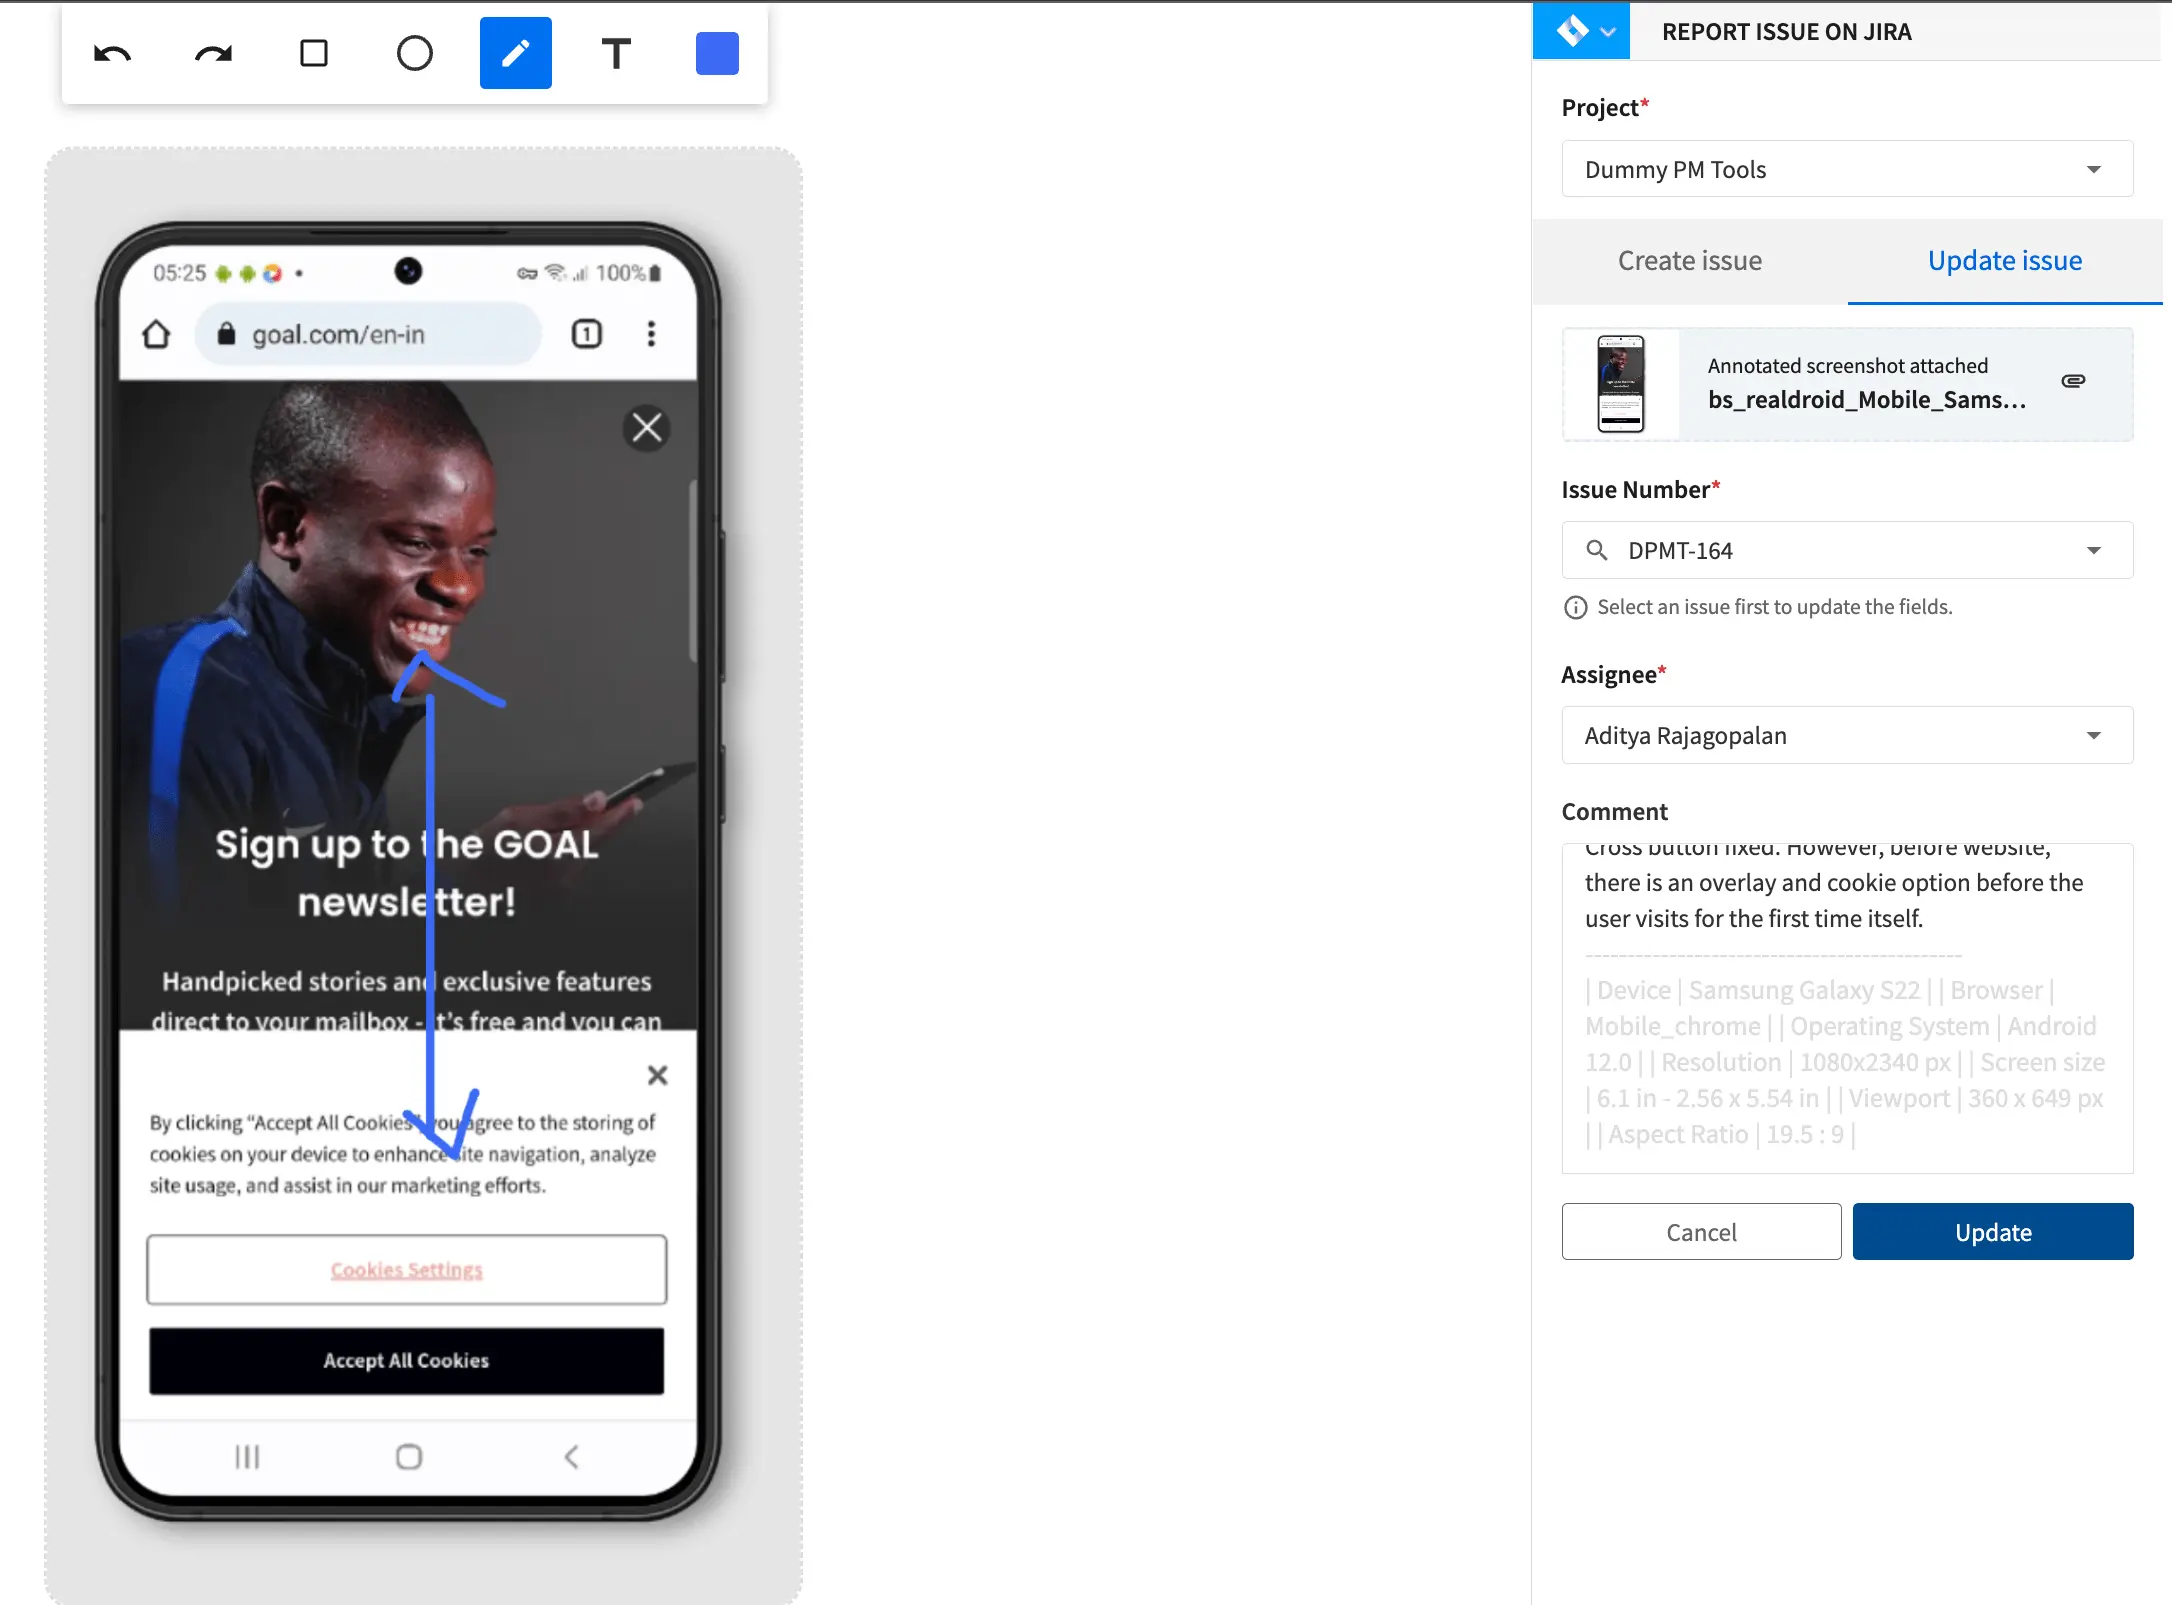
- Click Update to update the issue.
You see a message that the issue is successfully updated. Click View issue on the message prompt to see the updated issue in Jira. Each new update is added as a comment on the existing Jira issue.
Troubleshoot integration issues
Issue: When you try to integrate Jira from the ongoing Live session, you see the following Atlassian’s Access Denied page instead of the authorization page.
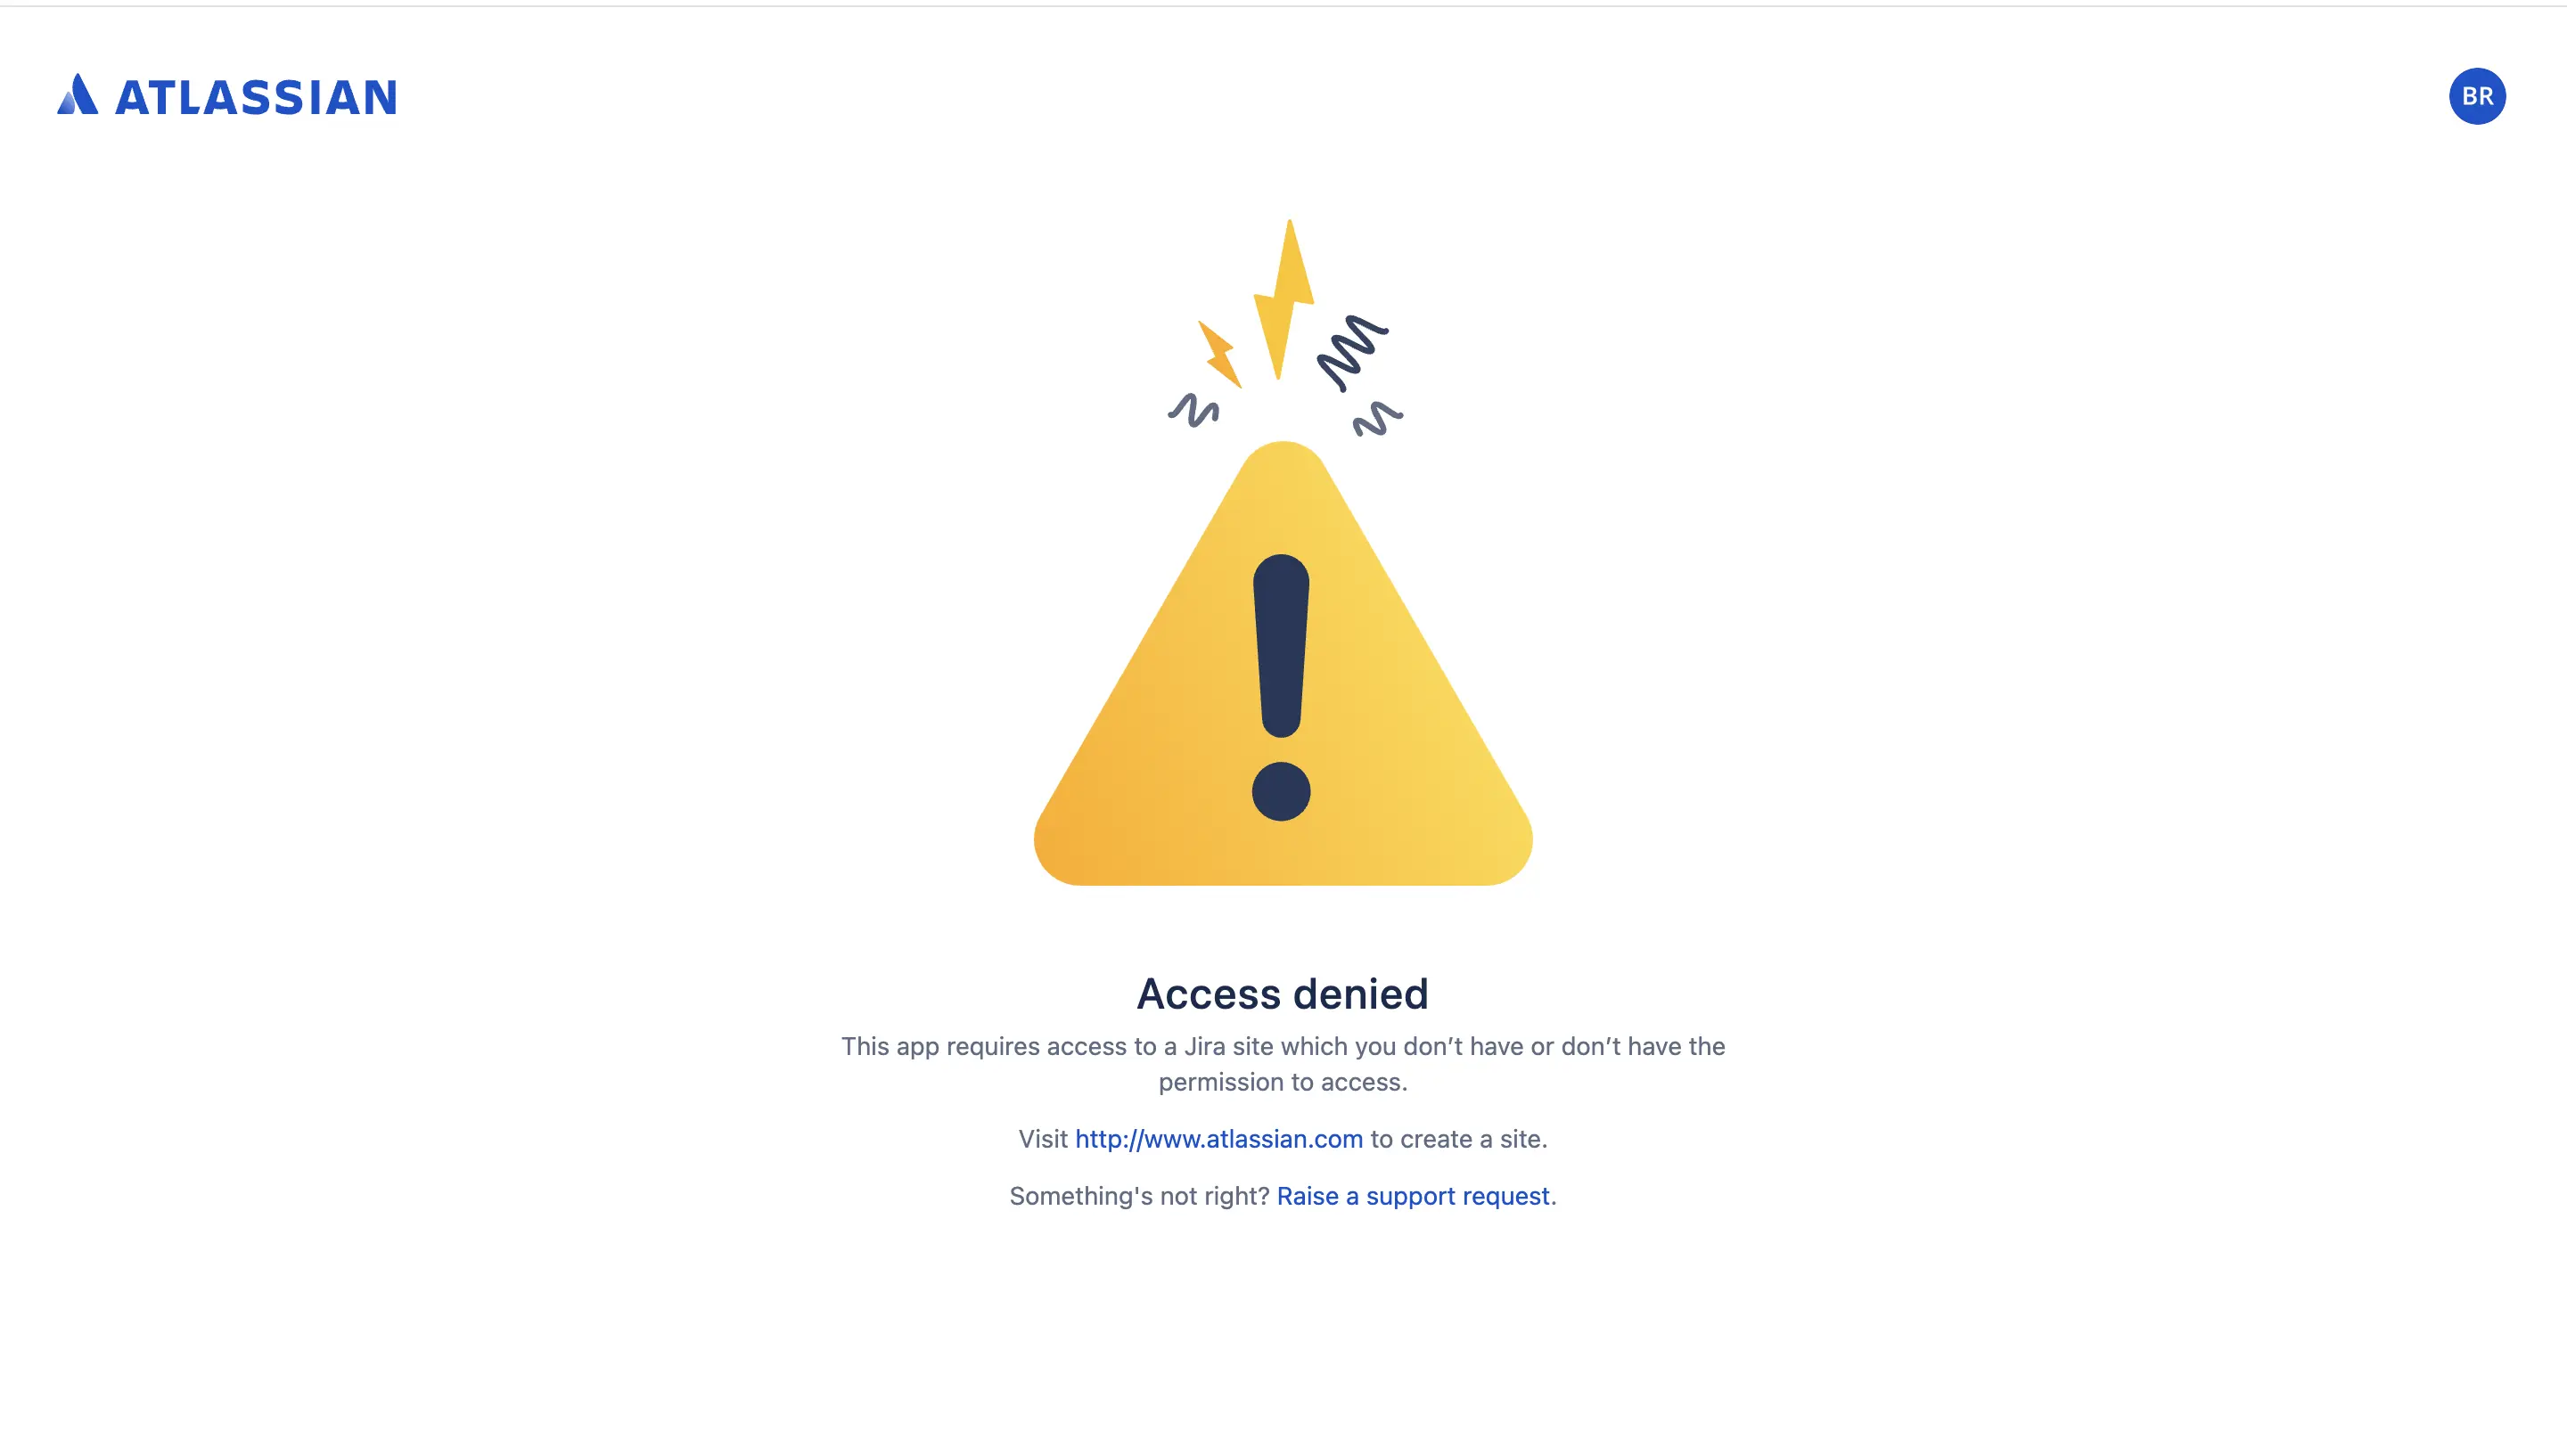
Resolution: Ensure that you are using Single Sign-On to log in to BrowserStack and Atlassian. If you are not using Single Sign-On or using different credentials for BrowserStack and Atlassian, close the Access Denied page and follow step 6 in the Integrate from ongoing Live test session section.
Troubleshoot problems while reporting an issue on Jira
To debug the issue, you need the response being sent on Jira when you try to file a bug. To get the response, follow these steps.
- Click Report on Jira.
- Select a project.
- Once the form populates, open the devtools of your local browser using F12 key or right-click and select inspect the element.
- Navigate to the Network tab.
- Type
pmtoolin the filter. - After selection of the project check for
create_meta_async?key=project.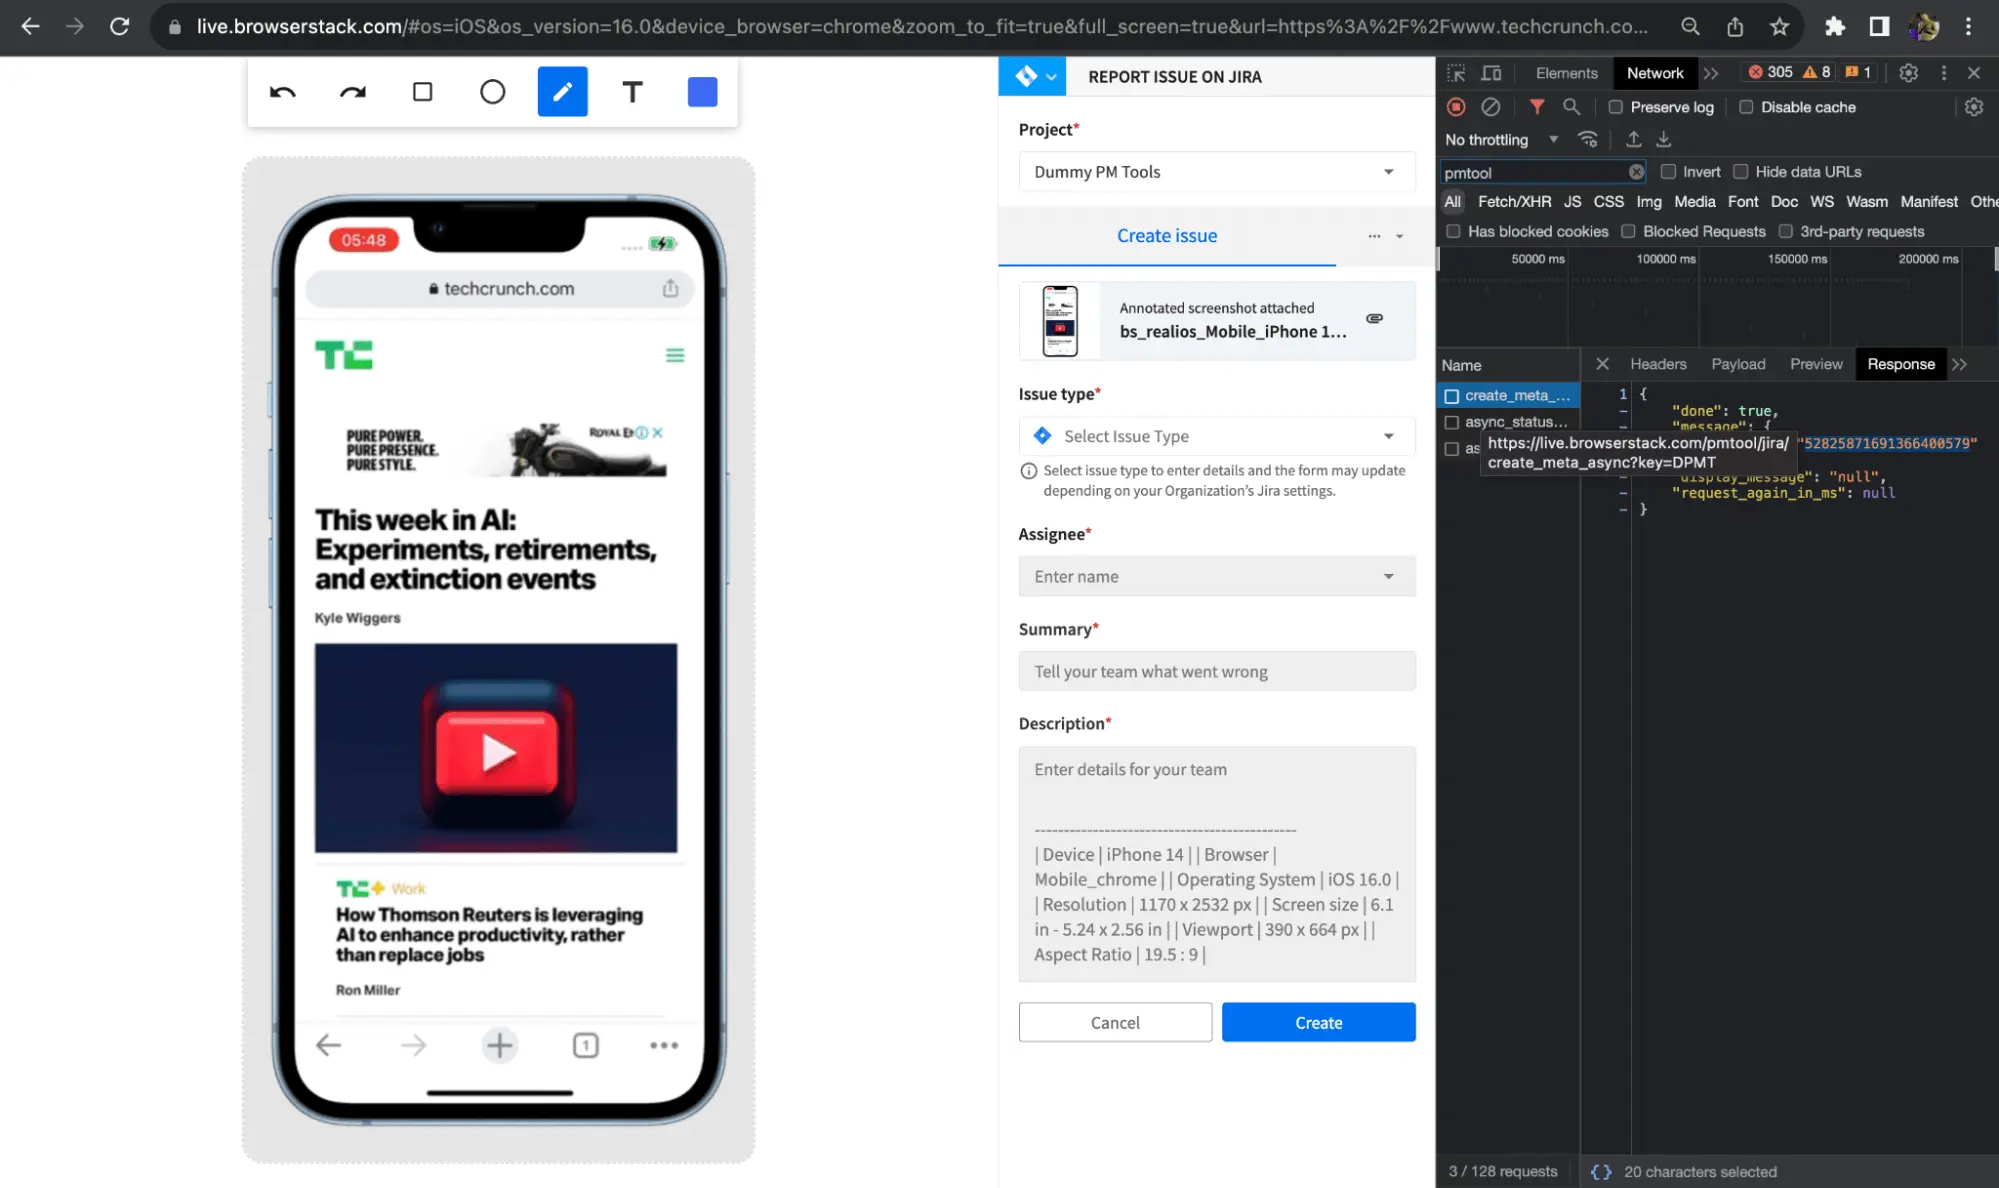
- Copy the Task ID from the response and paste the Task ID in the filter and check the last request.
- Copy the response and add it to the support ticket thread.
We're sorry to hear that. Please share your feedback so we can do better
Contact our Support team for immediate help while we work on improving our docs.
We're continuously improving our docs. We'd love to know what you liked
We're sorry to hear that. Please share your feedback so we can do better
Contact our Support team for immediate help while we work on improving our docs.
We're continuously improving our docs. We'd love to know what you liked
Thank you for your valuable feedback!