
 Join our Discord
Add validations or extract values from API responses
Learn how to validate API calls for accurate and reliable tests.
Low Code Automation allows you to make API calls while recording your test, solving the complexity of automating test cases that involve dependencies beyond the web application UI. You can integrate API calls directly into tests for:
- Initializing test environments
- Invoking specific services
- Checking backend conditions
- Managing test data
Add API step
- API steps running on the cloud do not support requests to localhost or private/internal APIs. For example, you cannot access APIs accessible only within your local network or behind a VPN/firewall.
- To perform comprehensive end-to-end API testing, use Requestly. For more details, refer to the Requestly document.
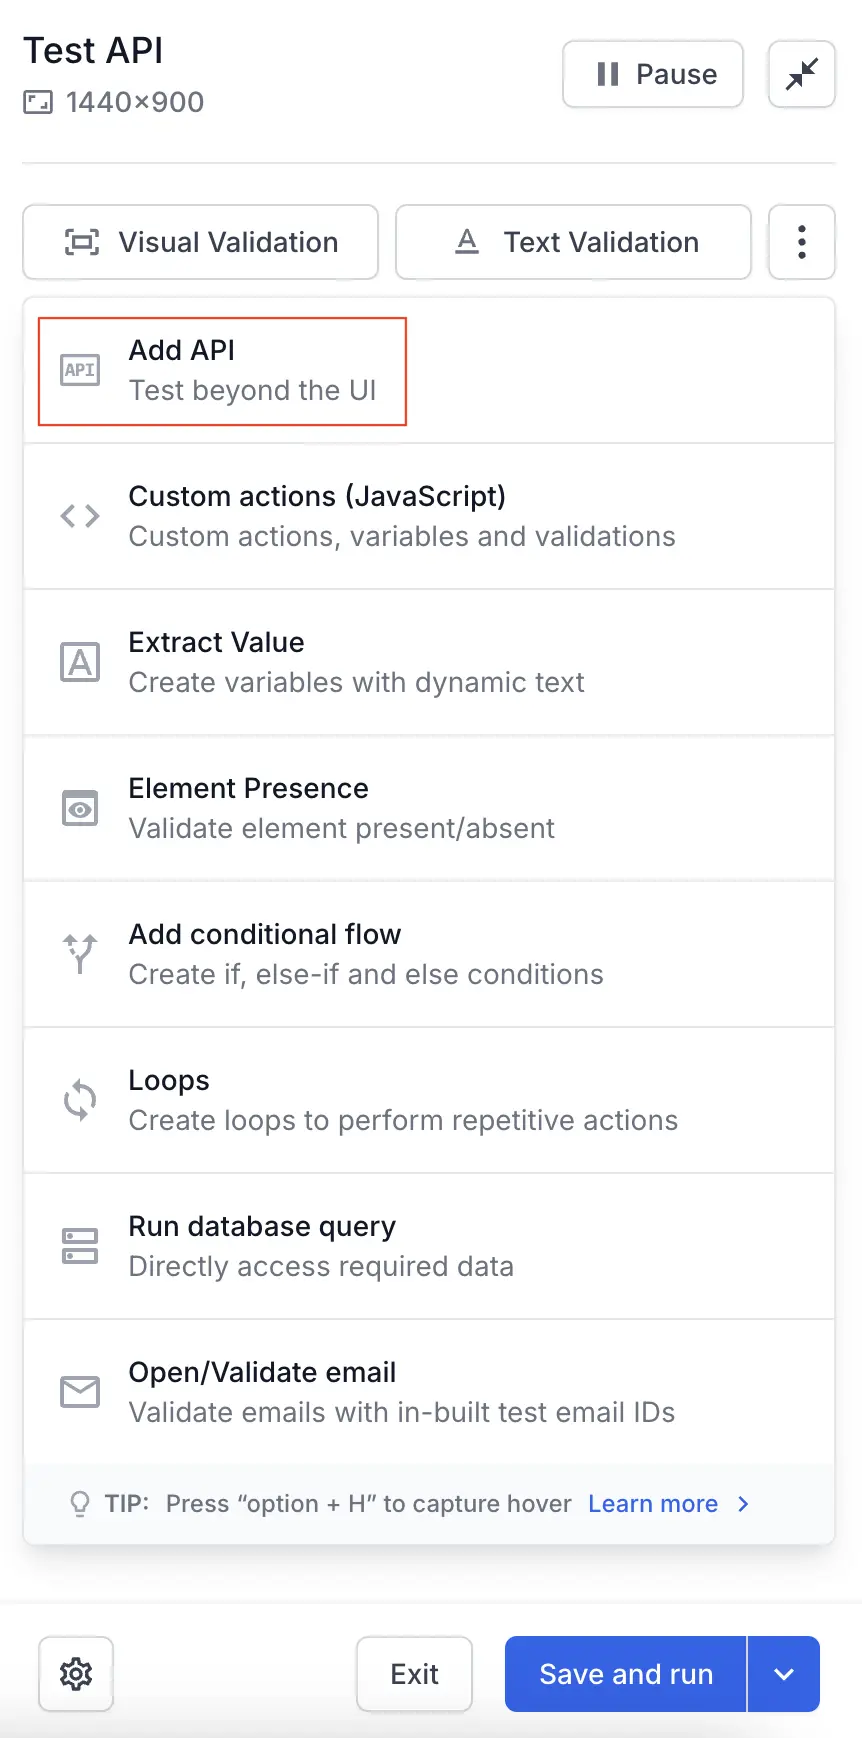
To add API requests in your tests, click the ︙ icon in the recorder panel and select Add API to configure an API step.
You will see a response window to fill in the request details like API URL, Parameters, Authorization, Header, and Body.
Request data
Low Code Automation supports JSON, XML, and plain-text response types for API steps.
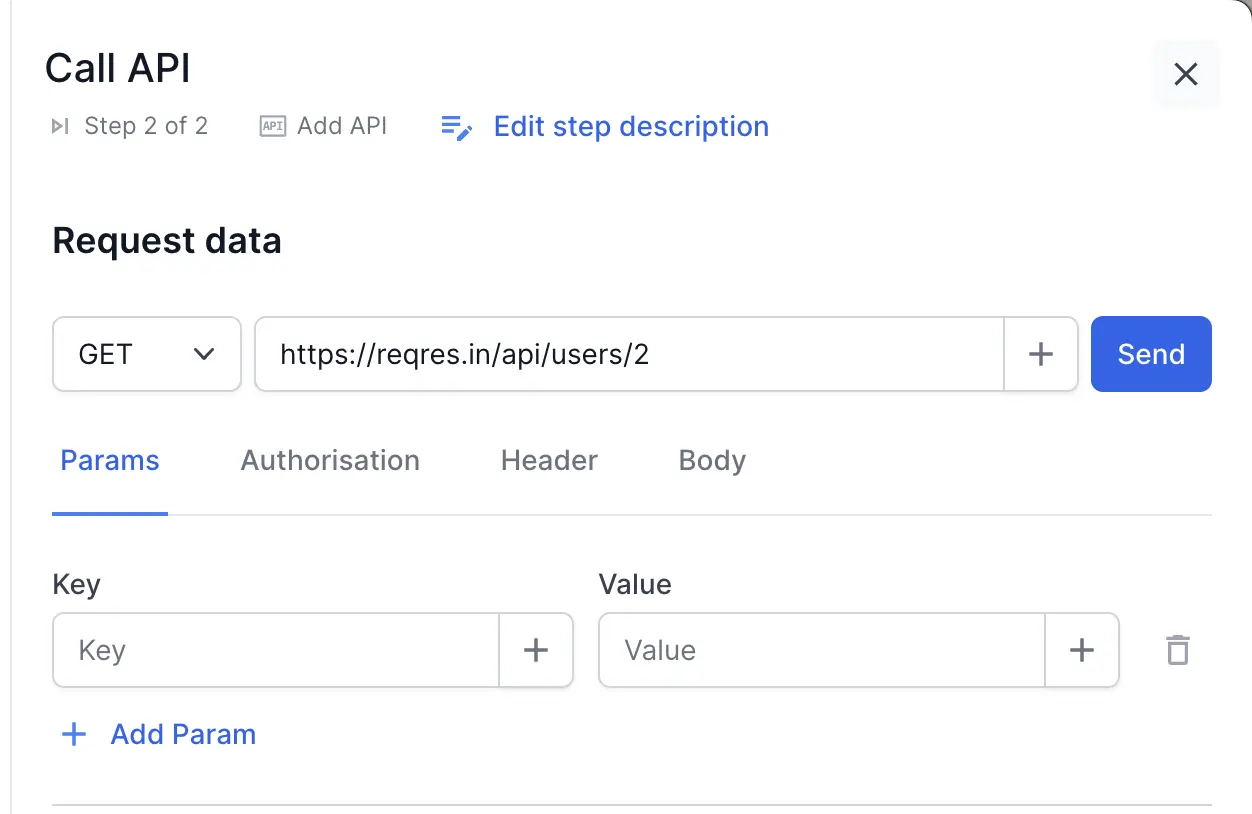
| Attributes | Description |
|---|---|
| Method | Select the HTTP method for the API call, including options like GET, POST, PUT, DELETE, or PATCH. |
| URL | Specify the URL for the API endpoint. |
| Parameters | Specify key-value fields for query parameters. |
| Authorization | Select and apply the suitable authorization method (Basic, Bearer) for the API call. |
| Header | Configure headers such as cookies, content-type, encoding, and language according to your API specifications. |
| Body | Specify the data to send in one of the following formats: - Form data or key-value fields - Raw - GraphQL |
| Response Type | Select the expected response format for the API call: - JSON - XML |
Import existing variable
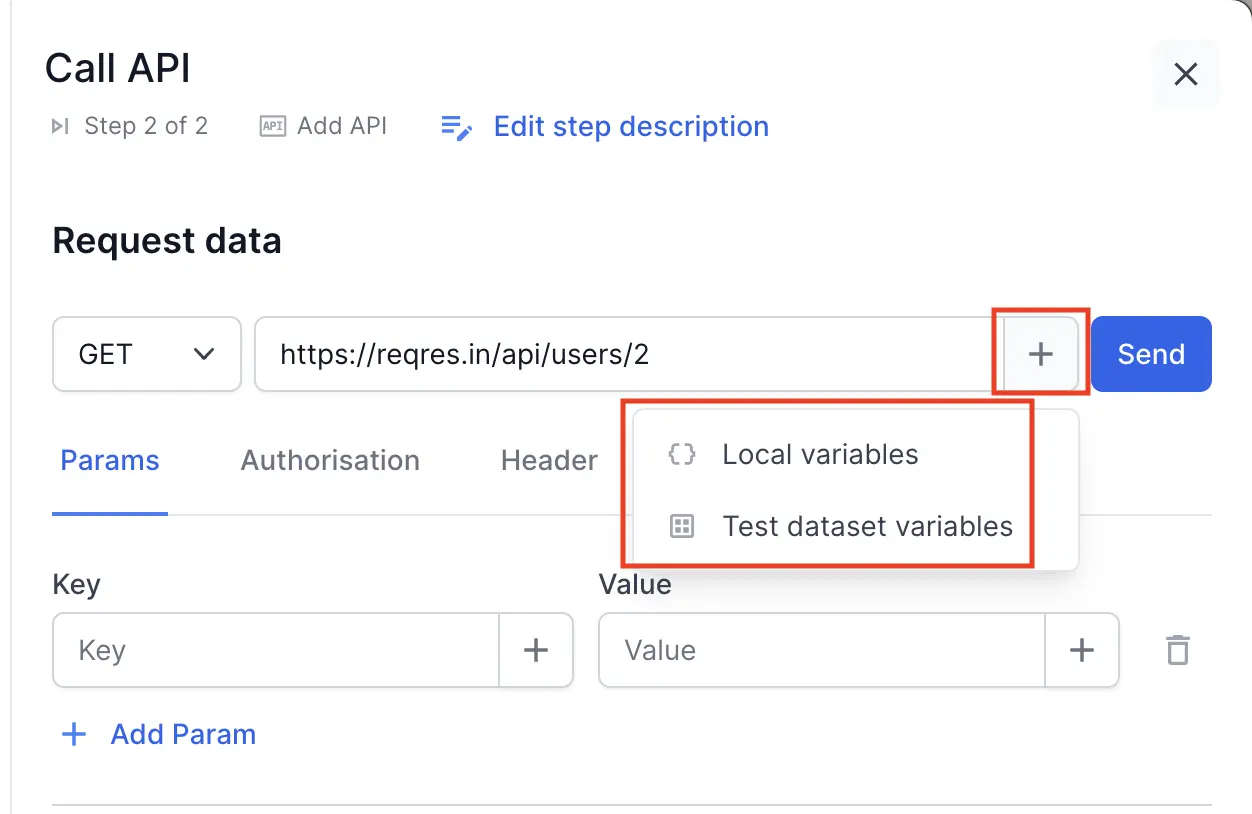
Click the + icon next to the URL field and select Variables or Test dataset variables. You can import a variable into any API field, such as URL, Username, Key, Value, and more.
Import from cURL
Paste a cURL command to fill in the method, URL, parameters, headers, authorization, and body in one go.
- Click the + icon next to the URL field and select Import from cURL.
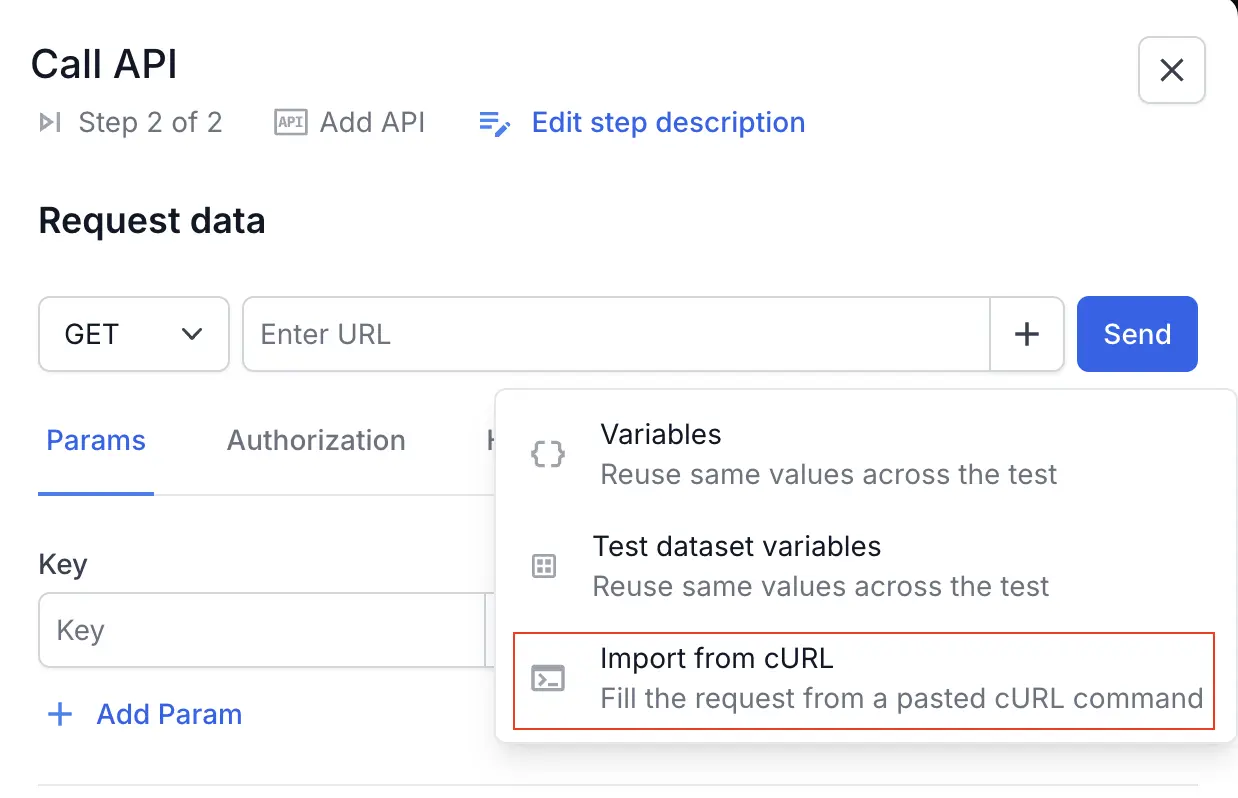
- Paste the cURL command and click Import.
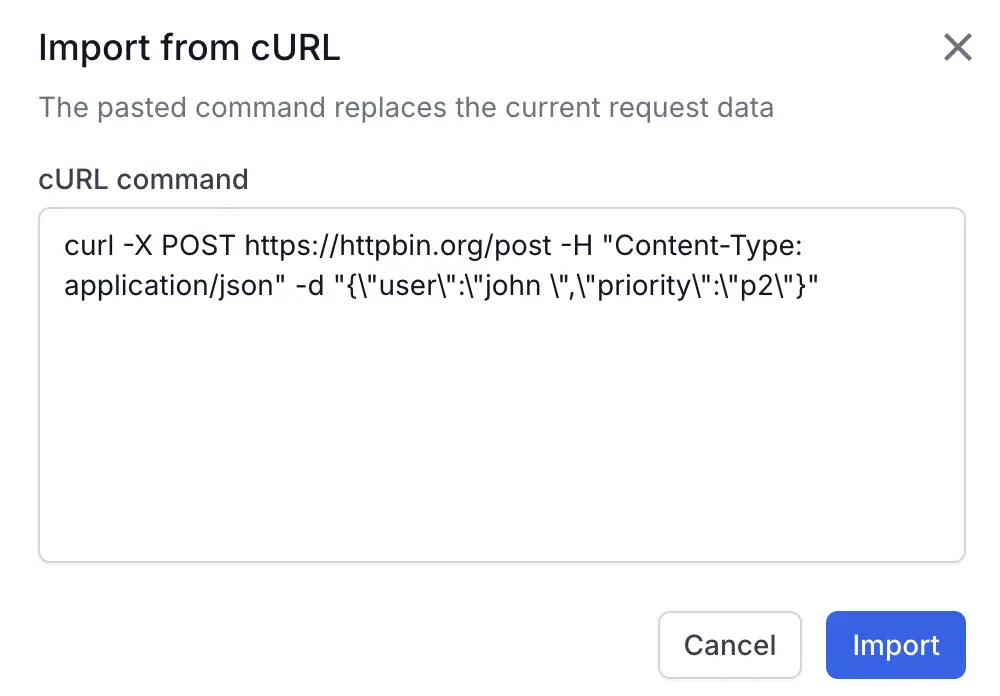
The imported command replaces the current request data. If the command contains a token, you can save it as a secret.
Send a GraphQL request
To send a GraphQL query, follow these steps:
- Select the HTTP method and enter the URL of the GraphQL endpoint.
- Click the Body tab and select GraphQL from the body type dropdown.
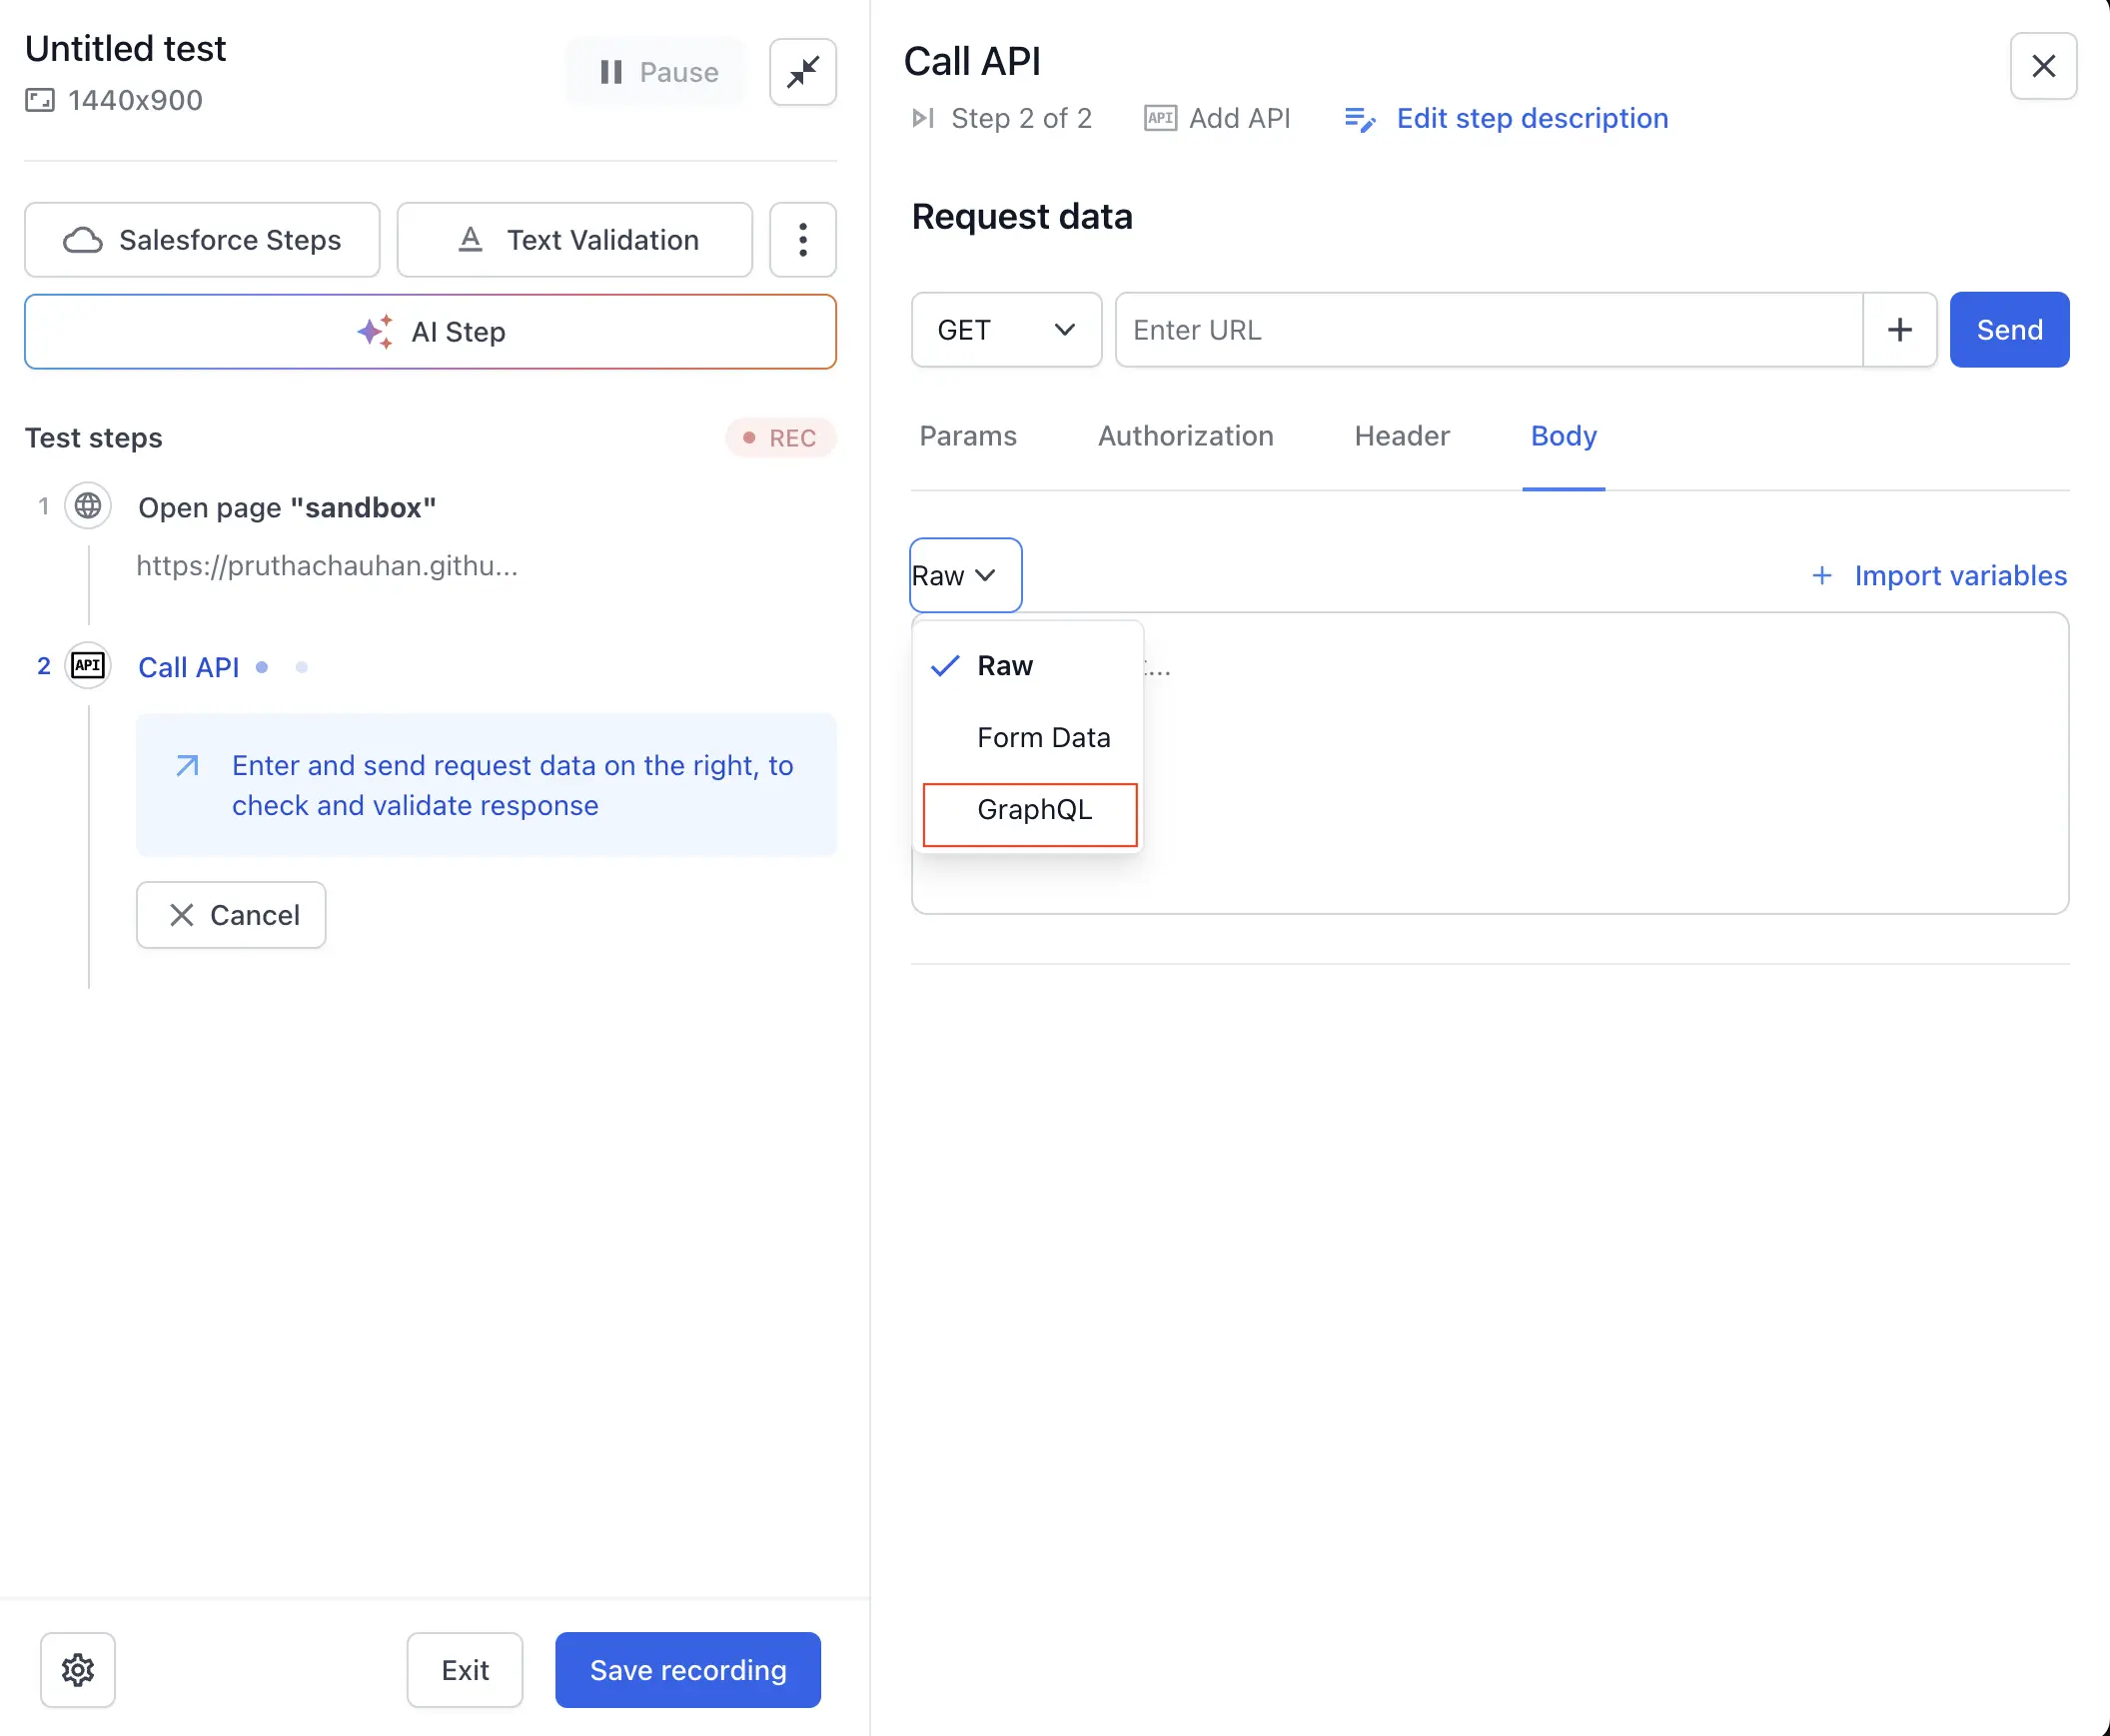
- Enter your query in the GraphQL query field.
- If your query uses variables, click Add GraphQL Variables and enter them in the GraphQL Variables field.
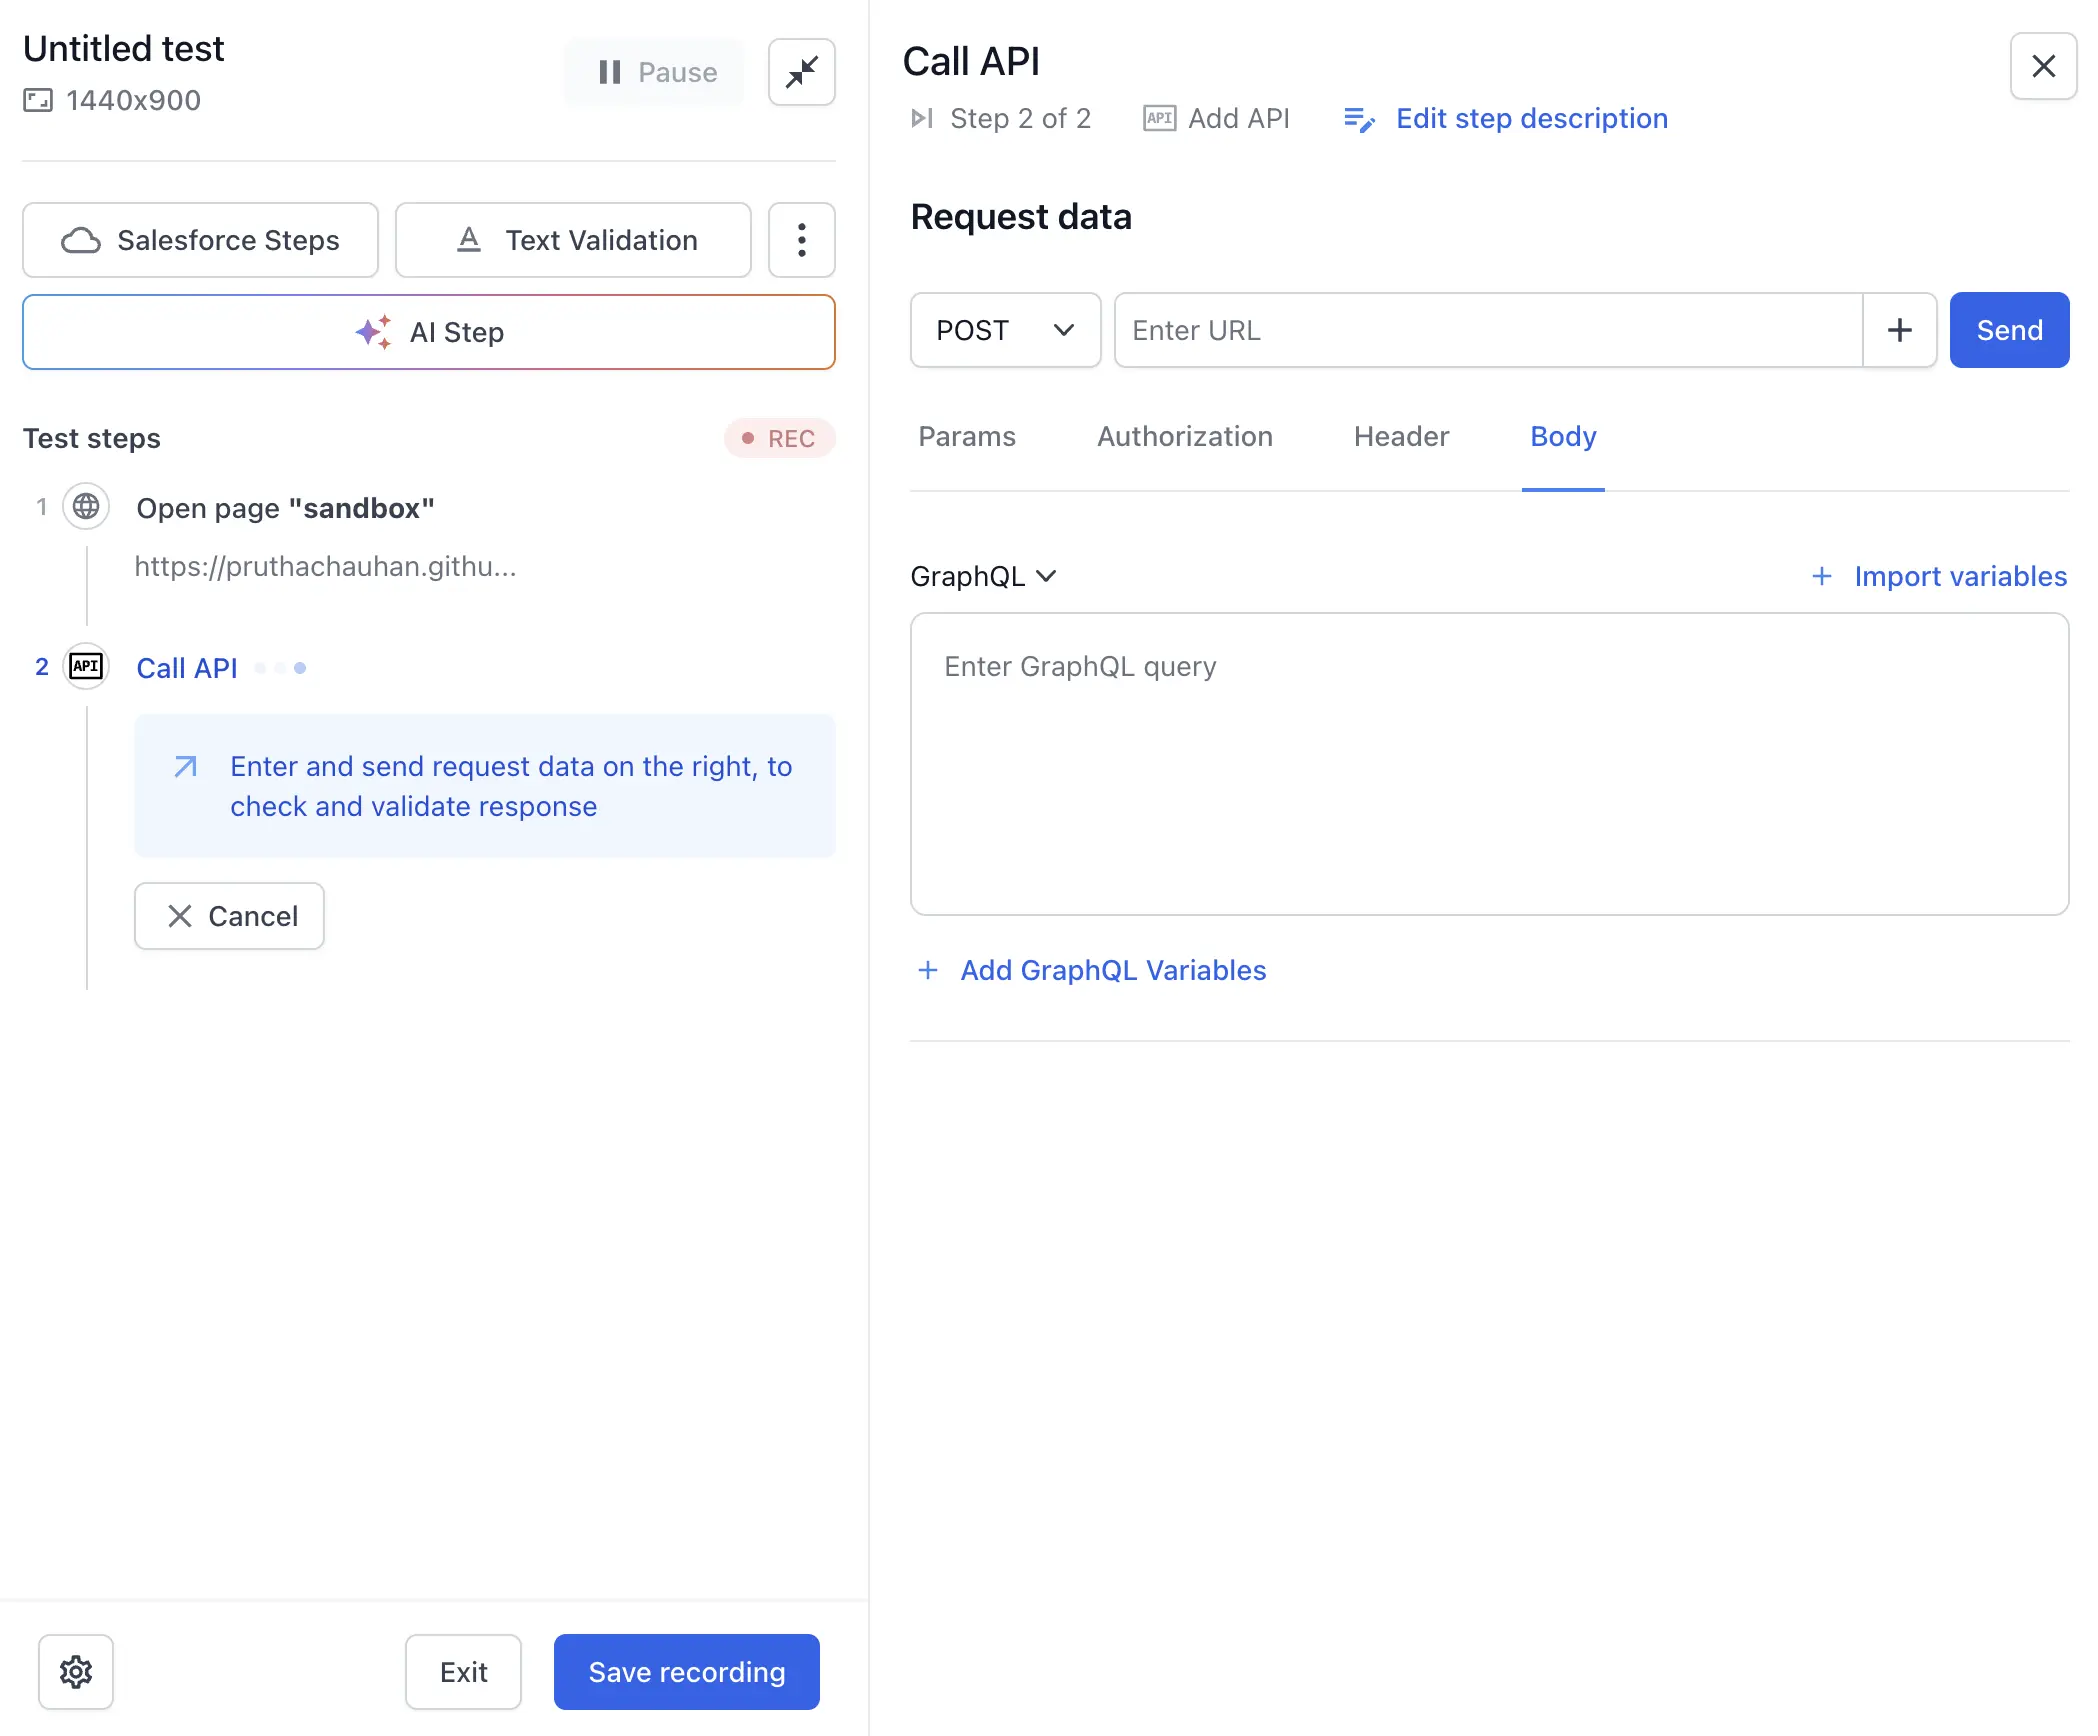
- Click Send.
To insert a variable into either field, click Import variables above that field.
Validate or extract response details
After you fill in the request fields and click Send, the response appears with three sections:
- Status
- Headers
- Body (JSON, XML, or plain text)
In the Body section, switch between Tree and Raw views. Click Copy to copy the response or Download to save it as a file.
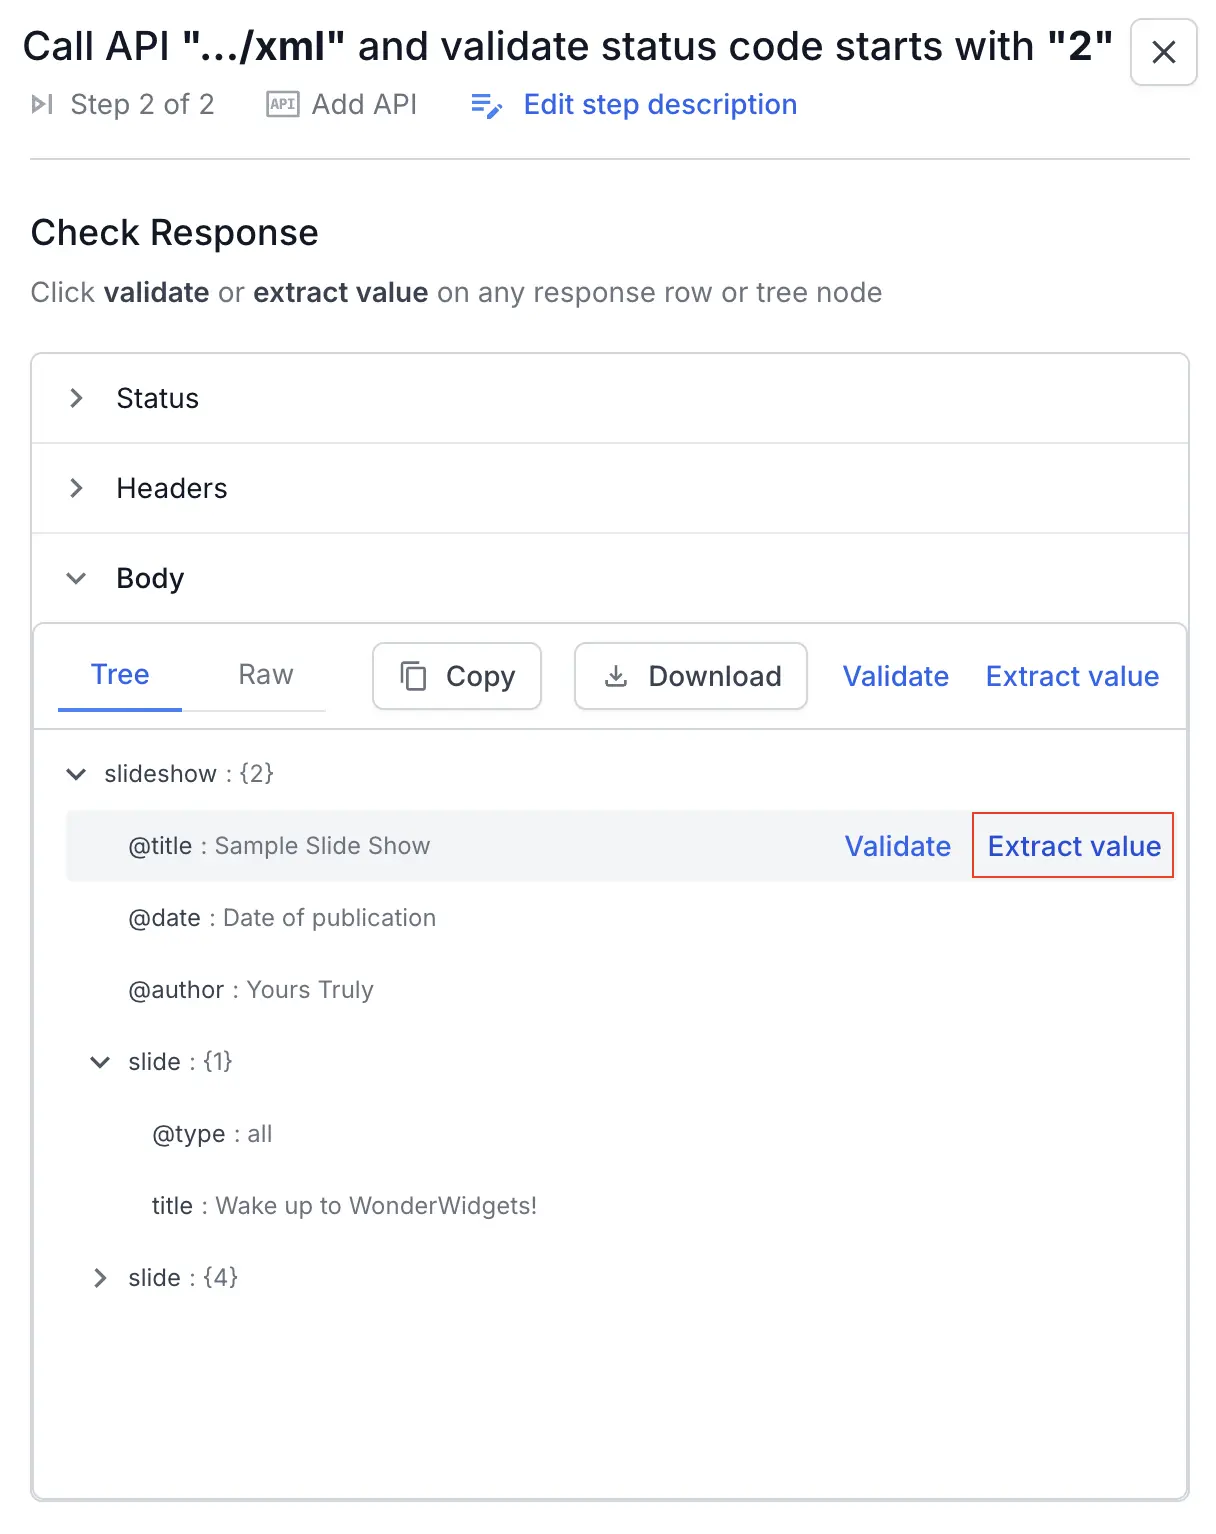
In the Tree view, hover over any row to add a validation or extract a value from that node. The JSON path or XPath is prefilled for you.
The response viewer truncates large responses. Validations and extractions still run against the full response, not only the part shown in the viewer.
The API response limit is 30,000 characters. To modify the limit for your account, contact us.
You can add either validations or extract values in a single API step. To perform both actions, add another API step and configure the additional validation or extraction as needed.
Validate JSON response
- Expand the response section to add validations on status, headers, or body.
- Hover over any value, and you will see the Validate option appear.
- Click Validate to add validation on the respective field.
- You can add multiple validations in a single API step.
The following video shows how to validate a JSON response from the Tree view:
Extract value from JSON response
- Expand Body and select the Tree view.
- Hover over the node you want to store and click Extract value. The JSON path is prefilled and the resolved value appears below it. If you use the Raw view instead, enter the JSON path manually.
- Enter a variable name and click Create.
For example, with the following response, the JSON path $.user.id extracts 12345:
{
  "user": {
    "id": 12345,
    "name": "Jane Doe"
  }
}
You can also store the extracted value in a test dataset column so that it persists after the test run. For more information, see Save values from tests to a test dataset.
The following video shows how to extract a value from a JSON response and reuse it in a later step:
You can either extract value or validate value. Switching from validation to extraction will remove existing validations.
Validate XML response
- Expand the response section to add validations on status, headers, or body.
- Hover over any XML node or attribute, and you will see the Validate option appear.
- Click Validate to add validation using XPath expressions for the selected XML element.
- You can add multiple validations in a single API step.
The following video shows how to validate an XML response from the Tree view:
Extract value from XML response
- Expand Body and select the Tree view.
- Hover over the XML node or attribute you want to store and click Extract value. The XPath is prefilled and the resolved value appears below it. If you use the Raw view instead, enter the XPath manually.
- Enter a variable name and click Create.
For example, with the following response, the XPath /user/id extracts 12345:
<user>
  <id>12345</id>
  <name>Jane Doe</name>
</user>
The following video shows how to extract a value from an XML response and reuse it in a later step:
Filter an extracted value with regex
You can also apply a regular expression to the extracted value to capture a substring or match a pattern. This works the same way as the regex filter in UI variable extraction.
For more details on regex and advanced patterns, refer to the Regular Expressions and Regex cheat sheet document.
Plain-text and binary responses
You can validate and extract values from plain-text responses. When you extract a value from a plain-text response, the entire response body is stored as a string.
For binary responses, such as images or PDFs, you can’t extract values. Click Download to save the response instead.
API step execution
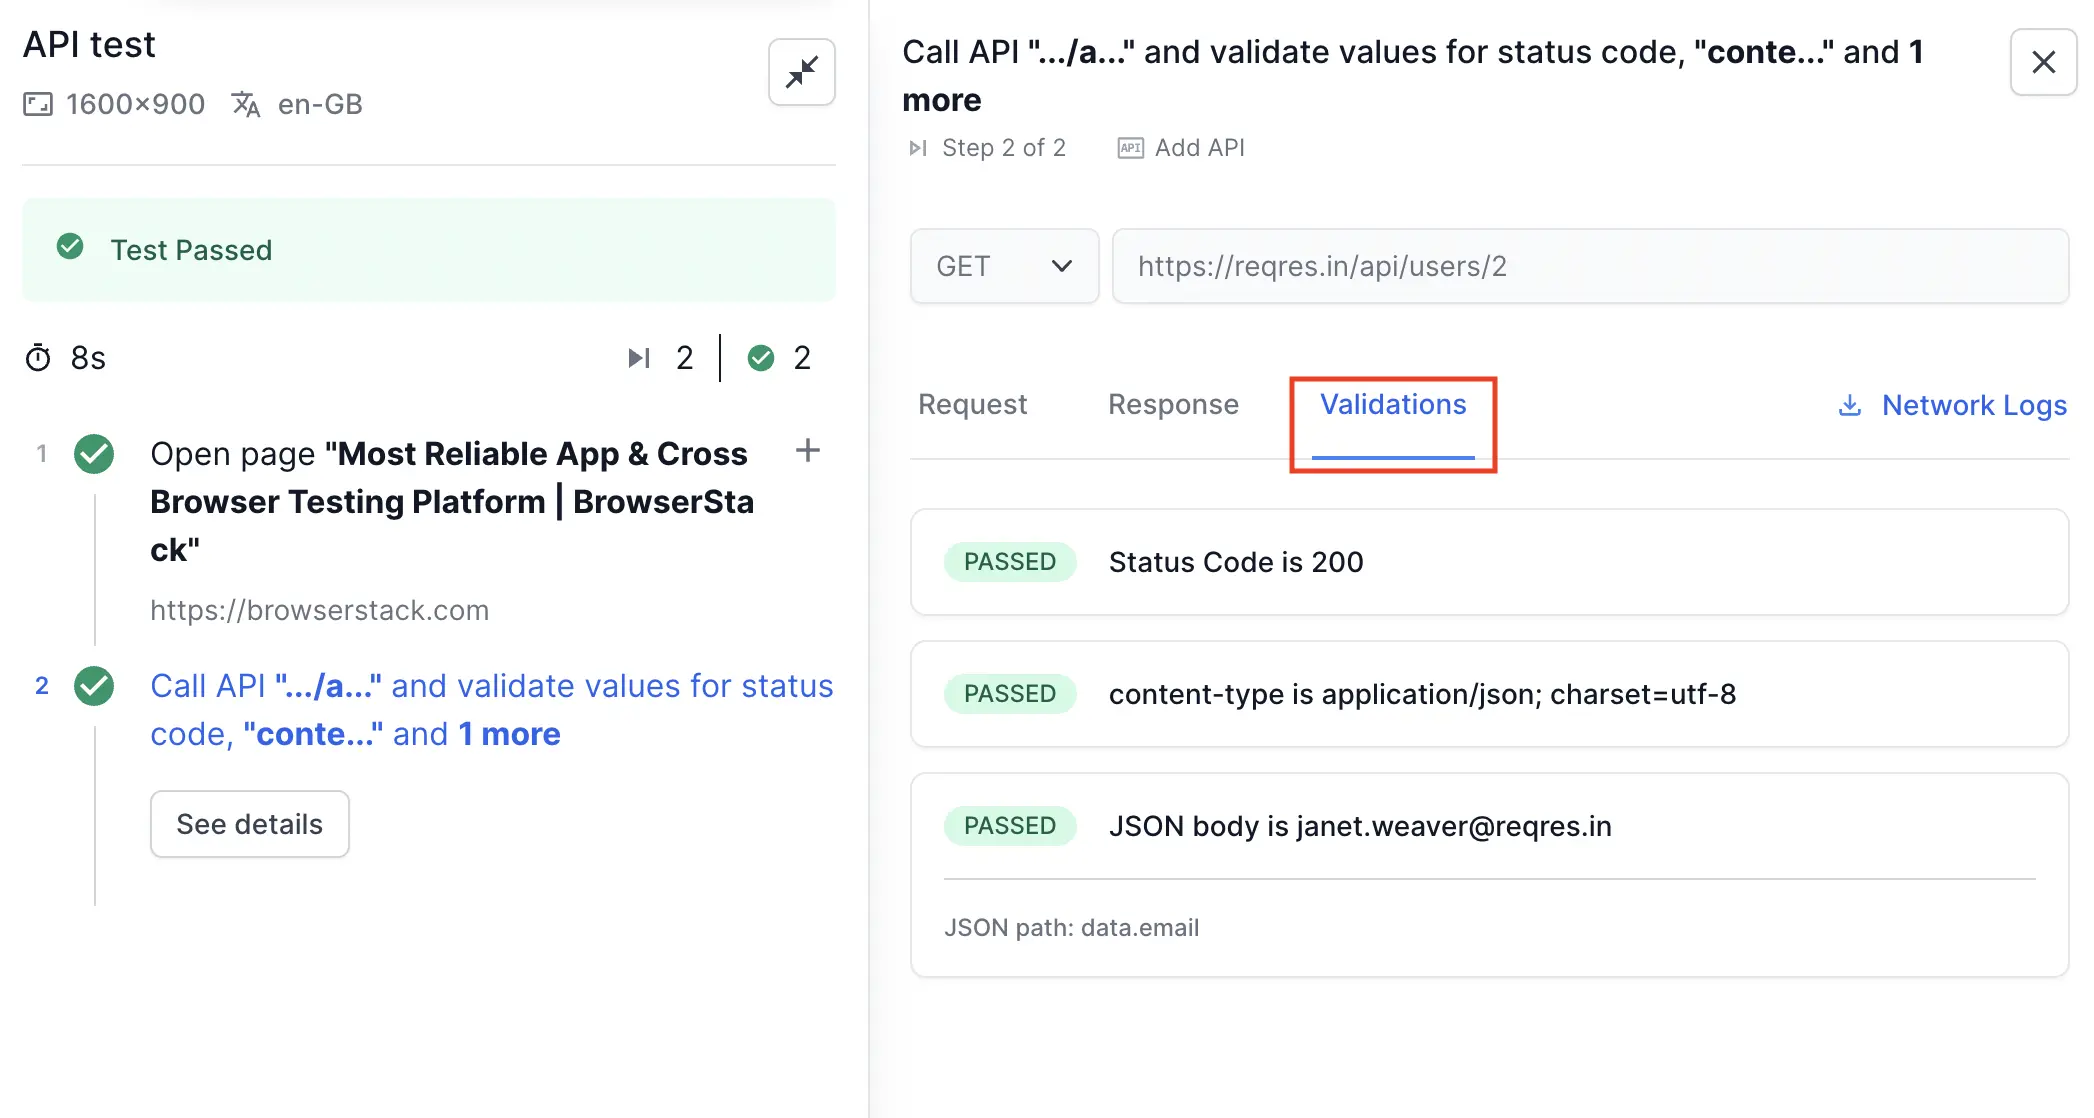
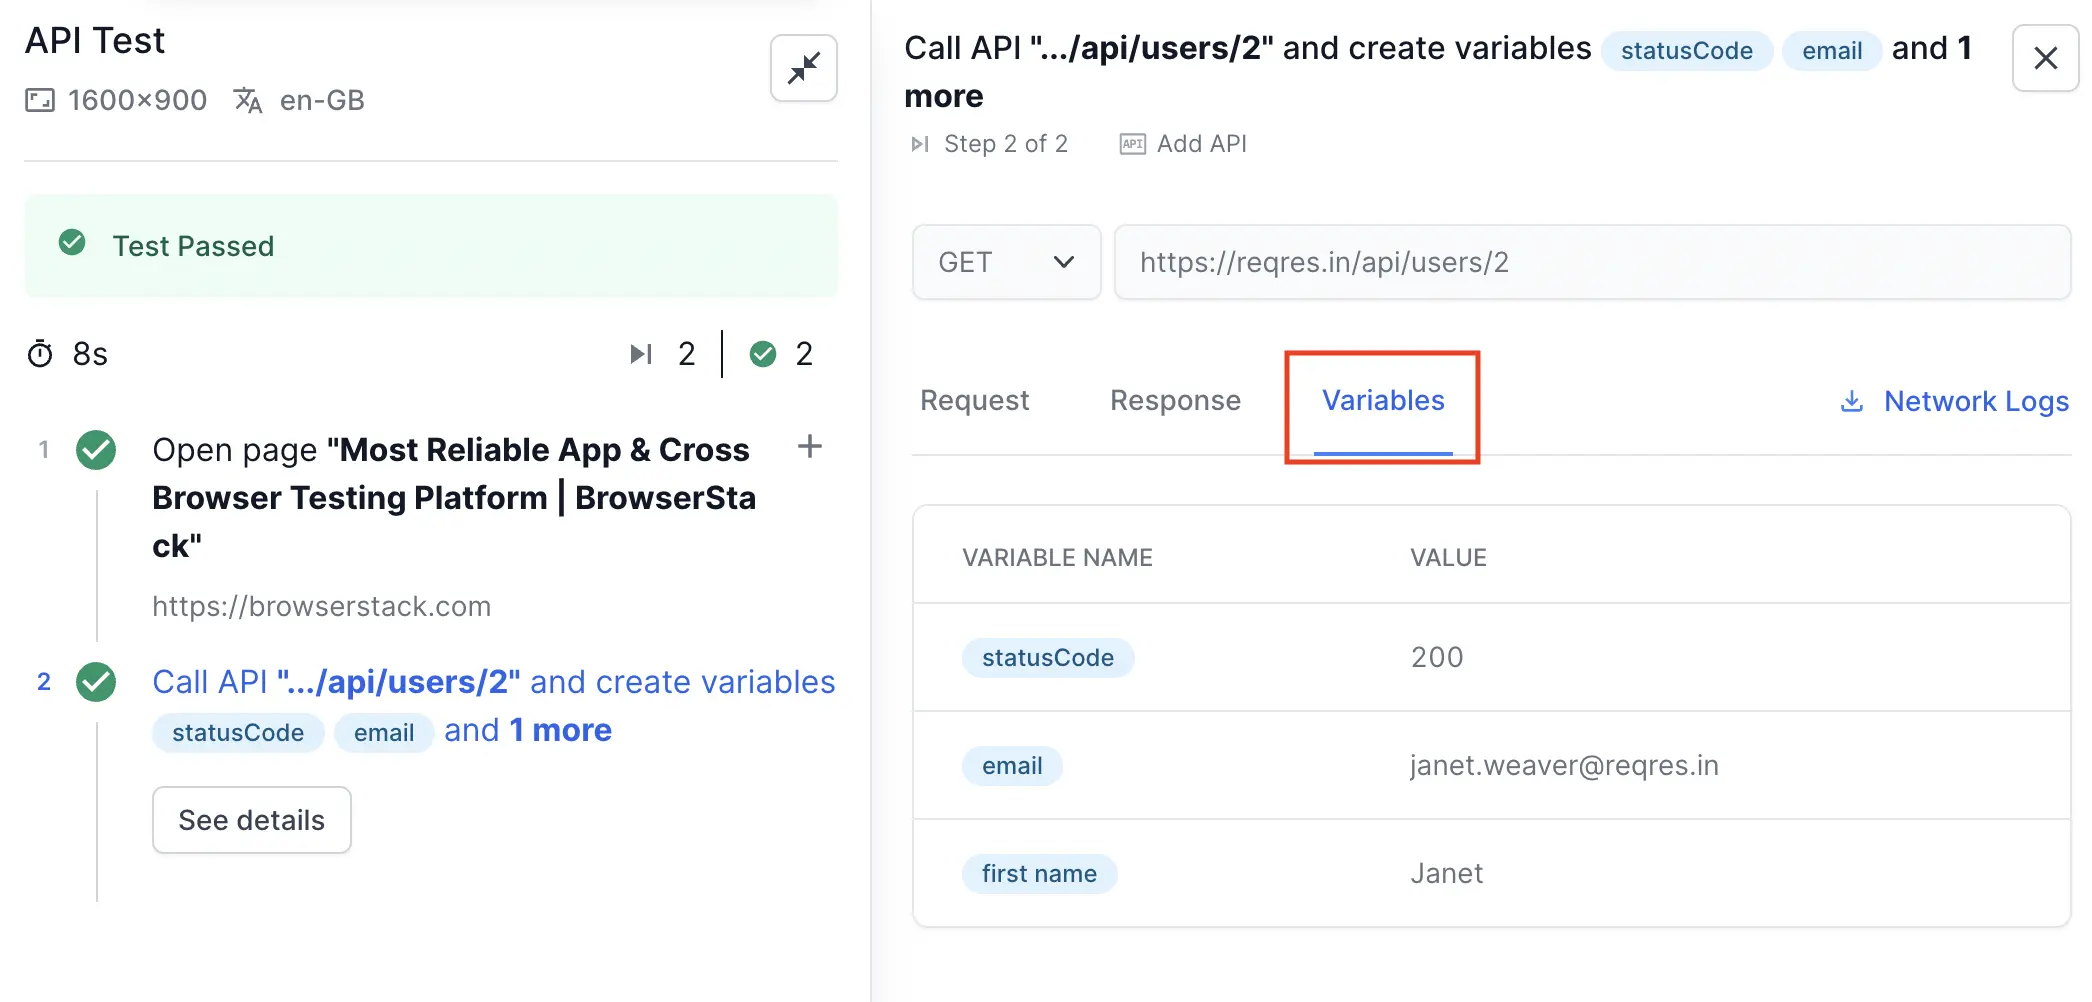
After test execution, a new See Details button appears, showing details about the API execution call.
Click this button to view the request, the generated response, along with the extracted variable values or validation results. If multiple validations were added, you will see results for all the passed and failed validations. For XML, the validation results display the XPath used and the value checked.
We're sorry to hear that. Please share your feedback so we can do better
Contact our Support team for immediate help while we work on improving our docs.
We're continuously improving our docs. We'd love to know what you liked
We're sorry to hear that. Please share your feedback so we can do better
Contact our Support team for immediate help while we work on improving our docs.
We're continuously improving our docs. We'd love to know what you liked
Thank you for your valuable feedback!