Custom Form Fields
Learn about the functionalities related to custom fields in Test Management.
Test Management allows you to create, amend, and manage custom fields in your Test Management projects.
Custom fields
Custom fields help you to customize your Test Management experience. You can add the fields you need to monitor the most important information to your project. This allows you to expand the standard test management fields, enabling you to track additional test information and adapt the platform to your specific workflow.
- Custom field management is restricted to Admin users. For details on how user restrictions apply, refer to the User Access Control documentation.
- Custom field names must be unique. Avoid using system-defined field names from Test Management.
Currently, Test Management supports the following custom field types:
After creating or editing custom fields, always assign them to relevant projects. This ensures that the fields are available for use within those projects. You can assign custom fields to all projects or choose specific projects. Unassigned fields will not appear in any project.
Create a custom field
Following are the steps to create a custom field.
-
Navigate to Form Fields and Values under Settings.
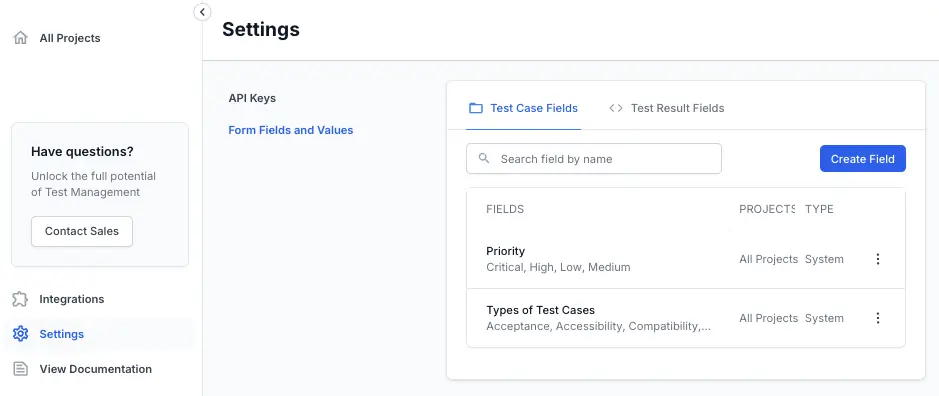
- Click Create Field.
-
Select the type of custom field from the Type drop-down menu. Enter the necessary details.
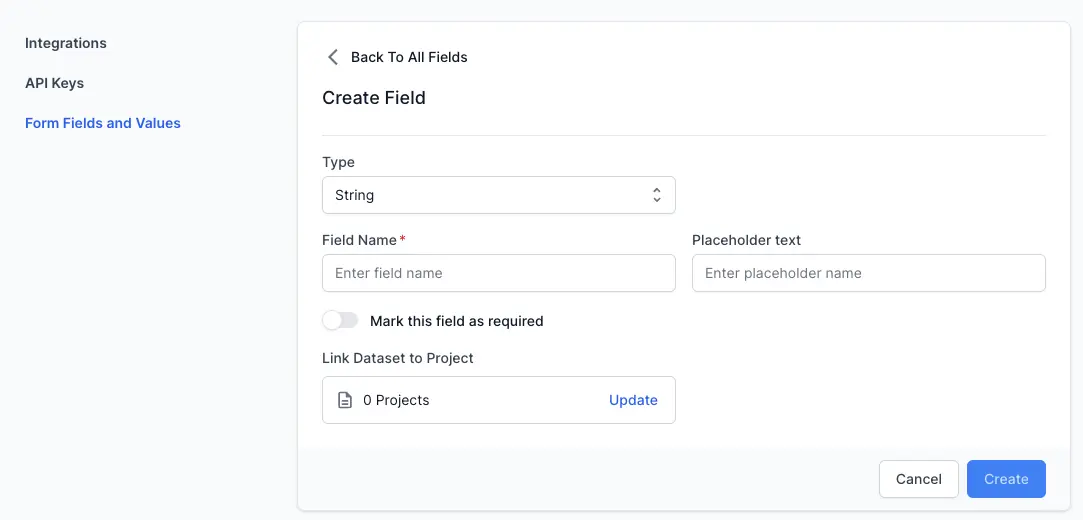
- Enable the Mark this field as required toggle to make this a mandatory field in your test case form.
-
Click Update to link projects.
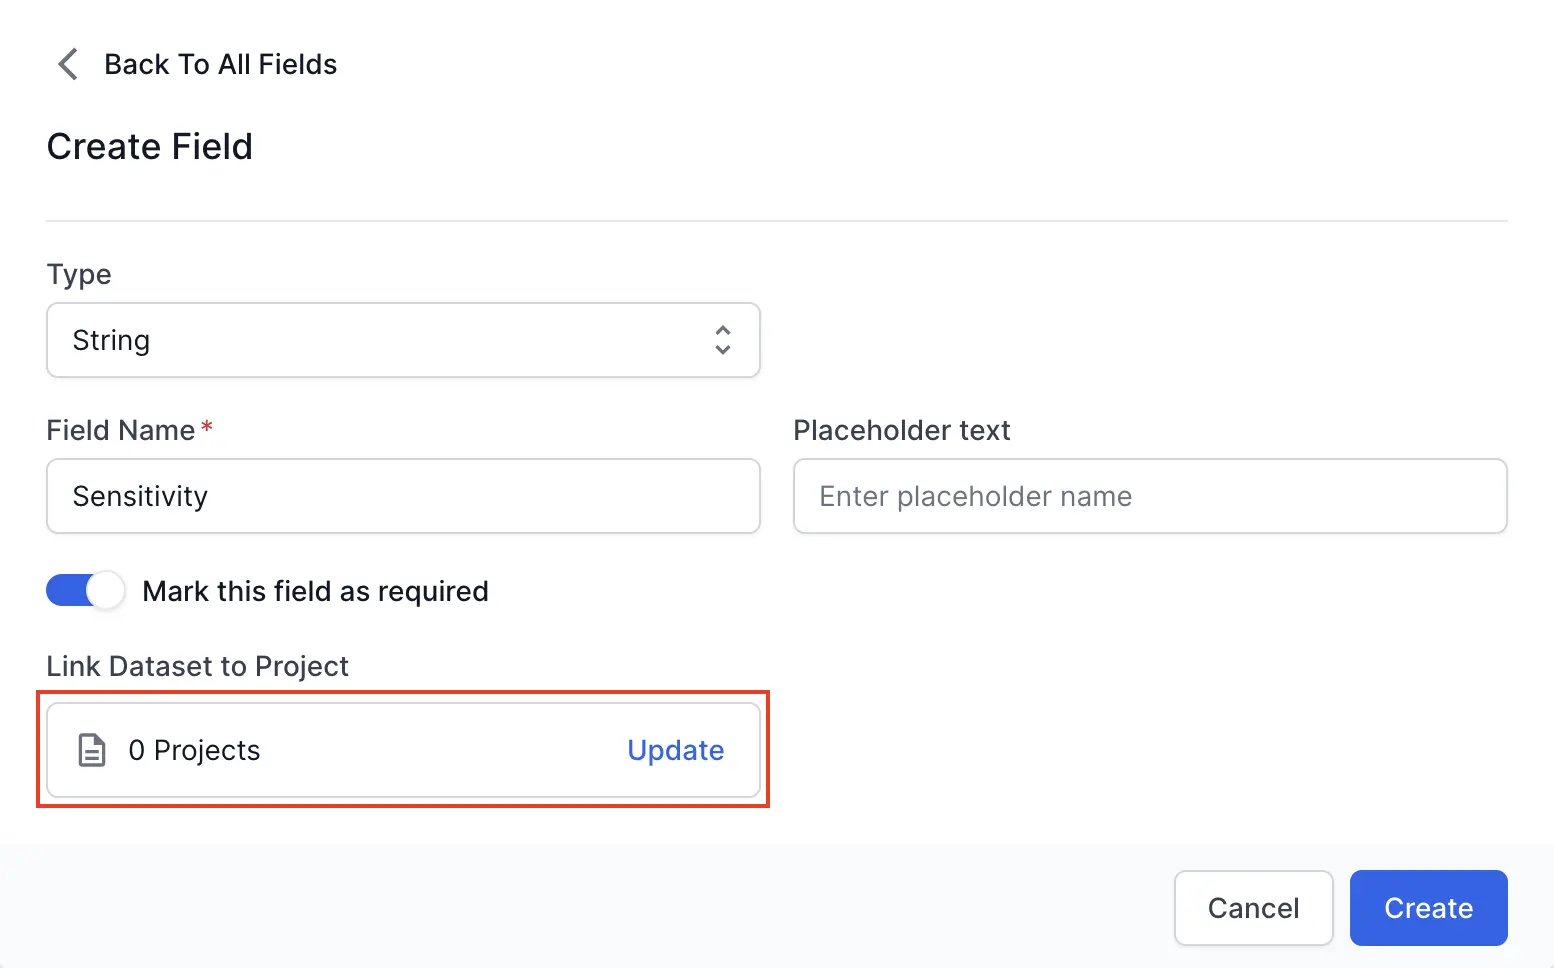
-
Select the projects to link with the field.
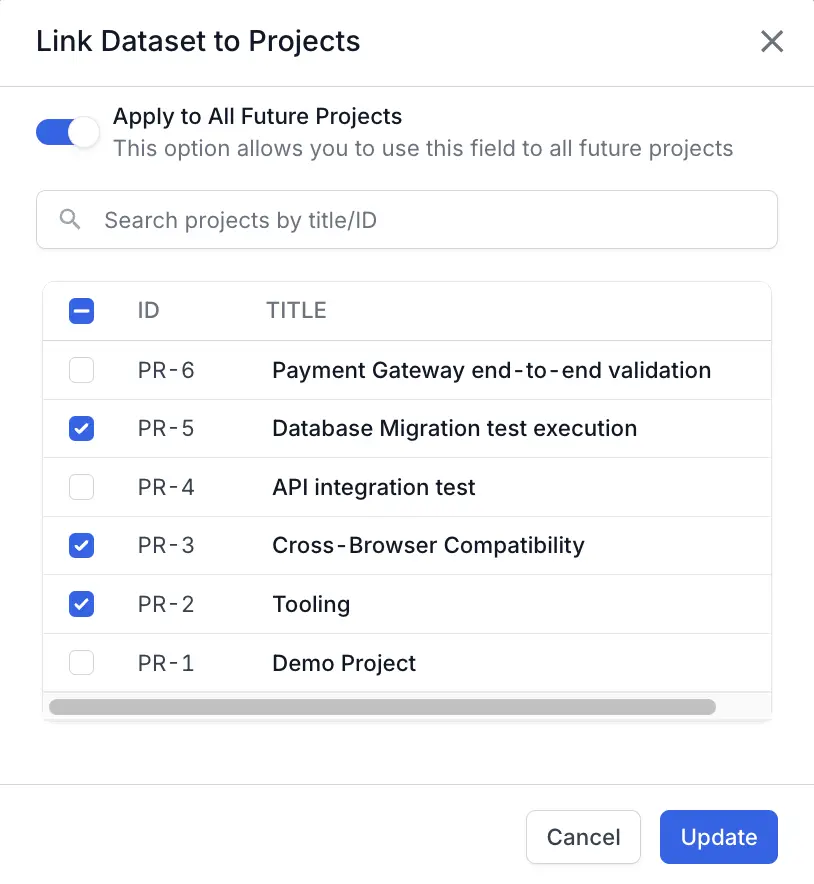
-
Click Create.
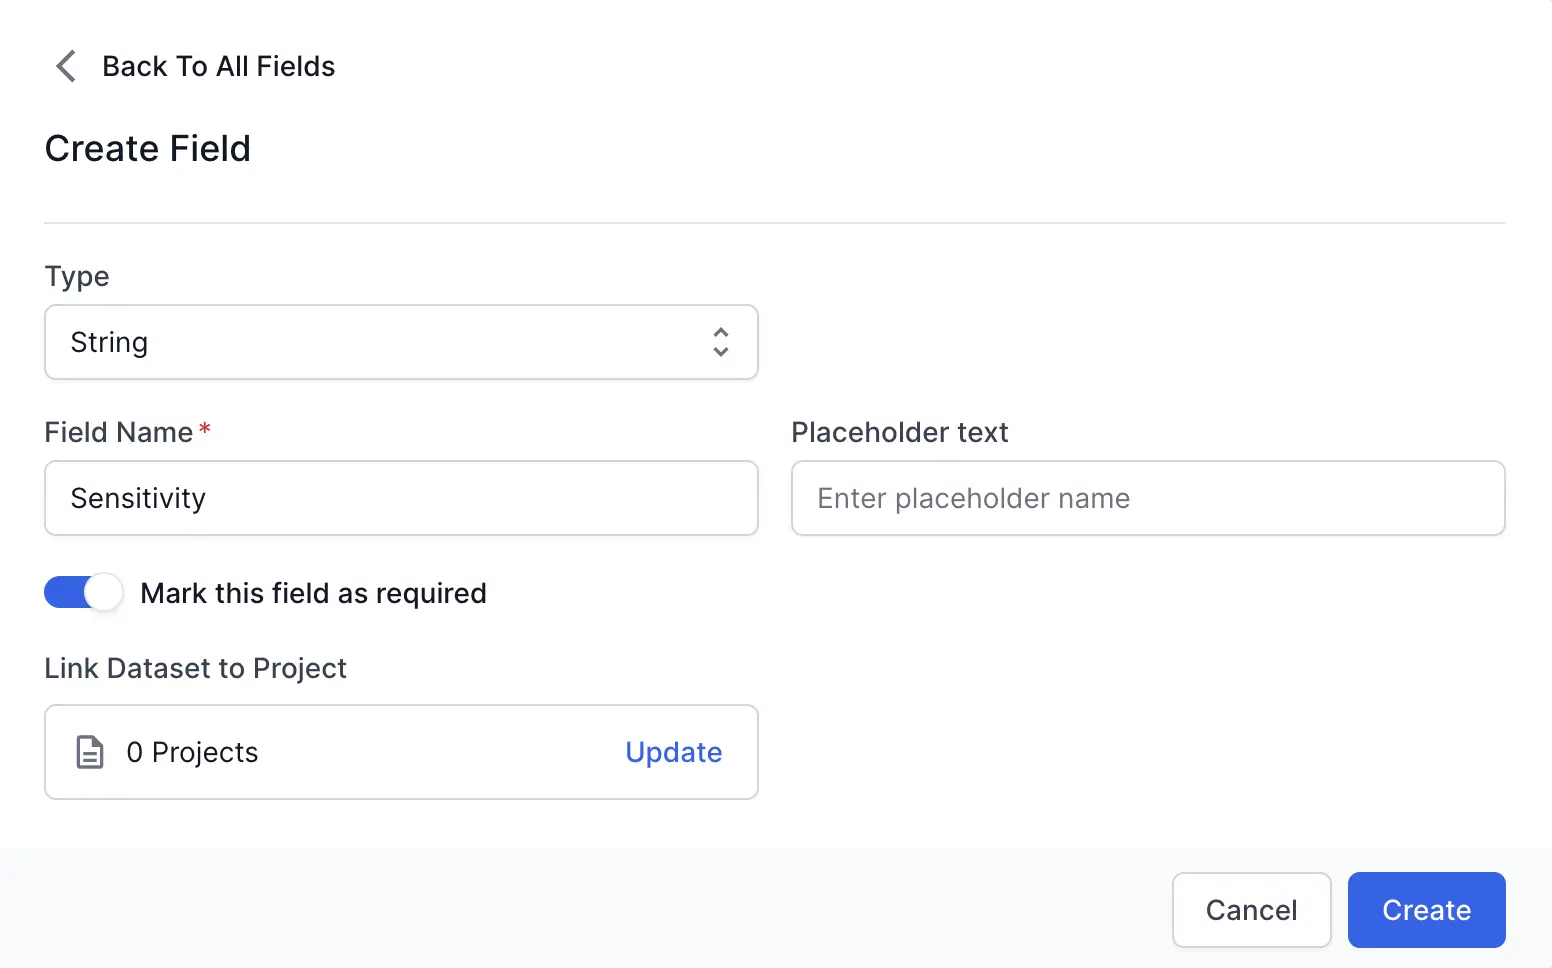
A custom field is created and is available in the form fields list view. Now, the custom field will appear in all the linked projects.
Search custom field
The Search functionality allows you to look up custom field based on their Title within your custom field list view. Quickly find the custom field you need by searching for its Title. Our intuitive search helps you locate the right entry without having to scroll or filter through long lists.
The search bar is visible above the list of custom field in the list view.

Update a custom field
To update an existing custom field:
- Click the kebab menu on the right of the desired custom field.
-
Click Configure Fields.
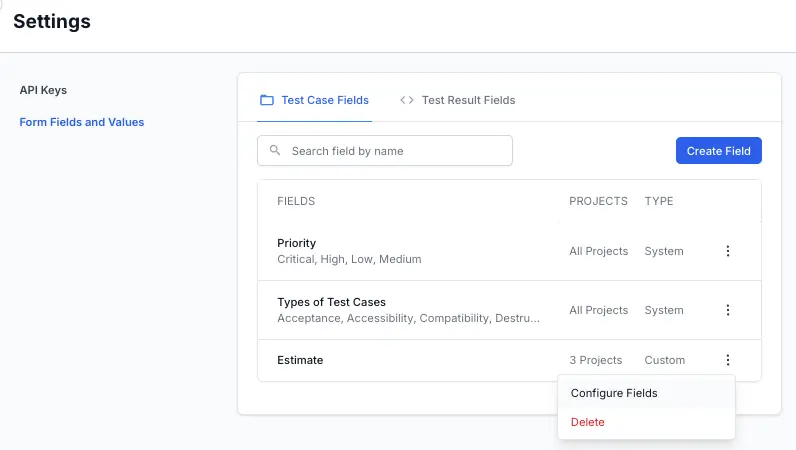
Update the necessary fields or switch on Mark this field as required toggle.
-
Click Update.
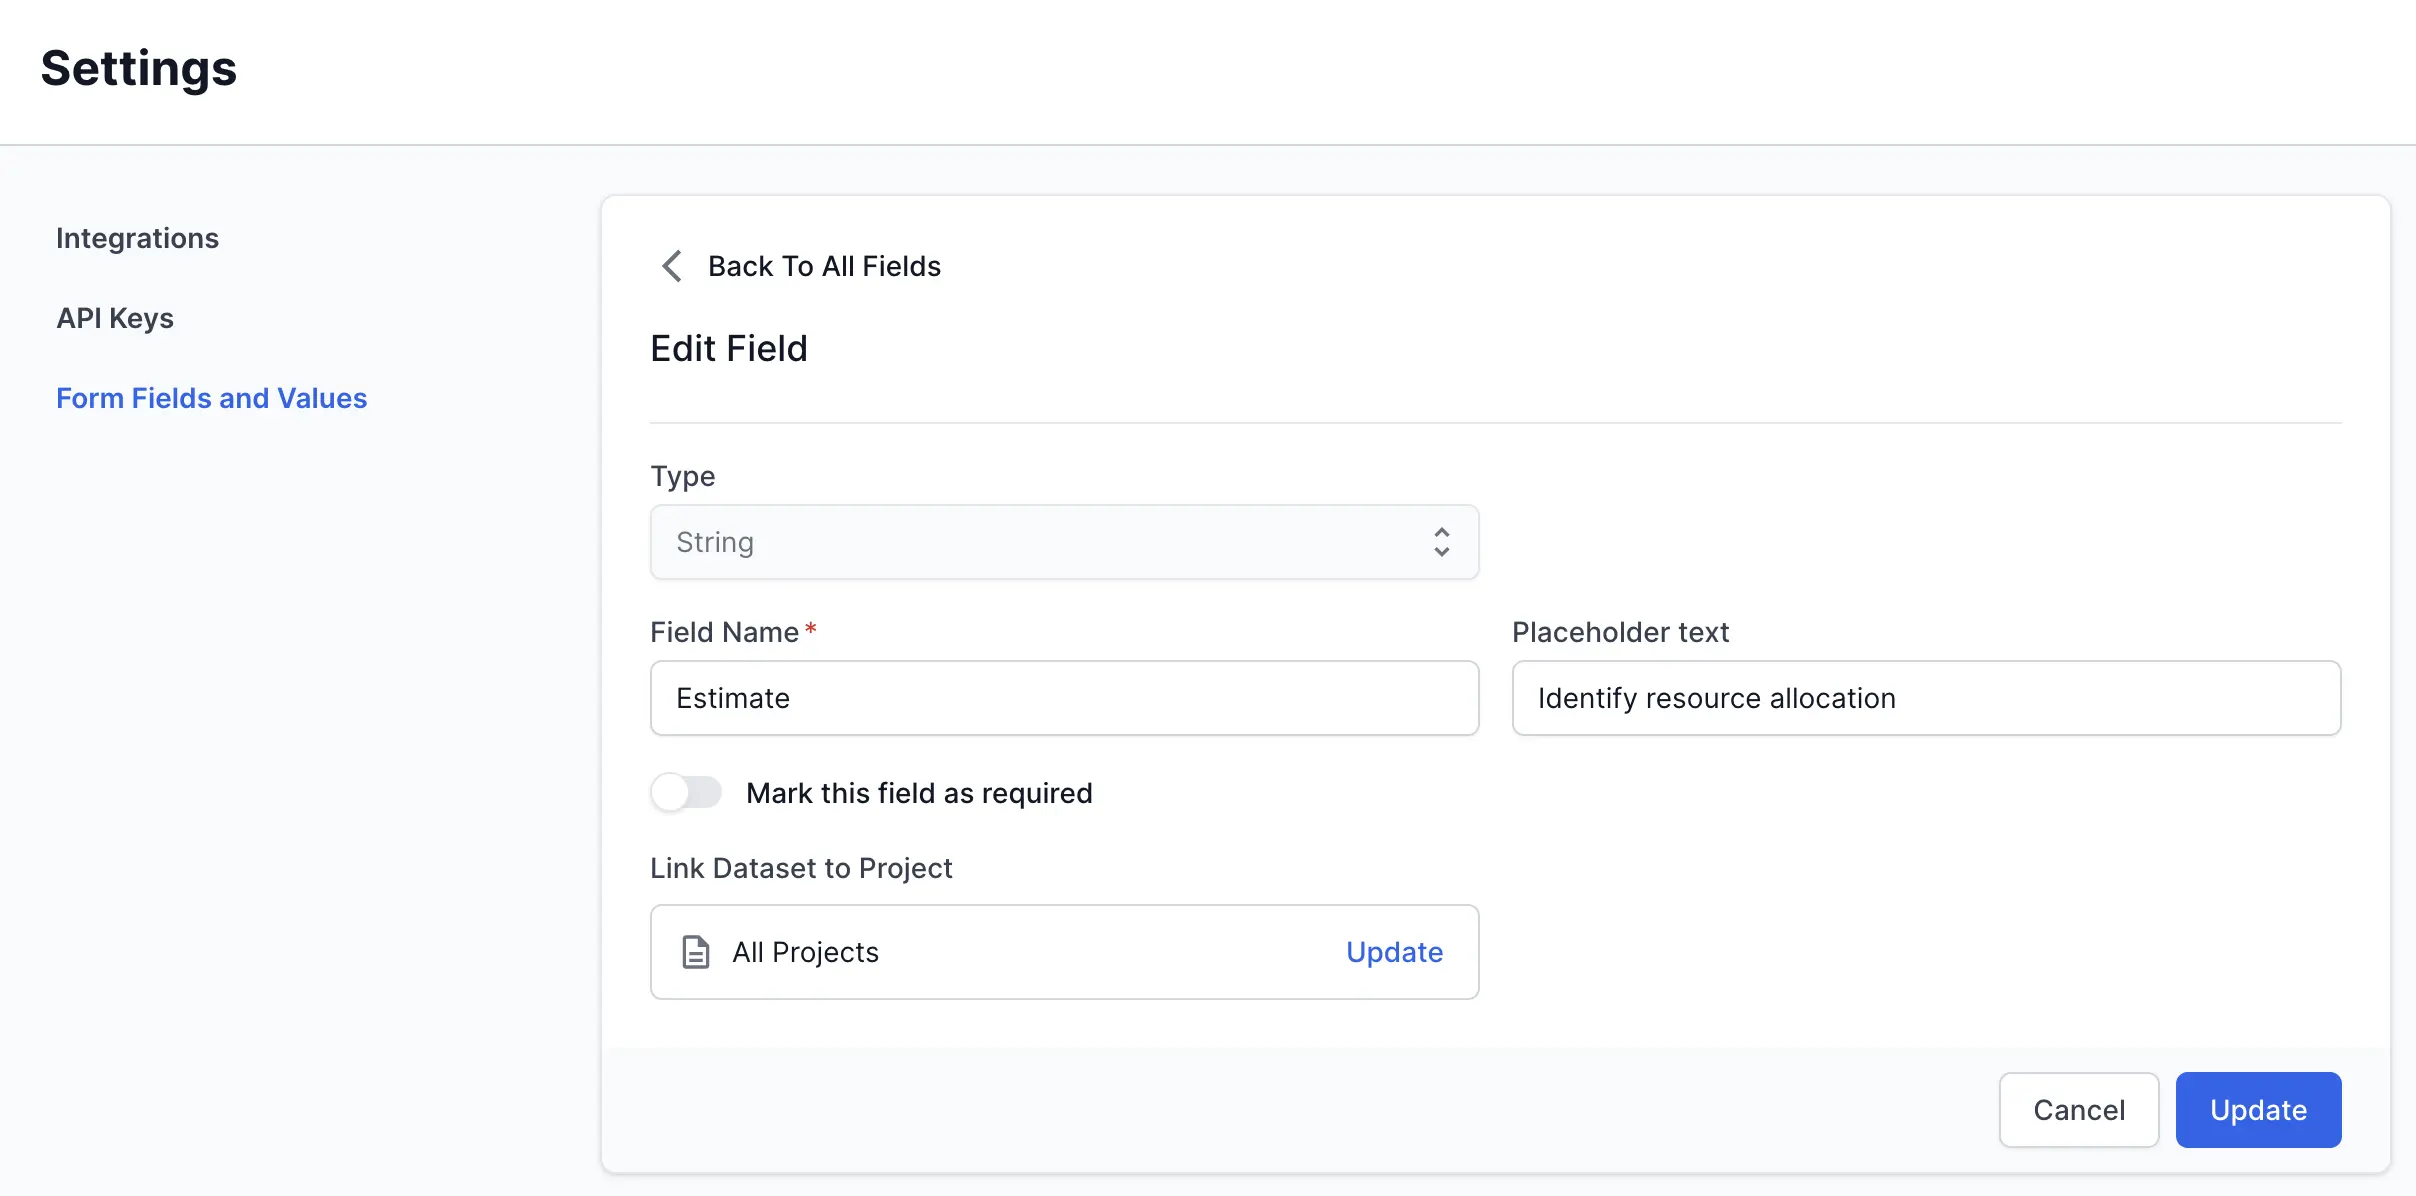
The custom field is updated and is available in the form fields list view.
Delete a custom field
When managing custom fields, it is important to note that only the user who creates a custom field can delete it. System-defined fields cannot be deleted.
To delete a custom field in the desired form field:
- Click the kebab menu on the right of the desired custom field.
-
Click Delete.

-
Click Delete in the confirmation pop-up.

The custom field is deleted and removed from the form fields list view and the associated projects.
Create a custom dropdown field
Custom dropdown fields provide pre-defined options to select from within your projects. Datasets are collections of values that you can assign to these dropdown fields; each dataset maps to multiple projects. The following procedure guides you through defining the field, creating datasets with dropdown options, and linking the field to relevant projects.
Points to remember
- Create at least one dataset with values when defining a custom dropdown field.
- A project can be linked to only one dataset at a time.
- When a project is linked to a new dataset, it automatically gets unlinked from any previously associated dataset.
- You can add only thirty datasets to a custom dropdown field.
-
Navigate to Form Fields and Values under Settings.

- Click Create Field.
-
Select Dropdown from the Type dropdown menu.
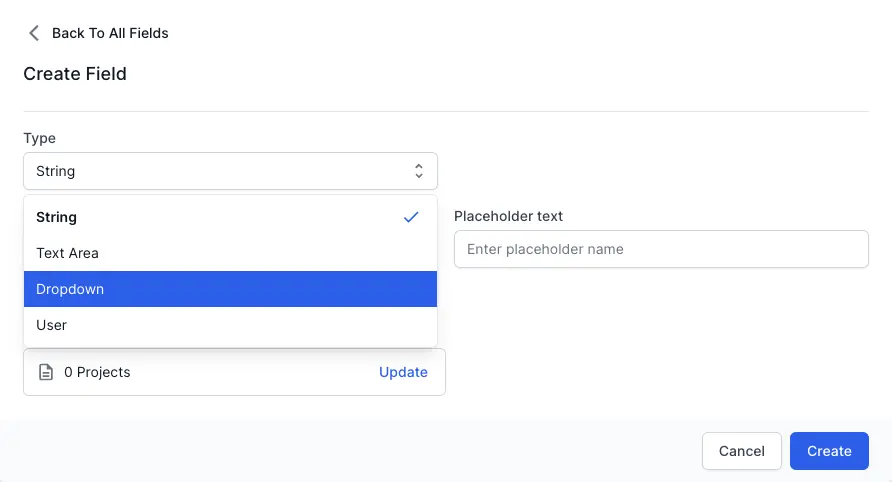
-
Enter a descriptive name in the Field Name textbox. If necessary, enter placeholder text in the Placeholder text textbox.
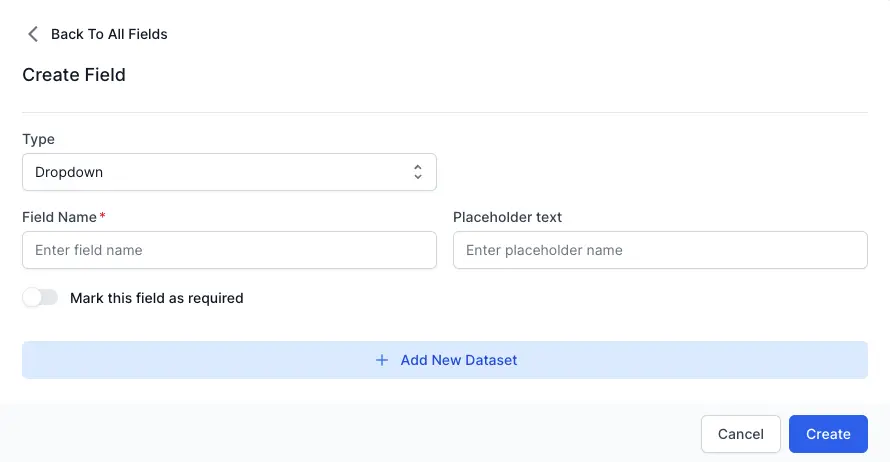
- Switch on Mark this field as required toggle to make this field mandatory in the test case form.
- Click Add New Dataset.
-
Enter value name in the textbox, which is an option in the dropdown, and click Add Value.
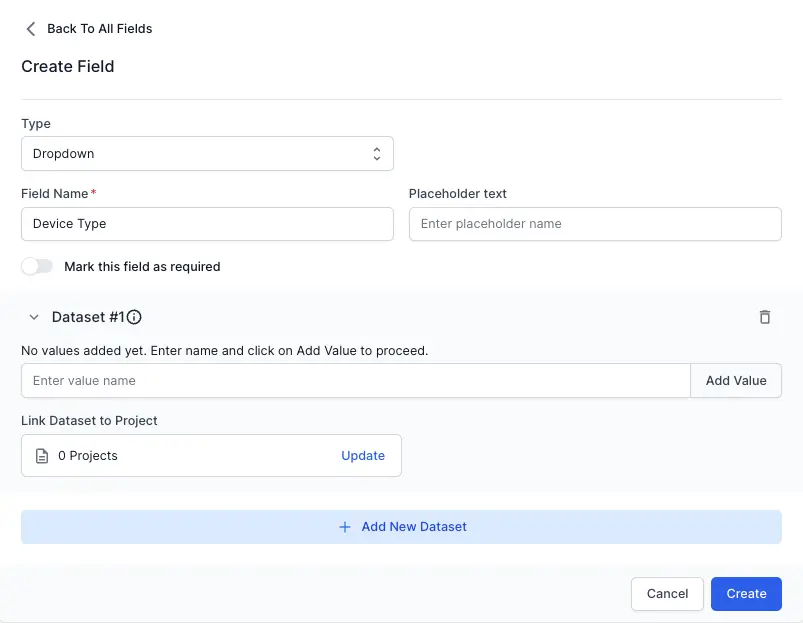
-
Optionally, select the DEFAULT toggle next to the value you want to be pre-selected in the dropdown field. This value will automatically appear as the initial selection.
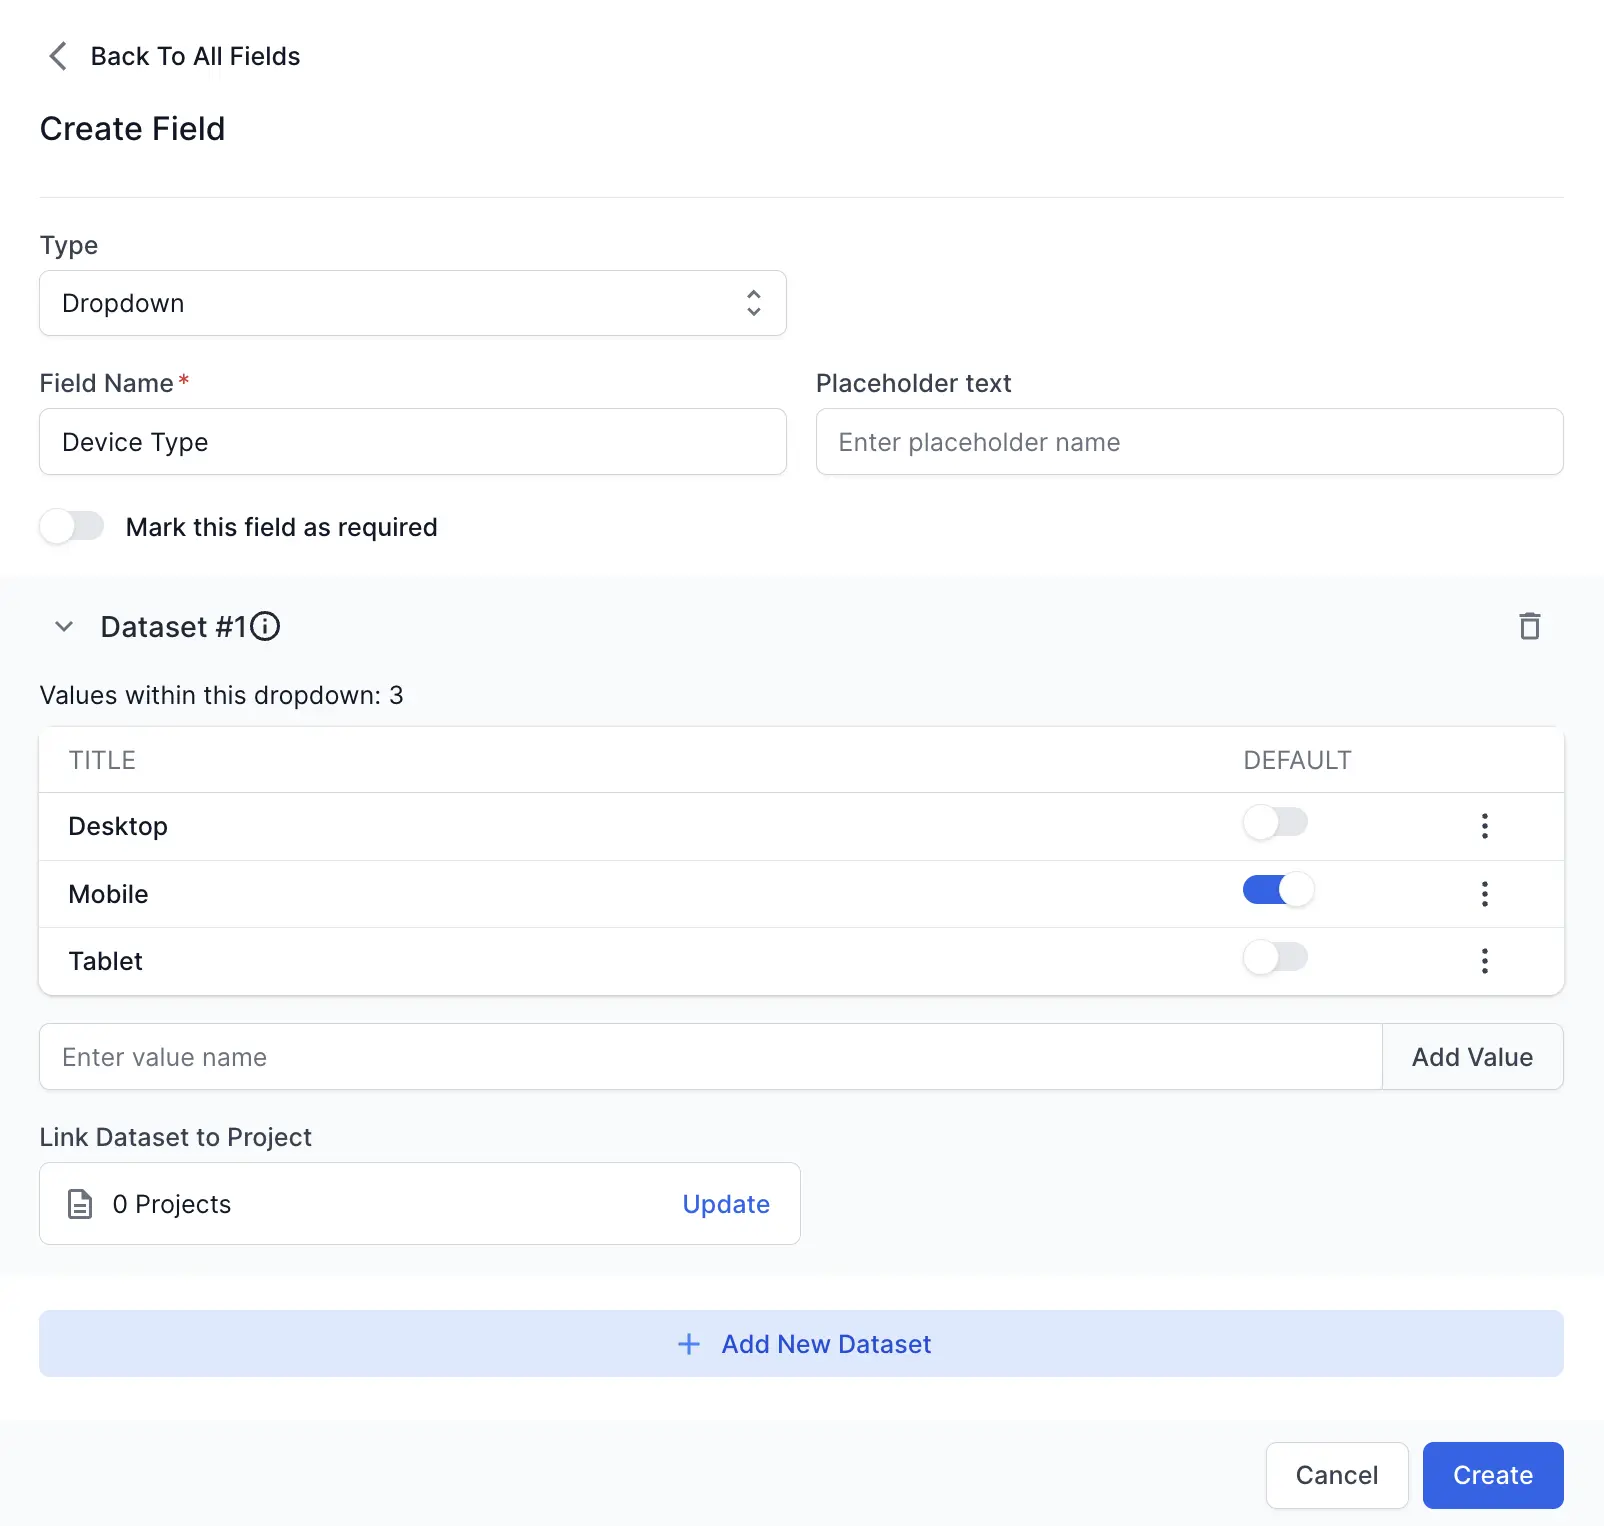
-
Click Update in the Link Dataset to Project field.

-
Select projects where you want to use this dropdown field and click Update.
-
Optionally, create additional datasets with unique values by repeating steps 6 through 10.

-
Click Create.
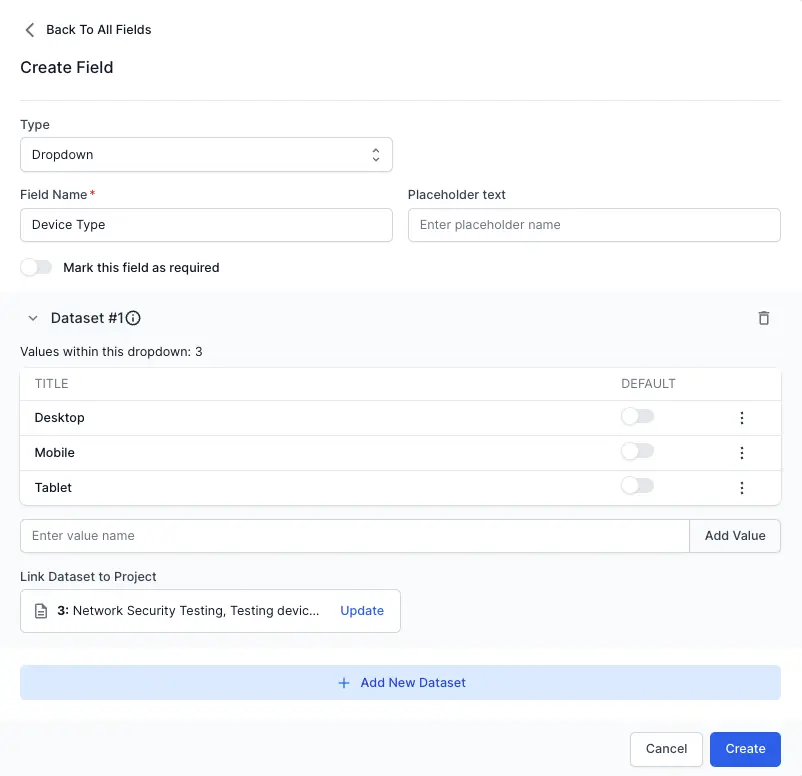
You have created a custom dropdown field with its associated datasets.
Manage custom dropdown fields and datasets
You can manage datasets and values associated with your custom dropdown fields. Here is how changes to datasets affect linked projects.
Changes made to datasets will automatically reflect in linked projects.
Link and unlink datasets from projects
Linking and unlinking datasets from projects, as needed, can ensure that your custom dropdown fields always offer suitable options.
When a project is linked to a new dataset, it automatically gets unlinked from any previously associated dataset.
To link and unlink datasets from projects:
-
In the Link Dataset to Project field, click Update.
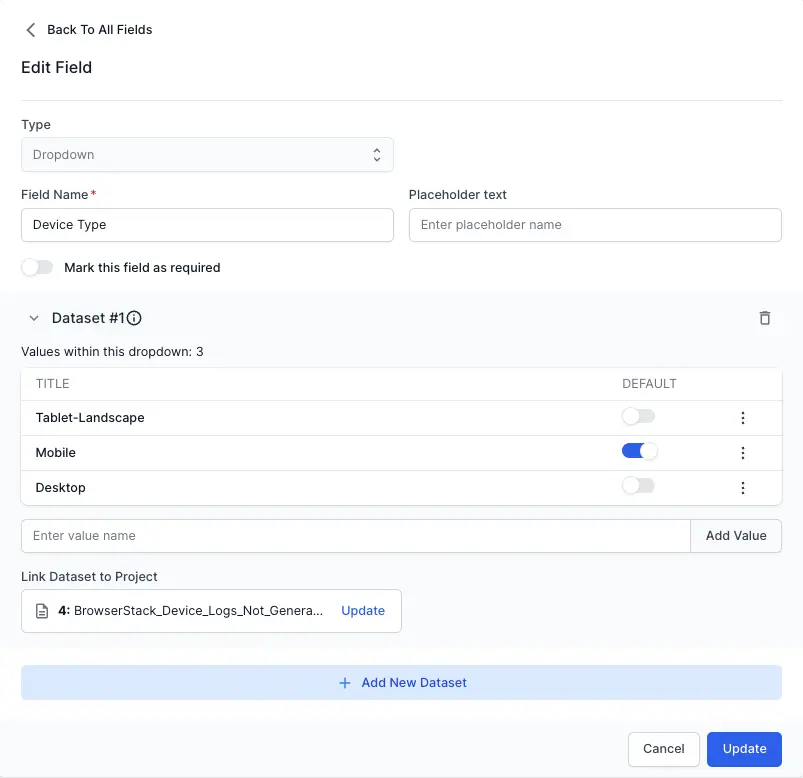
-
Select the projects to link with the field.

-
Click Update and confirm the action.
Now, the projects linked to the datasets are updated.
Update a dataset value
If you edit values within a dataset, the dropdown menu in linked projects will automatically reflect these changes. This ensures you always have access to the most up-to-date custom field.
To edit a value from a custom dropdown dataset:
-
Click the kebab menu next to the value you want to modify.
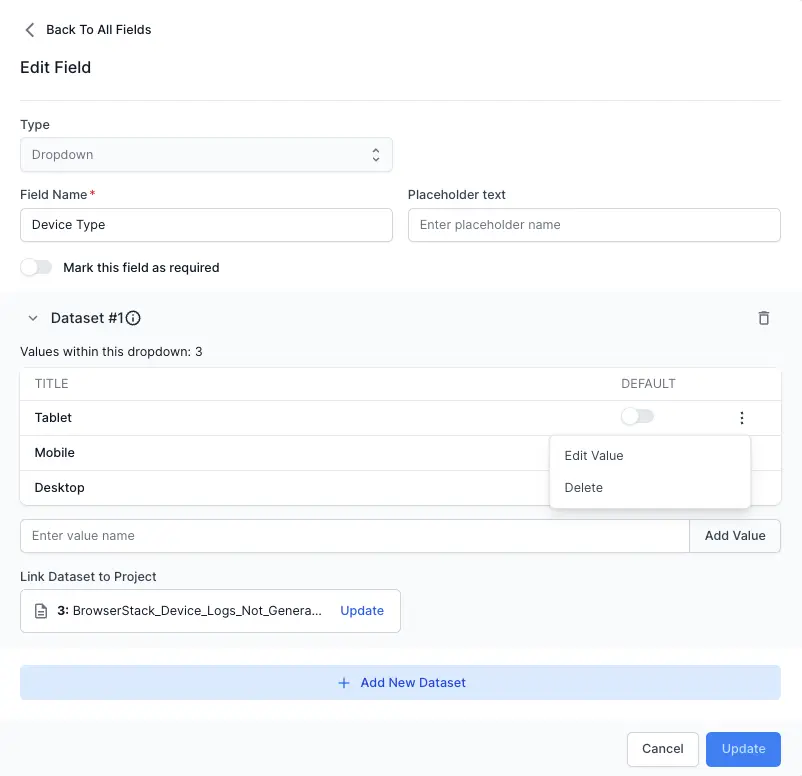
- Select Edit value.
-
Update the value in the text box and click Update.
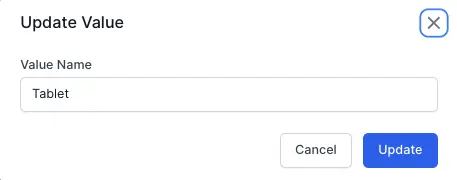
The dataset value is updated.
Modify default value
A custom dropdown field can have a designated default value. This pre-selected value automatically appears when you interact with the dropdown for the first time. Here is how to modify the default value within your dropdown field.
- Locate the value within the dataset that currently has the DEFAULT toggle enabled.
-
Click the DEFAULT toggle next to this value to deactivate it.

- Find the value you want to make the new default and click its DEFAULT toggle to enable it.
The modified default value will now be the automatic selection when you interact with the dropdown field.
Delete a dataset value
If you delete values within a dataset, the dropdown menu in linked projects will automatically reflect these changes.
You cannot delete a default value.
To delete a value from a custom dropdown dataset:
-
Click the kebab menu next to the value you want to remove.

- Click Deleteand confirm the action.
-
Click Delete.
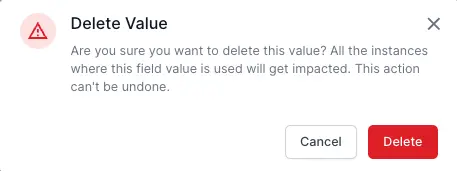
The value is deleted, and the dataset is updated to reflect the new dataset.
Delete a dataset
If you delete values within a dataset, the dropdown menu in linked projects will automatically reflect these changes. To delete a value from a custom dropdown dataset:
-
Click the Delete icon next to the dataset you want to remove.
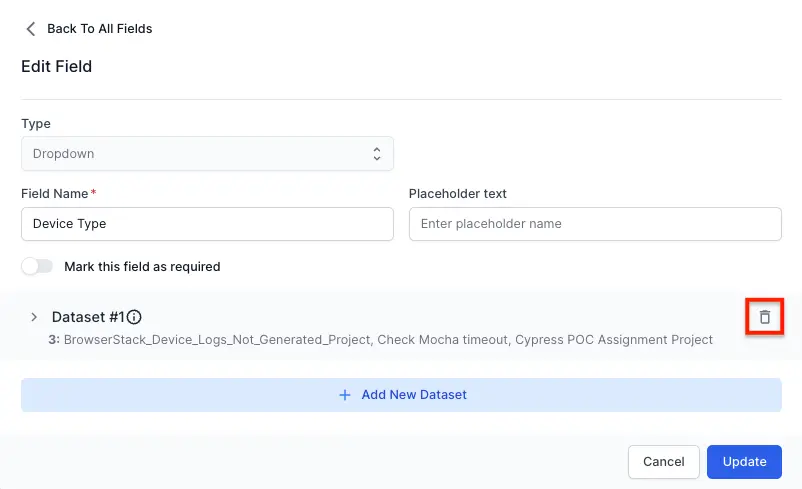
-
Click Delete and confirm the action.

The dataset is deleted, and the custom dropdown field has been updated.
If you delete a dataset, any fields from that dataset will also be removed from linked projects.
We're sorry to hear that. Please share your feedback so we can do better
Contact our Support team for immediate help while we work on improving our docs.
We're continuously improving our docs. We'd love to know what you liked
We're sorry to hear that. Please share your feedback so we can do better
Contact our Support team for immediate help while we work on improving our docs.
We're continuously improving our docs. We'd love to know what you liked
Thank you for your valuable feedback!