Upload images, QR codes, or barcodes to BrowserStack real devices
Applications such as banking and payment apps, lifestyle apps, and social media apps use the mobile device camera to capture images and scan QR codes or barcodes.
App Live enables you to test image capture and QR code/barcode scanning for your apps on BrowserStack real devices. You can upload an image, QR code, or barcode to the BrowserStack real device by using the Image Injection feature. The uploaded image/QR code/barcode is used as input to the real device camera to simulate the action of capturing an image or scanning a code.
By using Image Injection on App Live, you can test your app for scenarios such as:
- Capturing images of checks, receipts, and other images.
- Scanning QR code.
- Scanning barcode.
In this guide, you learn about:
- Supported devices, apps, and images/QR codes/barcodes
- Enabling Image Injection setting for your app
- Adding padding for images/QR codes/barcodes
- Uploading and injecting image or QR code/barcode
- Testing your app using uploaded images/QR codes/barcodes
- Troubleshooting
Supported devices, apps, and images/QR codes/barcodes
| Android | Devices running Android OS 6 and higher. |
| iOS | Devices running iOS 13 and higher. |
The devices that do not support Image Injection appear grayed out in the device listing on the App Live dashboard.
App Live supports testing of the following types of apps using Image Injection:
- Uploaded apps.
- Apps synced with App Center.
- Images or QR codes/barcodes in the
.jpg,.jpeg, and.pngformats. - Images/QR codes/barcodes with maximum height and width dimensions of
288 pixels. - Maximum size of an image/QR code/barcode not exceeding
10 MB.
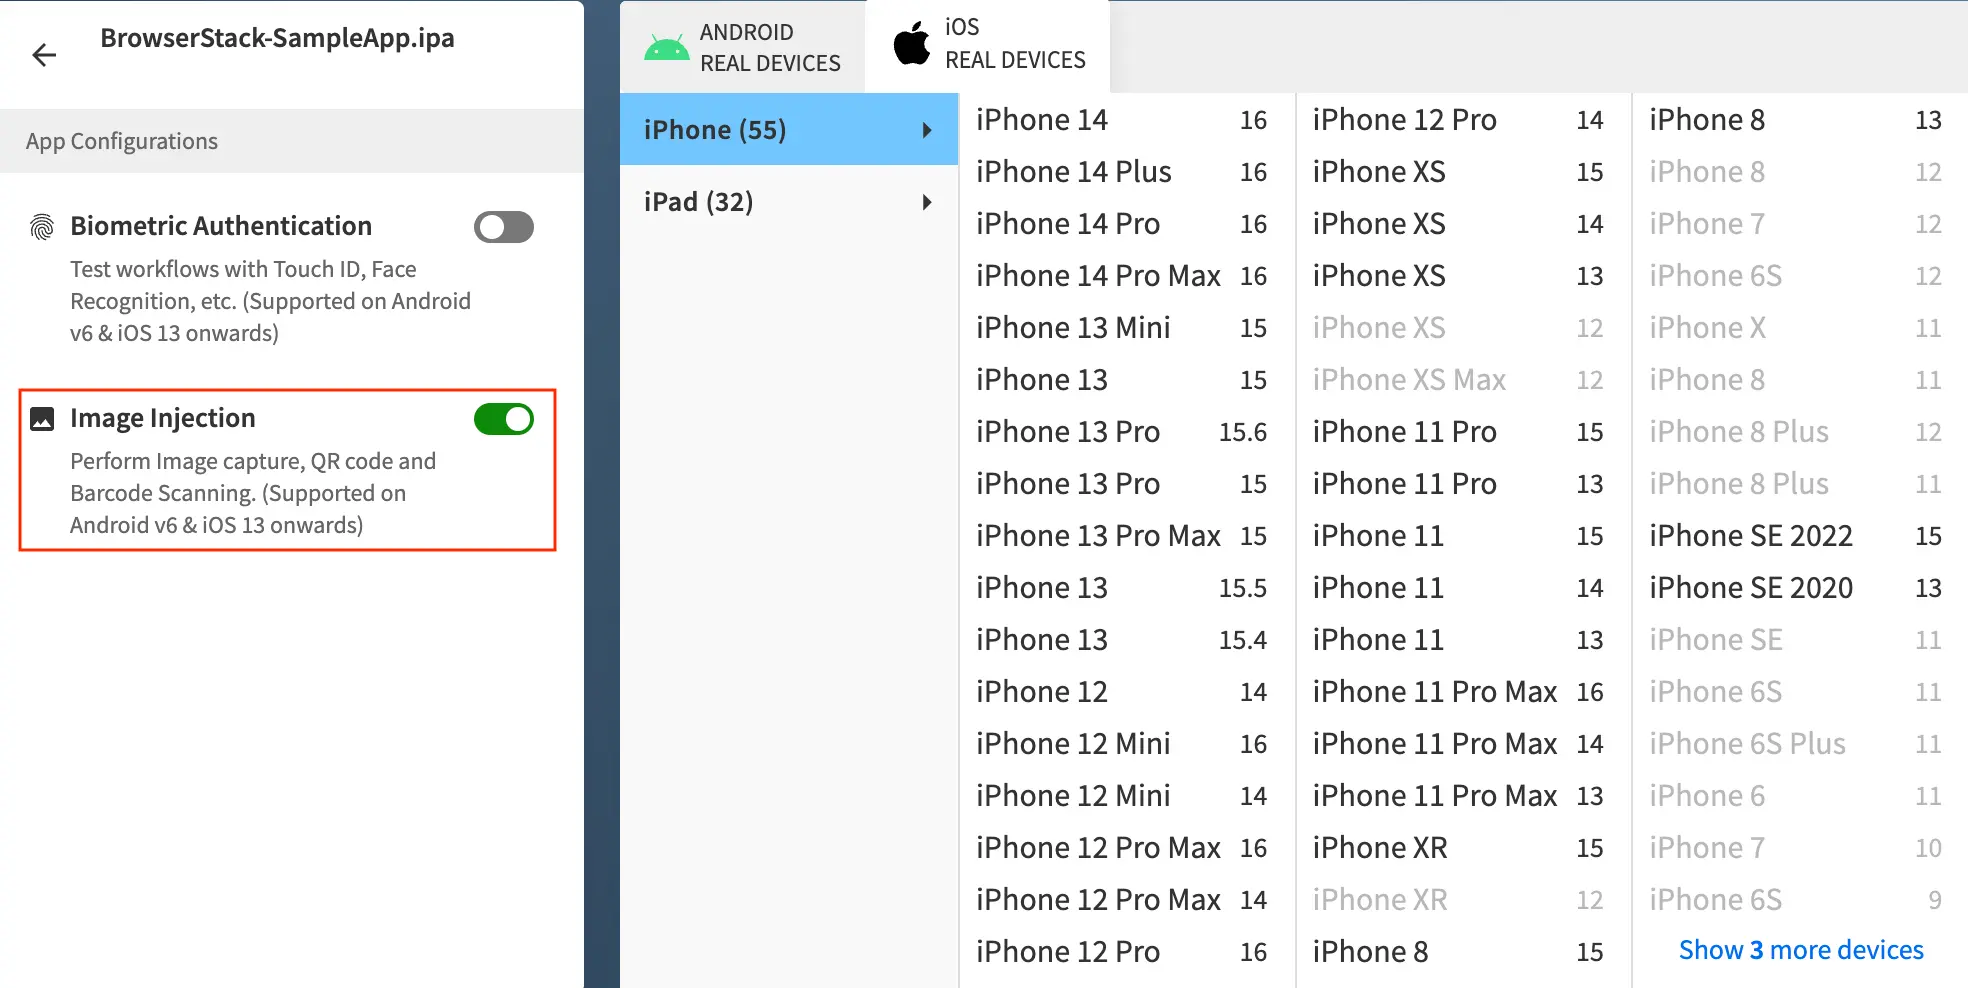
Enable Image Injection setting for your app
- Log in to the App Live dashboard.
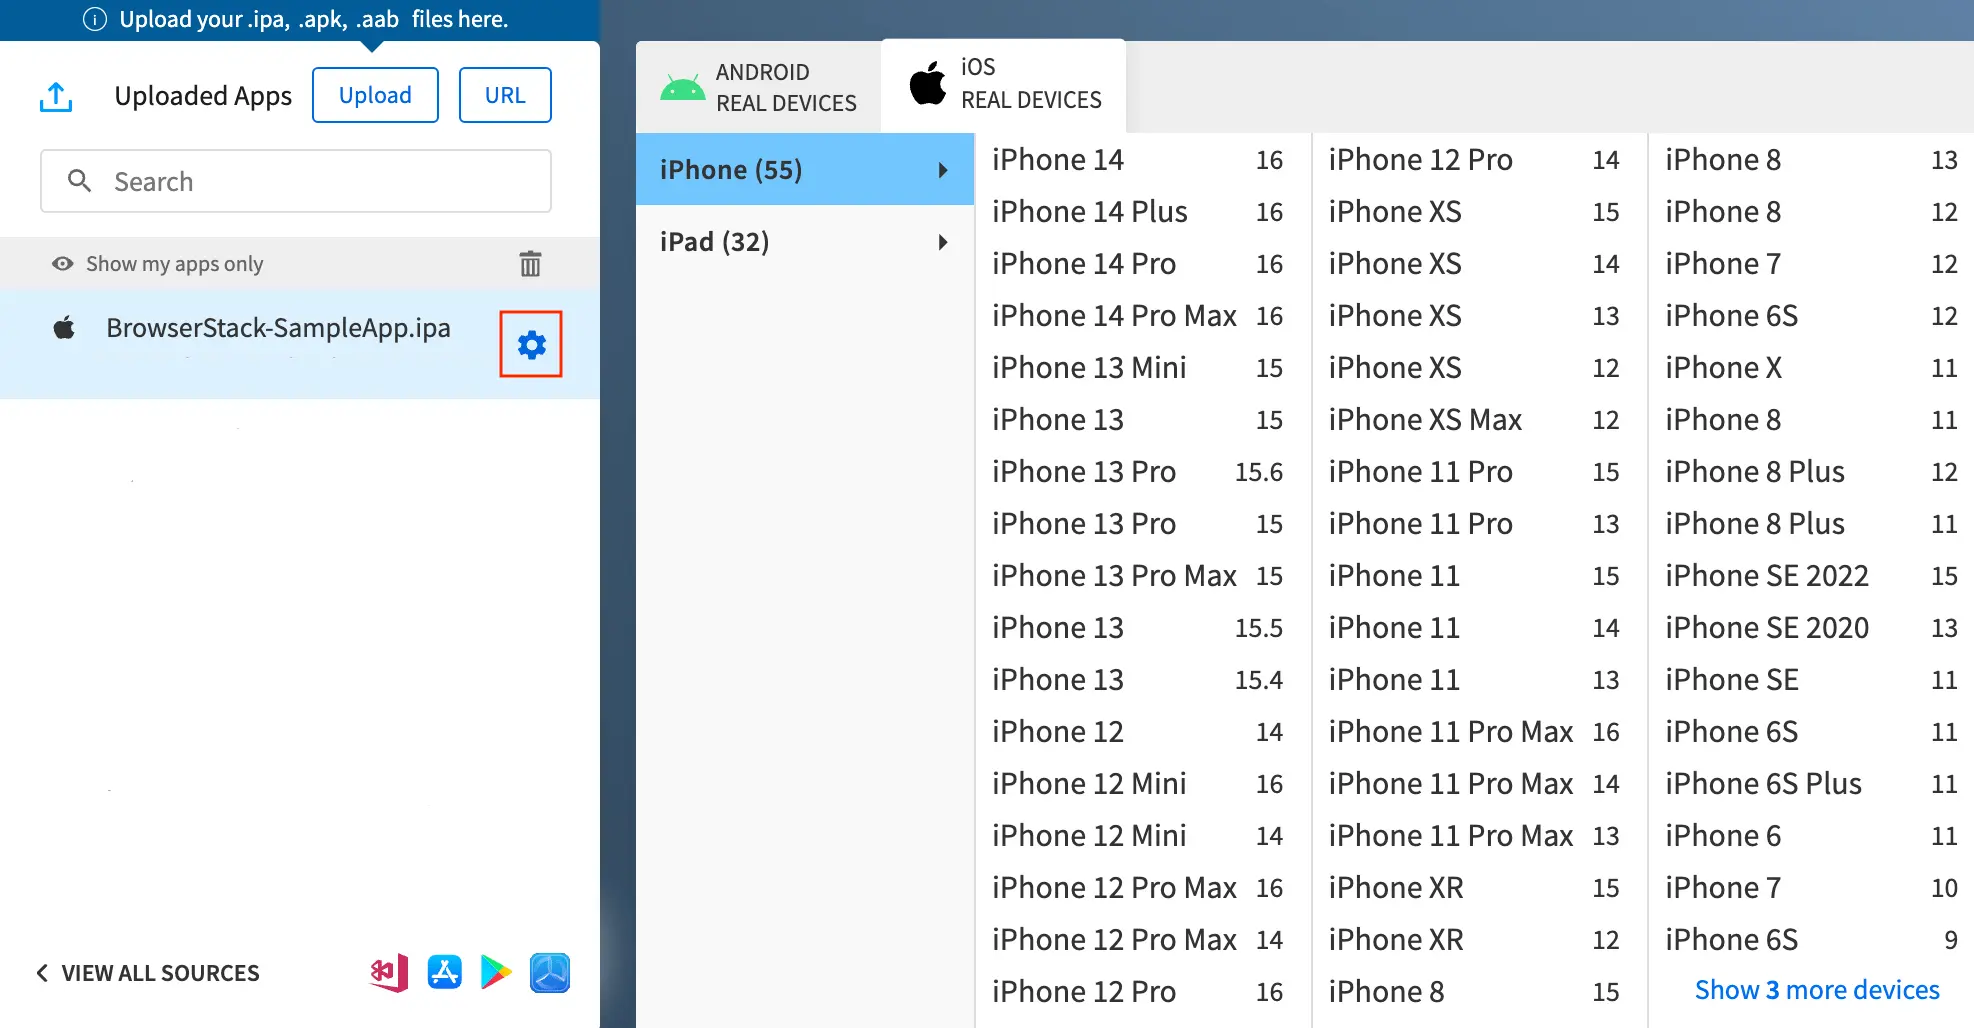
- Upload your app from the Select Source panel.
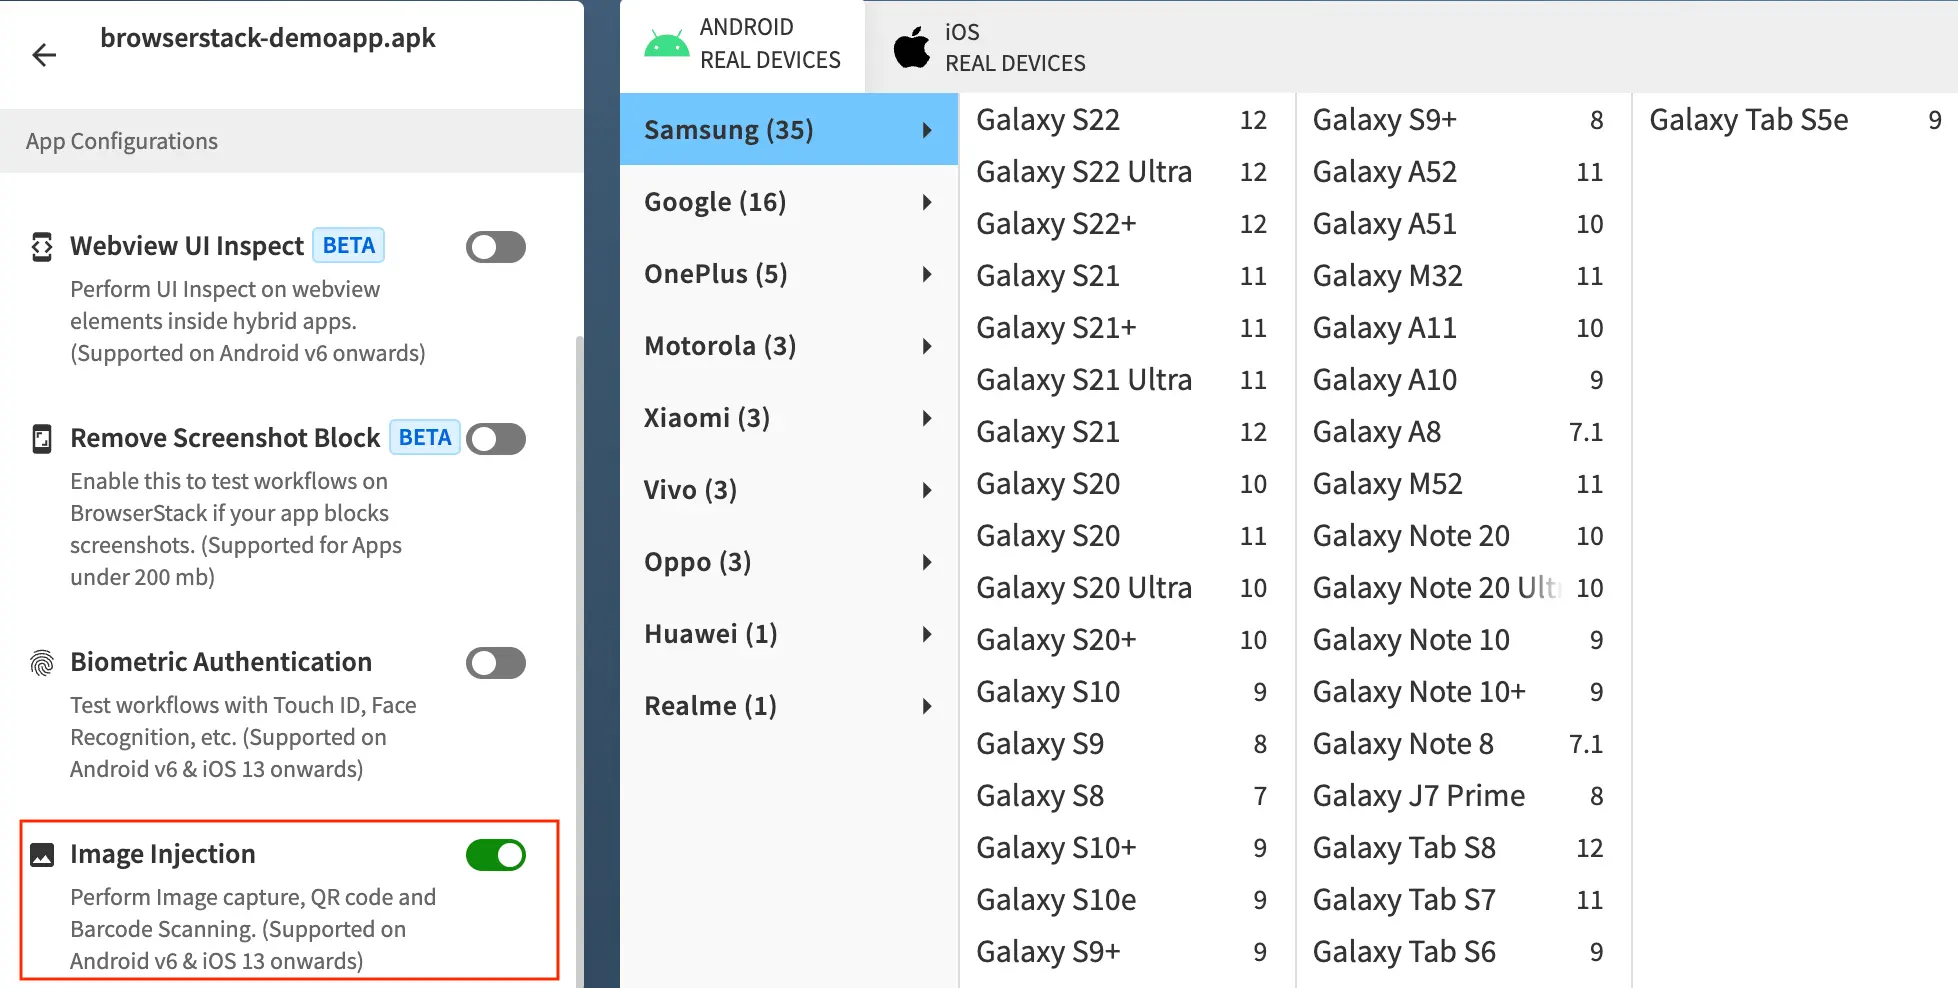
- After your app is uploaded, click the configuration icon next to the file name of your app.
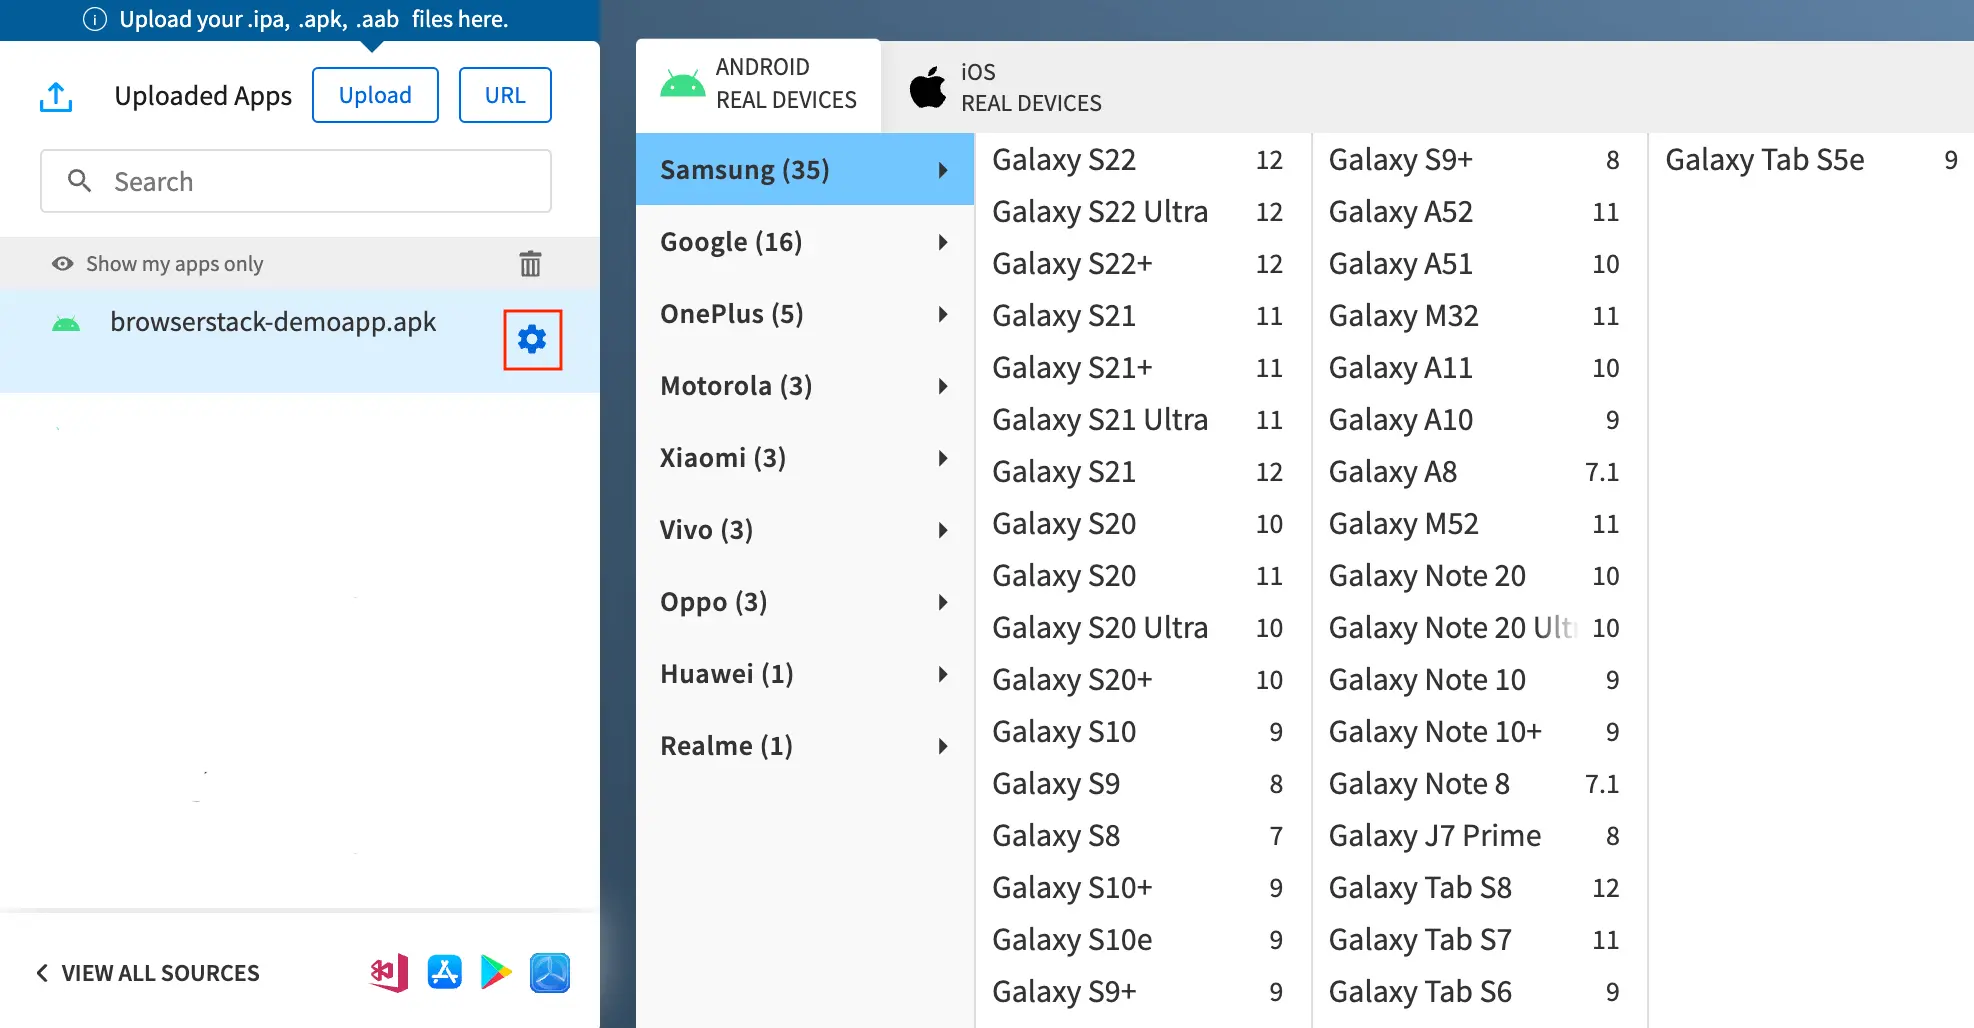
- Under App Configurations, enable Image Injection.
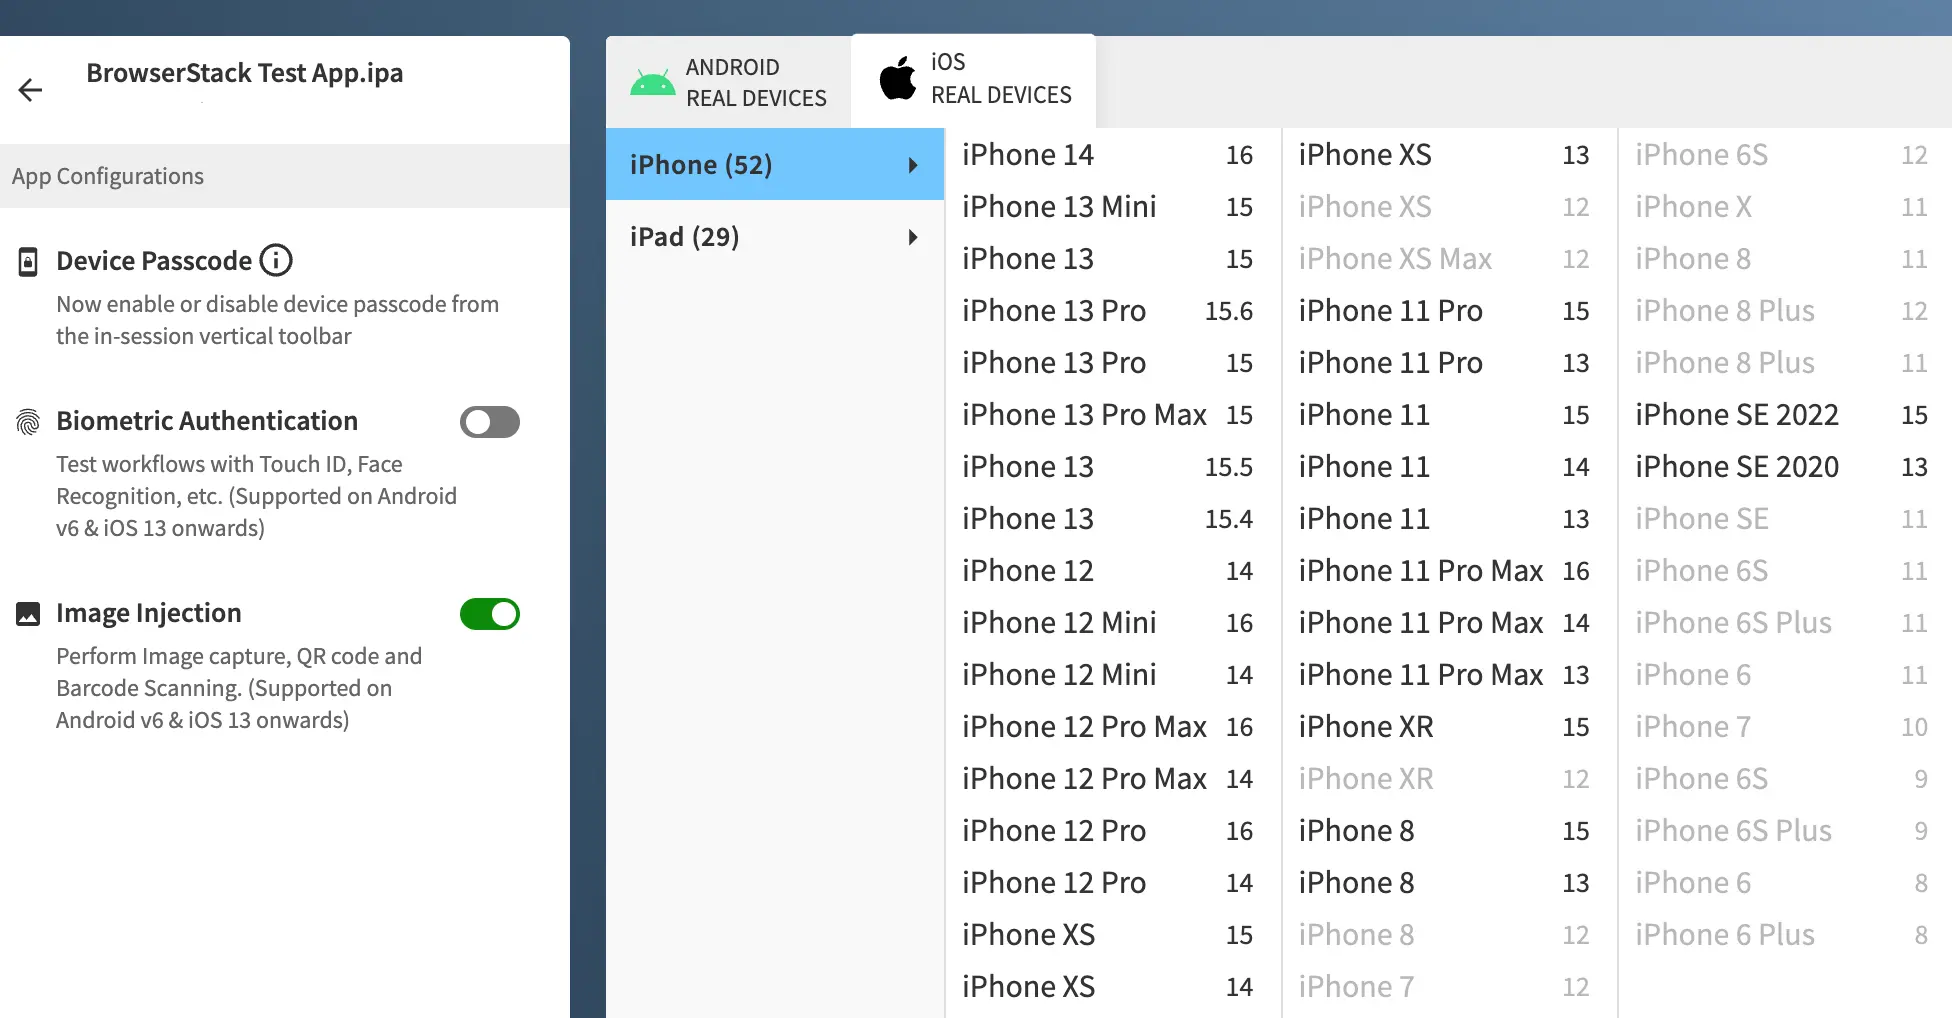
- Select your Android device from the list of available devices in the device listing, to launch your test session.
- Log in to the App Live dashboard.
- Upload your app from the Select Source panel.
- After your app is uploaded, click the configuration icon next to the file name of your app.
- Under App Configurations, enable Image Injection.
- Select your iOS device from the list of available devices in the device listing, to launch your test session.
Your setup session takes approximately 60 seconds.
Add padding for images/QR codes/barcodes
Many mobile apps that use the device camera to scan QR codes, barcodes, documents, etc. have a viewfinder or frame inside the camera output area to scan the image or code. If the image/QR code spans out of the viewfinder frame, the app fails to recognize and scan the image/code.
Padding for an image/QR code refers to the extra space between the image and the viewfinder frame. Adding padding enables most apps and devices to recognize and scan the image/code. The margin to be added for padding an image/QR code depends on the viewfinder area of an app.
Ensure that you add sufficient padding to the image/QR code before uploading it to BrowserStack real devices, if your app uses a viewfinder to scan images or QR codes.
If your uploaded image has insufficient padding because of which it is not recognized by your app, use the steps in the following example to add sufficient padding.
Add padding to images using sample scanner app
- Log in to the App Live dashboard.
- From the Select Source panel, upload or choose a sample QR code scanner app.
For example, QR & Barcode Scanner.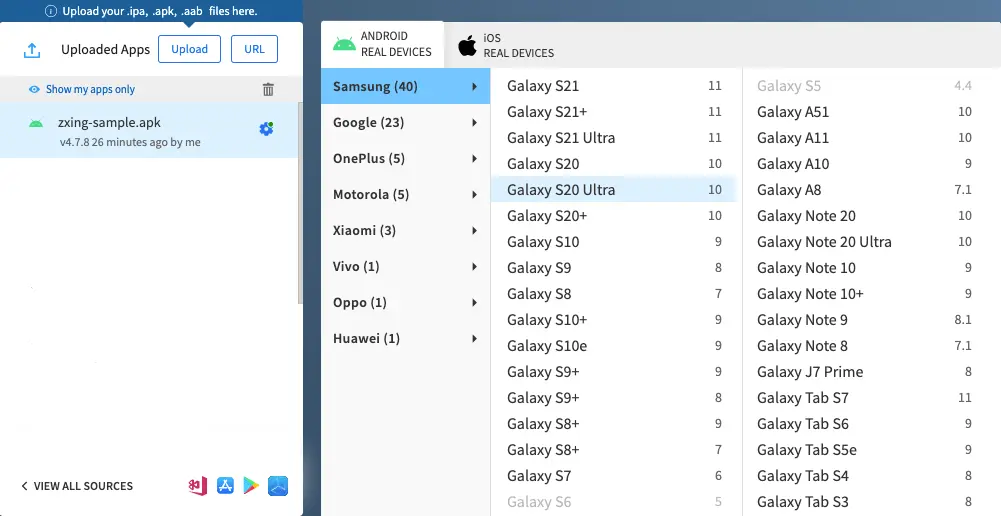
- Enable Image Injection setting for the sample app.
- Select a device from the device listing to launch your test session.
- In the sample app, trigger the QR code/barcode scan workflow.
- On the App Live vertical toolbar, click Capture Screenshot to take a screenshot of the device screen.
The screenshot is saved in theDownloadsfolder of your system. - Crop the screenshot image to remove the navigation bar, so that only the camera section of the image is visible.

- In your browser, open a sample image overlay website.
- Click Upload Image, and select the cropped screenshot from your system.
- Click Add Overlay Image, select the QR code you want to upload from your system, and fit the QR code inside the viewfinder area of the screenshot using any image editor.
Padding is added to your QR code.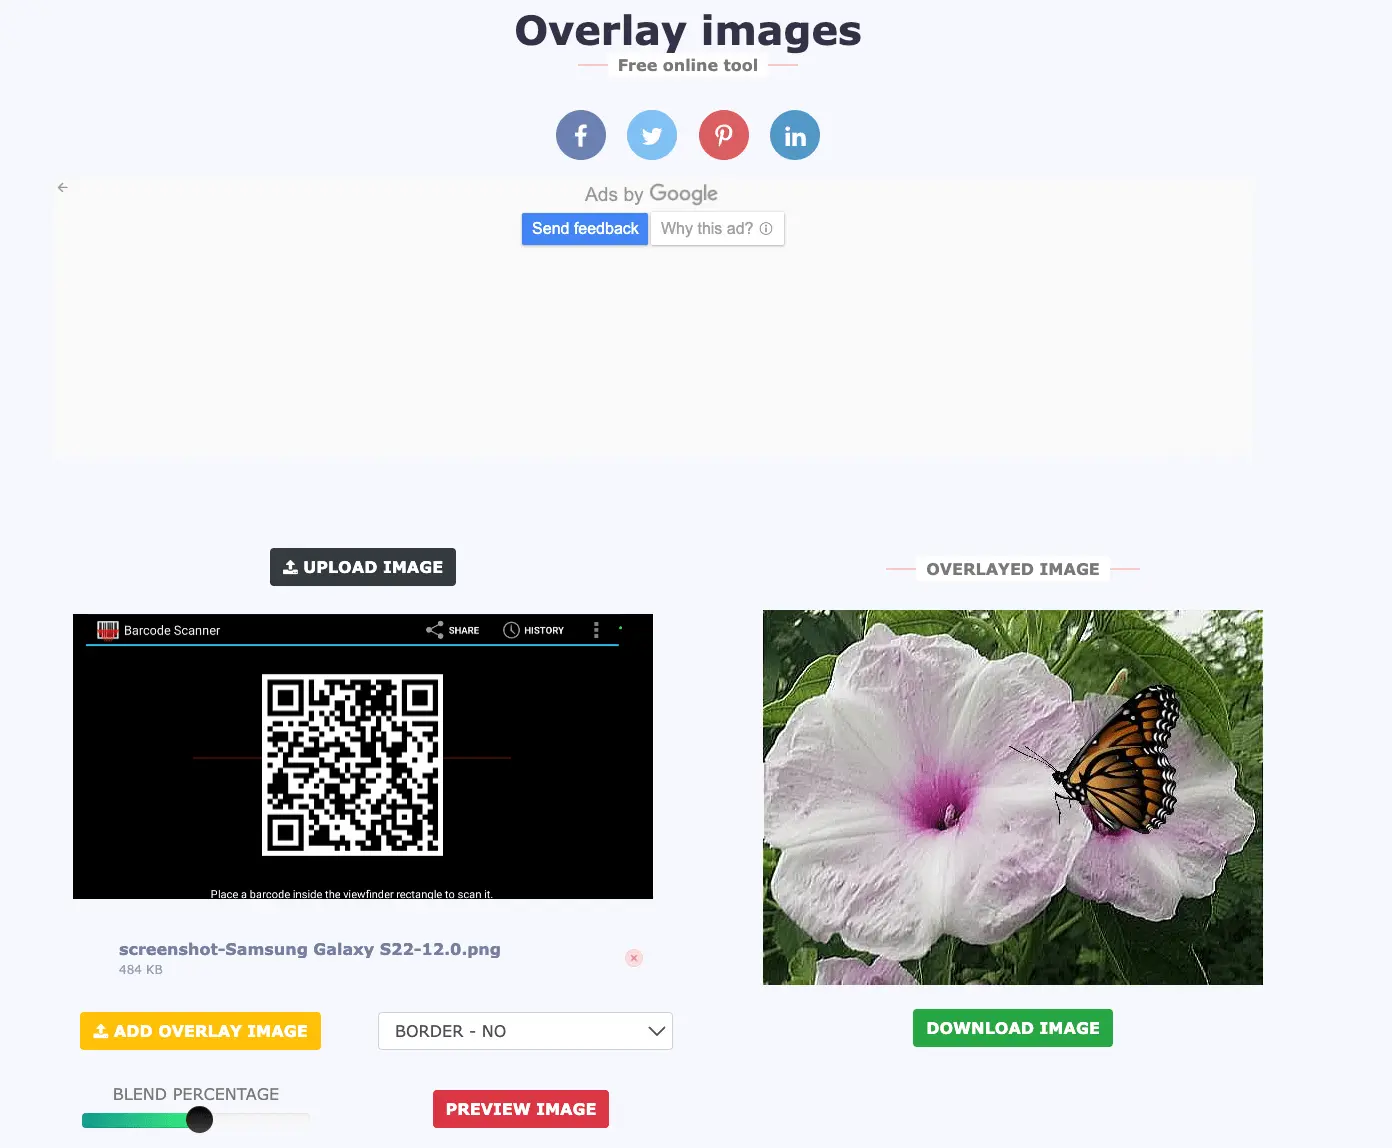
- Click Preview Image > Download Image to download the QR code with padding to your system.
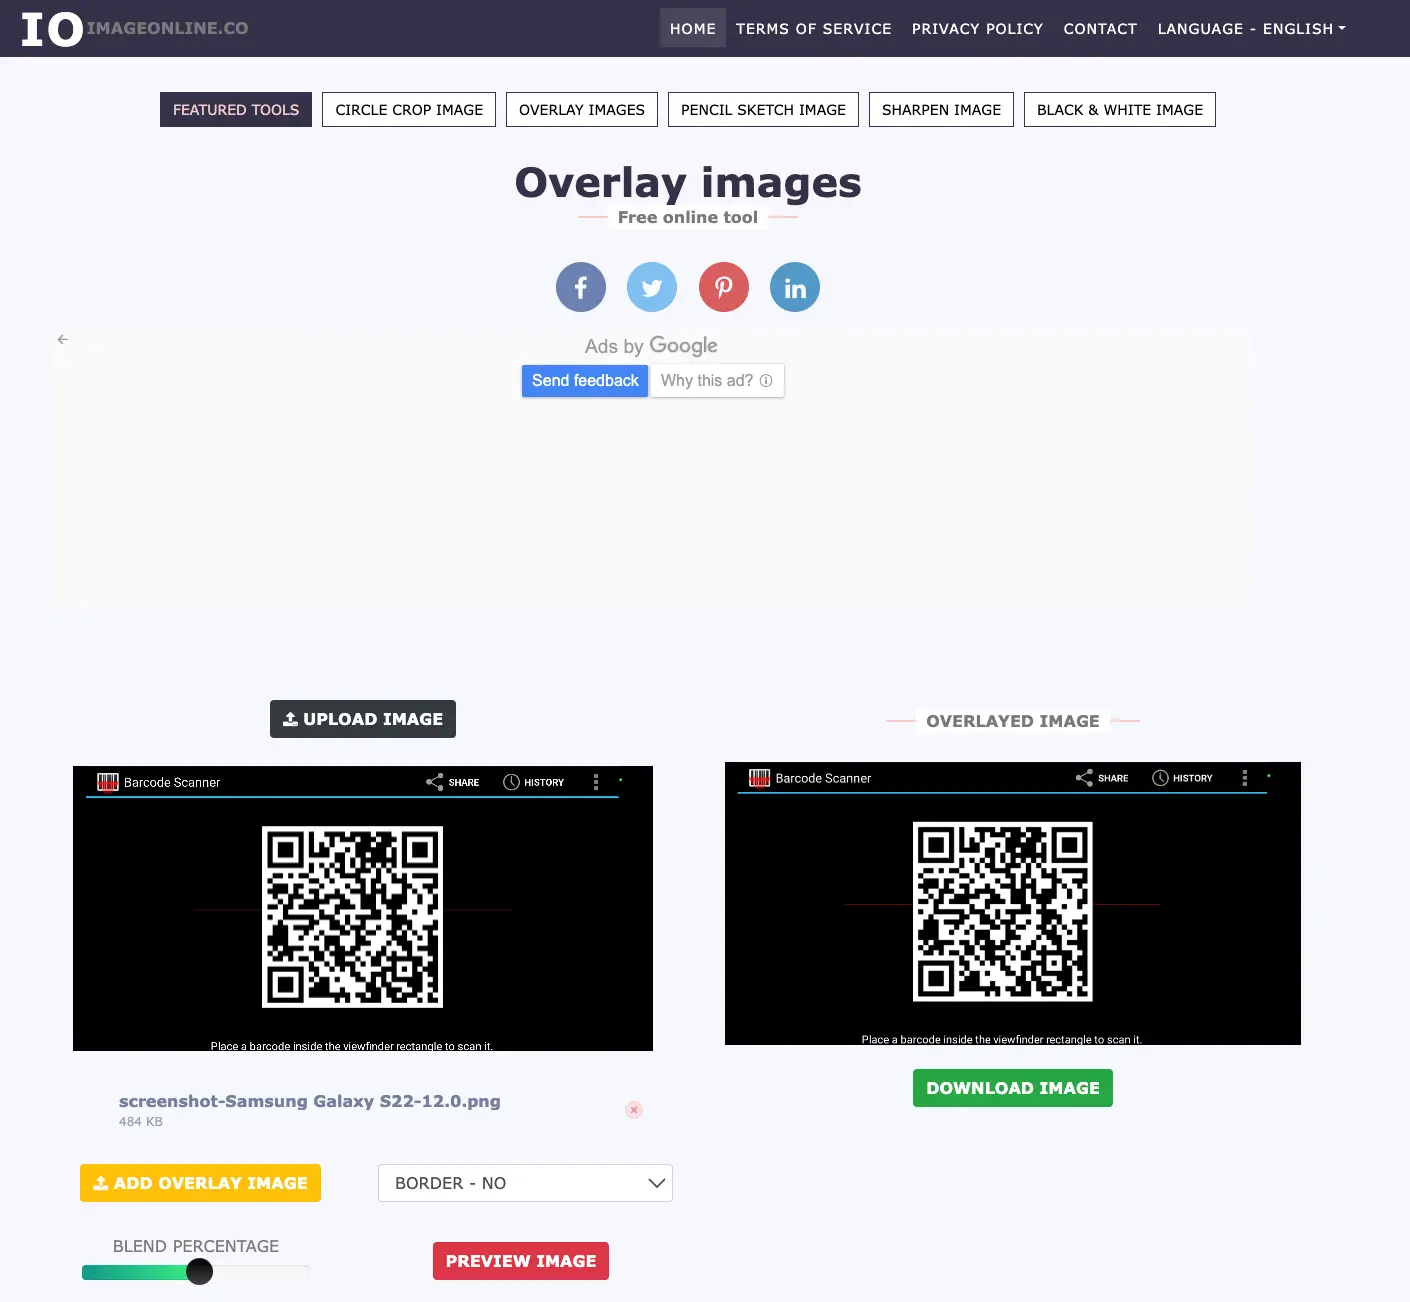
- Upload the QR code with padding to the BrowserStack real device.
Upload and inject image or QR code/barcode
Prerequisites:
- Enable Image Injection setting for your app.
- Add sufficient padding for images/QR codes if your app uses a viewfinder to scan images/codes.
You can upload up to five images to the image gallery on a BrowserStack real device. Upload one image at a time, for a maximum of five images, to test your app.
To upload an image/QR code/barcode:
- On the App Live vertical toolbar, click Files & Media.
- On the Files & Media prompt, click the Image injection tab.
A sample image is available on the device and injected in your app. You can use the sample image or upload your own images to inject in your app. - To upload an image, click Upload asset, select the image/QR code/barcode that you want to upload from your system, and click Open.
The Files & Media prompt displays the following:- The progress bar while the image/QR code/barcode is being uploaded. Click Cancel if you want to cancel the current upload and upload another image/QR code/barcode.
- A preview of the image/QR code/barcode after the upload is complete.
- Image gallery that displays the uploaded images.
You see a message on the dashboard that the asset is uploaded and injected in your app.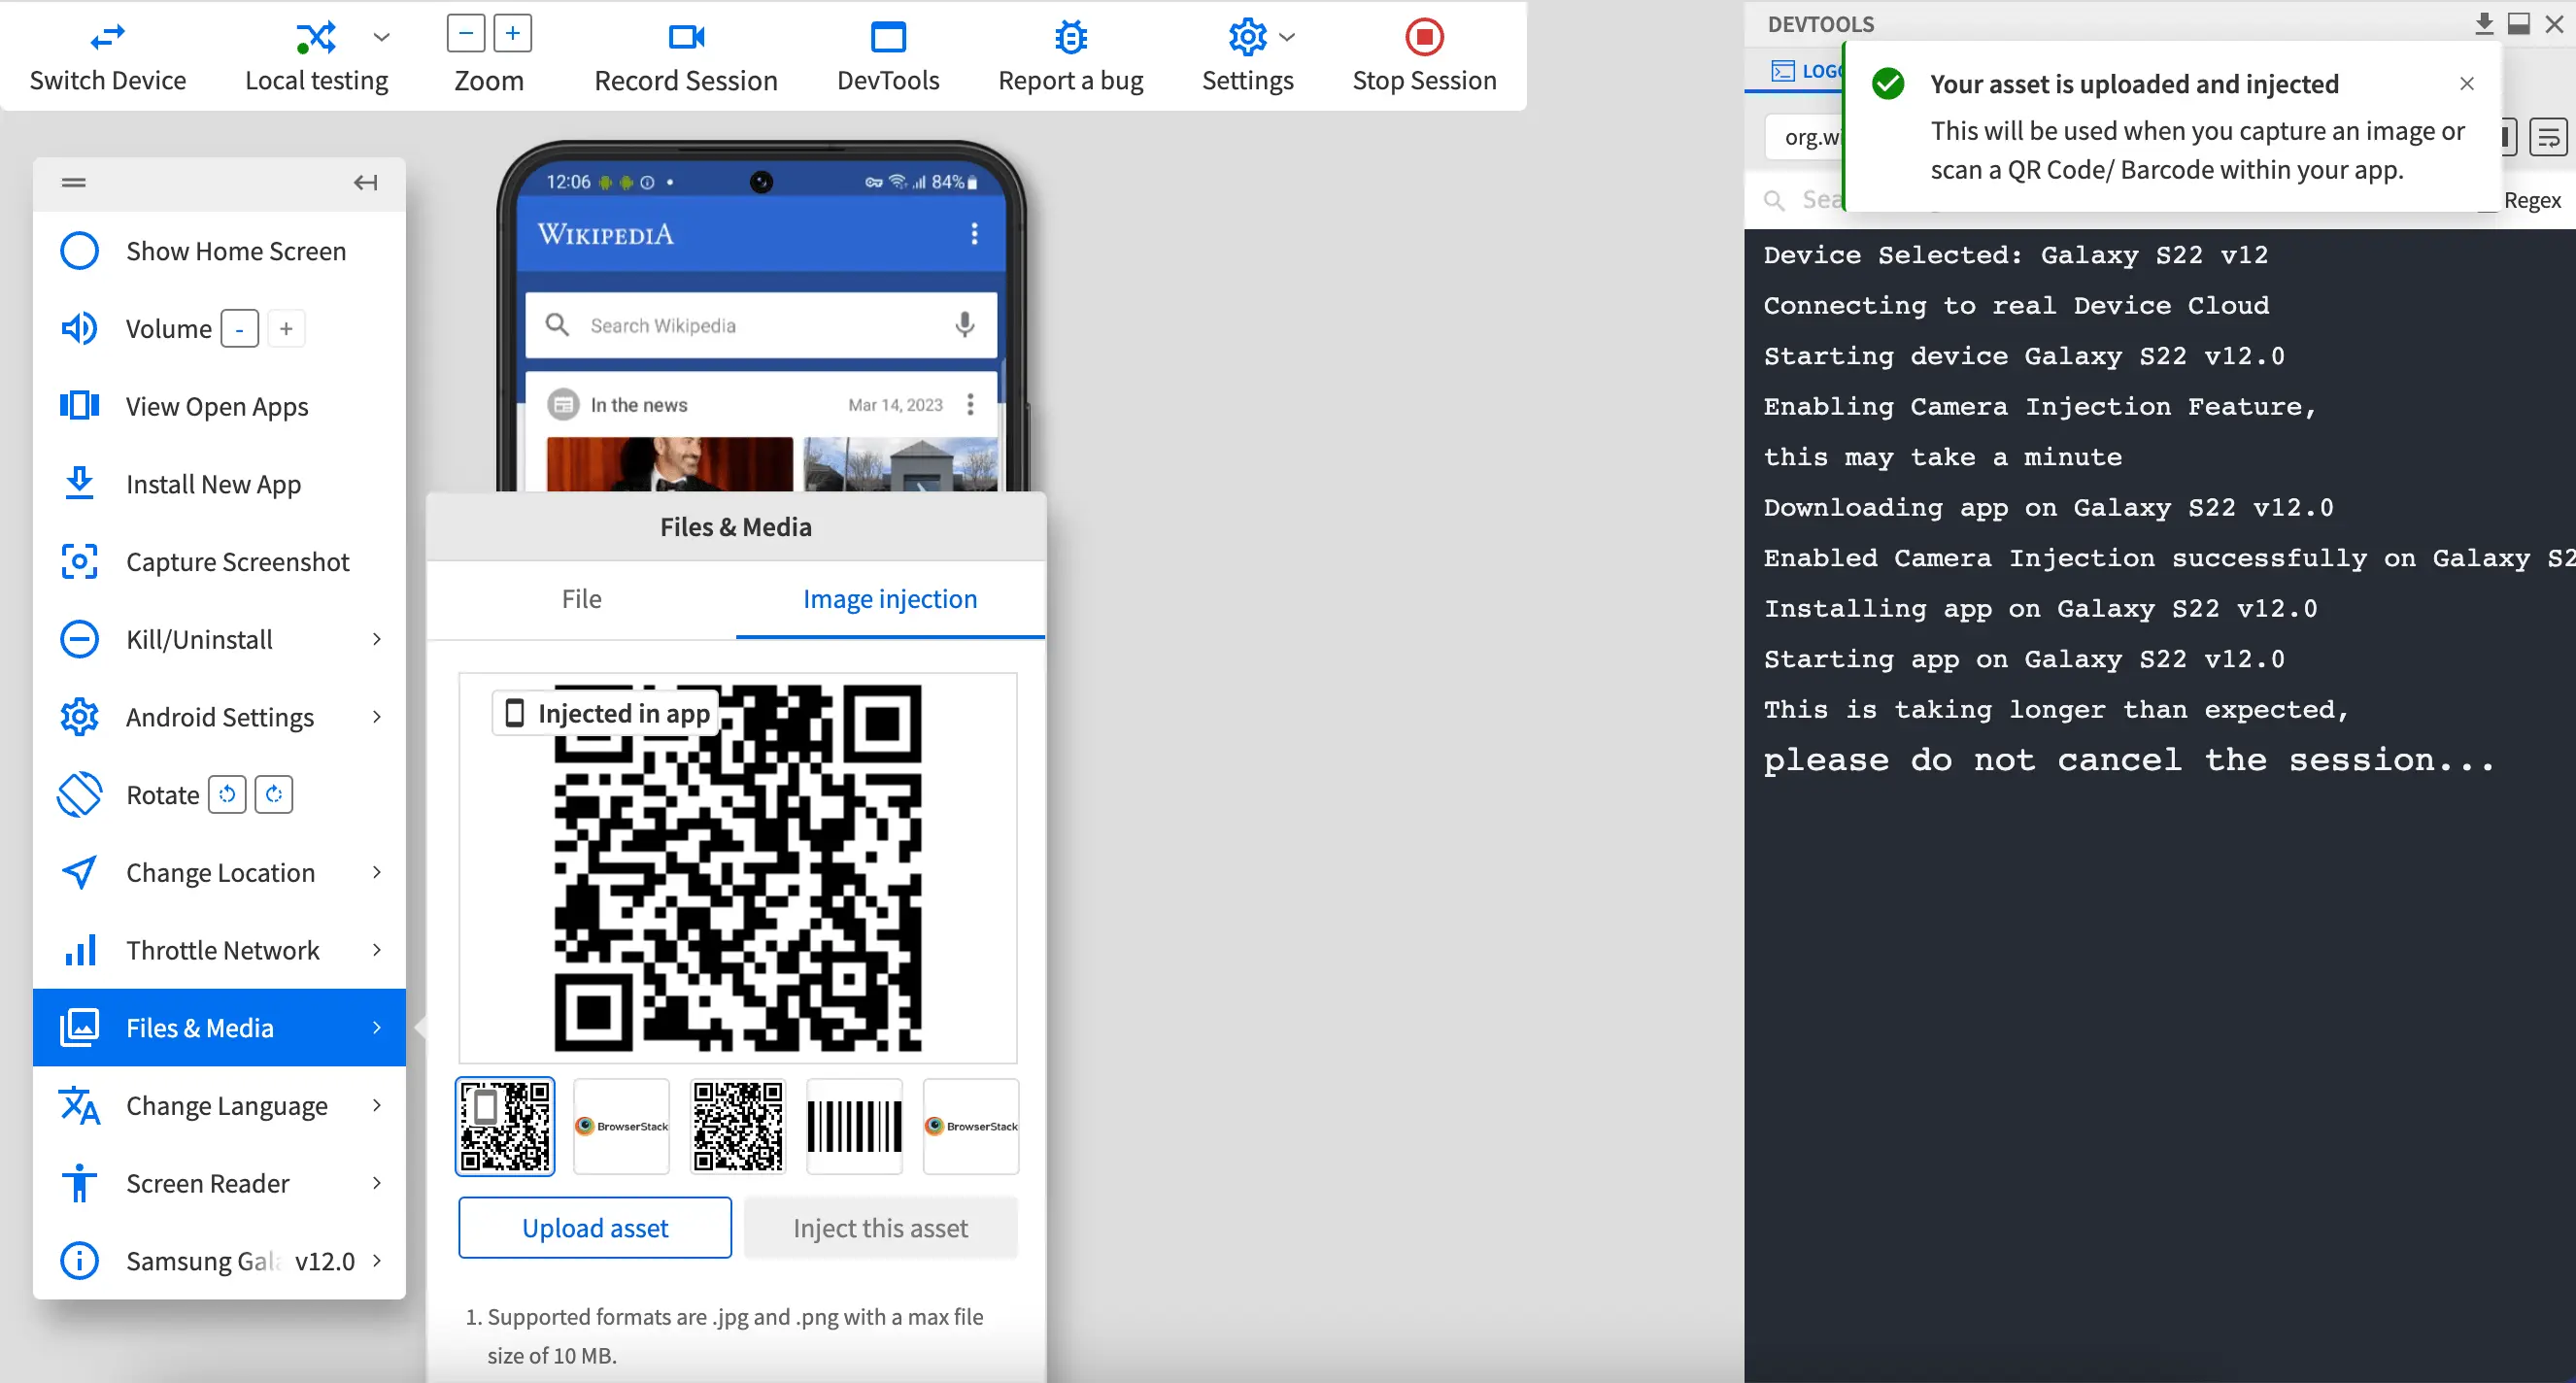
The latest uploaded image/QR code/barcode is injected in your app by default. However, you can select another image from the gallery to be injected in your app, and click Inject this asset.
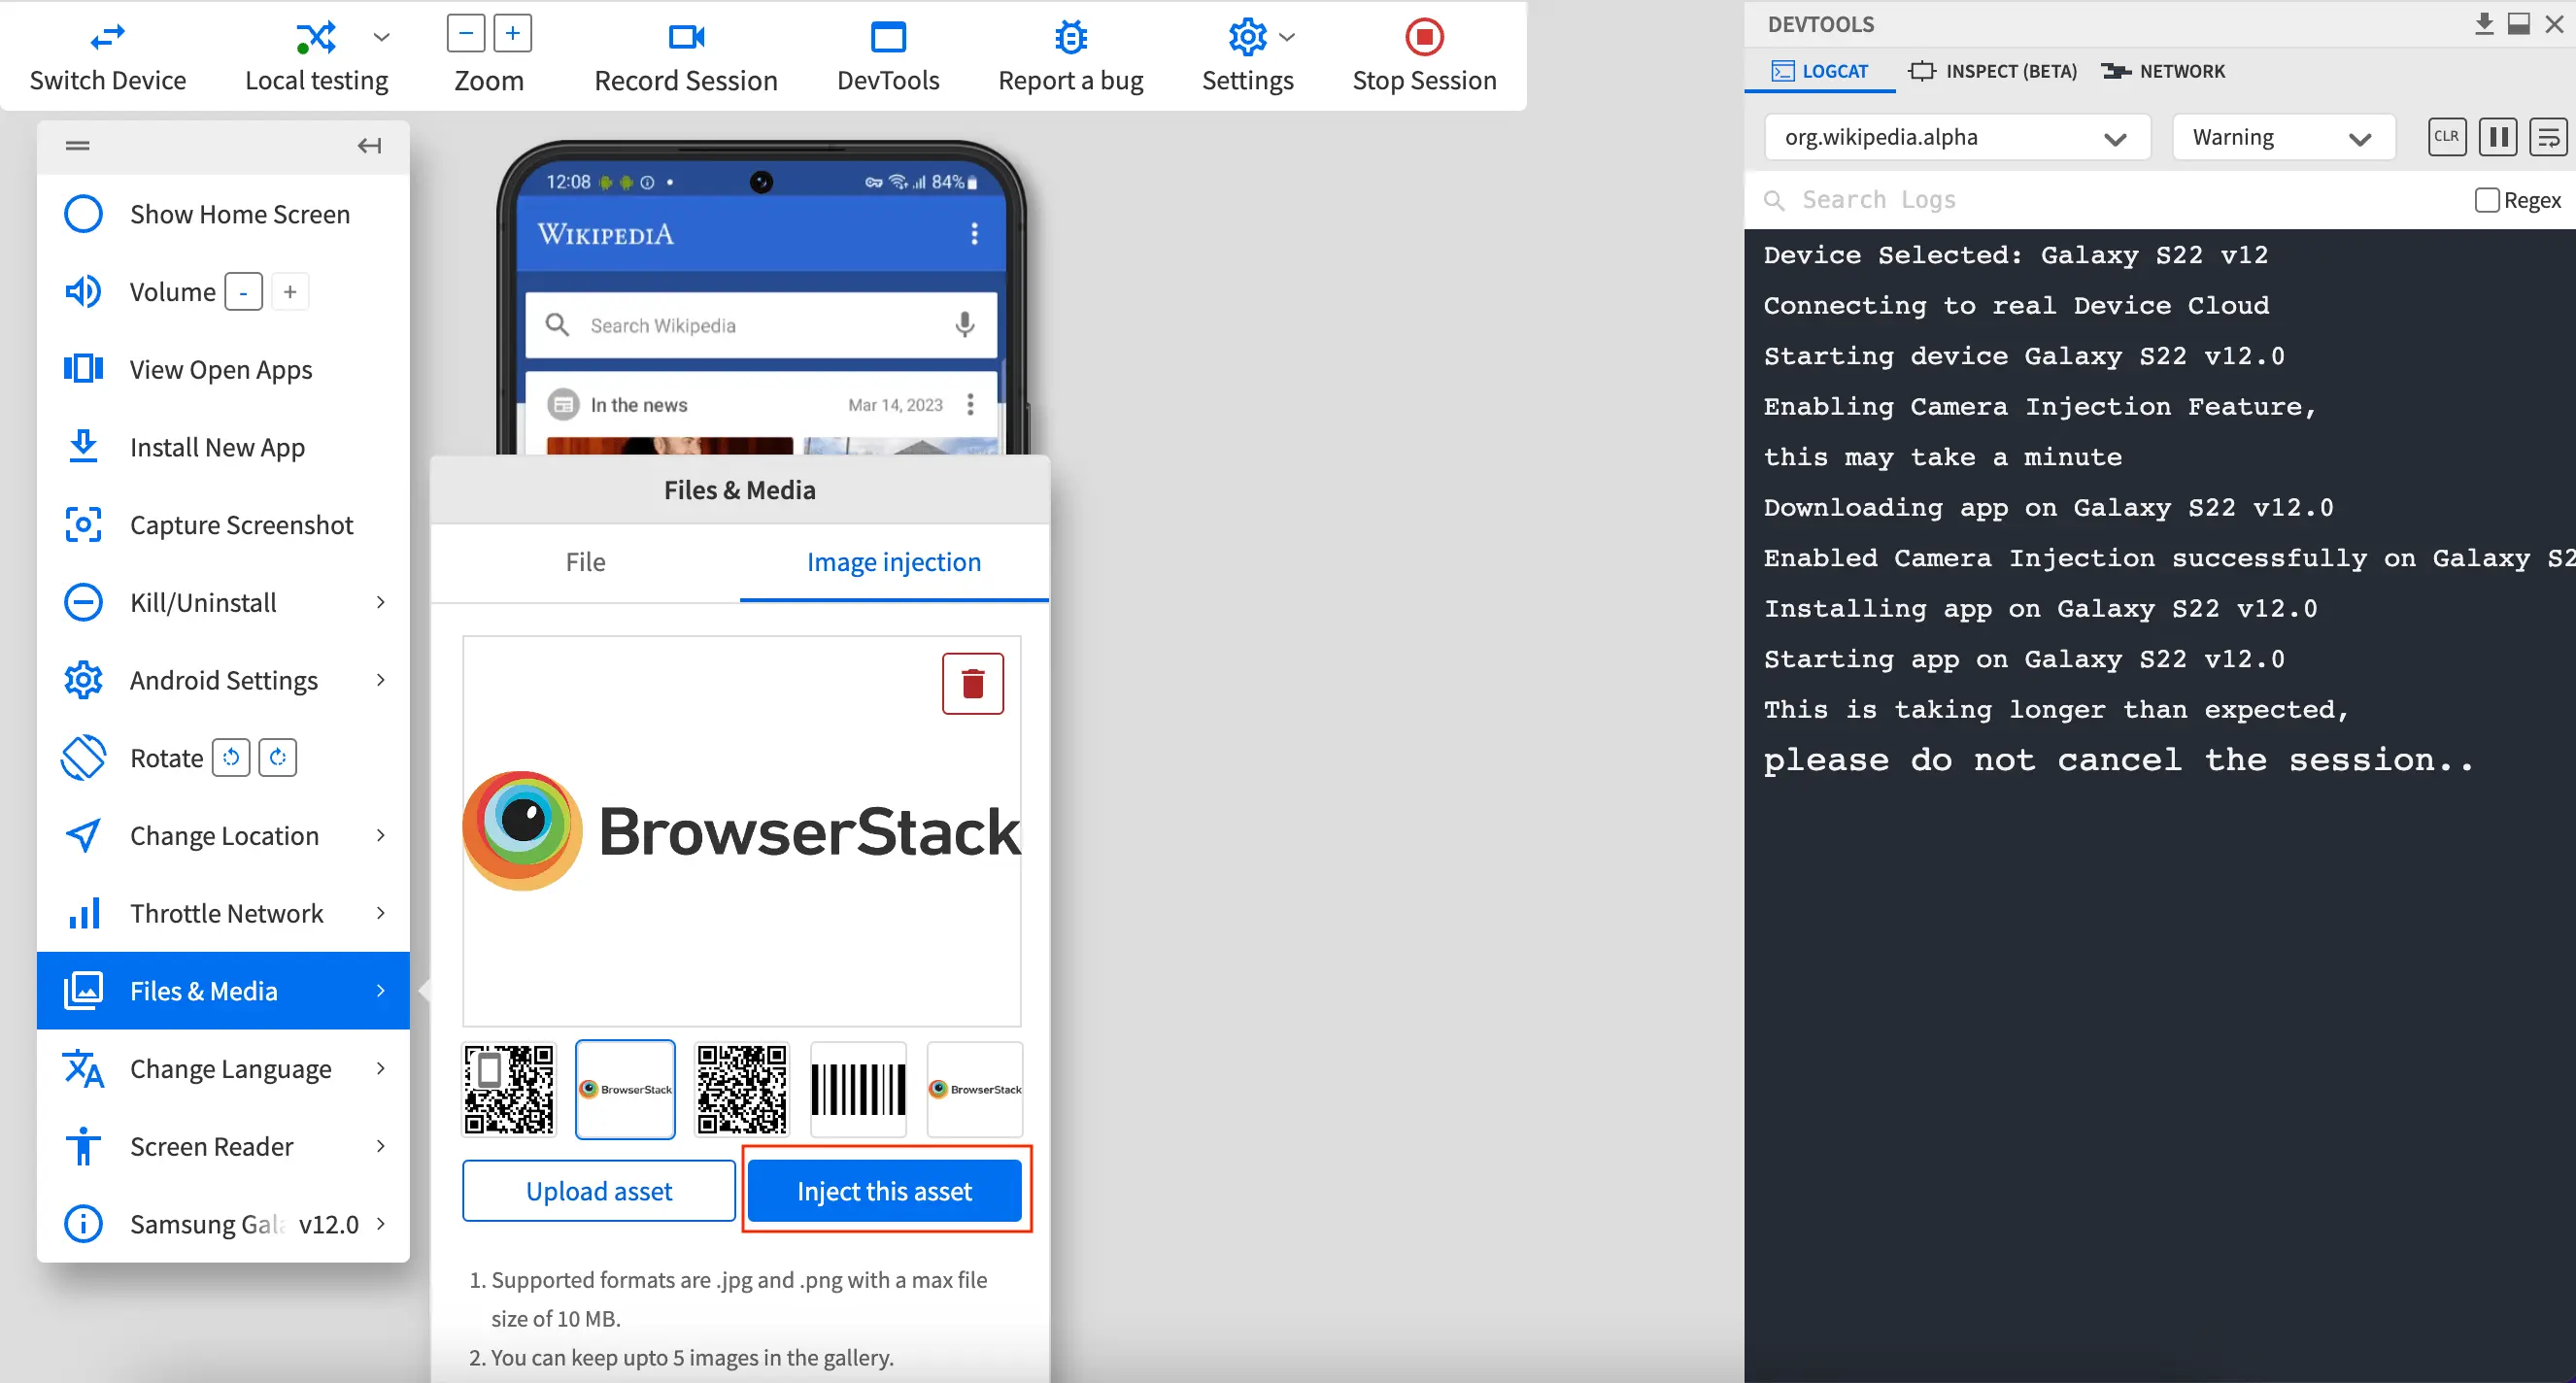 You see a message on the dashboard that the selected image is injected in your app.
Replace or delete an image/QR code/barcode
Prerequisite:
Upload and inject image or QR code/barcode.
To replace an image when the image gallery is full:
- Click Upload asset.
- On the Your gallery is full prompt, click Remove and Upload.
The oldest uploaded image is removed and is replaced by the latest uploaded image.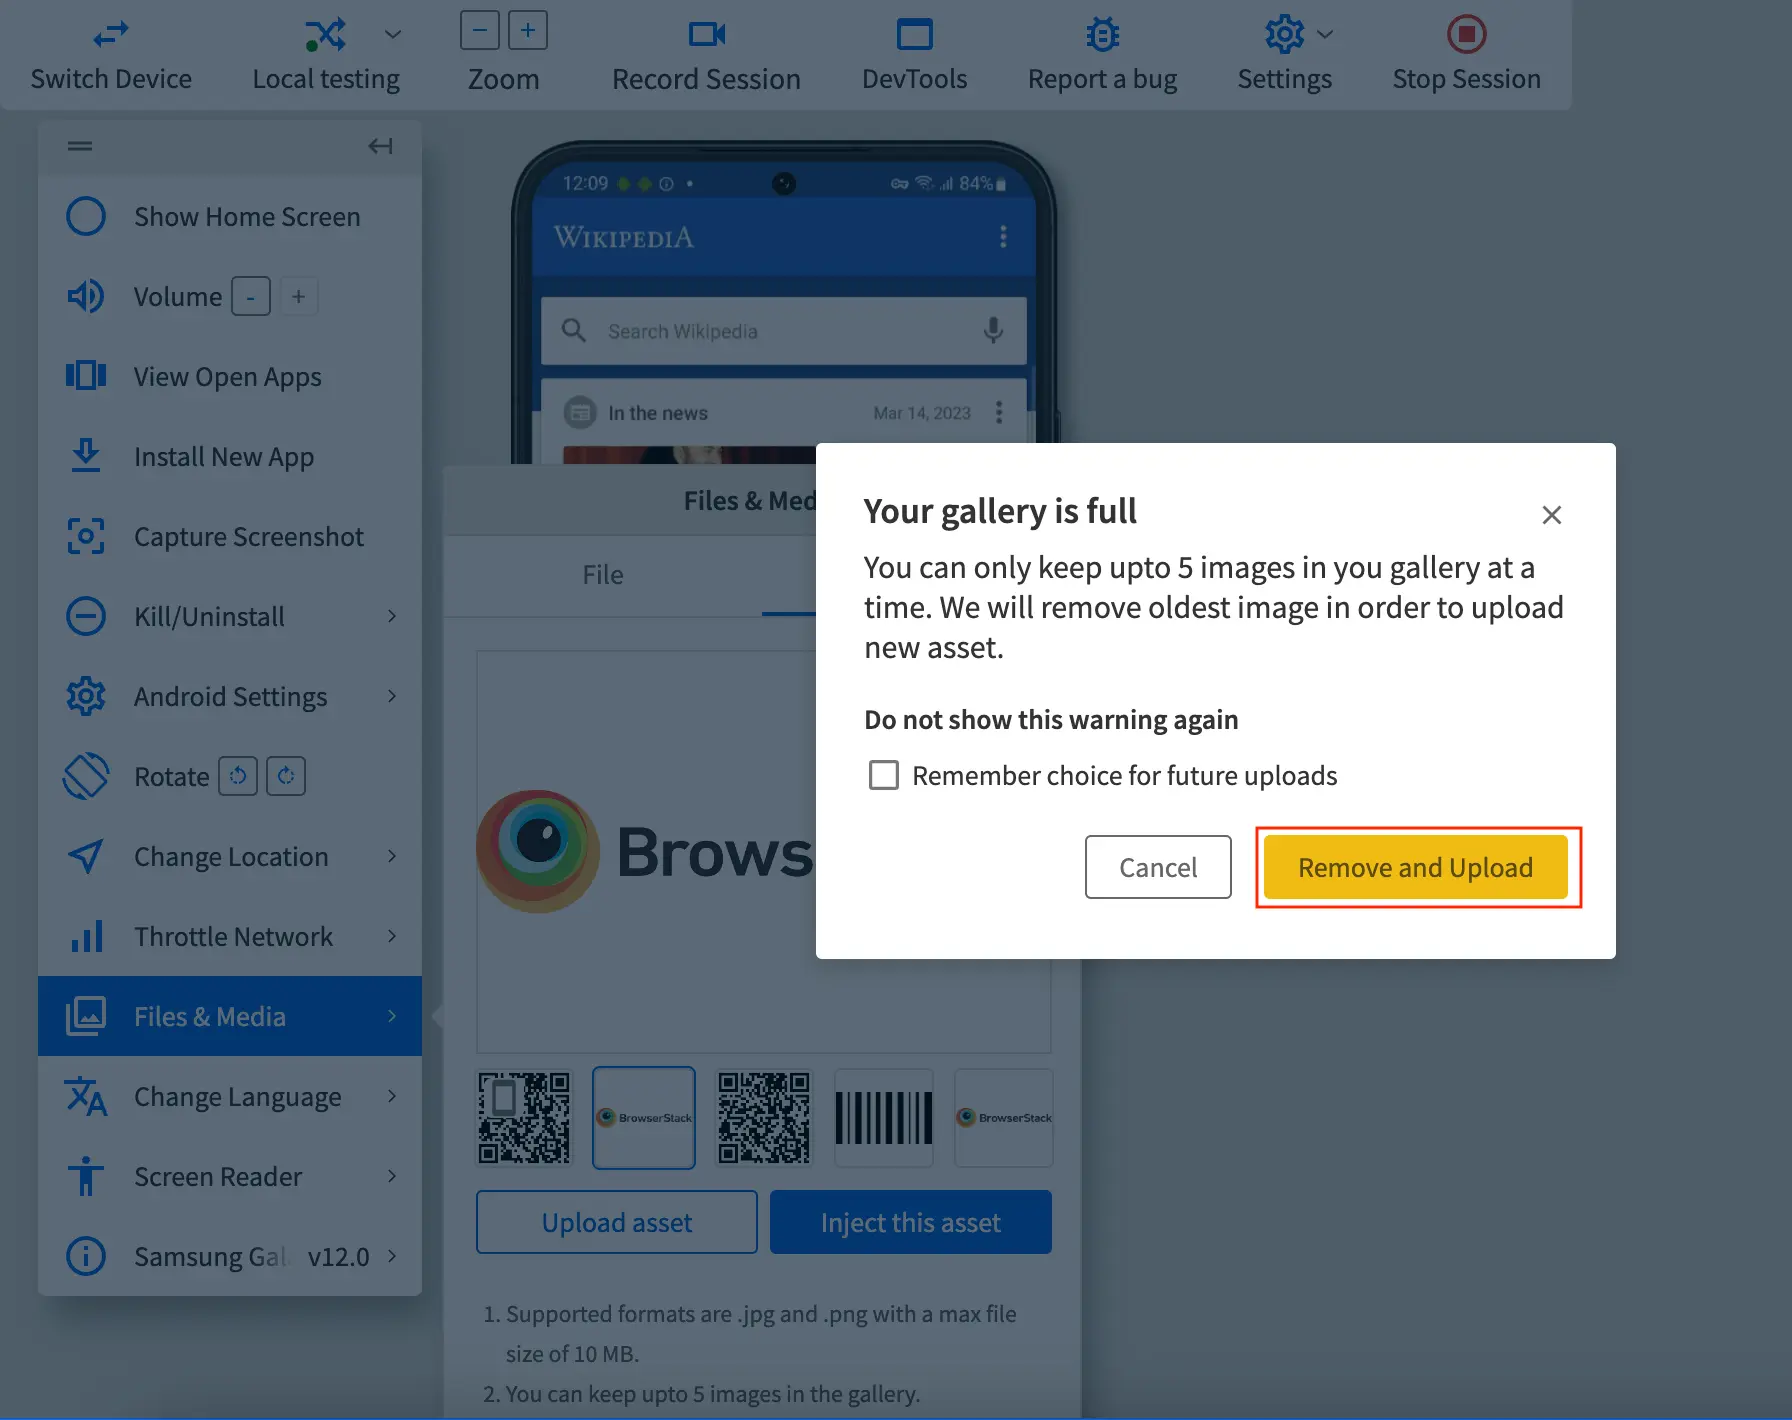
To delete an image from the image gallery:
- Click the image you want to delete.
- Click the delete icon on the image.
You see a message on the dashboard that the image was deleted successfully.
Test your app using uploaded images/QR codes/barcodes
Prerequisites:
- Enable Image Injection setting for your app.
- Add sufficient padding for images/QR codes if your app uses a viewfinder to scan images/codes.
- Upload and inject image or QR code/barcode.
To test your app using an uploaded image/QR code/barcode:
- In your app, trigger the image capture or QR code/barcode scanning workflow.
- Give your app the permission to access the device camera.
A blank screen in displayed. - Click the camera shutter button.
- Click Use Photo.
The image or QR code/barcode that you selected to be injected in your app is displayed.
Troubleshooting
The troubleshooting page lists some common errors that you may see while testing your app using Image Injection on App Live.
We're sorry to hear that. Please share your feedback so we can do better
Contact our Support team for immediate help while we work on improving our docs.
We're continuously improving our docs. We'd love to know what you liked
We're sorry to hear that. Please share your feedback so we can do better
Contact our Support team for immediate help while we work on improving our docs.
We're continuously improving our docs. We'd love to know what you liked
Thank you for your valuable feedback!