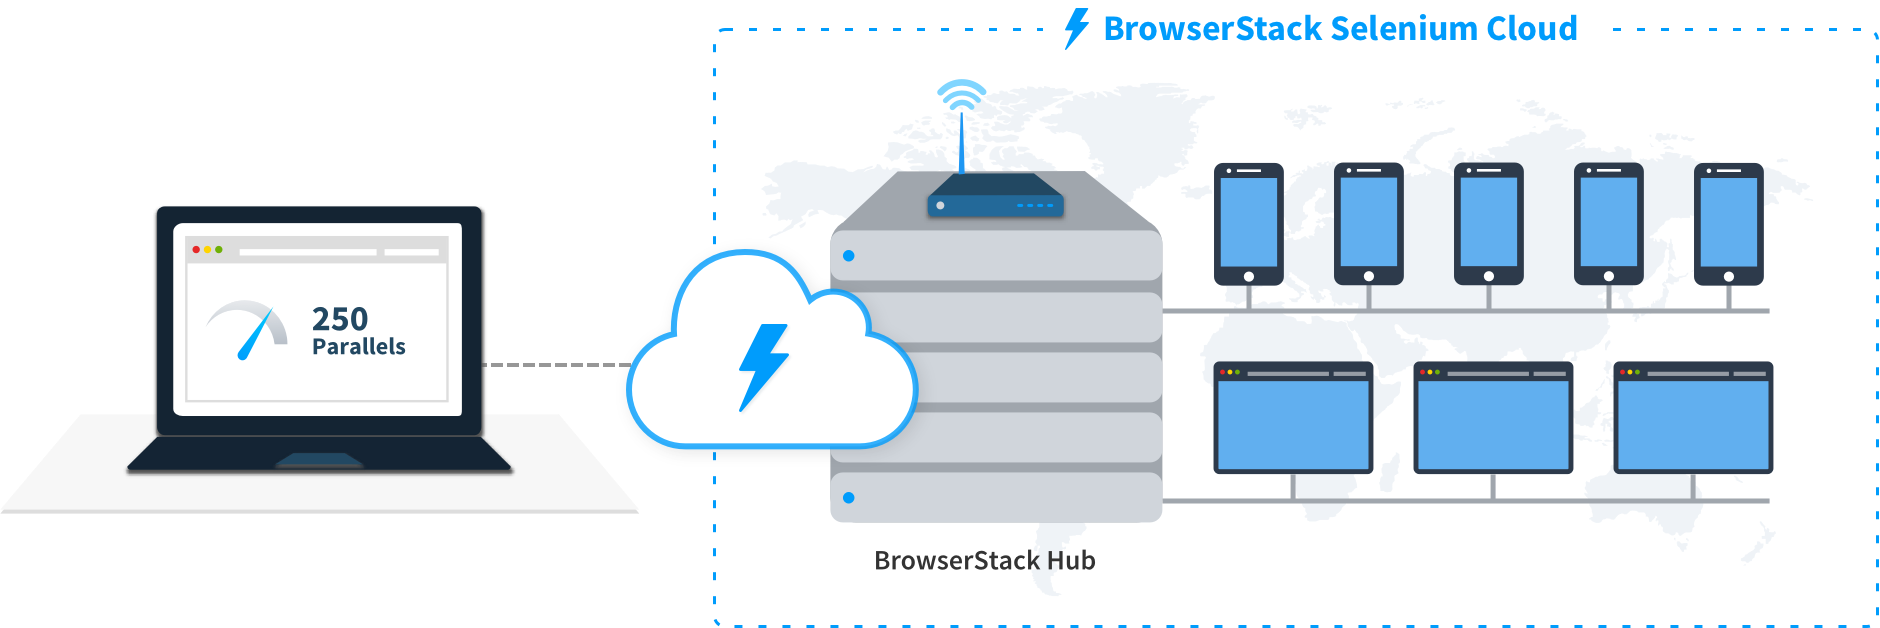
Selenium with JUnit 5
Your guide to running tests using JUnit 5 on BrowserStack’s Selenium Grid of 3000+ real devices and desktop browsers.
This section covers running your first build with BrowserStack’s sample repo. To run builds with your existing test suite(s), skip to integrate your test suite.
Prerequisites
-
BrowserStack Username and Access key. You can find this in your account profile. If you do not have an account yet, please sign up for a Free Trial.
-
JUnit v5, Java v8+, Selenium v2.5+ (W3C/JSON Wire).
-
If you are using Eclipse or IntelliJ IDEA for running tests, install the corresponding JUnit plugin.
-
If you are using CLI for running tests, ensure that Maven is installed on your machine, Maven environment variables are set, and Maven bin is added to system path,
$PATH.
Run a sample build
Run a sample JUnit 5 test build using your preferred method on BrowserStack:
If you are using Maven, follow the given steps to run the sample build:
Get Sample Project
Download Project
After downloading the sample project, unzip it in the desired location.
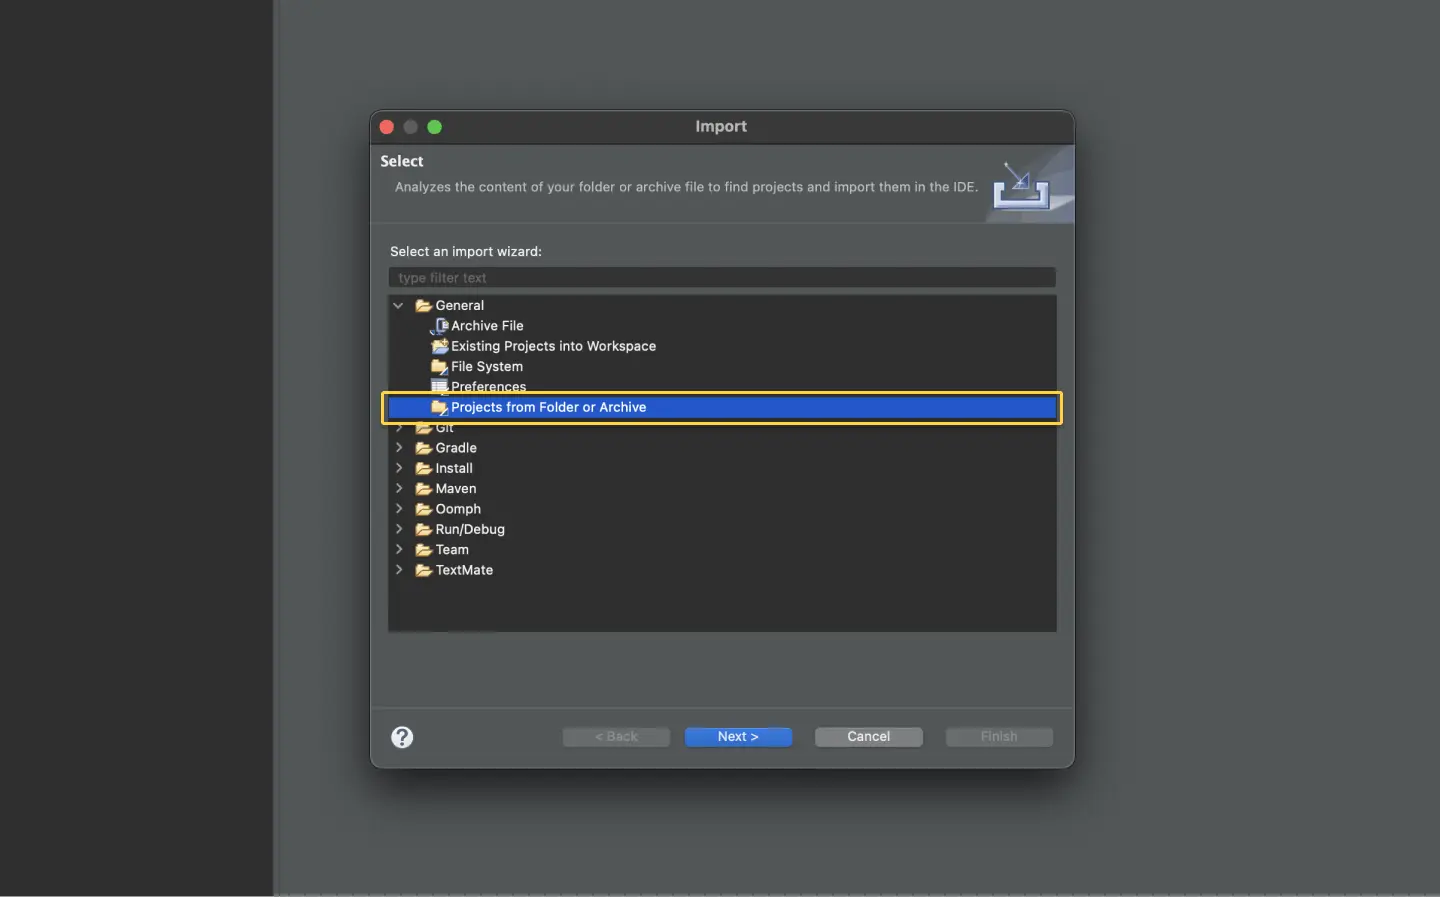
Import the downloaded project
Click File → Import. Expand General, select Projects from Folder or Archive, and click Next. Then, navigate to the earlier unzipped downloaded project .
Configure your browserstack.yml config file
The browserstack.yml file holds all the required capabilities to run your tests on BrowserStack
Set access credentials
Set userName and accessKey properties in the browserstack.yml file, available in the root directory, to authenticate your tests on BrowserStack.
Select desktop browsers or real devices from a list of 3000+ available combinations:
 Configure AI Agents
You can enable the following AI agents by adding the respective configurations in your browserstack.yml file:
Update the browserstack.yml config file
Copy and replace the platforms object in the browserstack.yml file.
Run sample tests on BrowserStack
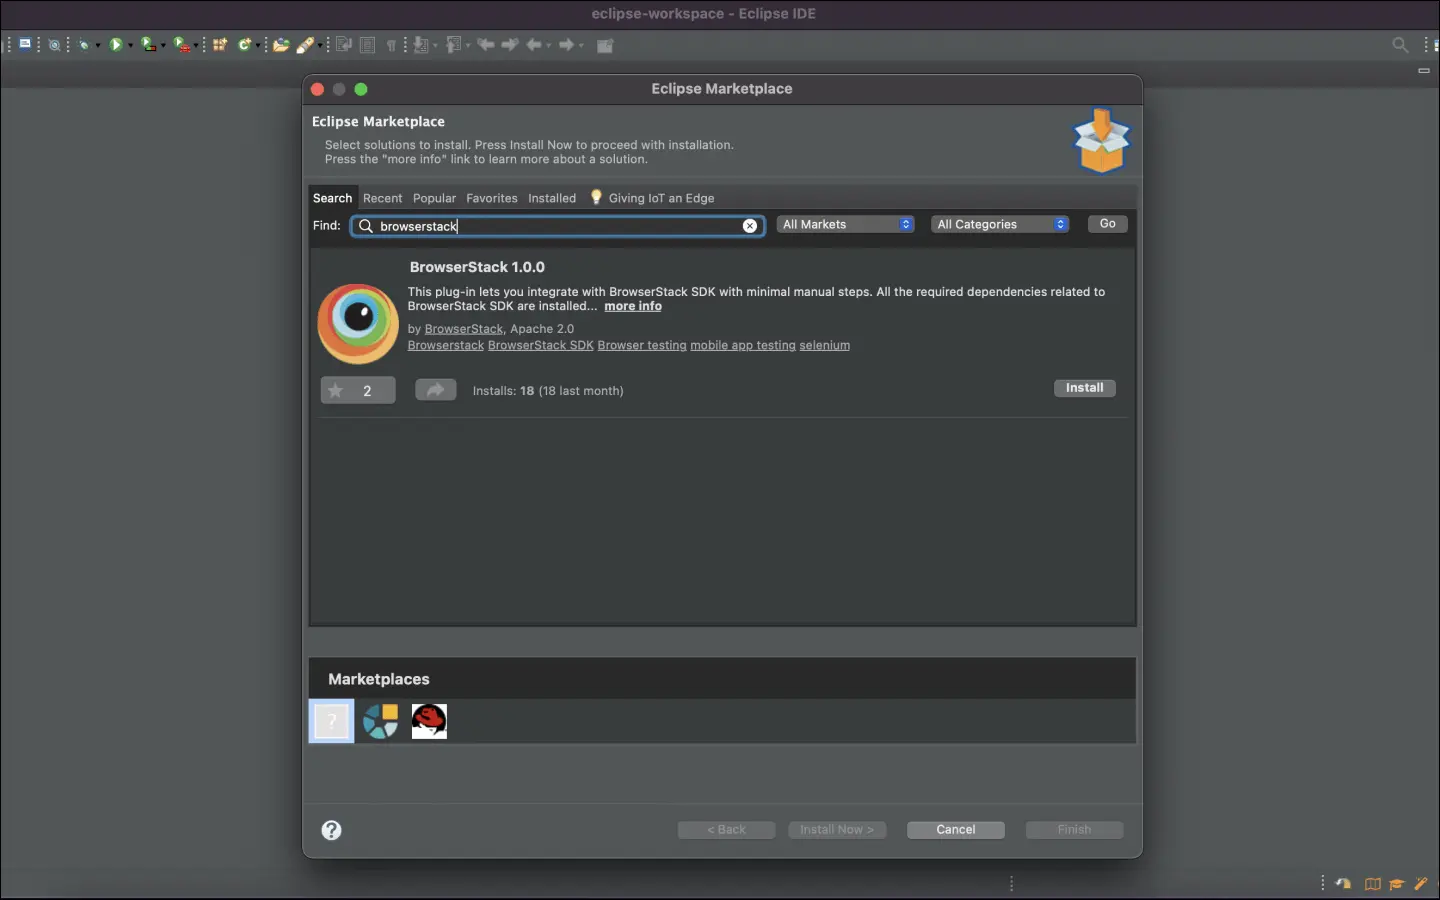
Install the BrowserStack Plugin - on the Eclipse toolbar, click Help > Eclipse Marketplace.
In the Eclipse Marketplace, search for BrowserStack, click Install > Finish.
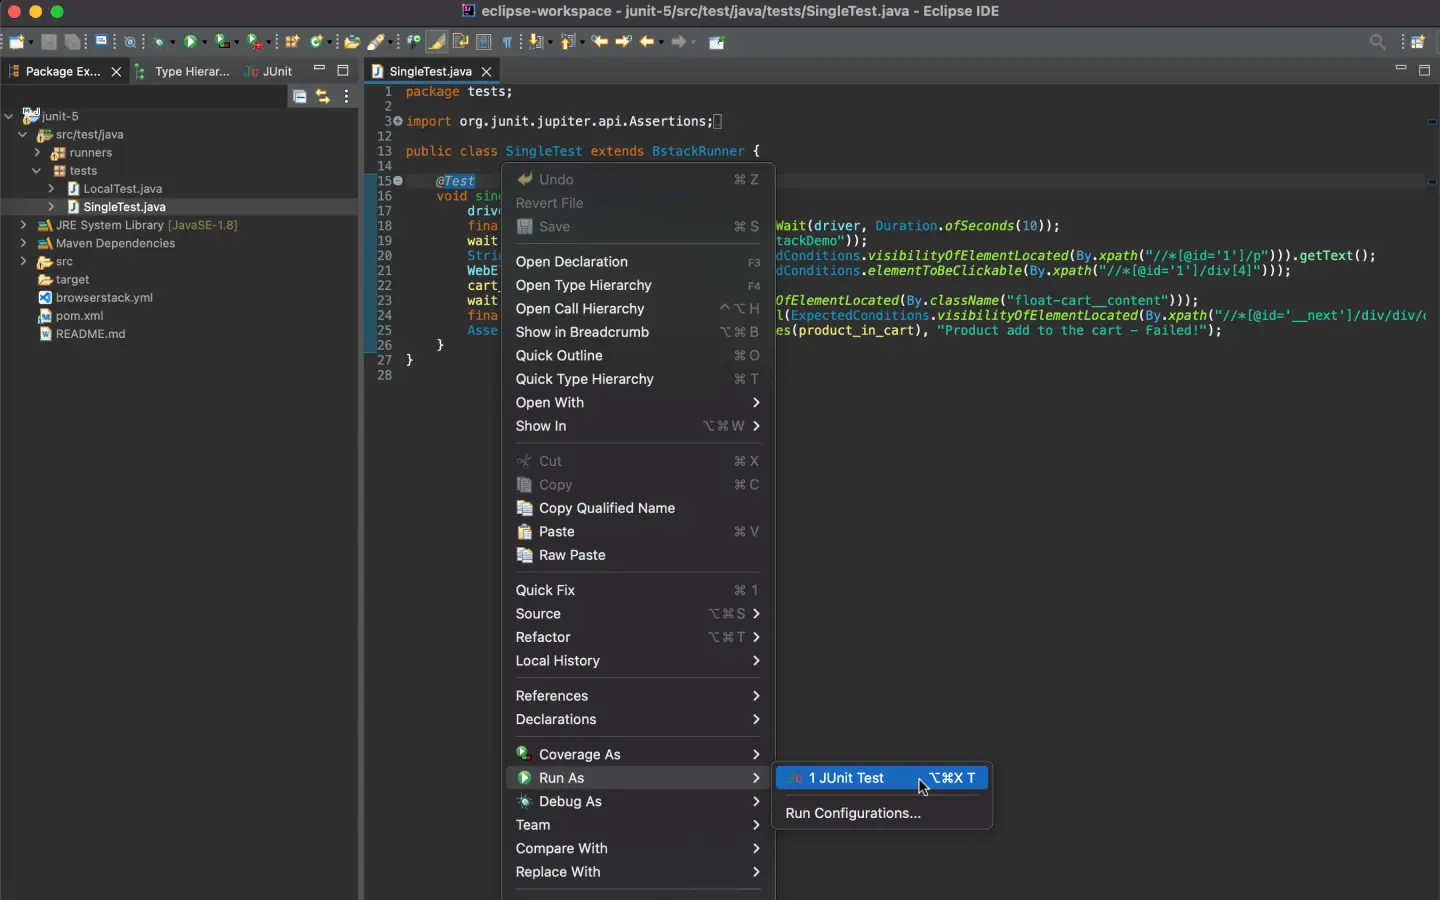
Right-click anywhere on the file SingleTest.java > Run As > JUnit Test.
Get Sample Project
Download Project
After downloading the sample project, unzip it in the desired location.
Import the downloaded project
Click File → Open. Navigate to the earlier unzipped downloaded project .
Configure your browserstack.yml config file
The browserstack.yml file holds all the required capabilities to run your tests on BrowserStack
Set access credentials
Set userName and accessKey properties in the browserstack.yml file,available in the root directory, to authenticate your tests on BrowserStack.
Select desktop browsers or real devices from a list of 3000+ available combinations:
Configure AI Agents
You can enable the following AI agents by adding the respective configurations in your browserstack.yml file:
Update the browserstack.yml config file
Copy and replace the platforms object in the browserstack.yml file.
Run sample tests on BrowserStack
Run the tests using the following steps:
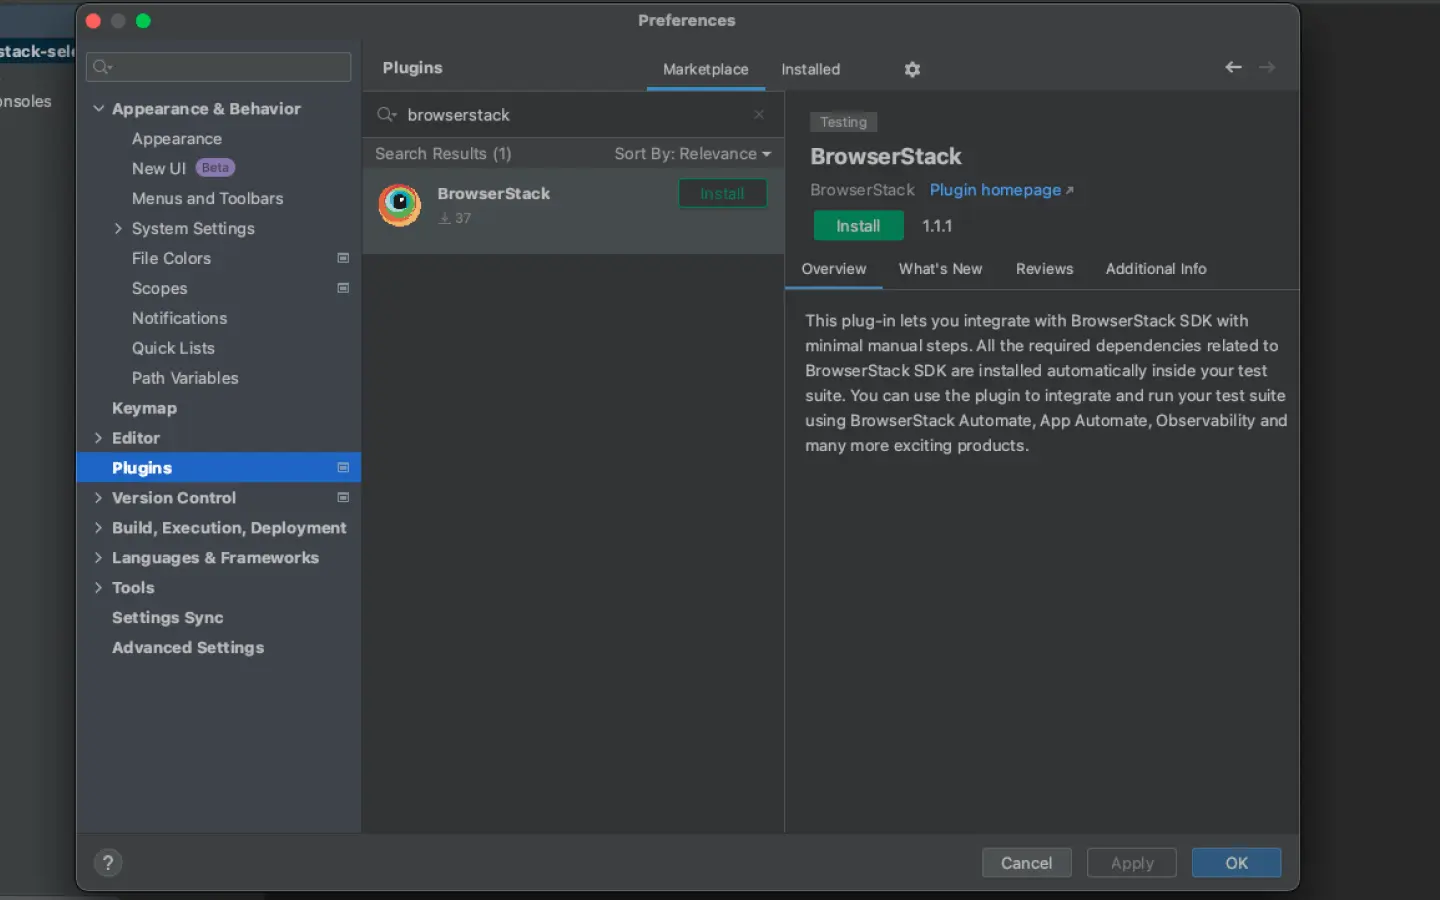
Install the BrowserStack Plugin: click IntelliJ IDEA > Preferences > Plugins.
Search for BrowserStack and click Install.
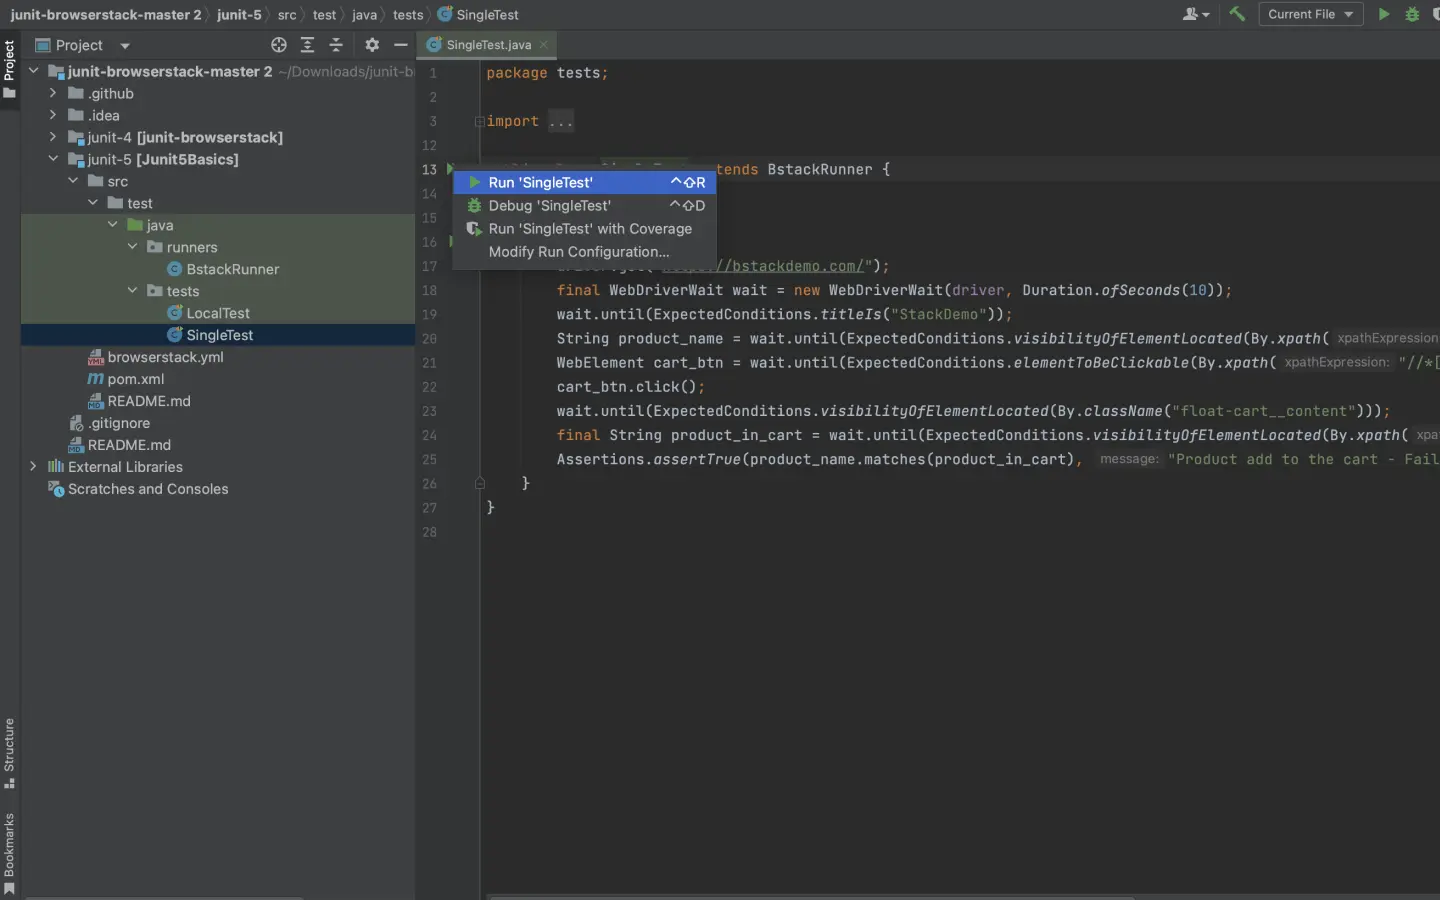
Open the file SingleTest.java and click the Run button.
Get Sample Project
Get our sample project using one of the following options:
Option 1: Download Project
Configure your browserstack.yml config file
The browserstack.yml file holds all the required capabilities to run your tests on BrowserStack
Set access credentials
Set userName and accessKey parameters in the browserstack.yml file, available in the root directory, to authenticate your tests on BrowserStack.
Select desktop browsers or real devices from a list of 3000+ available combinations:
Configure AI Agents
You can enable the following AI agents by adding the respective configurations in your browserstack.yml file:
Update the browserstack.yml config file
Copy and replace the platforms object in the browserstack.yml file.
Run sample tests on BrowserStack!
Install dependencies and run a sample test build on BrowserStack:
If you are using Gradle, follow the given steps to run the sample build:
Get Sample Project
Download Project
After downloading the sample project, unzip it in the desired location.
Import the downloaded project
Click File → Import. Expand General, select Projects from Folder or Archive, and click Next. Then, navigate to the earlier unzipped downloaded project and open the junit-5 directory.
Configure your browserstack.yml config file
The browserstack.yml file holds all the required capabilities to run your tests on BrowserStack
Set access credentials
Set userName and accessKey properties in the browserstack.yml file, available in the root directory, to authenticate your tests on BrowserStack.
Select desktop browsers or real devices from a list of 3000+ available combinations:
Configure AI Agents
You can enable the following AI agents by adding the respective configurations in your browserstack.yml file:
Update the browserstack.yml config file
Copy and replace the platforms object in the browserstack.yml file.
Run sample tests on BrowserStack
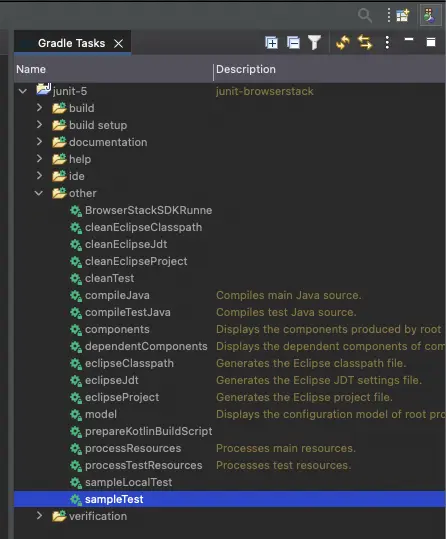
Click the Gradle tool window on the right-hand side. If you can’t see the tool window, click Window > Show View > Gradle Tasks to enable it
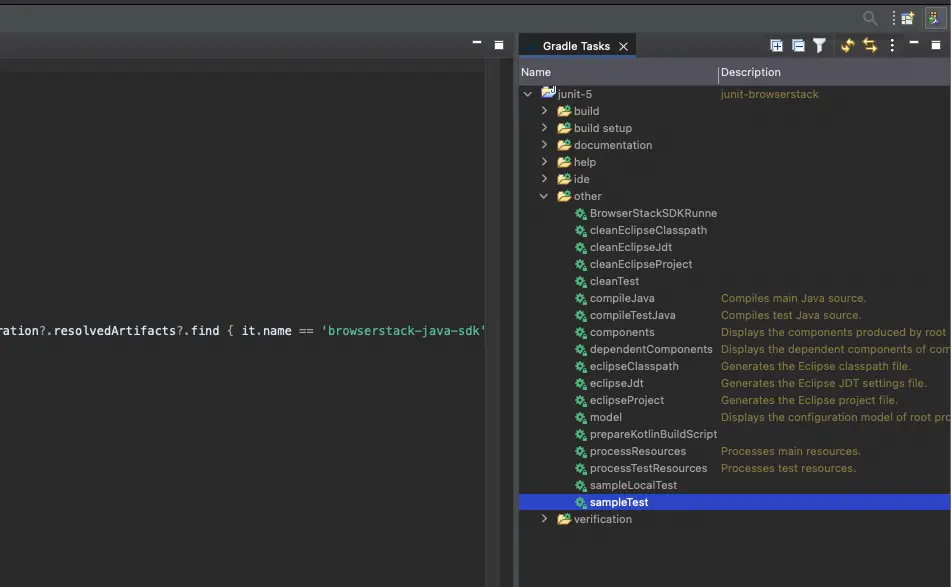
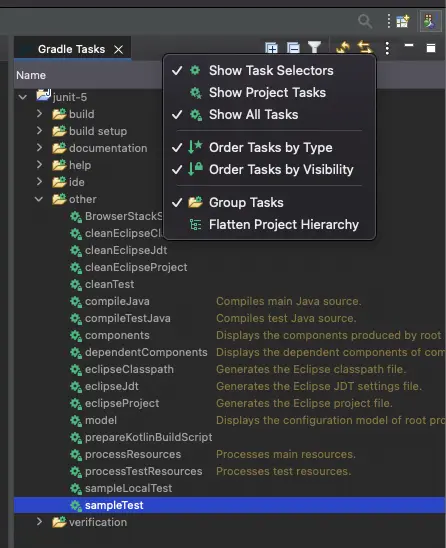
Ensure Show All Tasks is enabled by clicking on menu icon in Gradle Tasks.
Expand project, click on other drop-down, and double click on sampleTest to run your first test.
Get Sample Project
Download Project
After downloading the sample project, unzip it in the desired location.
Import the downloaded project
Click File → Open. Navigate to the earlier unzipped downloaded project .
Configure your browserstack.yml config file
The browserstack.yml file holds all the required capabilities to run your tests on BrowserStack
Set access credentials
Set userName and accessKey properties in the browserstack.yml file,available in the root directory, to authenticate your tests on BrowserStack.
Select desktop browsers or real devices from a list of 3000+ available combinations:
Configure AI Agents
You can enable the following AI agents by adding the respective configurations in your browserstack.yml file:
Update the browserstack.yml config file
Copy and replace the platforms object in the browserstack.yml file.
Run sample tests on BrowserStack
Run the tests using the following steps:
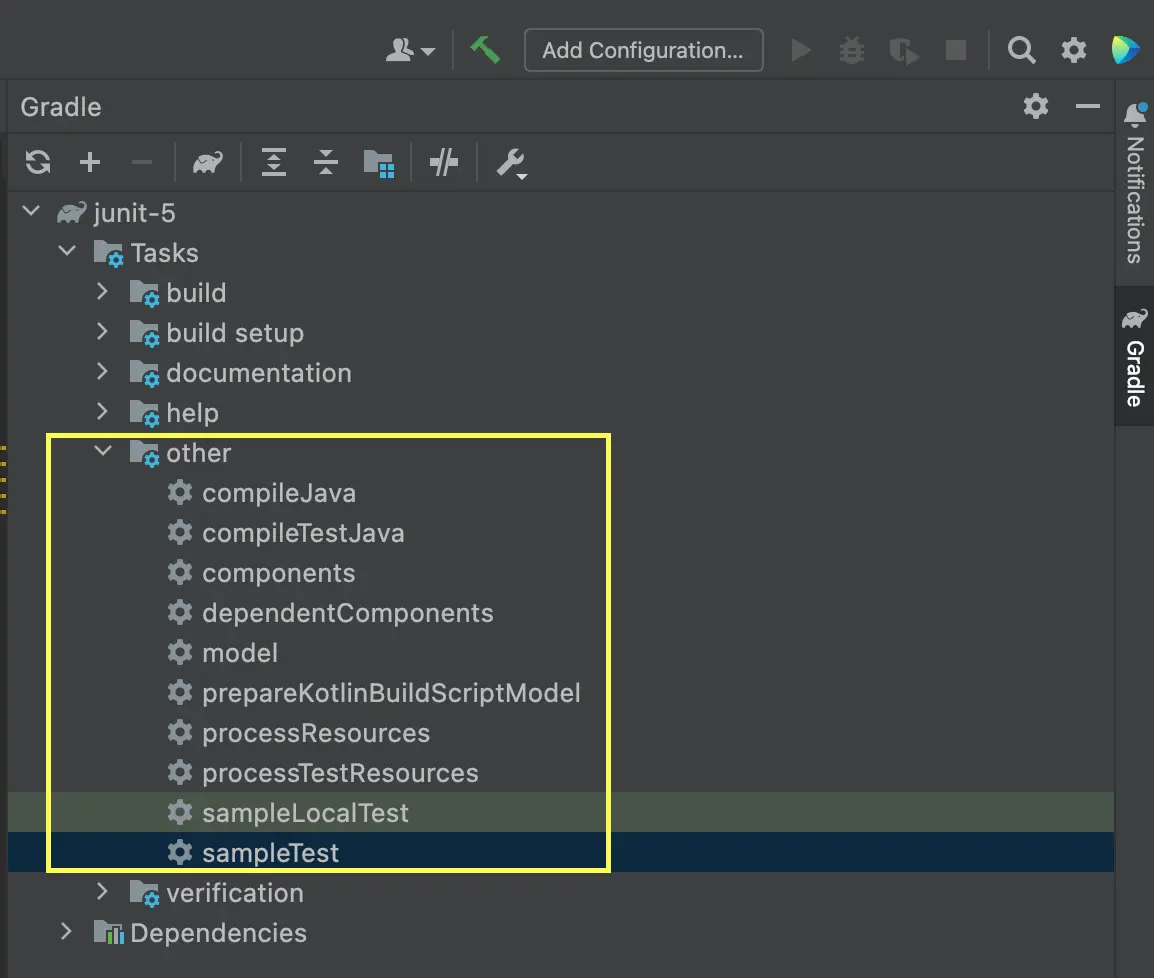
Click the Gradle tool window on the right-hand side. If you can’t see the tool window, click View > Tool Windows > Gradle to enable it:
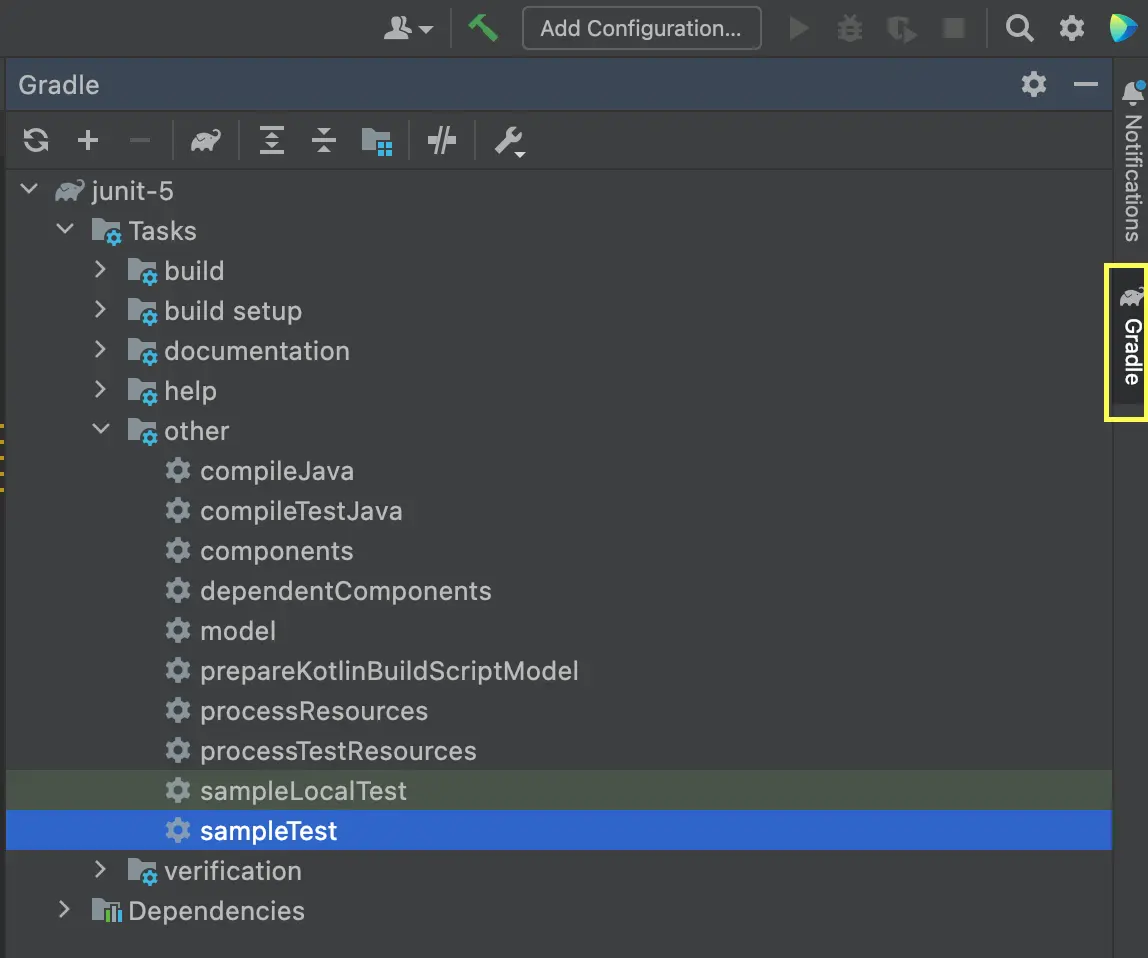
Under Tasks, select the task for running tests:
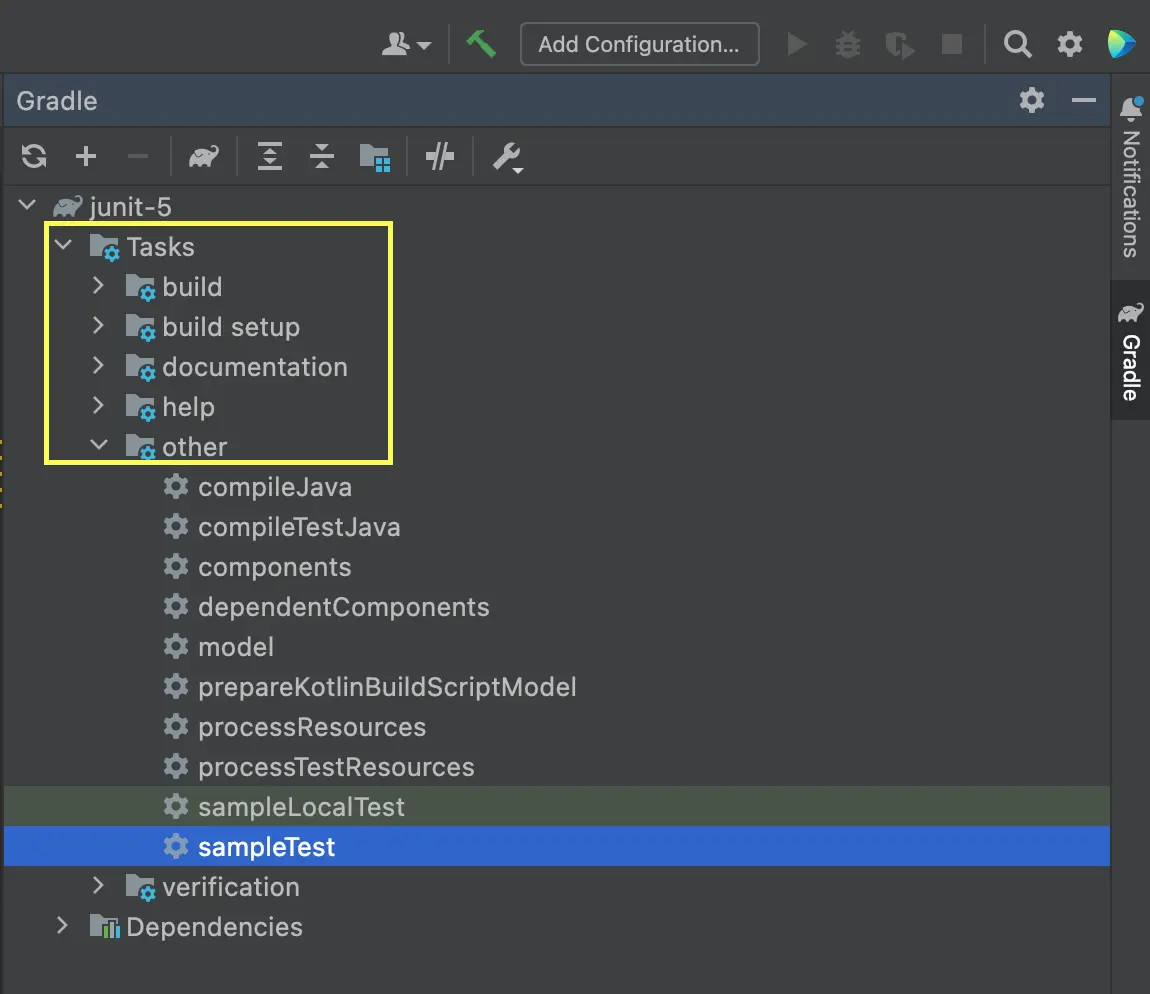
Expand the Other drop-down, and then double-click the task to run the tests:
Get Sample Project
Get our sample project using one of the following options:
Option 1: Download Project
Configure your browserstack.yml config file
The browserstack.yml file holds all the required capabilities to run your tests on BrowserStack
Set access credentials
Set userName and accessKey parameters in the browserstack.yml file, available in the root directory, to authenticate your tests on BrowserStack.
Select desktop browsers or real devices from a list of 3000+ available combinations:
Configure AI Agents
You can enable the following AI agents by adding the respective configurations in your browserstack.yml file:
Update the browserstack.yml config file
Copy and replace the platforms object in the browserstack.yml file.
Run sample tests on BrowserStack!
Install dependencies and run a sample test build on BrowserStack:
After you run your test, visit the Automate dashboard to view your test results.
Next steps
After you have successfully run your first test on BrowserStack, try integrating your test suite with BrowserStack.
We're sorry to hear that. Please share your feedback so we can do better
Contact our Support team for immediate help while we work on improving our docs.
We're continuously improving our docs. We'd love to know what you liked
We're sorry to hear that. Please share your feedback so we can do better
Contact our Support team for immediate help while we work on improving our docs.
We're continuously improving our docs. We'd love to know what you liked
Thank you for your valuable feedback!