Test on internal networks
Set up Local Testing to execute your test suites with localhost/private URL’s on cloud successfully.
BrowserStack Low Code Automation can trigger test suites against your local & staging websites, and even websites behind proxies/firewalls. This is done using BrowserStack Local - a tunneling capability that establishes a secure connection between the machine running the binary and BrowserStack Cloud.
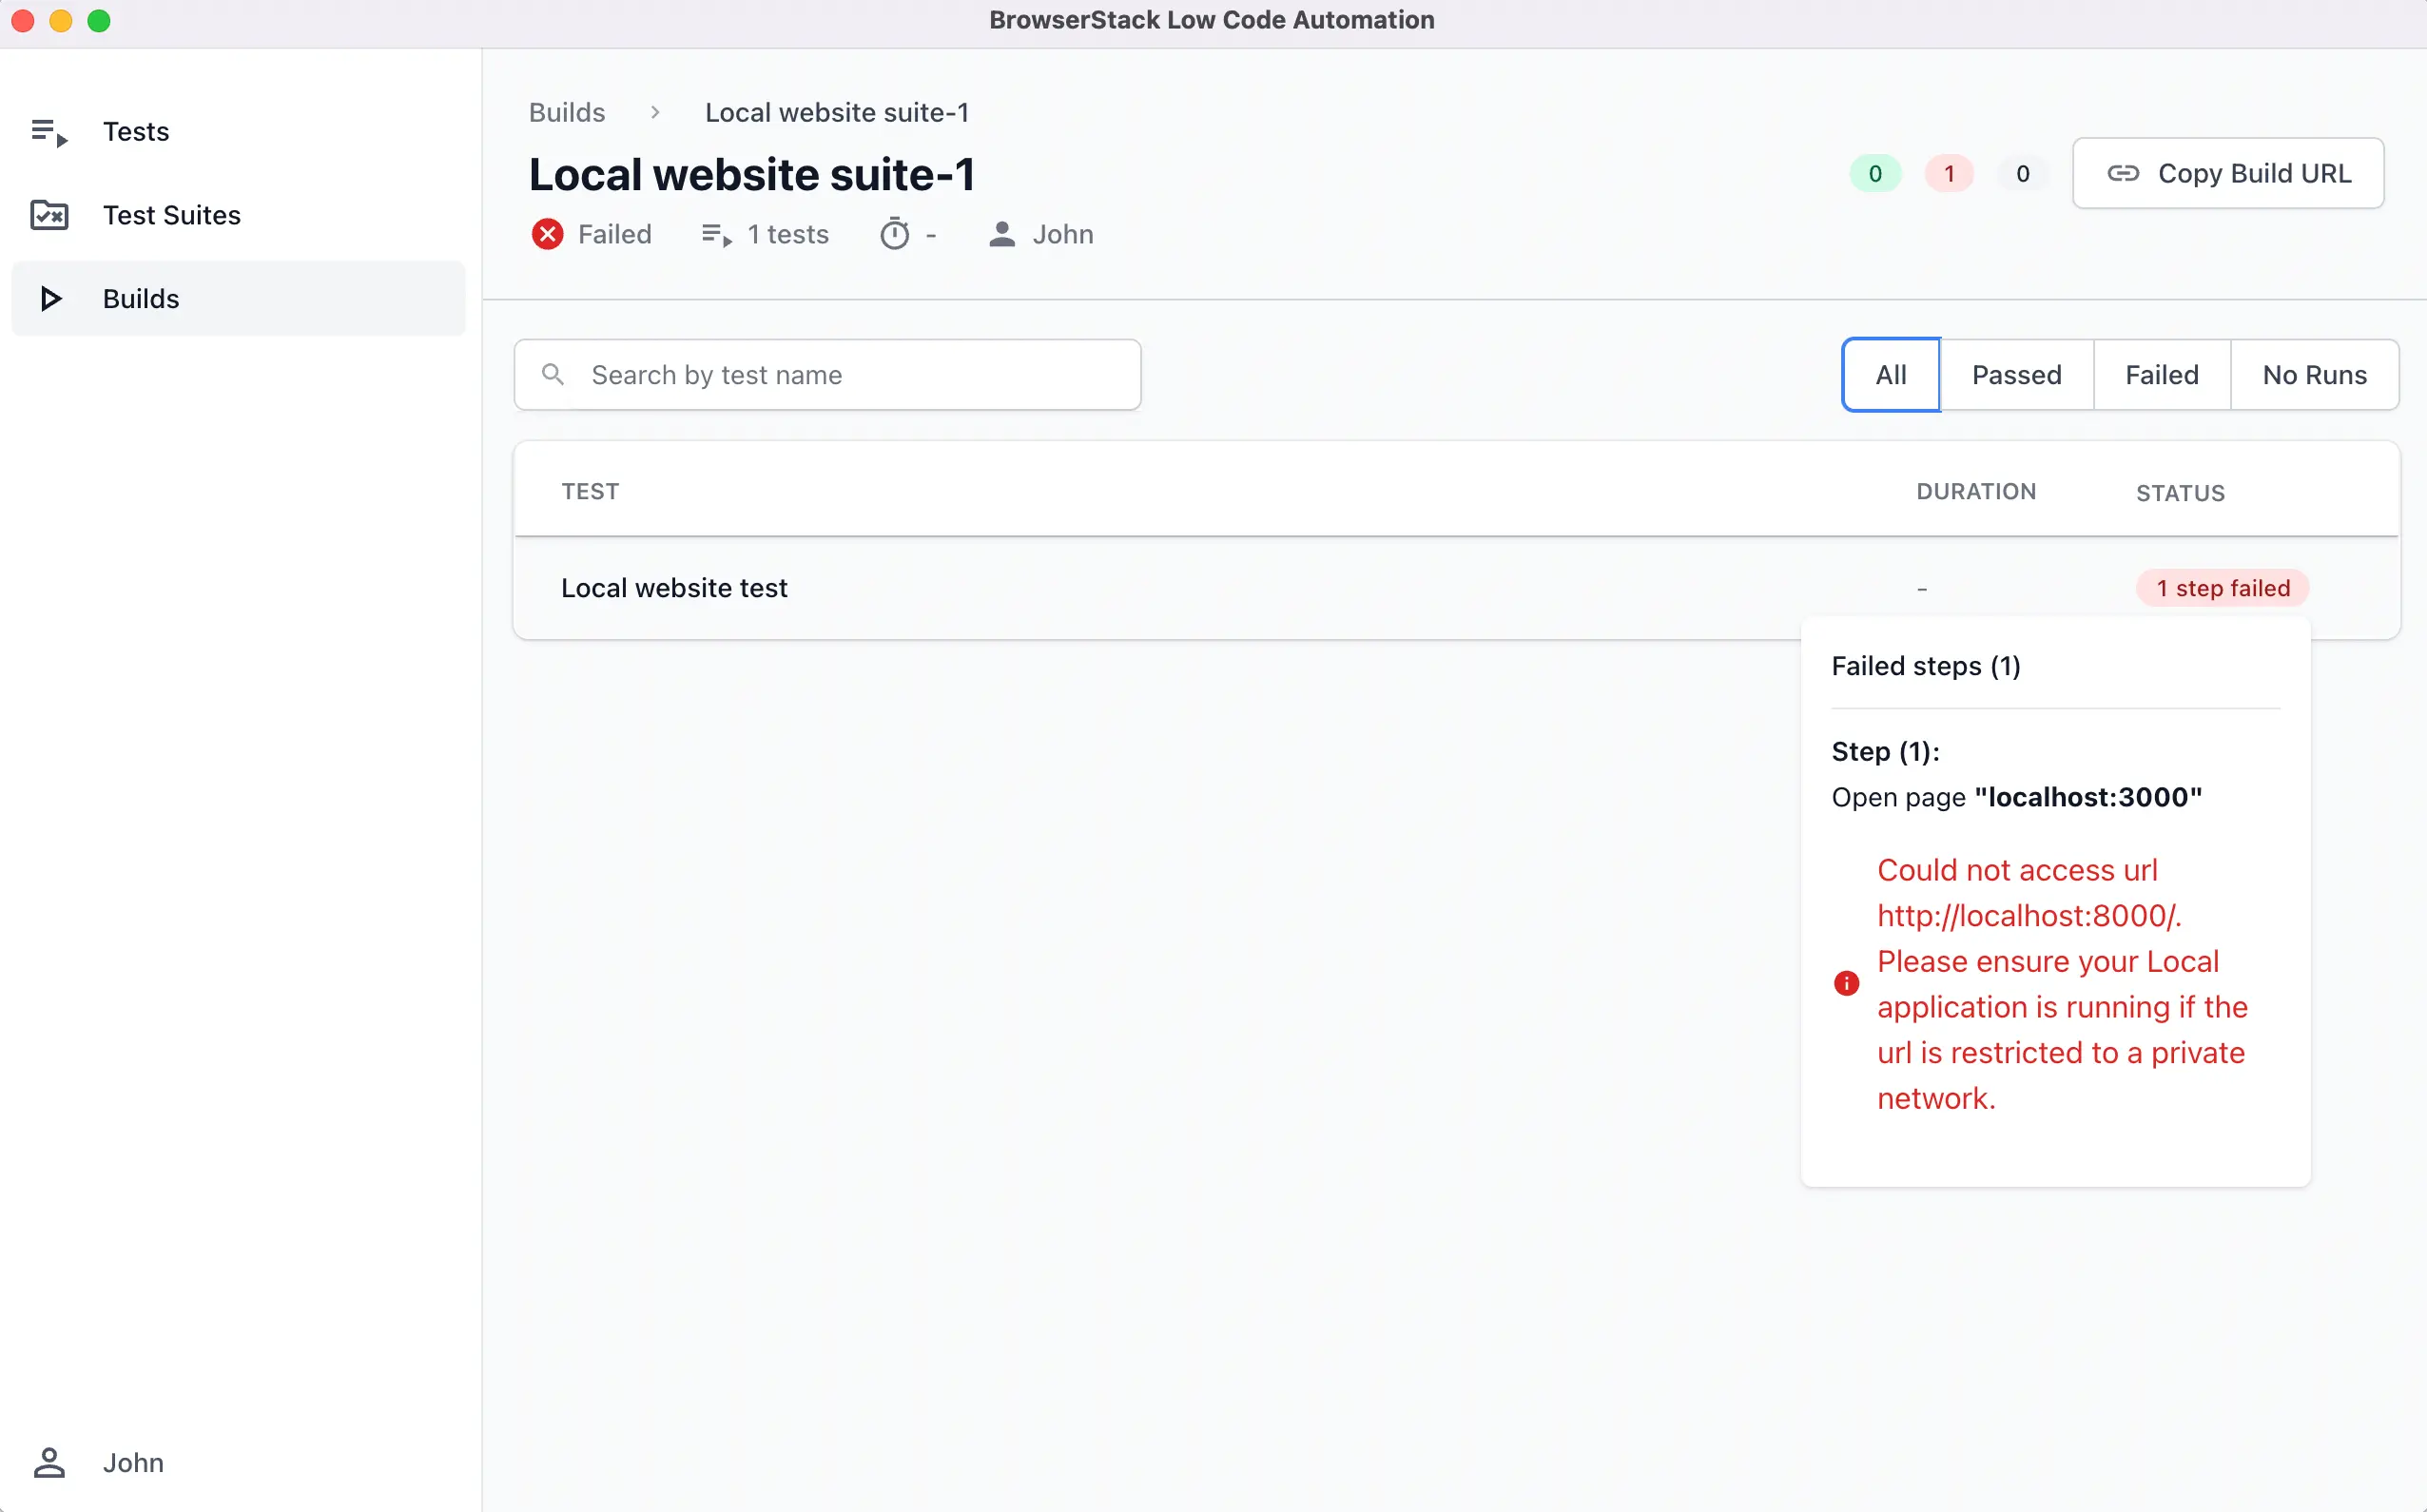
If you have triggered a Test suite and have faced the below issue while accessing the build run, it’s likely because you do not have Local setup running.

Pre-requisite
You need to have BrowserStack Username and Access key, which you can find in your account settings. If you have not created an account yet, you can sign up for a Free Trial.
To enable local, follow the setup instructions mentioned below.
How to configure and setup Local Testing?
Step 1: Enable Local Testing for Test Suite
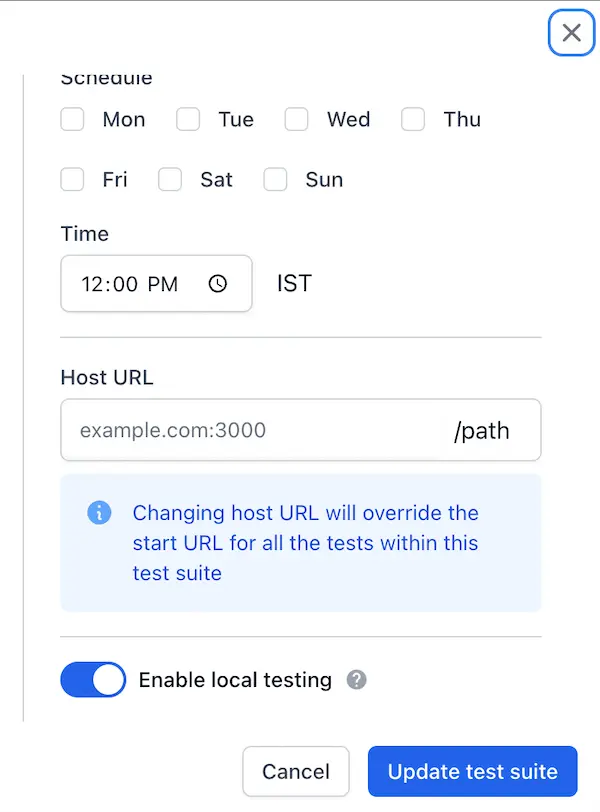
- Navigate to the test suite which has tests recorded on local or internal staging website.
- Edit the test suite and turn ON the setting Enable local testing.

Step 2: Setup Local Binary
Low Code Automation supports local testing only with the local binary, not with the local desktop app.
Follow the setup instructions for your OS:
Step 1: Download the BrowserStack Local binary for Windows.
Step 2: Unzip the file to a folder/directory on your system, open the command-line interface, and navigate to the folder containing the Local binary.
Step 3: Run the Local binary using the following command:
BrowserStackLocal.exe --key YOUR_ACCESS_KEY
- Use the access key associated with the group owner of your BrowserStack account. If the group owner’s access key is not shareable, you can also configure a Service Account to use its access key for running the local binary.
- Make sure to run the binary on a machine which can access your URL’s and is up during the build execution.
Step 1: Download the BrowserStack Local binary for macOS/OS X.
Step 2: Unzip the file to a folder/directory on your system, open the command-line interface, and navigate to the folder containing the Local binary.
Step 3: Run the Local binary using the following command:
./BrowserStackLocal --key YOUR_ACCESS_KEY
- Use the access key associated with the group owner of your BrowserStack account. If the group owner’s access key is not shareable, you can also configure a Service Account to use its access key for running the local binary.
- Make sure to run the binary on a machine which can access your URL’s and is up during the build execution.
Step 1: Download the appropriate BrowserStack Local binary for your system: Linux 32-bit | Linux 64-bit.
Step 2: Unzip the file to a folder/directory on your machine, open the command-line interface, and navigate to the folder containing the Local binary.
Step 3: Run the Local binary using the following command:
./BrowserStackLocal --key YOUR_ACCESS_KEY
- Use the access key associated with the group owner of your BrowserStack account. If the group owner’s access key is not shareable, you can also configure a Service Account to use its access key for running the local binary.
- Make sure to run the binary on a machine which can access your URL’s and is up during the build execution.
Test websites behind a firewall or VPN
With Local Testing, you can test internally hosted websites that are behind a firewall and/or VPNs.
If your Website / VPN / Firewall / Proxy only accept connections from certain IP addresses or Subnet addresses then it is mandatory to enable “Force Local”. You can enable it in either of the following ways
- If the binary is already running, navigate to http://localhost:45454, and toggle force local on.
- Pass the force local flag directly while running the binary as shown below:
- For Windows
BrowserStackLocal.exe --key YOUR_ACCESS_KEY --force-local - For macOS/Linux
./BrowserStackLocal --key YOUR_ACCESS_KEY --force-local
- For Windows
To set up Local Testing for other environments/network configurations, refer to our complete list of flags.
Inbound IP Whitelisting
IP Whitelisting is a BrowserStack solution where, instead of doing resolution of local assets via the Binary, the BrowserStack cloud directly accesses your assets via a limited and secure set of machines whose IPs have been whitelisted by your network administrator. If you want the BrowserStack cloud to directly resolve your IP-restricted assets without passing through the Binary, you can use this solution.
Learn more about how IP Whitelisting works and its pre-requisites here.
Note: Please note that Inbound IP Whitelisting is an Enterprise feature. If you are not already on an Enterprise plan, contact sales for details.
Follow these steps to properly set up IP whitelisting for Low Code Automation:
- Get in touch with our Support team to enable IP whitelisting.
- After enabling the feature and whitelisting the IPs, activate the local setting for the test suites. Refer to Step 1 in the How to Configure and Set Up Local Testing? section.
We're sorry to hear that. Please share your feedback so we can do better
Contact our Support team for immediate help while we work on improving our docs.
We're continuously improving our docs. We'd love to know what you liked
We're sorry to hear that. Please share your feedback so we can do better
Contact our Support team for immediate help while we work on improving our docs.
We're continuously improving our docs. We'd love to know what you liked
Thank you for your valuable feedback!