
 Join our Discord
Use Build Comparison Reports
Compare two automation builds to identify regressions, new failures, and coverage changes.
A build comparison report compares two builds you select to highlight changes between the two runs. These changes include new failures, tests which fail with a different reason, additional tests, dropped tests, newly passing tests, among others. Use it to compare a Target Run with a Baseline Run so that you get to know how any build performed relative to a benchmark.
This platform feature is available with Automate, App Automate, Test Management, Test Reporting & Analytics, and Automate TurboScale.
When to use a build comparison report
Use a build comparison report to answer one question: “What changed between these two builds?” Pick a Baseline Run (for example, your last stable release) and a Target Run (for example, a release candidate). Comparing the two helps you catch regressions and dropped coverage before you promote.
The following are a few common use cases:
- Gating a release candidate by acting on newly failed and dropped tests.
- Confirming that fixes landed by checking what’s now passing.
- Spotting coverage drift by comparing additional tests against dropped ones.
- Comparing two configurations or environments by running each as a separate build.
Build comparison is available on paid plans. Each paid plan has a comparison limit. You can only compare automation builds. Builds that are locked, archived, invalid, or in progress can’t be selected. Filters such as folder, test tags, and host name require SDK integration and are disabled for non-SDK builds.
What a build comparison report includes
Each build comparison report offers:
- Baseline Run and Target Run: Two builds you select for comparison, scoped by project, or found using the build filter type or a search by name, tag, build number, or CI number.
- Metadata: Build name, build number, tags, and status counts for both the Baseline Run and Target Run, plus a lock icon for closed builds.
- Stat tiles: High-value comparison metrics such as newly failed, failed with different reason, now passing, additional tests, dropped tests, and unchanged tests between the compared builds.
Comparison categories
Every test that appears in either build is matched by test name, file path, and scope, then placed into one of the following categories:
| Category | What it means | How to read it |
|---|---|---|
| Newly failed | Passed in the Baseline Run but failed or returned an unknown status in the Target Run. | A new regression. |
| Failed with different reason | Failed in both runs, but with different failure reasons. Includes tests with an unknown status. | Still failing, but the cause changed. |
| Now passing | Failed in the Baseline Run but passed in the Target Run. | A fix landed between the two runs. |
| Additional tests | Not part of the Baseline Run but included in the Target Run. | A newly added test. |
| Dropped tests | Part of the Baseline Run but missing, skipped, or not run in the Target Run. | A test that was removed or didn’t run. |
| Unchanged tests | Ran in both runs with the same result. | No change. |
How to create a build comparison report
Follow these steps to create a build comparison report:
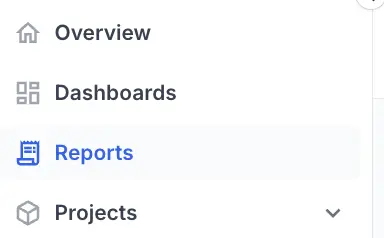
- Open Reports from the sidebar.
- Select Create Report.
- Select Build Comparison Report as the report type.

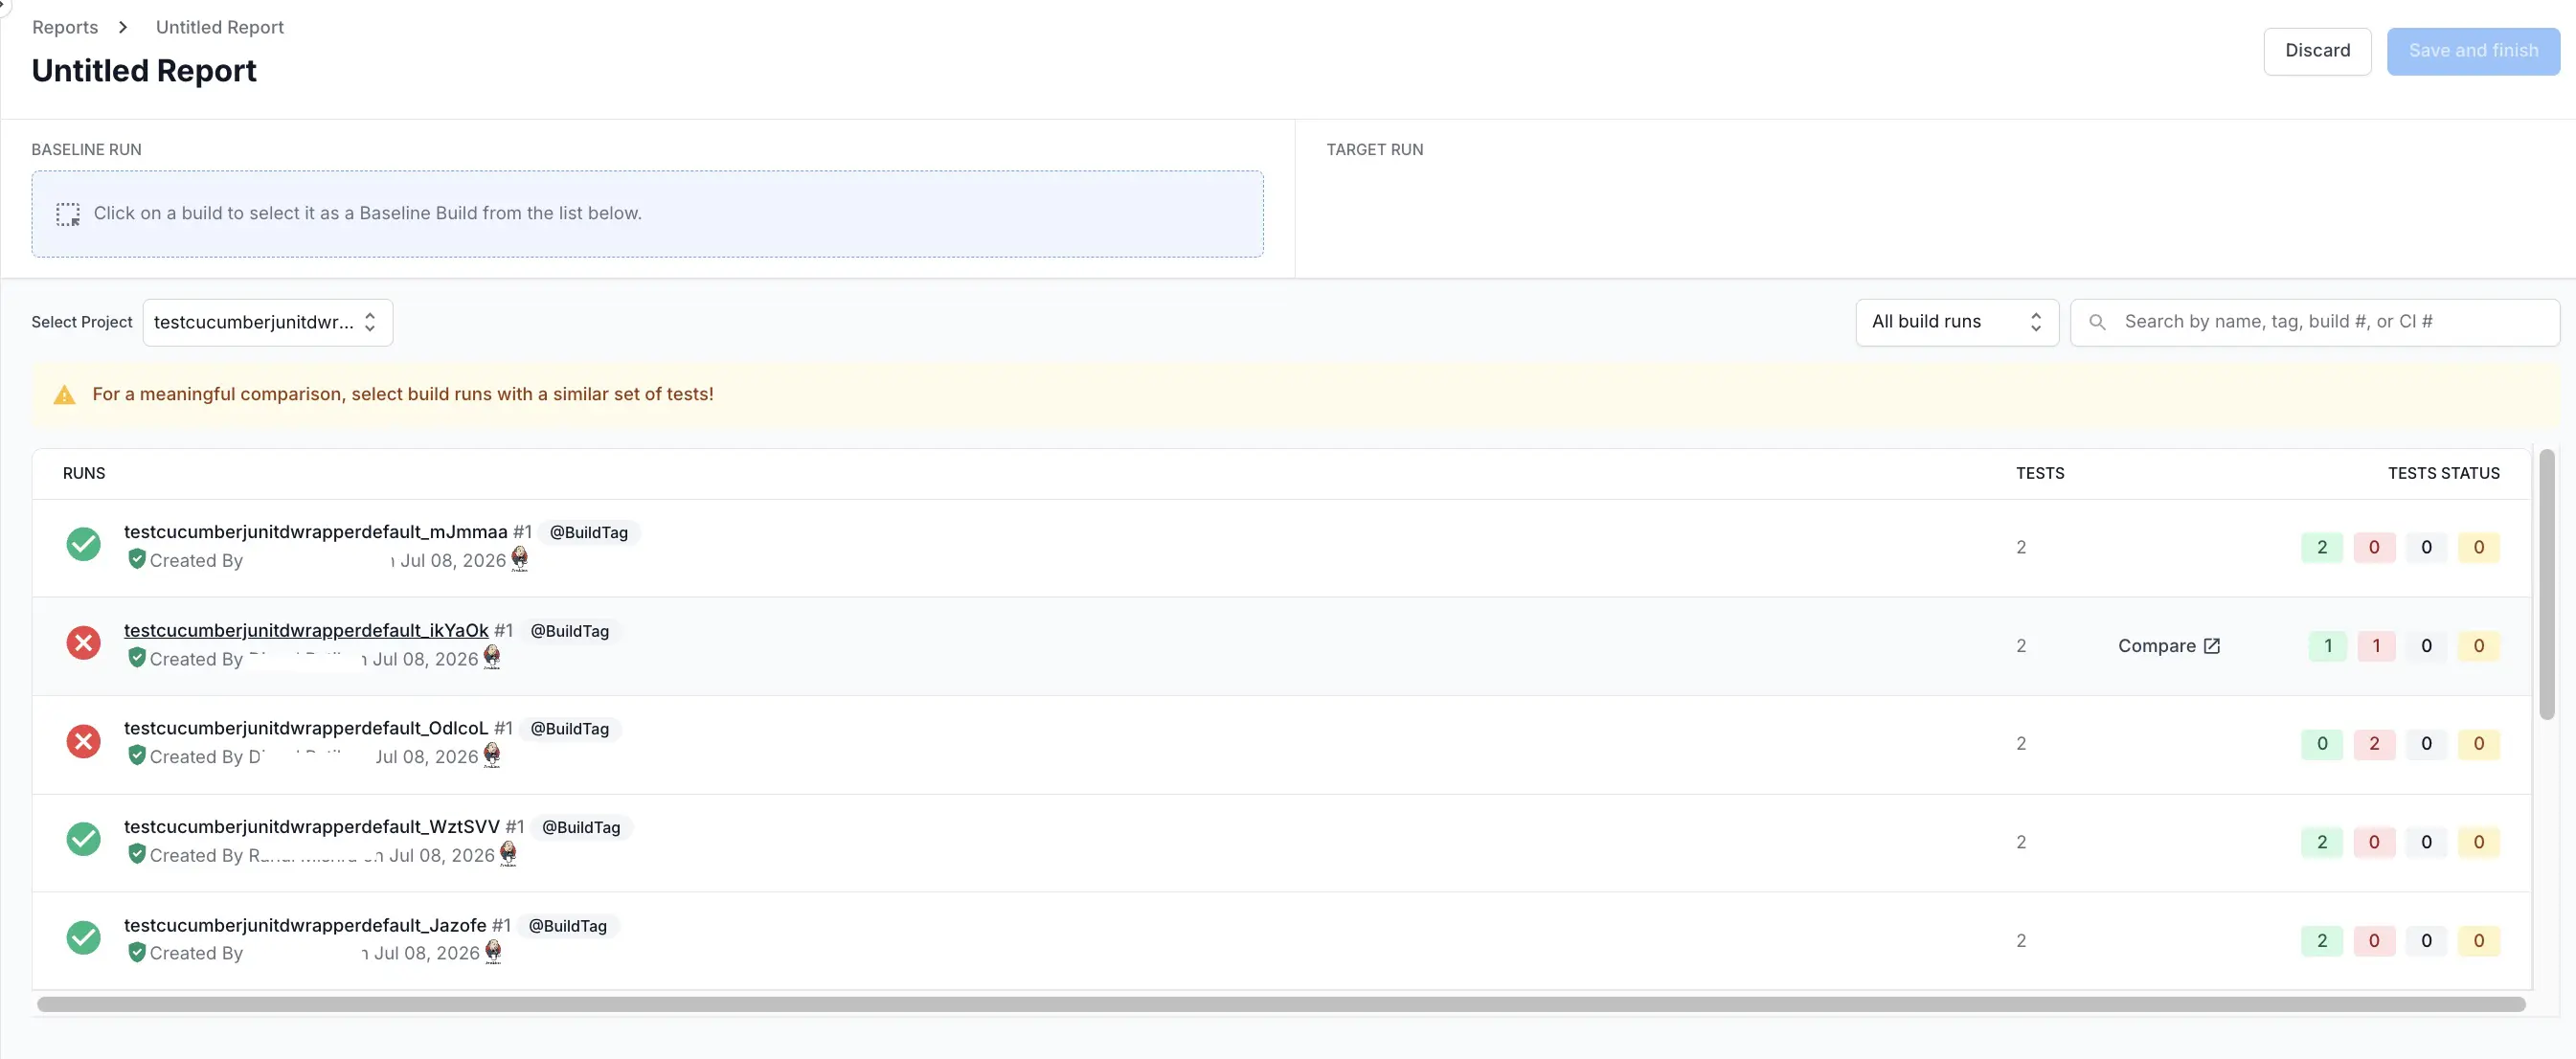
- Select a Baseline Run:
- Click Baseline Run.
- Select a Project.
- Optionally, use the available filters or search for the build run you want to choose as the Baseline Run. The Past runs of same build filter is to compare a build run against an older run of the same build.
- Click the build run to select it as the Baseline Run.
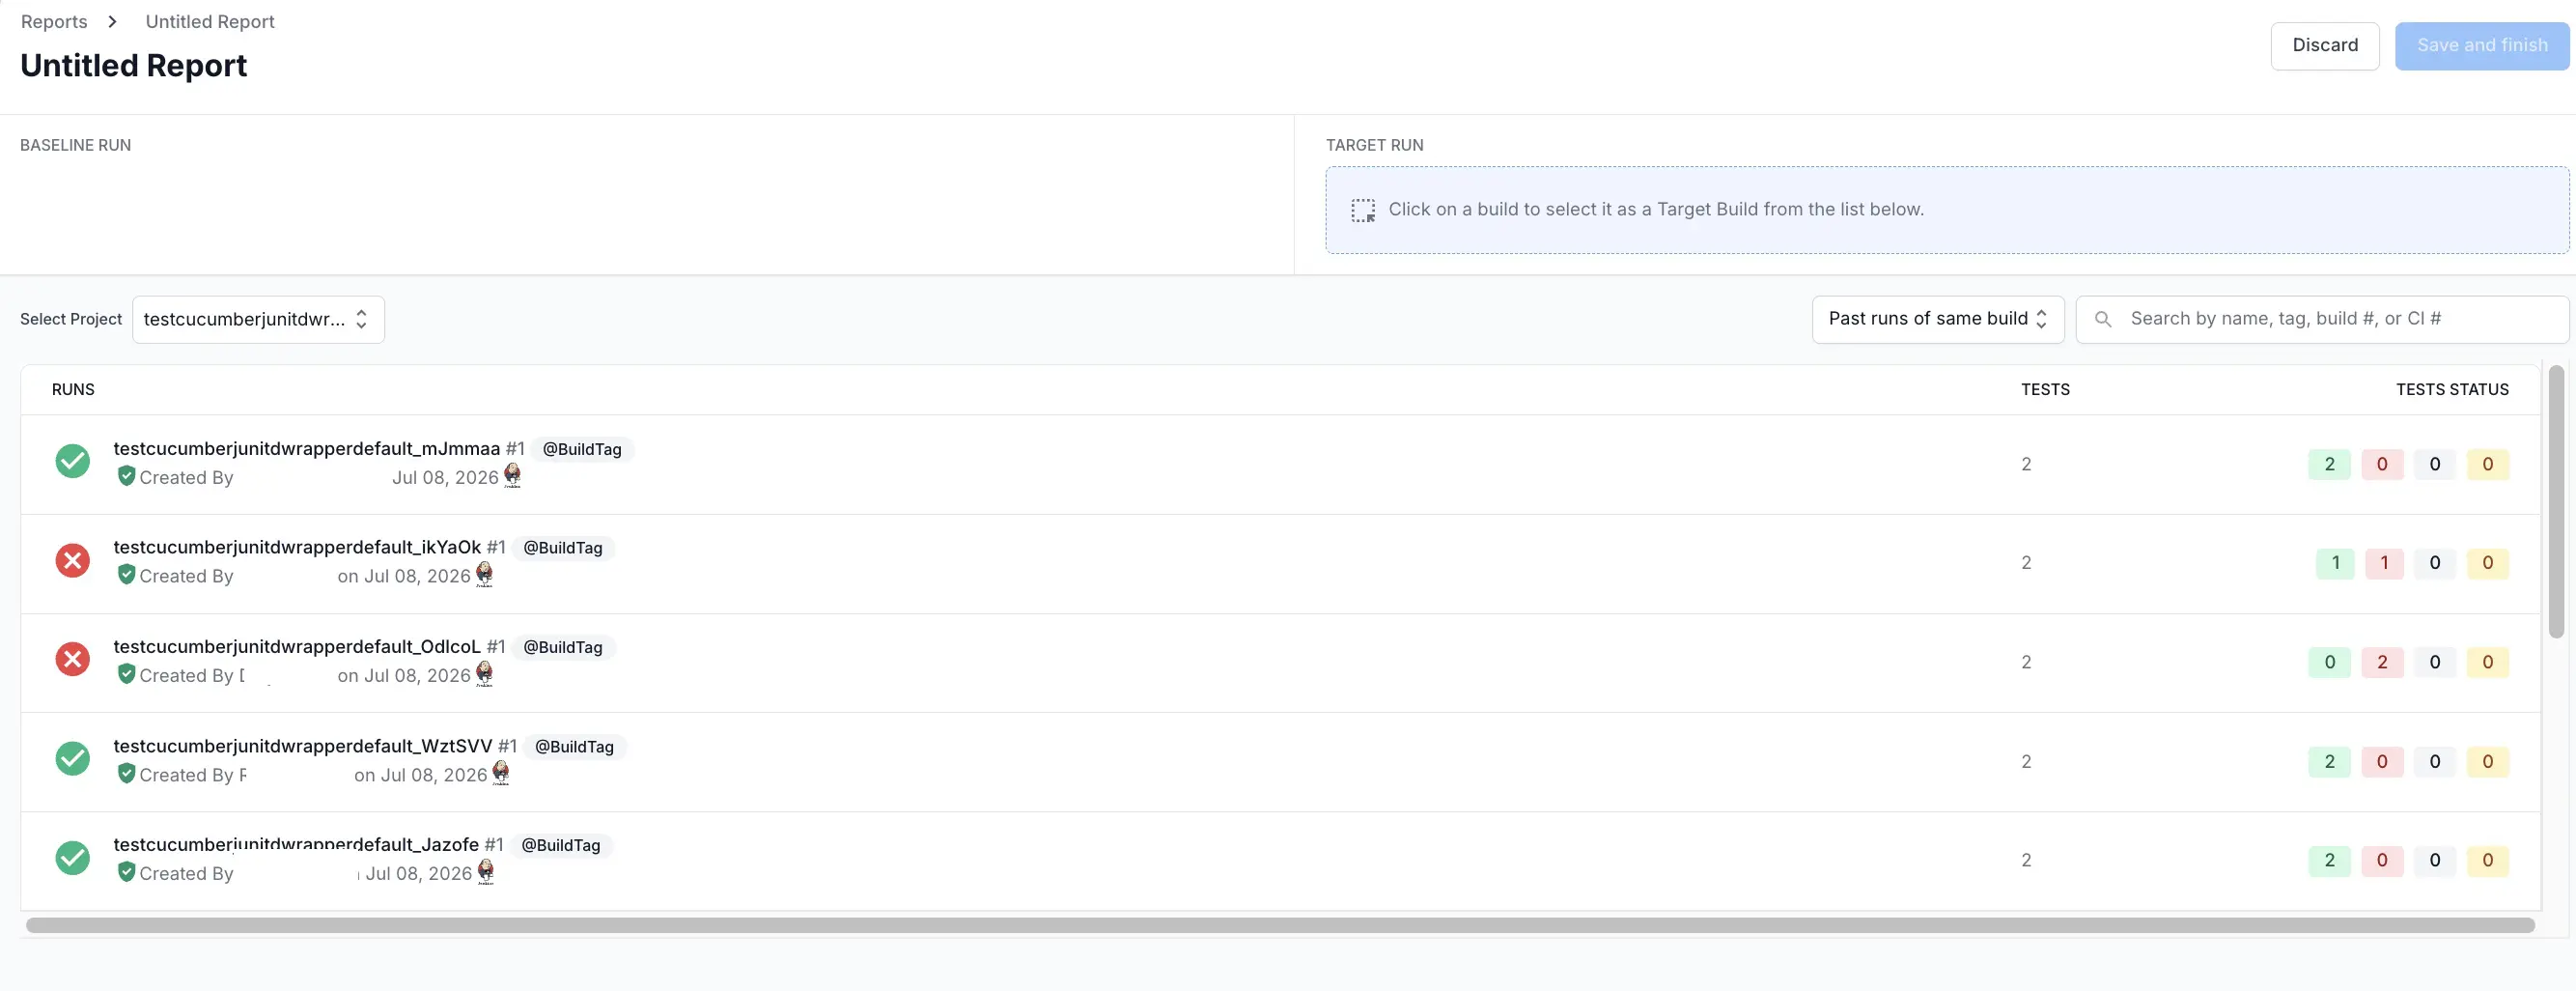
- Select a Target Run:
- Click Target Run.
- Select a Project.
- Optionally, use the available filters or search for the build run you want to choose as the Target Run.
- Click the build run to select it as the Target Run.
- Click Save and finish.
- Enter a name for the report.
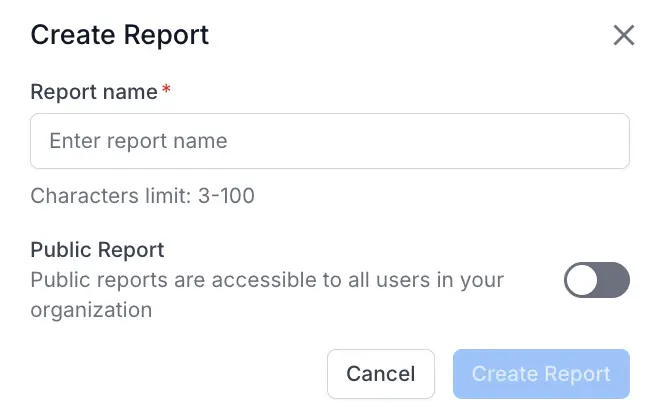
- Switch on Public Report if you want to share it within your organization.
- Click Create Report.
How to view a build comparison report
Follow these steps to view a build comparison report:
- Open Reports from the sidebar.
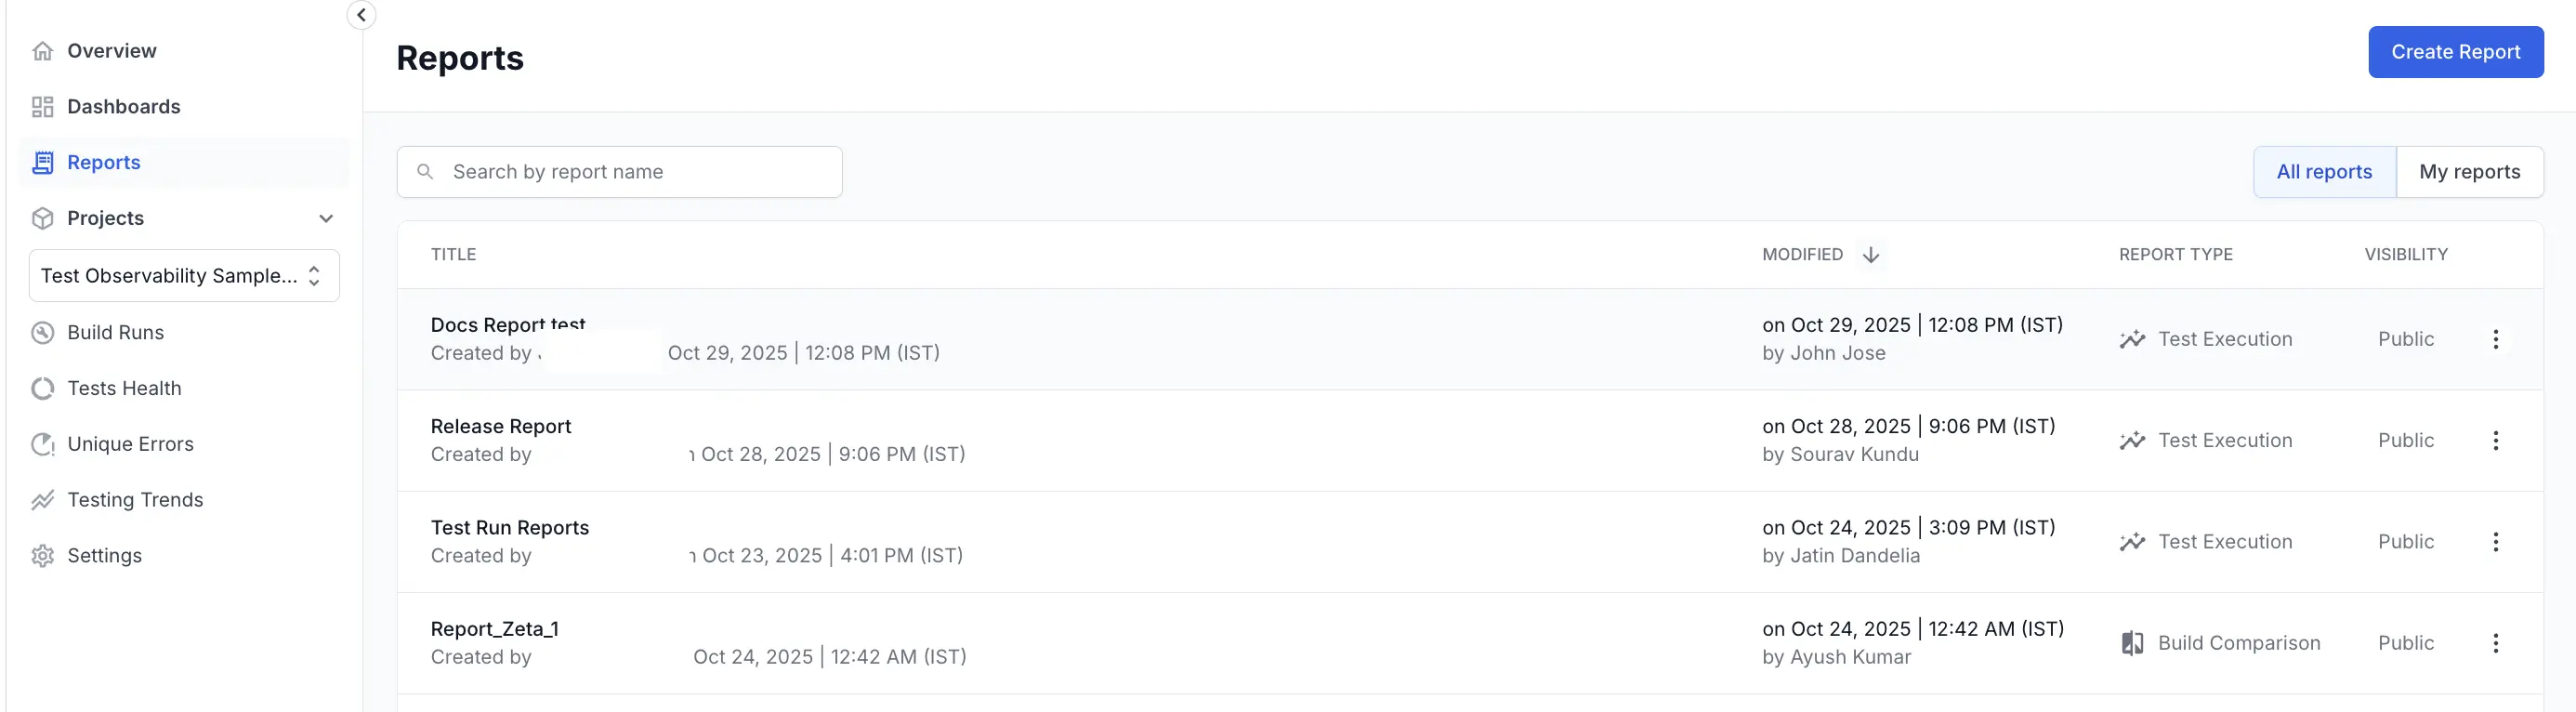
- From the list of available reports, select the build comparison report you want to view. The list contains a column to denote whether it is a test execution report or a build comparison report.
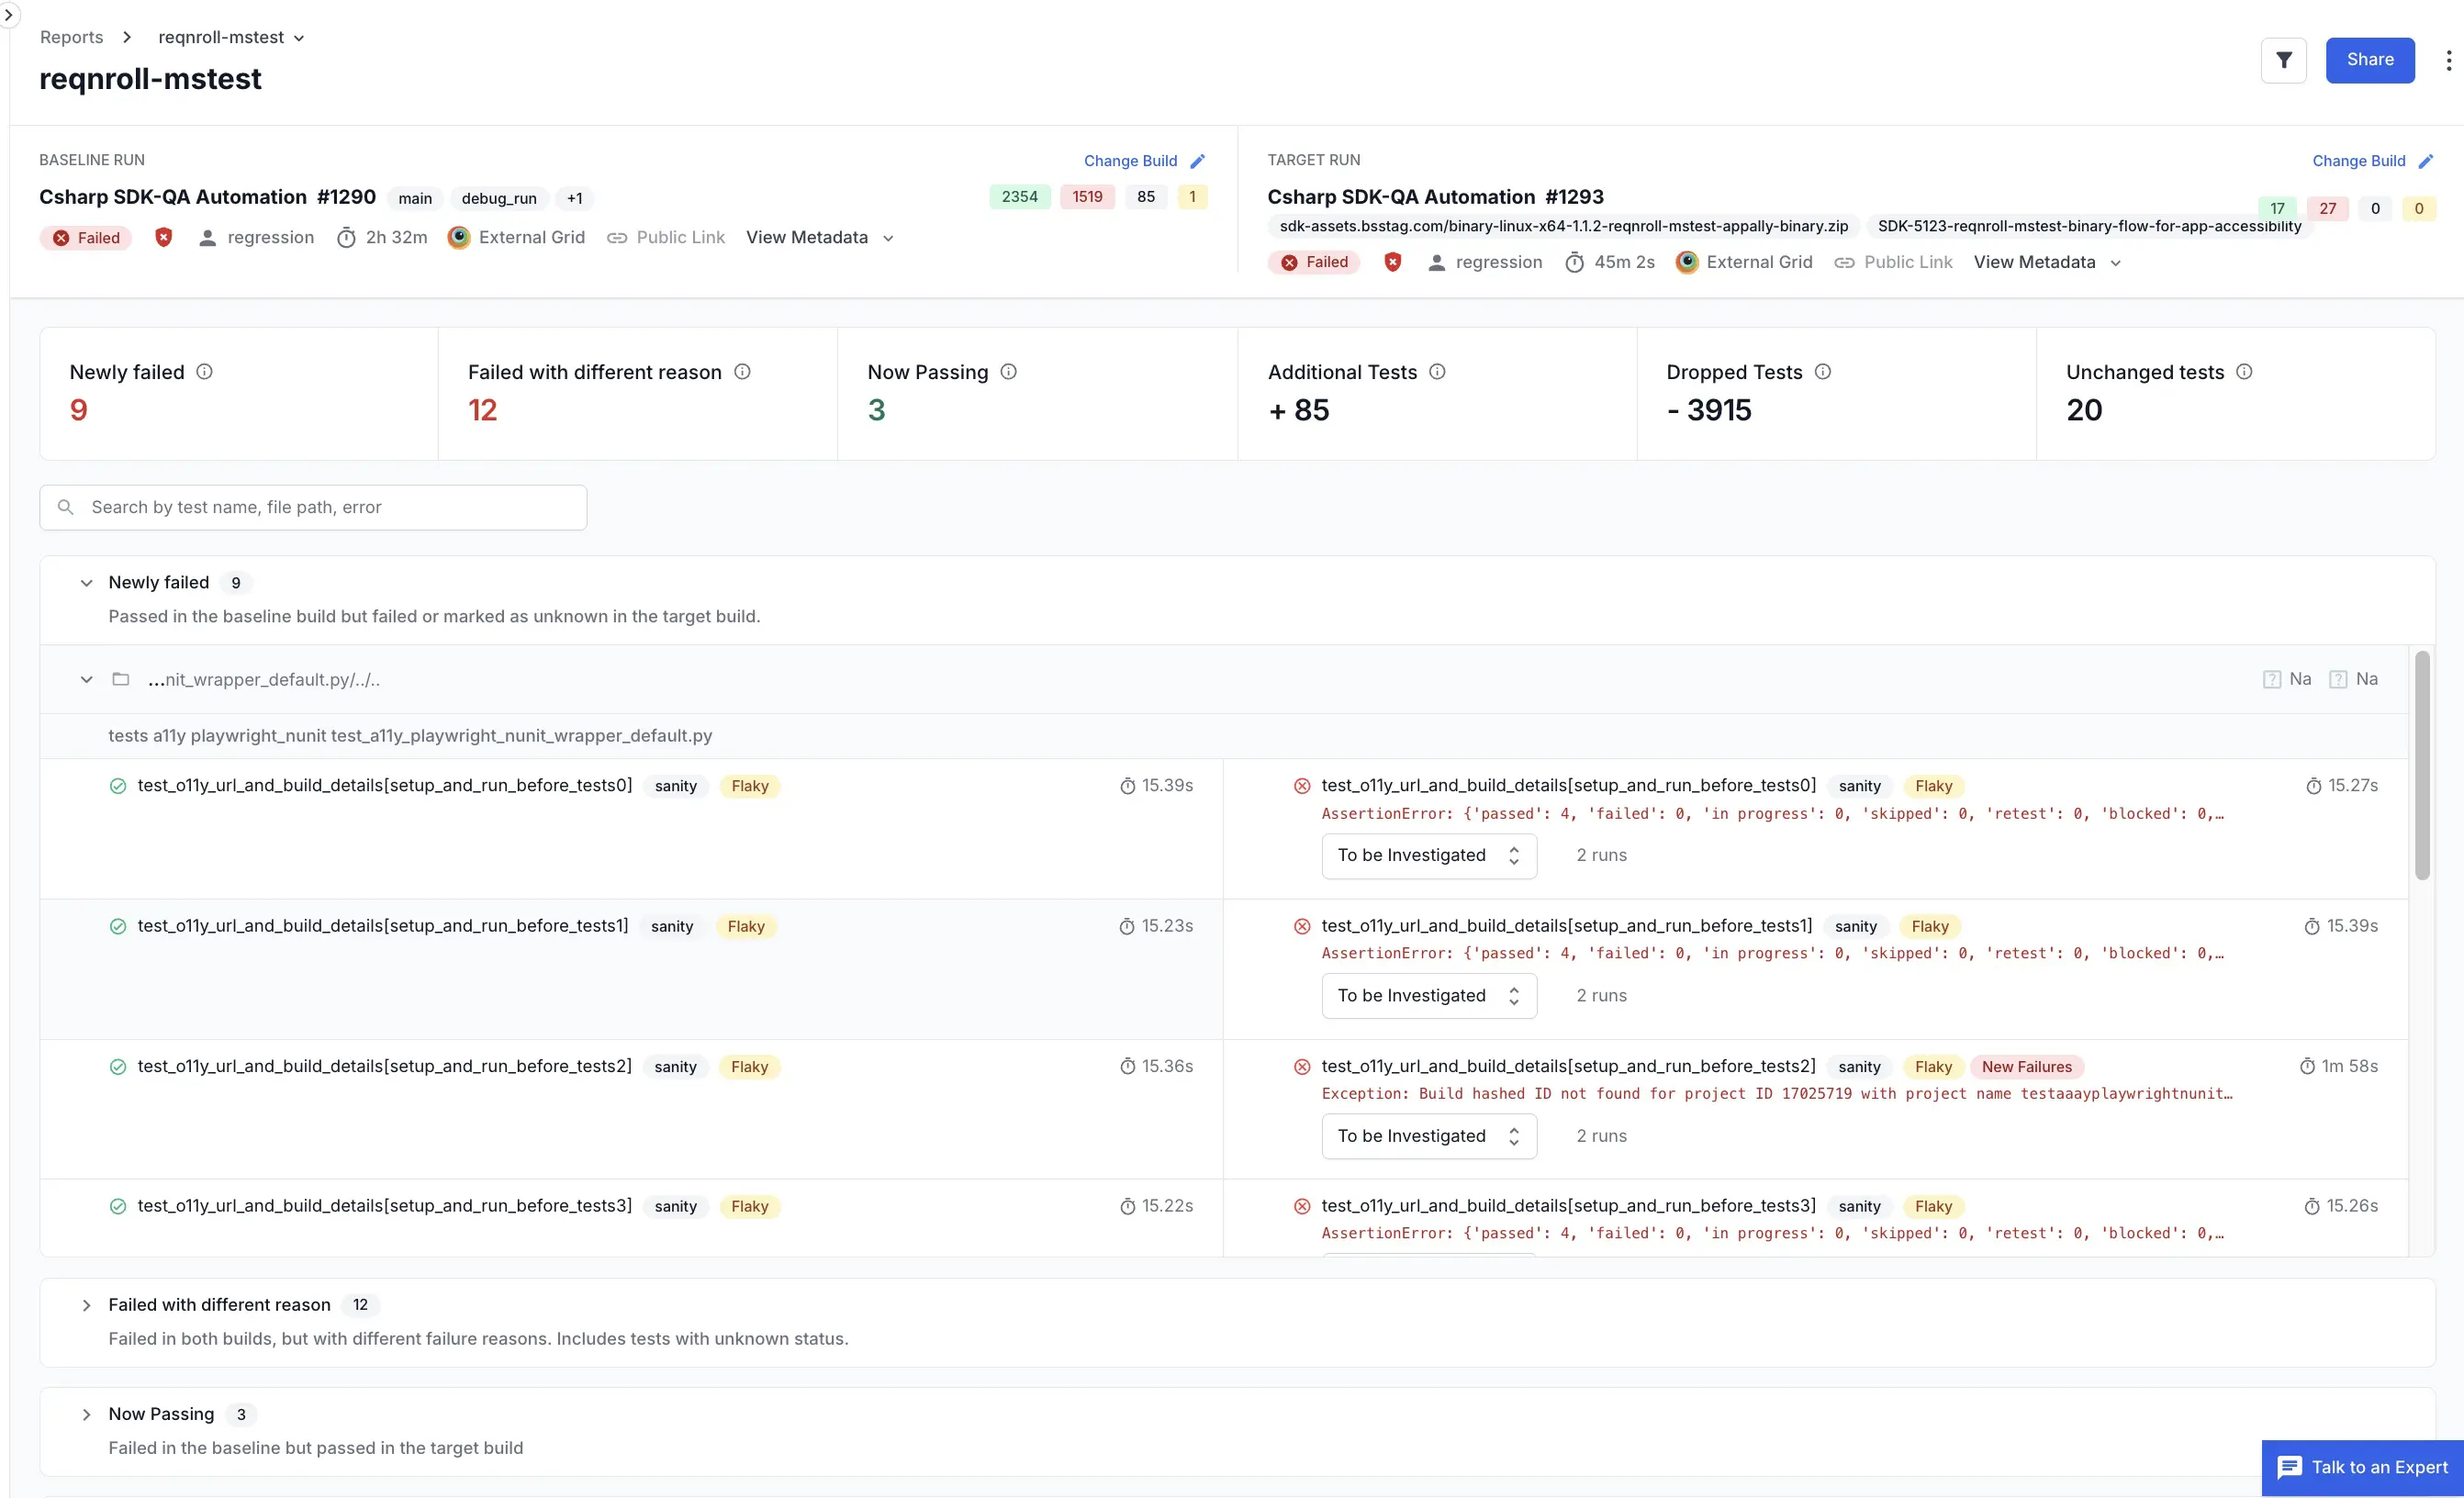
- The build comparison report opens with the Baseline Run and Target Run listed together. When you expand a category, each test shows the baseline result on the left and the target result on the right, with expandable failure/stack-trace detail.
- Use the search bar to find tests by name, file path, or error.
- Use Filters to narrow the results by folder, test tags, host name, device, OS, browser, and included hooks. Your personal filter state does not change the saved configuration.
- Interact with stat tiles. Click a tile, for example Newly failed, to view those tests.
- Click Change Build on either side to swap the Baseline Run or Target Run and recompute the comparison.
- Share the report:
- Copy the link to retain current filters.
- Use the public URL if visibility is org-wide.
Best practices
Follow these best practices to get the most out of build comparison reports:
- Compare against a known baseline build, such as the last stable release, for consistent trend measurement.
- Compare builds with a similar set of tests for a meaningful comparison.
- Start with the newly failed tests, expanded by default, to spot regressions, then check dropped tests for lost coverage.
- Manual status overrides on a build are ignored, so the comparison always reflects executed results.
- Regularly share and archive build comparison report links for compliance trails.
Related resources
- Test Execution Reports: Aggregate test executions across builds and projects to analyze coverage and stability.
- Custom dashboards: Understand whether a report or dashboard suits your use case.
We're sorry to hear that. Please share your feedback so we can do better
Contact our Support team for immediate help while we work on improving our docs.
We're continuously improving our docs. We'd love to know what you liked
We're sorry to hear that. Please share your feedback so we can do better
Contact our Support team for immediate help while we work on improving our docs.
We're continuously improving our docs. We'd love to know what you liked
Thank you for your valuable feedback!