Integrate your Selenium Robot Framework tests with Percy
A guide to integrating your Selenium Robot Framework tests with BrowserStack Percy. Catch visual differences in your web application on time.
Percy SDK offers the following integrations for your Robot Framework tests:
- Percy Web
- Percy with Automate
To establish this integration, choose the appropriate variant and refer to the following section accordingly:
Follow these steps to integrate Percy with your Robot Framework test suite to run visual tests:
Step 1 - Create a Percy project
- Sign in to percy.io.
- Create a new project or open an existing one.
- Copy your
PERCY_TOKENfrom Project Settings > Integrations.
Step 2 - Install the latest Percy CLI
Install the Percy CLI, which wraps your test run and uploads snapshots to Percy:
Step 3 - Install Robot Framework dependencies
Install the Percy Selenium SDK along with Robot Framework and SeleniumLibrary:
percy-selenium 2.2.0 and above ships the Robot Framework library, so no additional package is required.
Step 4 - Set your Percy token
Export the Percy token to your environment:
Step 5 - Update your test script
Import PercyLibrary alongside SeleniumLibrary, and then call the Percy Snapshot keyword wherever you want to capture a visual snapshot:
The snapshot keyword arguments are:
-
name(required) - The snapshot name; must be unique to each snapshot. -
**named- Named arguments for snapshot options (for example,widths,min_height,percy_css,scope,enable_javascript,enable_layout,labels,sync). See per-snapshot configuration options.
For example, to capture the homepage at multiple widths:
To learn more about snapshot configuration, visit Percy snapshot.
Step 6 - Run the build
Wrap your Robot Framework test run with the Percy CLI:
Percy collects snapshots from the wrapped run and uploads them for visual comparison.
Summary
You have successfully created your first build on Percy. To see the build with snapshots of your application, visit your project in Percy.
When you run another build with visual changes to your application, Percy takes new snapshots. You can then see the comparisons between the two runs on the new build.
Follow these steps to integrate Percy on Automate with your Robot Framework test suite to run visual tests:
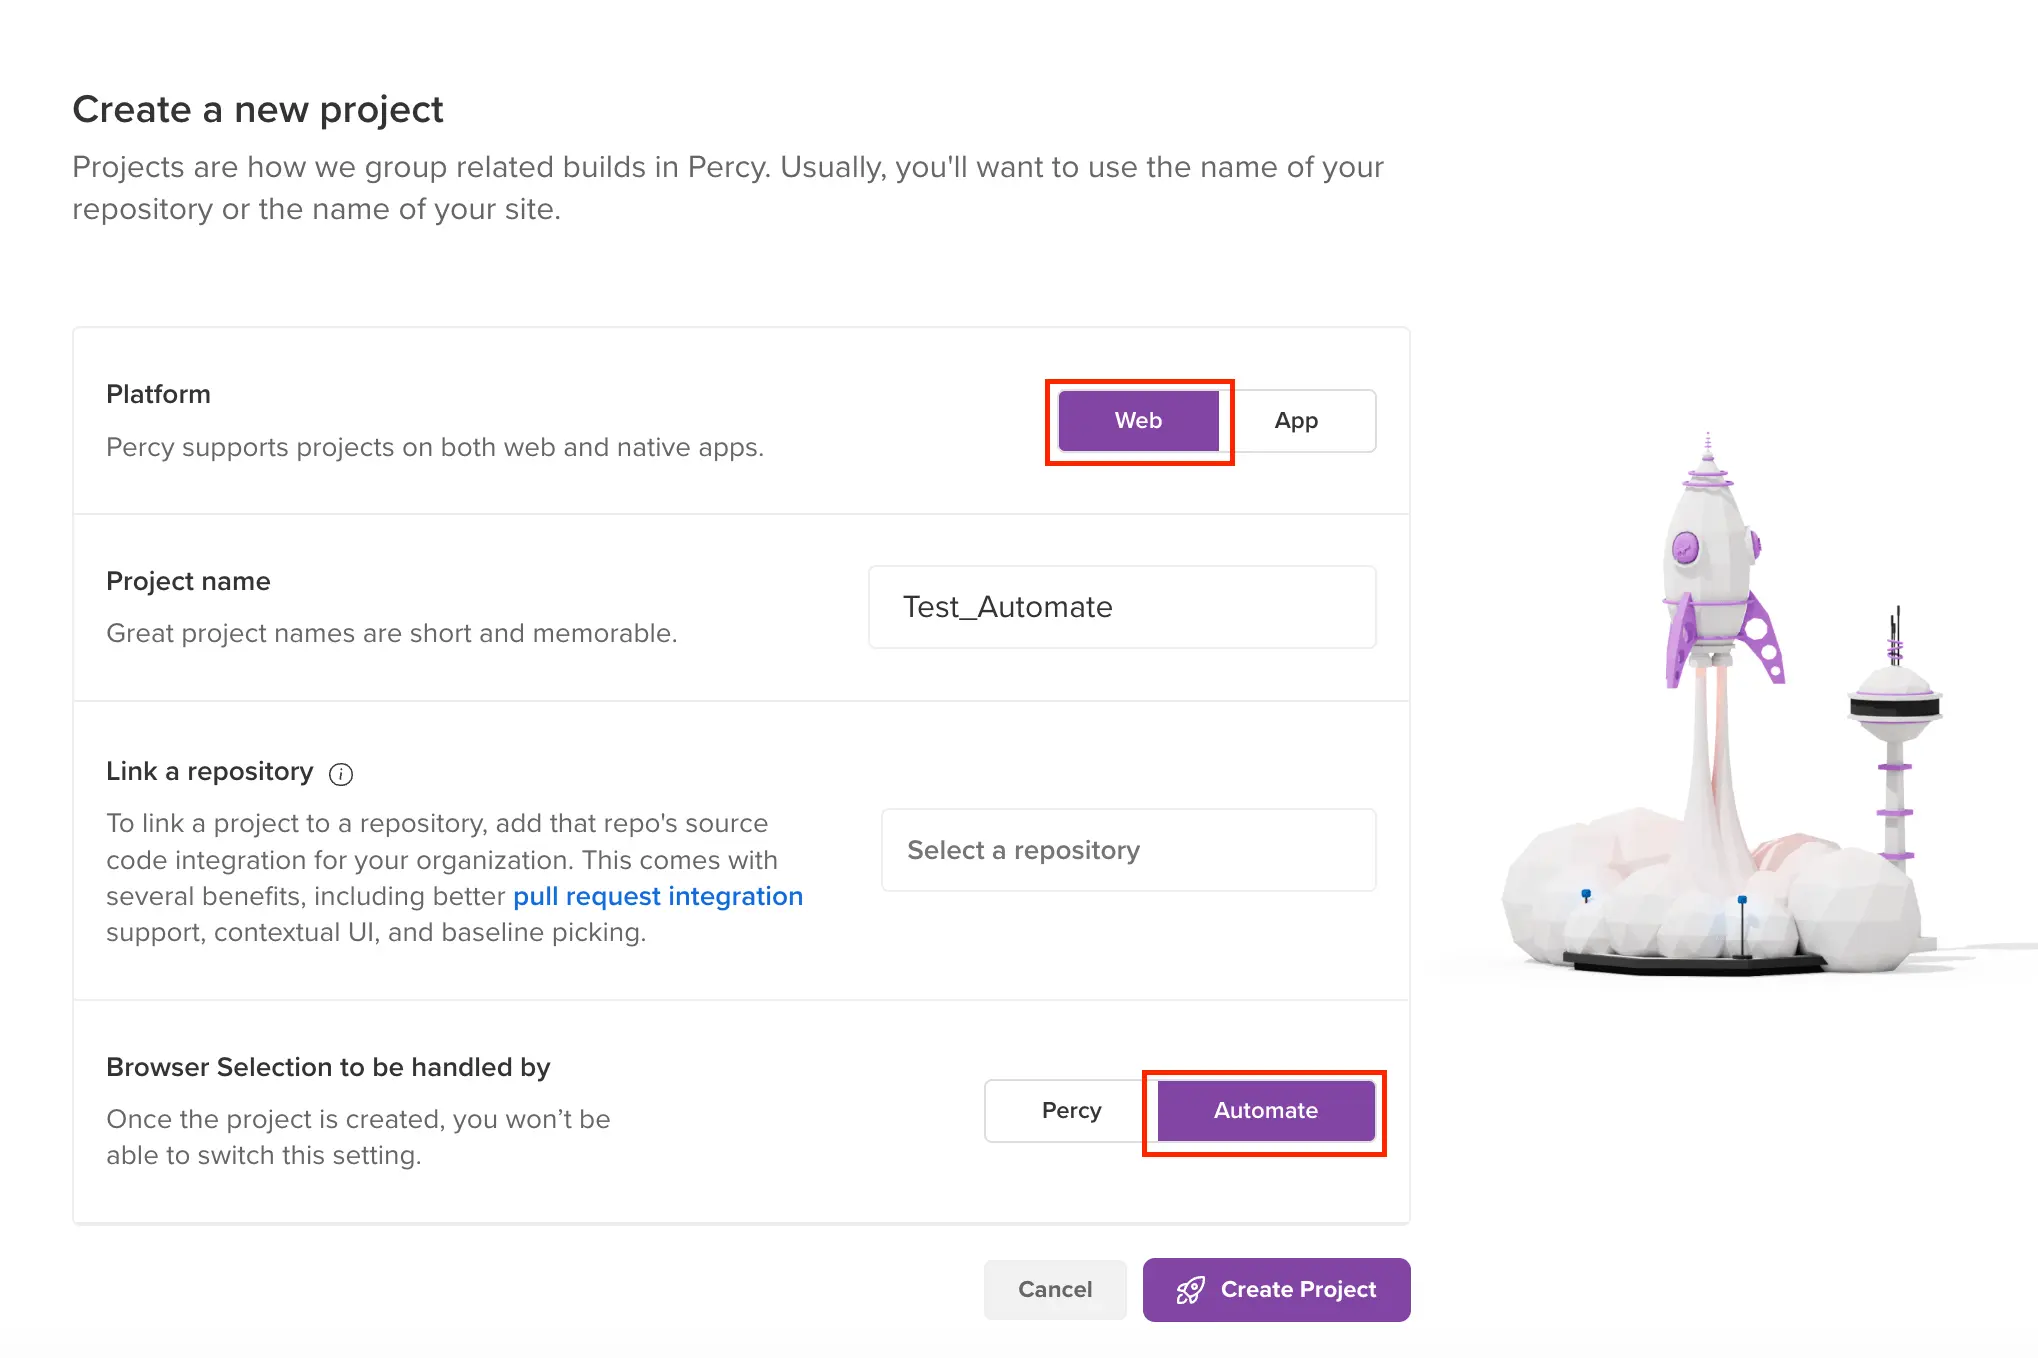
Step 1 - Create a Percy project
- Sign in to percy.io.
- On the Percy dashboard, make the following selections:
- Select Web as the platform.
- Select Automate to handle browser selection.
- Click Create Project.
- Copy your
PERCY_TOKENfrom Project Settings > Integrations.
Step 2 - Install the latest Percy CLI
Install the Percy CLI, which wraps your test run and uploads screenshots to Percy:
Step 3 - Install Robot Framework dependencies
Install the Percy Selenium SDK along with Robot Framework and SeleniumLibrary:
percy-selenium 2.2.0 and above ships the Robot Framework library, so no additional package is required.
Step 4 - Set your Percy token
Export the Percy token to your environment:
Step 5 - Update your Automate test script
Import PercyLibrary alongside SeleniumLibrary, and then call the Percy Screenshot keyword wherever you want to capture a screenshot during your Automate session:
The screenshot keyword arguments are:
-
name(required) - The screenshot name; must be unique to each screenshot. -
**named- Named arguments for screenshot options (for example,options,ignore_region_selenium_elements,consider_region_selenium_elements). See Percy on Automate options.
Robot Framework passes complex named arguments differently from Python. Build dictionaries with Create Dictionary and lists with Create List, then pass them by reference:
Step 6 - Run the build
Wrap your Robot Framework test run with the Percy CLI:
Percy collects screenshots from the wrapped run and uploads them for visual comparison.
Summary
You have successfully created your first build on Percy. To see the build with screenshots of your application, visit your project in Percy.
When you run another build with visual changes to your application, Percy takes new screenshots. You can then see the comparisons between the two runs on the new build.
We're sorry to hear that. Please share your feedback so we can do better
Contact our Support team for immediate help while we work on improving our docs.
We're continuously improving our docs. We'd love to know what you liked
We're sorry to hear that. Please share your feedback so we can do better
Contact our Support team for immediate help while we work on improving our docs.
We're continuously improving our docs. We'd love to know what you liked
Thank you for your valuable feedback!