
 Join our Discord
Scan for accessibility issues
Scan iOS and Android apps for accessibility issues on real BrowserStack devices and review them by severity without leaving your IDE.
Test Companion installs your app on a real BrowserStack device, navigates the screens you specify, and runs an accessibility scan after each UI change. When the session ends, you receive a single report that groups every issue by severity. The report links to the App Accessibility dashboard, where you inspect the element behind each issue.
Prerequisites
- A supported IDE with the Test Companion extension installed.
- An app already uploaded to BrowserStack, or a local build ready to upload. Test Companion accepts
.apk,.ipa,.aab, or.xapkfiles. See Connect your app. - A BrowserStack account with App Accessibility access. The scan runs on your own account.
- For an Advanced + AI scan, a BrowserStack accessibility plan that includes advanced and AI rules.
Choose a scan mode
Test Companion supports two scan modes, and asks which one to use before it starts the session.
- Use Basic when the standard WCAG rules are enough.
- Use Advanced + AI when you also want BrowserStack’s advanced rules and AI-detected issues.
To skip the question, name the mode in your prompt, for example, Run an Advanced + AI accessibility scan on the login screen.
You cannot change the mode after the session starts. To use a different mode, start a new session.
If your plan does not include advanced and AI rules, Test Companion shows the message from BrowserStack App Accessibility and stops before the session starts, so the run uses no device time. Start again in Basic mode.
Start an accessibility scan
-
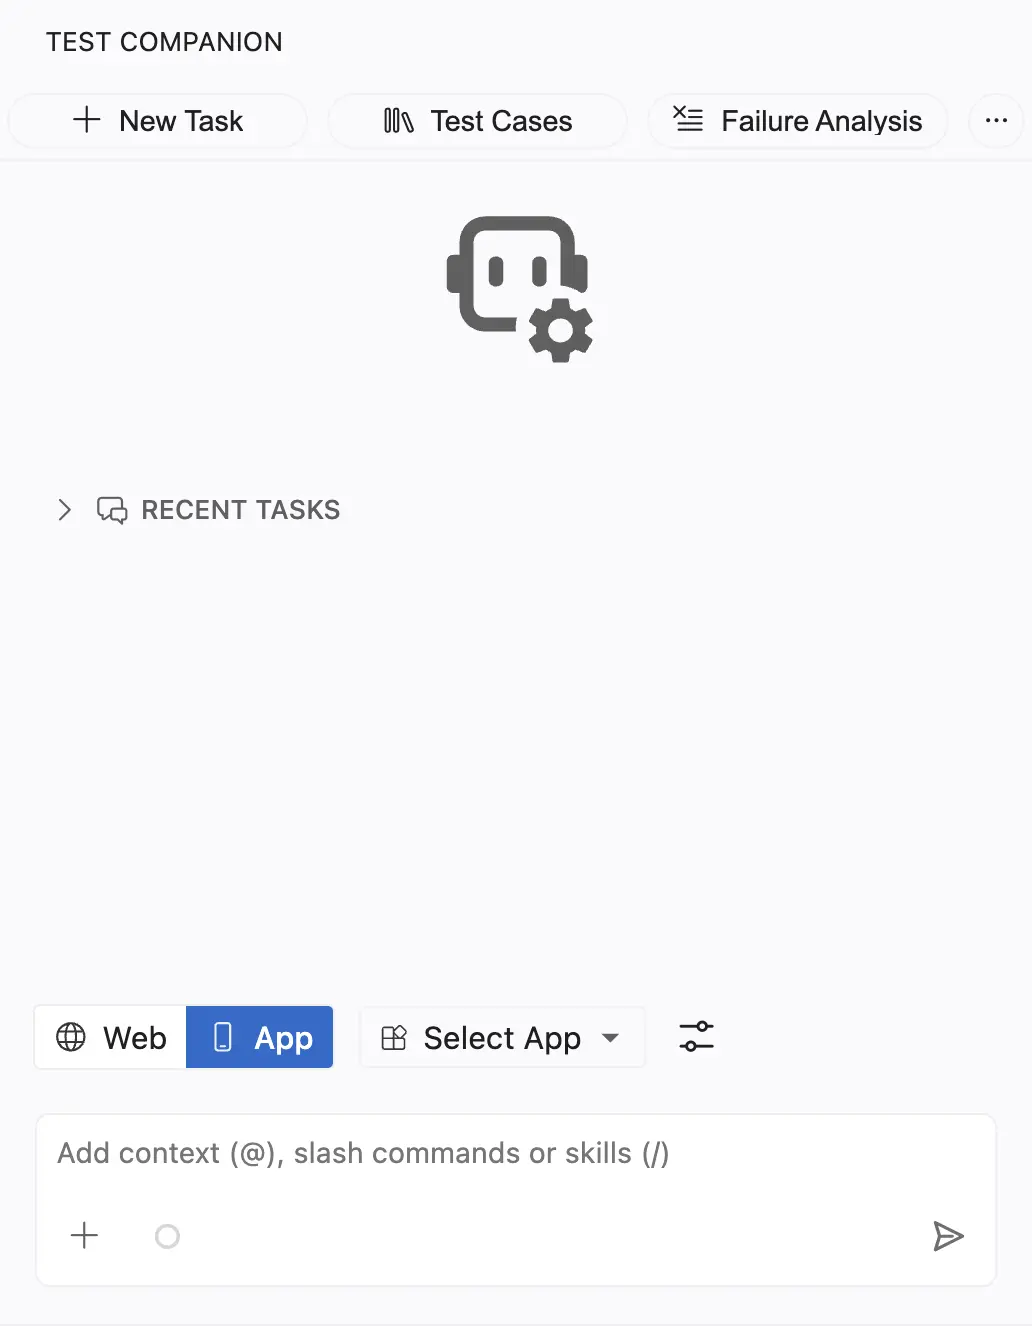
Click App at the bottom of the panel to switch to App mode.
-
Click Select App to open the Connect the App to test dialog.
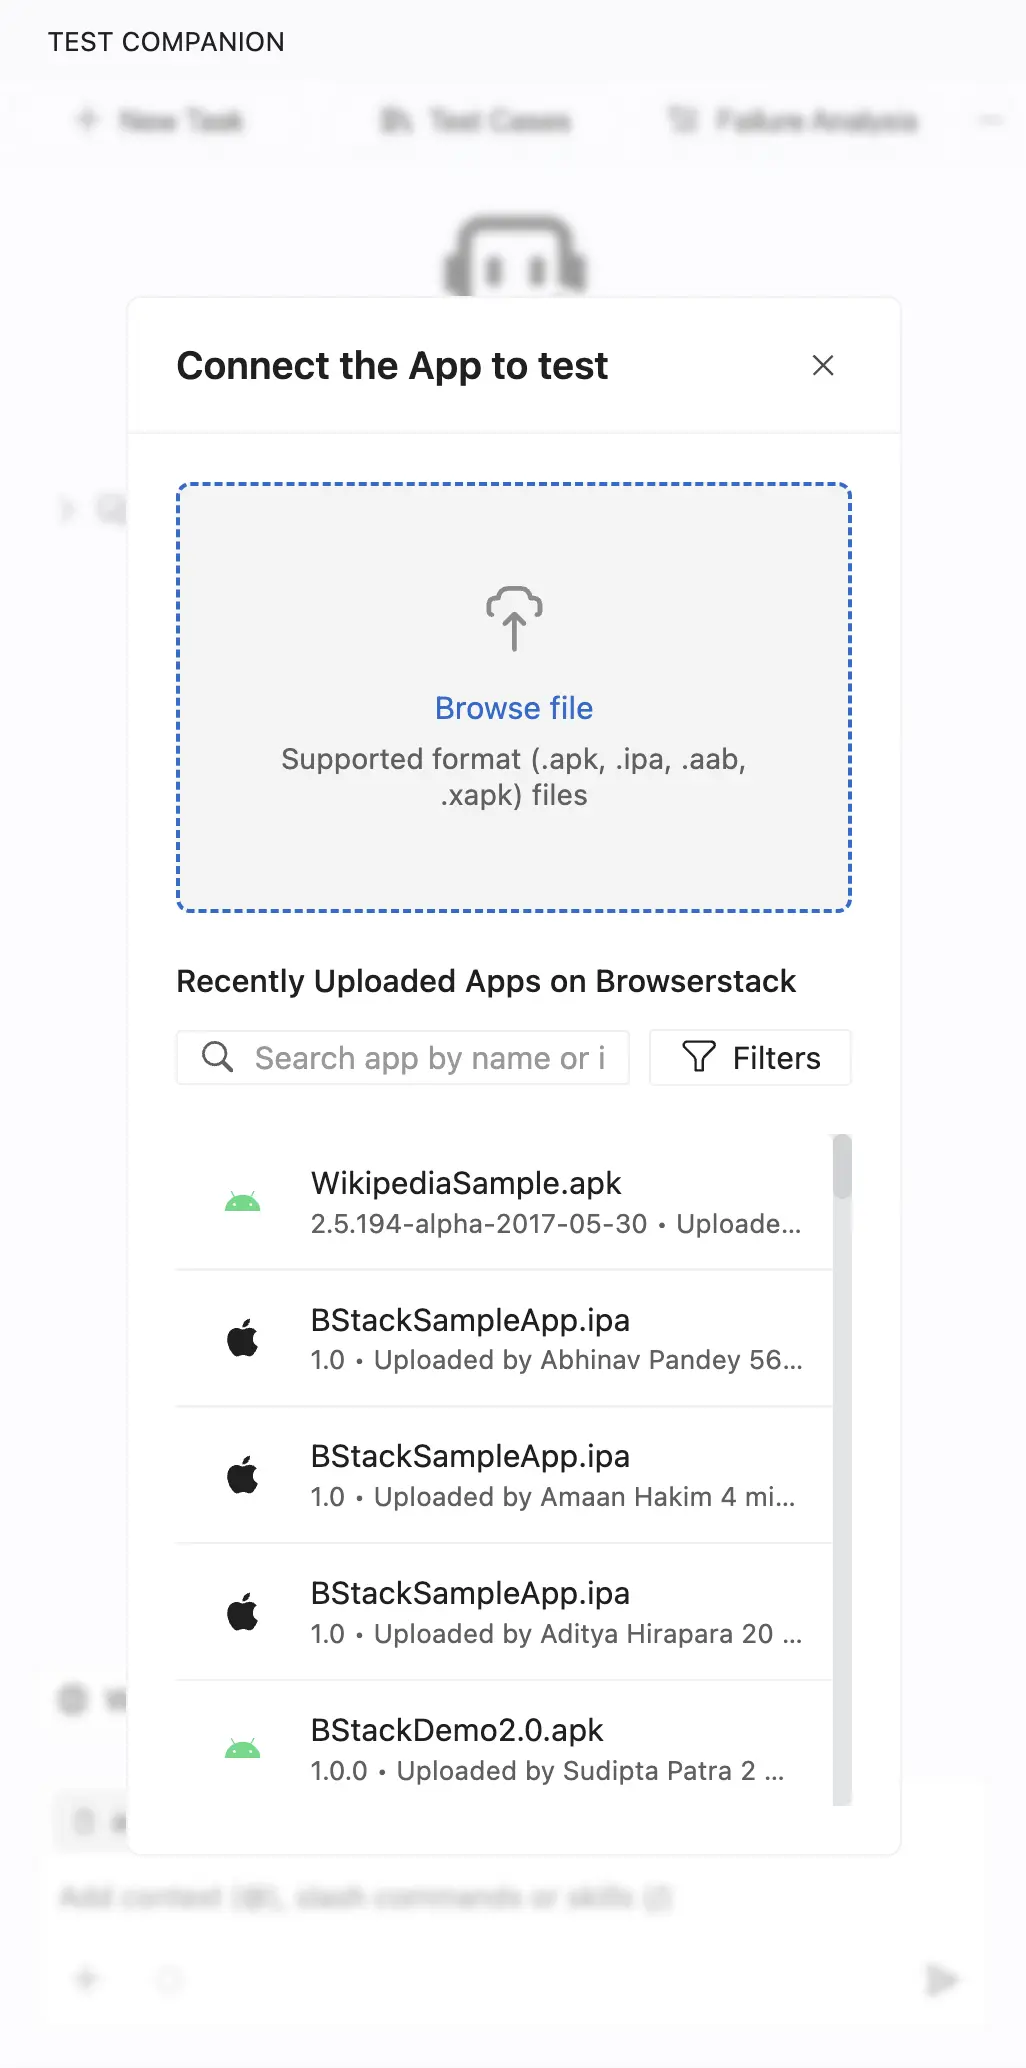
- Select an app you already uploaded, or click Browse file to upload a new build.
- Write a prompt that asks for an accessibility scan. See Example prompts.
- Press Enter to start the scan.
During the scan
After you answer the scan-mode question, Test Companion may ask which screens or flows to cover. Answer it to focus the scan. Name those screens in your prompt to skip the question.
Test Companion then runs the scan on its own. You do not need to interact with the device.
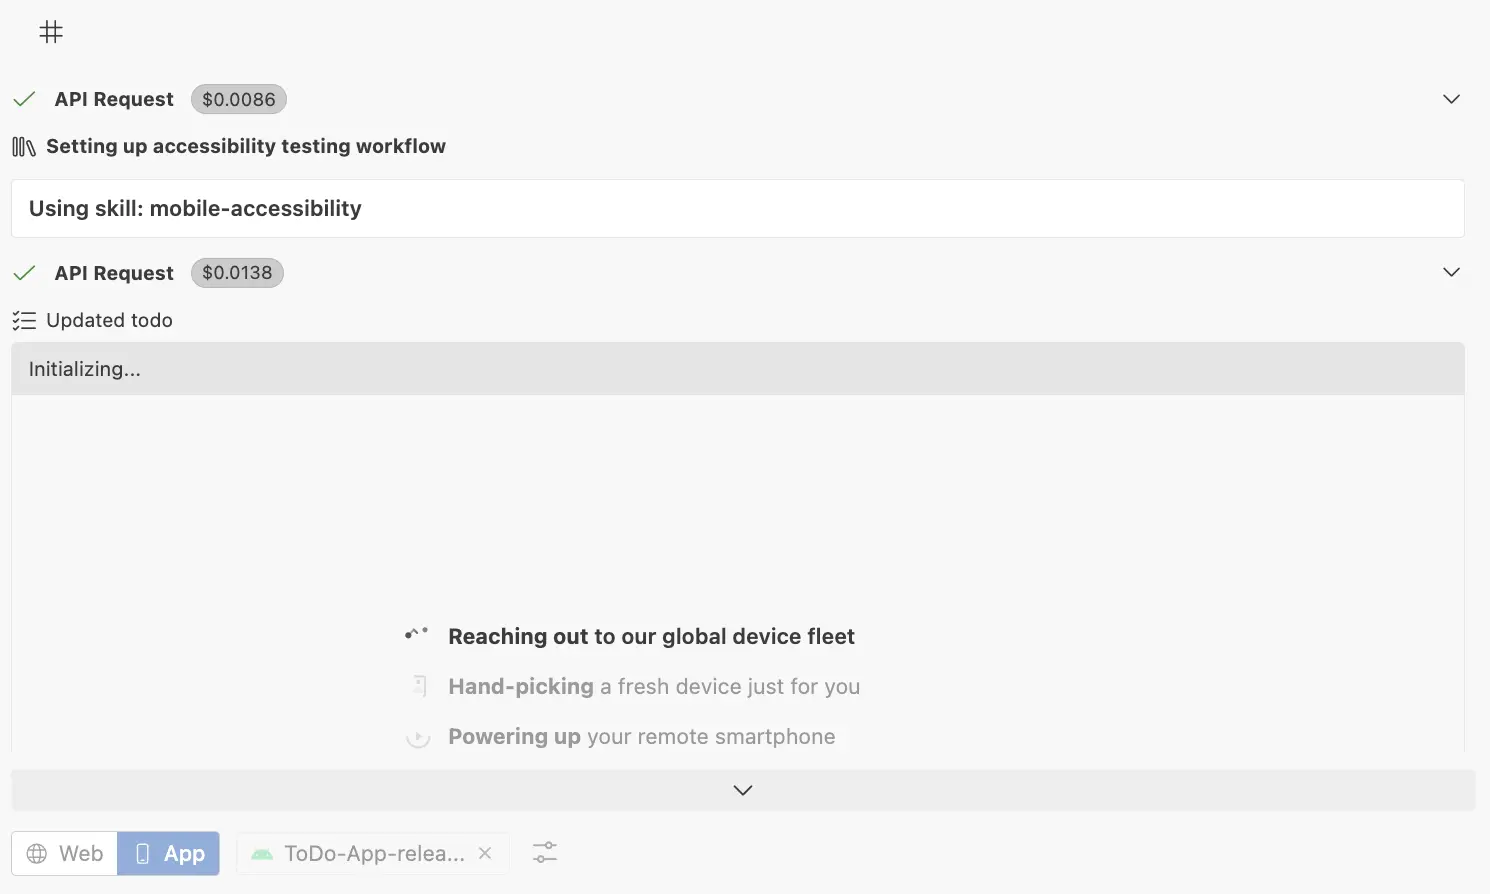
After the device is ready, Test Companion:
- Starts a real-device session for your app.
- Installs and opens your app.
- Navigates the screens you specify in your prompt.
- Scans the current screen after each UI-changing action, such as a tap, a keystroke, a scroll, or a screen change.
- Shows its progress in the panel as it works.
You do not need to trigger a scan per screen. Every finding lands in one report.
Review detected issues
When the session ends, Test Companion posts a summary in the chat. It sorts the issues by severity, then by count.
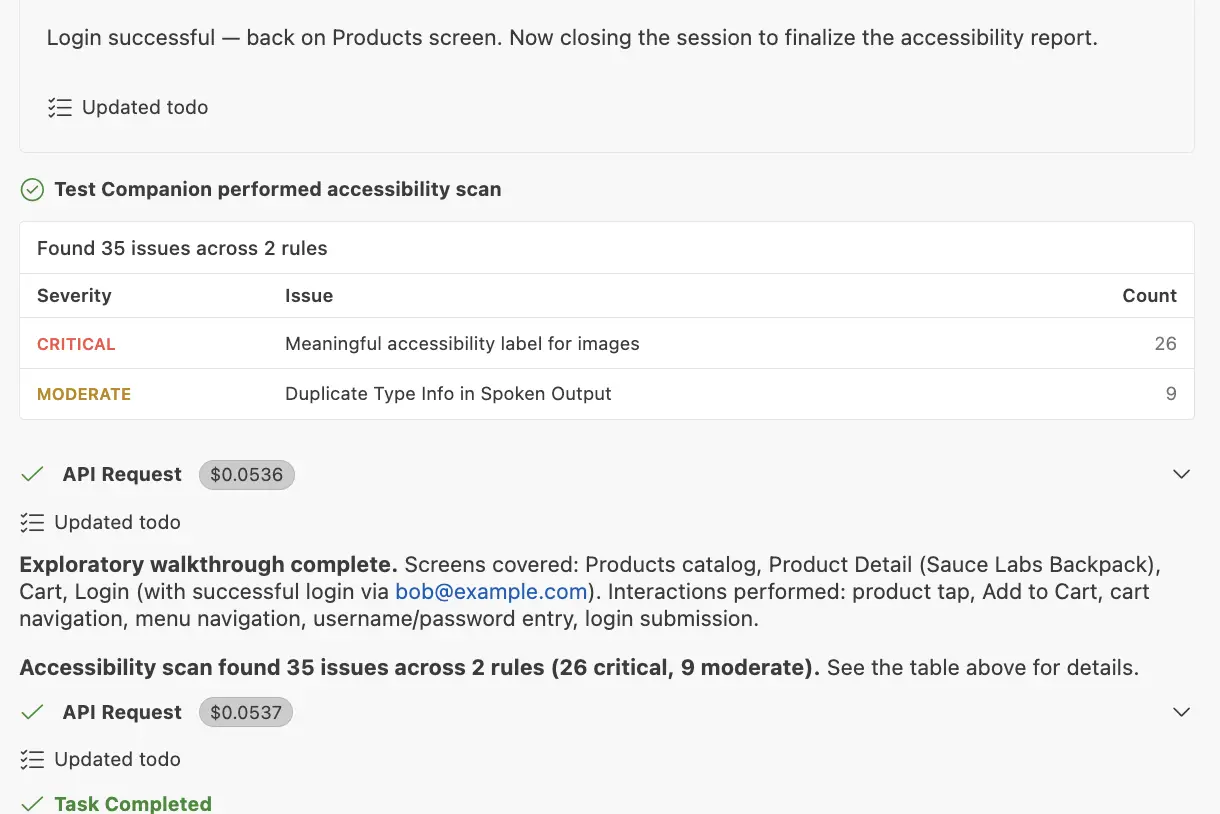
The summary groups every issue into three columns:
- Severity: How serious the issue is, shown as Critical, Serious, Moderate, or Minor.
- Issue: The WCAG rule that failed, for example, Meaningful accessibility label for images.
- Count: The number of elements the rule affects.
When a scan finds no issues, the report shows a message confirming none were found instead of the table.
Across apps, the scan most often flags these categories:
- Labels and names: Buttons, images, and inputs with no accessibility label.
- Tap targets: Interactive elements smaller than the platform minimum.
- Contrast: Text or icons below the WCAG contrast threshold.
- Hierarchy: Problems with heading order, focus order, or grouping.
Open the App Accessibility dashboard
Open the App Accessibility dashboard to see per-element evidence for each issue.
For each issue, the dashboard shows:
- The screen where the issue appeared.
- A screenshot with the affected element highlighted.
- The WCAG version and the rule that failed.
- A recommended fix.
Use the dashboard to investigate a single rule in depth. You can also share a dashboard link with a designer or developer.
Example prompts
Name the screens or flows you want to scan in your prompt.
Single screen:
Run an accessibility scan on the login screen.
Flow with specific checks:
Test accessibility for the checkout flow. Focus on tap targets and contrast.
Specific WCAG version:
Scan the app for WCAG 2.1 issues on the home screen and the settings screen.
Best practices
- Name the screens or flows in your prompt. A scoped prompt, such as the checkout flow, produces a focused report instead of a broad sweep.
- Scan after each build. Run a scan when the UI changes so you catch new issues before they reach users.
- State the WCAG version when it matters. Name the version in your prompt when your team reports against a fixed standard.
- Share the dashboard link for fixes. Send the App Accessibility dashboard link to the designer or developer who owns the fix. They do not need the IDE to view it.
Next steps
- Connect your app: Upload a build, or pick one from your account, before you start a session.
- Generate test cases: Turn the screens you scanned into reusable test cases.
- Prompt guide: Write prompts that get the best results from app sessions.
We're sorry to hear that. Please share your feedback so we can do better
Contact our Support team for immediate help while we work on improving our docs.
We're continuously improving our docs. We'd love to know what you liked
We're sorry to hear that. Please share your feedback so we can do better
Contact our Support team for immediate help while we work on improving our docs.
We're continuously improving our docs. We'd love to know what you liked
Thank you for your valuable feedback!