
 Join our Discord
Manage projects in BrowserStack Test Reporting & Analytics
Learn how to rename or delete a project in Test Reporting & Analytics, and how to update projectName in your SDK config after a rename.
Tests and builds in Test Reporting & Analytics are organized into projects. This guide details the steps to rename or delete a project in Test Reporting & Analytics.
Rename a project
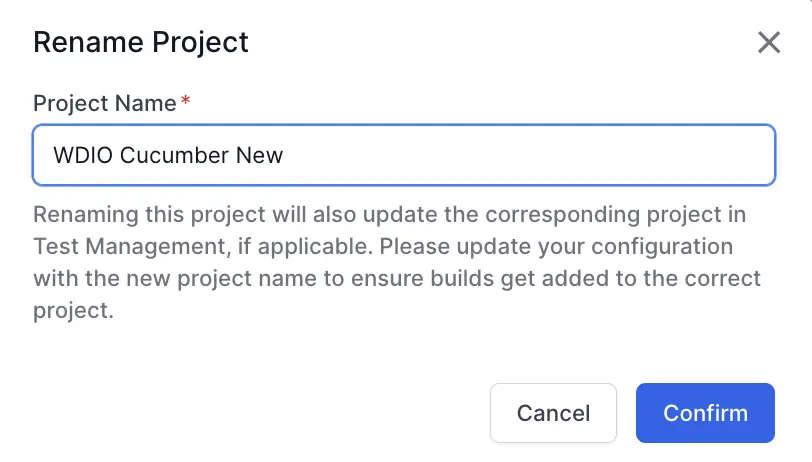
Renaming a project also updates the corresponding project in Test Management, if applicable. Your SDK config still points to the old project name, so update it before your next build run.
Only members with the required privileges can rename a project. For details, see Who can rename or delete a project.
To rename a project:
- Open Projects.
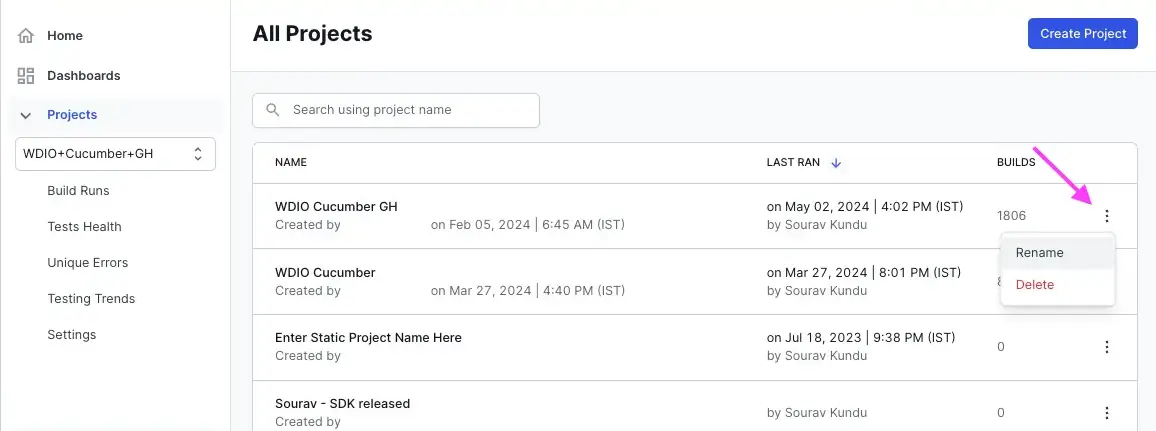
- Click the kebab menu next to the project and click Rename. If you don’t see this option, you don’t have access to rename that project.
- Enter the new Project Name and click Confirm.
- Click Done.
Update the project name in your SDK config
Renaming a project on the dashboard doesn’t change the projectName value in your browserstack.yml file. After you rename a project, set projectName to the new name in your SDK config:
The following table shows what happens on your next build run, depending on whether you update projectName:
| SDK config after the rename | What happens on the next build run |
|---|---|
projectName updated to the new name |
New builds go into the renamed project, and the build sequence numbers continue from the last build. |
projectName still set to the old name |
Test Reporting & Analytics creates another project with the old name, and builds in that new project start again from serial number 1. |
Delete a project
Deleting a project is an irreversible action. It will also erase all data in the corresponding project in Test Management, if applicable.
Follow these steps to delete a project:
- Open Projects.
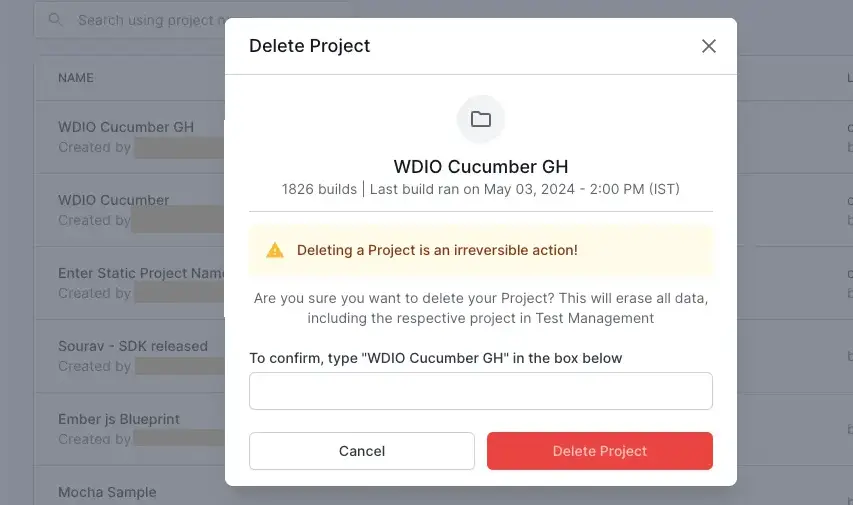
- Click the kebab menu next to the project and click Delete. If you don’t see this option, you don’t have access to delete that project.
- Type the Project Name in the text box and click Delete Project.
You can also delete a project as follows:
- Open Projects.
- Search and open the project you want to delete.
- Go to Settings > General.
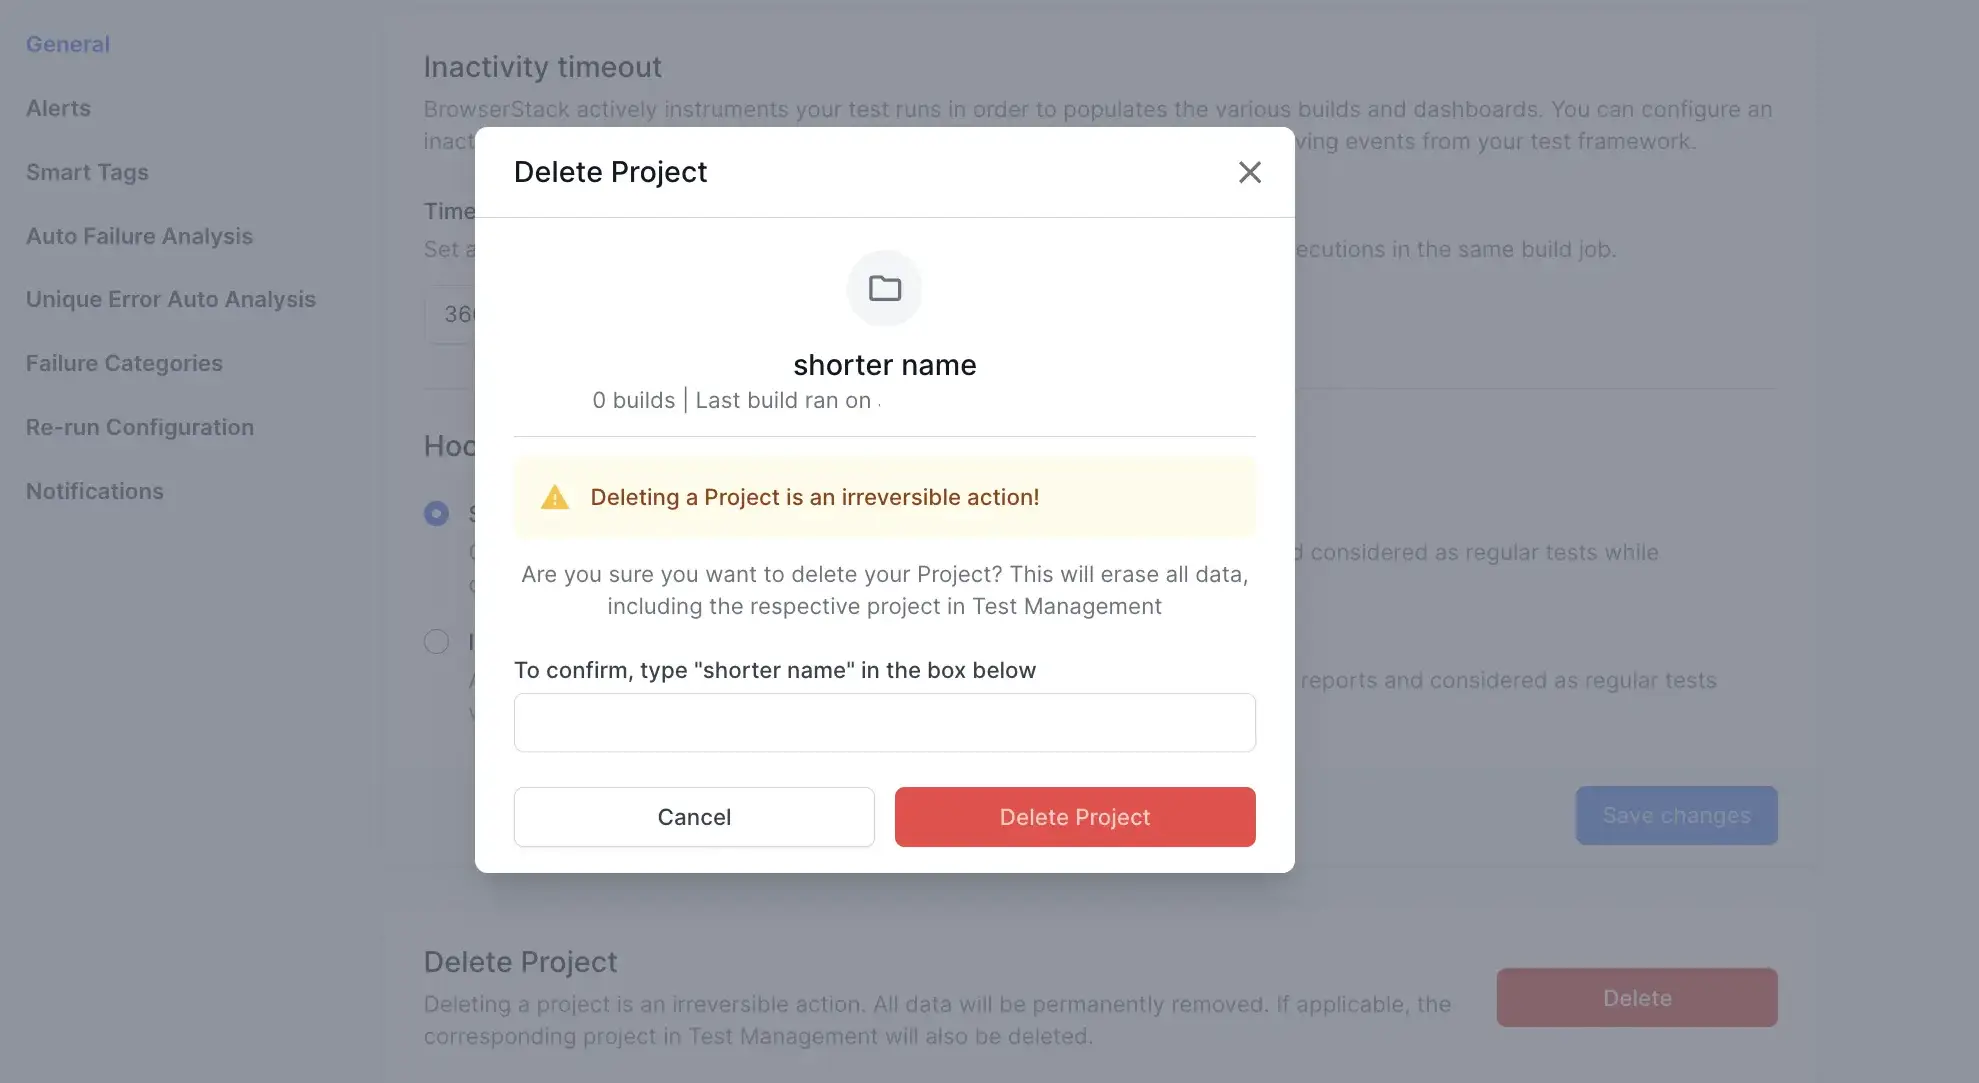
- Click Delete under Delete Project.

- Type the Project Name in the text box and click Delete Project.
Who can rename or delete a project
Only org-level owners or admins can rename or delete a project. This restriction is to prevent unintended changes that could affect multiple products.
We're sorry to hear that. Please share your feedback so we can do better
Contact our Support team for immediate help while we work on improving our docs.
We're continuously improving our docs. We'd love to know what you liked
We're sorry to hear that. Please share your feedback so we can do better
Contact our Support team for immediate help while we work on improving our docs.
We're continuously improving our docs. We'd love to know what you liked
Thank you for your valuable feedback!