Integrate Percy with your test suite to run visual tests. To do that, follow these steps:
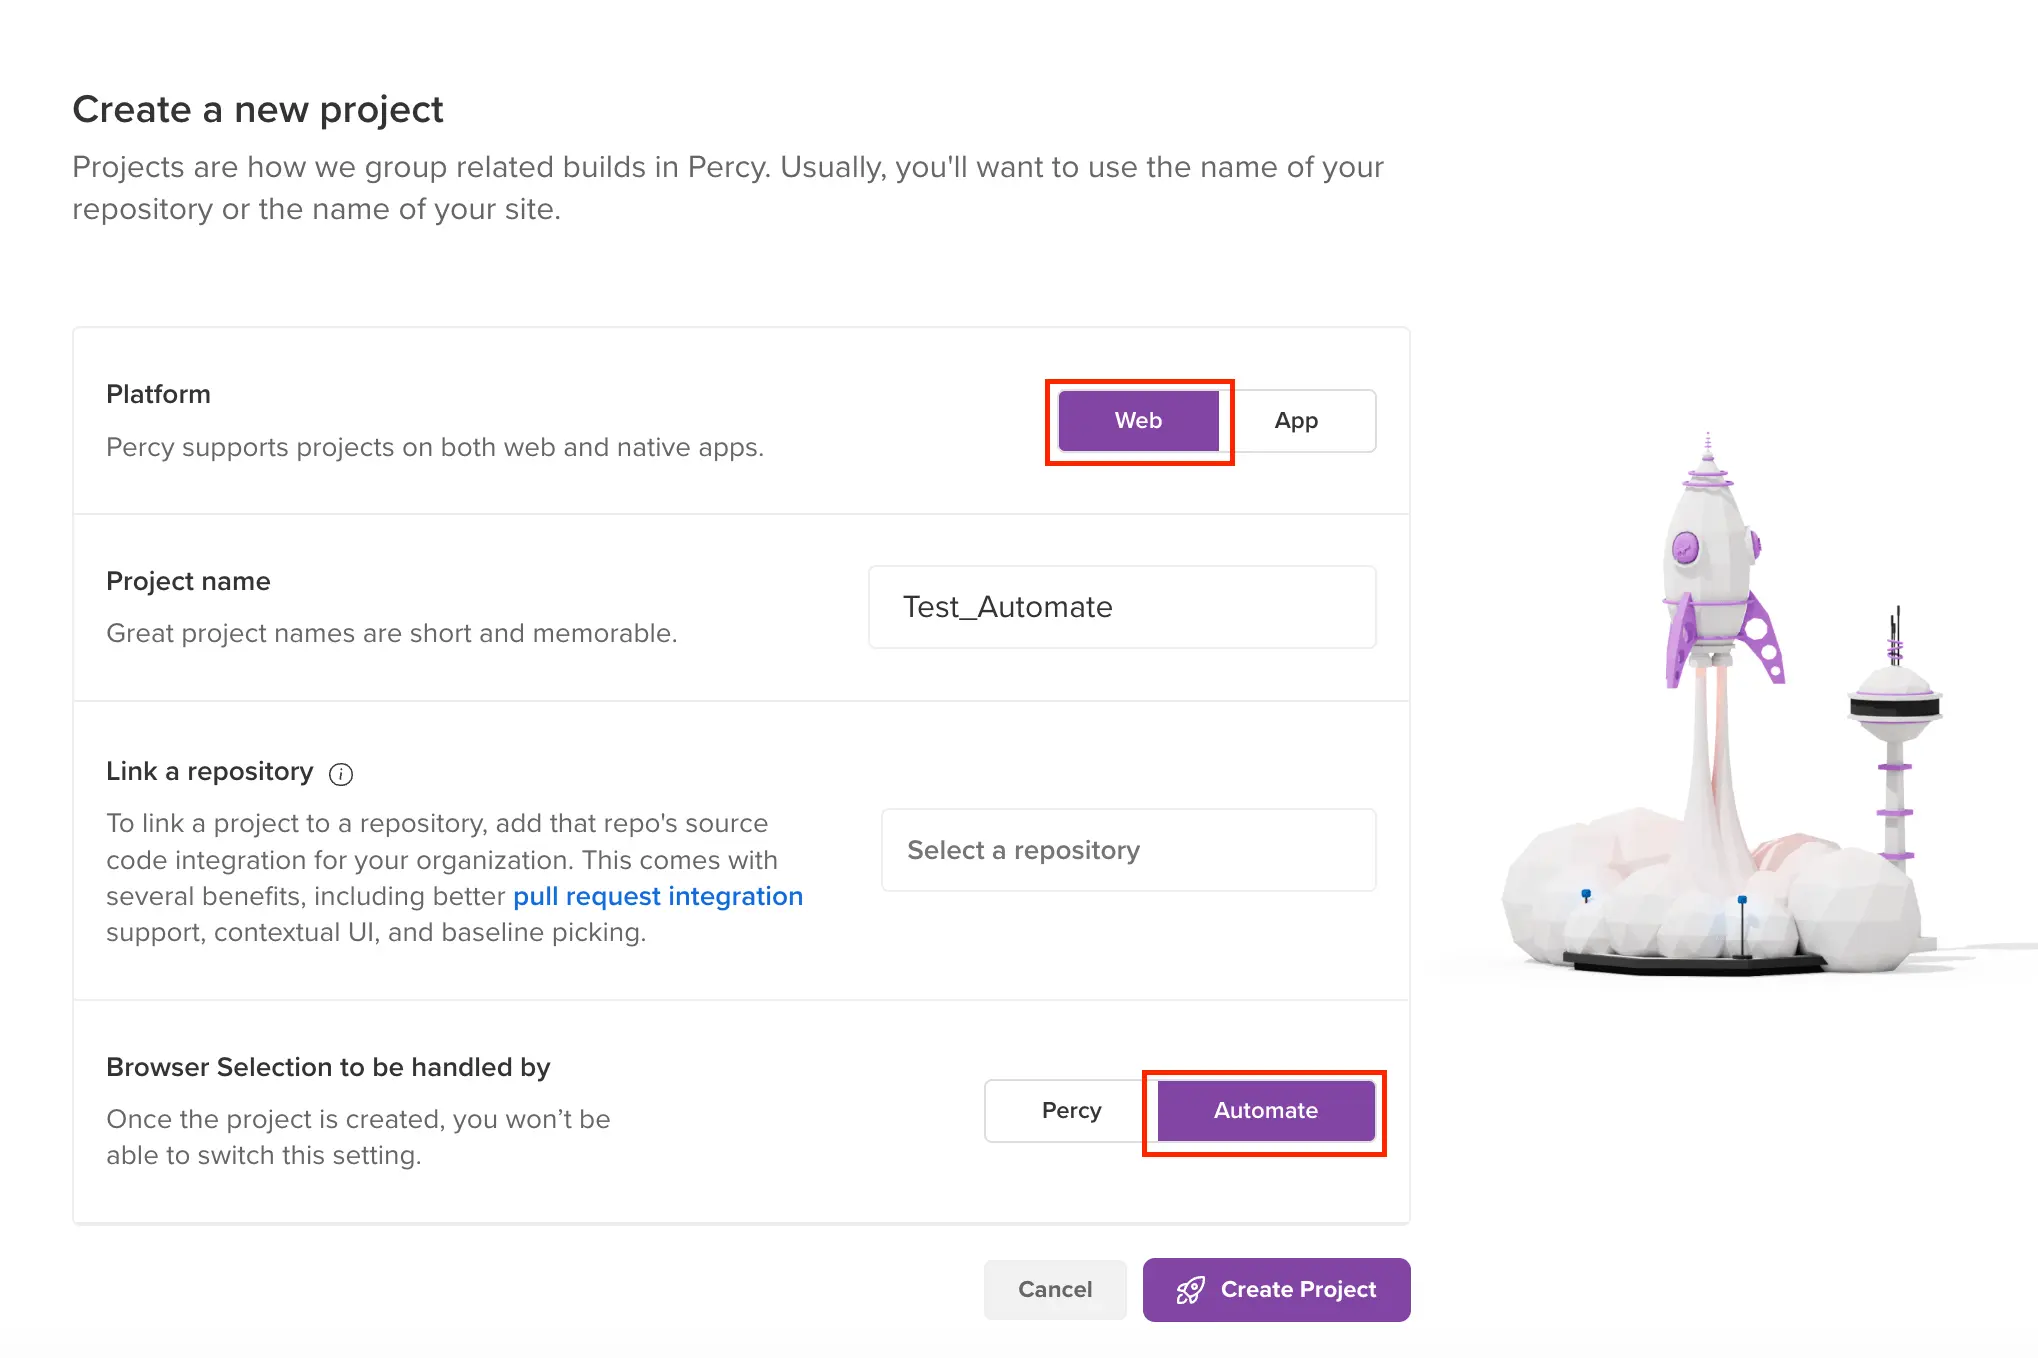
Create a Percy project Sign in to Percy. In Percy, create a project of the type, Web, and then name the project. After the project is created, Percy generates a token. Make a note of it. You have to use it set your environment variable in the next step.
Run Percy
Run your tests using the percy exec command as shown below:
If you are unable to use the percy:exec command or prefer to run your tests using IDE run options, you can use the percy exec:start and percy exec:stop commands. To learn more, visit Run Percy.
```bash
npx percy exec -- <command to run the test script file>
```
You have successfully created your first build on Percy. To see the build with snapshots of your application, visit your project in Percy.
When you run another build with visual changes to your application, Percy takes new snapshots. You can then see the comparisons between the two runs on the new build.
Advanced topics
Percy Snapshot command
In the preceding steps, we used the Percy Snapshot command for capturing snapshots. Percy provides various configurations to use with Percy snapshot command. To learn more visit, Percy snapshot command.
Base build selection
By default, Percy uses the previous build for comparison however, you always have the option to configure the base build for comparison as needed. To learn more, visit base build selection logic.
Integrating functional and visual testing can greatly enhance your ability to catch UI regressions and ensure the visual consistency of your application. By integrating Percy with your functional testing pipeline, you can seamlessly capture screenshots during your functional test runs and compare them to baseline images.
Choose the “Automate” option when creating a Percy project, the “browsers selection” option will not appear in the project settings. Instead, the selection of browsers will be based on the capabilities specified in the Automate session.
You can use the Percy Screenshot command to capture a screenshot when a page is rendered during an Automate session. This screenshot is directly sent to the Percy build for comparison.
Set the browser height and width to get consistent screenshots.
For Apple devices, close the tag for smart app banners before taking screenshots.
Playwright for Android and iOS is currently supported only for NodeJS.
Integration steps
Integrate Percy on Automate with your test suite to run visual tests. To do that, follow these steps:
Capture a full-page screenshot using the full-page parameter. By default, Percy On Automate captures a single tile, for the full page, refer to the instructions below.
(2) Use the Percy screenshot command to take required screenshots in your Automate session.
For example, in the following Python code, the percy_screenshot("name", "options") method is called twice. In the first instance, we are passing only the required argument which is “name”. In the second instance, we are passing both the required and optional “options”.
```python
# In your desired location add the command
percy_screenshot(page, name = 'Screenshot 1')
# You can pass `options`
percy_screenshot(page, name = 'Screenshot 1', options = { 'freezeAnimation': False, 'percyCSS': 'h1{color:green;} a{color: green;font-size: 1rem;}', 'ignore_region_xpaths':['/html/body/div/p[2]/a']})
```
(3) Add the browser capabilities to your test script.
We recommend running your build using a single browser like Chrome or Firefox, to begin with. Once you have achieved stability with Chrome or Firefox, you can set up cross-browser testing.
```json
//Add the following options to your test script
"environments": [
{
"os": "Windows",
"os_version": "11",
"name": "Test on Chrome latest on Windows 11",
"browser": "chrome",
"browser_version": "latest"
},
{
"os": "OS X",
"os_version": "Ventura",
"name": "Test on Webkit latest on Ventura OS",
"browser": "playwright-webkit",
"browser_version": "latest"
},
{
"os": "Windows",
"os_version": "11",
"name": "Test on latest Firefox browser",
"browser": "playwright-firefox"
}
]
```
(Required) The screenshot name must be unique for each screenshot captured. For example: name = Screenshot 1.
options()
1. (Optional) freezeAnimatedImage(Boolean) - To determine whether Percy will perform stabilization on the DOM. By default set to false, set to true if stabilization needs to be performed by Percy. 2. (Optional) freezeAnimatedImageOptions(Boolean) - In the case of specific animated images that do not appear to freeze, we can select and submit them for freezing.There are two ways to select it. i. freezeImageBySelectors. ii. freezeImageByXpaths. 3. (Optional) percyCSS - Apply Percy-specific CSS to stabilize screenshots. 4. (Optional) ignoreRegions - To ignore a particular set of elements or sections in DOM. There are four ways to pass it. i. ignoreRegionXpaths. ii. ignoreRegionSelectors. iii. customIgnoreRegions. 5. (Optional) considerRegions - To counteract the effects of IntelliIgnore. There are two ways to consider it. i. considerRegionXpaths. ii. considerRegionSelectors. iii. customConsiderRegions.
full-page(Boolean)
Set to true if we want to take fullpage screenshots, default is false.
Step 6 - Run the build
```bash
npx percy exec -- <command to run the automate script file>
```

 Join our Discord