Create a project
Learn how to create a Percy project.
Percy is an all-in-one visual testing and review platform that allows you to run visual tests using either the BrowserStack SDK or the Percy SDK. To test your UI across browsers using Percy, you need to integrate your test suites with Percy.
You can integrate visual testing with Percy using:
- BrowserStack SDK: This simplifies testing by combining functional and visual tests in a single pipeline using BrowserStack’s Automate platform. You can run your functional tests on multiple combinations of browsers and devices on BrowserStack, while the visual tests are run on Percy in parallel.
- Percy SDK: With this, you can manually integrate Percy with your functional automated testing and use the Percy dashboard for visual testing.
Based on your SDK selection, refer to the appropriate section for detailed instructions on creating a project and executing your visual tests.
You can create a Percy project using the BrowserStack SDK and manage browsers through either Automate or Percy. Percy supports the latest versions of modern browsers, including Chrome, Firefox, Edge, and Safari. With Automate, you can configure various browser names and versions using the Automate capability builder. Choose the appropriate option and refer to the following section accordingly:
When using the BrowserStack SDK, Percy automatically creates a project with the project name specified in the BrowserStack configuration file. This allows you to seamlessly integrate your tests and perform both functional and visual tests.
Related topic
Create your test script based on the required framework and language. Check if your framework and language are supported using the BrowserStack SDK.
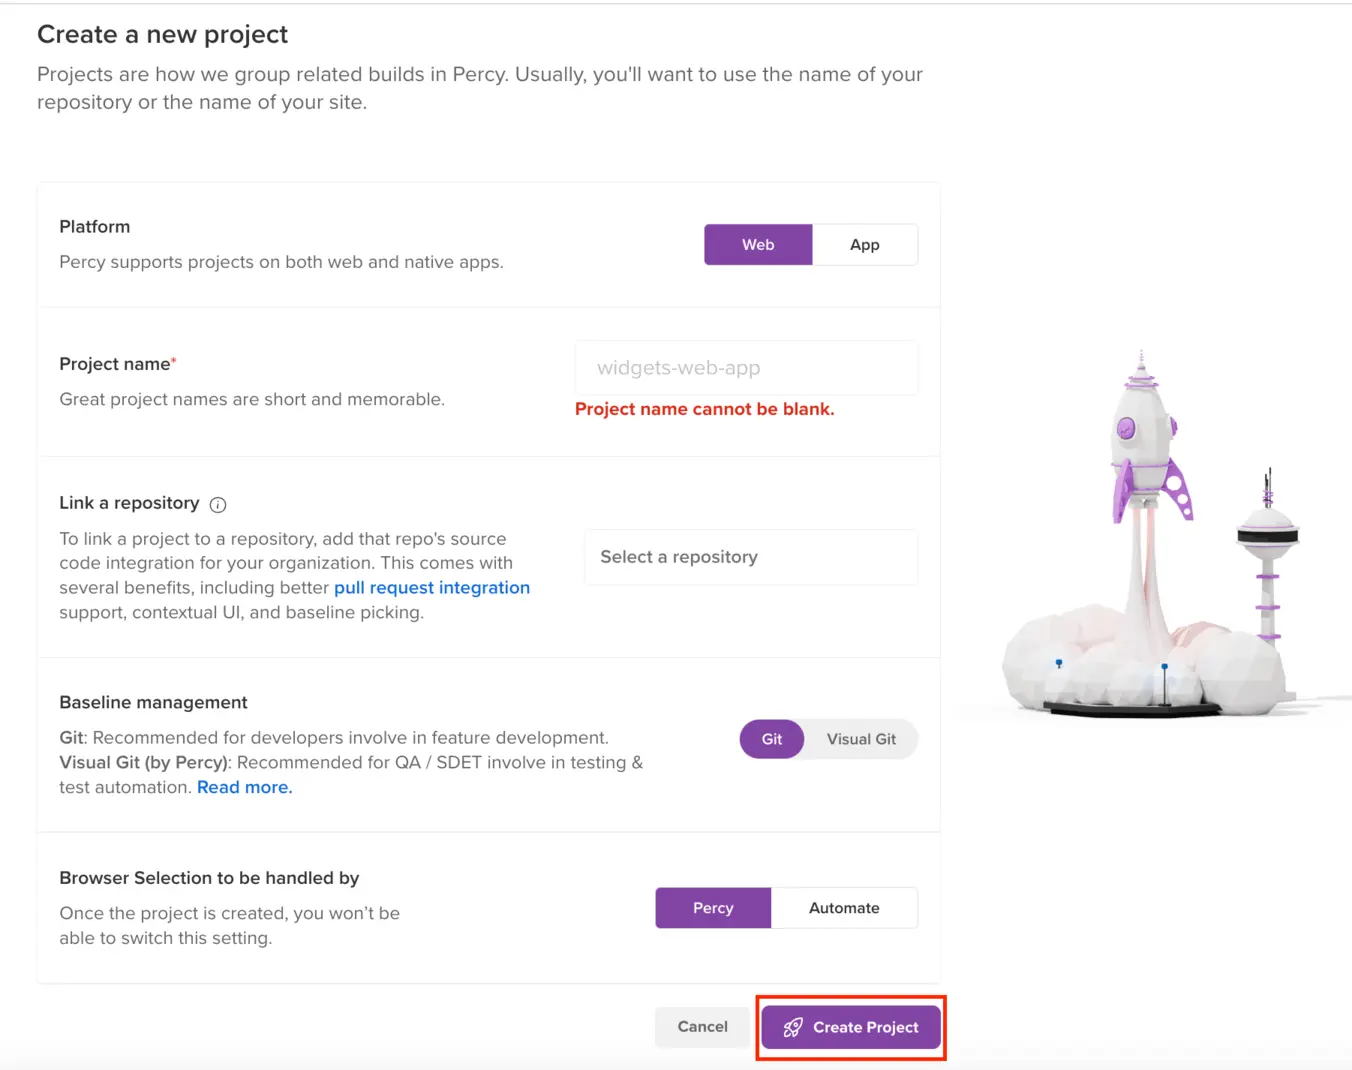
Follow these steps to create a project in Percy:
- Sign in to Percy.
-
Click Create new project. The “Create a new project” window appears.

-
Select Web App as the platform and name your project.
-
Run visual tests on
- Select Percy. Note that this setting cannot be changed once the project is created.
- Labels (optional): Create or add labels to categorize and organize projects.
- Link a repository (optional): Add your repository’s source code integration if needed.
-
Choose baseline management:
- Git is recommended for developers involved in feature development.
- Visual Git is recommended for QA and SDET involved in testing & test automation.
- Click Create Project.
- Update your BrowserStack config file.
- In the
browserstack.ymlfile, setpercy: true. - Use the same
projectNamespecified when creating the Percy Web Project in step 2. - Set
browserstackAutomation: trueif it is currently set tofalse. - Set
percyCaptureMode: autofor Auto mode, or setpercyCaptureMode: manualfor Manual mode.
- In the
- Update your test script to capture snapshots using the BrowserStack SDK in Auto and Manual modes.
Your script is ready to execute visual tests, and Percy is prepared to receive the build. After the tests runs, the snapshots are added to the same project.
A build with the same project name and platform configuration mentioned in the BrowserStack config file appears on the Automate dashboard.
Related topic
You can create a project using the PercySDK with Percy Web or Percy with Automate. Choose Percy to perform visual tests solely on the newest browsers, or choose Automate to run visual tests across a range of desktop, mobile, and browser combinations.
- We recommend using our BrowserStack SDK for Percy integration.
- By default, Percy Web supports running Selenium tests with Automate Turboscale.
Follow these steps to create a project in Percy:
- Sign in to Percy.
-
Click Create new project. The “Create a new project” window appears.
-
Select Web App as the platform and name your project.
-
Run visual tests on:
- Select Percy. You can change this setting after creating the project using the available Percy action options. For more information, see Percy Actions
- Labels (optional): Create or add labels to categorize and organize projects.
- Link a repository (optional): Add your repository’s source code integration if needed.
-
Choose baseline management:
- Git is recommended for developers involved in feature development.
- Visual Git is recommended for QA/SDET involved in testing & test automation.
- Click Create Project.
Percy is ready to receive your first build.

Percy generates a unique PERCY_TOKEN for every created project. This token identifies the organization and project for uploading snapshots. The token starts with web_xxxxxxxx for Percy web projects .
Related topic
- We recommend using our BrowserStack SDK for Percy integration.
- By default, Percy Web supports running Selenium tests with Automate Turboscale.
Follow these steps to create a project in Percy:
- Sign in to Percy.
-
Click Create new project. The “Create a new project” window appears.
-
Select Web App as the platform and name your project.
-
Run visual tests on:
- Select BrowserStack Automate. Note that this setting cannot be changed once the project is created.
- Labels (optional): Create or add labels to categorize and organize projects.
- Link a repository (optional): Add your repository’s source code integration if needed.
-
Choose baseline management:
- Git is recommended for developers involved in feature development.
- Visual Git is recommended for QA / SDET involved in testing & test automation.
- Click Create Project.
Percy is ready to receive your first build.
Percy generates a unique PERCY_TOKEN for every created project. This token identifies the organization and project for uploading snapshots. The token starts with auto_xxxxxxxx for Percy Automate projects.
Related topic
We're sorry to hear that. Please share your feedback so we can do better
Contact our Support team for immediate help while we work on improving our docs.
We're continuously improving our docs. We'd love to know what you liked
We're sorry to hear that. Please share your feedback so we can do better
Contact our Support team for immediate help while we work on improving our docs.
We're continuously improving our docs. We'd love to know what you liked
Thank you for your valuable feedback!