Quick Import data using qTest
Set up BrowserStack Test Management by quickly importing projects and test cases from qTest.
You can import qTest data by entering host name and API token and establishing a connection.
Do not change/modify the folder structure in qTest while you import in Test Management.
Prerequisites
- Before you start your import, ensure you have a qTest user account that has full administrative privileges.
Perform the following steps to connect qTest with Test Management.
Connect qTest with Test Management
-
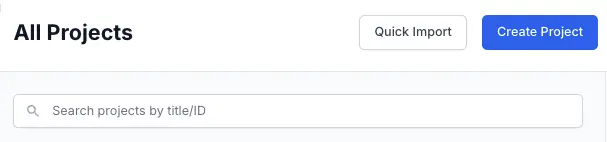
In the Test Management dashboard, click Quick import.
- Click qTest.
- Enter the following details:
- qTest Host Name. Host Name is your qTest web address.
- qTest API key which is the Bearer Token from qTest. To locate it, log in to qTest, then Resources > API & SDK > Bearer Token.
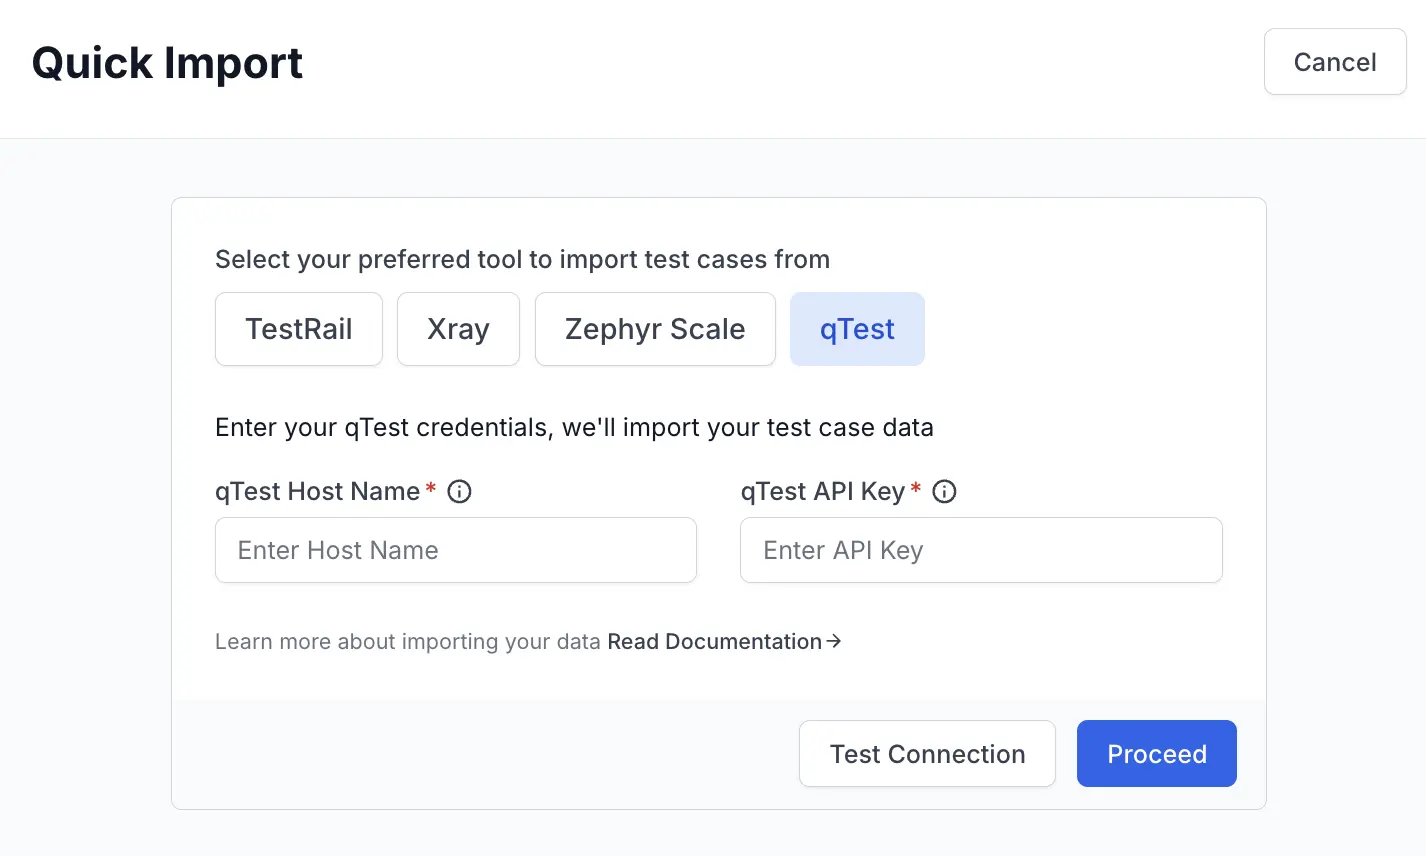
- Click Test connection to verify the connection with provided details.
- Click Proceed to save and establish the connection.
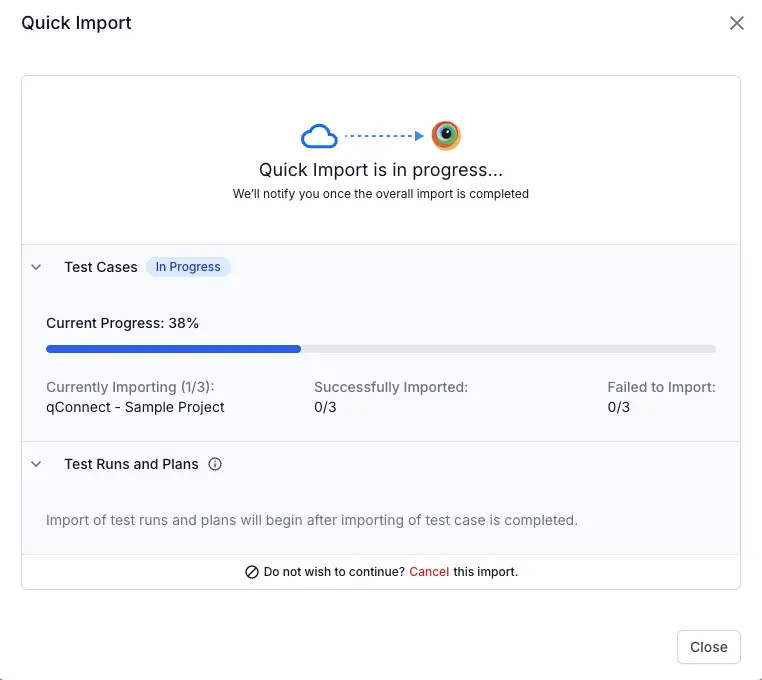
Import progress
-
Select the checkbox for the projects you want to import.
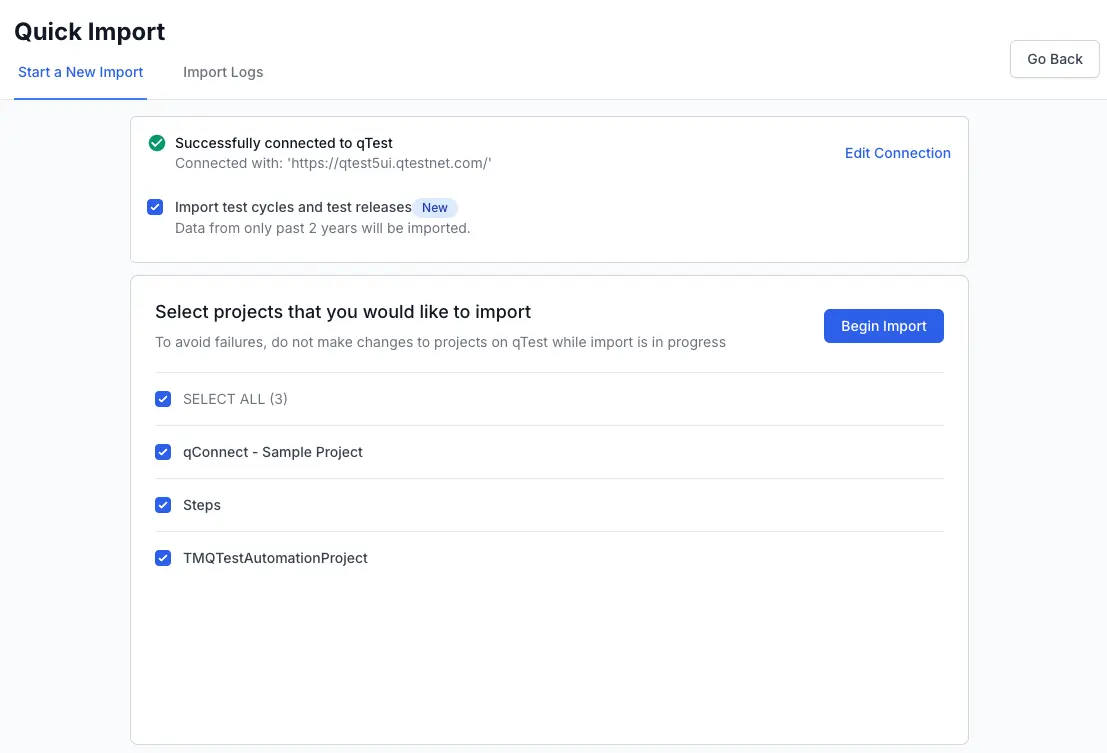
- Select the Import test cycles and test releases check box to import test runs, test plans, and its related data.
- Click Begin import.
-
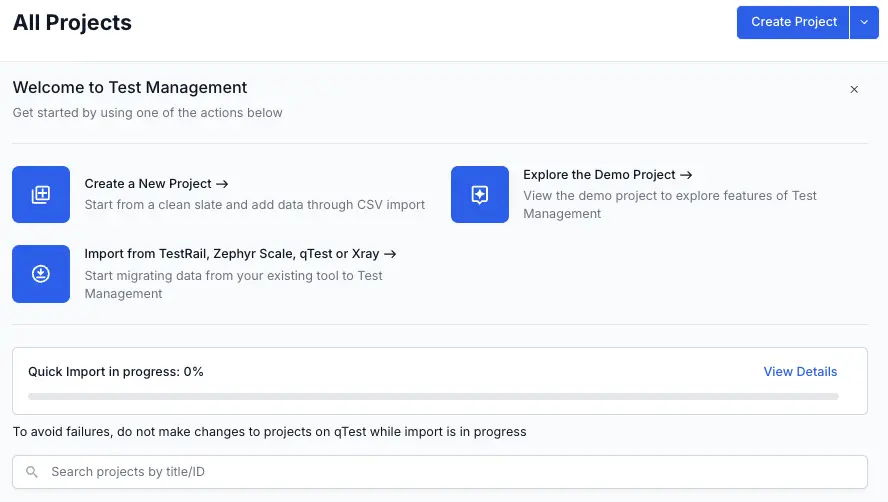
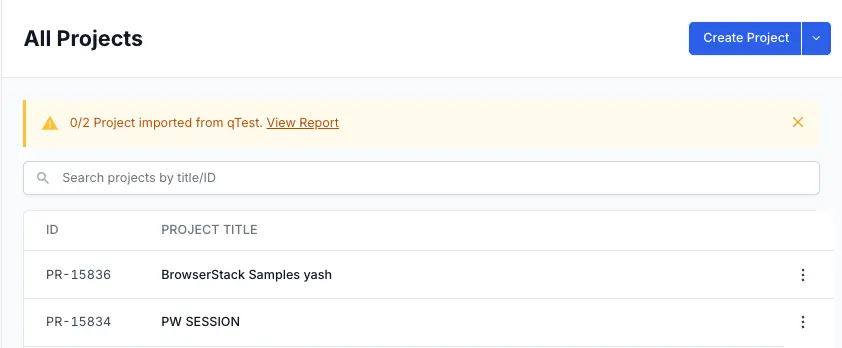
Monitor the import progress on the All Projects dashboard. Click View Details to check import progress.
-
Click Cancel if you want to stop the import process.
After the import completes successfully, click View Report to check the result of the import process.
- To ensure IDs are unique, BrowserStack generates new IDs for all imported projects, as qTest allows the same identifier across different projects.
- Test case IDs from qTest are not retained. New unique IDs are generated in BrowserStack Test Management.
- The original qTest IDs are stored in a custom field named
Imported Test Case ID.
View and manage Import Logs
After confirming your import settings and initiating a qTest import, you can track its progress and review the outcomes of current and all previous imports from the Import Logs tab. This centralized log helps you track ongoing imports and keep a record of all completed or failed attempts for troubleshooting and analysis.
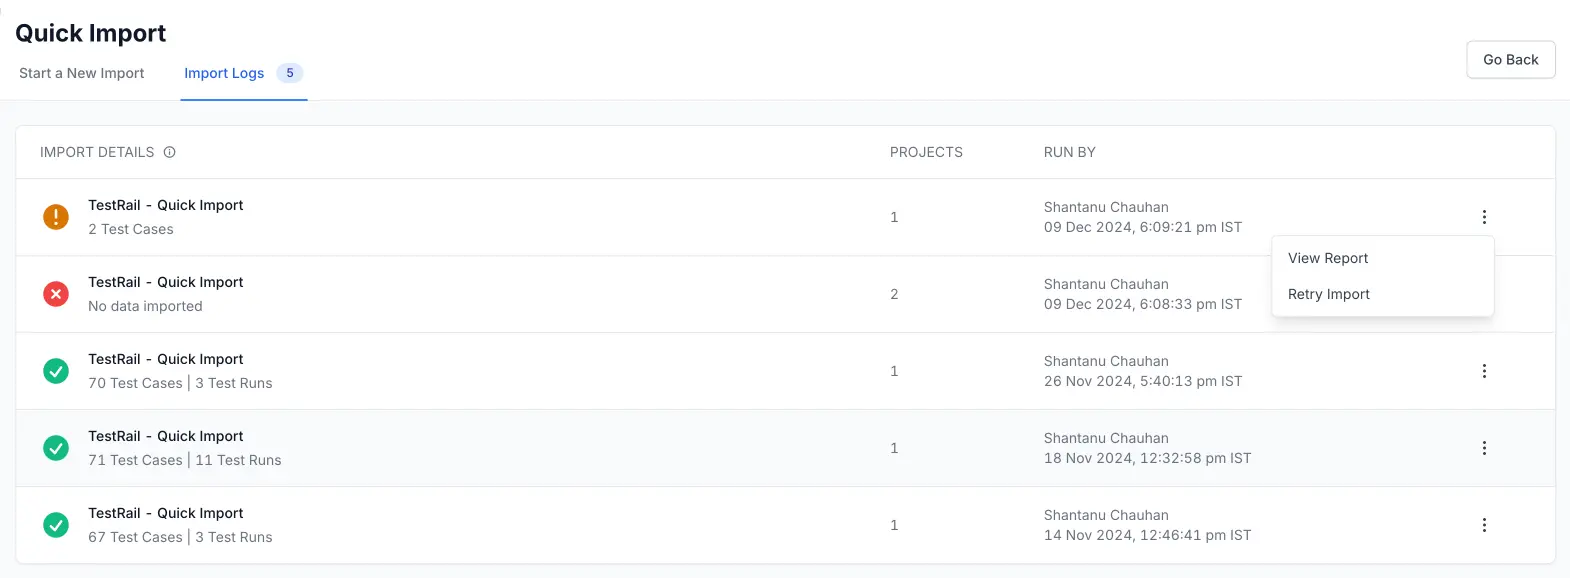
Key features of the Import Logs:
-
Real-time status tracking:
When you start an import, it will appear in the list with a corresponding status indicator. You’ll be able to see if the import is still in progress, has completed successfully, or encountered errors. The status icons and textual cues offer a quick snapshot of the current state. -
Detailed metrics per import:
Each entry in the logs provides essential metrics about that specific import, such as:- Number of test cases imported: How many test cases were successfully brought over from qTest.
- Test runs & test plans data: You can verify the accurate transfer of key project elements by the number of test runs and test plans associated with the import.
- Project count: The number of projects affected by the import operation.
-
User & timestamp information:
The logs capture who initiated the import and when it was started. This helps maintain accountability and trace changes back to specific team members. If you have multiple team members initiating imports, this information streamlines coordination and follow-up. -
Access to detailed error information:
Using the action menu (the three dots next to a specific import), you can:
- View Report: Dive deeper into the results of a completed or partially completed import. These reports can include success metrics, error messages, and other diagnostic details.
- Retry Import: If an import encountered errors or did not yield the expected results, quickly reinitiate the process from here. This feature streamlines troubleshooting and reduces the time spent switching between different sections of the interface.
Understand the qTest import mapping
When you import test execution data from qTest, the import process intelligently maps your project entities to the BrowserStack Test Management structure. This guide explains how your qTest Releases, Cycles, and Test Runs are translated, so you know exactly where to find your data after the migration.
Use this table as a quick reference for the qTest to BrowserStack entity mapping.
| qTest entity | BrowserStack equivalent | Details migrated |
|---|---|---|
| Release | Test Plan | Name, Start/End Dates, Description, Release Notes, Attachments |
| Test Cycle | Test Run | Name, Description, Assignee, All contained test executions |
| Test Run (inside a Cycle) | Test Case Execution | Status, Step Results, Attachments, Notes, Tester, Timestamp |
| Test Run (direct under Release) | Test Case Execution | Grouped into a new Ad-hoc Execution Test Run |
| Linked Requirements/Defects | Linked Requirements/Defects | Links are preserved at the Test Run or Test Case level |
How your qTest data is mapped
Test Plans from qTest Releases
Each of your qTest Releases is migrated into a BrowserStack Test Plan. A test plan acts as a high-level container for all test executions related to that release milestone.
-
Test plan name: Matches the qTest
Releasename. -
Dates: The
start dateandend dateare carried over. -
Details: The
DescriptionandRelease notesfrom qTest are combined into the Test Plan’s description field. - Attachments: Any files attached to the Release are migrated to the Test Plan.
- Note: By default, the importer fetches execution data from qTest releases created within the last two years.
Test Runs from qTest Cycles
Each qTest Test Cycle within a Release is migrated as a distinct Test Run under the corresponding Test Plan.
-
Test run name: Matches the qTest
Test Cyclename. -
Description: The
Test Cycledescription is mapped to the Test Run’s description. -
Assignee: The
Assign Tofield from the Test Cycle is migrated. -
Test Cases: All test cases executed within the cycle (as qTest
Test Runs) are added to this BrowserStack Test Run, preserving their execution details.
Handling standalone qTest test runs
In qTest, you can add test runs directly under a Release without a Test Cycle. To preserve these, the importer groups them into a special Test Run.
A new Test Run is created with the name Ad-hoc Execution – [Release Name]. This Ad-hoc run contains all test cases that were executed under the Release but were not part of any Test Cycle. It is linked to the same Test Plan as other runs from that release.
How execution data is migrated
We ensure that no execution history is lost. For every test case within a Test Run, the following data is preserved:
-
Status: The final execution status (e.g.,
Pass,Fail,Blocked) is migrated. The complete execution history for each test case is also retained. -
Step-Level Results: The
status,actual result, andattachmentsfor each test step are preserved. The qTestActual Resultis mapped to theNotesfield for the test step in BrowserStack. - Metadata: The execution timestamp and the tester responsible for the execution are carried over.
Handling Other qTest entities
Jira links
Your requirement and defect linkages from Jira are fully preserved.
-
Requirements: Requirements linked to a qTest
Test Cycleare linked to the corresponding BrowserStackTest Run. -
Defects: Defects linked to a qTest
Test Caseexecution are linked to that test case within its BrowserStackTest Run.
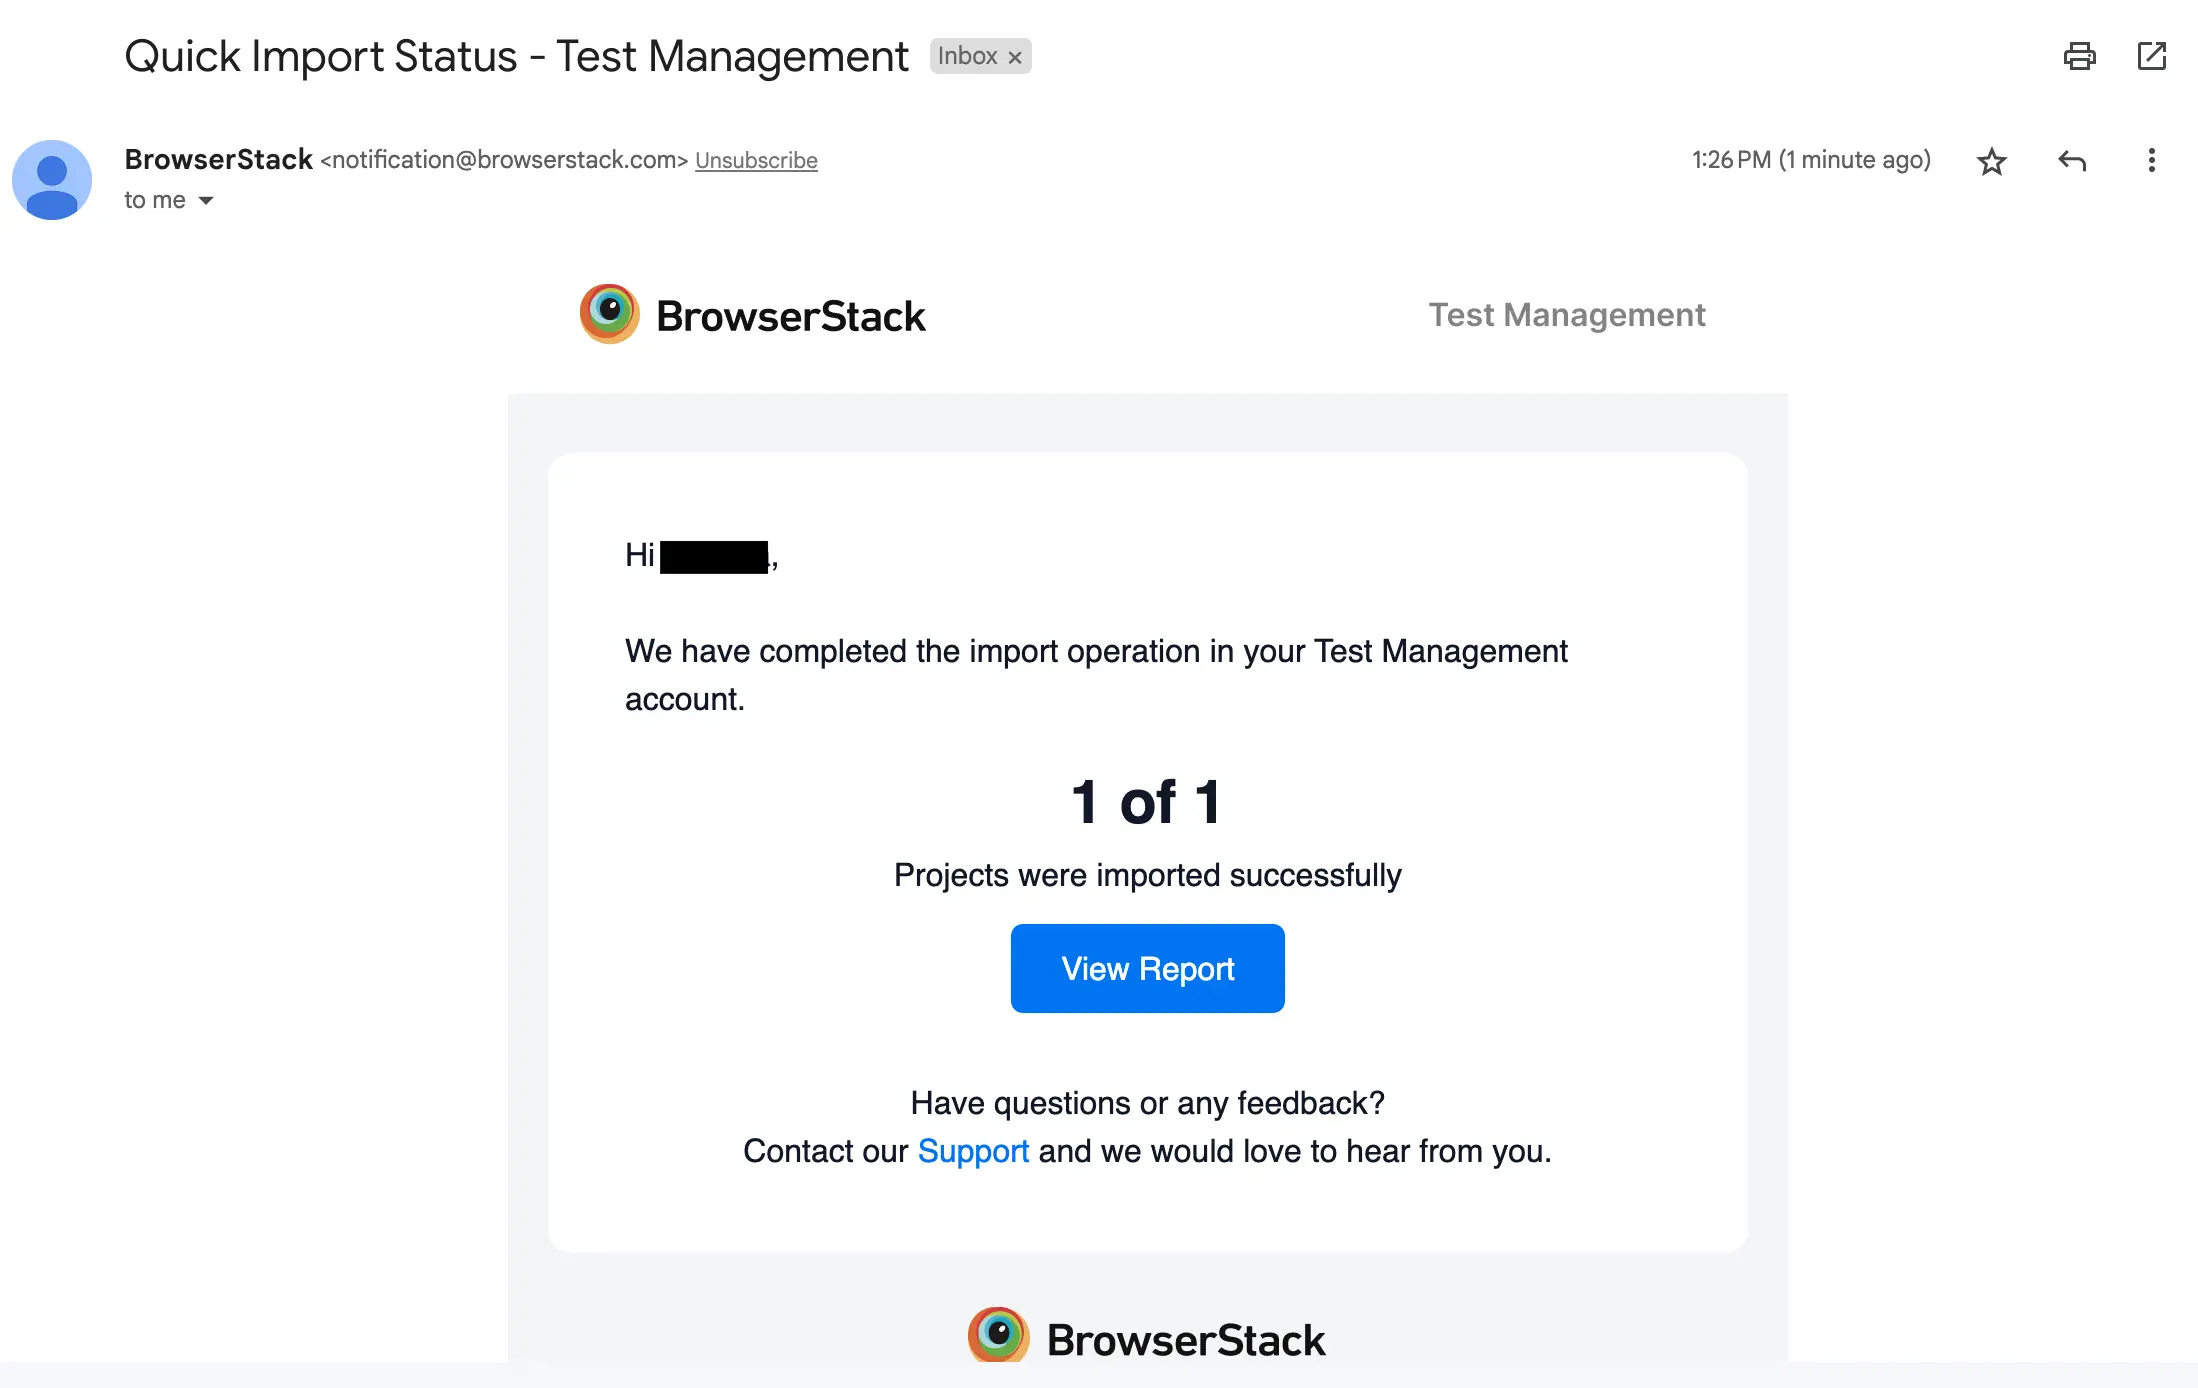
Email notification
An email notification is also sent to your registered email ID when the Quick Import process completes successfully.
Quick Import or CSV import saves email addresses of unregistered users and automatically assigns the associated test cases and test runs when they register or login to Test Management.
We're sorry to hear that. Please share your feedback so we can do better
Contact our Support team for immediate help while we work on improving our docs.
We're continuously improving our docs. We'd love to know what you liked
We're sorry to hear that. Please share your feedback so we can do better
Contact our Support team for immediate help while we work on improving our docs.
We're continuously improving our docs. We'd love to know what you liked
Thank you for your valuable feedback!