
 Join our Discord
Report bugs using Jira integration
Test Reporting & Analytics allows you to easily report and track bugs or issues in your test suite directly on Jira without navigating away from Test Reporting & Analytics.
Integrate Test Reporting & Analytics with Jira
Depending on your Jira instance type, choose the appropriate procedure:
Prerequisite
Ensure that you have an Atlassian user account.
Jira on cloud
To integrate Jira with Test Reporting & Analytics on cloud:
- Sign in to Test Reporting & Analytics.
- Select Integrations from the left pane.
-
On the Integrations page, click Connect under the Jira logo.
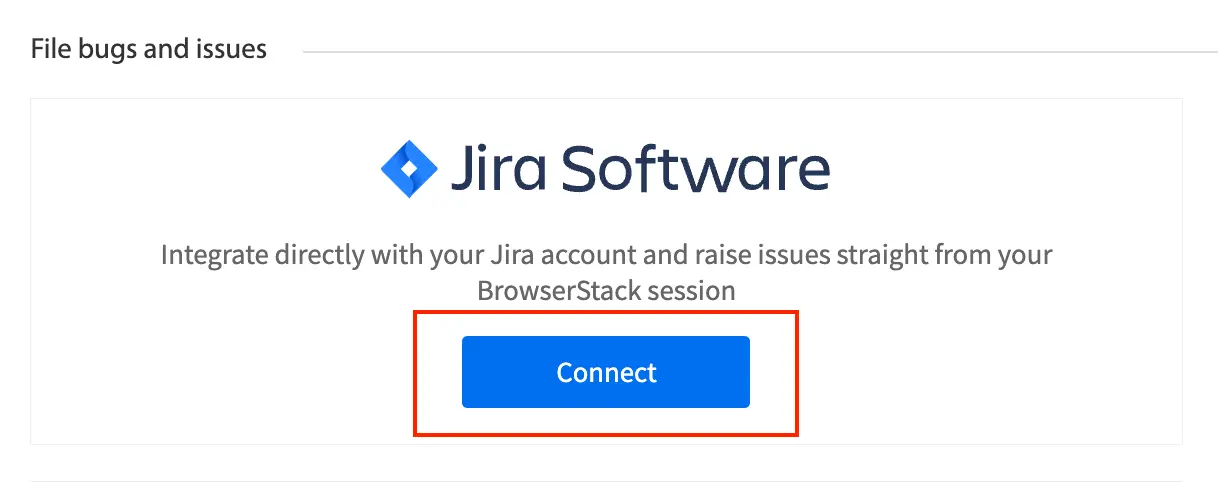
- Select Jira On Cloud from the Instance Type menu.
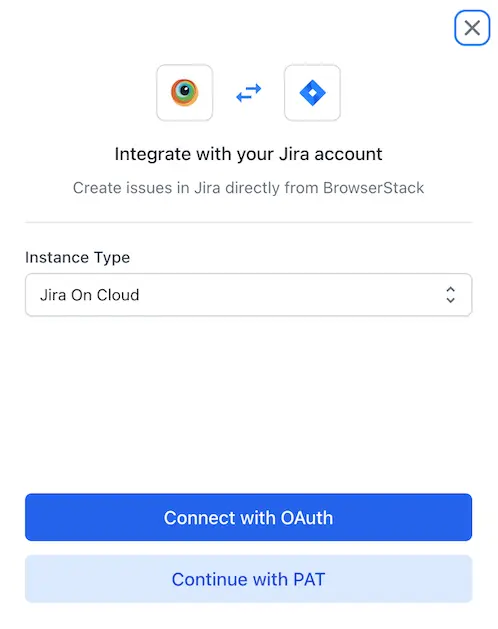
- You can connect Jira with OAuth or using PAT.
-
a. Connect with OAuth
- Redirects you to the Atlassian access page.
- Click Accept to allow BrowserStack Jira Integration access to your Atlassian account. On successful completion, Jira status under the Test Reporting & Analytics section, changes to Connected.
-
b. Connect using PAT (Personal Access Token)
- Enter your Atlassian host name and email ID.
- To get your API access token, click Get your API token. It redirects you to the Jira website.
- In Jira, under API Tokens, click Create API token.
- Enter a label for your token and click Create.
- Copy the generated API token right away. Note, it will not be visible again.
- Return to Test Reporting & Analytics, enter the hostname, email, and the copied token.
- Click Continue to connect with Test Reporting & Analytics. On successful completion, Jira status changes to Connected.
-
a. Connect with OAuth
BrowserStack recommends using an API token instead of a password.
Jira self-hosted
It explains the following:
Prerequisites
This prerequisite applies only to self-hosted Jira instances that are not publicly accessible. If your self-hosted Jira is publicly accessible, you can skip this step.
BrowserStack Local Library
To integrate BrowserStack with your self-hosted Jira instance, you need to set up the BrowserStack Local Binary. Follow these steps to ensure proper configuration.
Step 1: Download the latest version of the BrowserStack Local Binary.
The download links are secure, and the binaries are digitally signed, with the publisher identified as BrowserStack Ltd.
Step 2: Unzip the file to a folder on your system, open the command line, and navigate to the folder containing the Local binary.
Step 3: To connect BrowserStack to your self-hosted Jira instance, use the following command: BrowserStackLocal.exe --local-identifier integrations-repeater --only <jira-host-url-without-https>,<jira-port>,<ssl 0 or 1> --key YOUR ACCESS KEY
| Element | Description | Example |
|---|---|---|
<jira-host-url-without-https> |
Jira server URL (e.g., jira.mycompany.com). |
jira.mycompany.com |
<jira-port> |
The port number on which your Jira instance runs. Replace 8080 with your actual port. |
8080 |
<ssl> |
Indicates whether SSL is enabled (1 for HTTPS, 0 for HTTP). |
0 for HTTP or 1 for HTTPS |
YOUR ACCESS KEY |
Your BrowserStack Access Key, which you can find in your BrowserStack account settings. | abcd1234efgh5678 |
This gives you the setup needed to connect your local environment to BrowserStack before you start the integration.
Integrate Jira self-hosted
To integrate Jira self-hosted with your Test Reporting & Analytics:
- On the left navigation bar of Test Reporting & Analytics, click Integrations.
- On the Integrations page, click Connect under the Jira logo.
- Select Self Hosted from the menu.
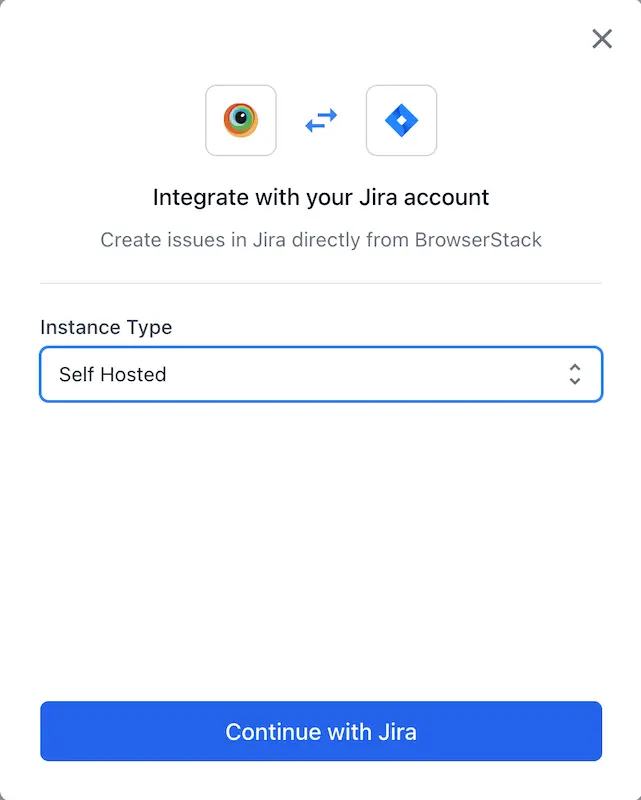
- Click Continue with Jira.
- Enter your Atlassian host URL and API token to complete the integration. To get your API access token, click Get your API token.
- Click Continue. On successful completion, Jira status changes to Connected.
After successful authentication, the Jira tile should indicate a connected status. Your Jira self-hosted instance is now integrated with the Test Reporting & Analytics, allowing you to create and track issues directly from the tool.
Report an issue on Jira
- On Test Reporting & Analytics, go to Builds and select the required failed test.
-
On the Timeline Debugging pane, click Report a bug.
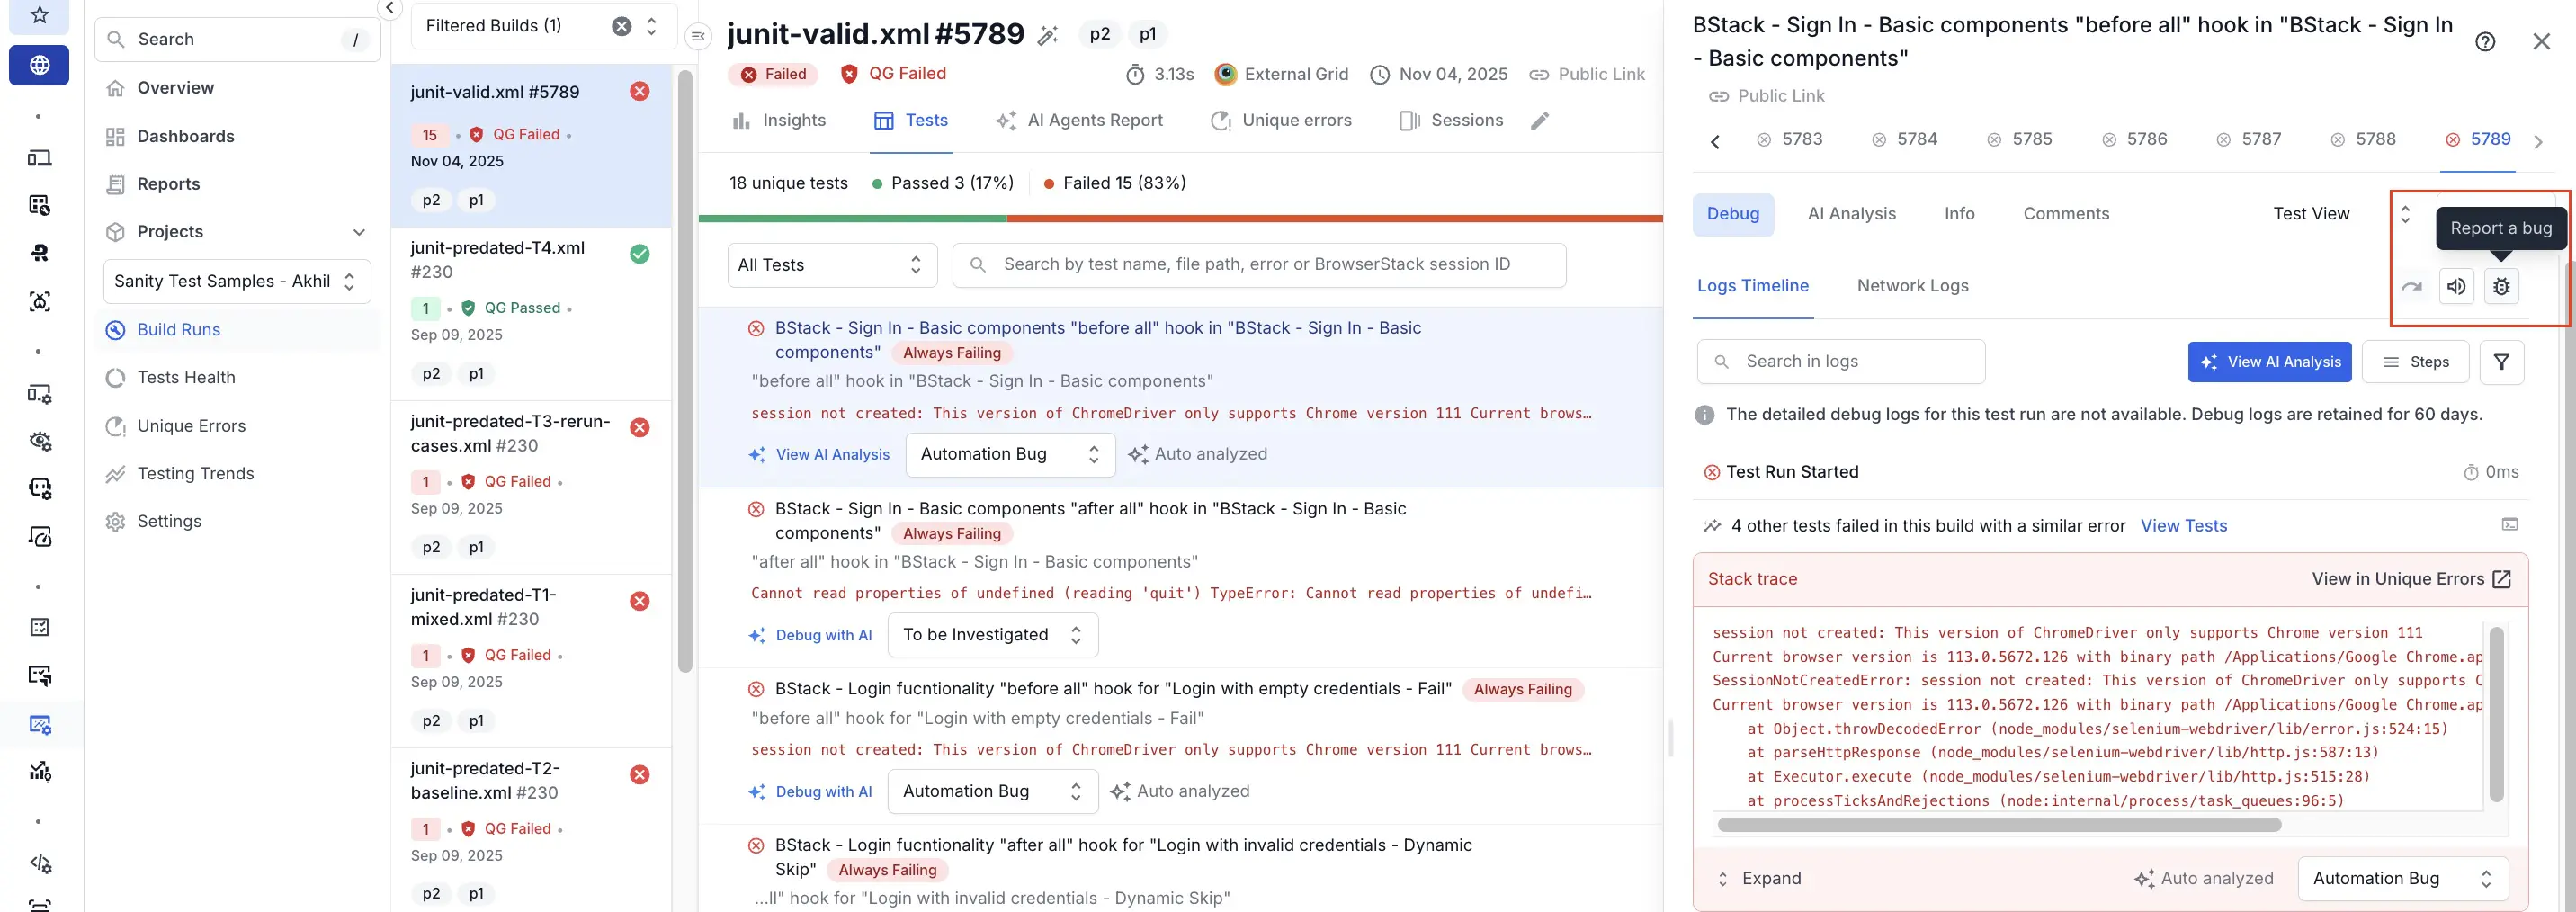
-
Select a project from the Project drop-down menu in the window that appears. Test Reporting & Analytics automatically picks up all the fields in your Jira project.
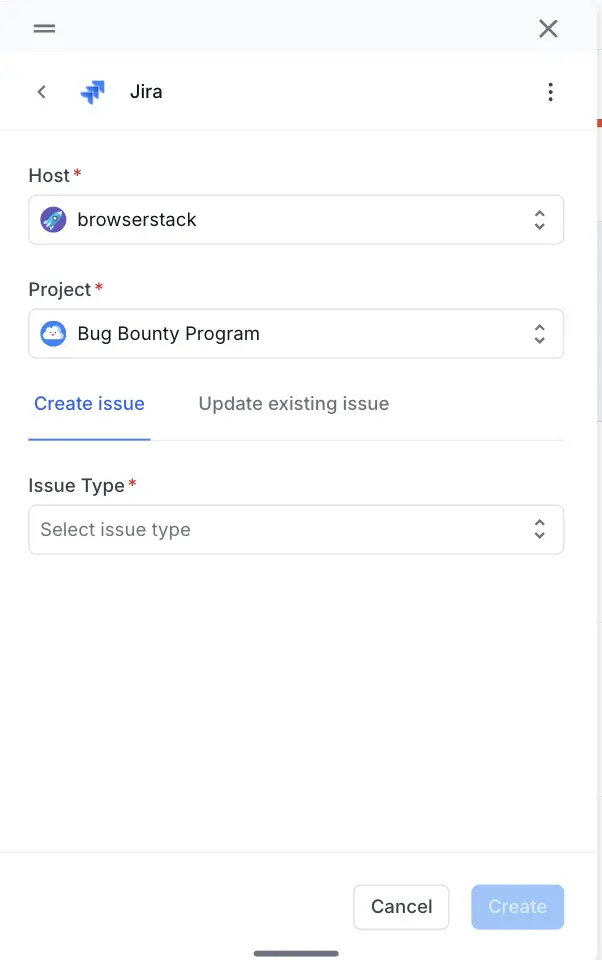
- On the Create Issue tab, select the issue type.
- Enter the details about the bug. Click Show all fields to view all the fields.
- Expand Additional meta data added with description to view all the test related metadata that Test Reporting & Analytics auto-populates. For more information, see the Metadata to aid in debugging section.
- Click Create.
You will receive a success message that the Jira issue was created.

You can click View issue on the success message to view the bug on Jira.
The Jira bug gets associated with the test run.
If you face the error Create a project in your Jira in order to continue when raising a Jira bug, disconnect Jira and connect it again using an API token instead of a password.
Metadata to aid in debugging
When you report a Jira bug, Test Reporting & Analytics logs the following metadata and other information to the Jira bug and makes debugging easier:
- Session URL to view the issue on BrowserStack
- Build Name
- Build ID
- CI Environment
- CI Build URL
- Test Name
- Test URL
- Test Status
- Operating System
- Browser name and version
- Host Name
- Defect Type
- Duration
-
isAutoAnalyzedflag - Status of Build Runs
- Error message or exception
- Environment
As Test Reporting & Analytics automatically logs this information onto the Jira bug, you can reduce manual work, debug faster, and improve the data quality of your Jira bugs.
Update an issue on Jira
You can update an issue that is linked to a test run. You can also link an existing issue from the Jira board to a specific test run.
Ensure that you have integrated Jira with Test Reporting & Analytics as described in Jira on cloud or Jira self-hosted.
- You can open the window to update a Jira bug in two ways:
- From the Tests tab of Build Insights, hover the cursor over the timeline graph of a failed test and click Report a bug.
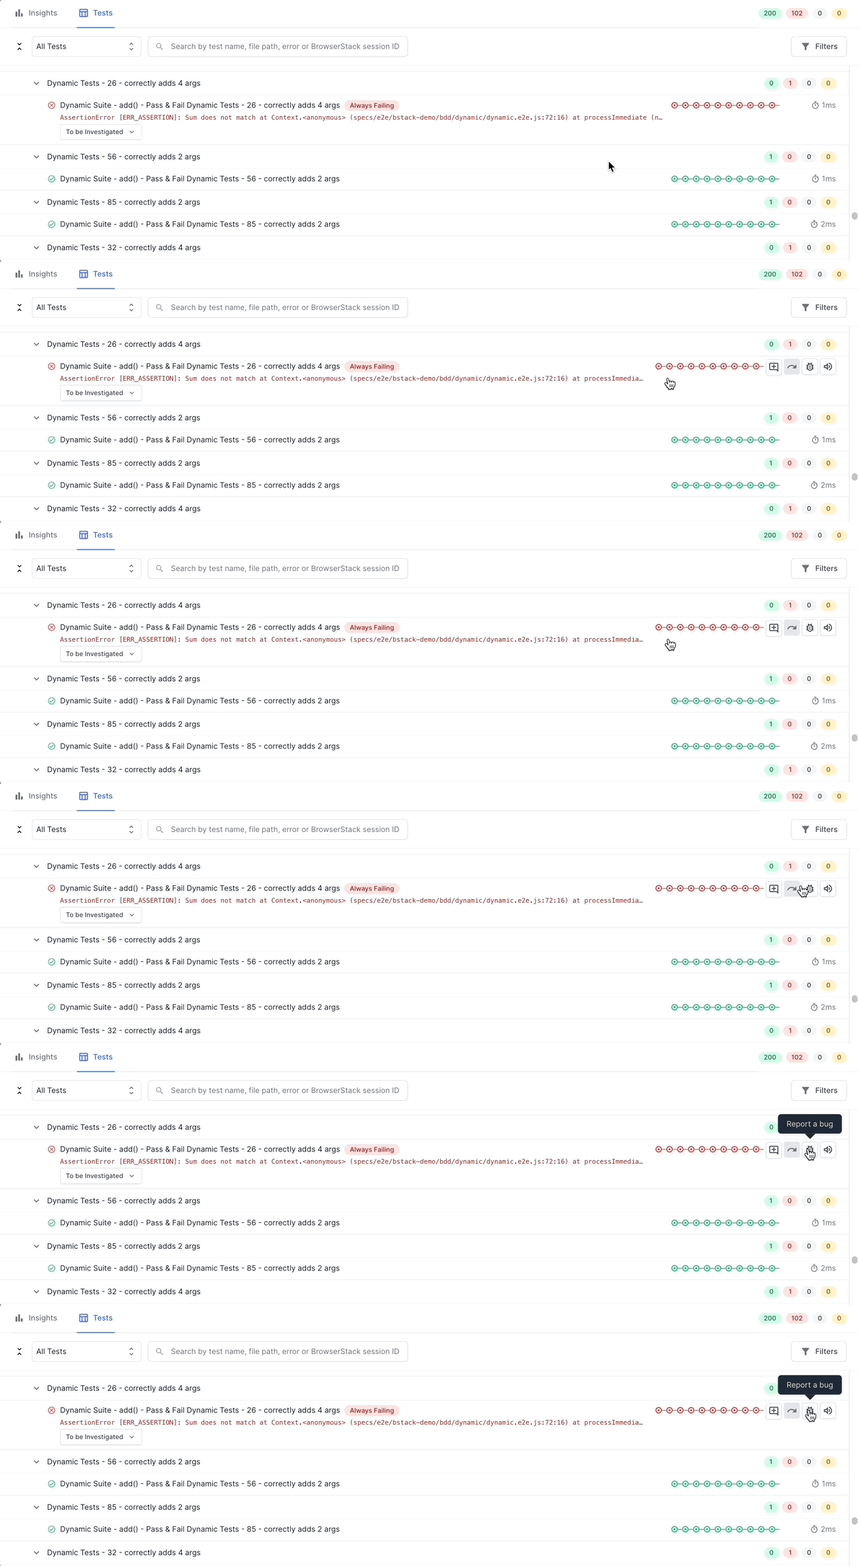
- From the Timeline Debugging view, click the bug icon.
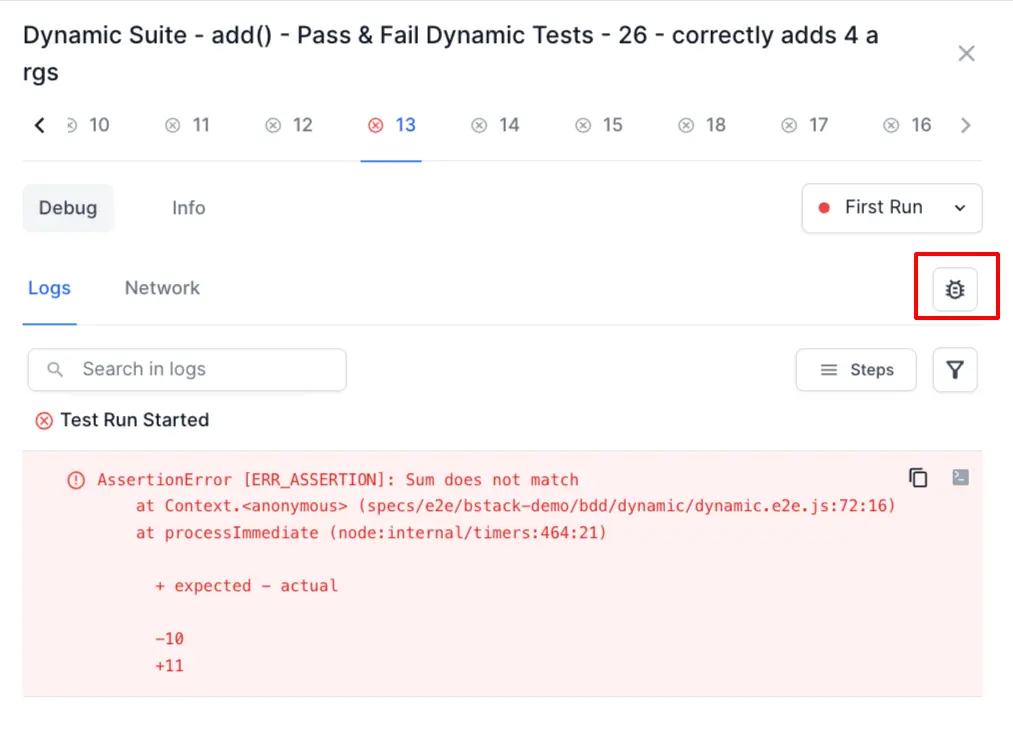
- From the Tests tab of Build Insights, hover the cursor over the timeline graph of a failed test and click Report a bug.
- Select a project from the Project drop-down.
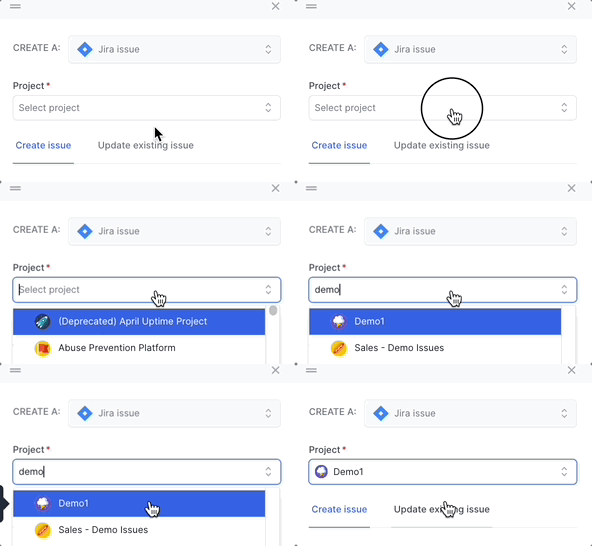
- Click the Update existing issue tab and select the bug which you want to update from the Issue drop-down.
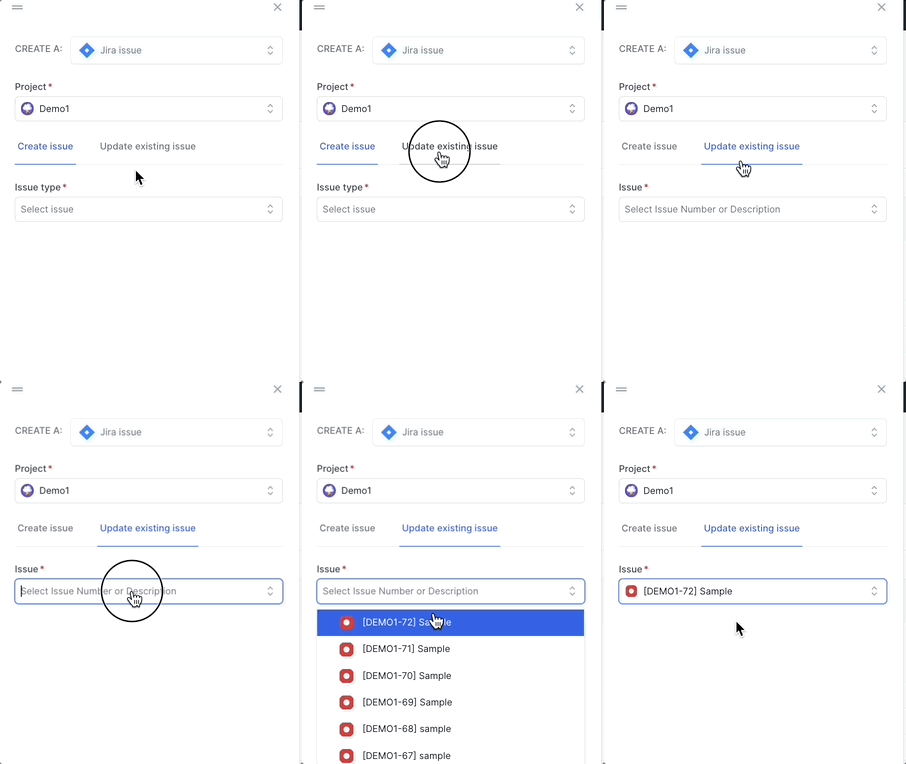
- Click Show all fields to view additional fields. Update the details about the bug.
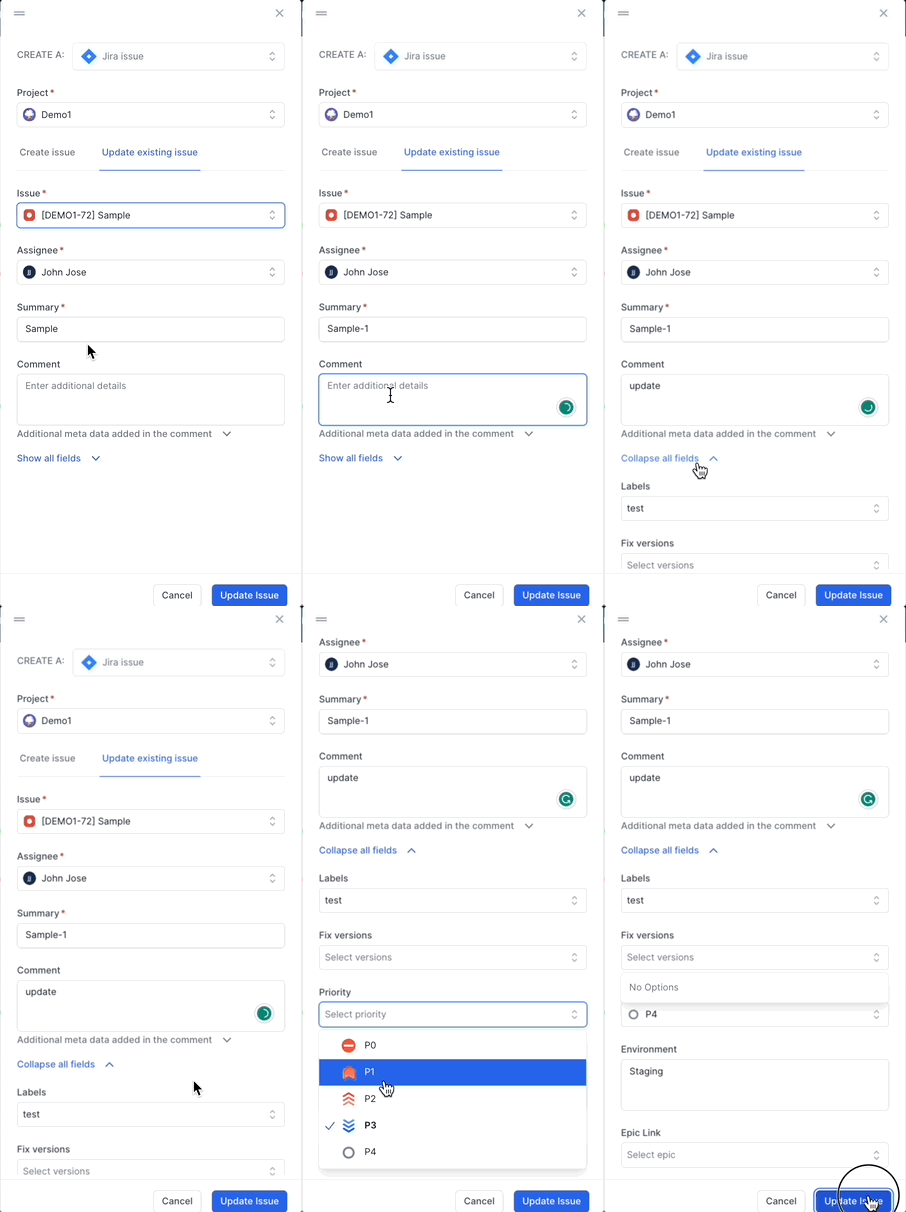
- Click Update Issue.

You will receive a success message that the Jira issue was updated.
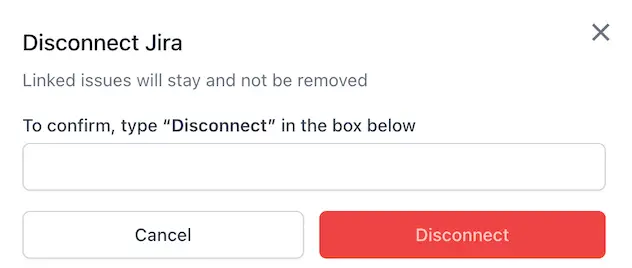
To disconnect the integration, click Disconnect on the Jira tab. In the Disconnect Jira dialog, type Disconnect in the box and click Disconnect again.
We're sorry to hear that. Please share your feedback so we can do better
Contact our Support team for immediate help while we work on improving our docs.
We're continuously improving our docs. We'd love to know what you liked
We're sorry to hear that. Please share your feedback so we can do better
Contact our Support team for immediate help while we work on improving our docs.
We're continuously improving our docs. We'd love to know what you liked
Thank you for your valuable feedback!