Configure step behaviour
Enhance your testing with App Low Code Automation by customizing step behavior like wait time, intelligent timeout, and failure logic.
App Low Code Automation finds unique elements and waits the right amount of time before the next action. You can modify the default wait time and failure logic for each step. This document covers the following:
Intelligent timeout
Intelligent timeout is App Low Code Automation’s smart wait mechanism that automatically determines the optimal wait time for each step. By default, it detects the best wait time based on network requests and screen transitions during the recording process. This approach ensures test stability even if elements take longer than usual to load during execution.
How intelligent timeout works?
-
During recording: The system observes network activity, screen transitions, and element loading patterns to understand the typical wait time needed for each step.
-
During test execution: The element selection algorithm locates the unique element and performs actionability checks (such as verifying the element is visible, enabled, and ready for interaction) before executing the step.
-
Retry mechanism: If the element is not found or not actionable, the system retries until the step’s timeout is reached, using the intelligently determined wait time as the maximum limit.
-
Automatic optimization: When intelligent timeout is enabled (default state), the system automatically uses the optimal maximum wait timeout based on the recorded behavior. You don’t need to manually specify a timeout value.
Wait time
The wait time indicates the maximum duration a step is allowed to run before moving on to the next step.
Override intelligent timeout using wait time
You can override the intelligent timeout and set a custom wait timeout for specific steps where you need more granular control. This is useful when:
- An element takes significantly longer to load than the intelligent timeout expects
- You want to fail fast for steps that should execute quickly
- You are testing specific timeout scenarios
To configure the wait timeout for a step:
- Hover over the step you want to configure. The configuration icon appears.

- Click the configuration icon to open the Settings of step panel.
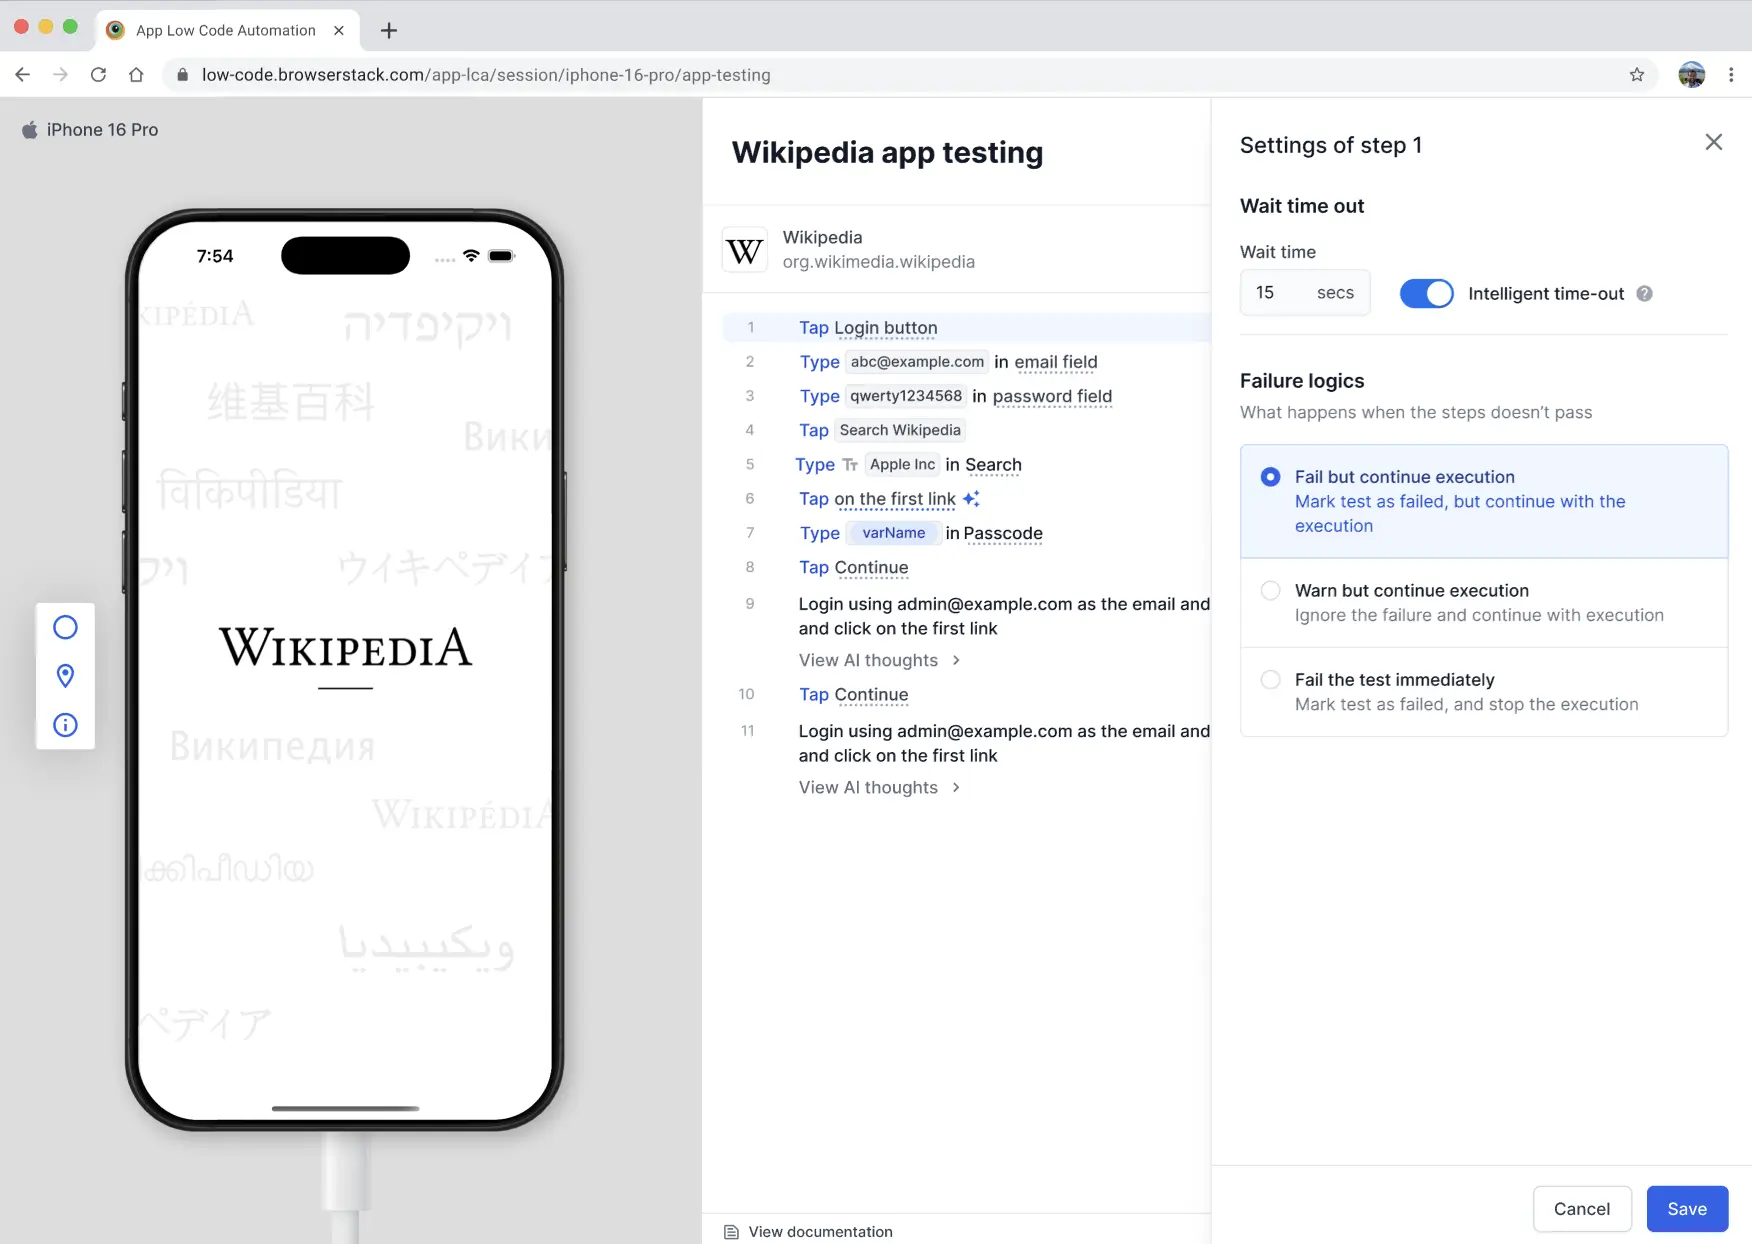
- In the Wait time out section, the Intelligent time-out toggle is enabled by default. To override, disable the Intelligent time-out toggle.
- When you disable intelligent timeout, enter a custom timeout value in seconds in the Wait time field.
- Click Save.
Maximum timeout limits:
- DSL steps: Maximum 240 seconds
- AI steps: Maximum 300 seconds
For steps configured with Warn but continue execution failure logic, the default maximum wait time is set to 15 seconds. If you explicitly change the timeout value for a step, that custom value will be honored even if the failure configuration is later changed to “Warn but continue execution”.
Configure step failure logic
When a test step fails, you can define how the system handles the error. You can define what happens next when an action or validation step fails. This flexibility allows you to stop execution immediately, continue despite a failure, or continue with a warning.
To configure the failure logic for a step:
- Hover over the step you want to configure. The configuration icon appears.
- Click the configuration icon to open the Settings of step panel.
- In the Failure logics section, select one of the three failure logic options.
- Fail but continue execution: Mark the test as failed, but continue with the execution of remaining steps. Use this option to perform additional validations even if the current validation fails.
- Warn but continue execution: Ignore the step failure and continue with execution. Failure of this step does not affect the overall test status.
-
Fail the test immediately: Mark the test as failed and stop the execution immediately.

- Click Save.
Default failure logic
The default failure logic varies by step type:
-
DSL steps:
- Action steps: Default to Fail the test immediately.
- Validation steps: Default to Fail but continue execution.
- AI steps: All AI steps default to Fail the test immediately.
Supported steps: The failure behavior options are supported for all existing actions and validations, including:
- Tap
- Double Tap
- Long Press
- Scroll
- Swipe
- Press
- All validation commands
We're sorry to hear that. Please share your feedback so we can do better
Contact our Support team for immediate help while we work on improving our docs.
We're continuously improving our docs. We'd love to know what you liked
We're sorry to hear that. Please share your feedback so we can do better
Contact our Support team for immediate help while we work on improving our docs.
We're continuously improving our docs. We'd love to know what you liked
Thank you for your valuable feedback!