
 Join our Discord
Edit a test
Learn how to view and edit test details at any time in App Low Code Automation when requirements change.
In App Low Code Automation, you can edit a test at any time to keep your tests organized and relevant. You can perform the following actions:
- Edit test steps
- Update test details such as the name, folder, tags, and description.
Edit a test in these situations:
- Your app’s workflows, features, or validations change significantly, and you need to update test metadata.
- You want to add tags, move the test to a different folder, or clarify the test description for better organization.
- You need to clone, move, or delete a test to manage your automation suite efficiently.
- You need to add new steps between existing steps or reorder steps when your app’s user flow changes.
App Low Code Automation helps you keep your test information current, so your automation remains easy to manage.
Edit a test
To edit a test:
In your App Low Code Automation sidebar, select All tests.
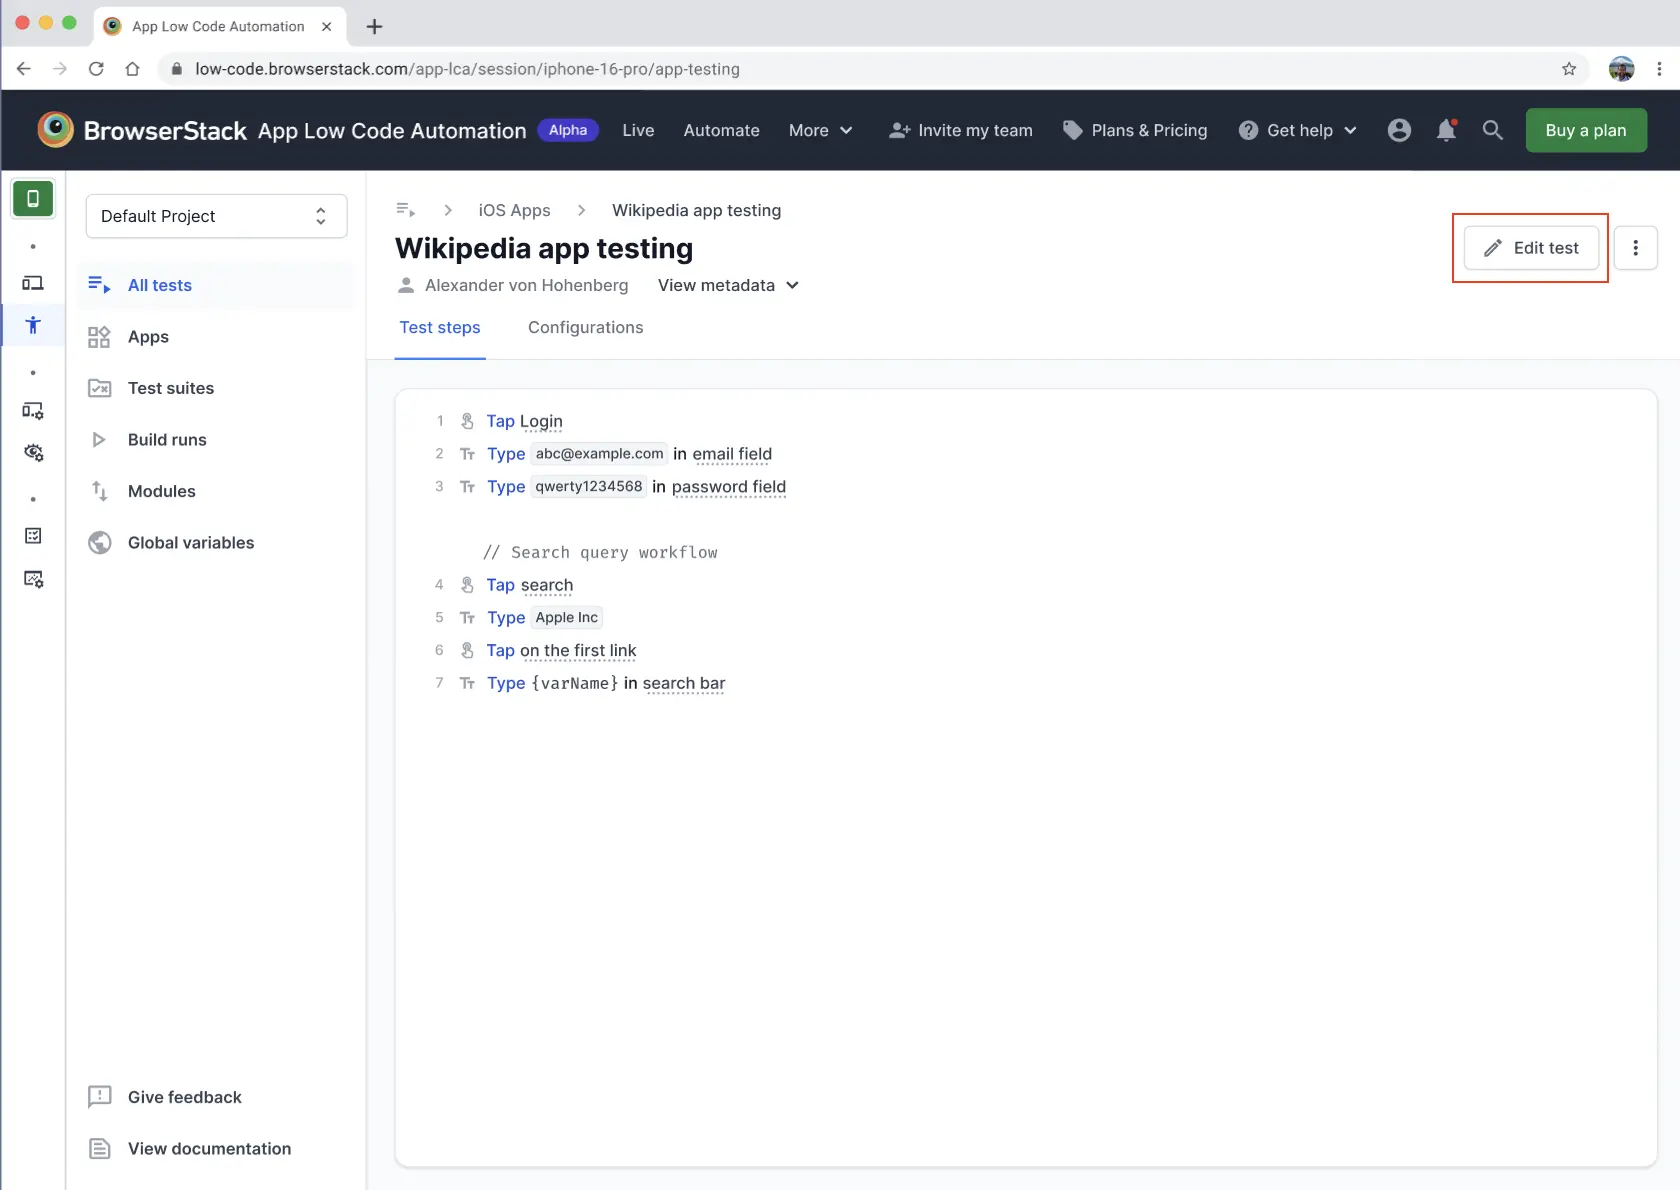
Open the test you want to update, then select Edit test at the top. App Low Code Automation opens a session using the device chosen during test creation. You can now modify the test steps in the editor.
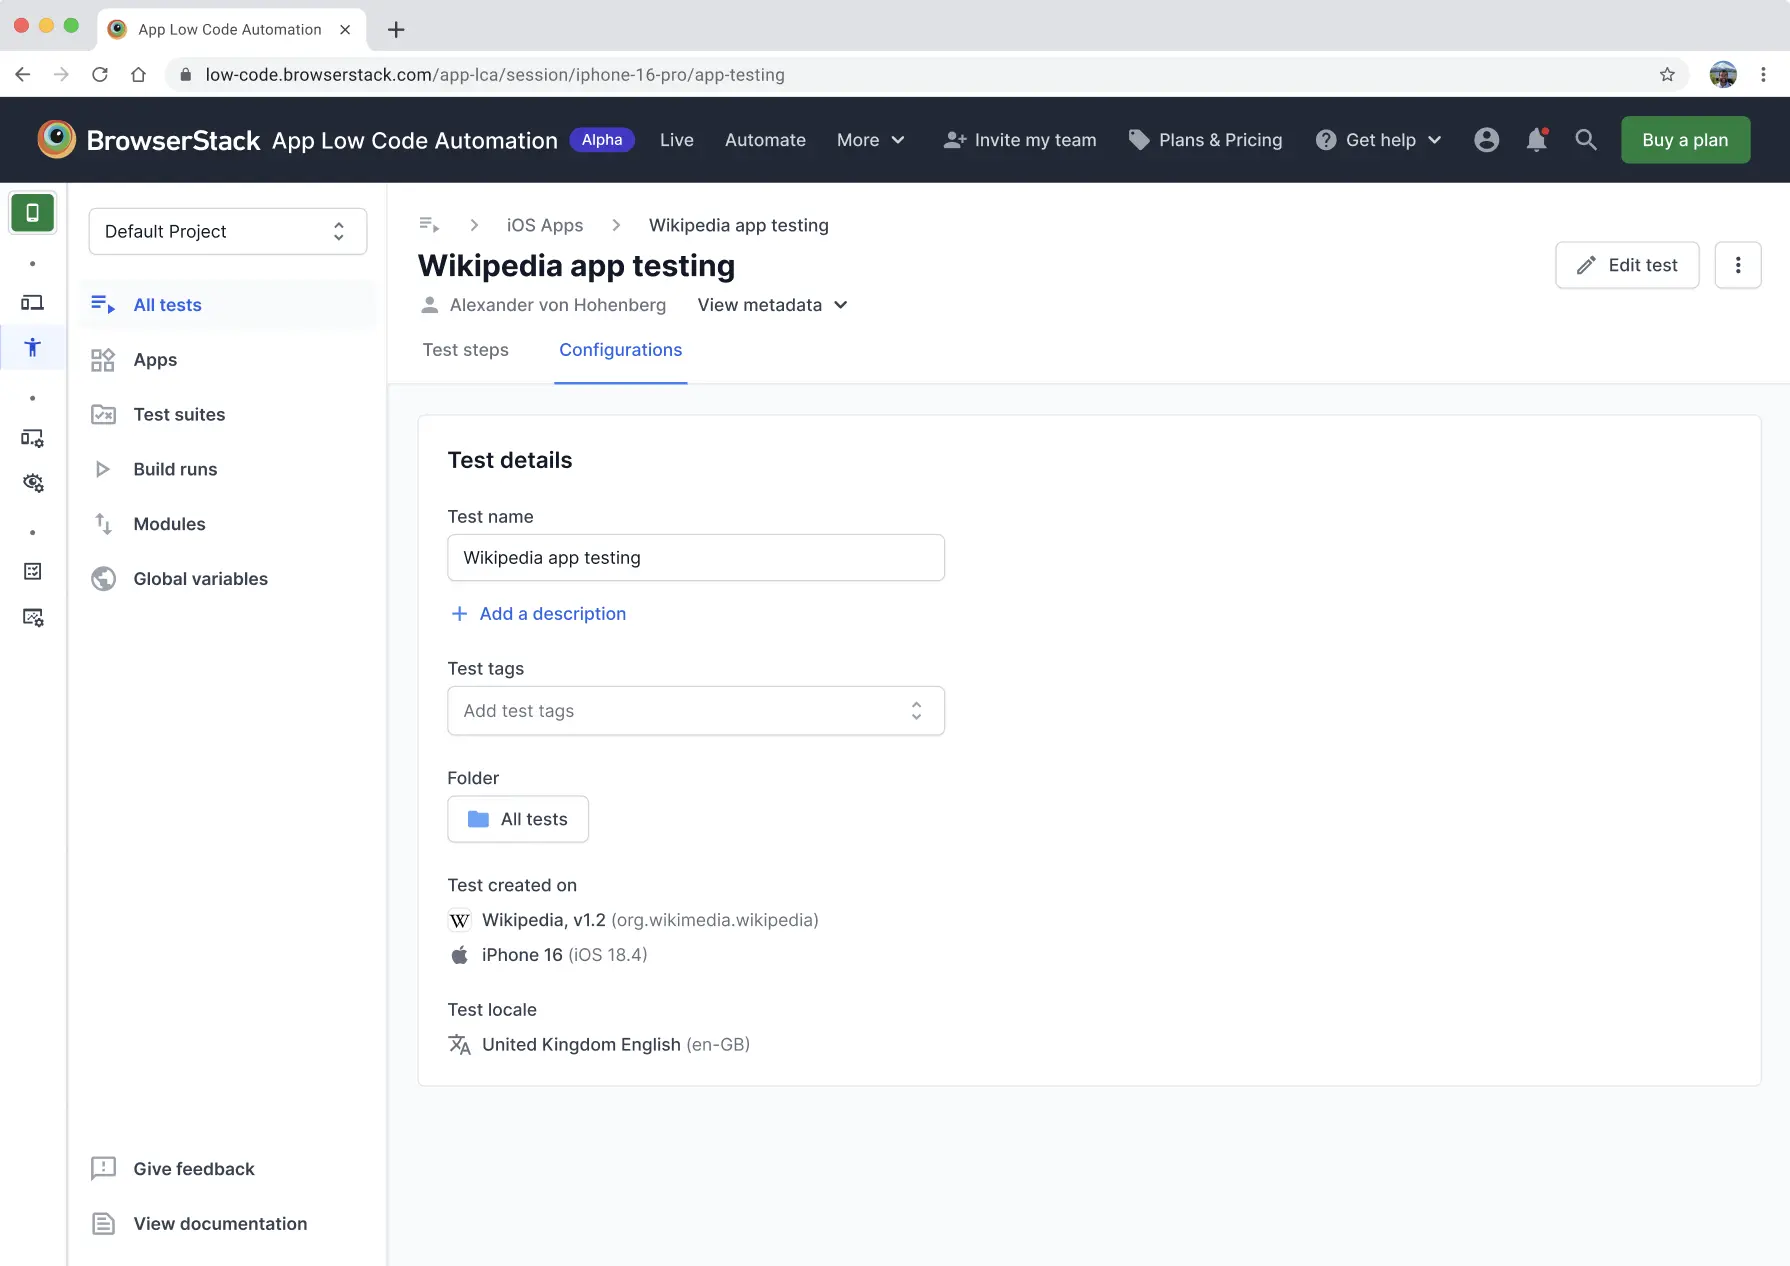
In the Configurations tab, update details such as the test name, description, tags, or folder.
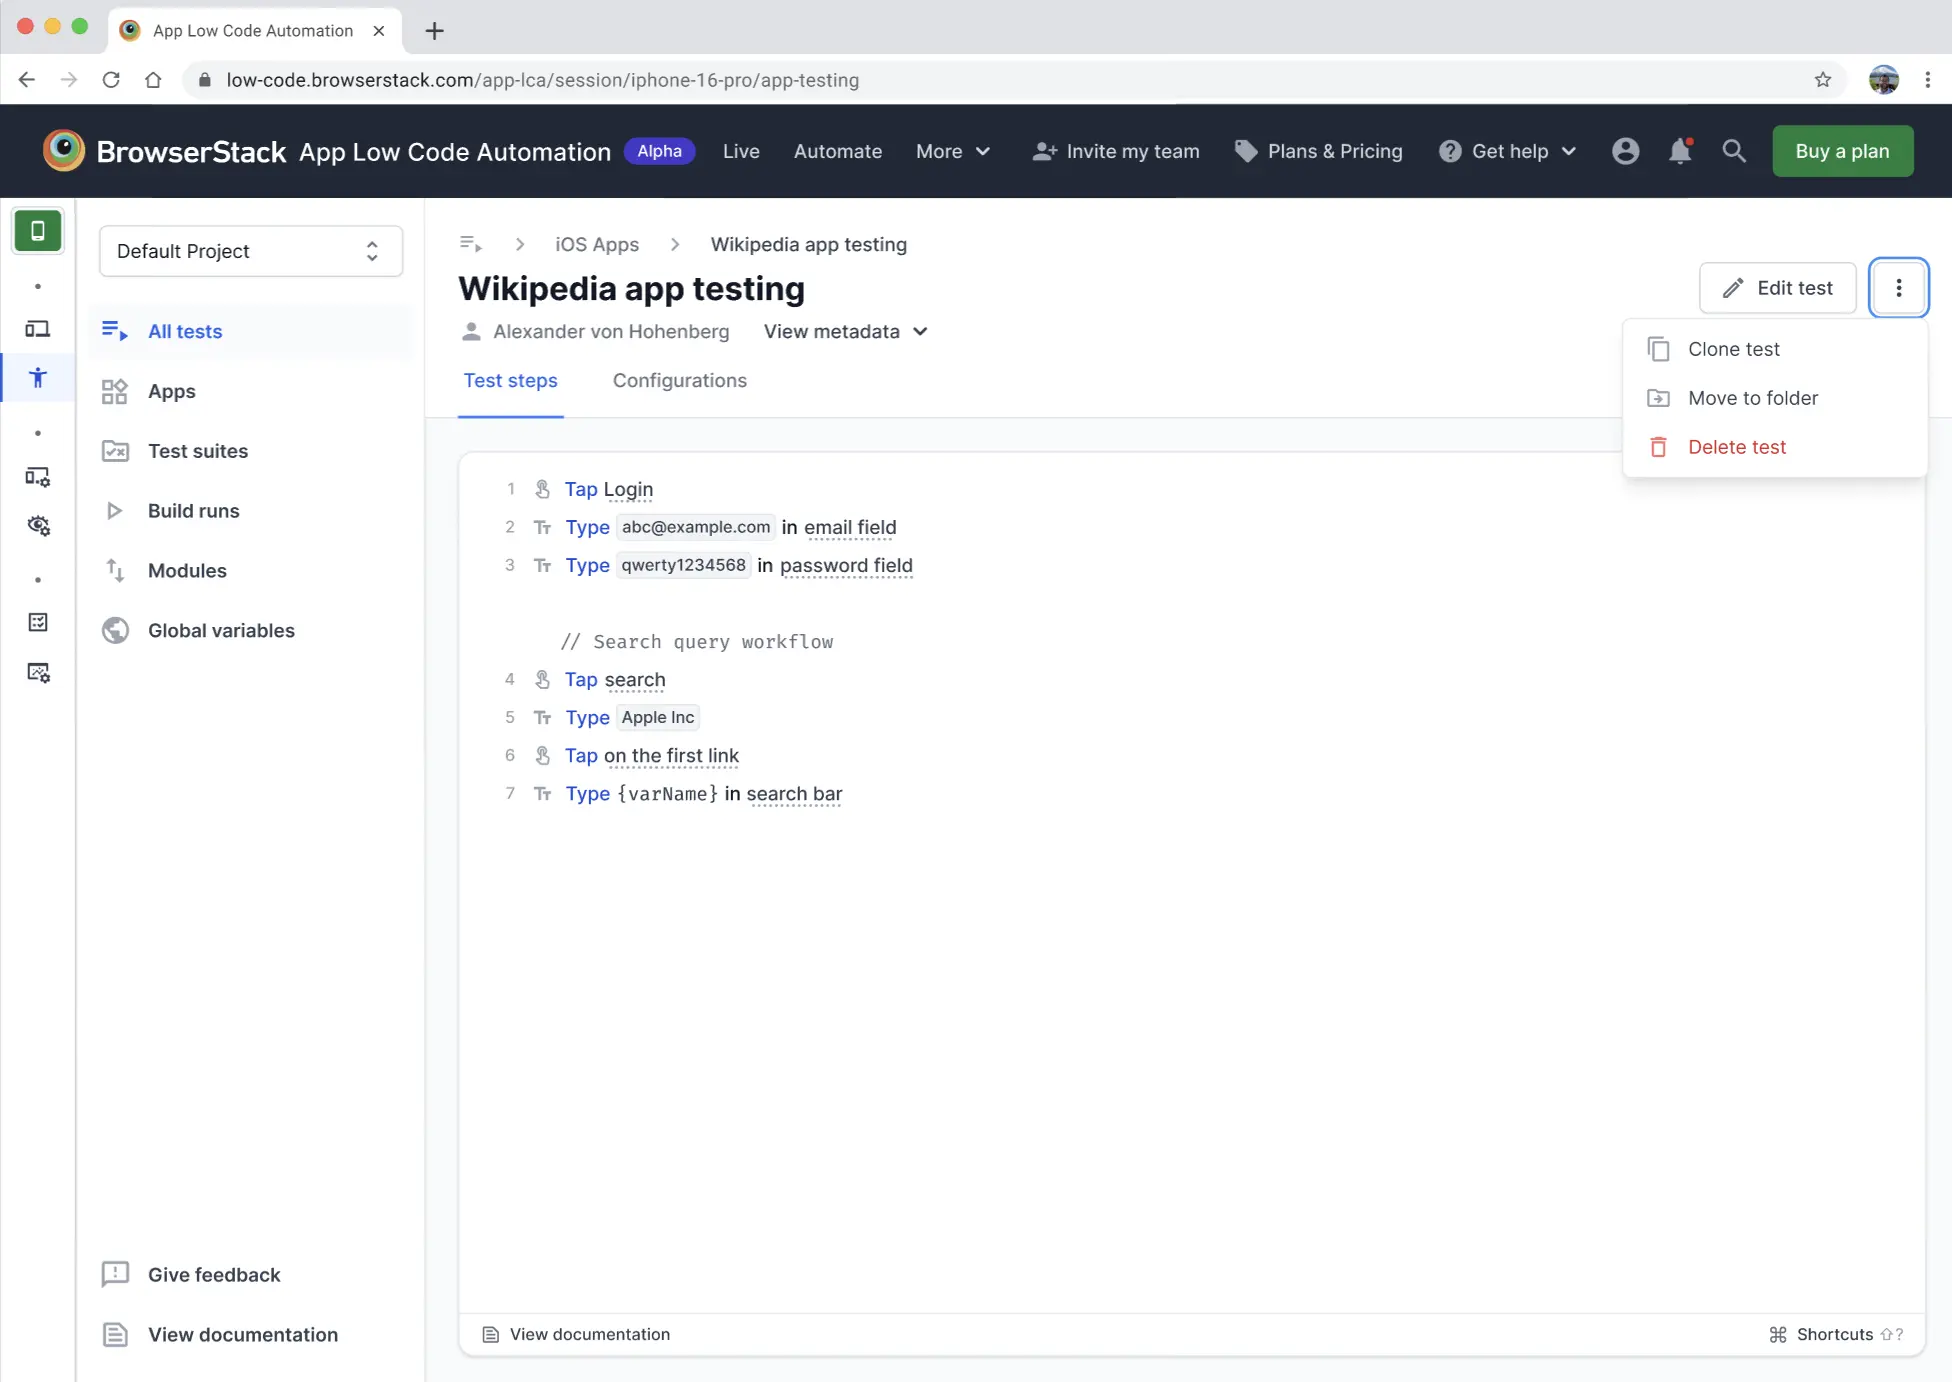
Click the ︙ icon at the top for more options:
- Clone test: Duplicate the test to reuse or customize without changing the original.
- Move to folder: Organize the test by moving it to another folder in your project.
Manage test steps
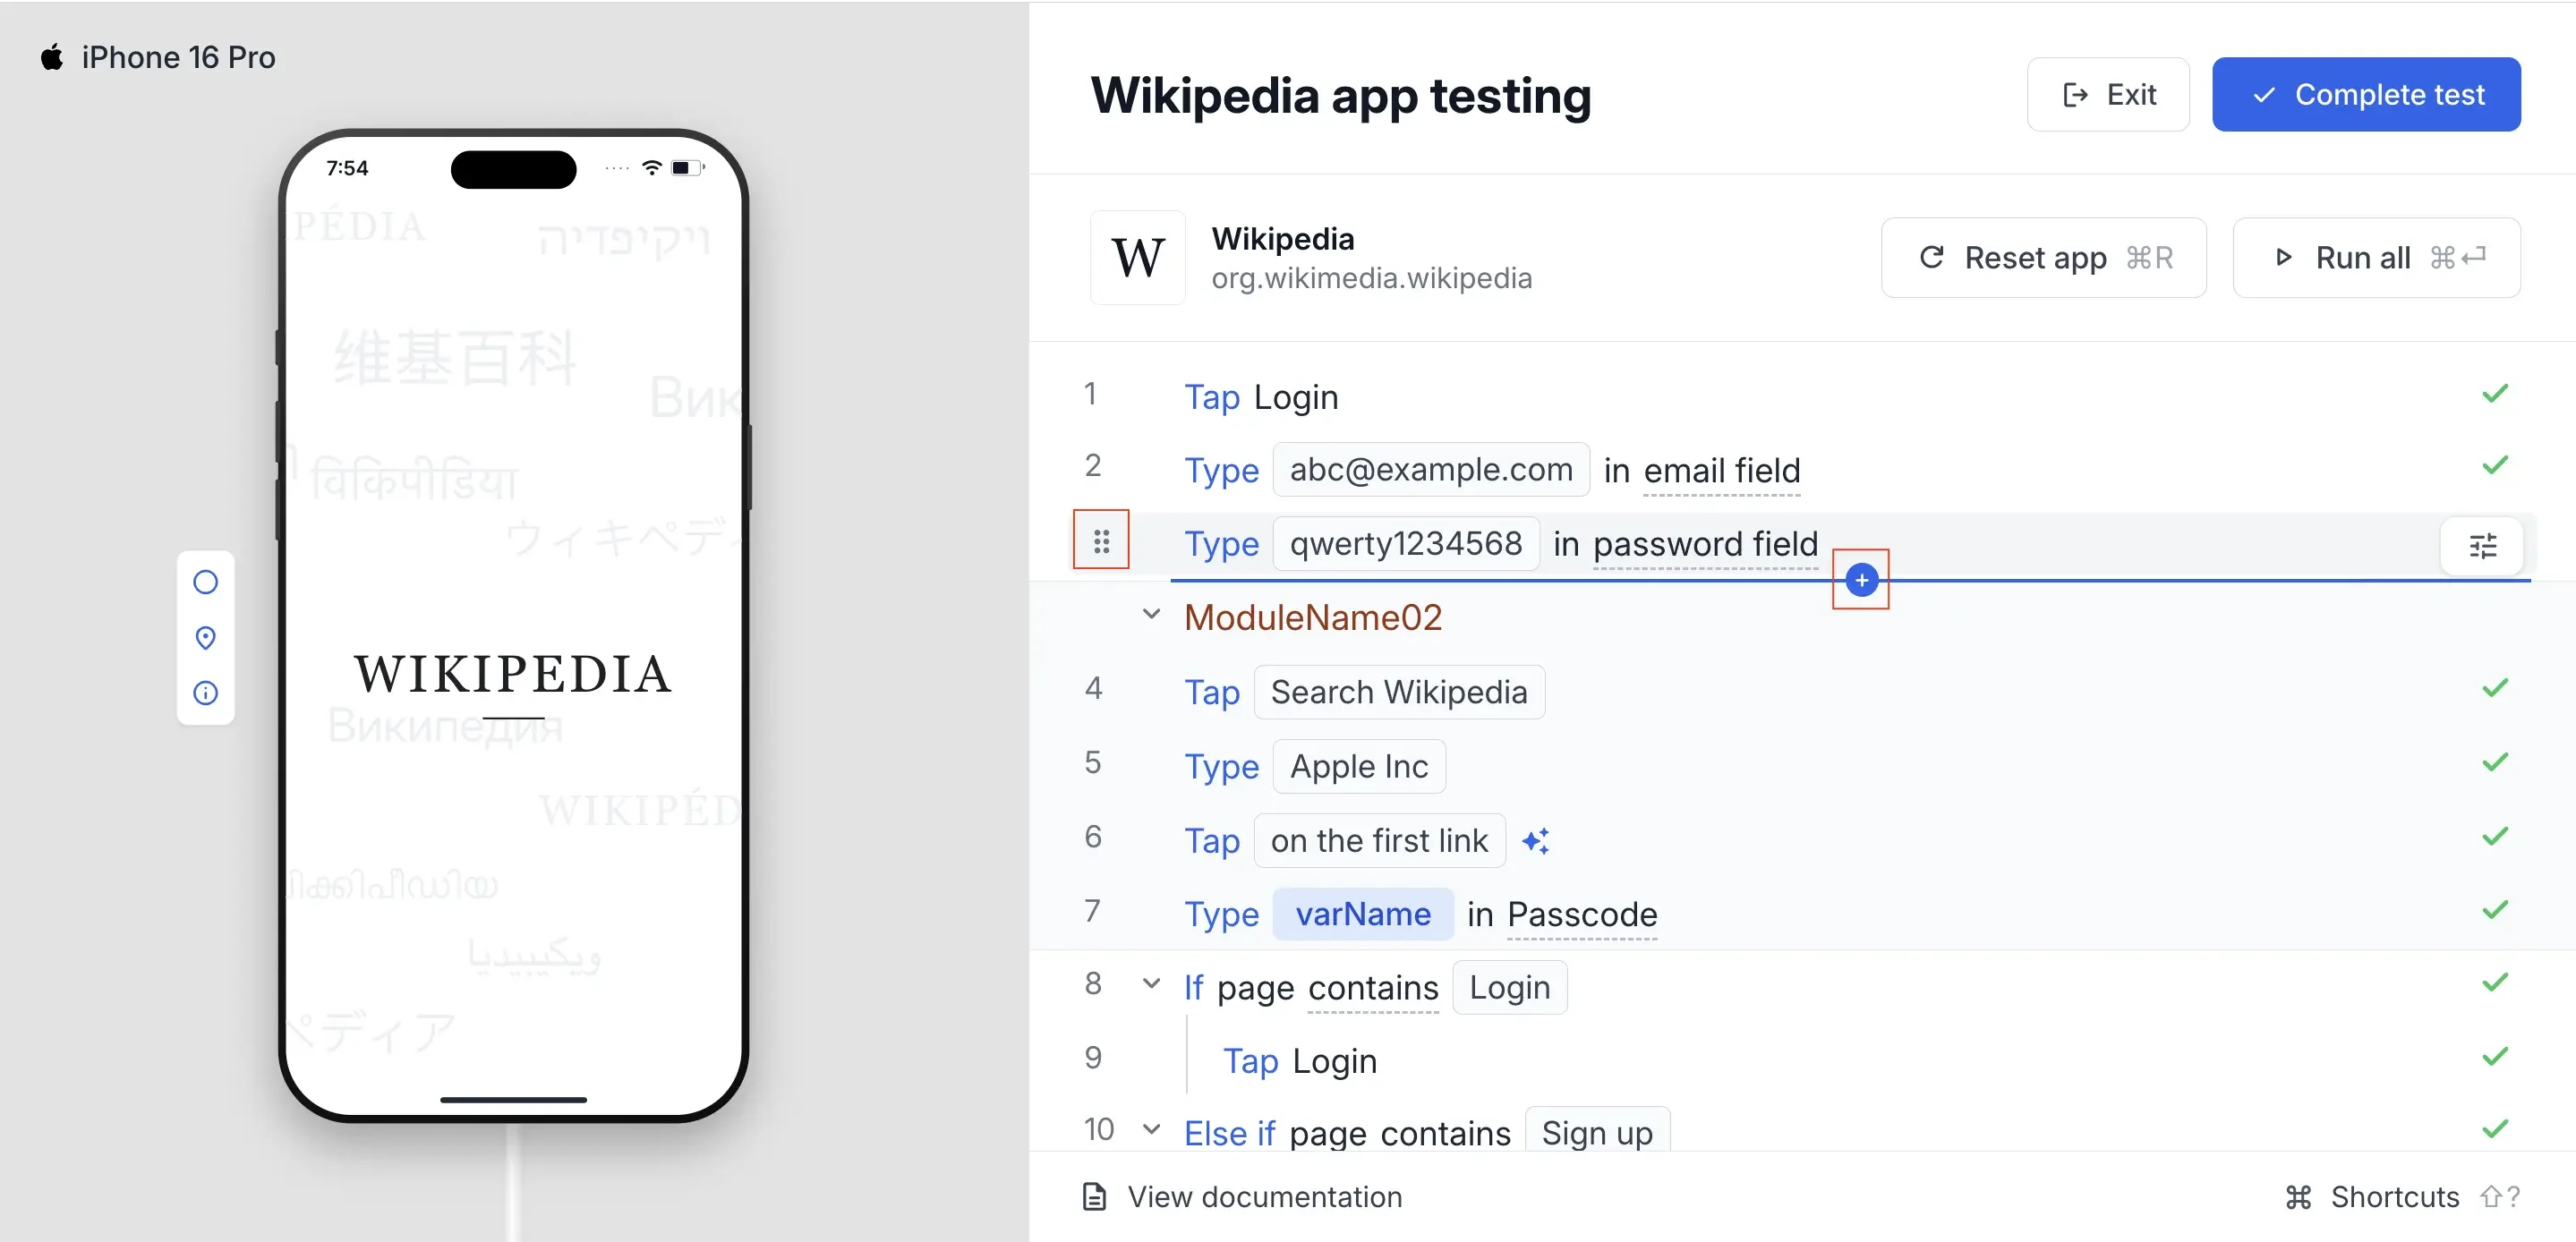
In the test editor, hovering over a step displays the following controls:
- A drag handle (⠿) in place of the step number.
- A blue line with a + icon between two steps.
To manage test steps:
Hover over the step you want to work with.
Perform any of the following actions:
- Add a step: Click the + icon on the blue line above or below the step. An empty step appears at that position. Select a command from the dropdown, or write a prompt to generate the step using AI.
- Reorder a step: Drag the step using the drag handle (⠿) and release it at the new position. As you drag, a blue line shows where the step lands. The step numbers update automatically.
Things to keep in mind
Keep the following points in mind when you add or reorder steps:
- Reordering resets execution status: After you move a step, that step and every step after it appear as unexecuted. Re-run them, or select the save-without-execution checkbox when you click Complete test.
- Blocks move as one unit: Drag a block by its header to move all of its steps together. Dragging an If header moves the If block together with its Else if and Else blocks. Dragging a Repeat header moves the loop with its steps. Dragging a module header moves the entire module.
-
Variables limit where a step can move: You can’t move a step above the
Setstep that creates its variable. You also can’t move aSetstep below a step that uses its variable. - Where the + icon adds a step: The + icon appears on the top or bottom edge of the step you hover over. On the last step of a block, the + icon on the bottom edge adds a step inside the block. The + icon on the top edge of the next step adds a step outside it.
Clone a test
Cloning creates a copy of an existing test, including all its test steps and configurations. Use cloning when you want to build a variation of a test, such as running the same flow with different data or on a different device.
To clone a test:
Select All tests from the App Low Code Automation sidebar.
Click the ︙ icon in the row of the test you want to copy, then select Clone test.
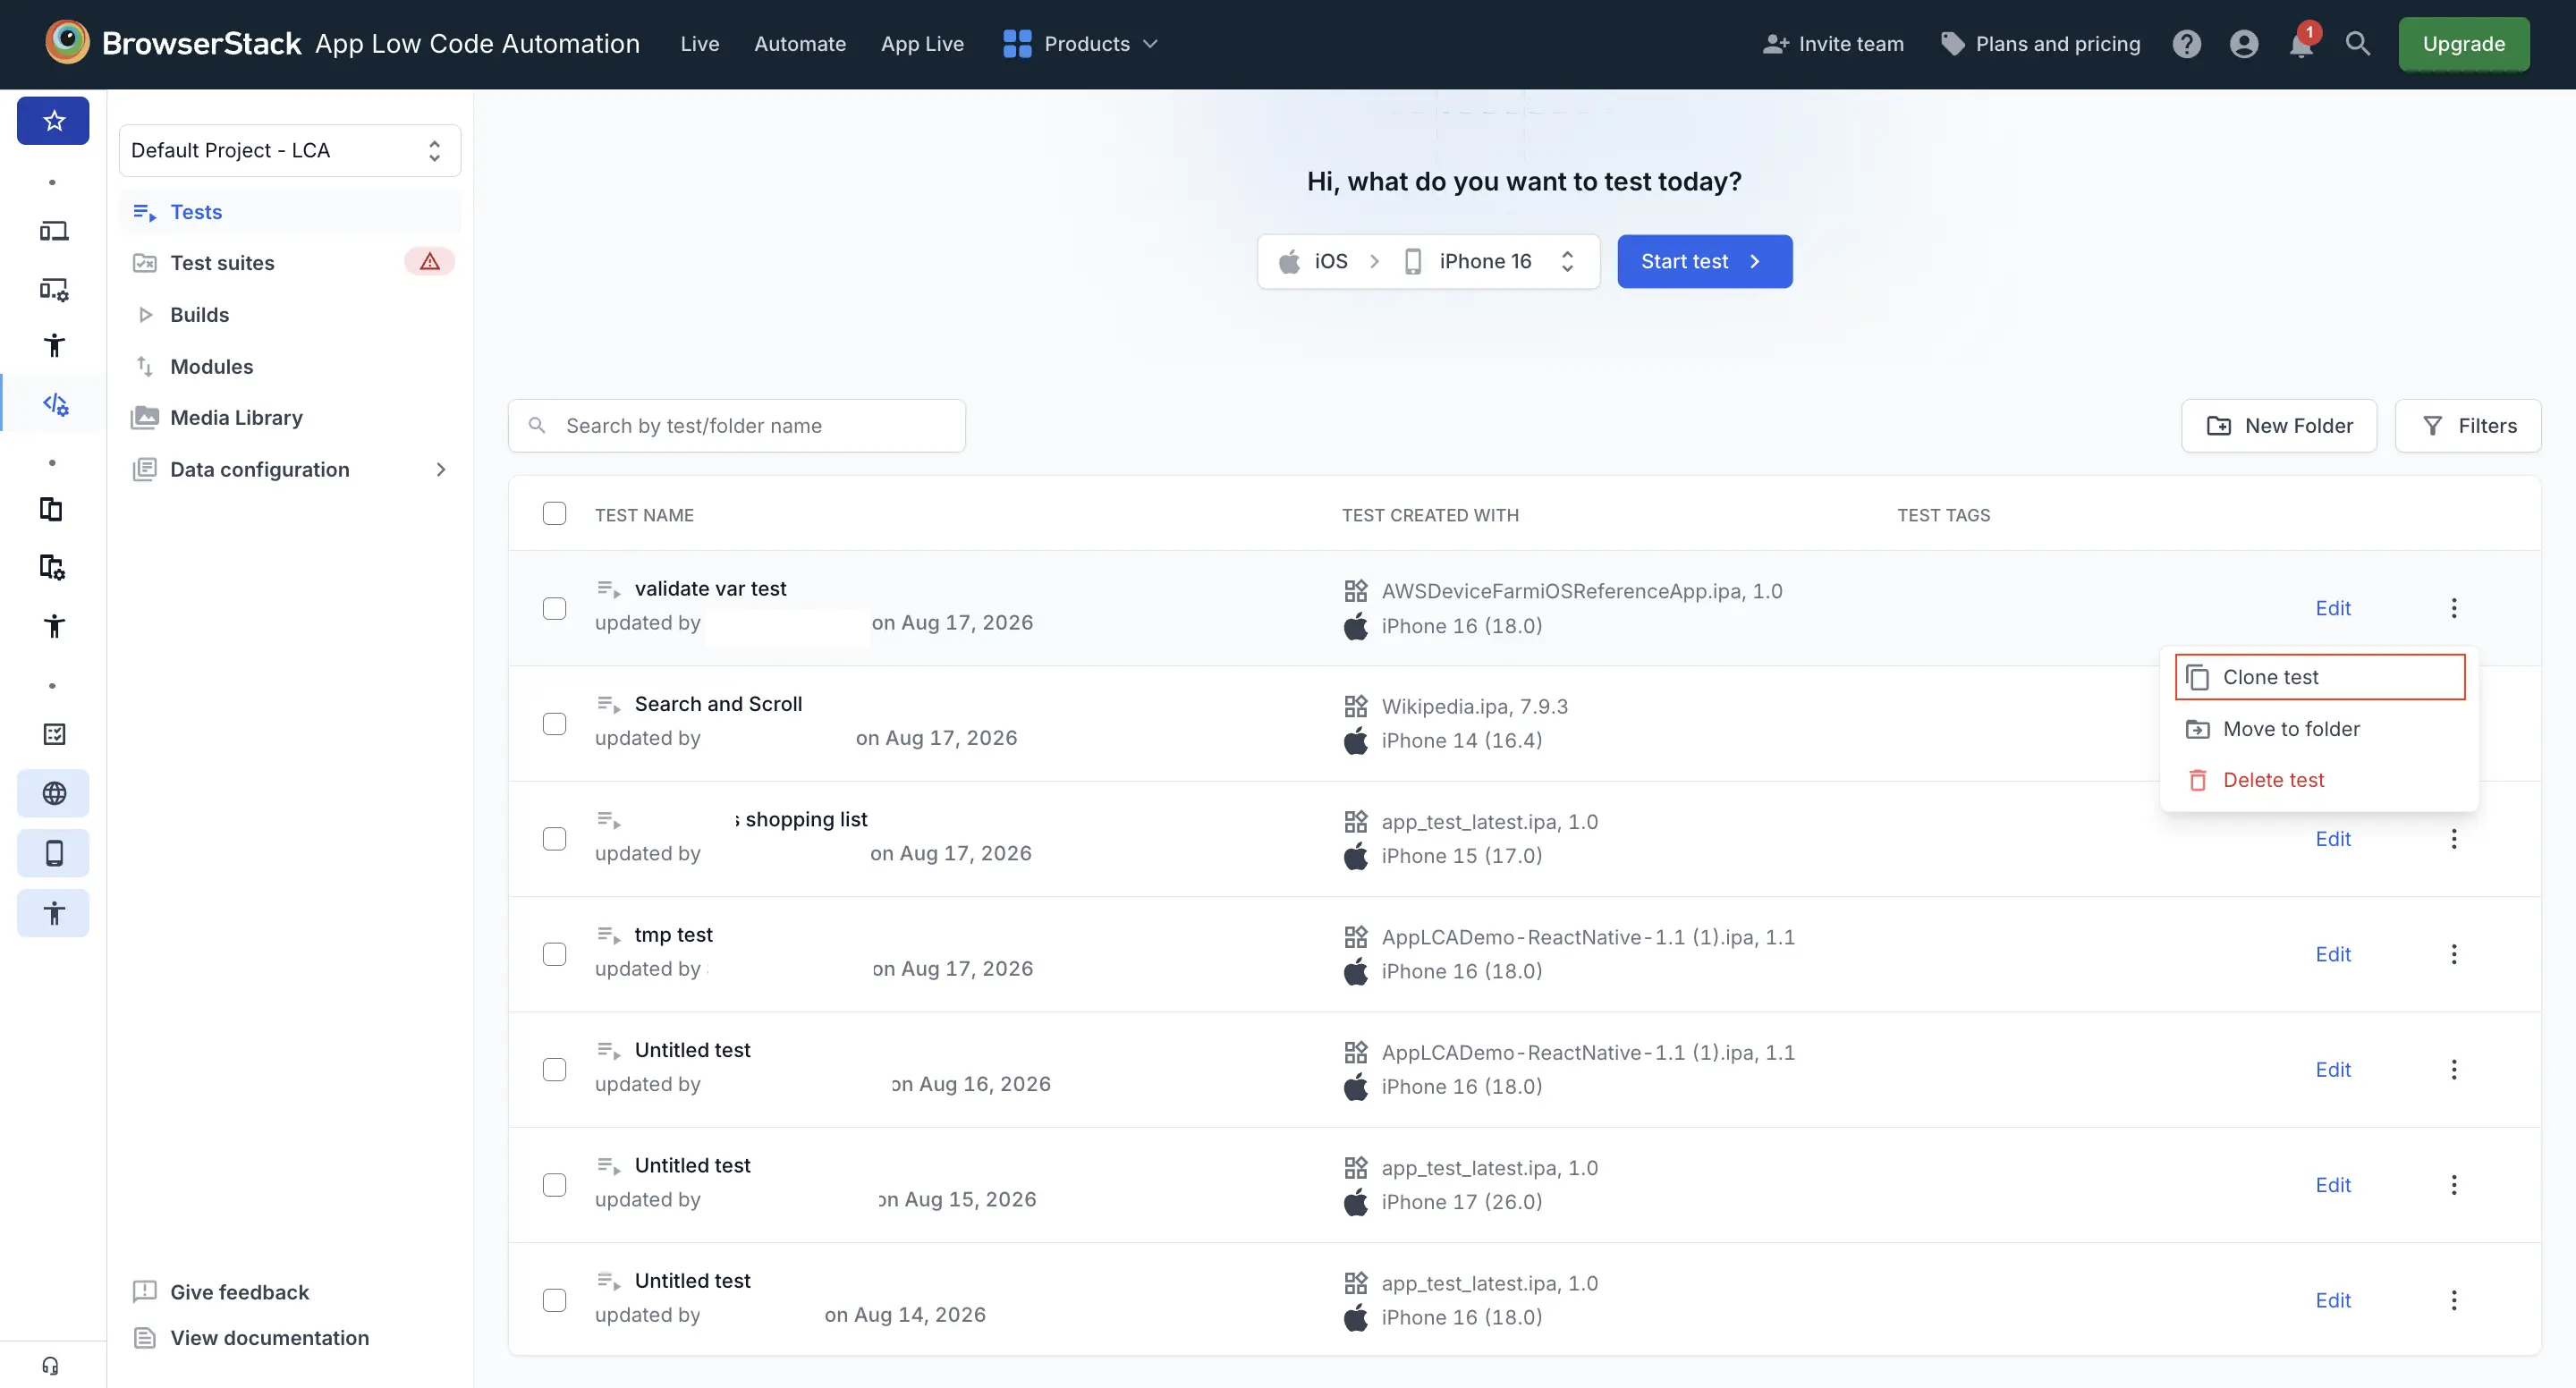
Enter a name for the test in the Clone test dialog.
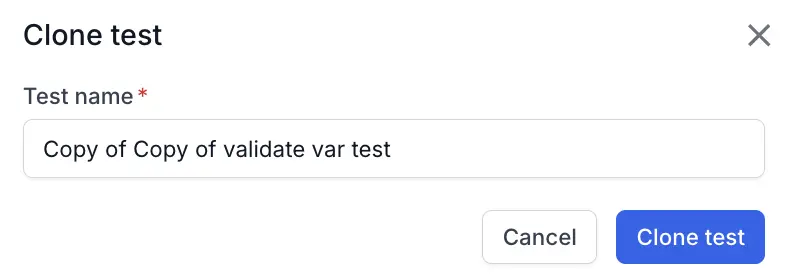
Click Clone test. A confirmation message appears, and the cloned test is added to the tests list.
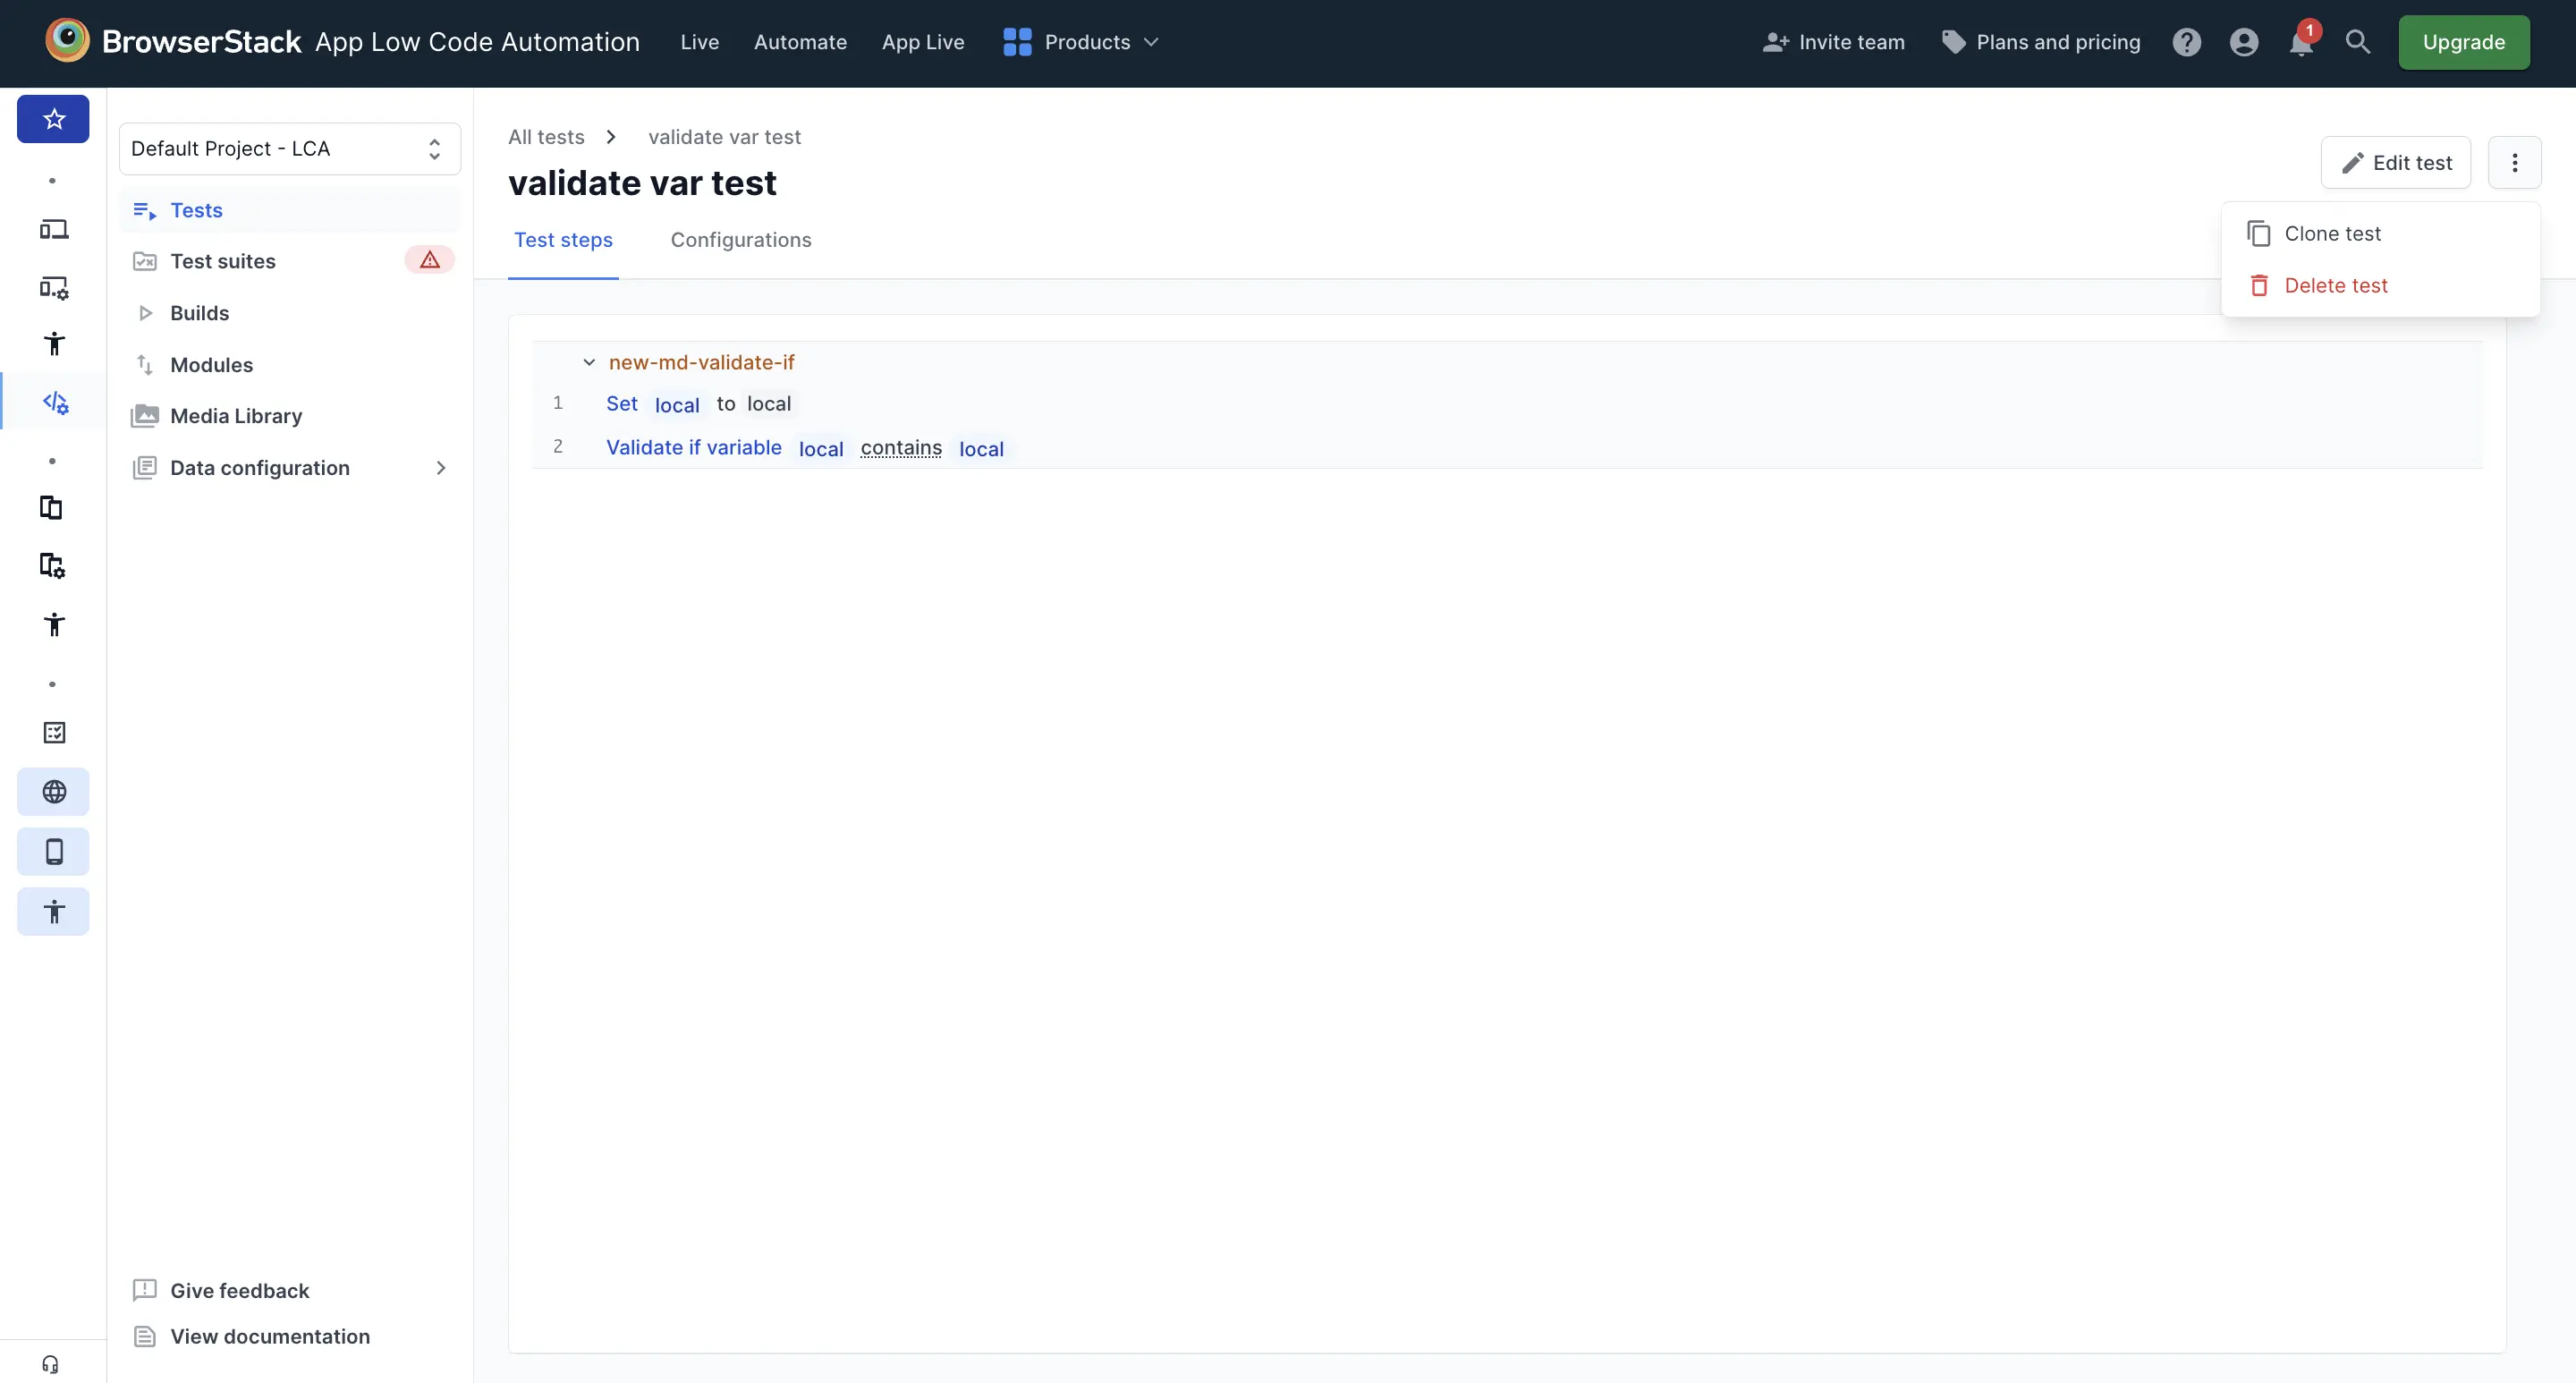
You can also clone a test from within the test itself by opening the test and selecting Clone test from the ︙ menu.
We're sorry to hear that. Please share your feedback so we can do better
Contact our Support team for immediate help while we work on improving our docs.
We're continuously improving our docs. We'd love to know what you liked
We're sorry to hear that. Please share your feedback so we can do better
Contact our Support team for immediate help while we work on improving our docs.
We're continuously improving our docs. We'd love to know what you liked
Thank you for your valuable feedback!