
 Join our Discord
Customize test execution with blocks
Customize how the tests in a test suite run by grouping them into blocks, managing dependencies, and controlling execution order in App Low Code Automation.
Use blocks to organize your test suite into logical groups, manage dependencies, and control execution order. Group related tests and set dependencies so tests run in a specific order and only if prerequisite blocks pass. This approach improves reliability and maintainability. Blocks help you:
- Organize tests into logical groups.
- Control execution order and dependencies.
- Reduce flakiness by ensuring prerequisite tests run first.
Creating and managing blocks is available on App Low Code Automation Pro and higher plans.
How blocks run
The following rules govern how a suite with blocks runs:
| Rule | Behavior |
|---|---|
| Block order | Blocks run one after another, in the order listed. A block starts only after every test in the previous block finishes. |
| Tests in a block | Run in parallel or in sequence, based on that block’s setting. |
| Block failure | A block fails if any test in it fails. In sequence mode, the remaining tests in the block still run. |
| Stop execution | Tests already running finish, and all tests in the blocks that follow are marked Skipped. |
| Multiple configurations | A failure on any device or OS combination skips the subsequent blocks for all combinations. |
Blocks run the same way for manual runs, scheduled runs, and runs triggered from CI.
Create blocks
To create blocks in your test suite:
On the Test suites page, click + Create test suite.
- Enter a name and description for the test suite.
- Click Select tests.
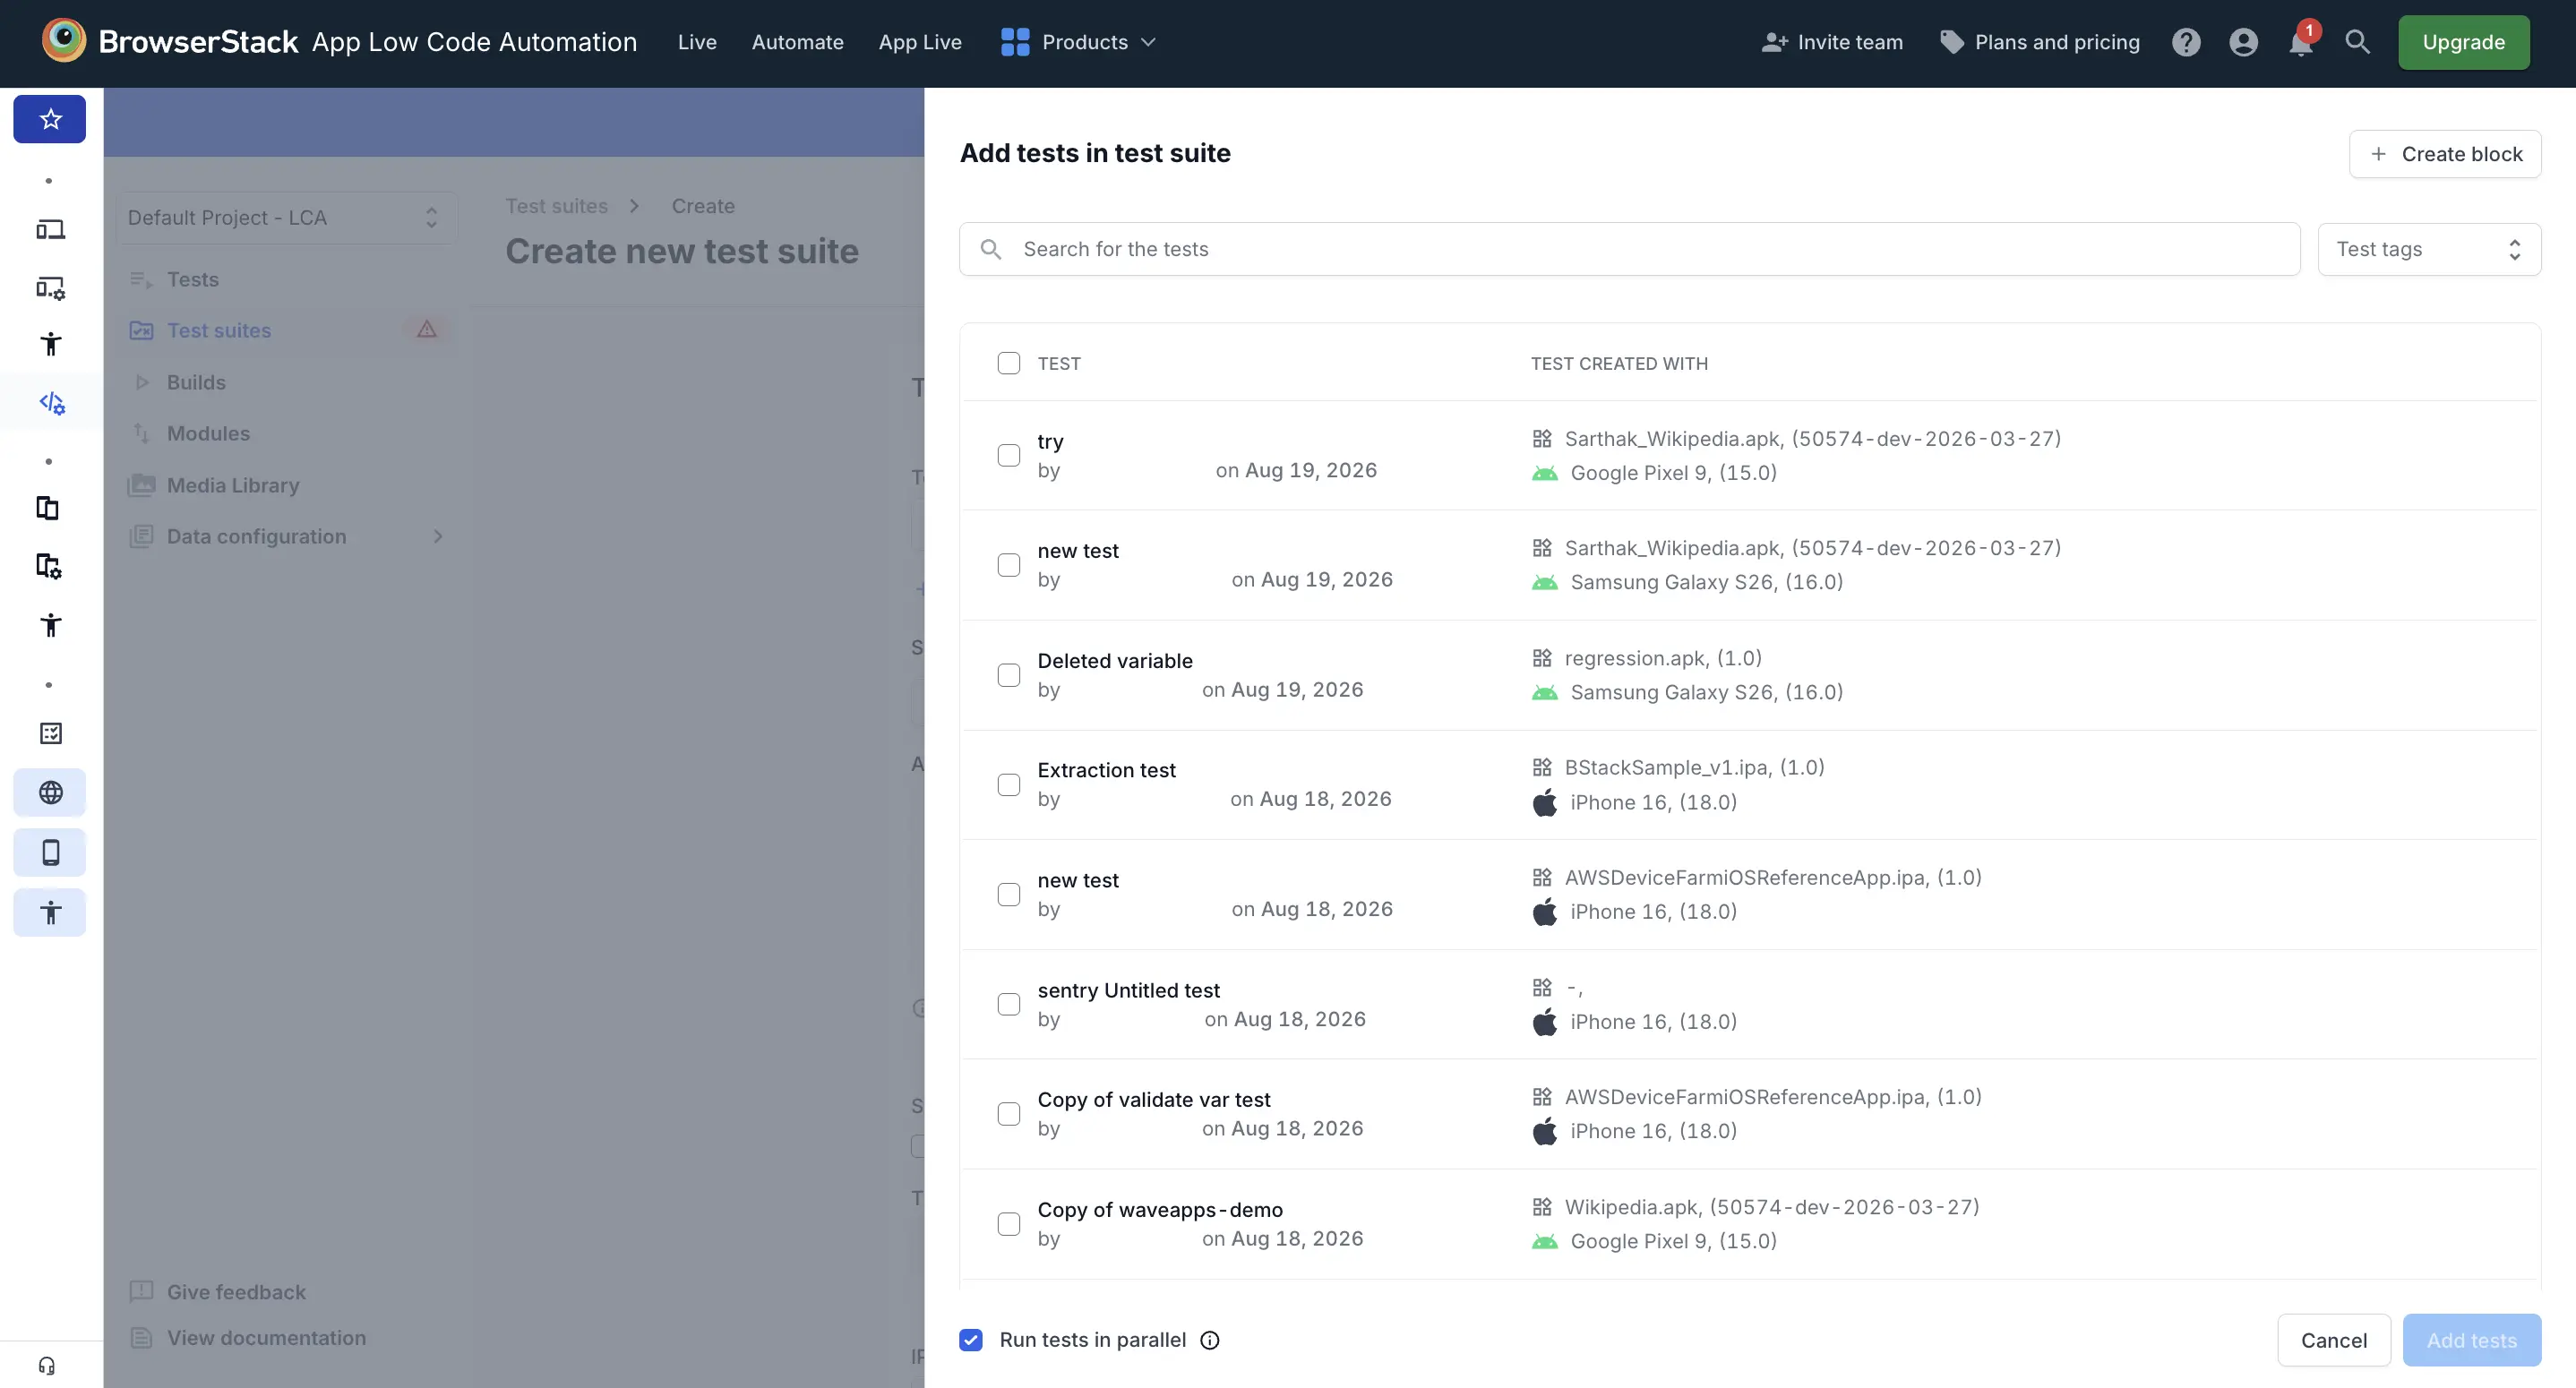
In the test selection pane, select the tests you want to include, then click + Create block.
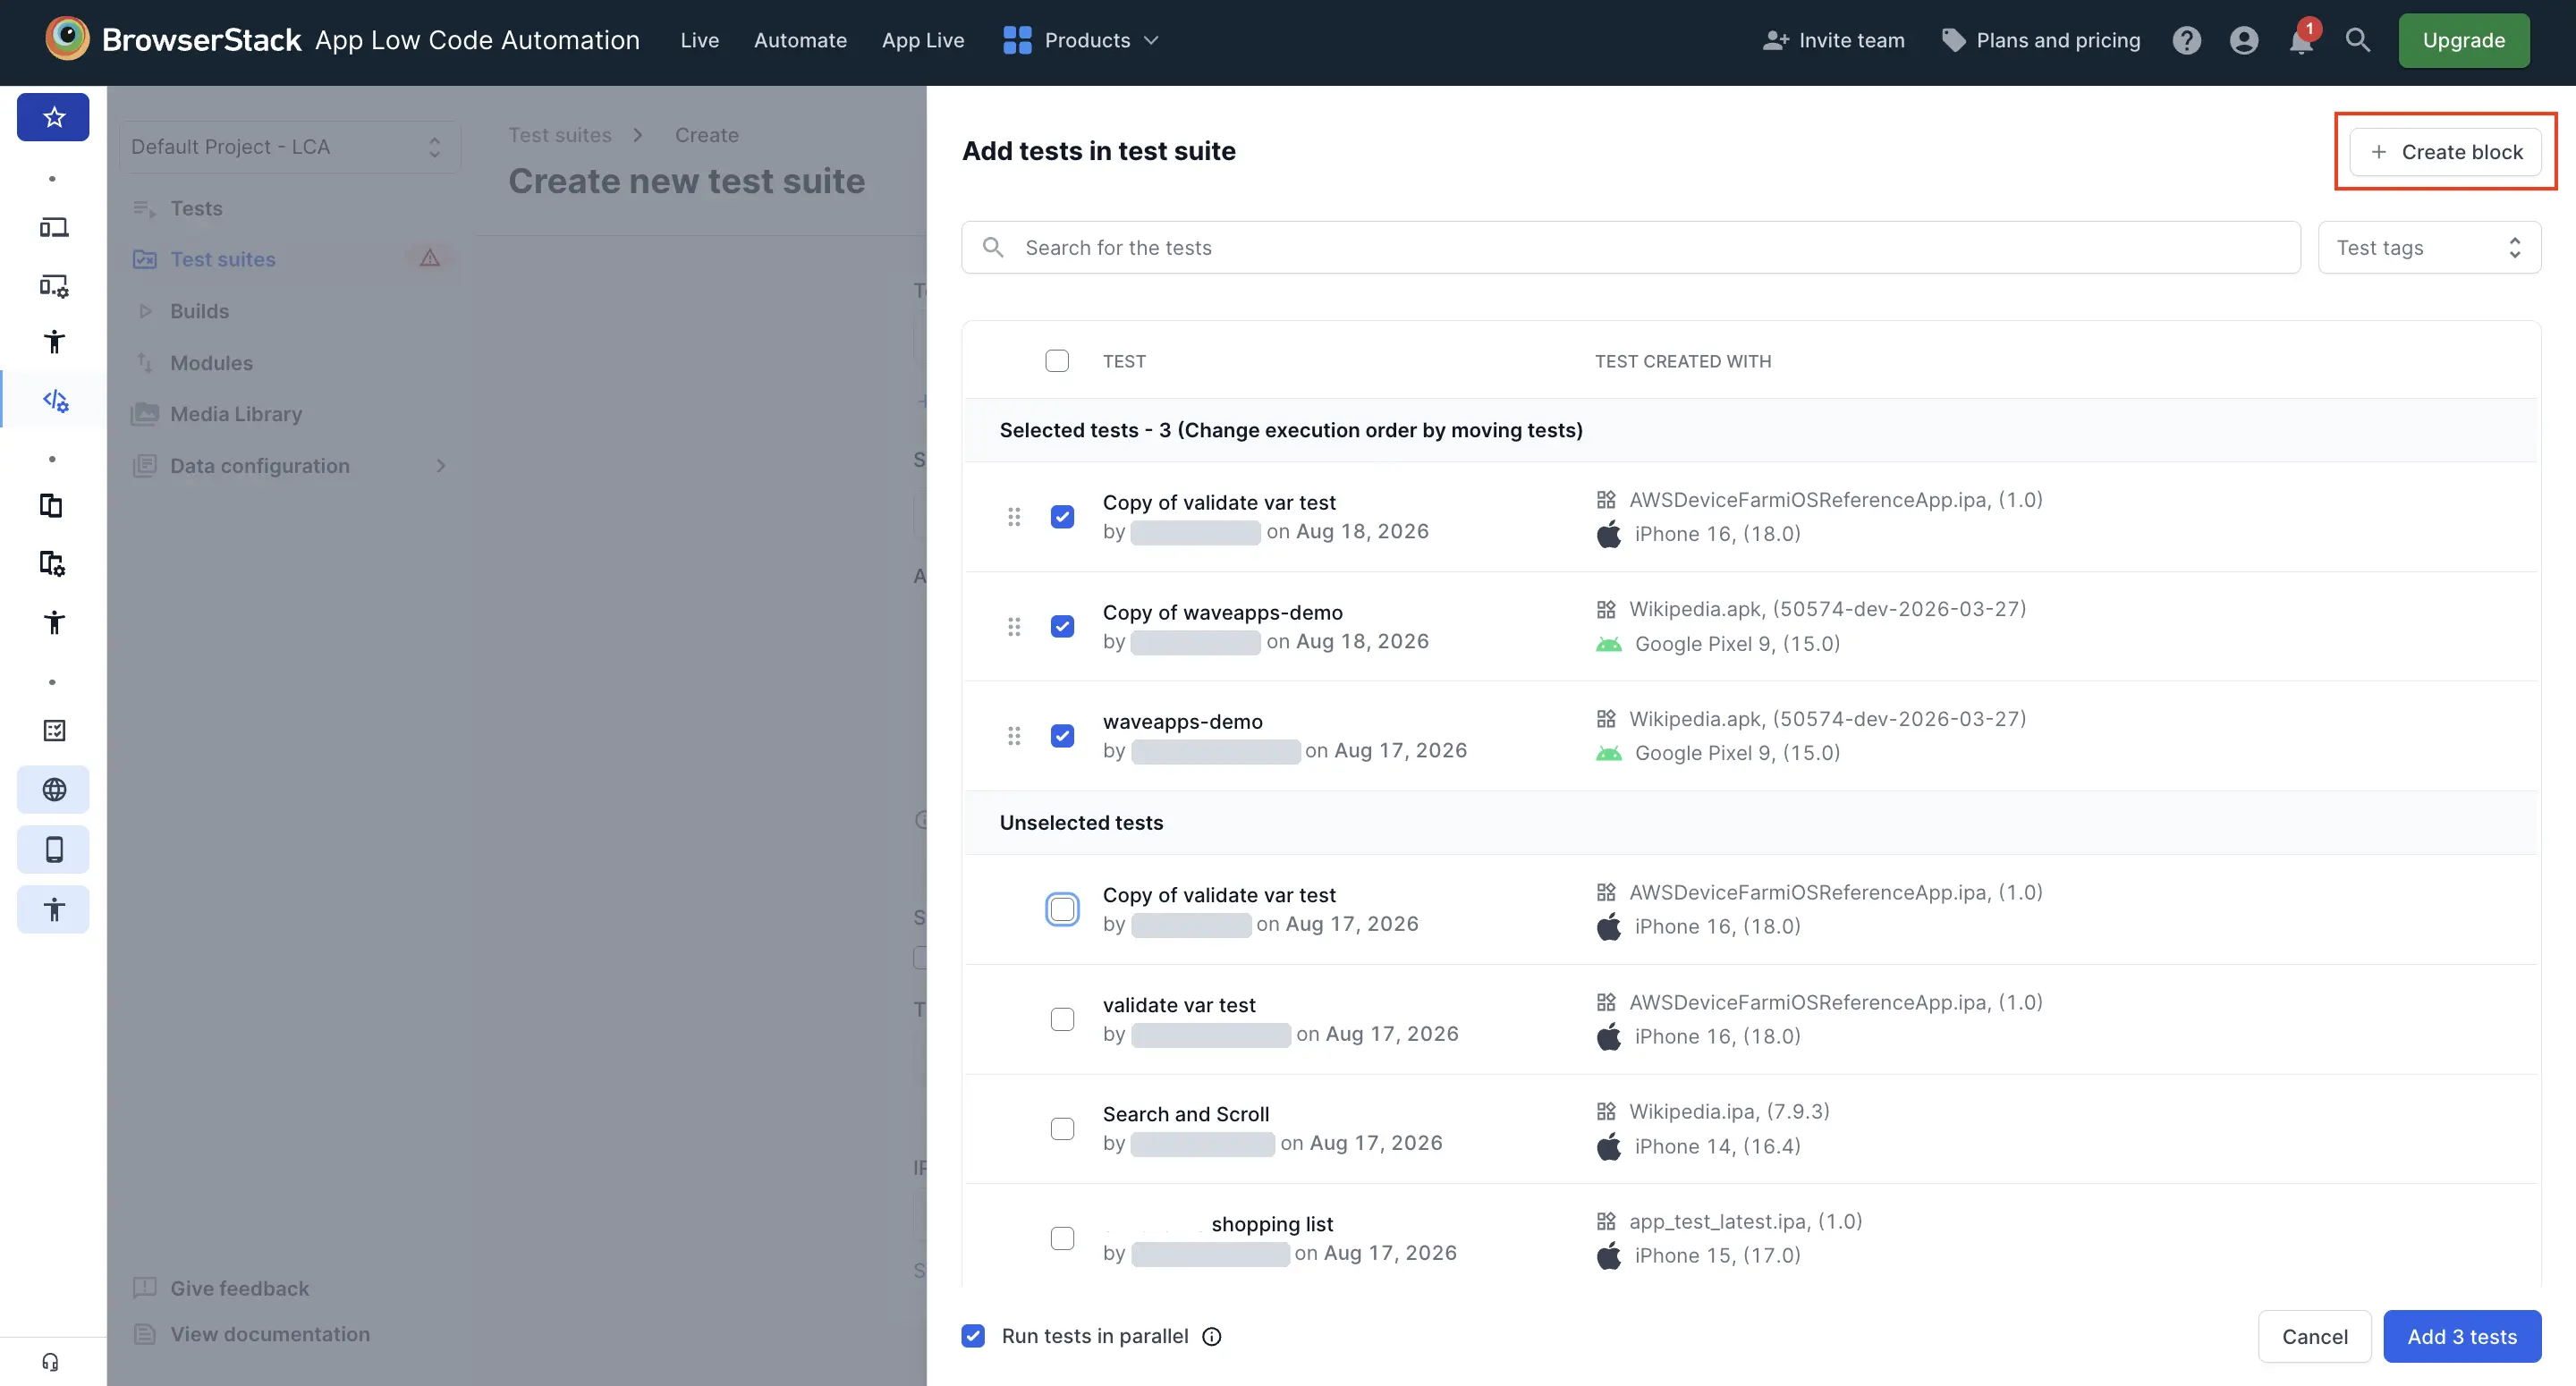
Your selected tests move into Block 1. All tests you add to the suite must be placed inside a block, and a test can belong to only one block in a suite.
A test suite with blocks must have at least two blocks, with at least one test in each block. Until then, Save test suite stays disabled.
Add new blocks and tests to existing blocks
To add new blocks and tests to existing blocks:
Click + Add block.
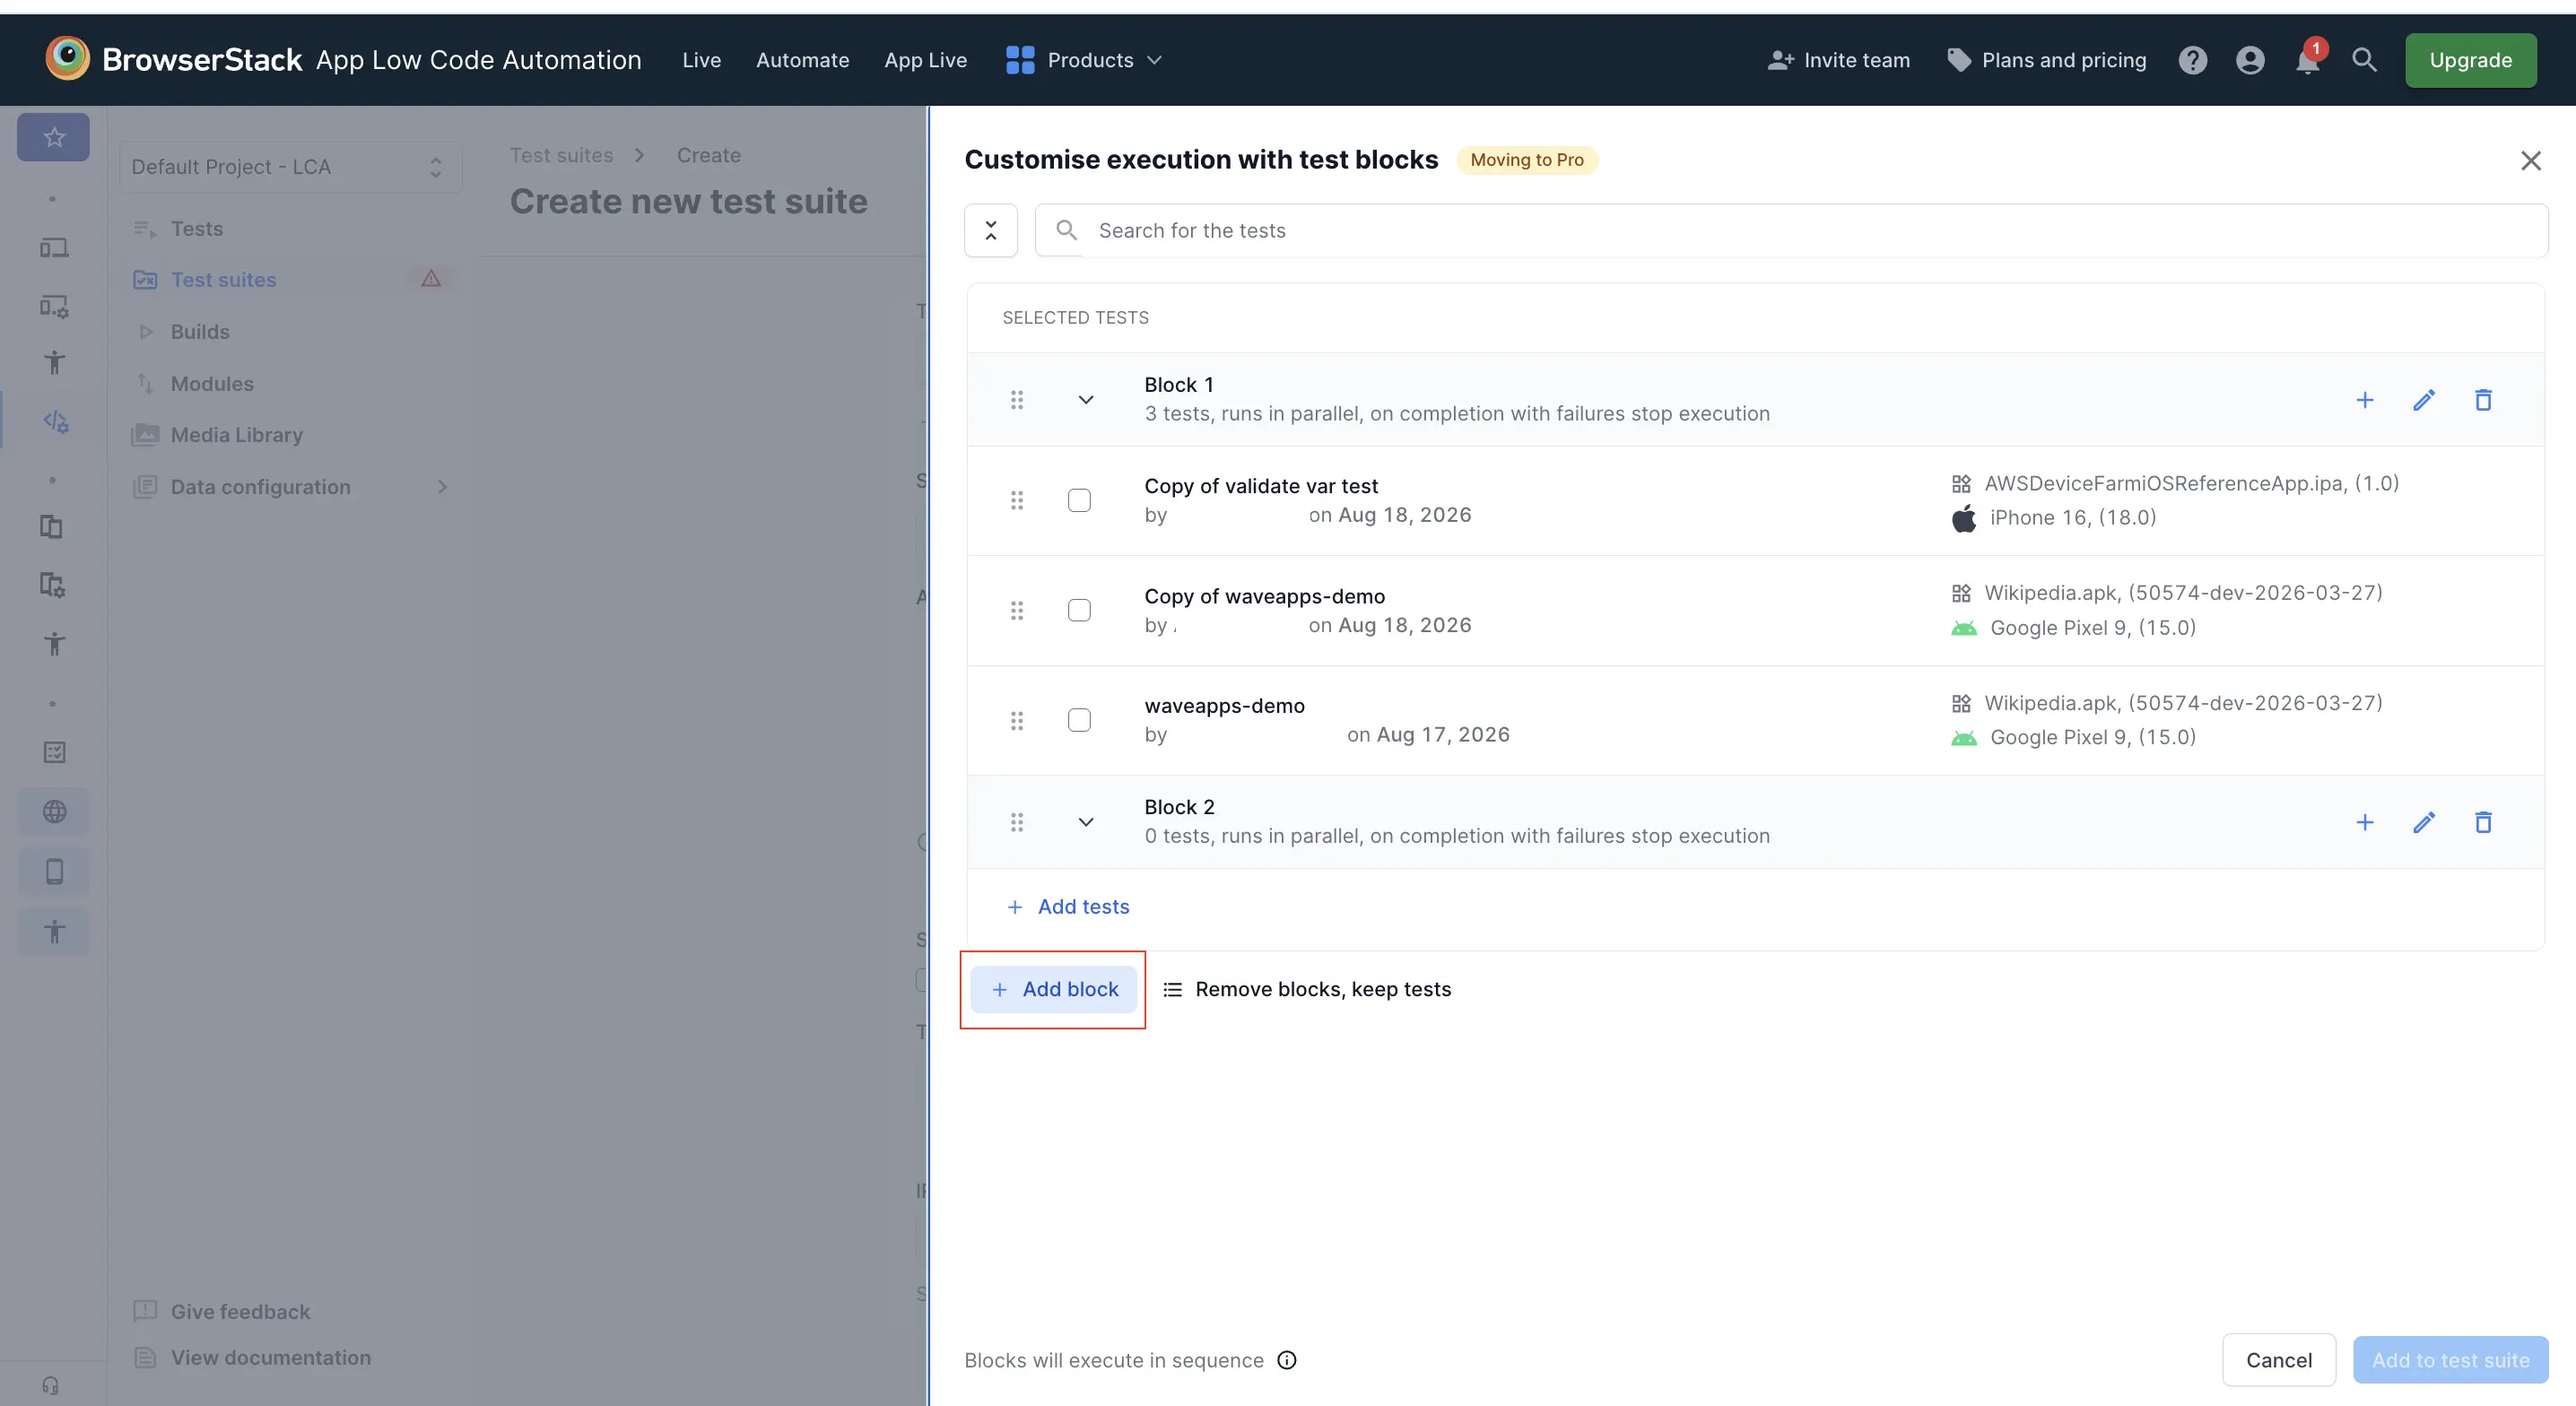
Click + Add tests and select the tests you want to include in the block. To add more tests to an existing block, click the + icon next to the block. Click Add tests to block to confirm your selection.
Repeat these steps to add more blocks or tests as needed.
Move tests and blocks
To move tests or blocks, hover over the test or block you want to move. You can do the following:
- Drag and drop a test to a different position in the same block.
- Drag and drop a block to a new position in the suite.
- Drag and drop a test from one block to another.
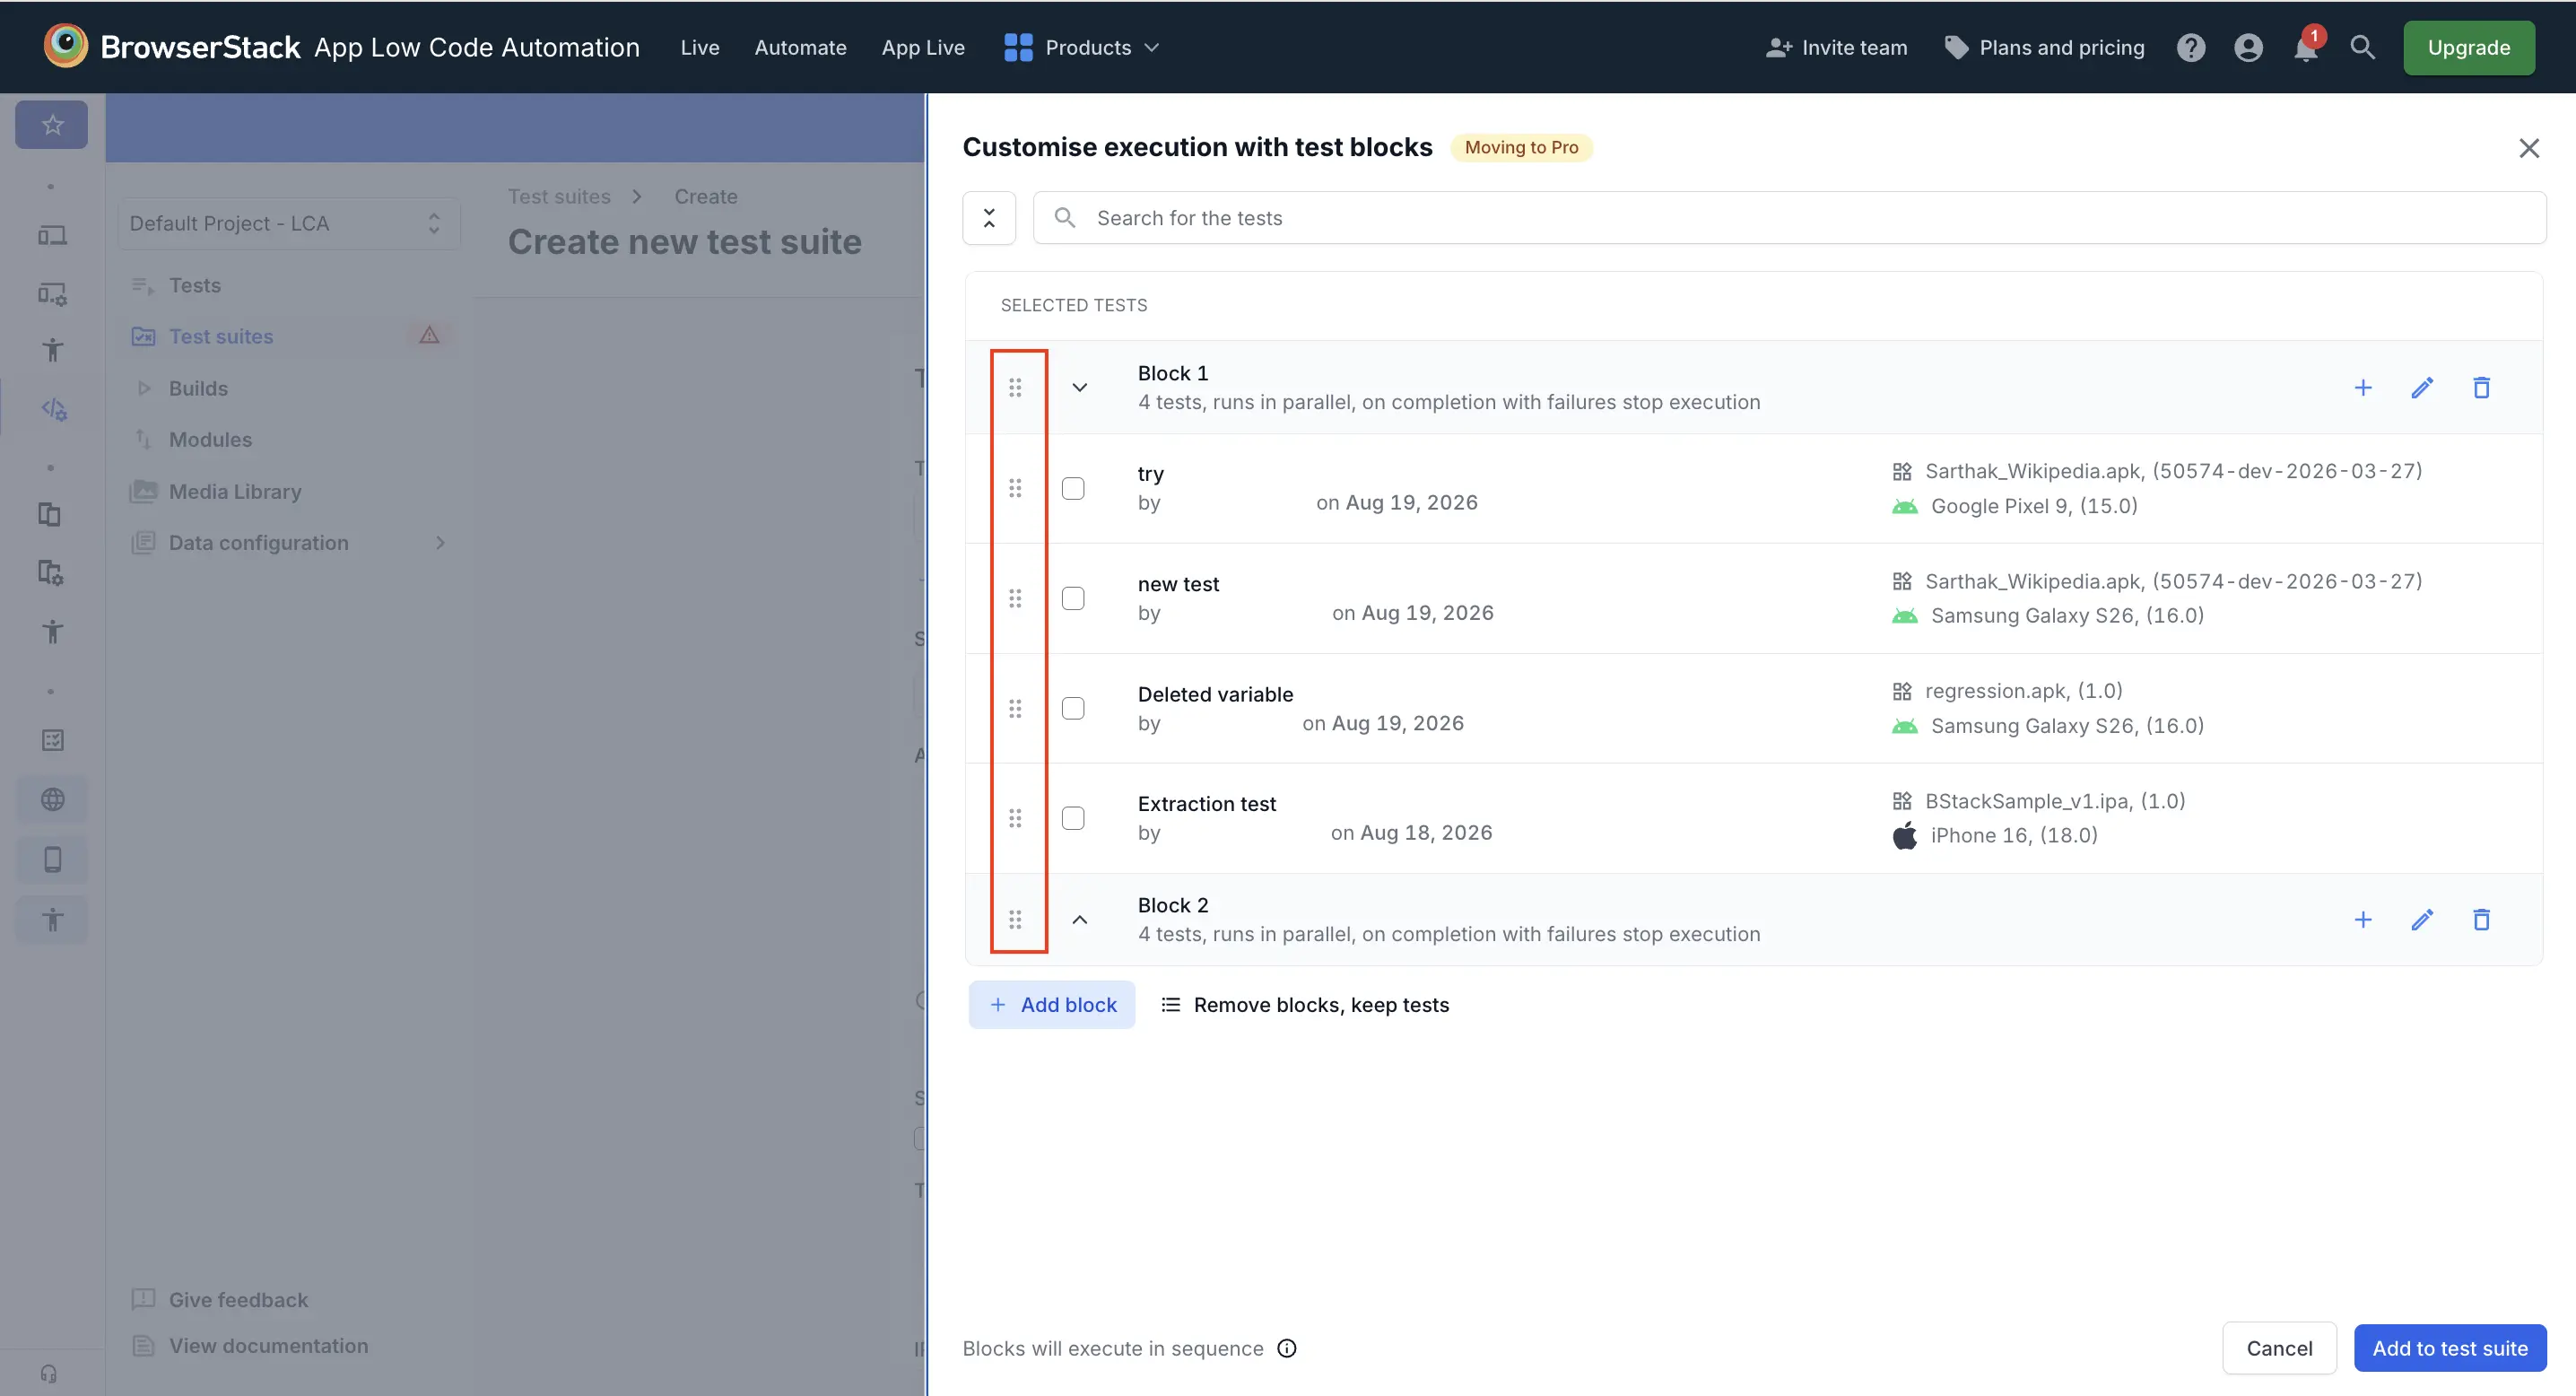
To move several tests together, select their checkboxes and drag the selection into the target block.
Edit a block
To edit a block in your test suite:
Click the Edit icon next to the block name.
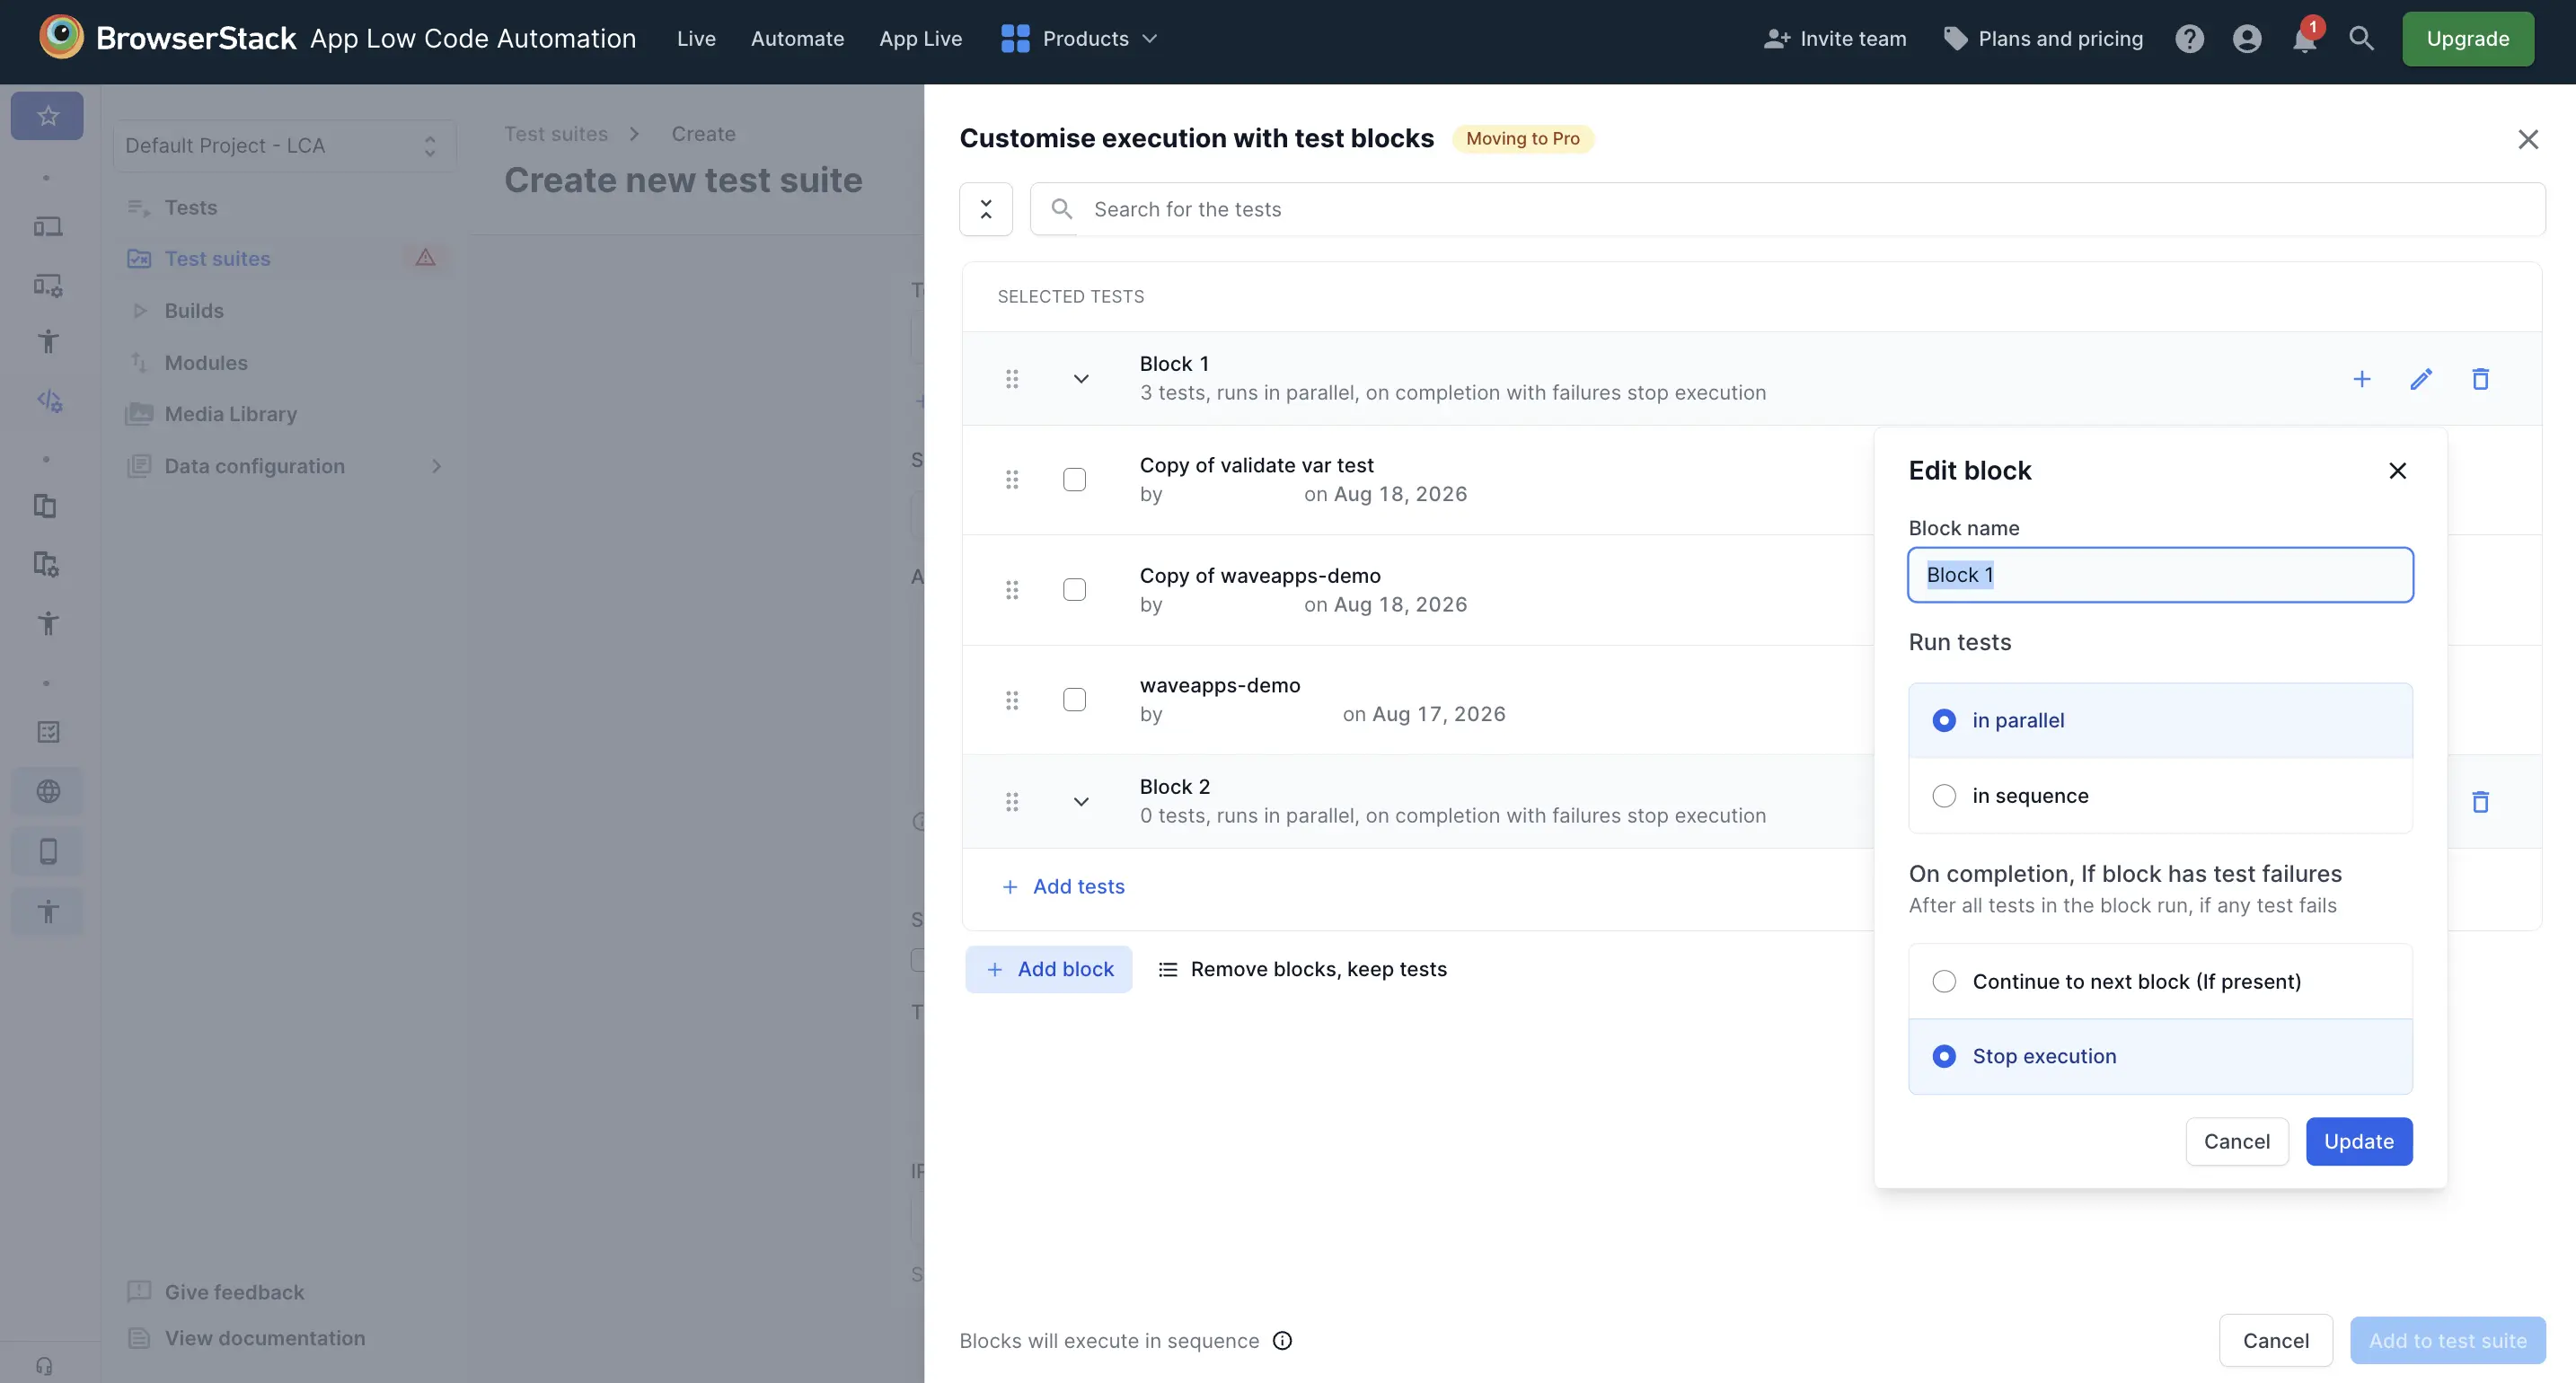
Update the block name as needed.
Choose to run tests in parallel or in sequence. This setting applies only at the block level:
- in parallel: Runs multiple tests inside the block at the same time for faster execution. This option is only available if your plan includes more than one parallel execution.
- in sequence: Runs tests inside the block one after another for better isolation.
Set what happens if the block has test failures:
- Continue to next block (If present): Runs all blocks, even if some fail. Use for a complete test overview.
- Stop execution: If a test in this block fails, the blocks after this one do not run. All tests in those blocks are marked Skipped.
Click Update.
When you finish creating and organizing blocks and tests, click Add to test suite.
Remove blocks and keep tests
To run the suite as a flat list of tests again, click Remove blocks, keep tests, and then click Remove blocks to confirm.
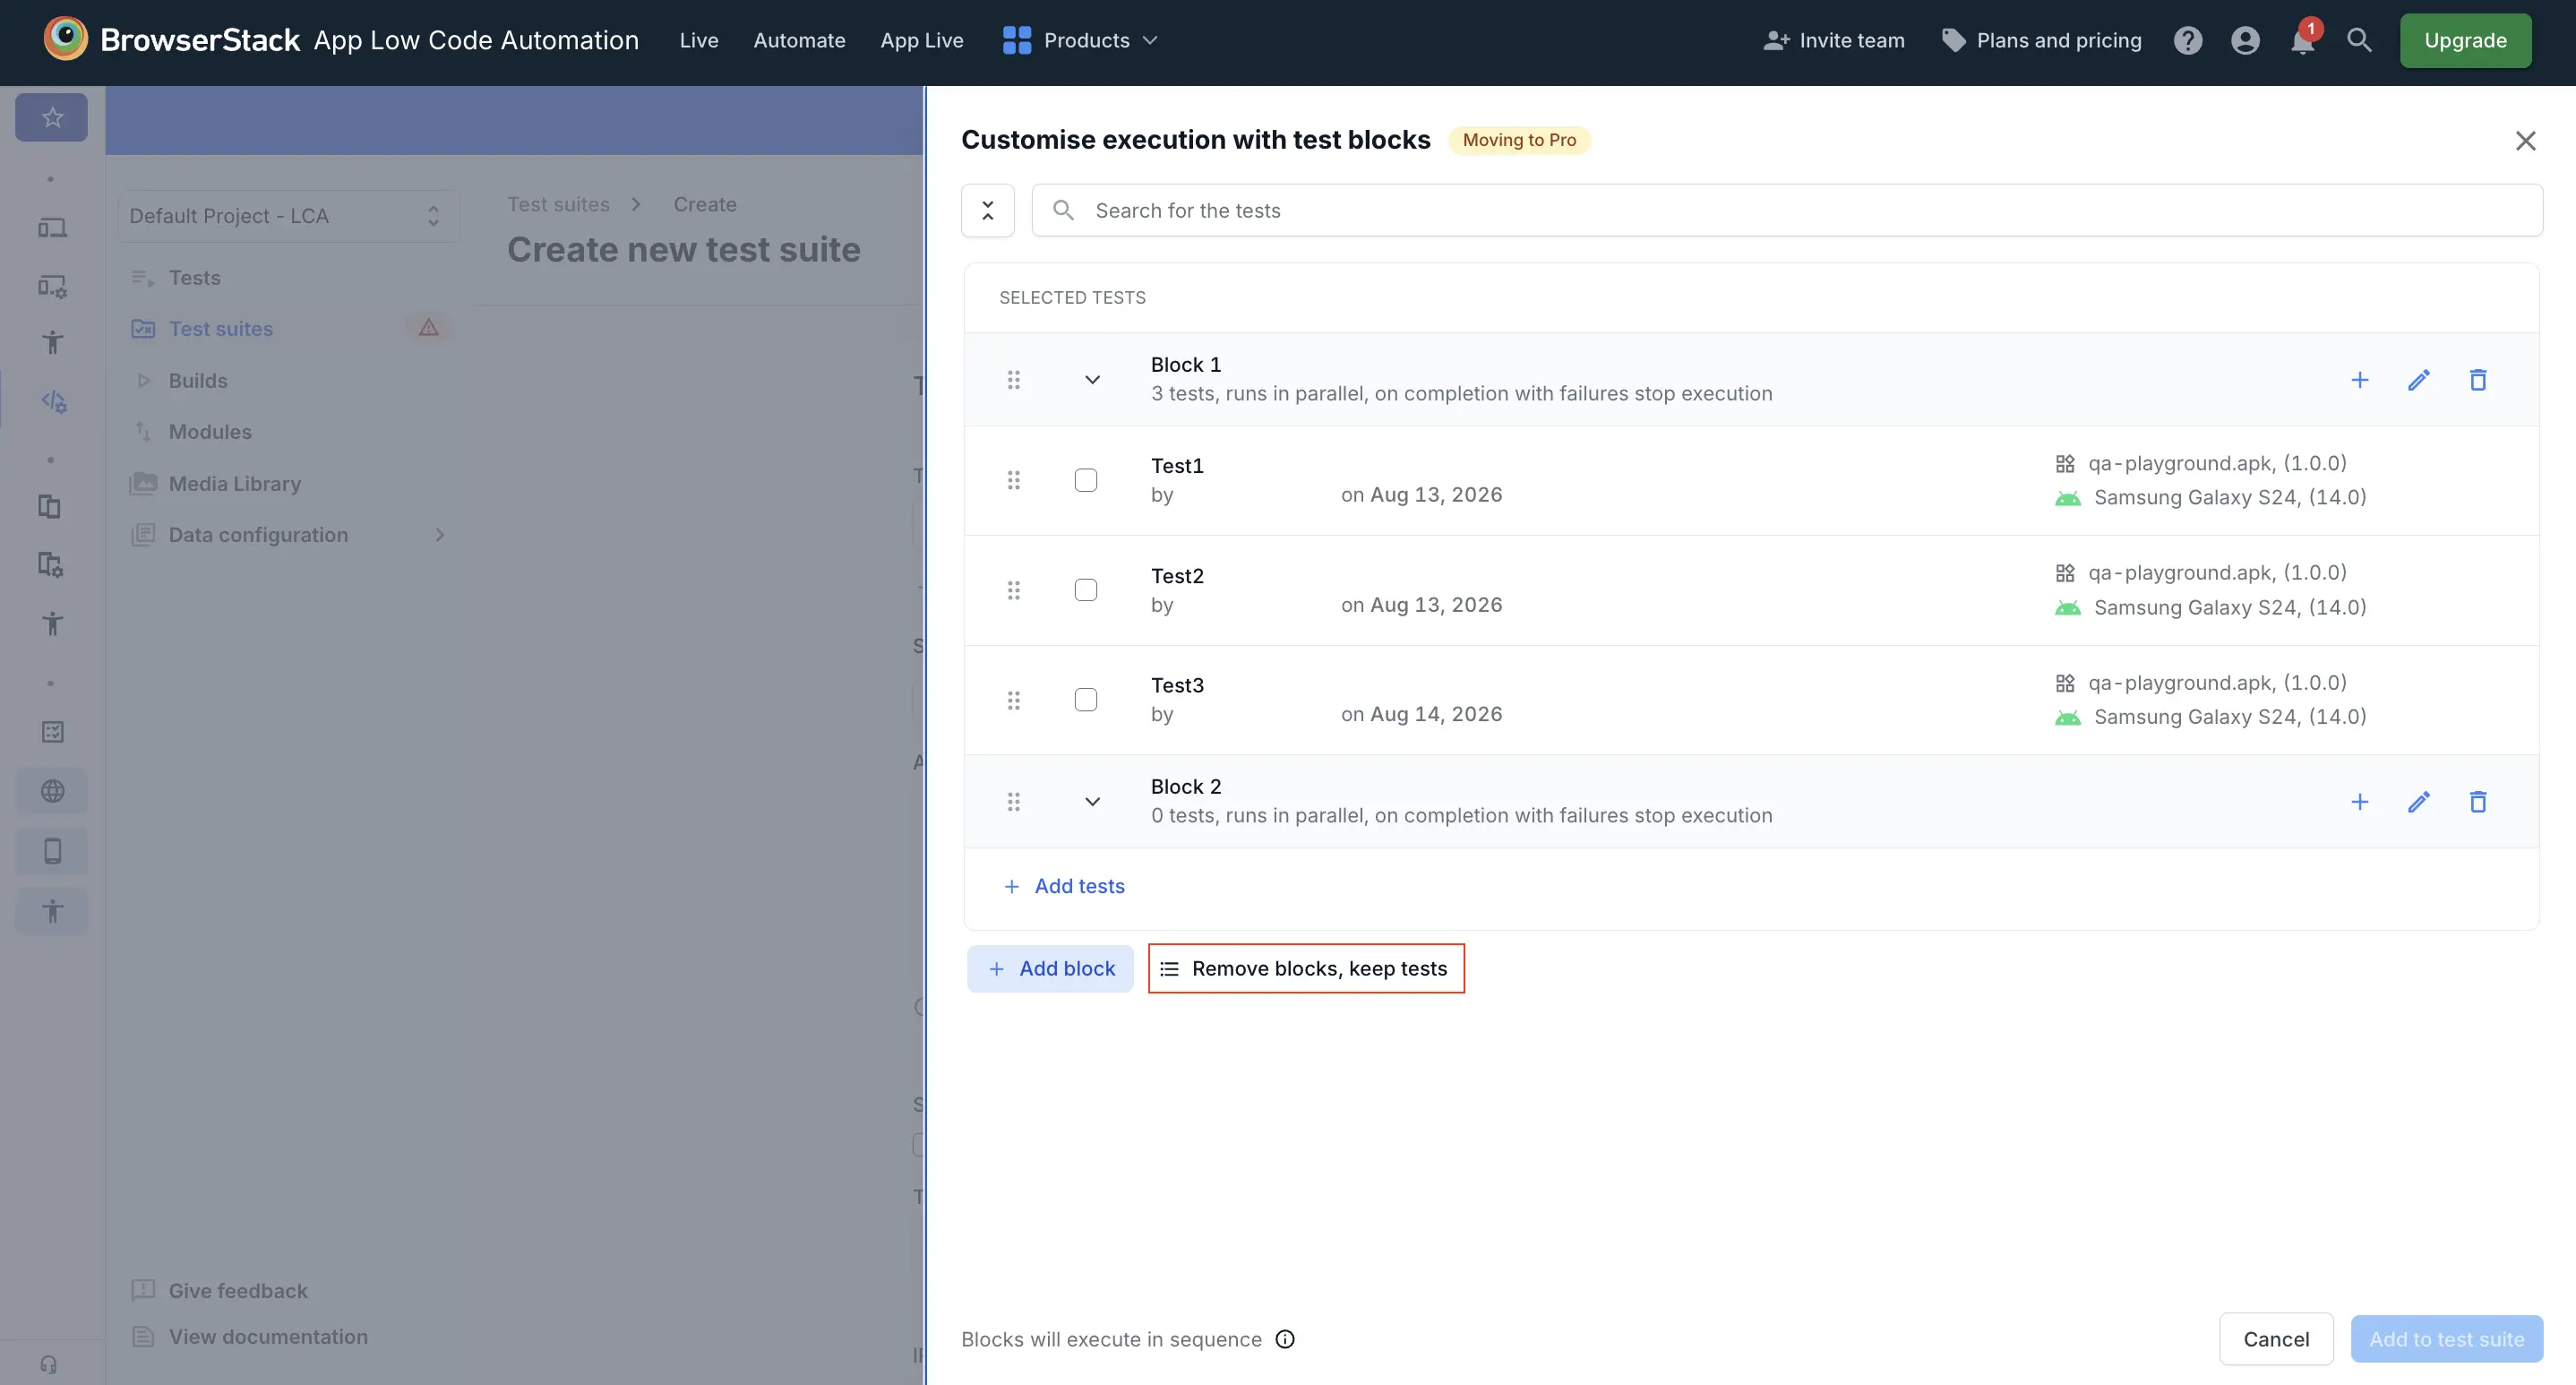
The blocks are removed and the tests stay in the suite in the same order. The suite then runs using the suite-level settings, including the Run tests in parallel option.
Delete a block
To delete a block in your test suite, click the Delete icon next to the block, and then confirm the deletion.
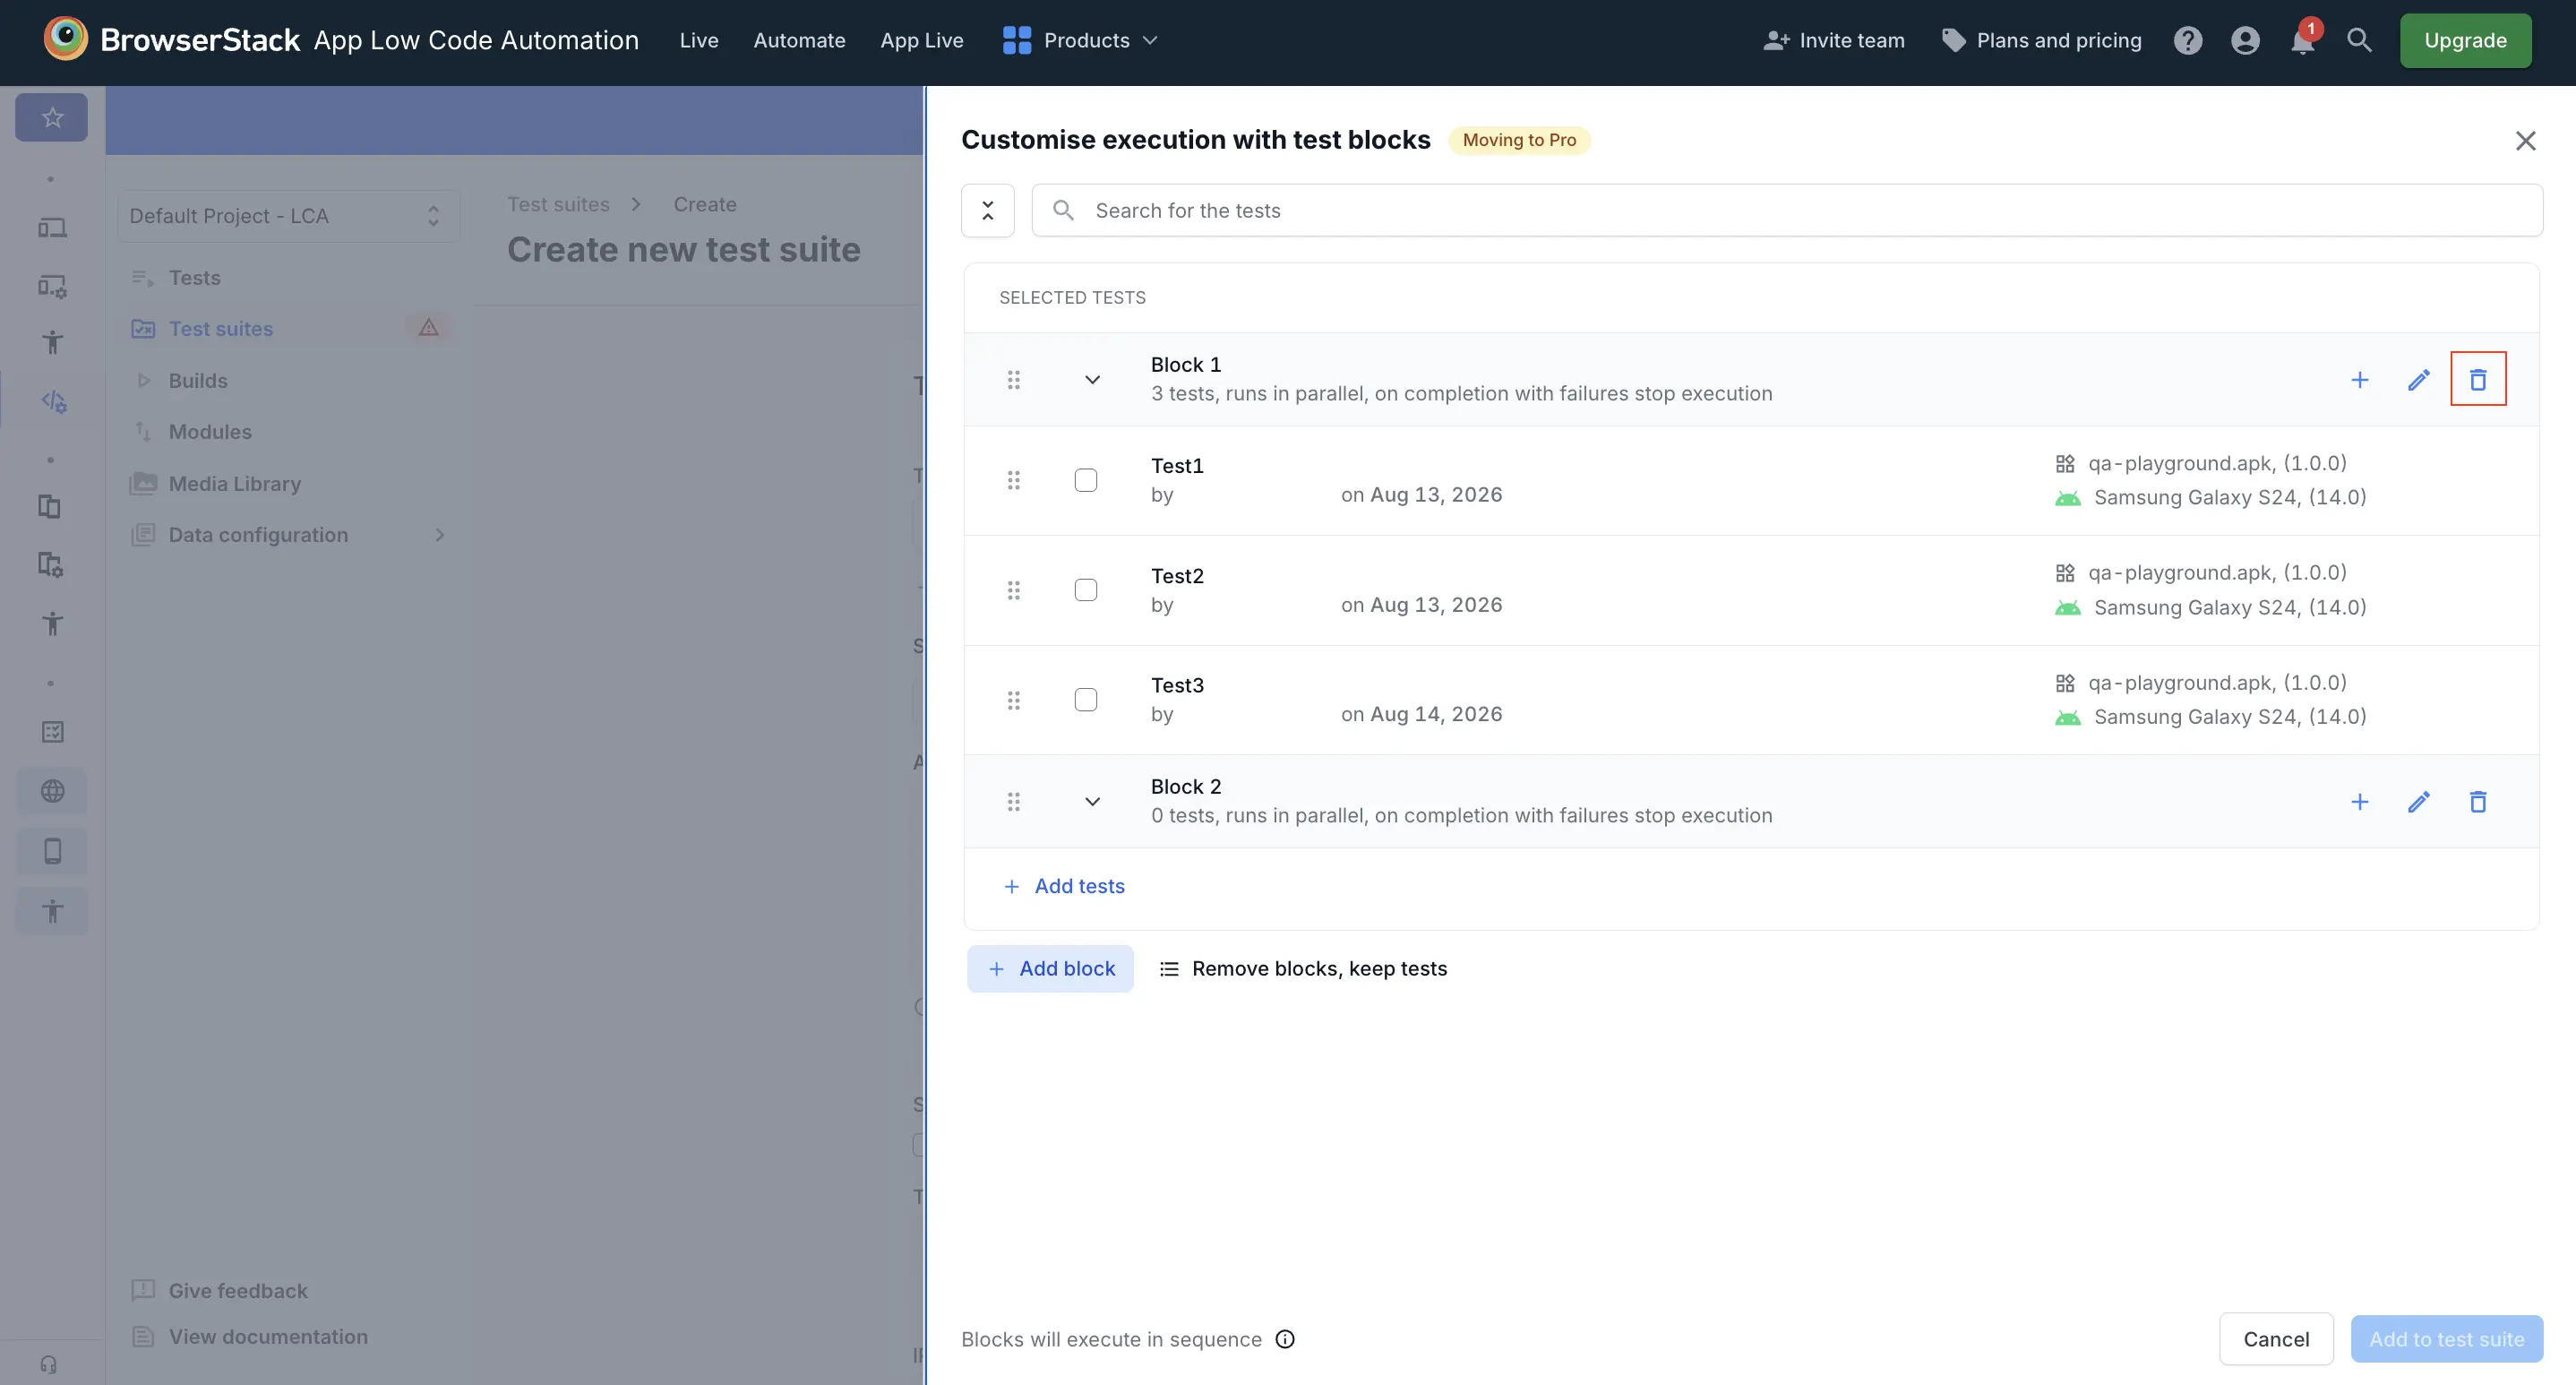
The tests in that block are removed from the suite selection. To keep them, move them to another block first.
Next steps
We're sorry to hear that. Please share your feedback so we can do better
Contact our Support team for immediate help while we work on improving our docs.
We're continuously improving our docs. We'd love to know what you liked
We're sorry to hear that. Please share your feedback so we can do better
Contact our Support team for immediate help while we work on improving our docs.
We're continuously improving our docs. We'd love to know what you liked
Thank you for your valuable feedback!