Get started with Single sign-on (SSO)
Configure Single sign-on with an identity provider to control access.
Single sign-on (SSO) ensures a centralized and secure way of controlling access to BrowserStack. This means that a single set of credentials can be used by your users to access multiple different applications. When you integrate BrowserStack with your Identity Provider, you can:
- Control access to BrowserStack via your Identity Provider (IdP).
- Allow your users to log in to BrowserStack with their IdP accounts.
- Manage your accounts in one central location - the IdP.
Supported Identity Providers
We support both IdP-initiated as well as SP-initiated SSO, which means that you can connect from your identity provider of choice directly into BrowserStack.
Permissions to set up SSO
User with Owner permissions can set up SSO on BrowserStack.
Select SSO authentication standard
Follow the steps below to get started with the SSO setup:
-
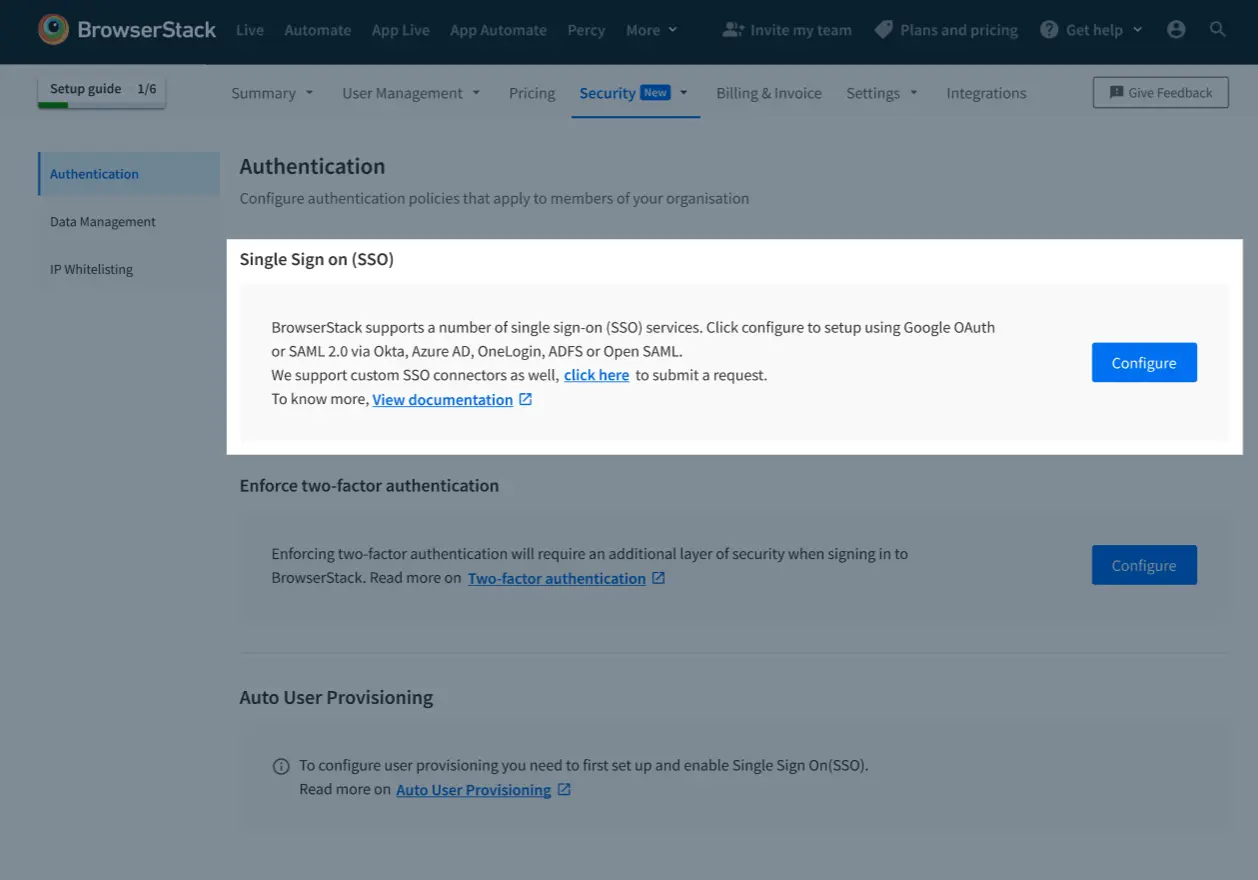
Go to Account > Security and select Authentication from the side-nav menu.
-
Under Single Sign On (SSO), click Configure.
-
Choose your authentication service:
| Standard | Description |
|---|---|
| SAML 2.0 | For SAML 2.0, currently you can setup connector with the following IdPs: - Okta - Azure AD - OneLogin - ADFS If your preferred IDP doesn’t have a connector with BrowserStack, you can use Open SAML |
| Google OAuth | Authentication via Google’s OAuth connector. Google OAuth |
If you are not able to connect using Open SAML Connector, please connect with your account manager to assist you in setting up a custom SSO connector.
Configure SSO with SAML
Post you have followed the instructions mentioned in the above section, you can follow the steps below to enable SSO using SAML 2.0:
1. Select Identity Provider (IdP)
We use SAML 2.0 which means you can use any Identity Provider that supports this protocol. We’ve also partnered with a couple of Identity Providers in offering third party connectors to BrowserStack. Configuration steps depend on the Identity Provider you use:
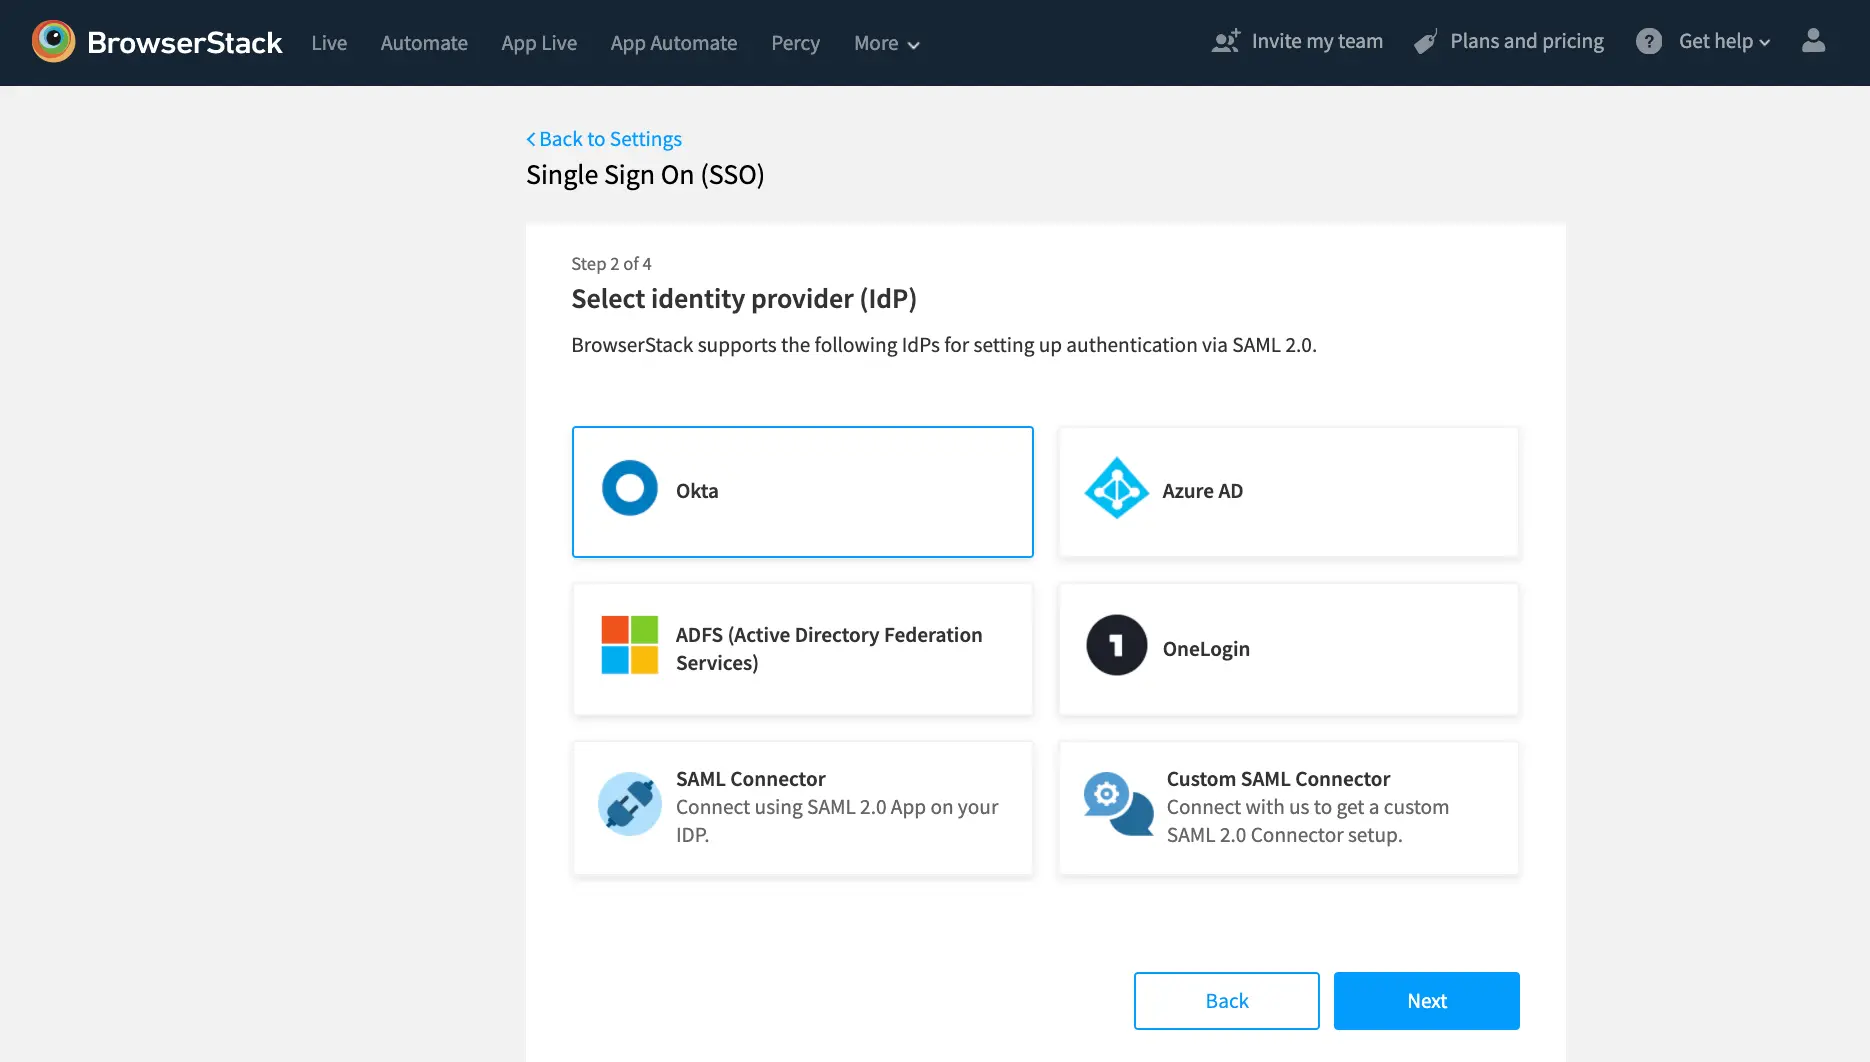
If your preferred identity provider doesn’t have a connector with BrowserStack, you can use our Open SAML connector option.
2. Set up SAML configuration
- Once you select the Identity Provider and click Next, you will be directed to configuration settings which are required to set up BrowserStack app on your IdP.
- Copy the settings(
ACS URLetc.) from BrowserStack and then fill the Entity ID, SSO URL, and Certificate fields (which you will get from your Identity Provider). - Please note that we require the NameID to contain the user’s email address.
3. Configure SSO settings
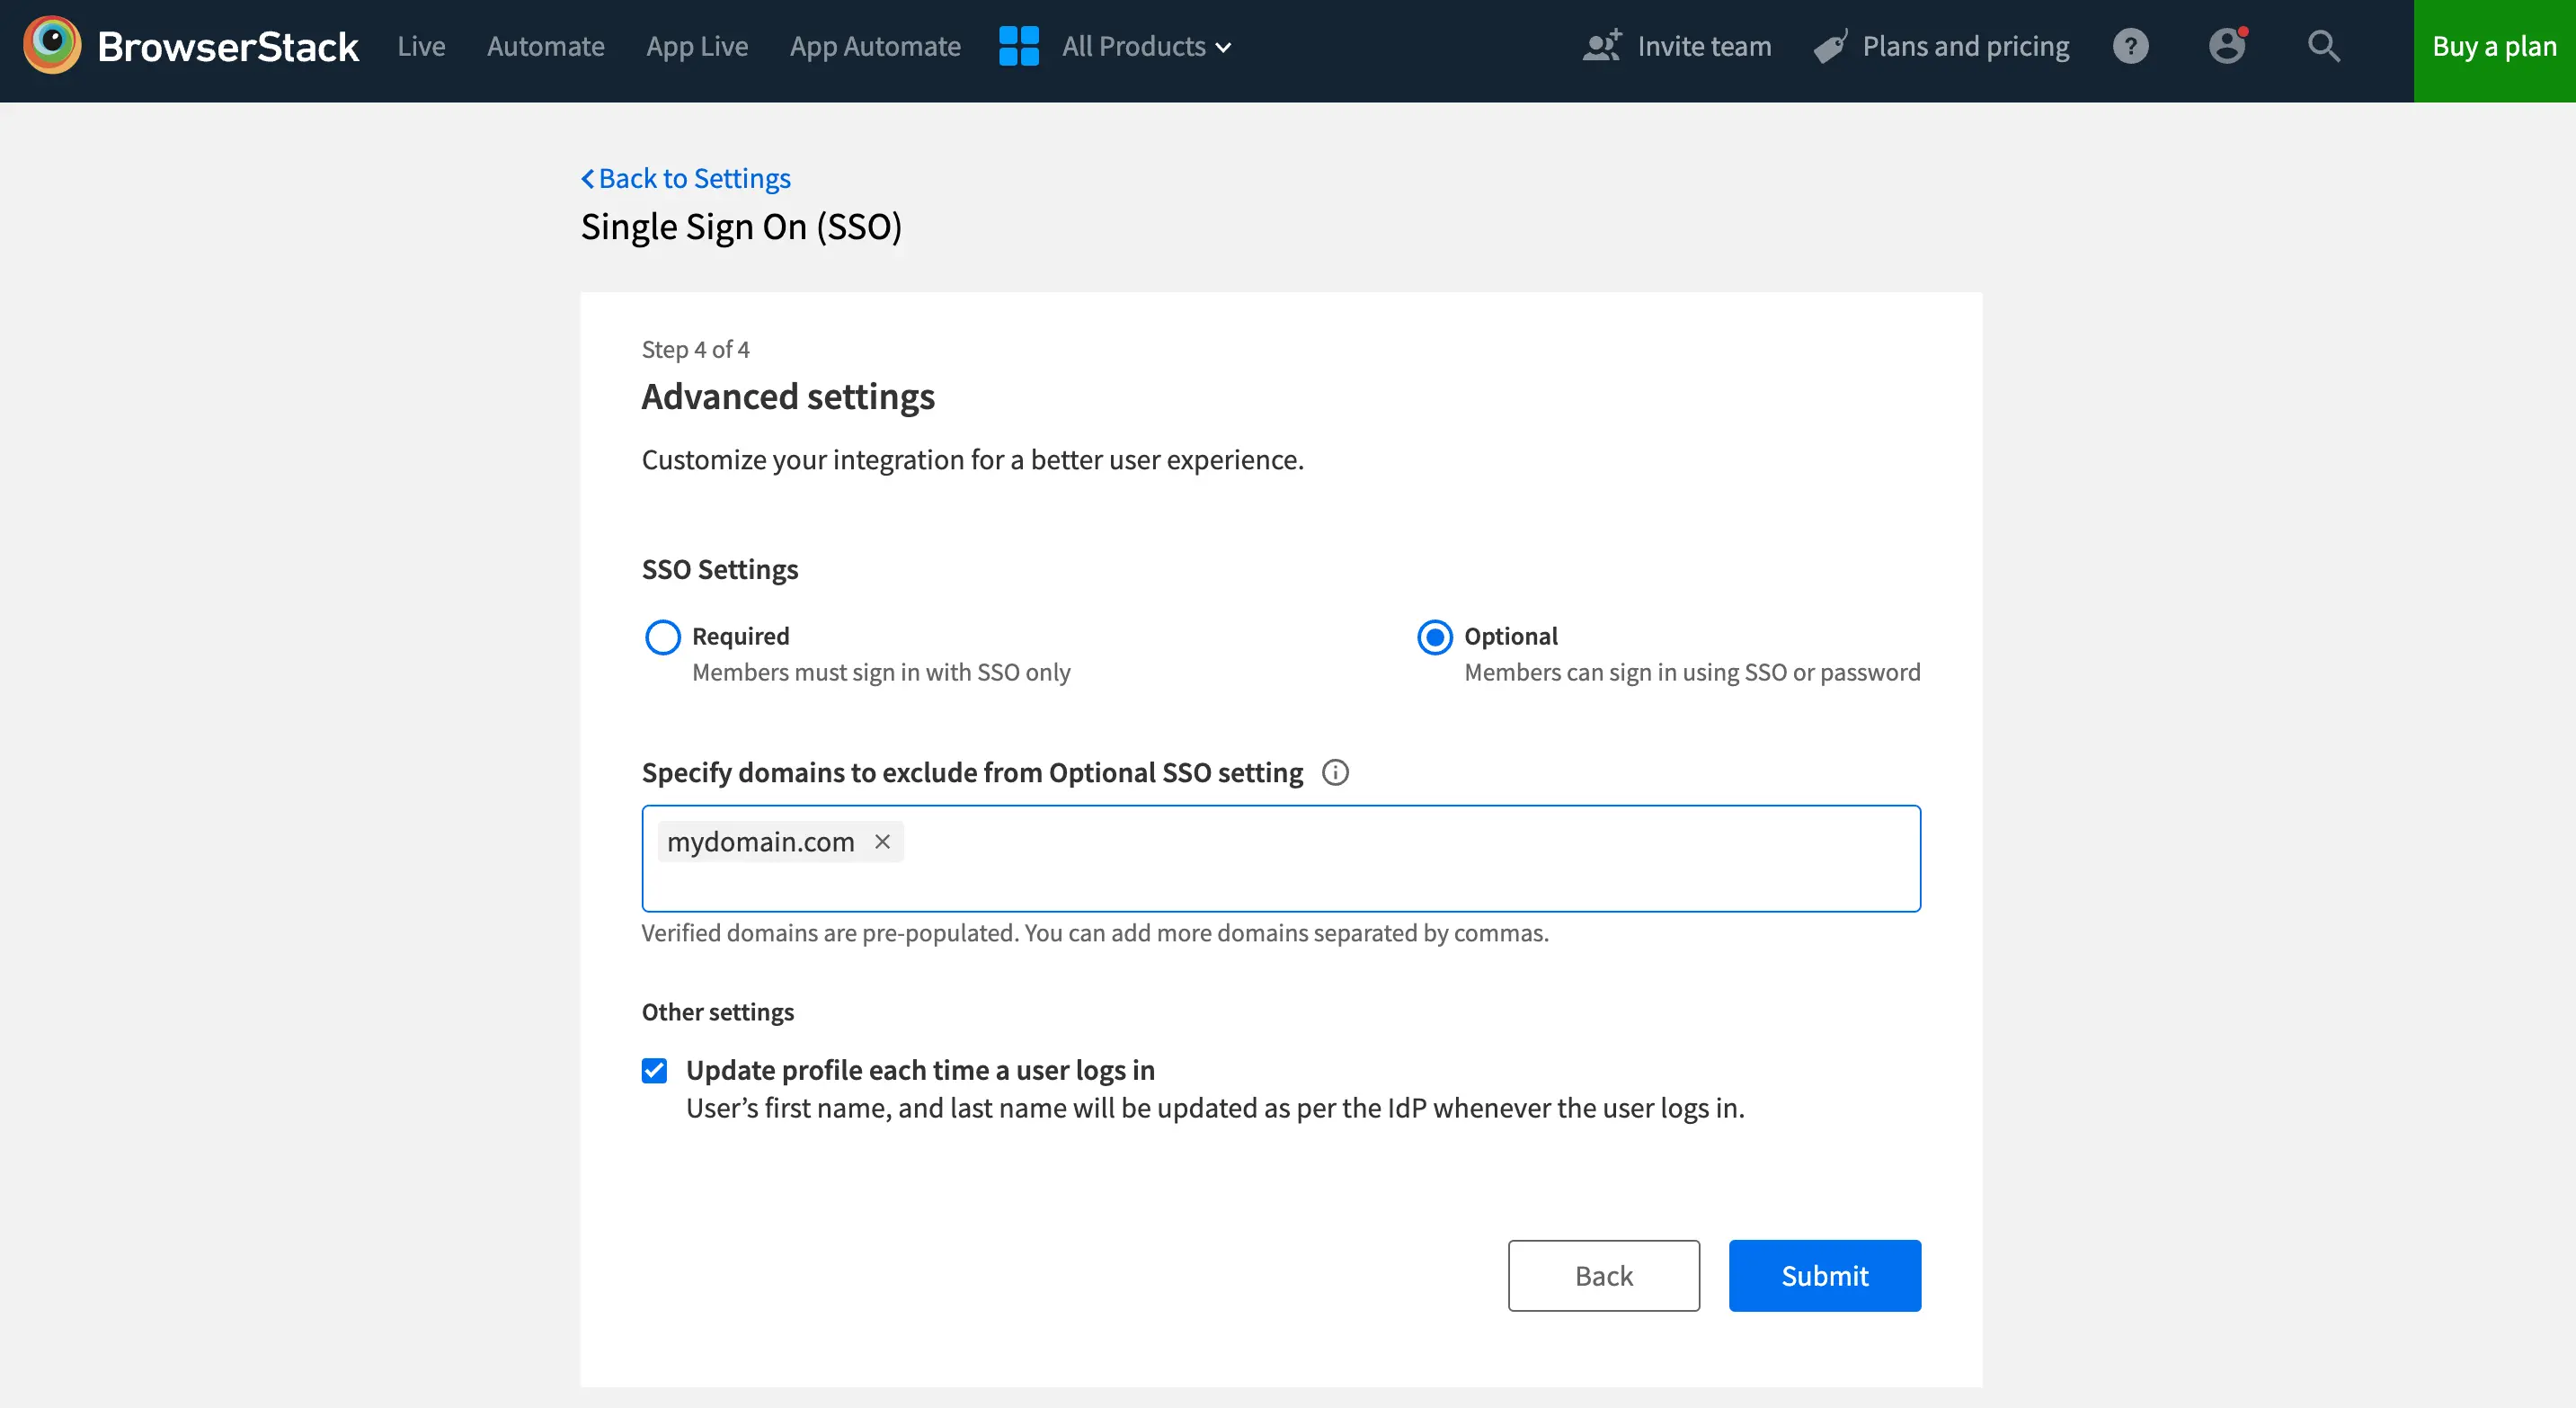
- BrowserStack supports SSO configuration in two settings i.e. Required and Optional, providing you with the freedom to choose the level of SSO enforcement that suits your organization’s needs.
-
Required (default): Choose this option if you want to ensure that your team members must sign in to BrowserStack using SSO. Their BrowserStack credentials will no longer work. However, owners can still sign in using either of their SSO or BrowserStack credentials.
-
Optional: Opt for this setting if flexibility is your priority. With SSO configured as Optional, your team members can sign in using either their SSO or BrowserStack credentials. Additionally, you can choose to extend this flexibility only to some team members. Simply specify domains of members to exclude from Optional setting and all users from those domains will be required to login using SSO only.
-
4. Test your SSO configuration
Before enabling SSO for your entire organization, you can test the SAML configuration from the Service Provider configuration to make sure that your connection is working. You can initiate the test by clicking Test Setup. If the connection is working fine, you will be taken to your Identity Provider, authenticated and redirected to a page containing the SAML response received from the identity provider.
5. Enable SSO
Once you have tested your configuration and are confident that SSO is working, you can Enable the Single Sign-on for your Organization on BrowserStack. The SSO setup is complete.
6. Assign users on BrowserStack
In the case of SAML SSO, to allow your existing users to continue using BrowserStack, assign these users BrowserStack app on your Identity Provider. This will force all the members to log in with SAML SSO instead of their username/password. Also, an email will be sent to users notifying them about the change.
Frequently asked questions
Can someone other than Owner configure SSO for my group?
Yes. Owner can grant permission to another group admin (such as IT administrator) to configure security settings for the group. For more information on this feature, refer to our documentation on Manage Custom Permissions.
I don’t see a connector for my Identity Provider?
For Identity Provider other than Okta, OneLogin, Azure AD, ADFS, we support Open SAML connector. You can also get in touch with your Account Manager to get a custom SSO connector built.
Do I need meta-data file for SSO setup (using SAML 2.0)?
You don’t need a meta-data file for SSO setup using SAML 2.0 on BrowserStack. The required meta for setting up SSO using SAML 2.0, is provided in the configuration/settings page in the self-serve SSO flow.
How can I give SSO access to existing BrowserStack users?
Assign the BrowserStack app on your IDP to these users. This will allow these users to login into BrowserStack via SSO.
How can I disable SSO?
Once you have enabled SSO, you can disable(if needed) the SSO setup from Account > Security.
- Select Authentication from the side-nav menu and click Disable under Single Sign On (SSO).
- Users will be logged out of BrowserStack and they can log in with their old username/password combination or reset their password.
How can I update the SSO certificate?
To update your Single Sign-On (SSO) certificate, follow these simple steps:
- Visit the Security page and select Authentication from the side-nav menu.
- Under Single Sign On (SSO), click Disable to temporarily disable SSO.
- Click on Modify and proceed through the steps until you reach Step 3.
- Update the new certificate in the corresponding field and click Next.
- Test your setup, and once confirmed, re-enable SSO.
Can I switch between Optional and Required SSO settings?
Certainly, you have the flexibility to adjust this setting to align with your organization’s needs.
- Visit the Security section.
- Select Authentication from the side-nav menu and click Modify under SSO settings.
- Toggle the SSO settings to make the changes as necessary.
Can I modify the list of domains excluded from the Optional SSO setting once it is enabled?
Yes, even after SSO is enabled, you have the ability to add or remove domains as per your requirements
- Visit the Security section.
- Select Authentication from the side-nav menu and click Modify under SSO settings.
- Add or remove the domains which need to be excluded from Optional SSO setting and click Save
We're sorry to hear that. Please share your feedback so we can do better
Contact our Support team for immediate help while we work on improving our docs.
We're continuously improving our docs. We'd love to know what you liked
Test web and mobile, from manual to automation, on real devices in one unified platform.
Contact UsWe're sorry to hear that. Please share your feedback so we can do better
Contact our Support team for immediate help while we work on improving our docs.
We're continuously improving our docs. We'd love to know what you liked
Thank you for your valuable feedback!