Create Projects in BrowserStack
Learn how to create projects centrally in BrowserStack and link them with products like Test Management, Percy, and Accessibility to streamline test organization and reporting.
Creating projects in BrowserStack lets you keep your tests and results organized. This document explains how to create a new project and what permissions are required.
Permissions to create projects
Your permission to create projects depends on the IAM and RBAC roles assigned to you. For more information, see the Project RBAC documentation.
Create a project
If you have access to Project Management, you can create projects from both the Project Management dashboard and individual product interfaces.
- Log in to your BrowserStack account.
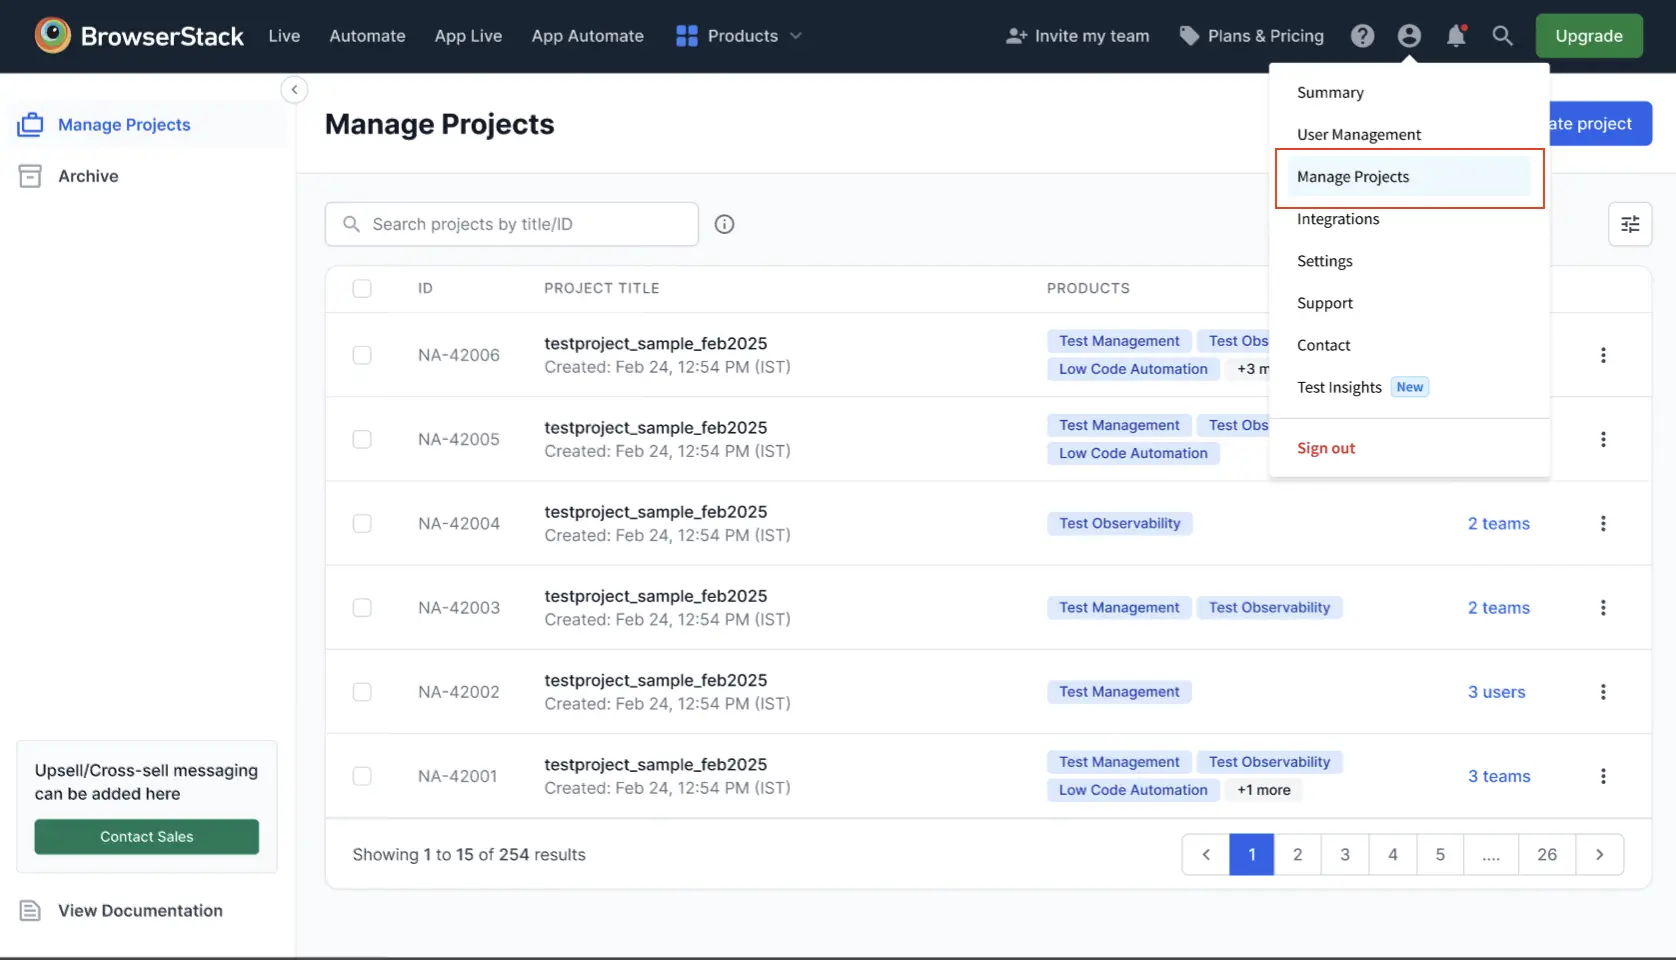
- Click the User Profile icon in the top-right corner, then select Manage Projects.
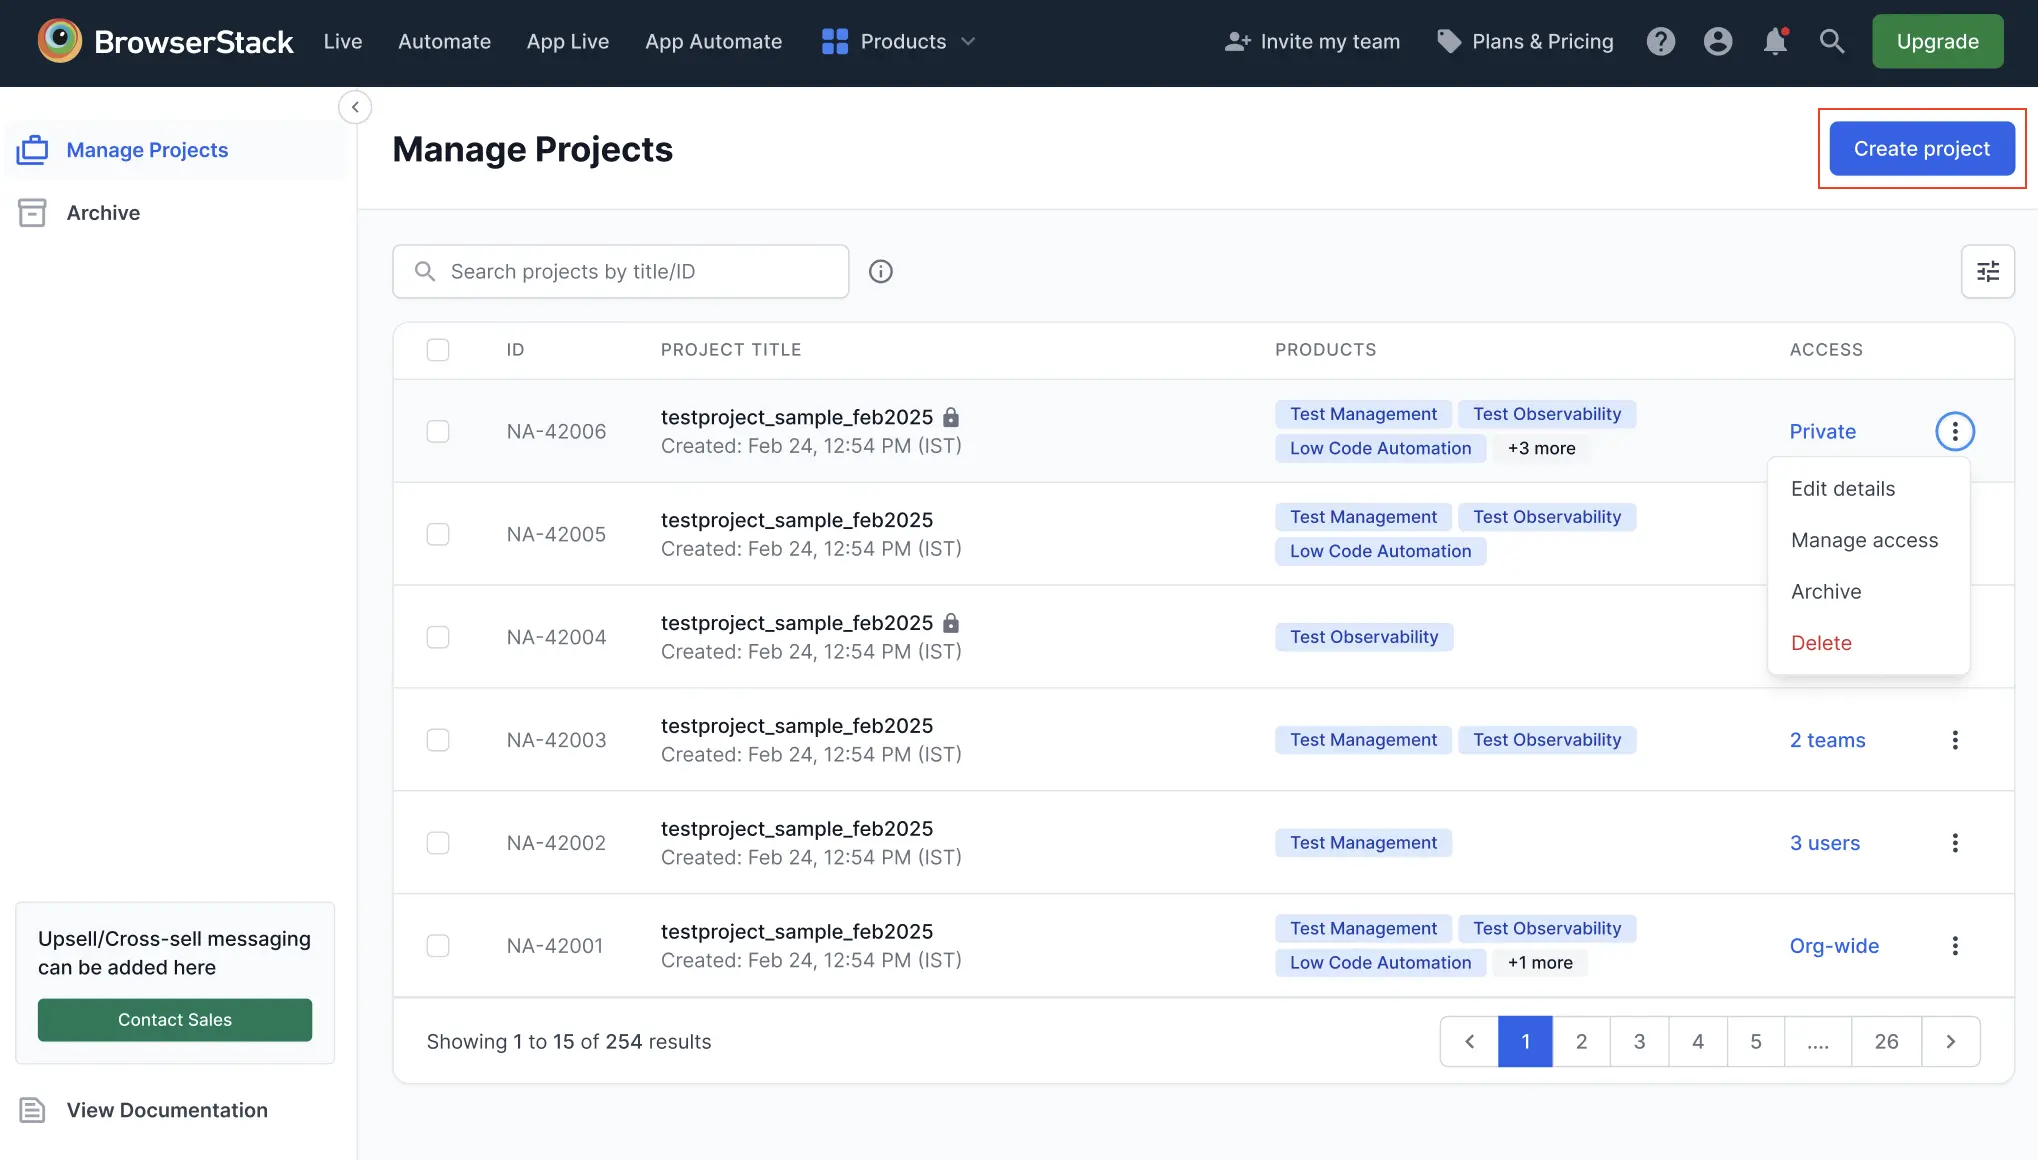
- Click Create project. The Create Project window appears.
- Enter the following details:
- Project name: A unique name for your project.
- Description: A brief summary of the project’s purpose or scope.
-
Linked products: Select the BrowserStack products (Test Management, Test Reporting & Analytics, Low Code Automation, etc.) relevant to this project.
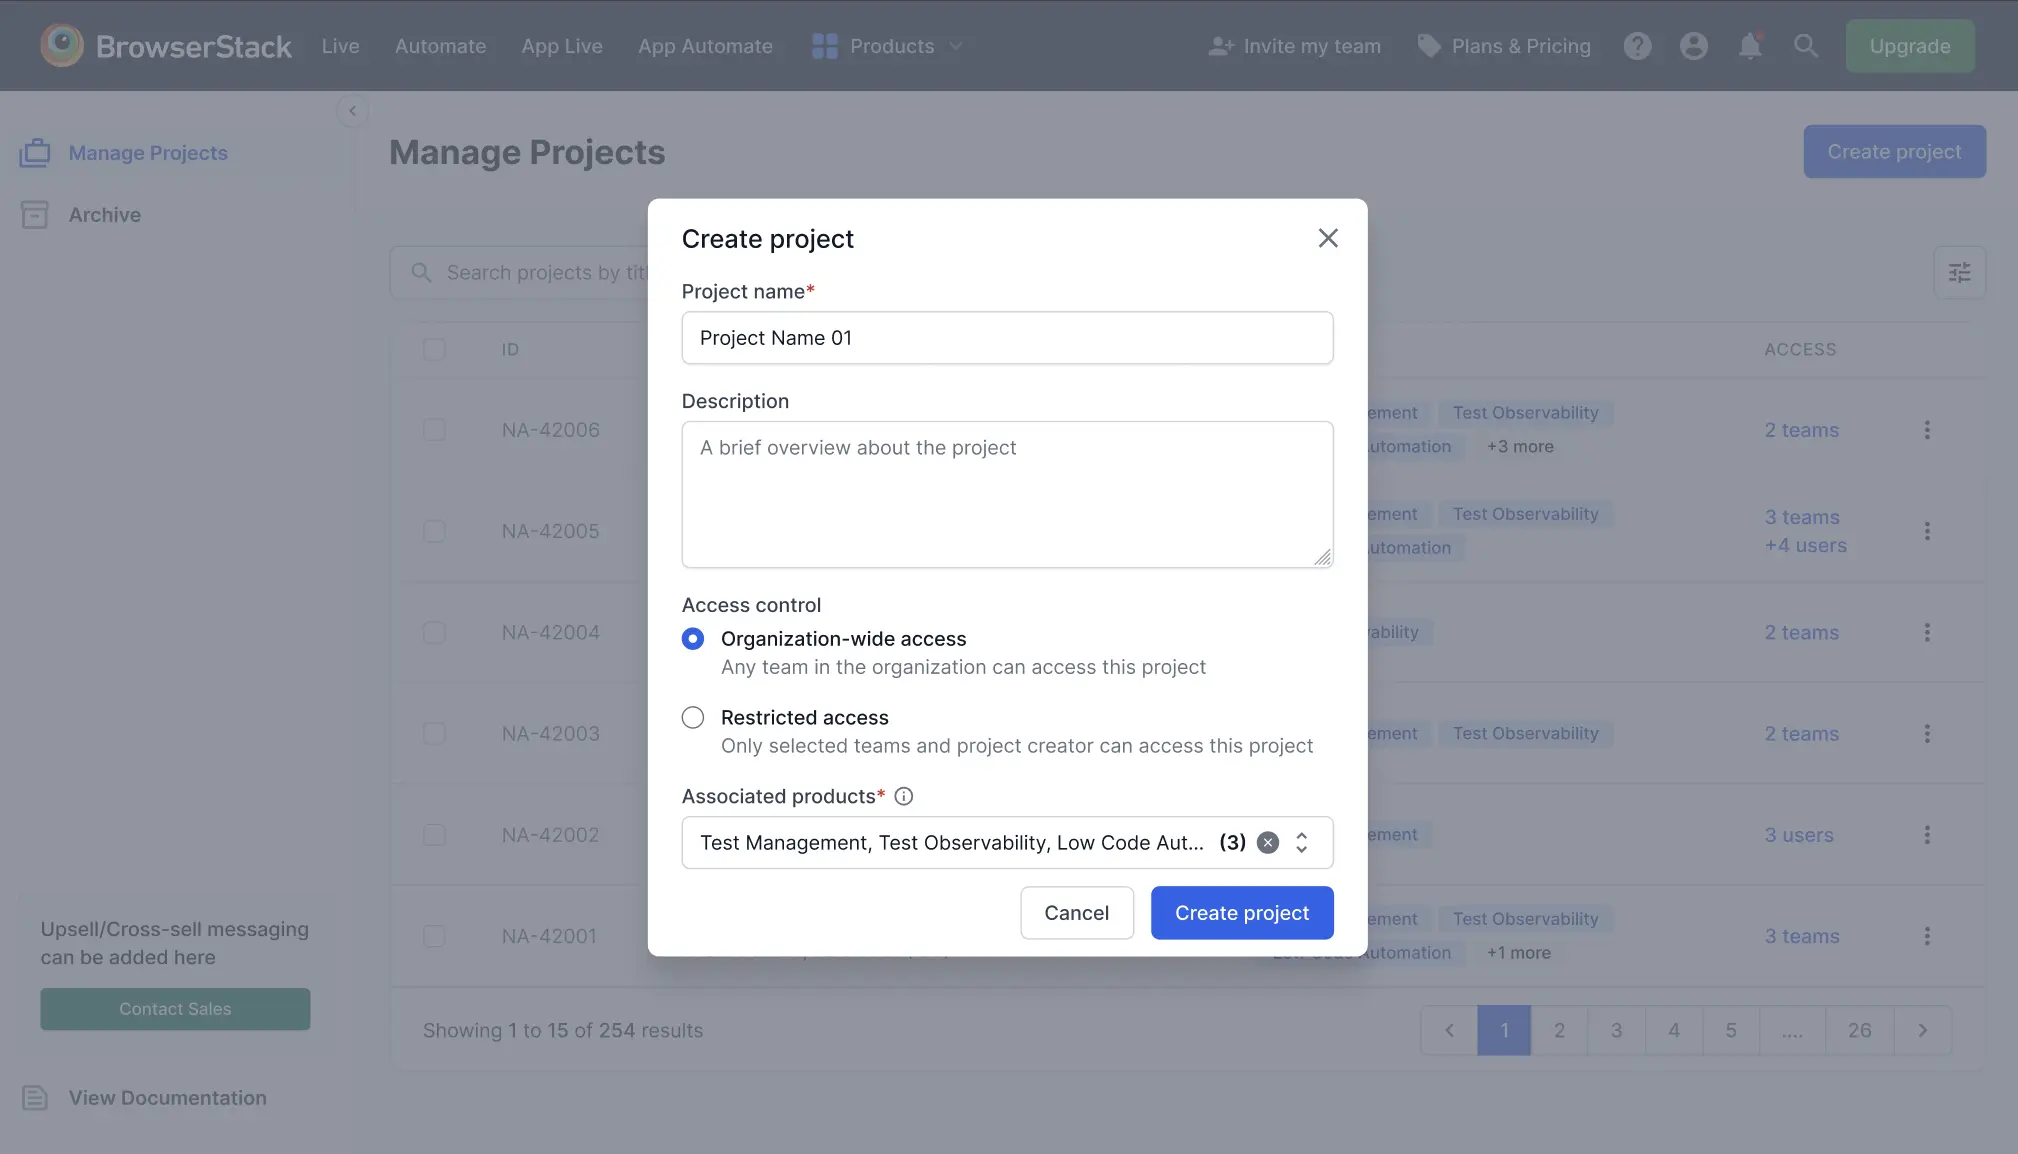
- Choose the Access control for your project, if PBAC is enabled:
- Organization-wide access: All teams in your organization can access this project.
- Restricted access: Only the teams, users you specify, and the project creator can access this project.
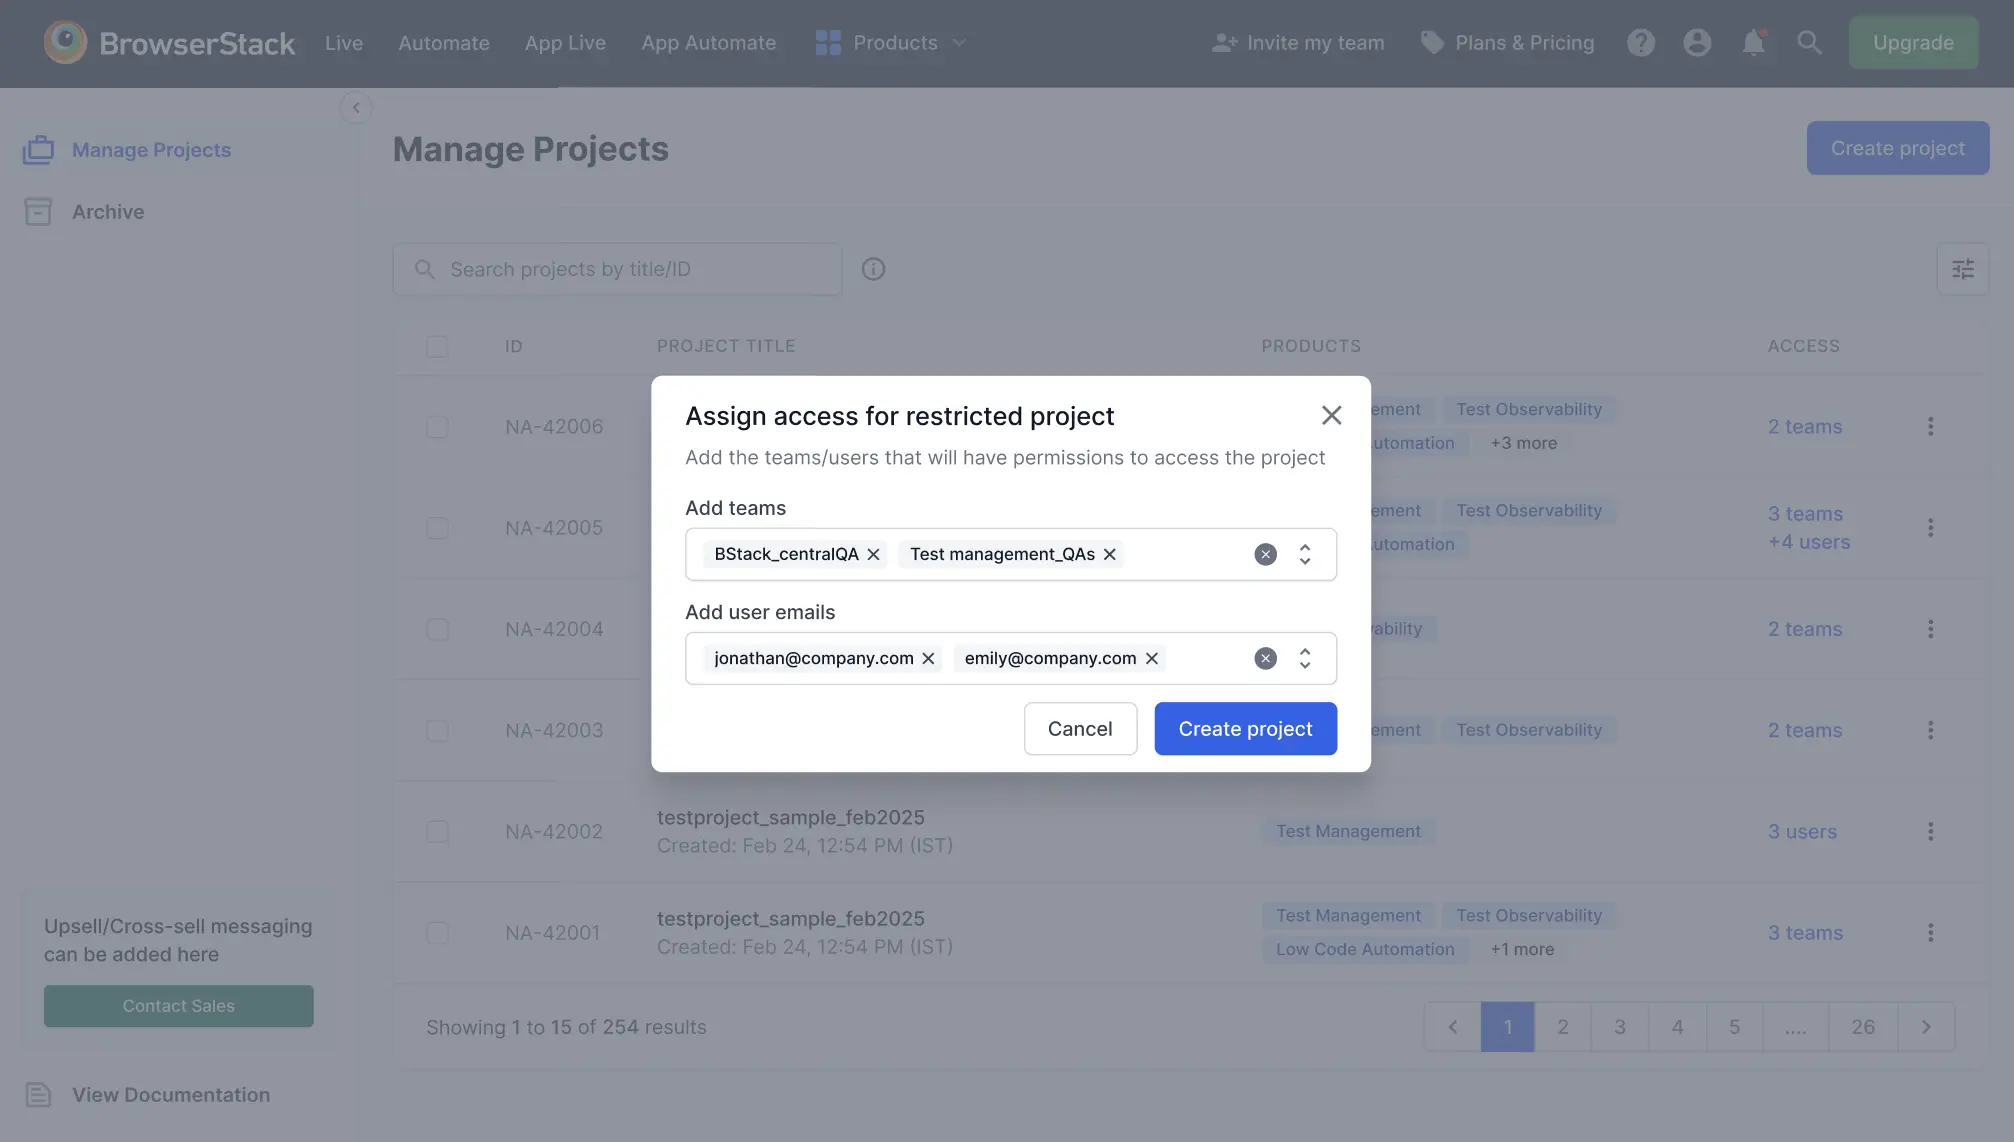
- If you select Restricted access, a window appears. Enter the teams and user email addresses to grant them access to the project. Click Create project.
- If
Restrictedis selected andOrganization-wideis disabled, it means the owner has configured Team Access for the organization. - If
Organization-wideis selected andRestrictedis disabled, it means the owner has configured Global Access for the organization.
In these cases, you cannot assign specific teams or users. To change access settings, refer to the Project-based access control documentation.
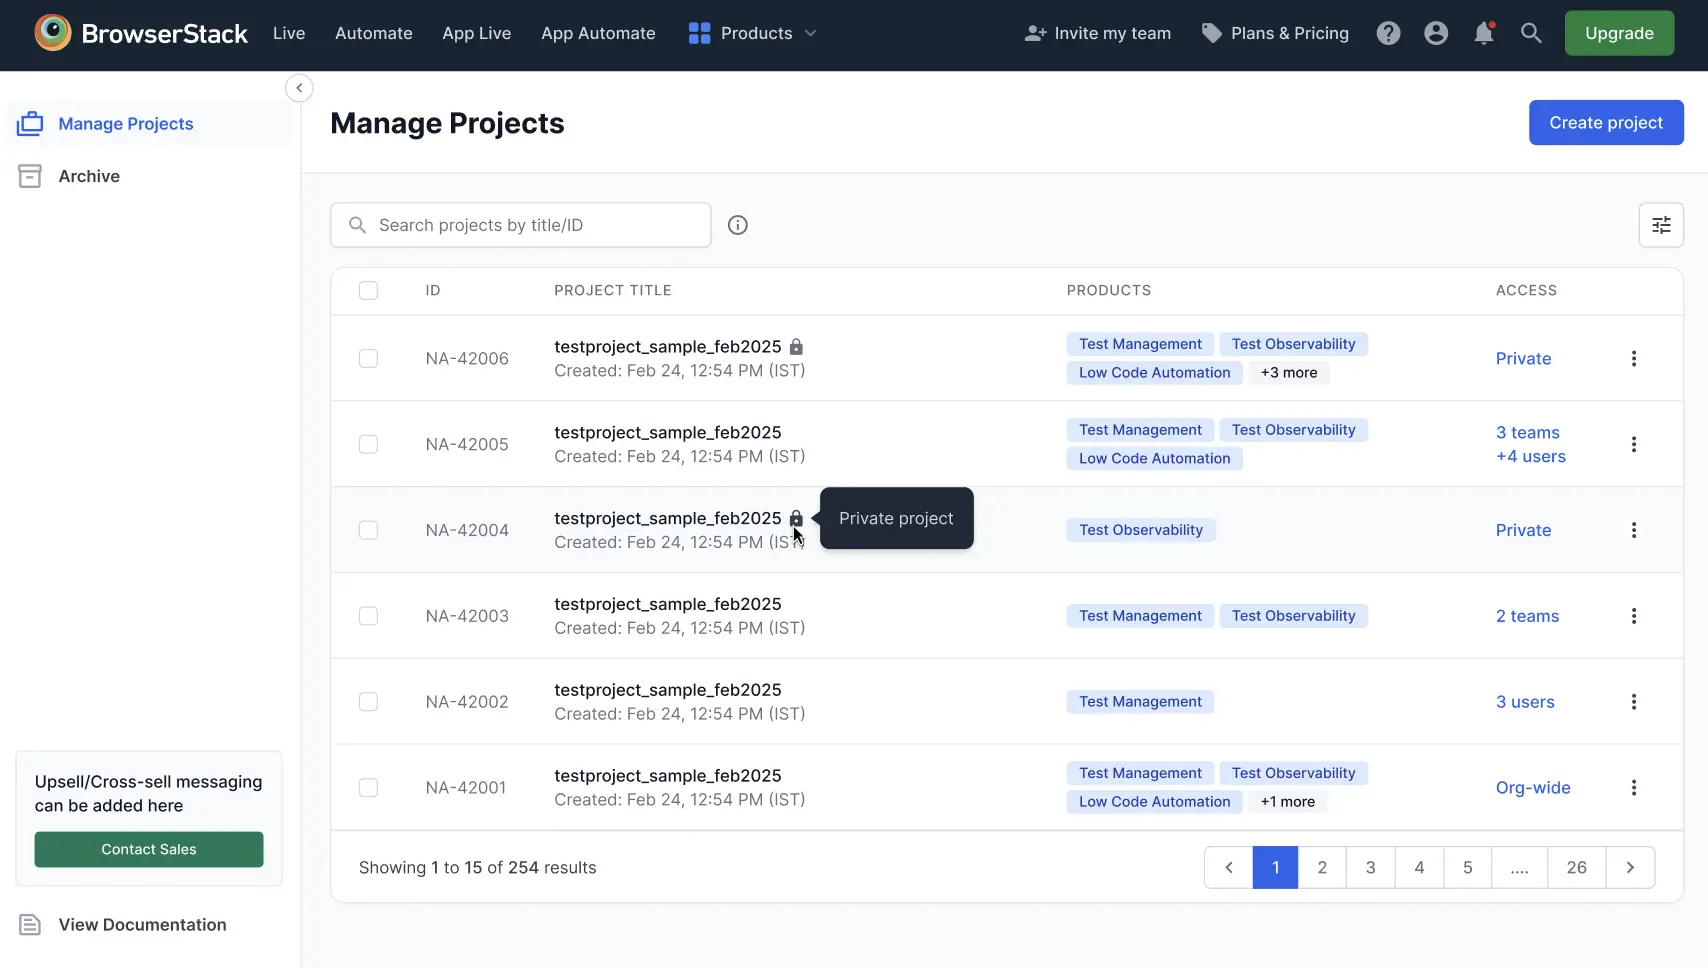
You see the Project created successfully message, and the new project appears in the Project Management dashboard. The dashboard displays a table with details for each project. If a project has restricted access, a lock icon appears next to its name.
You can further manage your created projects. For more details on how to manage projects, refer to the Manage existing projects document.
We're sorry to hear that. Please share your feedback so we can do better
Contact our Support team for immediate help while we work on improving our docs.
We're continuously improving our docs. We'd love to know what you liked
We're sorry to hear that. Please share your feedback so we can do better
Contact our Support team for immediate help while we work on improving our docs.
We're continuously improving our docs. We'd love to know what you liked
Thank you for your valuable feedback!