Modules
Learn how to create and reuse common test steps across multiple tests using modules in Salesforce Test Automation.
Modules allow you to encapsulate and reuse common test steps across multiple tests in Salesforce Test Automation. By creating modules, you can build reusable workflows that streamline test creation and maintenance.
Key benefits of using modules:
- Reusability: Create once, use across multiple tests
- Efficiency: Reduce test creation time by importing existing modules
- Consistency: Ensure uniform execution of common workflows
Example use cases
Modules are ideal for repetitive workflows that appear across multiple tests:
- Navigation sequences: Navigate through multiple pages or screens to reach a specific state
- Form filling: Complete standard forms with common field values
Create a module
You can create modules from existing test steps during test creation or editing.
To create a module:
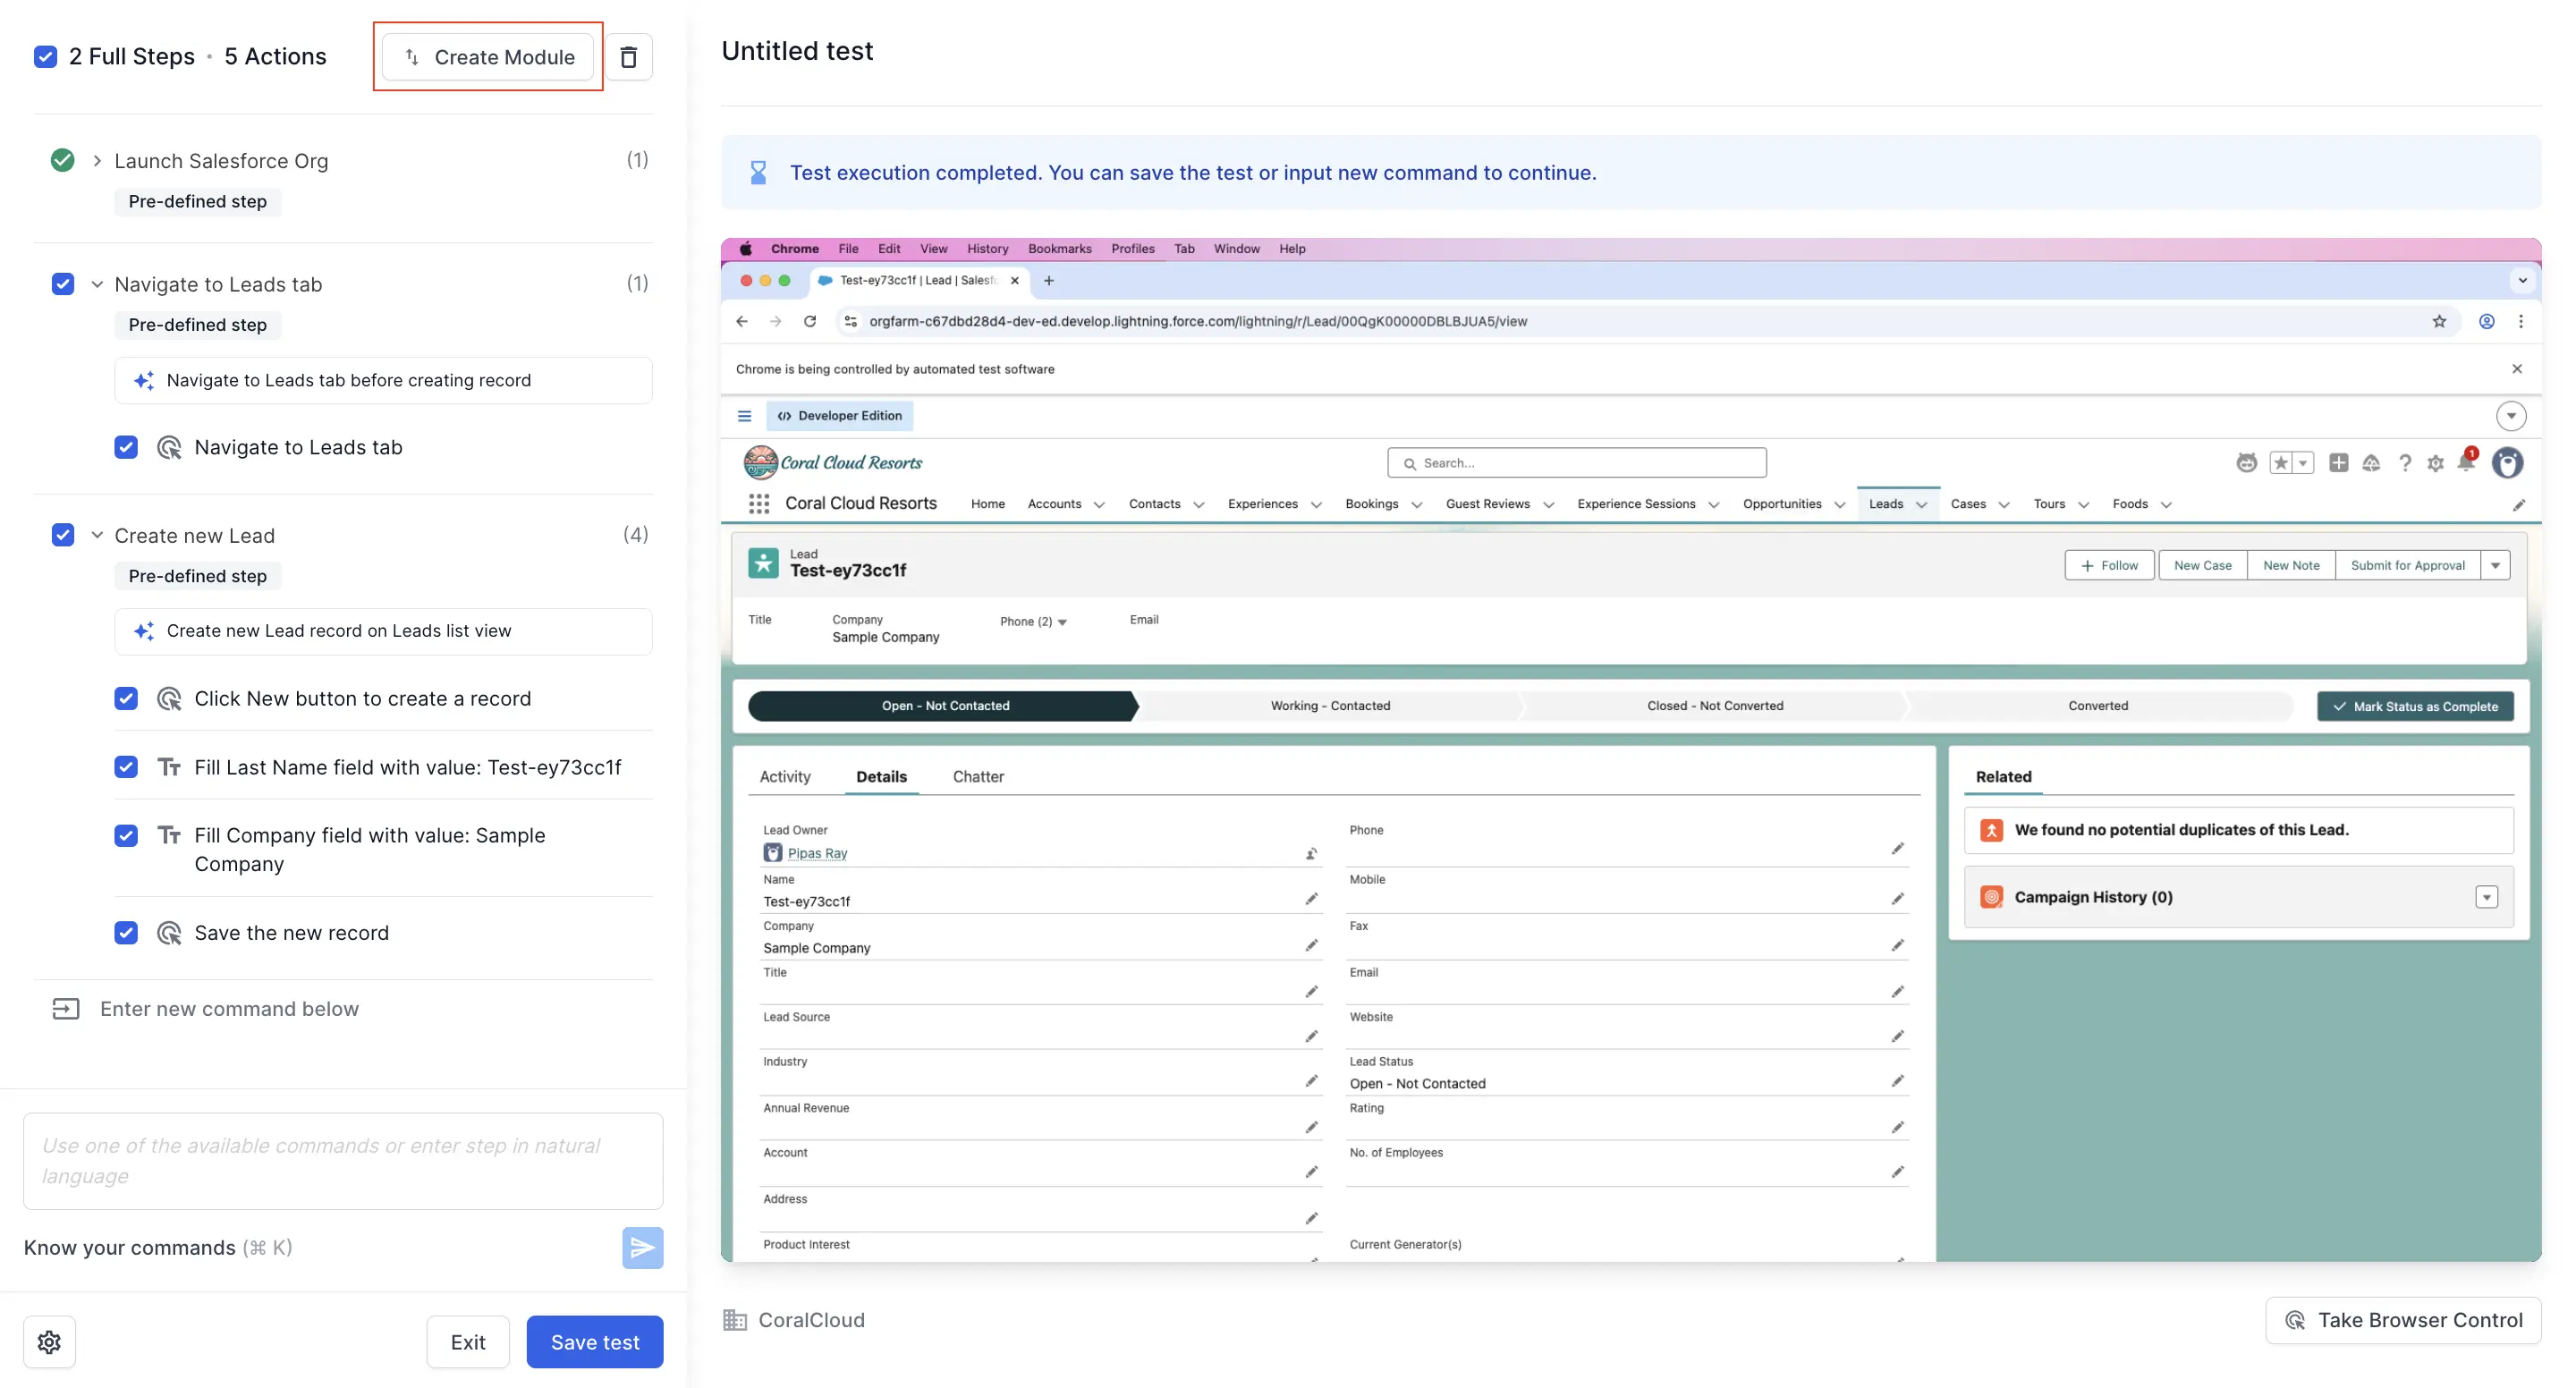
- In the test recorder, record or add the steps you want to include in the module.
- Select the steps you want to convert into a module by checking the checkbox next to each step.
-
Click Create Module in the toolbar.
-
In the Create module dialog, enter a descriptive name for your module.
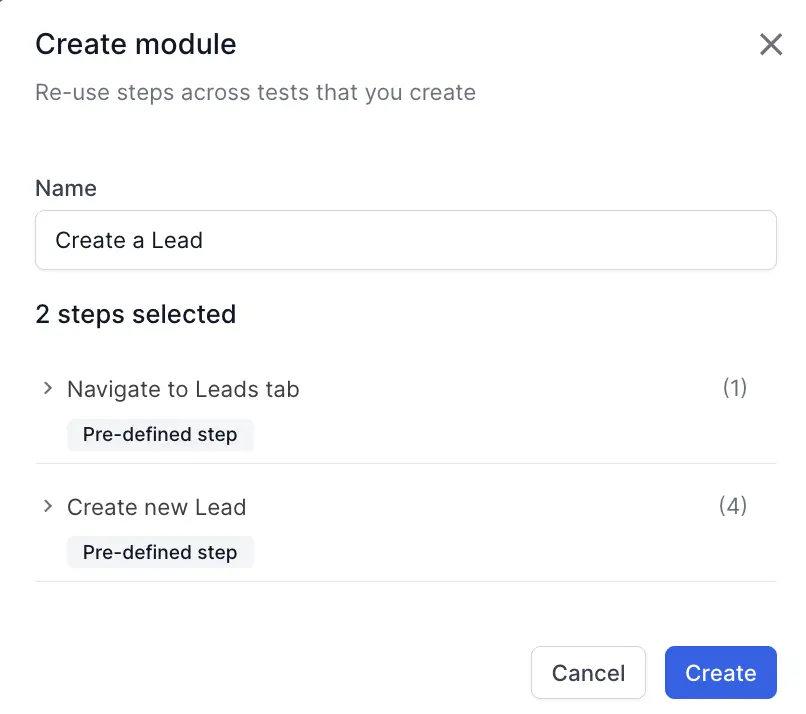
- Review the selected steps displayed in the dialog (for example, “2 steps selected”).
- Click Create.
The selected steps are now converted into a module and can be reused across other tests. The module appears in your test with a module icon, indicating it contains reusable steps.
Add new action to your module
When building your test, you can add new test steps either within your main test flow or inside an imported module.
To add new action to you module:
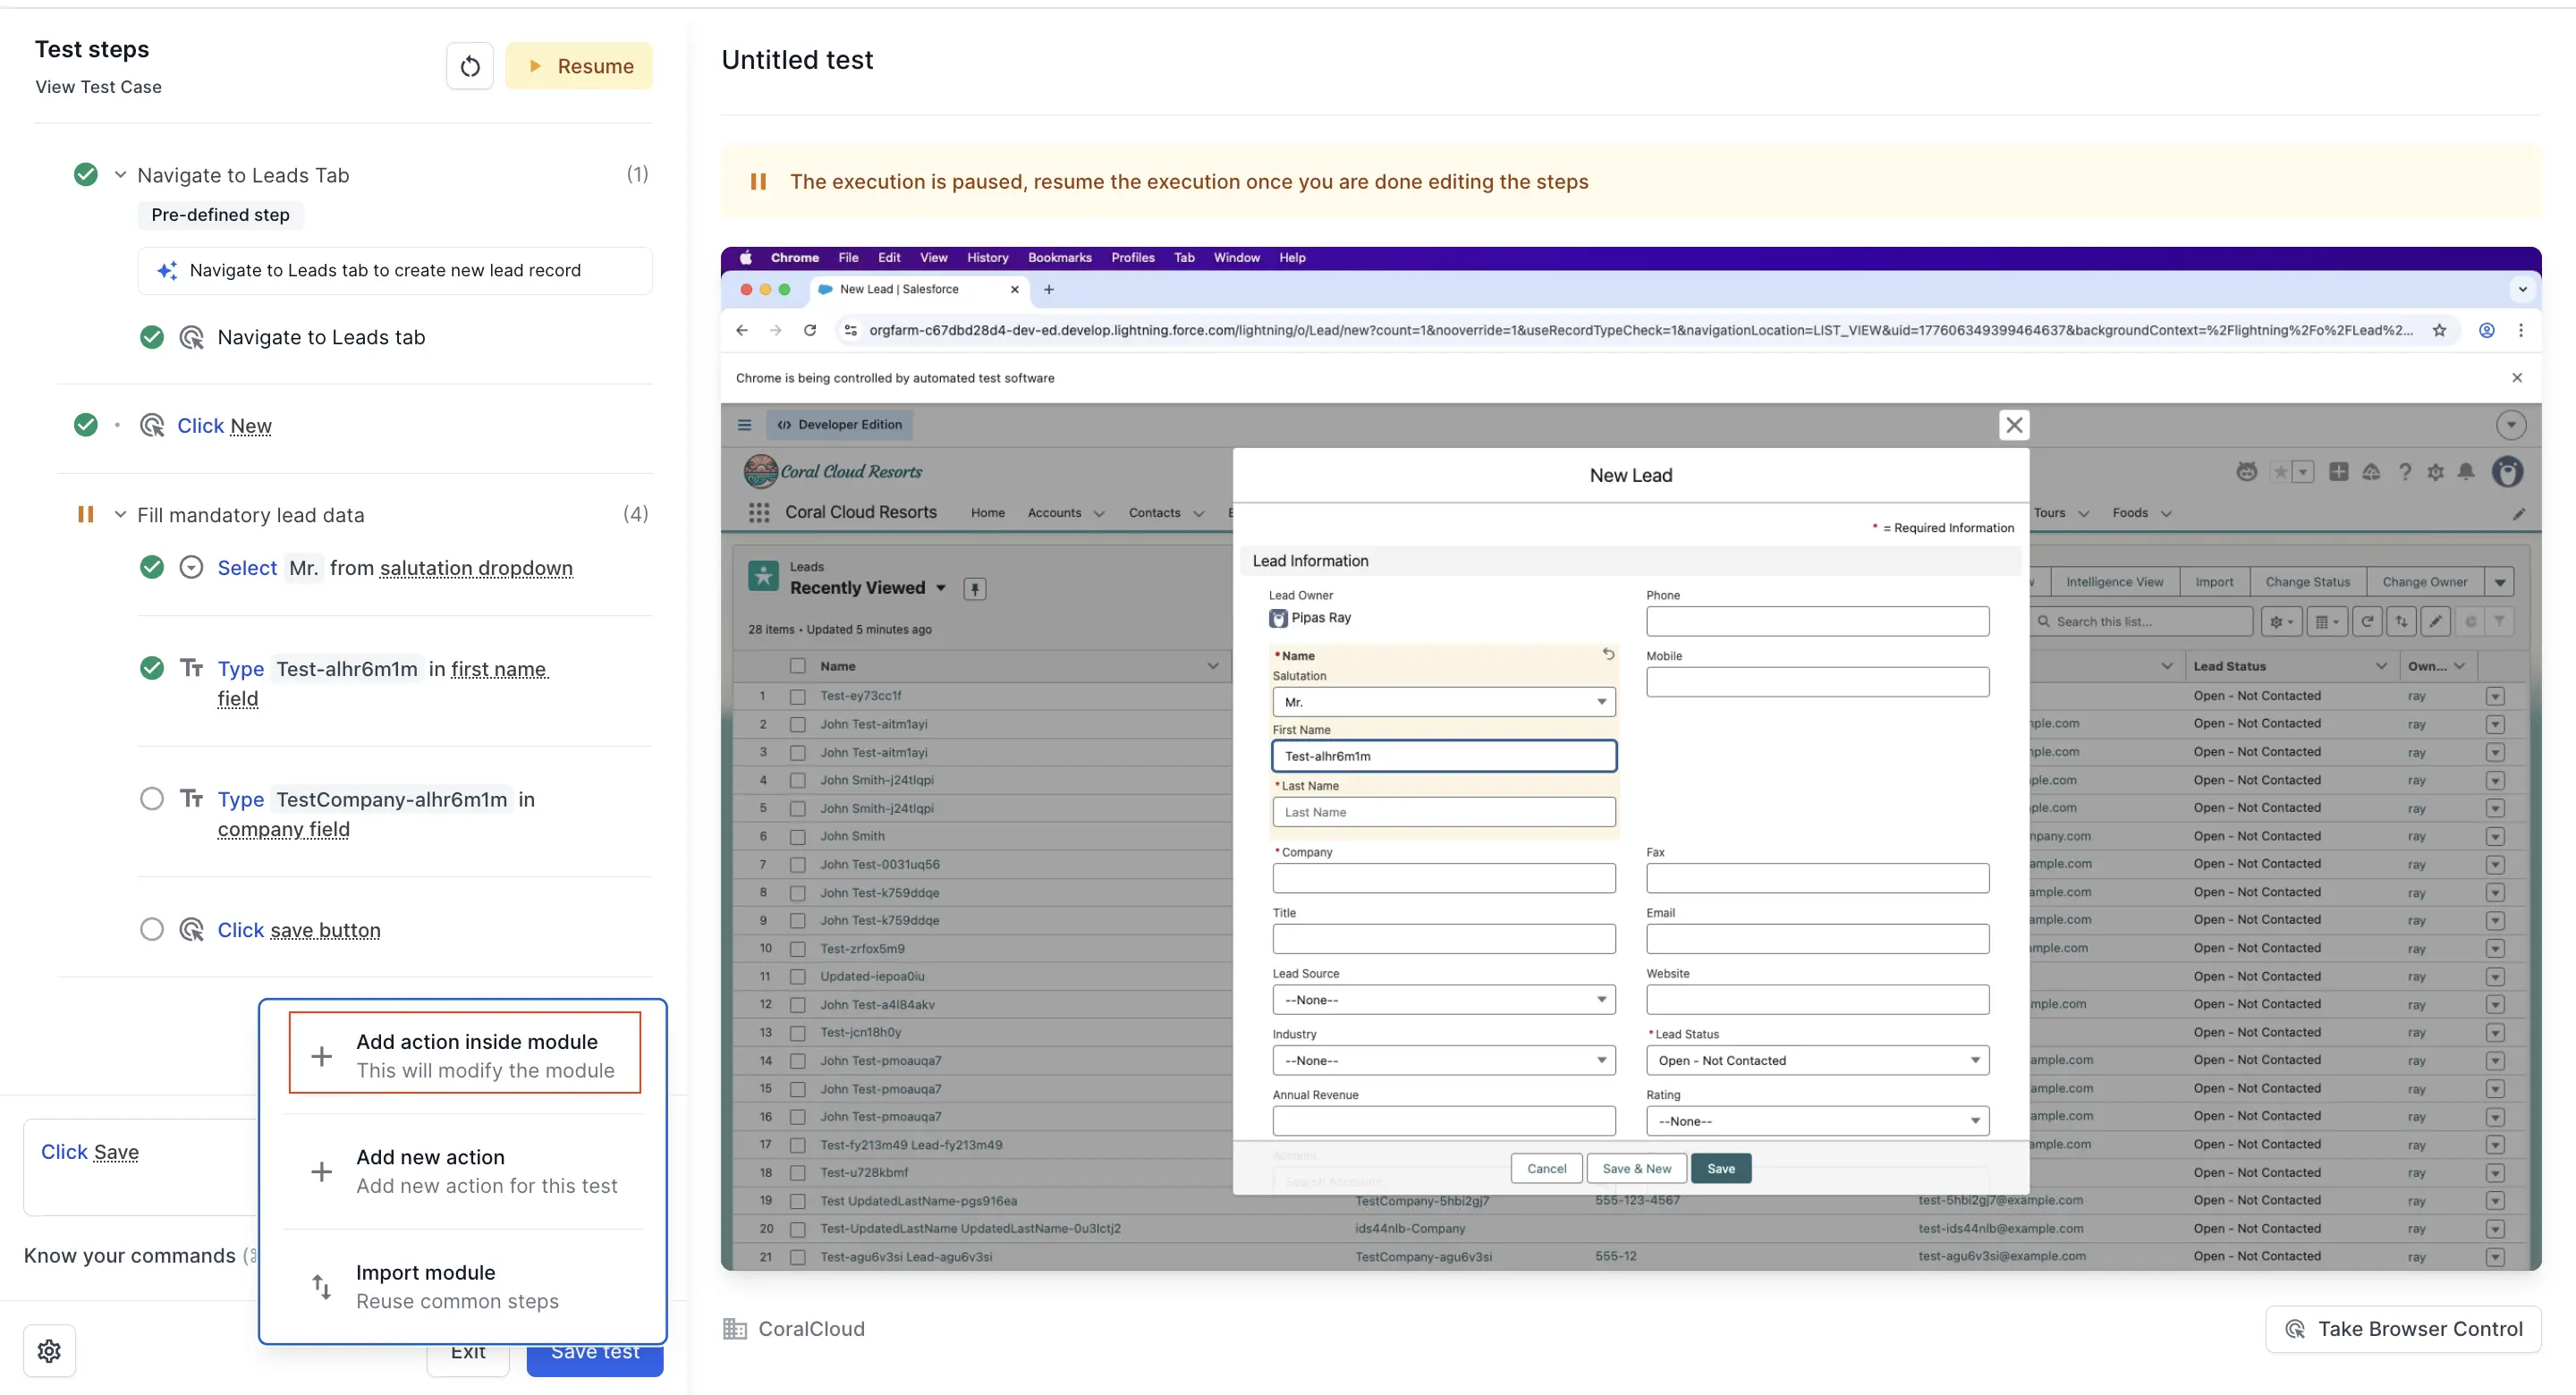
- In the test recorder, click the + Add action icon where you want to insert an action.
- Click Add action inside module. A text editor appears. Enter the new step in plain language to update the module.
Import a module
You can import existing modules into your tests to reuse common workflows.
To import a module:
-
In the test recorder, click Enter new command below or click the + Add action icon where you want to insert the module.
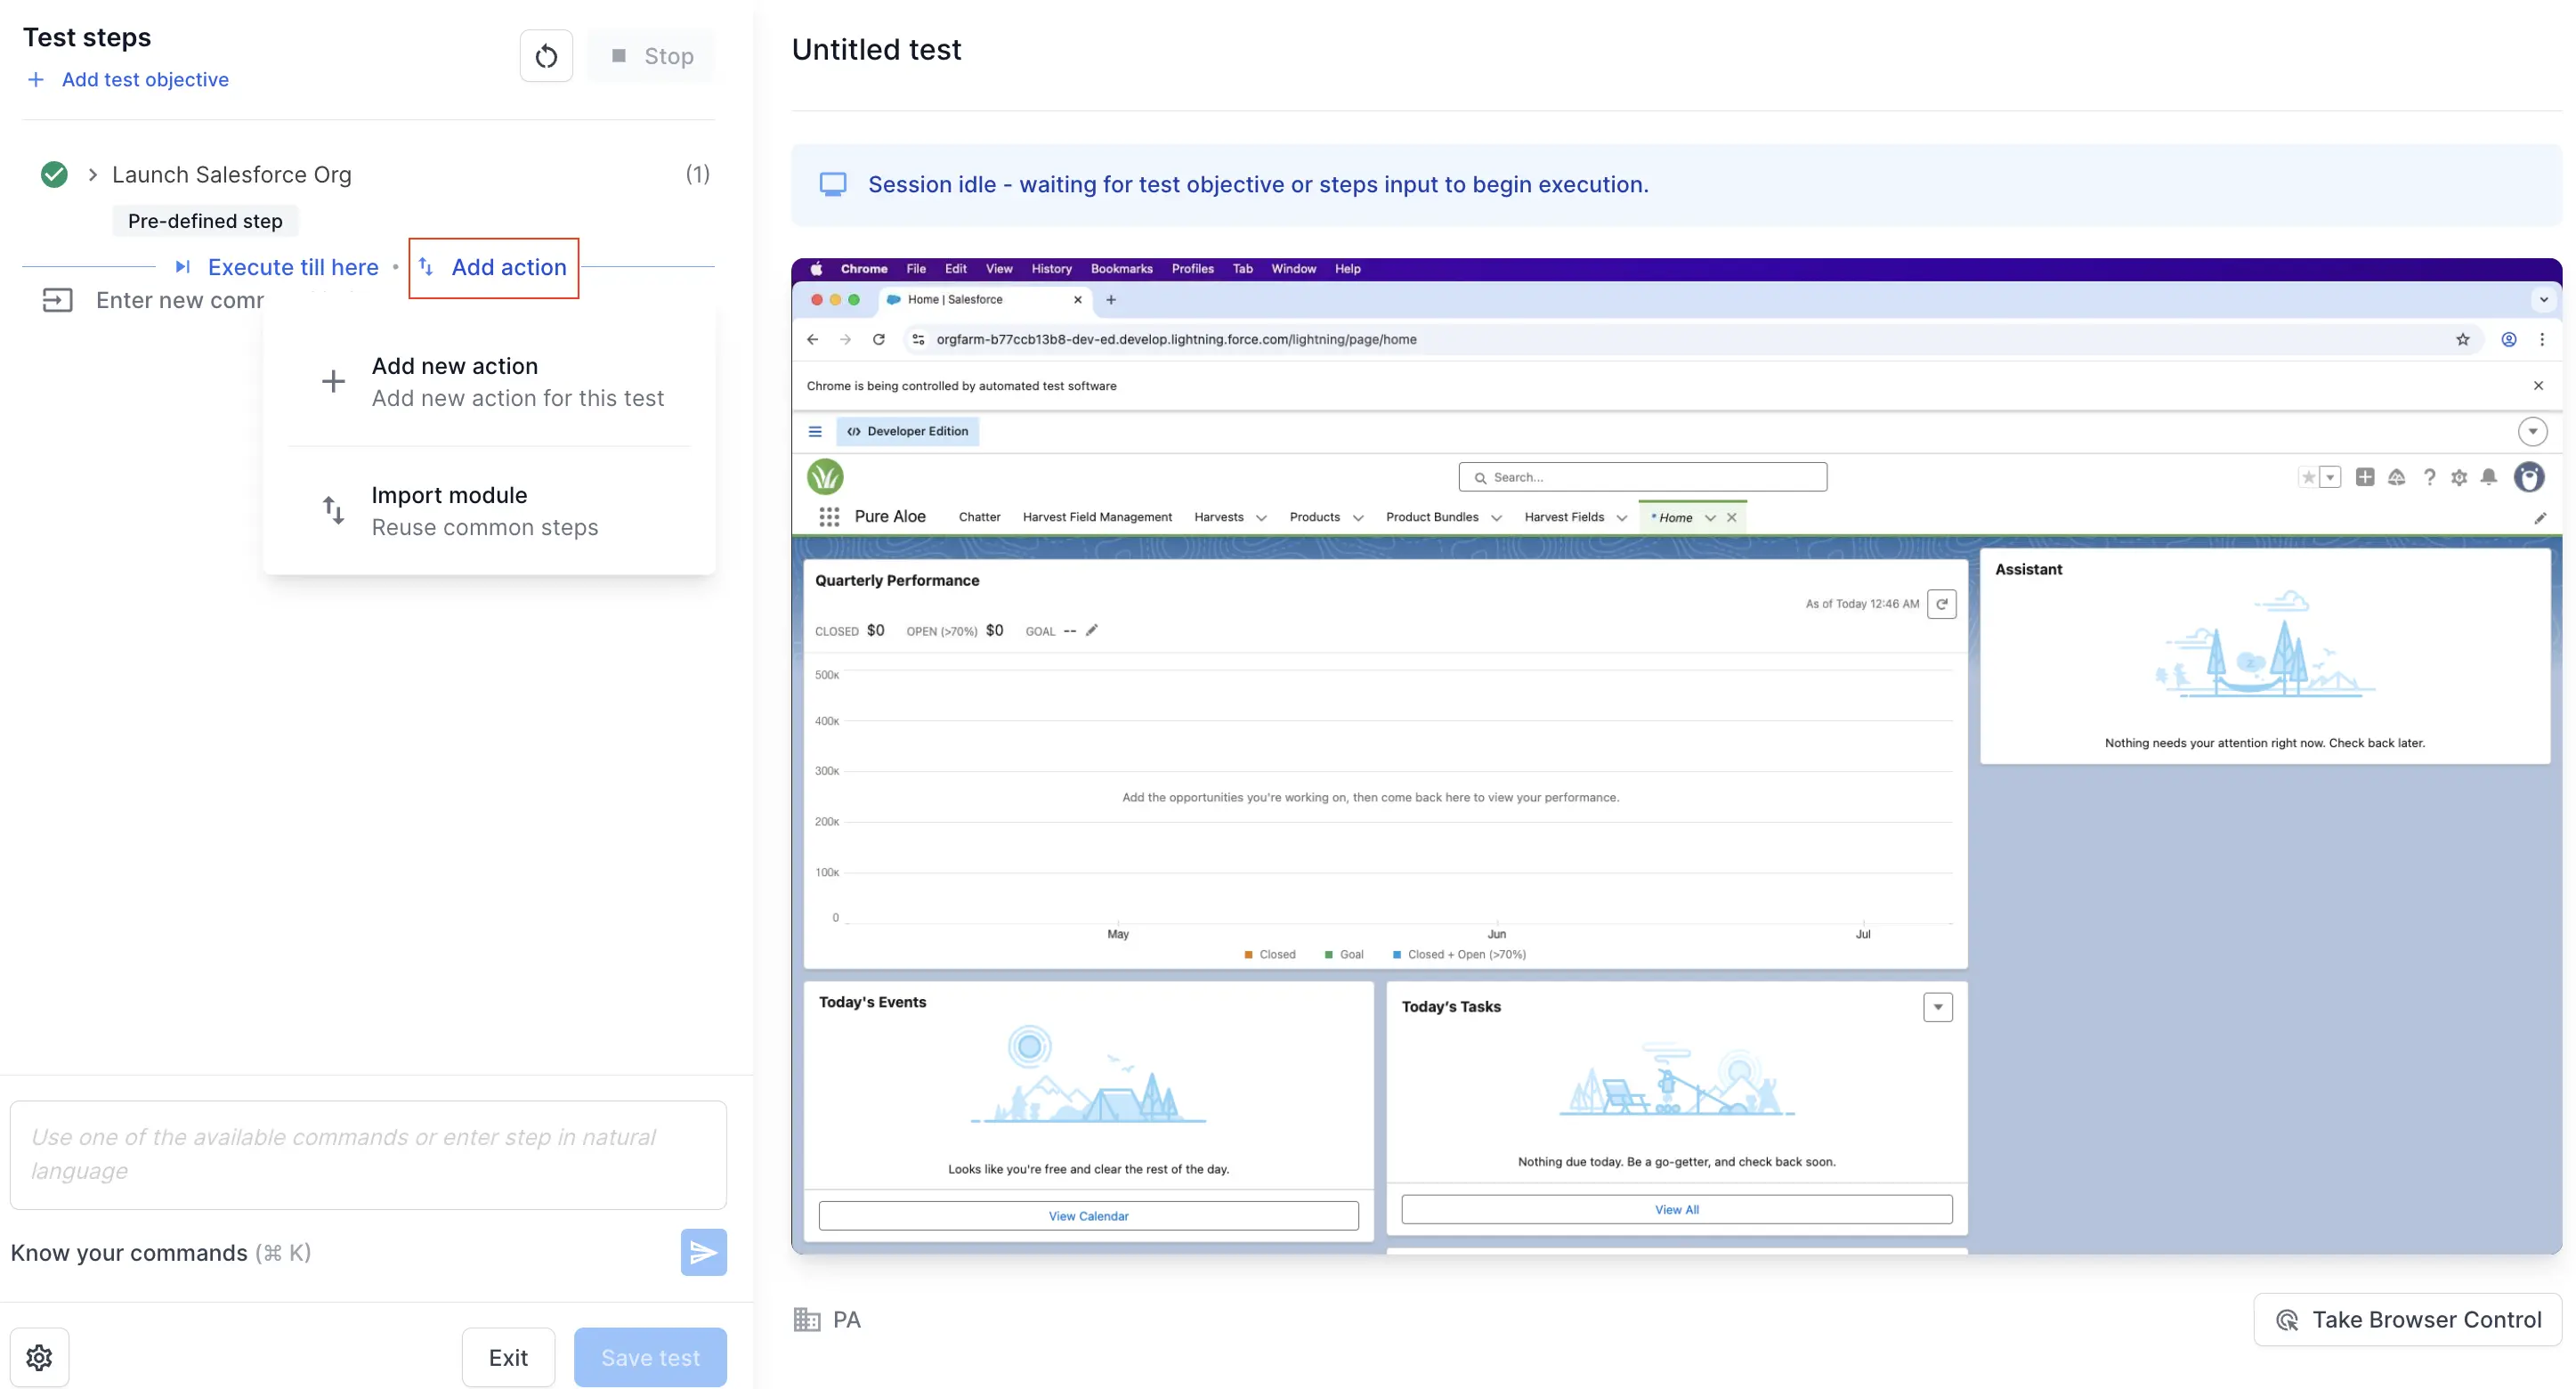
- Select Import module from the options menu.
-
In the Import Module dialog, browse the list of available modules or use the search bar to find a specific module by name.

- Select the module you want to import. The dialog displays the module name and the number of steps it contains.
- Click the module to add it to your test at the selected position.
The imported module appears in your test steps with a module icon. You can expand the module to view its individual steps.
Edit or delete a module
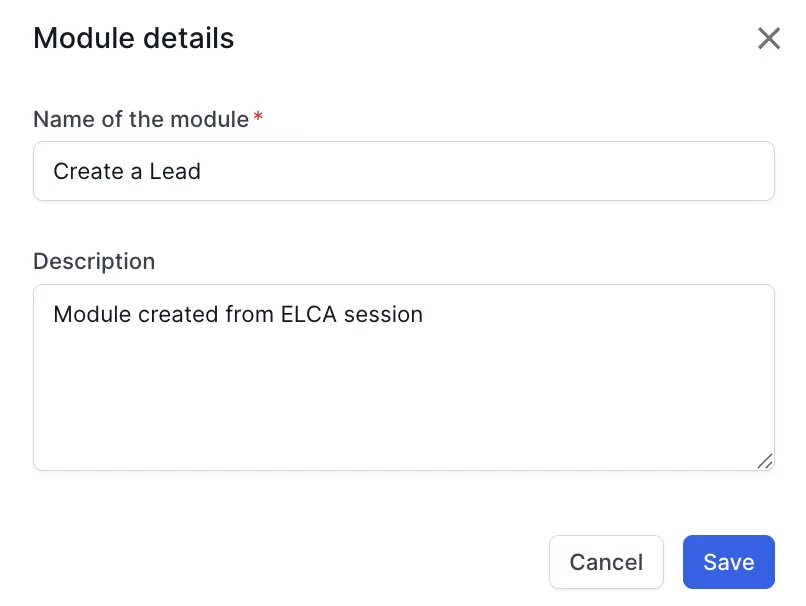
You can only edit a module’s name and description from the Modules tab. You cannot modify the actions or steps inside a module from this tab. To update the steps within a module, open a test that uses the module and edit the steps there.
To edit or delete a module:
- You can open the test and edit the module directly within the test editor. Remember that any changes made to a module applies to all other tests that use the same module.
- Alternatively, go to the Modules section on the left bar of Salesforce Test Automation. It displays all the modules. It shows it is used in how many tests.
- Locate the module you want to edit or delete in the modules list.
- Click the three-dot menu (⋮) next to the module.
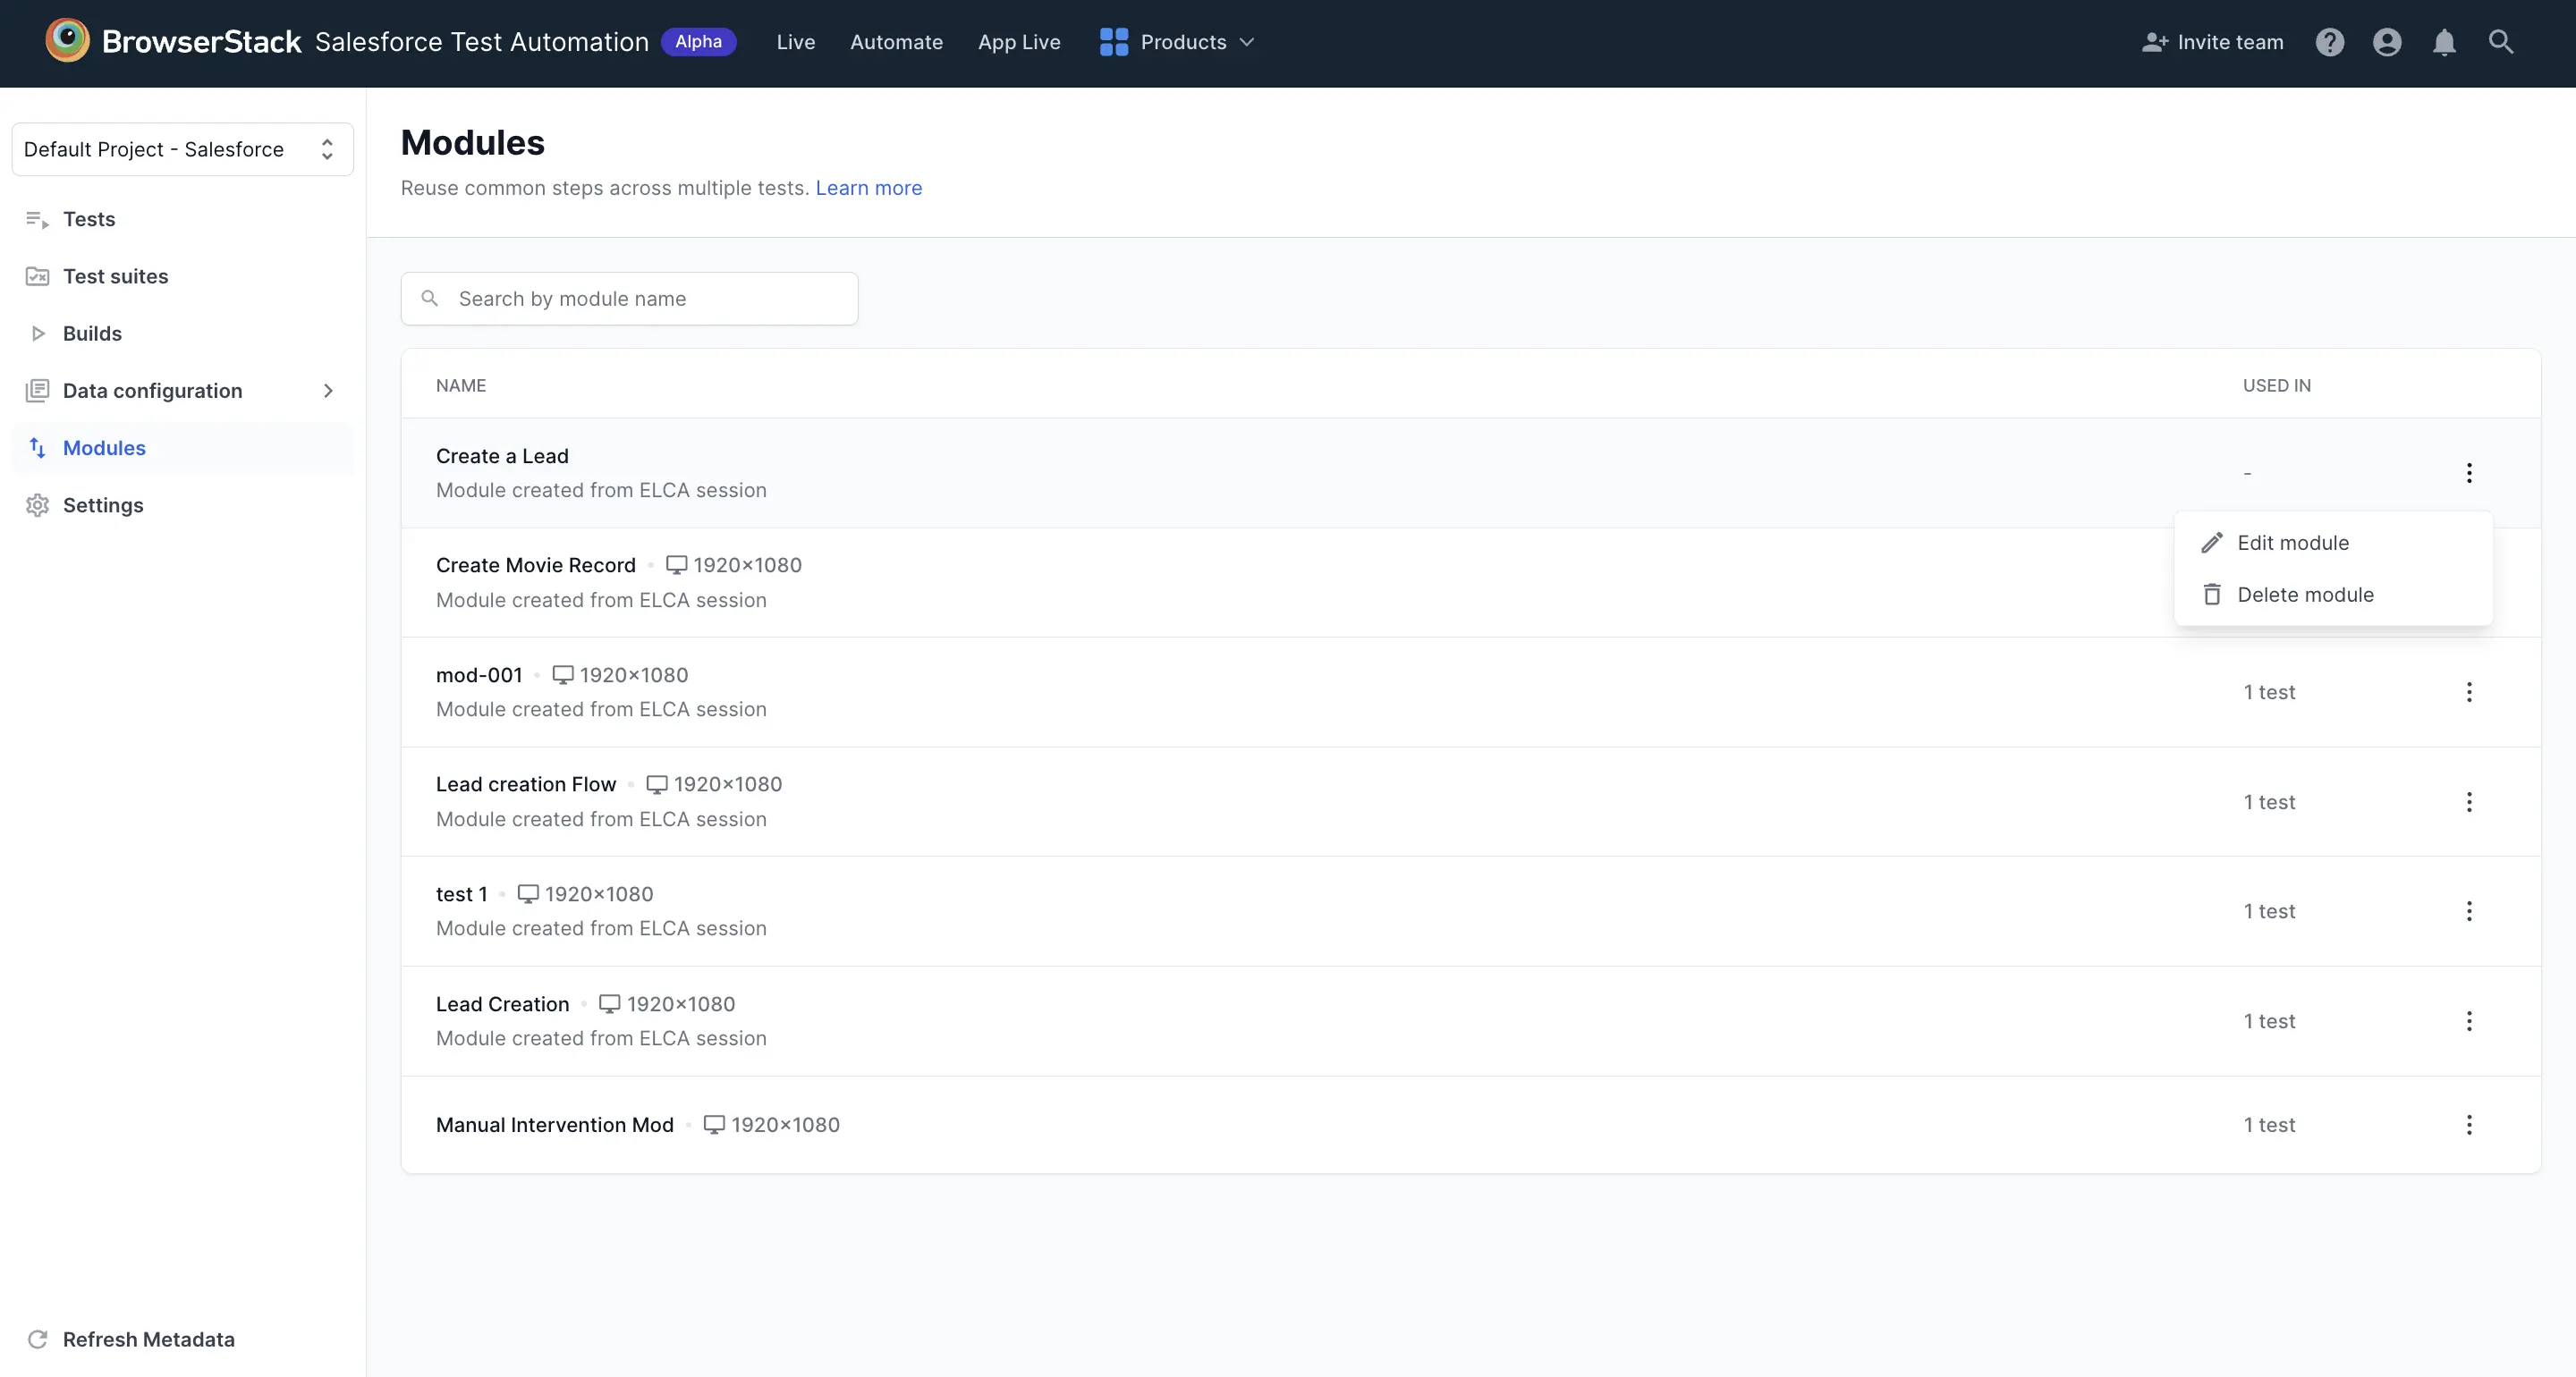
- Choose from the following options:
-
Edit module: Opens the Module details dialog where you can update the module name and description. After making your changes, click Save.
- Delete module: Removes the module. Confirm the deletion when prompted.
-
Edit module: Opens the Module details dialog where you can update the module name and description. After making your changes, click Save.
You cannot delete a module that is currently used in other tests. Before you can delete a module, ensure that no tests reference it. Check the USED IN column to see which tests use the module.
We're sorry to hear that. Please share your feedback so we can do better
Contact our Support team for immediate help while we work on improving our docs.
We're continuously improving our docs. We'd love to know what you liked
We're sorry to hear that. Please share your feedback so we can do better
Contact our Support team for immediate help while we work on improving our docs.
We're continuously improving our docs. We'd love to know what you liked
Thank you for your valuable feedback!