Use API step
Learn how to use API steps in Salesforce Test Automation to validate and extract values from API responses.
API testing in Salesforce Test Automation allows you to make external API calls within your test flows to validate responses or extract data for use in subsequent test steps. This is useful for scenarios like verifying data synchronization, testing integrations, or setting up test data through APIs.
Add API step
To add an API step to your test:
- In the test editor, click Enter new command below and enter
Add API. -
Click the Add API command.
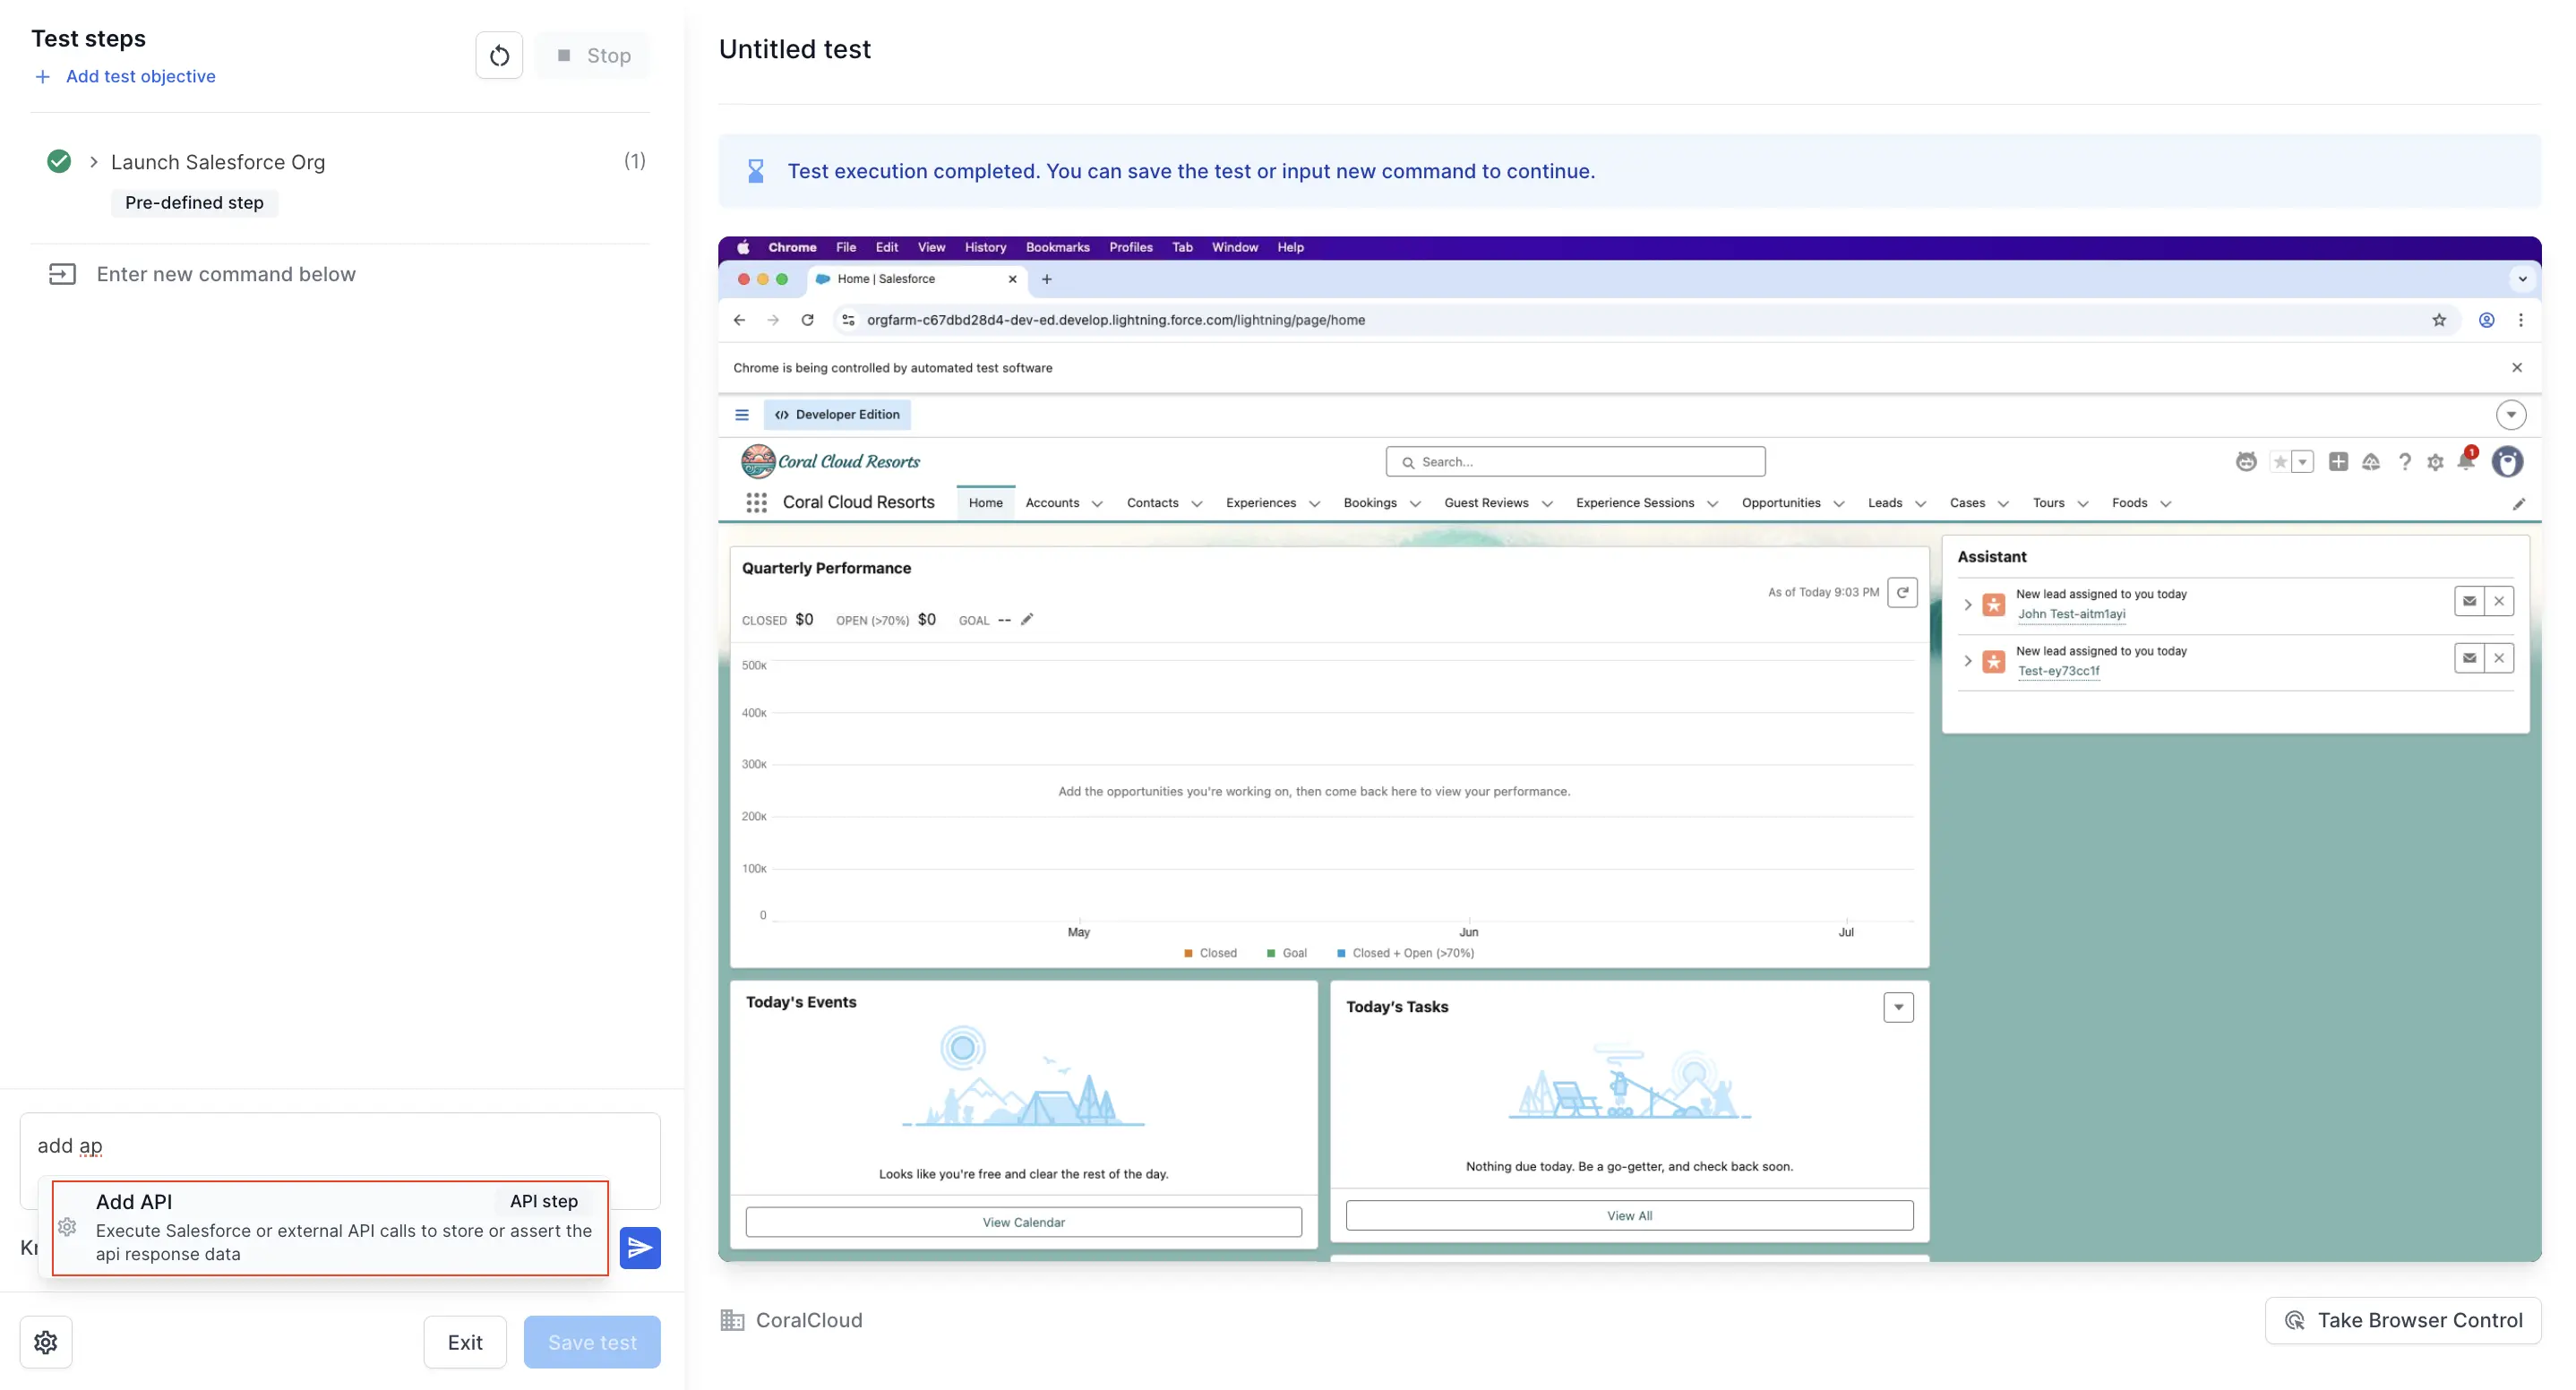
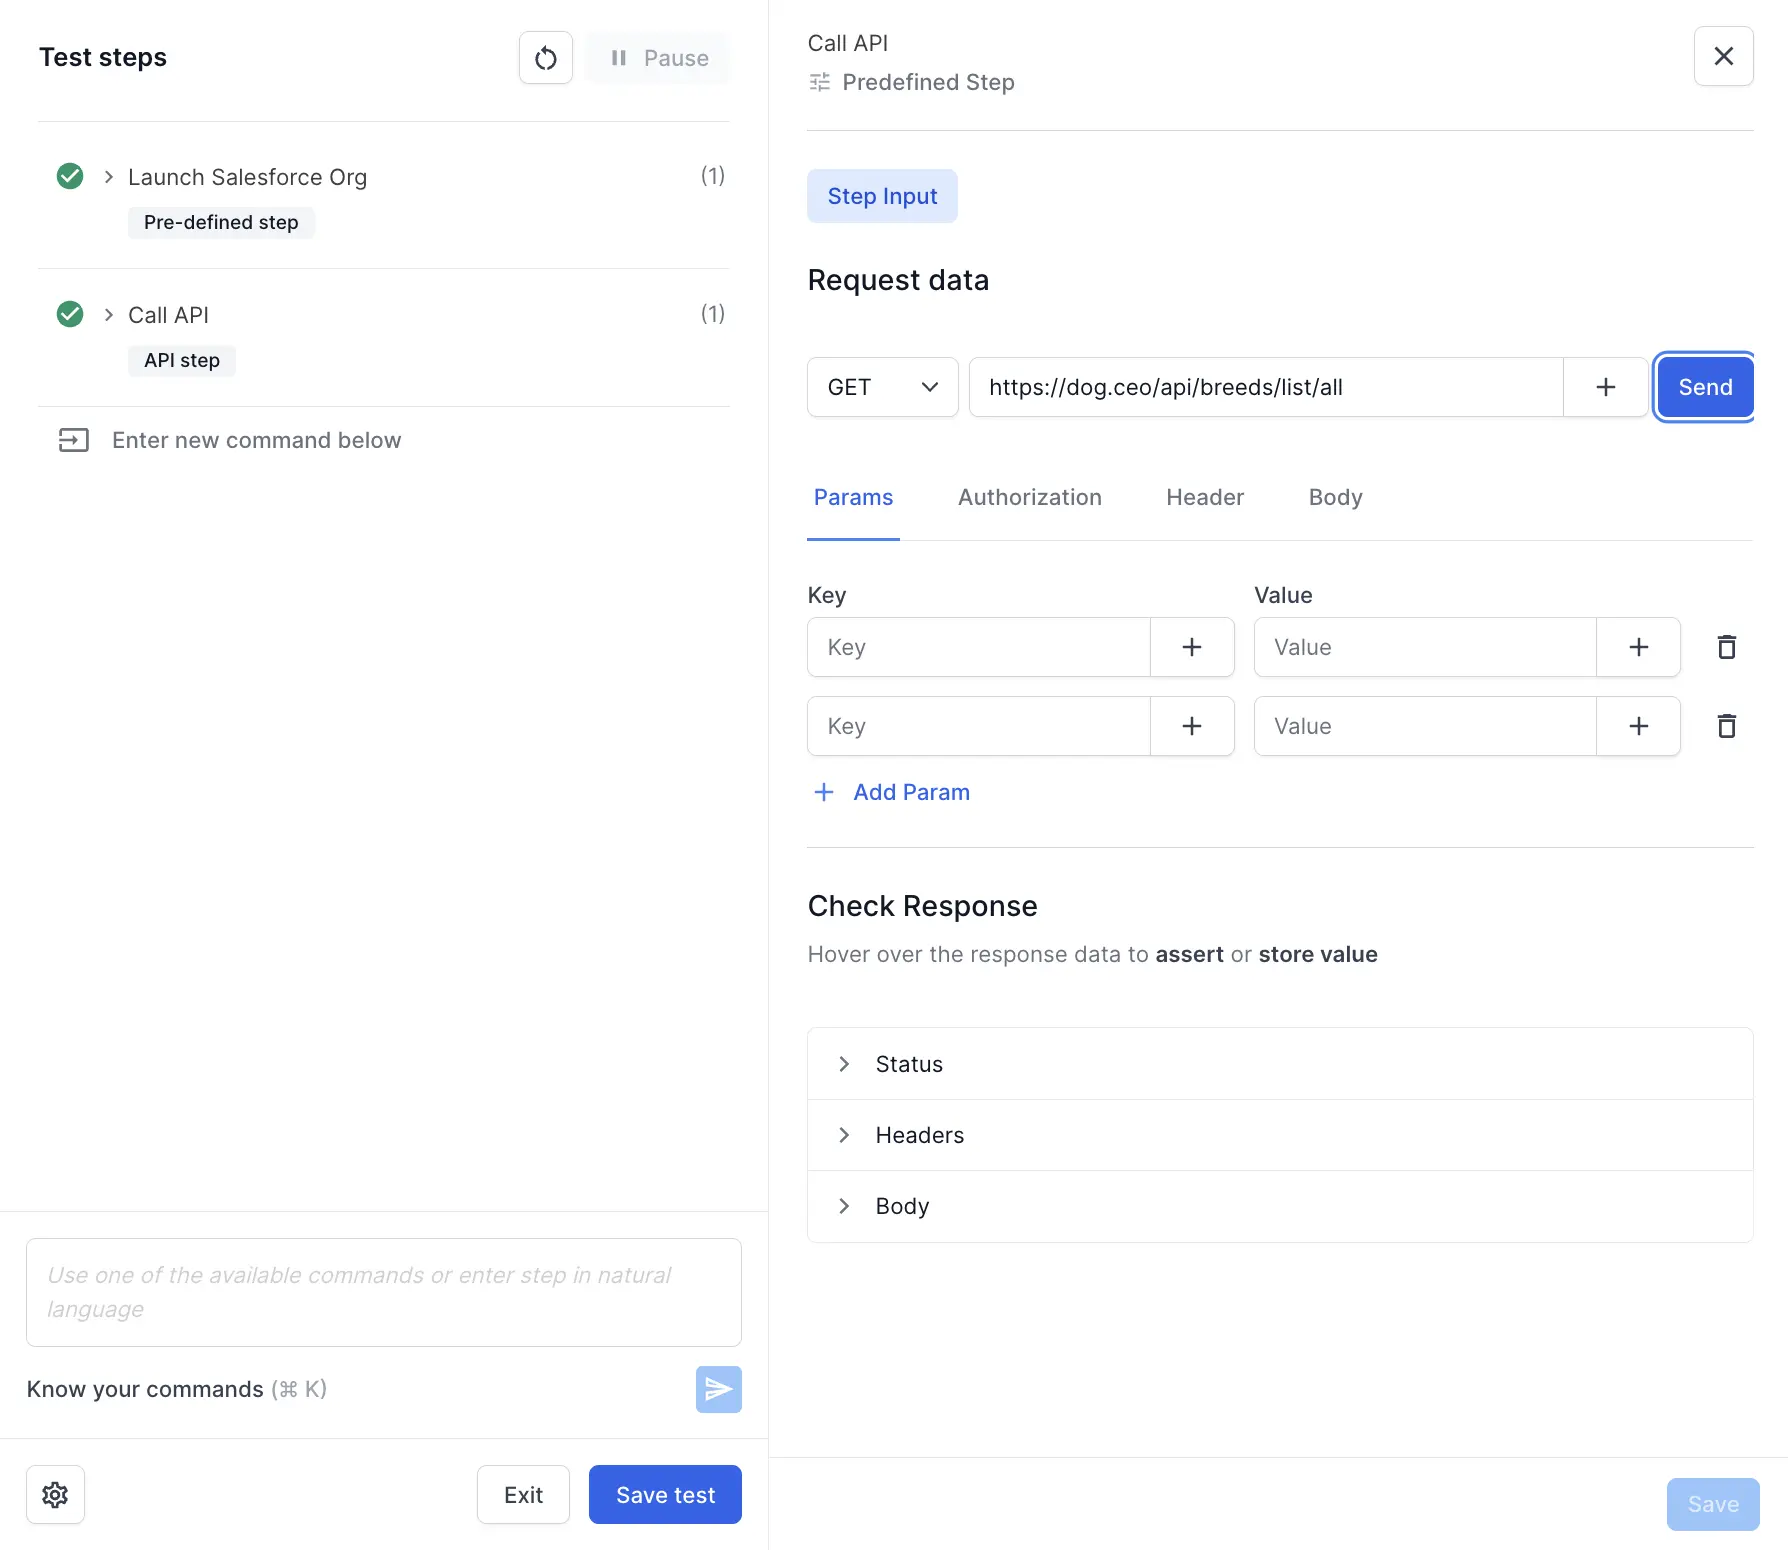
- The API step configuration panel opens on the right side.
- Configure the API request:
- Method: Select the HTTP method (GET, POST, PUT, PATCH, DELETE)
- URL: Enter the API endpoint URL
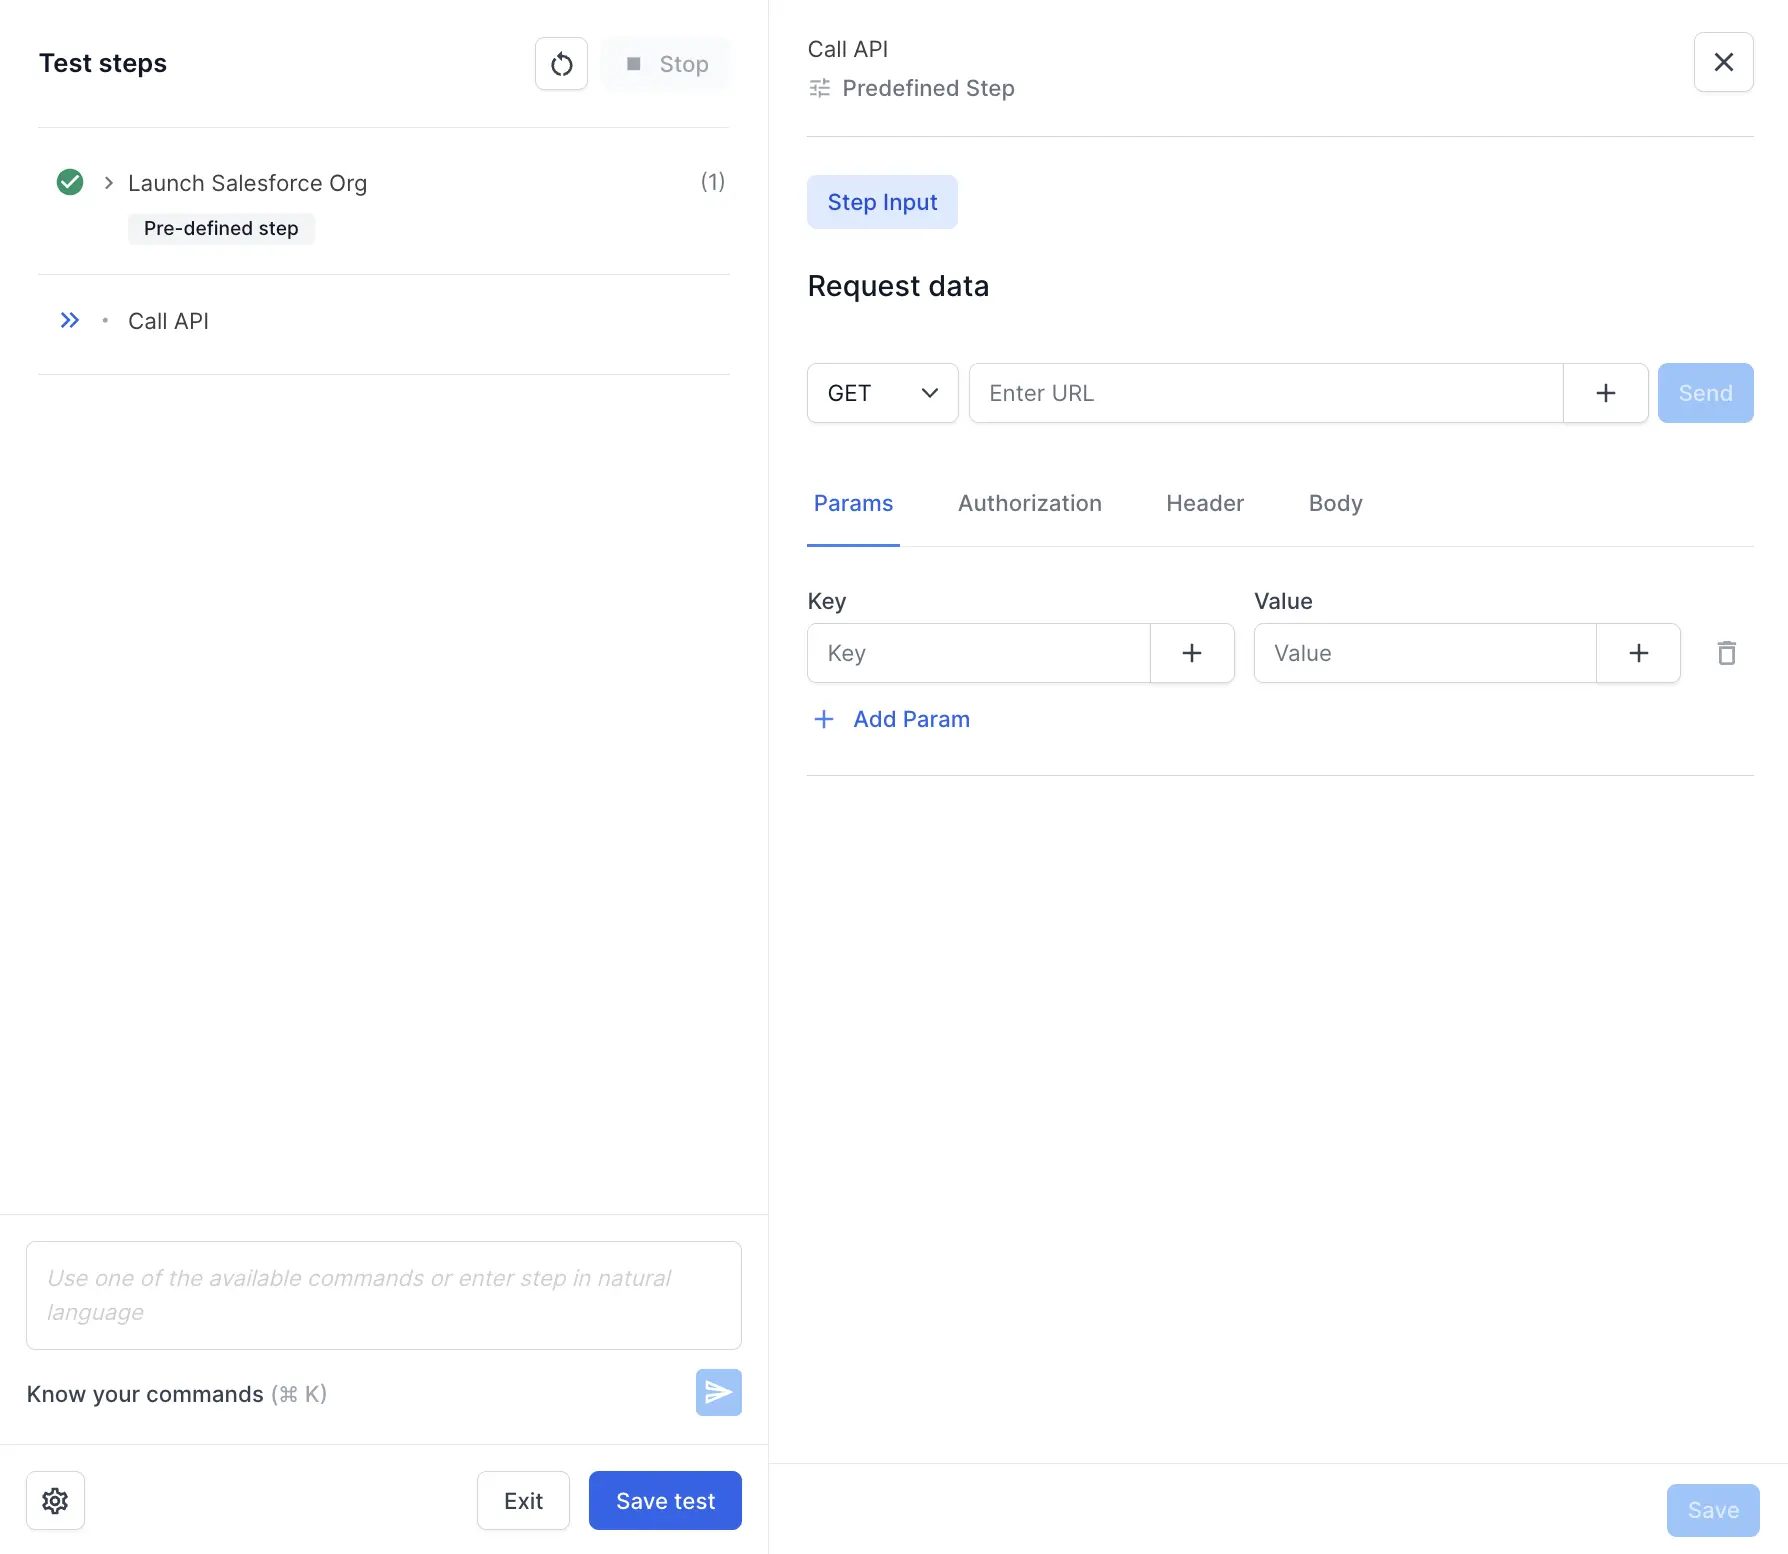
- Click Send to test the API request and view the response.
Request data
Configure your API request with the following details:
HTTP method
Select the HTTP method for your API request from the dropdown:
- GET: Retrieve data from the server
- POST: Send data to create a new resource
- PUT: Update an existing resource
- PATCH: Partially update a resource
- DELETE: Remove a resource
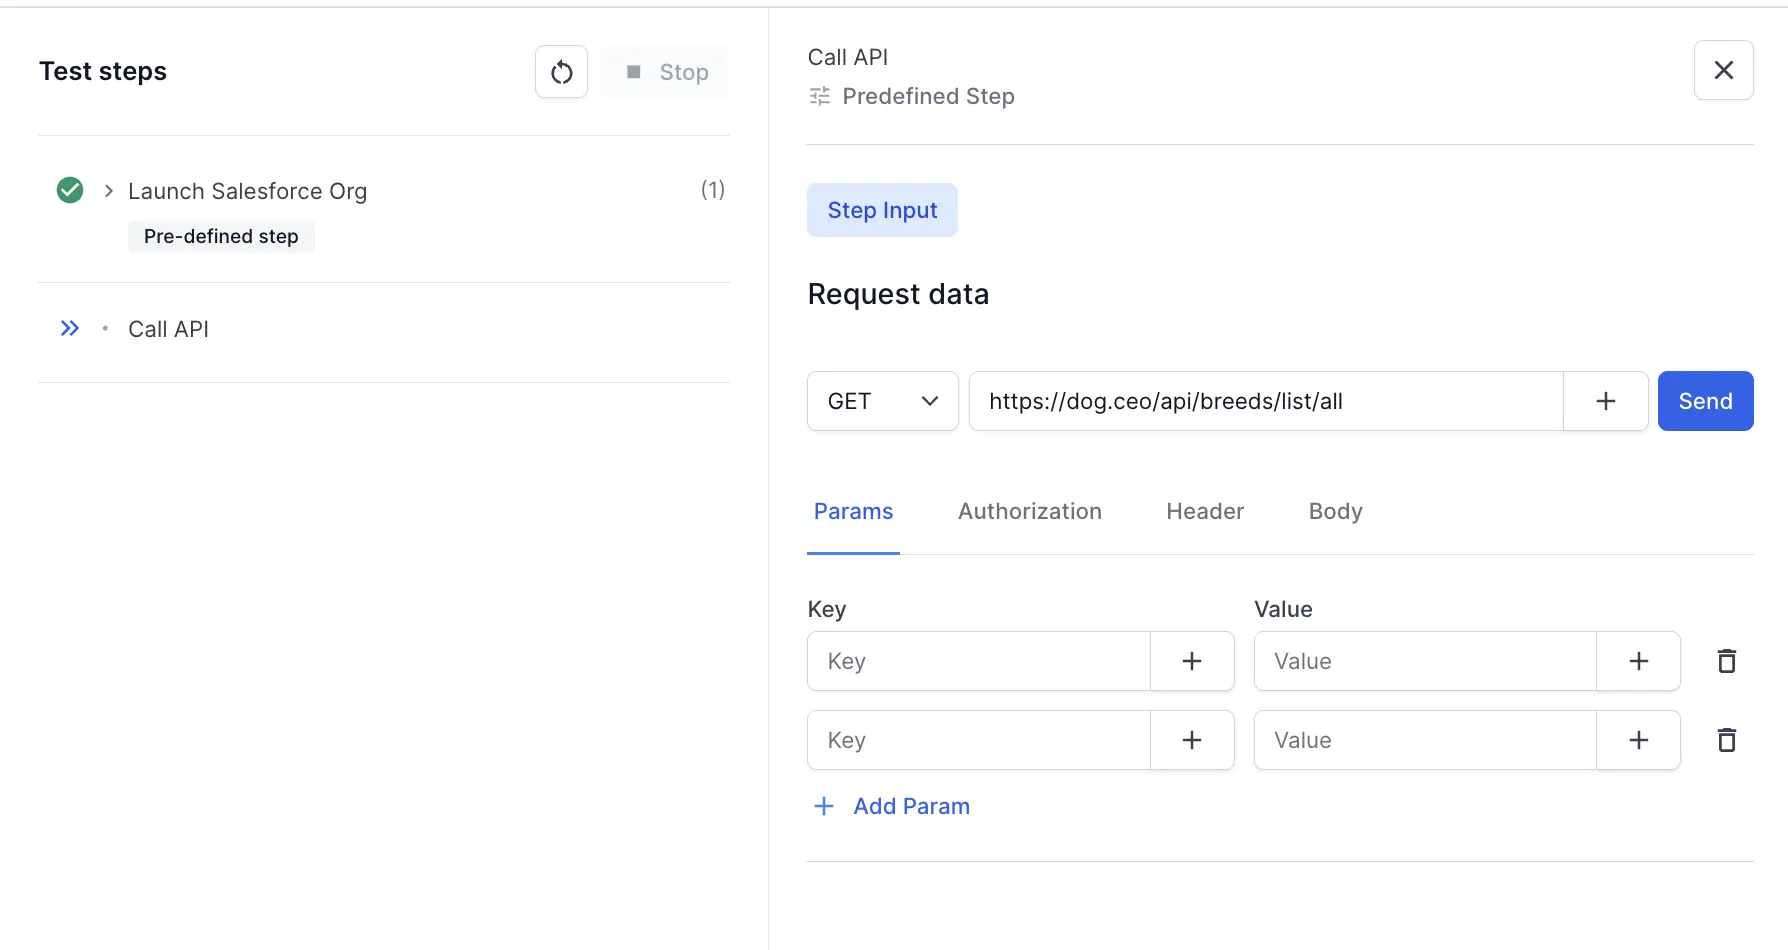
URL
Enter the complete API endpoint URL in the URL field. You can use variables in the URL to make it dynamic.
Example:
https://dog.ceo/api/breeds/list/all
Request parameters
Configure request parameters using the tabs:
- Params: Add query parameters as key-value pairs
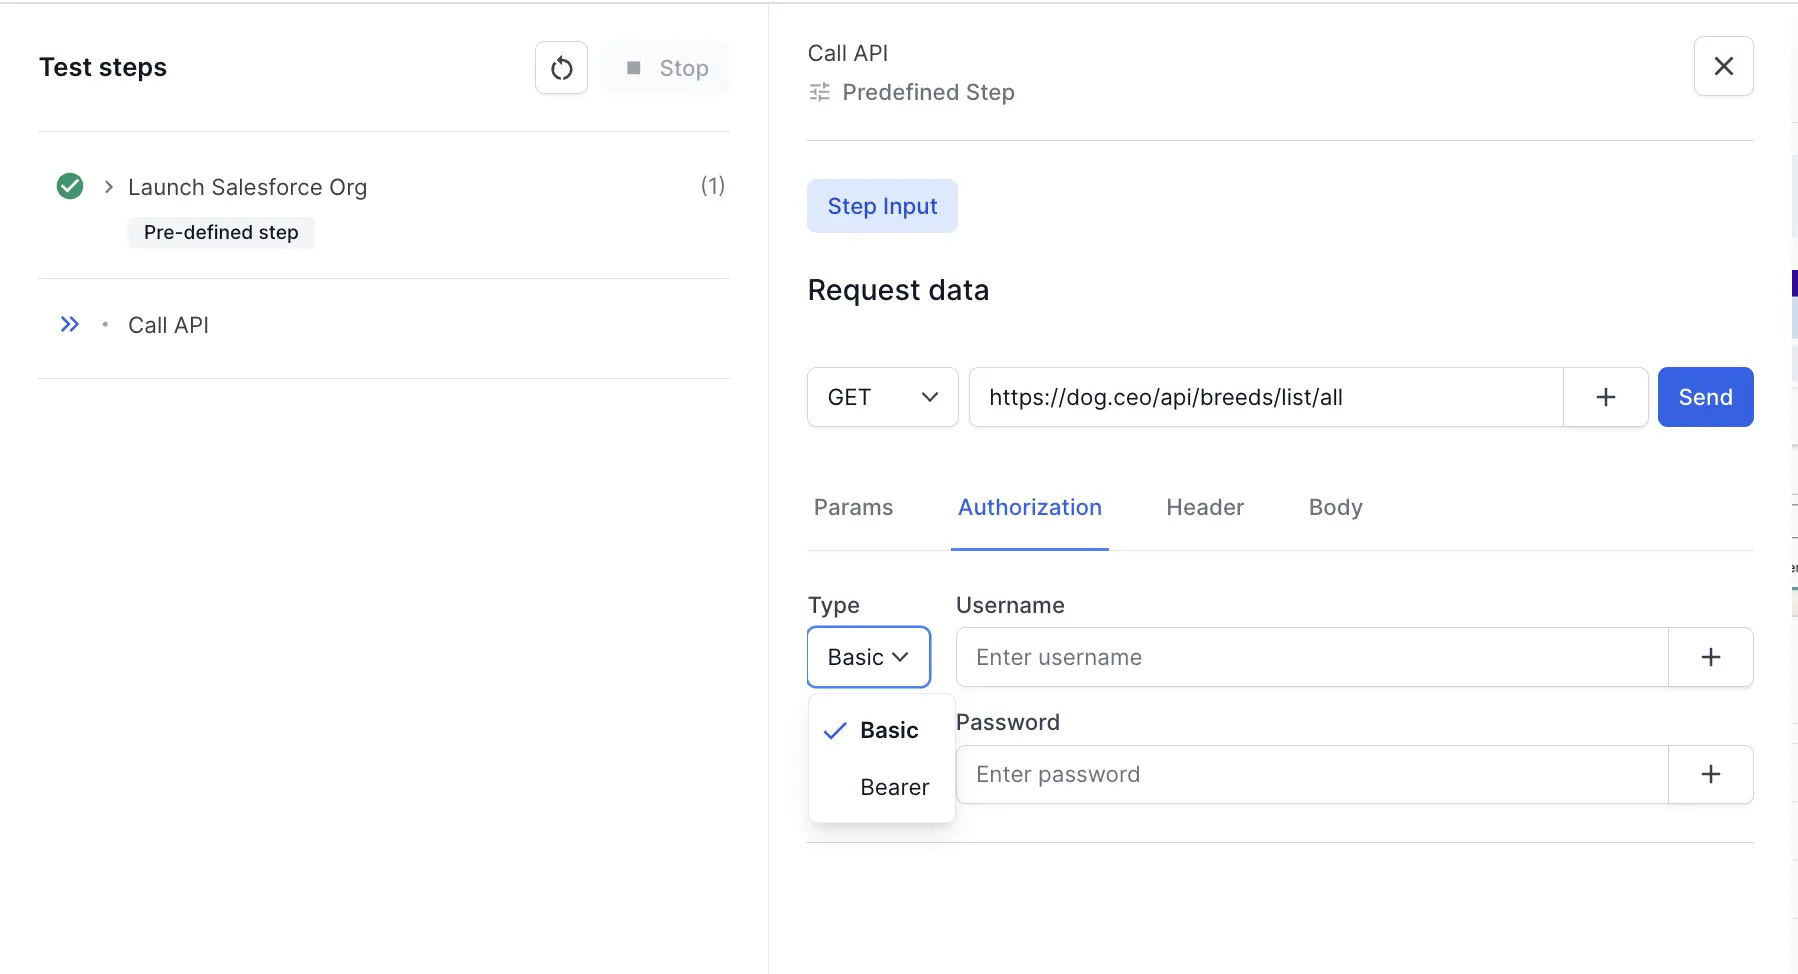
- Authorization: Configure authentication (Basic Auth or Bearer Token)
- Header: Add custom headers for your request
- Body: Add request body data for POST, PUT, or PATCH requests (supports JSON, XML, form data)
To add parameters:
- Click the respective tab (Params, Authorization, Header, or Body).
-
Enter the Key and Value for each parameter.
- Click + Add Param to add multiple parameters.
- You can import variables into the value fields by clicking the + icon next to the value field.
For authentication, use the Authorization tab to configure Basic Auth or Bearer Token:
Send request
Click the Send button to execute the API request and view the response in real-time. This helps you verify the API configuration before adding validations or extracting values.
Import existing variable
You can use existing variables in your API request configuration:
- Click the + icon next to any input field (URL, parameter value, header value).
- Select Import variables from the dropdown.
- Choose from available variables:
- Test dataset variables
- Global variables
- Variables created in previous steps
This allows you to create dynamic API requests that use data from your test flow.
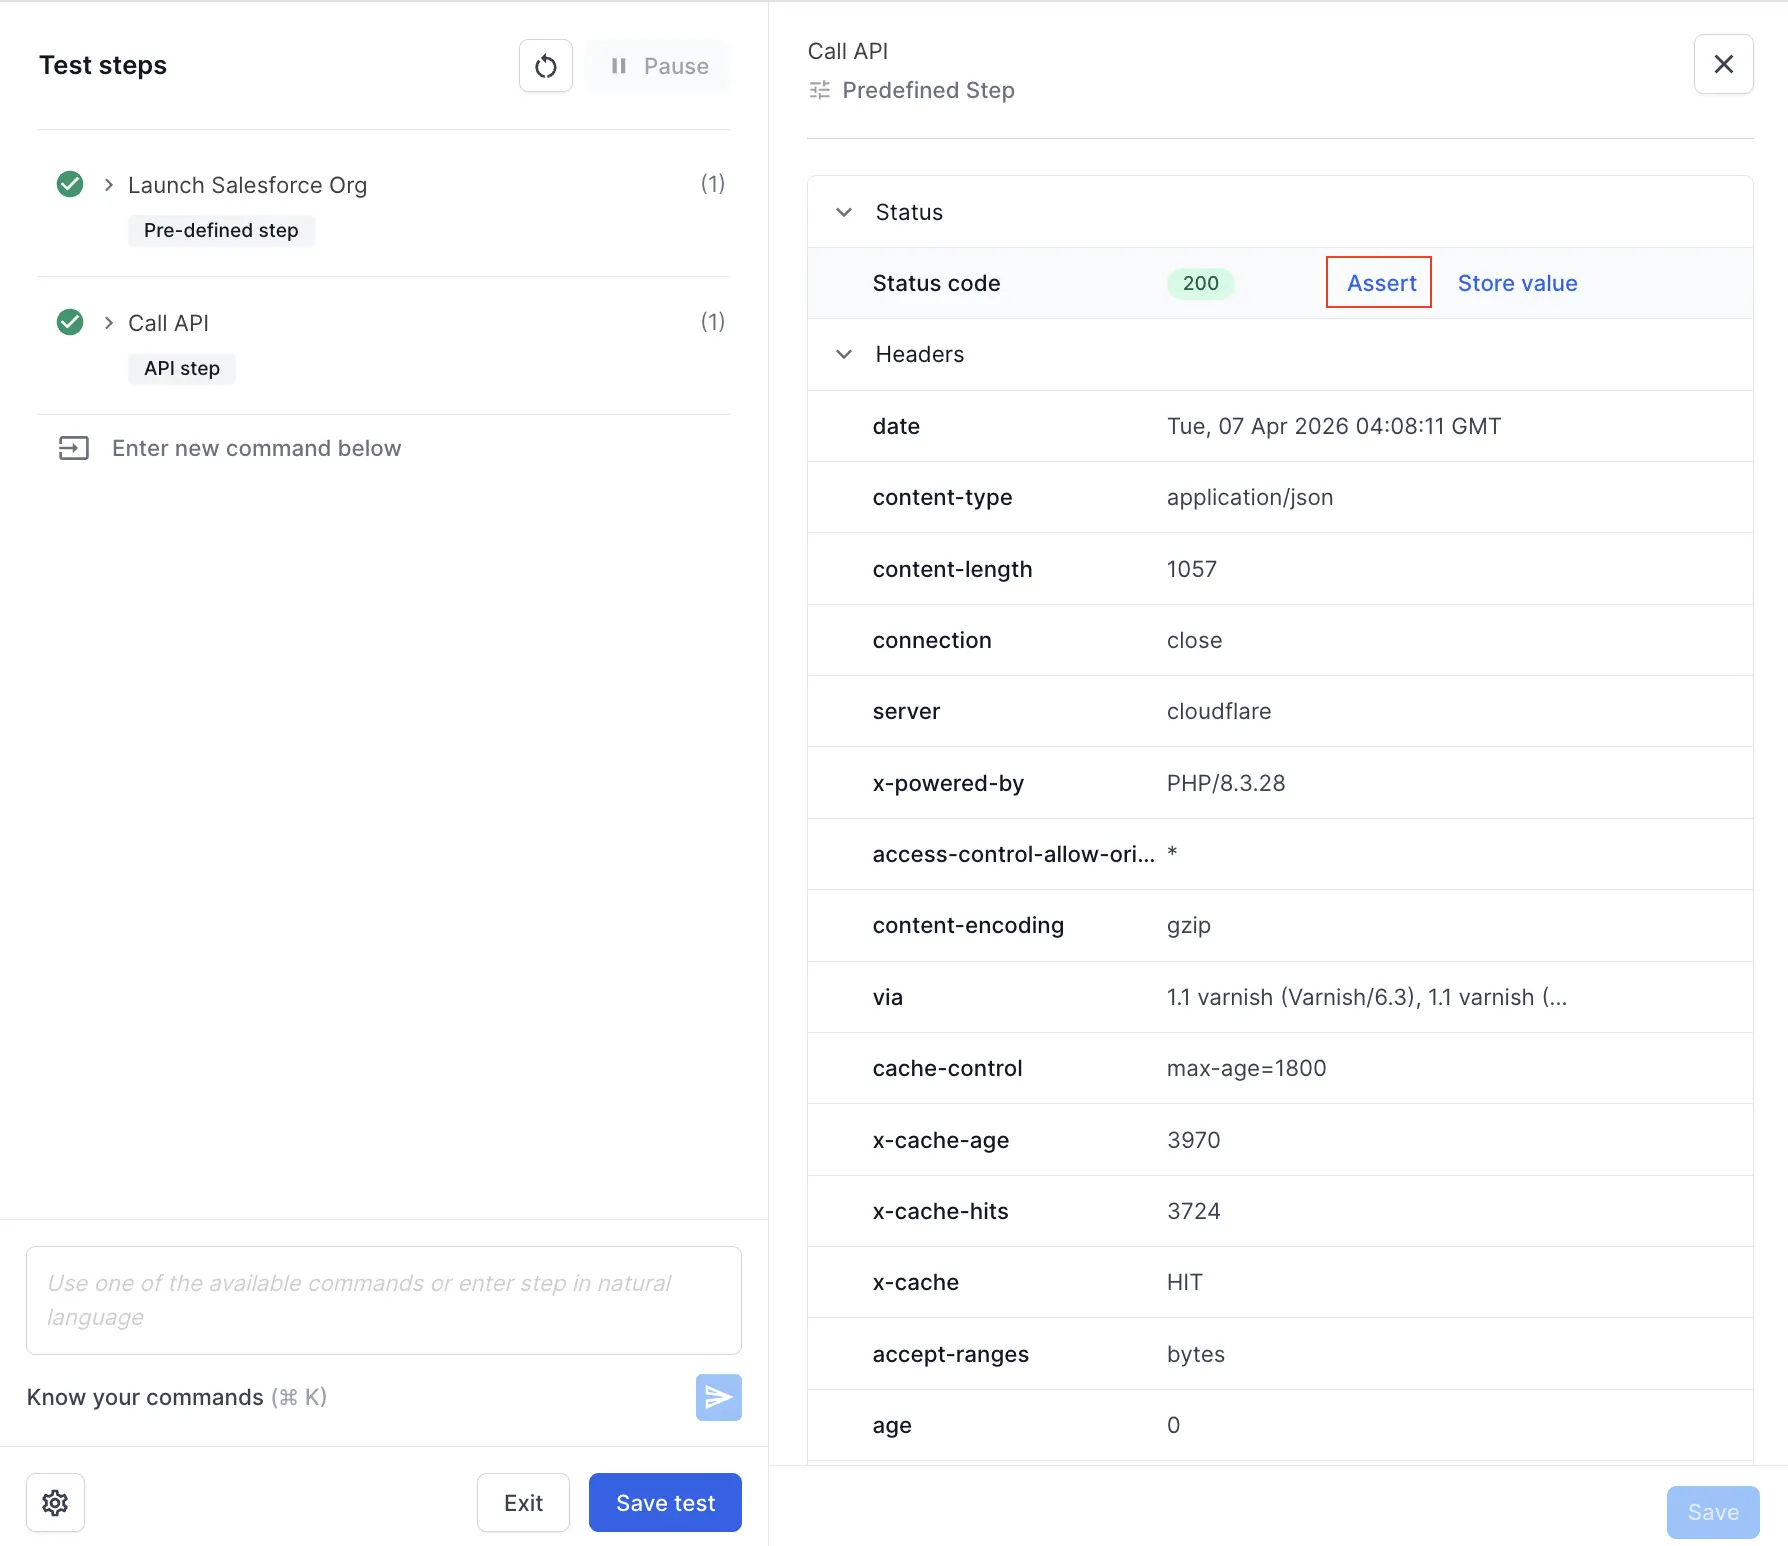
Assert value
Add assertions to validate API response data and ensure your API returns expected values.
To validate response data:
- In the API step panel, click the Check Response section.
- Expand the response sections (Status, Headers, Body) to view available fields.
-
Hover over any field value and click Assert to create a validation.
- In the assertion dialog:
- Captured value: Shows the actual value from the API response
- Comparison operator: Select from equals, not equals, contains, does not contain, greater than, less than, etc.
- Expected value: Enter the value you expect or import a variable
-
Enable case sensitivity: Toggle for case-sensitive string comparisons
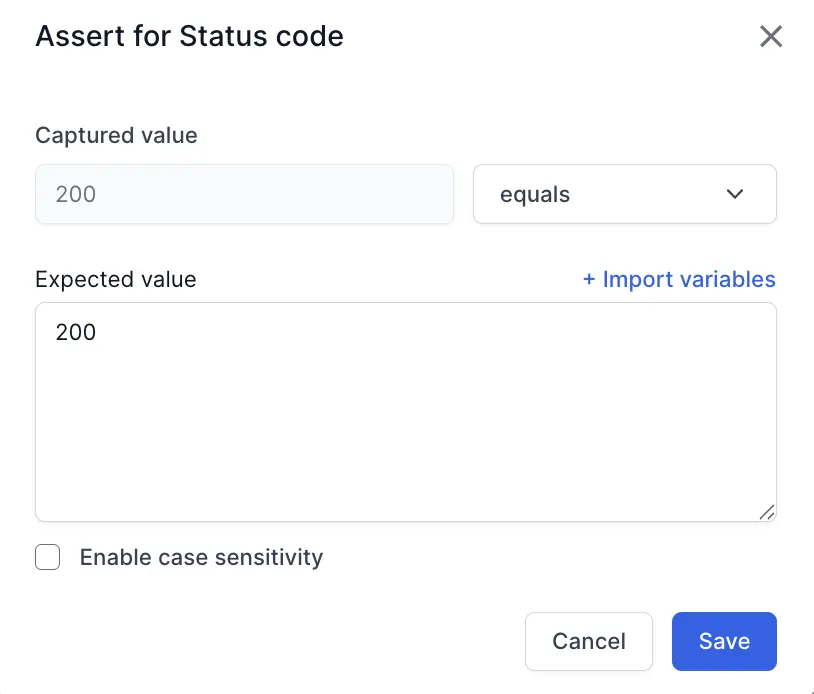
- Click Save to add the assertion.
Common validations:
- Verify status code is 200 (success)
- Check response headers (content-type, authorization)
- Validate specific fields in the response body
- Ensure arrays contain expected number of items
You can add multiple assertions to the same API step to validate different aspects of the response.
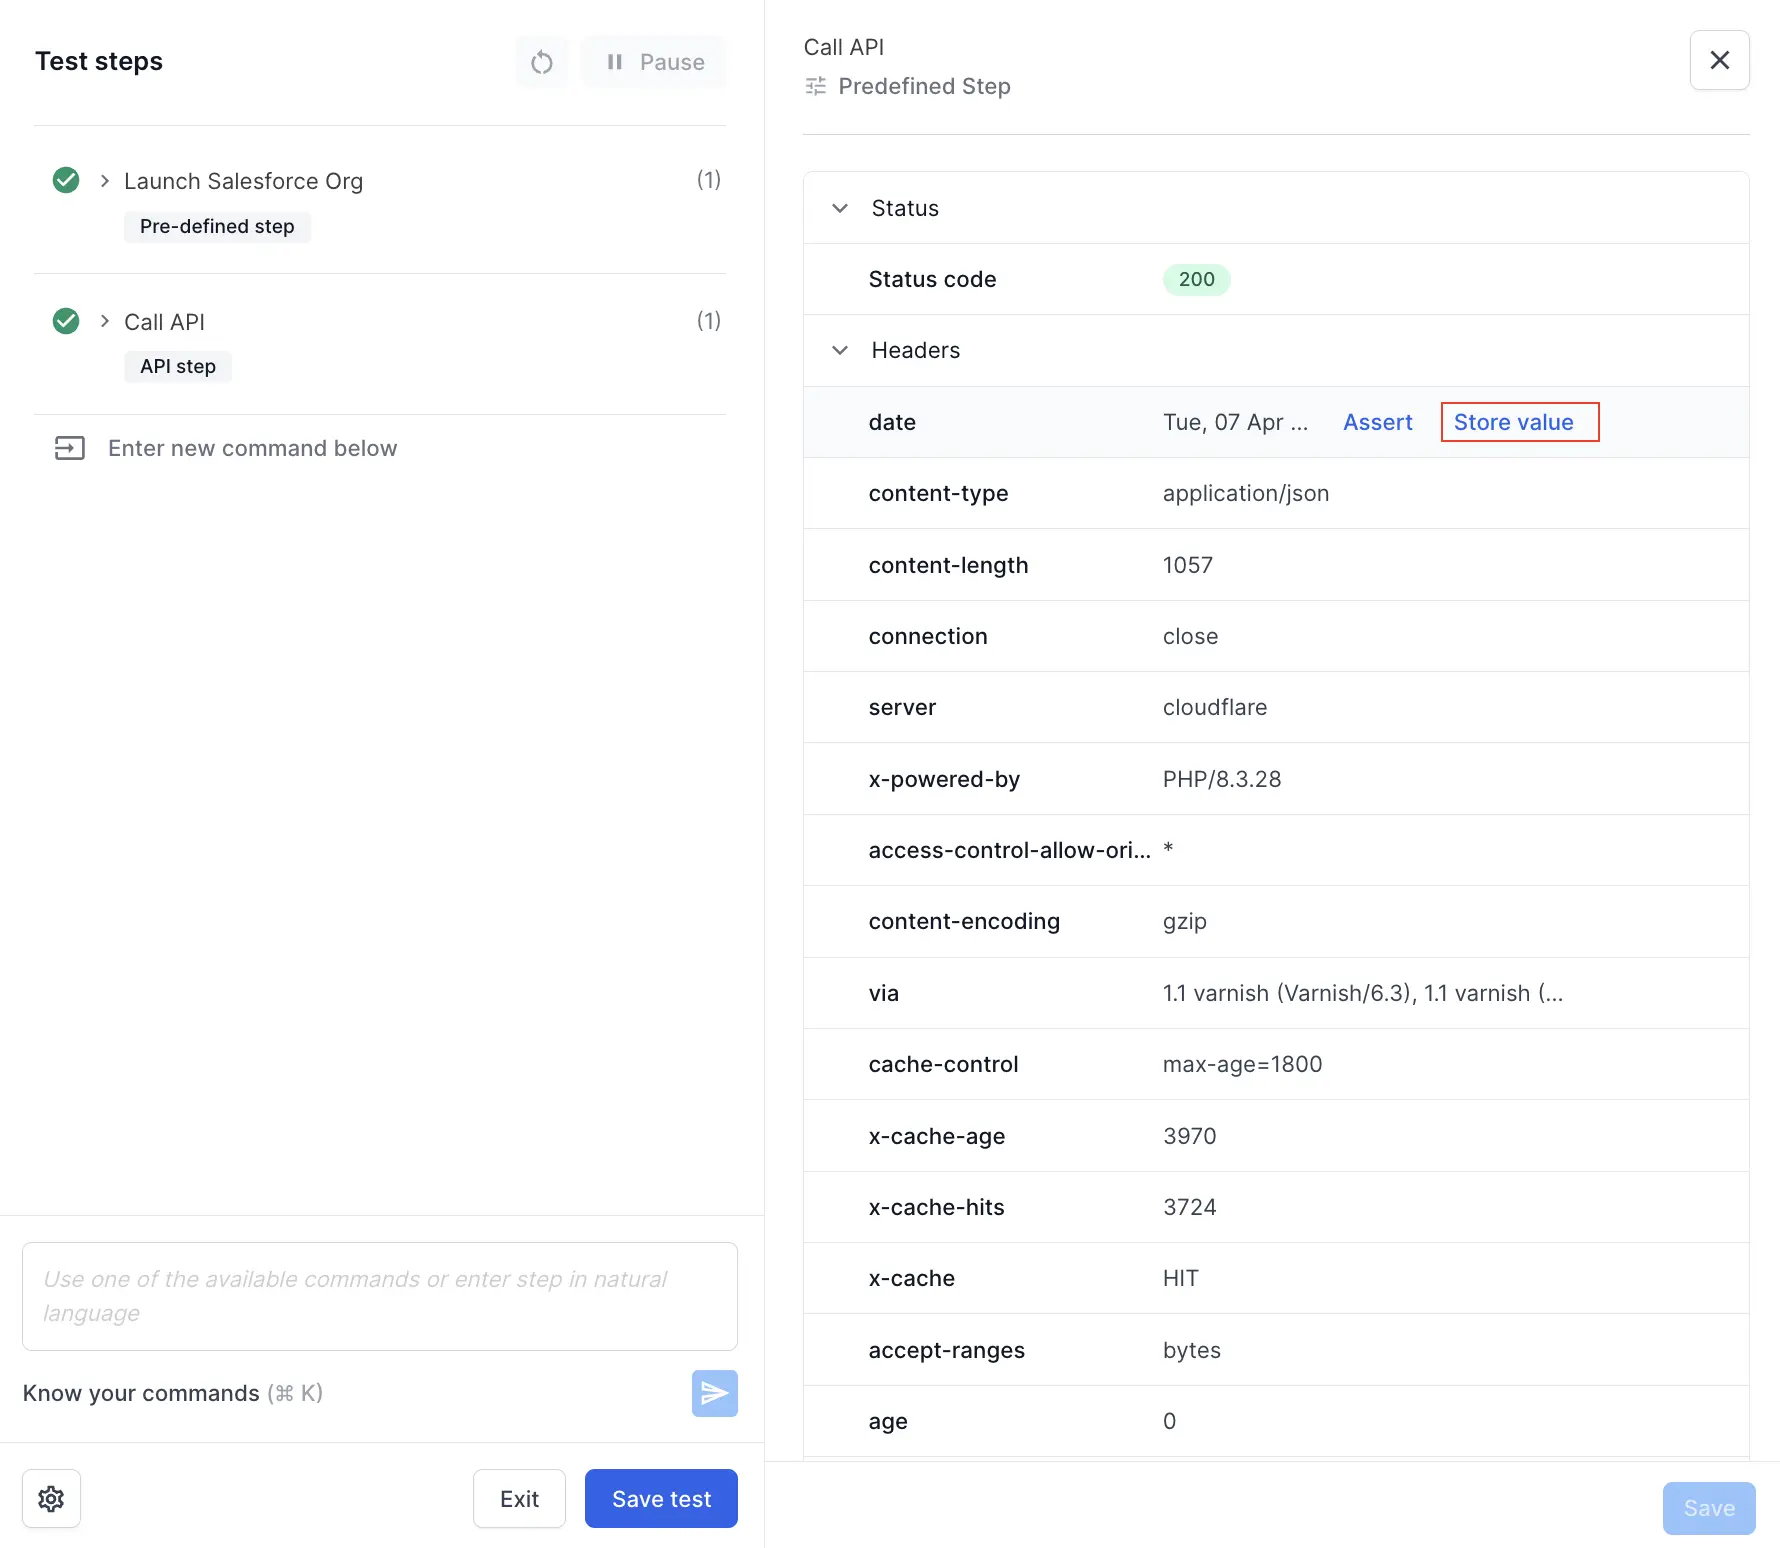
Store value
Extract values from API responses and store them as variables for use in later test steps. We support both JSON and XML responses.
To extract values from response:
- In the API step panel, expand the Check Response section.
- Navigate through the JSON structure to find the field you want to extract.
-
Hover over the field value and click Store value.
- In the “Store value for vary” dialog:
-
Name of the variable: Enter a unique variable name (e.g.,
breed_name,user_id) - “vary” value: Shows the JSON path to extract the value
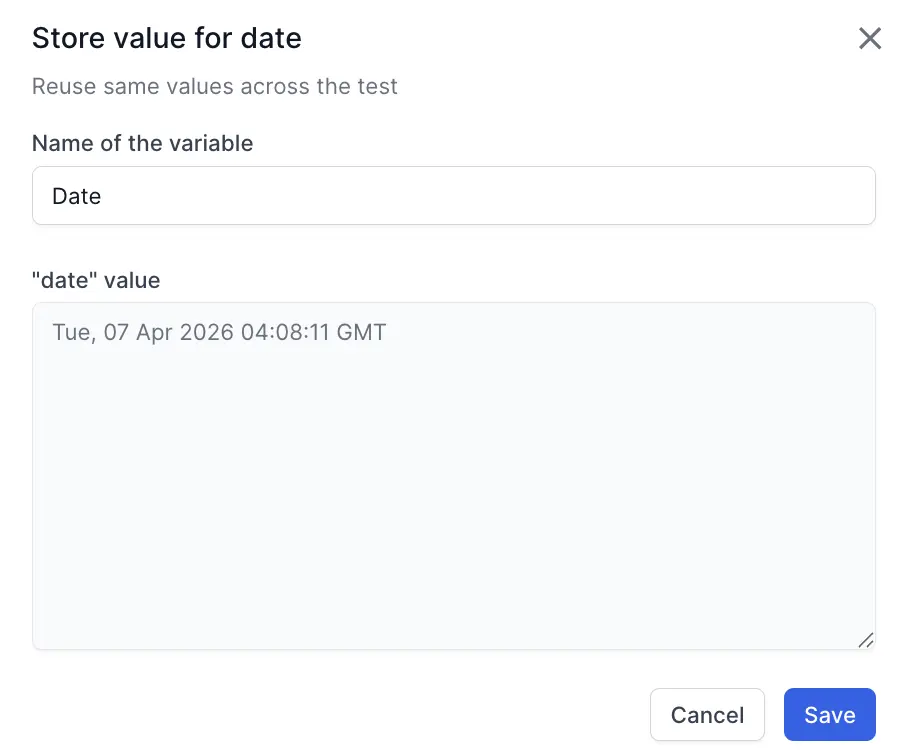
-
Name of the variable: Enter a unique variable name (e.g.,
- Click Save to create the variable.
The extracted value is stored as a test variable and can be used in subsequent steps by referencing ``.
Use cases:
- Extract authentication tokens from login API responses
- Store record IDs created through APIs
- Capture dynamic values for data validation
- Use API response data in UI test steps
Variable names must be unique within the test. If you create a variable with an existing name, it will overwrite the previous value.
View API step results
During and after test execution:
- Status: Shows whether the API call succeeded or failed
- Response time: Displays how long the API took to respond
- Status code: Shows the HTTP response code
- Response body: View the complete API response
- Assertions: See which validations passed or failed
- Variables: View extracted values stored in variables
Add descriptive names to your API steps by clicking the step and editing the name. This makes it easier to identify API calls in test execution logs.
We're sorry to hear that. Please share your feedback so we can do better
Contact our Support team for immediate help while we work on improving our docs.
We're continuously improving our docs. We'd love to know what you liked
We're sorry to hear that. Please share your feedback so we can do better
Contact our Support team for immediate help while we work on improving our docs.
We're continuously improving our docs. We'd love to know what you liked
Thank you for your valuable feedback!