
 Join our Discord
Browser settings
Set the browser viewport size, choose whether tasks reuse a browser profile, and decide whether the agent runs visibly or headless.
Browser settings control how Test Companion renders and drives web pages during browser-based tasks. From this tab, you set the viewport size, the browser profile behavior, and headless mode. Each setting changes what the AI sees and how it acts. Choosing the correct viewport size, for example, ensures that the AI sees your application the way your end users would on a specific device category.
How to open settings
To open the browser settings:
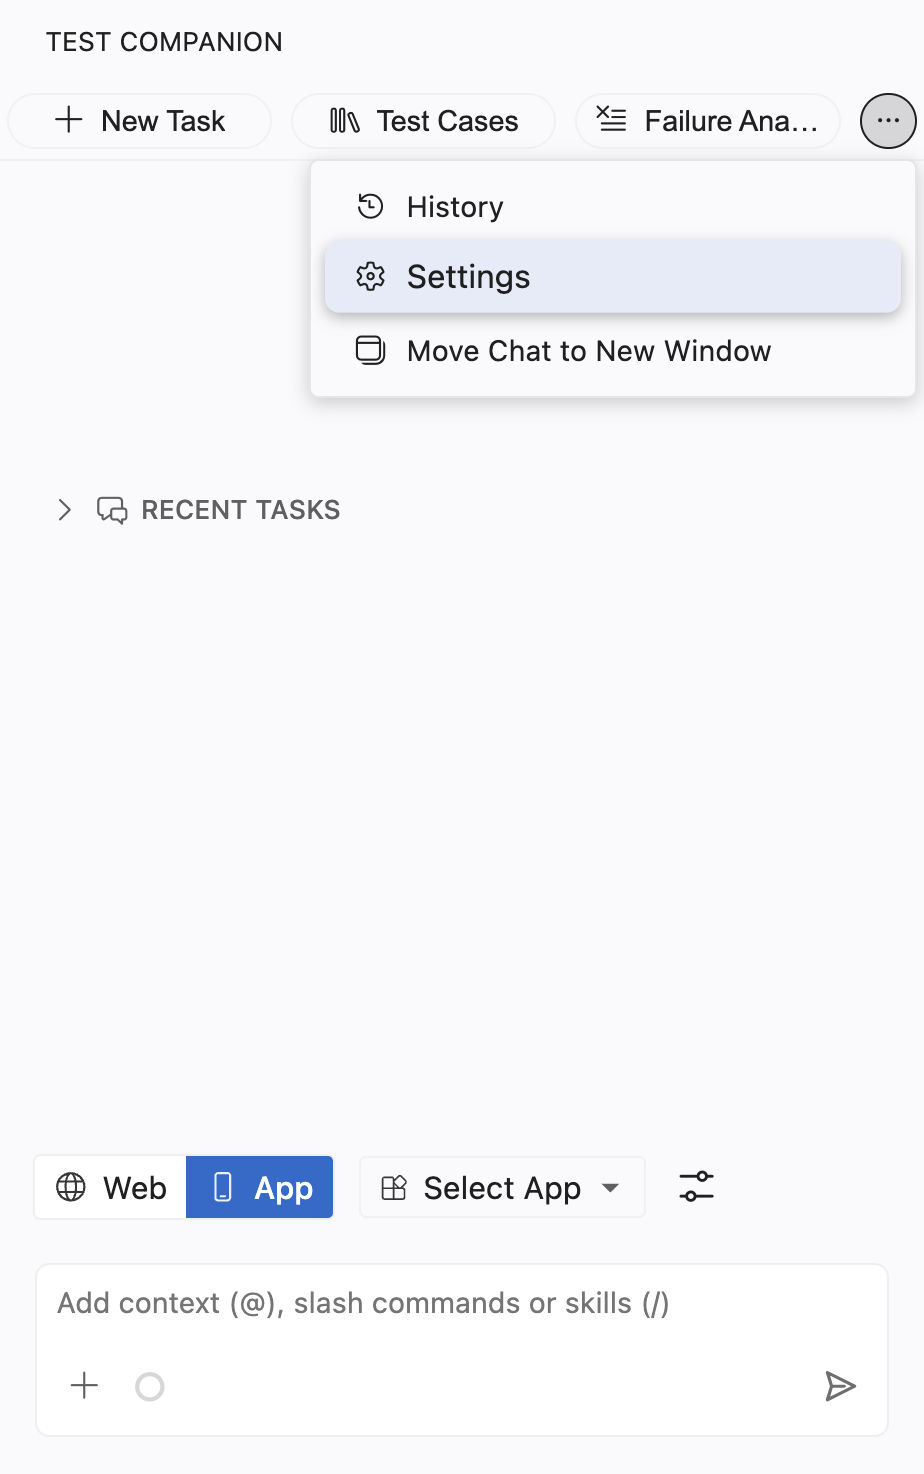
Click the ... (more options) button at the top-right corner of the Test Companion panel, then select Settings.
Select the Browser Settings tab.
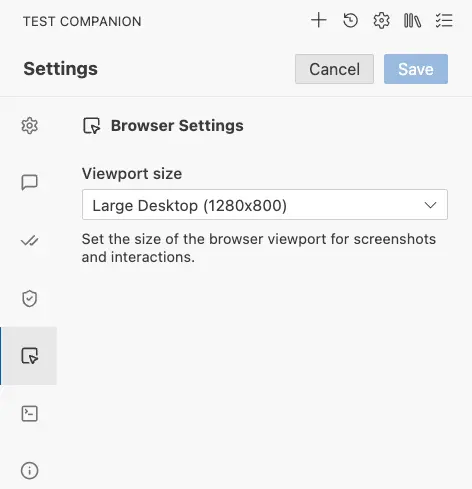
Set the viewport size you need, then click Save.
Viewport size
The viewport size defines the width and height of the virtual browser window that Test Companion uses when interacting with websites. This affects how web pages render, which elements are visible, and which responsive design breakpoints are triggered.
| Setting | Details |
|---|---|
| Field type | Dropdown |
| Default value | Large Desktop (1280×800) |
| Options | Full HD (1920×1080), Large Desktop (1280×800), Small Desktop (900×600), Tablet (768×1024), Mobile (360×640) |
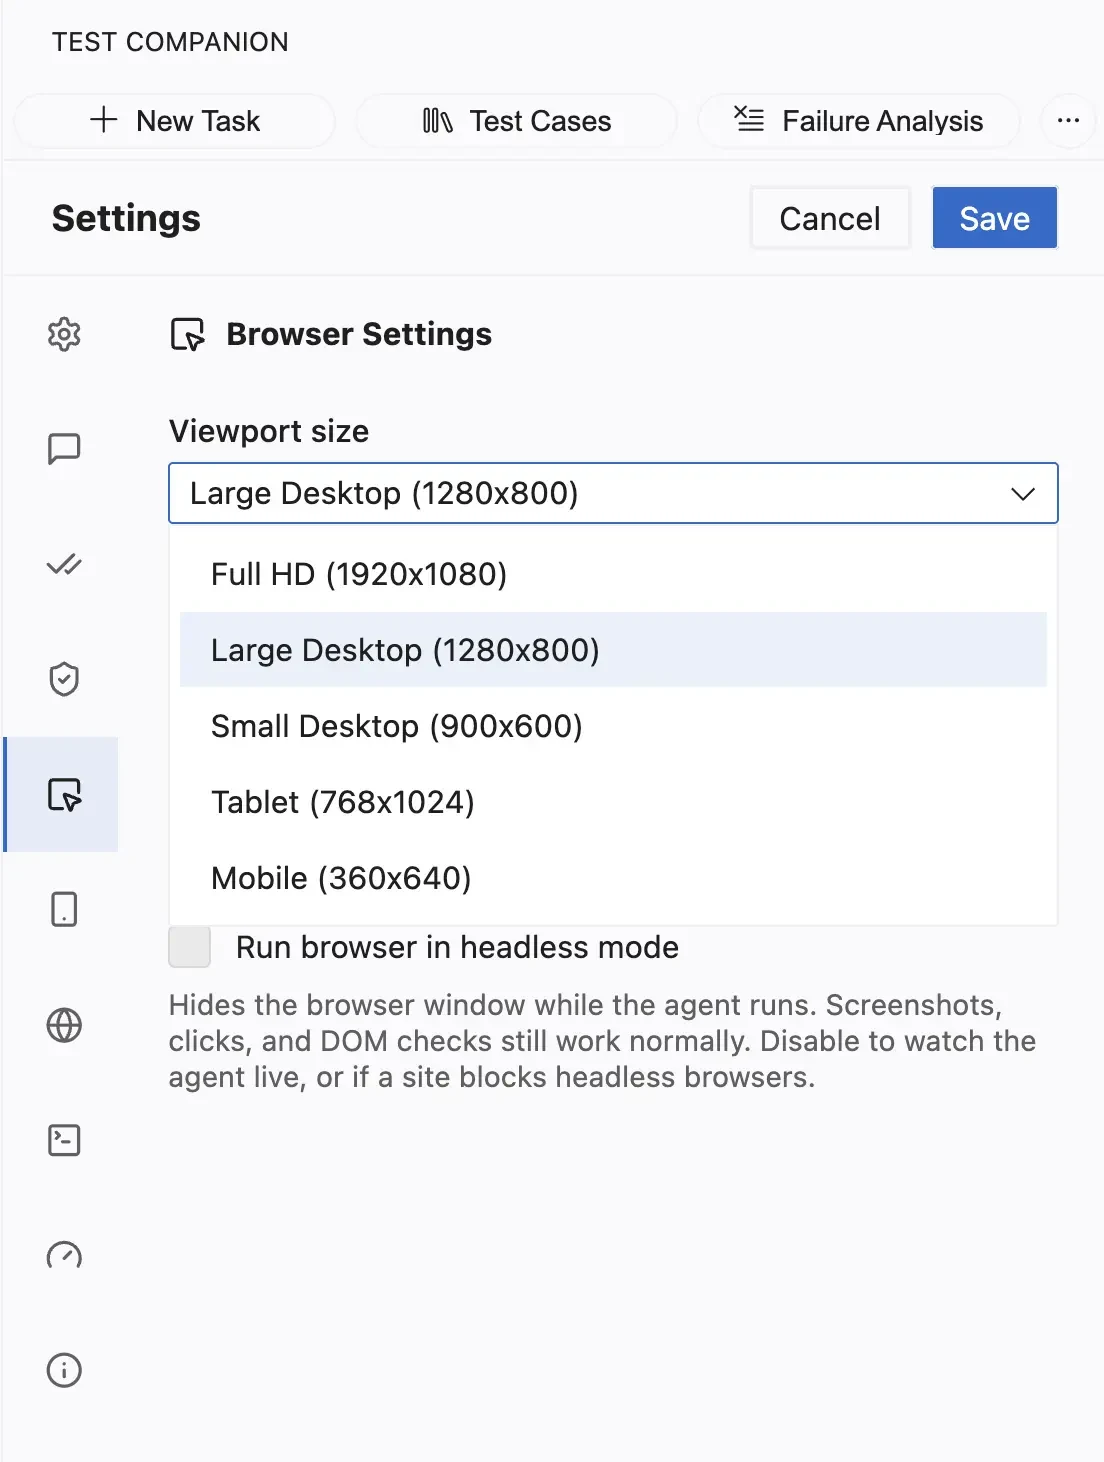
Available viewport options
Test Companion supports the following viewport options:
Full HD
The largest viewport, at 1920×1080. This matches a full HD external monitor and shows the widest version of a responsive layout.
Use this when:
- Your application targets large, high-resolution desktop displays.
- You need to see wide layouts, multi-column dashboards, or content that only appears at full width.
- You are reproducing an issue a user reported on a 1080p monitor.
Large Desktop
The default setting, at 1280×800. This matches a standard laptop display and is the most common viewport for desktop web testing.
Use this when:
- Your application is primarily used on desktop or laptop computers.
- You want to see the “full” version of a responsive website.
- You are generating tests for the standard desktop experience.
- You are not sure which viewport to choose (this is a safe default).
Small Desktop
A narrower desktop viewport, at 900×600. Many responsive websites start to adjust their layout at this width, collapsing navigation menus or rearranging content into fewer columns.
Use this when:
- You want to test how your application responds to a smaller browser window.
- Your users frequently resize their browser windows or use split-screen setups.
- You need to verify that elements remain accessible at a reduced width.
Tablet
A portrait-orientation tablet viewport, at 768×1024, that matches common tablets like the iPad. At this size, most responsive websites switch to their tablet layout, typically a mix of mobile and desktop design elements.
Use this when:
- Your application has a tablet-specific layout you need to test.
- You are testing responsive behaviour at the tablet breakpoint.
- Your users access the application on iPads or similarly sized devices.
Mobile
A portrait-orientation mobile viewport, at 360×640, that matches a typical smartphone screen. At this size, responsive websites display their mobile layout: single-column content, hamburger menus, and touch-optimized controls.
Use this when:
- You are testing the mobile experience of your web application.
- You need to generate tests that verify mobile-specific UI elements (hamburger menus, swipe gestures, bottom navigation bars).
- Your product team needs mobile-specific test coverage.
How viewport size affects the AI’s behaviour
The viewport choice matters because Test Companion uses browser screenshots to see your application. When the AI takes a screenshot at a mobile viewport, it sees the mobile layout. It tailors its actions and test generation accordingly.
For example:
- At Large Desktop, the AI may interact with a full navigation bar and side panel.
- At Mobile, the AI recognizes that it needs to tap a hamburger menu icon first to access navigation links, and it generates test steps accordingly.
This means you should match the viewport to the device your tests are meant to cover. If you are writing tests for the mobile experience, switch to Mobile viewport before starting the task. The AI’s understanding of your application changes based on what it sees.
Use case
Testing across multiple viewports
If you need to test the same feature across multiple device sizes (a common requirement for responsive design testing), you can:
- Set the viewport to Large Desktop, generate or run your desktop tests.
- Change the viewport to Tablet, then repeat the task for the tablet layout.
- Change to Mobile and run the task again.
Each run will produce tests or interactions tailored to that specific viewport’s layout.
Pair your viewport choice with the right BrowserStack device targets in your System Instructions.
For example, if you set the viewport to Mobile (360×640), your System Instructions might specify:
- Target BrowserStack device: Samsung Galaxy S23, Android 14.
This way, the generated test code matches both the visual layout and the cloud device configuration.
Use persistent browser profile
A browser profile holds cookies, saved logins, and local storage. When you turn this on, Test Companion reuses the same profile across tasks, so a login or a saved preference from one task carries into the next. When you leave it off, each task starts with a fresh browser that has no history. For test case and test script generation, keep this off. A fresh start gives every task the same baseline, which keeps generated output consistent and avoids interference from a previous task.
| Setting | Details |
|---|---|
| Field type | Checkbox |
| Default value | Disabled (unchecked) |
| What it does | Reuses the same browser profile (cookies, saved logins, and localStorage) across tasks instead of starting each task with a fresh browser. |
Run browser in headless mode
When headless mode is on, Test Companion hides the browser window while the agent works. The agent still takes screenshots, clicks elements, and runs DOM checks exactly as before. When headless mode is off, the browser window opens on your screen so you can watch the agent work in real time. The choice does not change the agent’s results.
| Setting | Details |
|---|---|
| Field type | Checkbox |
| Default value | Disabled (unchecked) |
| What it does | Hides the browser window while the agent runs. Screenshots, clicks, and DOM checks still work. |
We're sorry to hear that. Please share your feedback so we can do better
Contact our Support team for immediate help while we work on improving our docs.
We're continuously improving our docs. We'd love to know what you liked
We're sorry to hear that. Please share your feedback so we can do better
Contact our Support team for immediate help while we work on improving our docs.
We're continuously improving our docs. We'd love to know what you liked
Thank you for your valuable feedback!