How to customize rules in the rule engine
Use rule engine customization to enable or disable specific accessibility rules and adjust severity based on your organization’s testing priorities.
This guide explains how to configure rules and apply those settings across your organization.
Prerequisites
Before you start:
- Ensure you have Owner or Admin access.
- Ensure your team understands the impact of rule customization. For details, see Impact of rule engine customization.
Customize individual rules
To enable customization, follow these steps:
- Go to Settings.
- Switch on Enable custom rule engine configuration under Rule Engine Customisation.

- If you agree to the impact of customizing rules, click Continue to confirm. You can see a list of different rules listed under the type of rule, like
keyboard,color, etc. Expand each type to view the individual rules, their WCAG success criteria, severity, and current activation status.
To customize individual rules:
- You can disable or enable any rule using the toggle next to each rule.Use individual updates when you want fine-grained control over specific checks.
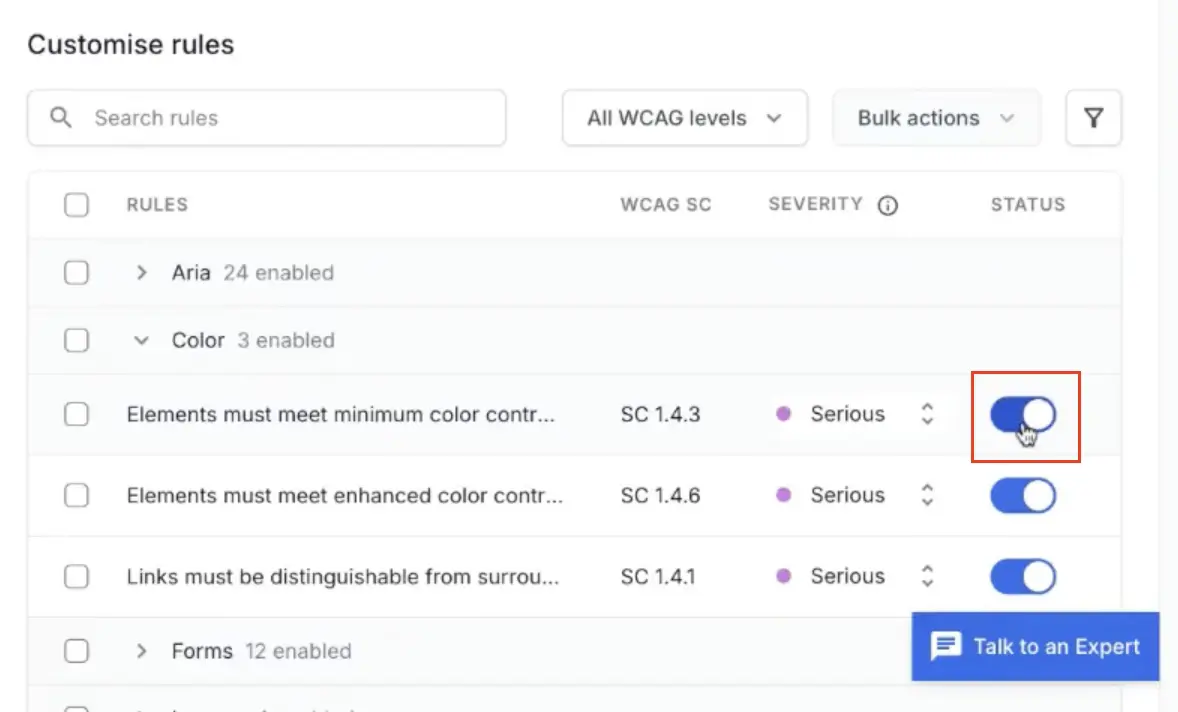
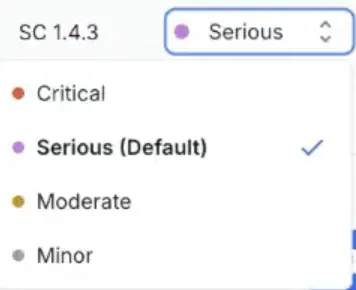
- You can change the severity level of a rule using the drop-down menu.
Customize rules in bulk
To enable customization, follow these steps:
- Go to Settings.
- Switch on Enable custom rule engine configuration under Rule Engine Customisation.
- If you agree to the impact of customizing rules, click Continue to confirm.
To update multiple rules at once:
- Select multiple rules.
- Click Bulk Action.
- Apply one action:
- Enable rules
- Disable rules
- Change severity
To target rules faster, use filters and search:
- Search by keyword, such as
keyboardorcolor. - Filter by WCAG success criterion (for example, 1.1.1).
- Filter by severity.
- Filter by rule type, such as AI-powered, advanced, or experimental.
- Filter by current state (enabled or disabled).
Apply organization-wide enforcement
Use customization to enforce one policy for the entire organization:
- Configure and save your customized rule set.
- Start a new scan.
After saving:
- The saved rule customization is enforced across the organization.
- Scan-level rule toggles are restricted to prevent conflicts with enforced settings.
- Potential issue remains separately configurable.
Common use cases
You can use customization for scenarios such as:
- Lower priority checks: Disable a rule group that is not currently in scope. For example, if color-related rules are not a priority in your organization, you can select the rule type color and disable it.
- Org-specific severity: Downgrade or upgrade rule severity based on internal risk classification. For example, if color-contrast rule is comparitively of a lesser priority in your organization, you can select the rule and assign a lower severity to the rule.
- Focused audits: Disable all rules, then enable only the rules required for a specific audit target. For example, if you want to check proper alt text for images in your website, disable all rules, enable the alt text related rules and run a test.
-
Enforce WCAG 2.2 A checks for all teams:
- Disable all rules except any one rule. (disabling all rules is not permitted).
- Filter for WCAG 2.2 A rules.
- Bulk-enable only those rules.
- Disable the one rule that was not disabled in step 1.
- Click Save changes. Note that users won’t be able to individually configure their scans if you have enforced a standard at the organization-level.
Save and validate changes
Before rollout:
- Review the selected rules and severities.
- Save the customization.
- Run a validation scan.
- Compare the results with previous runs and communicate the change to your team.
Related links
We're sorry to hear that. Please share your feedback so we can do better
Contact our Support team for immediate help while we work on improving our docs.
We're continuously improving our docs. We'd love to know what you liked
We're sorry to hear that. Please share your feedback so we can do better
Contact our Support team for immediate help while we work on improving our docs.
We're continuously improving our docs. We'd love to know what you liked
Thank you for your valuable feedback!