
 Join our Discord
Set up Charles Proxy with App Automate
Capture network logs between BrowserStack devices and your app under test during Appium tests by routing traffic through a Charles Proxy server.
Charles Proxy is an HTTPS proxy that provides a plain text view of the communication between your app and the SSL web server. Use Charles Proxy to capture network logs for iOS and Android devices while you run your Appium tests on BrowserStack App Automate.
You can capture traffic between BrowserStack devices and the app under test with a Charles Proxy server, and debug using the captured logs.
We recommend this configuration if you decide to enable Charles Proxy in your test setup.
Set up Charles Proxy with BrowserStack
To get Charles Proxy working with App Automate:
Set up Charles Proxy
- Open the Charles Proxy app.
- Click Help > SSL Proxying, and then click Install Charles Root Certificate.
- In the Keychain Access dialog box, search for
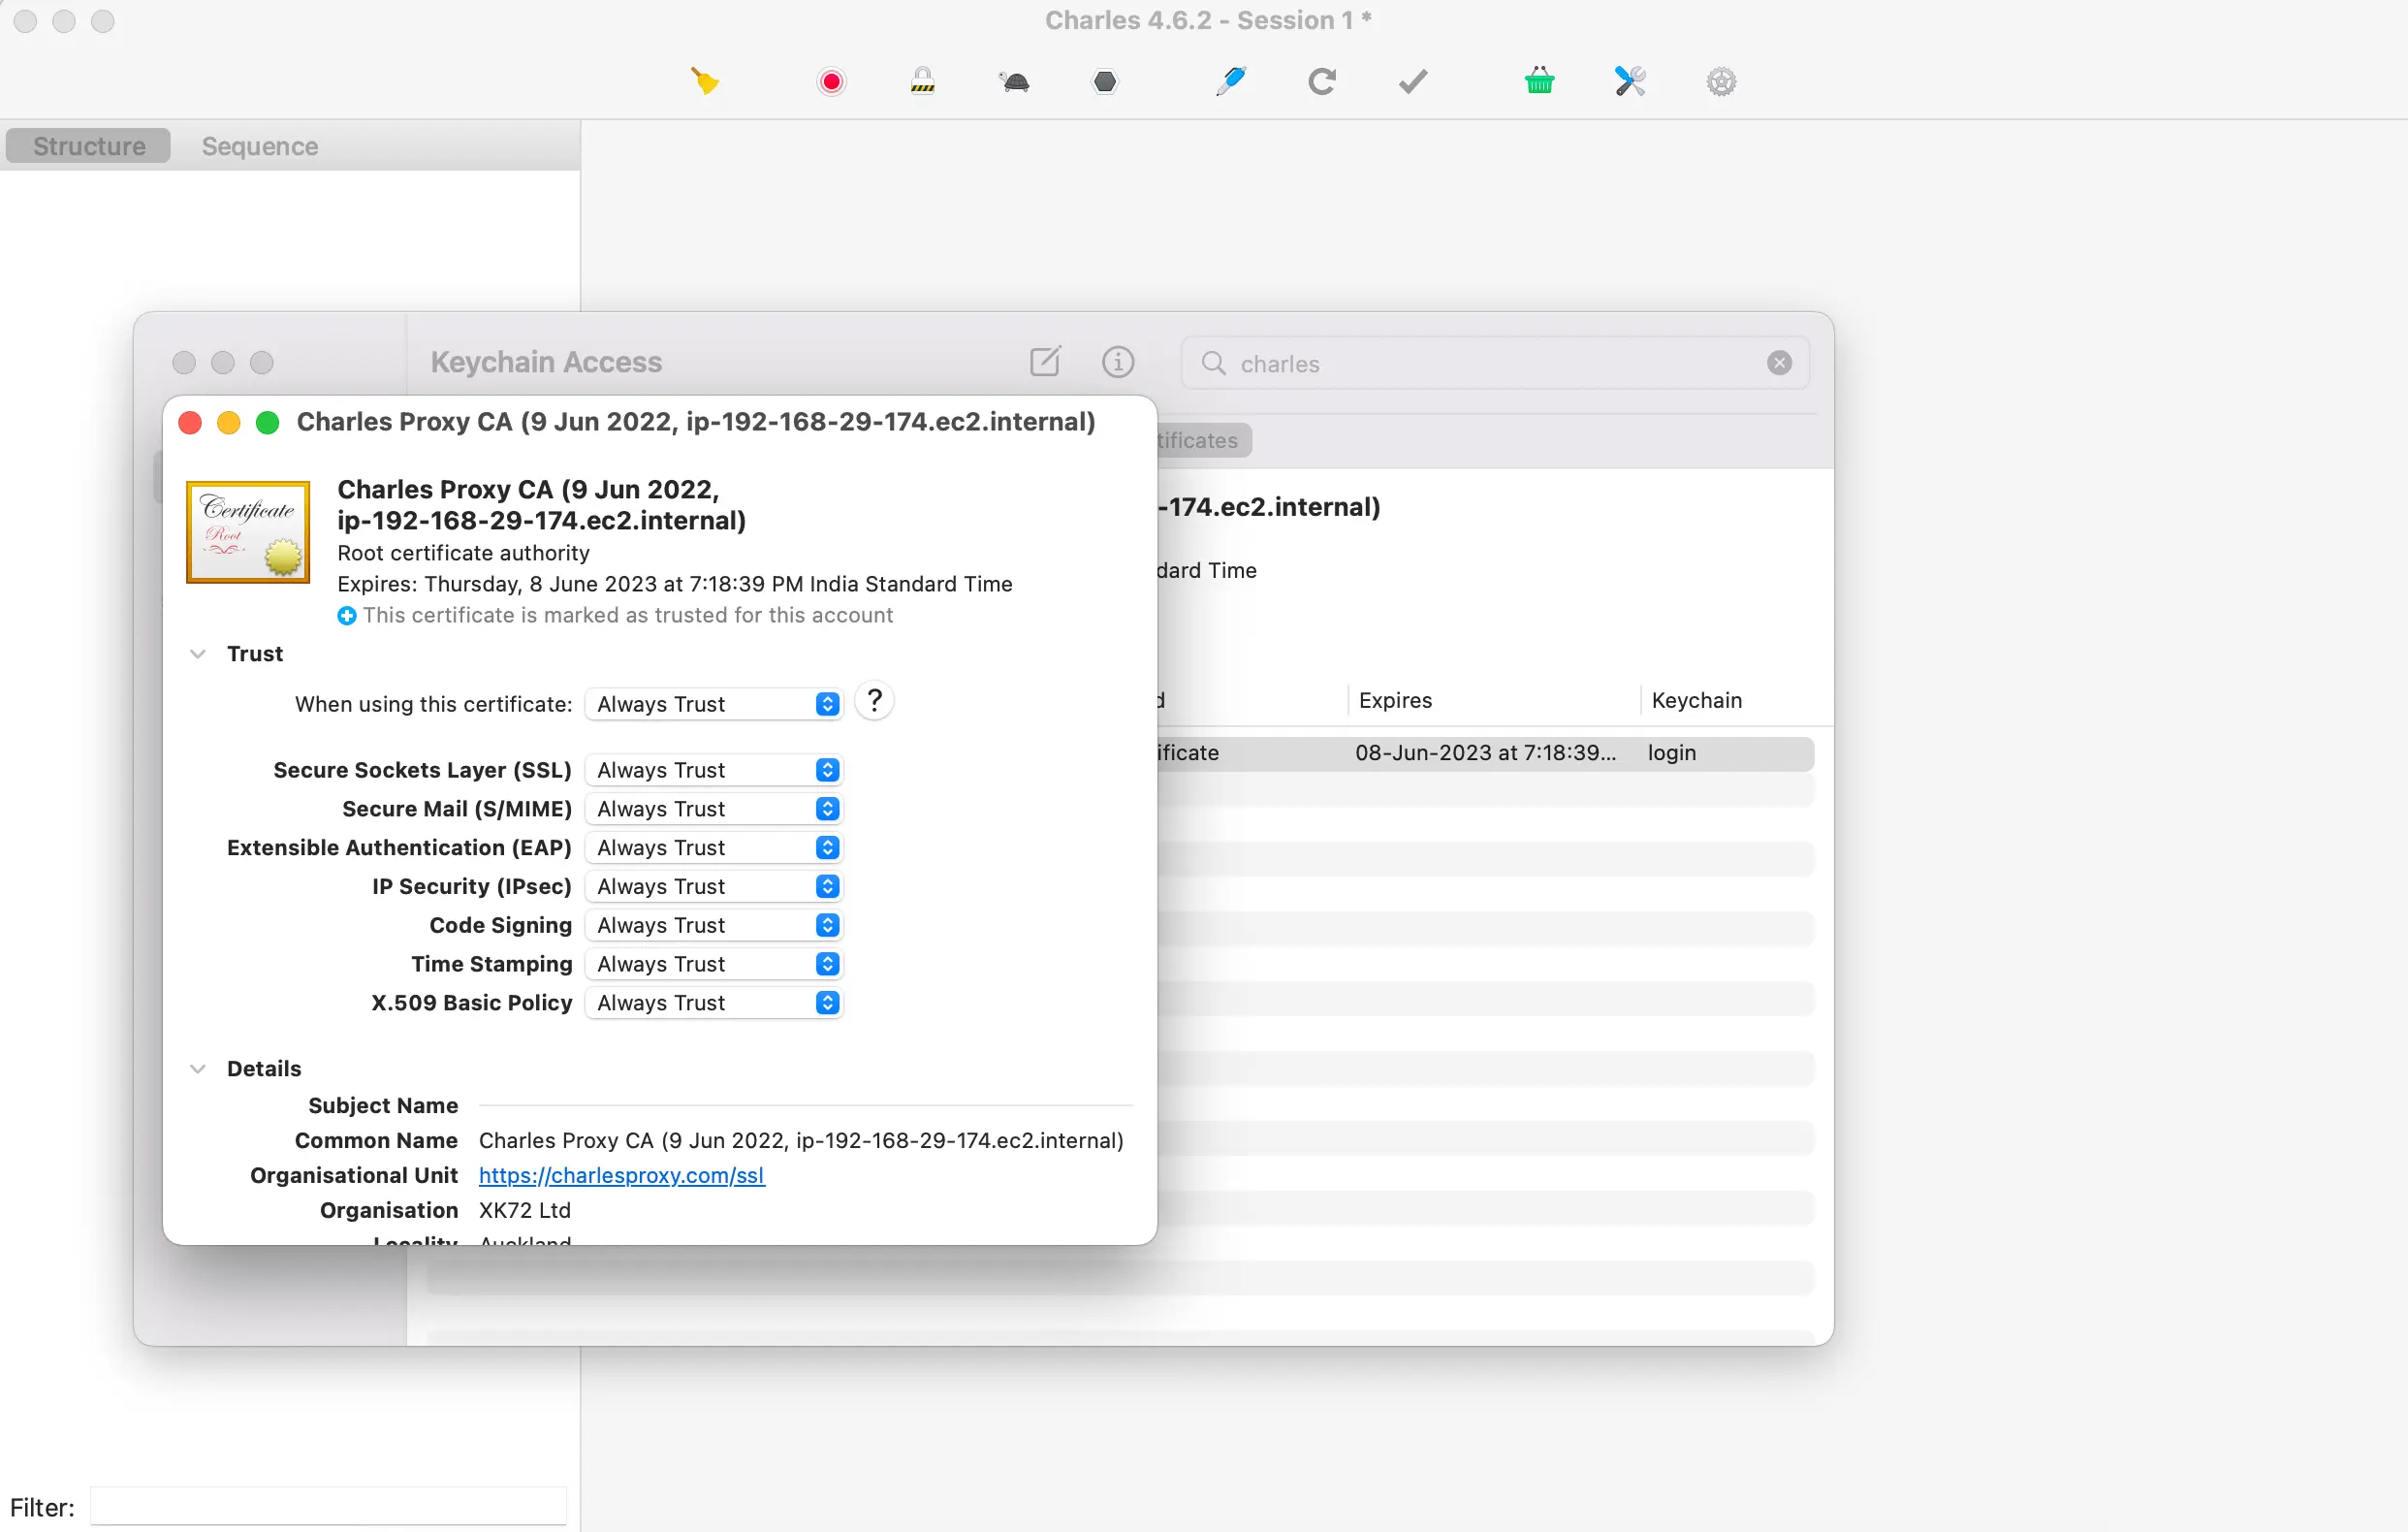
charles, and double-click the Charles Proxy CA certificate that appears. - Expand the Trust section, ensure all options are set to Always Trust, and close the dialog box.
- Click Settings > Proxy Settings and note the port number that appears.
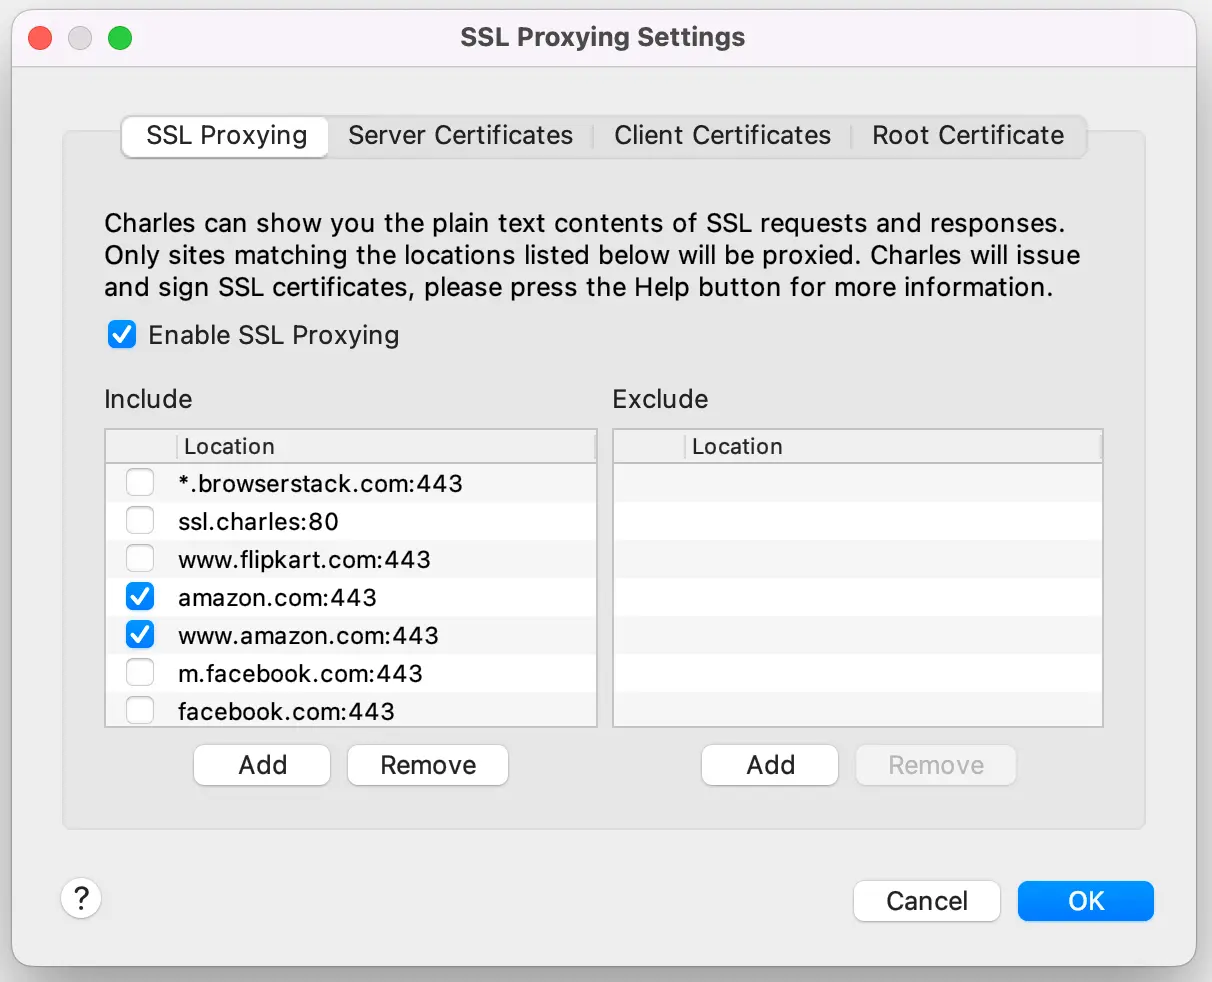
- In the Charles app, click Proxy > SSL Proxying Settings.
- Under the SSL Proxying tab, select the Enable SSL Proxying option.
- Under the SSL Proxying tab, add and select your app-specific location. Clear all other location entries.
Add proxy details to Local
App Automate routes your app traffic through Charles Proxy over a BrowserStack Local connection. Configure the proxy details using the Local binary:
- Download the BrowserStackLocal binary.
- Open your command line and run the following command:
<BrowserStackLocal binary path> --key <your access key> --local-proxy-host localhost --local-proxy-port <charles_proxy_port> --force-proxy --force-localEnsure that you replace
charles_proxy_portwith the port number you noted when you set up Charles.
Start an App Automate session
An App Automate session is an Appium test run on BrowserStack. If you haven’t set up your tests yet, see Get started with Appium to run a sample build or integrate your existing test suite, and Upload and manage apps to make your app available to your tests. Then enable Local and network logs so that your session routes traffic through Charles and captures the logs:
- Enable BrowserStack Local in your test configuration by setting
browserstackLocaltotrue, or thebrowserstack.localcapability totruefor non-SDK setups, so that the session uses the Local connection you started in the previous step. For detailed setup instructions, see Test in local environments. - Enable network logs by setting
networkLogstotrue, or thebrowserstack.networkLogscapability totruefor non-SDK setups. For detailed setup instructions, see View network logs for Appium tests.
Review captured network logs in the Charles app while the session is live. Unlike standard Appium sessions, the App Automate dashboard doesn’t retain network logs for sessions routed through a local proxy after the session ends.
Run your Appium test on App Automate. After the test sends a request, check the Charles app for the captured logs.
We're sorry to hear that. Please share your feedback so we can do better
Contact our Support team for immediate help while we work on improving our docs.
We're continuously improving our docs. We'd love to know what you liked
We're sorry to hear that. Please share your feedback so we can do better
Contact our Support team for immediate help while we work on improving our docs.
We're continuously improving our docs. We'd love to know what you liked
Thank you for your valuable feedback!