
 Join our Discord
Test email workflows
Learn how to test sign-up, login, and OTP flows in App Low Code Automation using BrowserStack-provided test email IDs.
Mobile app flows such as sign-up, password reset, and OTP login stop at the “check your inbox” screen. App Low Code Automation gives you test email IDs and an Open email step, so you can read the email and pull values out of it without leaving the test editor or using an external mail service.
Email testing is moving to the Pro plan soon. After the change takes effect, you need to upgrade to the Pro plan to continue using email testing. For more information about the Pro plan, contact BrowserStack Support.
Email testing lets you:
- Sign up in your app with a test email ID.
- Extract an OTP or verification code and enter it in the app.
- Check that an email arrived from the expected sender with the expected subject.
BrowserStack-provided email IDs
App Low Code Automation provides two email IDs. You can’t create, rename, or edit them.
-
Temporary email: a new address generated for each test execution. For example,
applca_temp_c8a26736@bstackinbox.com. Use it for sign-up flows. Each execution in a suite or parallel run gets its own address, so runs never read each other’s emails. -
Permanent email: a single address that stays the same across runs. For example,
applca_perm_browserstackteam_001@bstackinbox.com. Use it when your flow needs a known account.
Test an email workflow
The steps below follow an OTP login, where the app emails a verification code that you read back into the test.
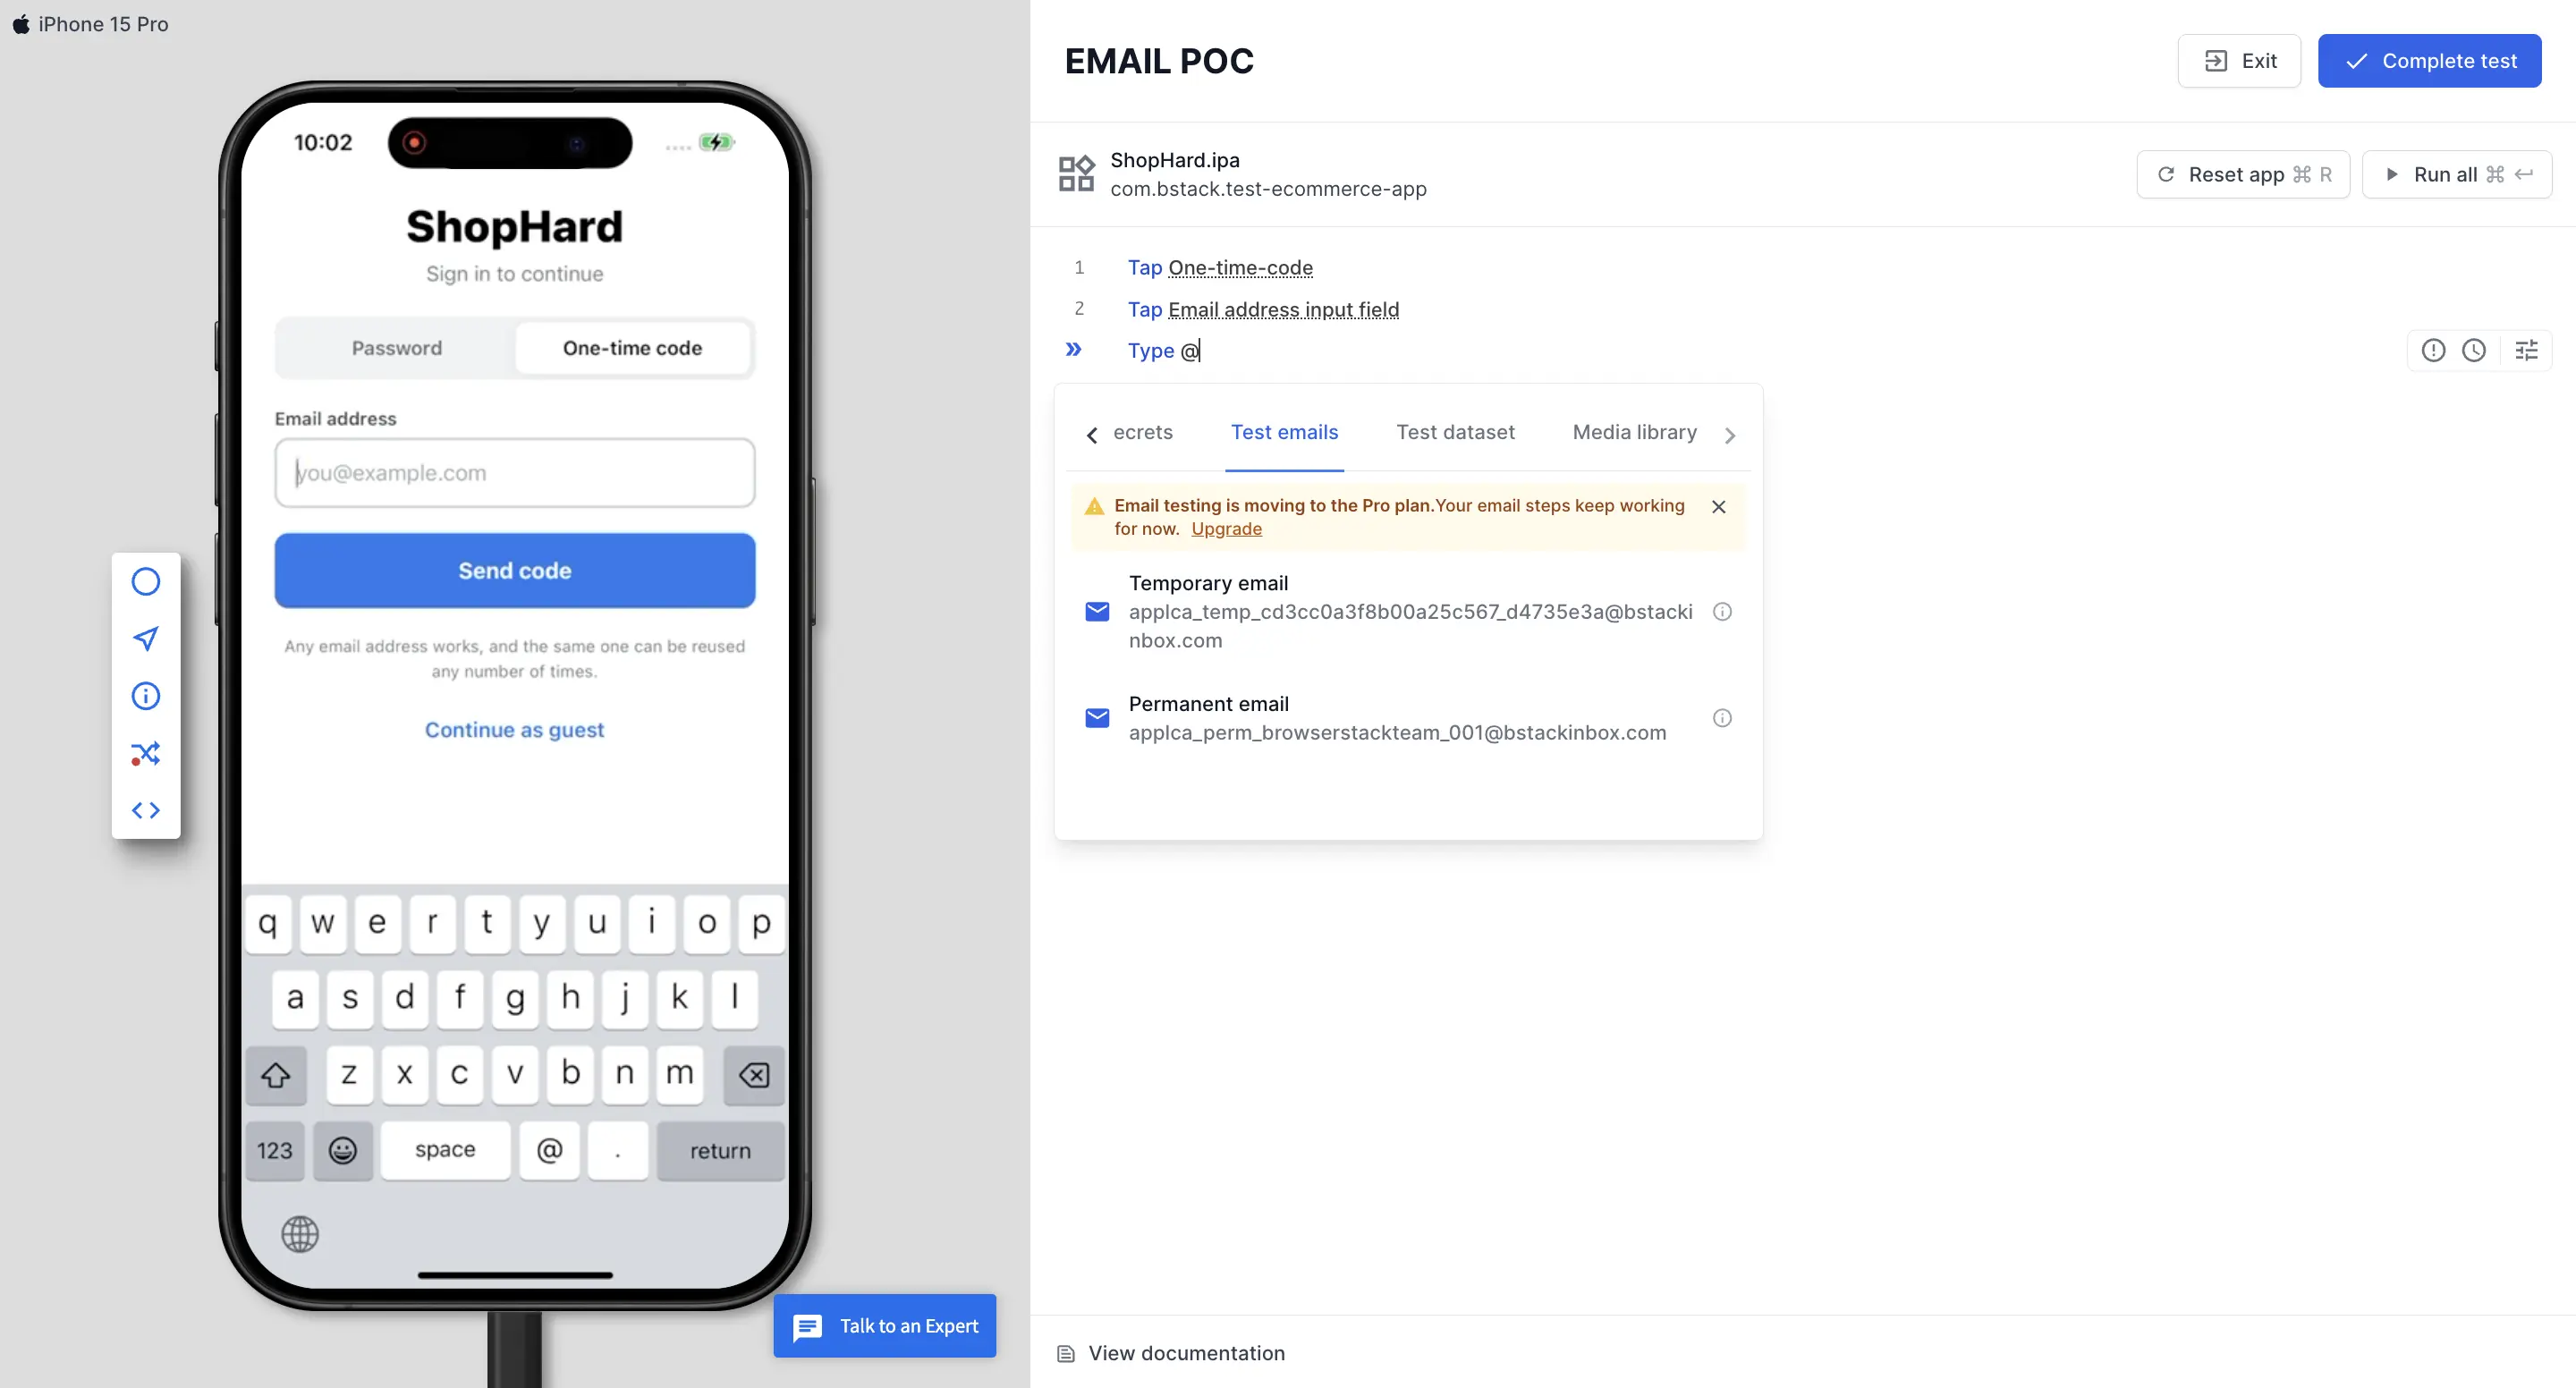
Enter a test email ID in your app
In the step where your app asks for an email address, type @ and select the test email ID you want to use. For example, Type temp email ID.
Trigger the email
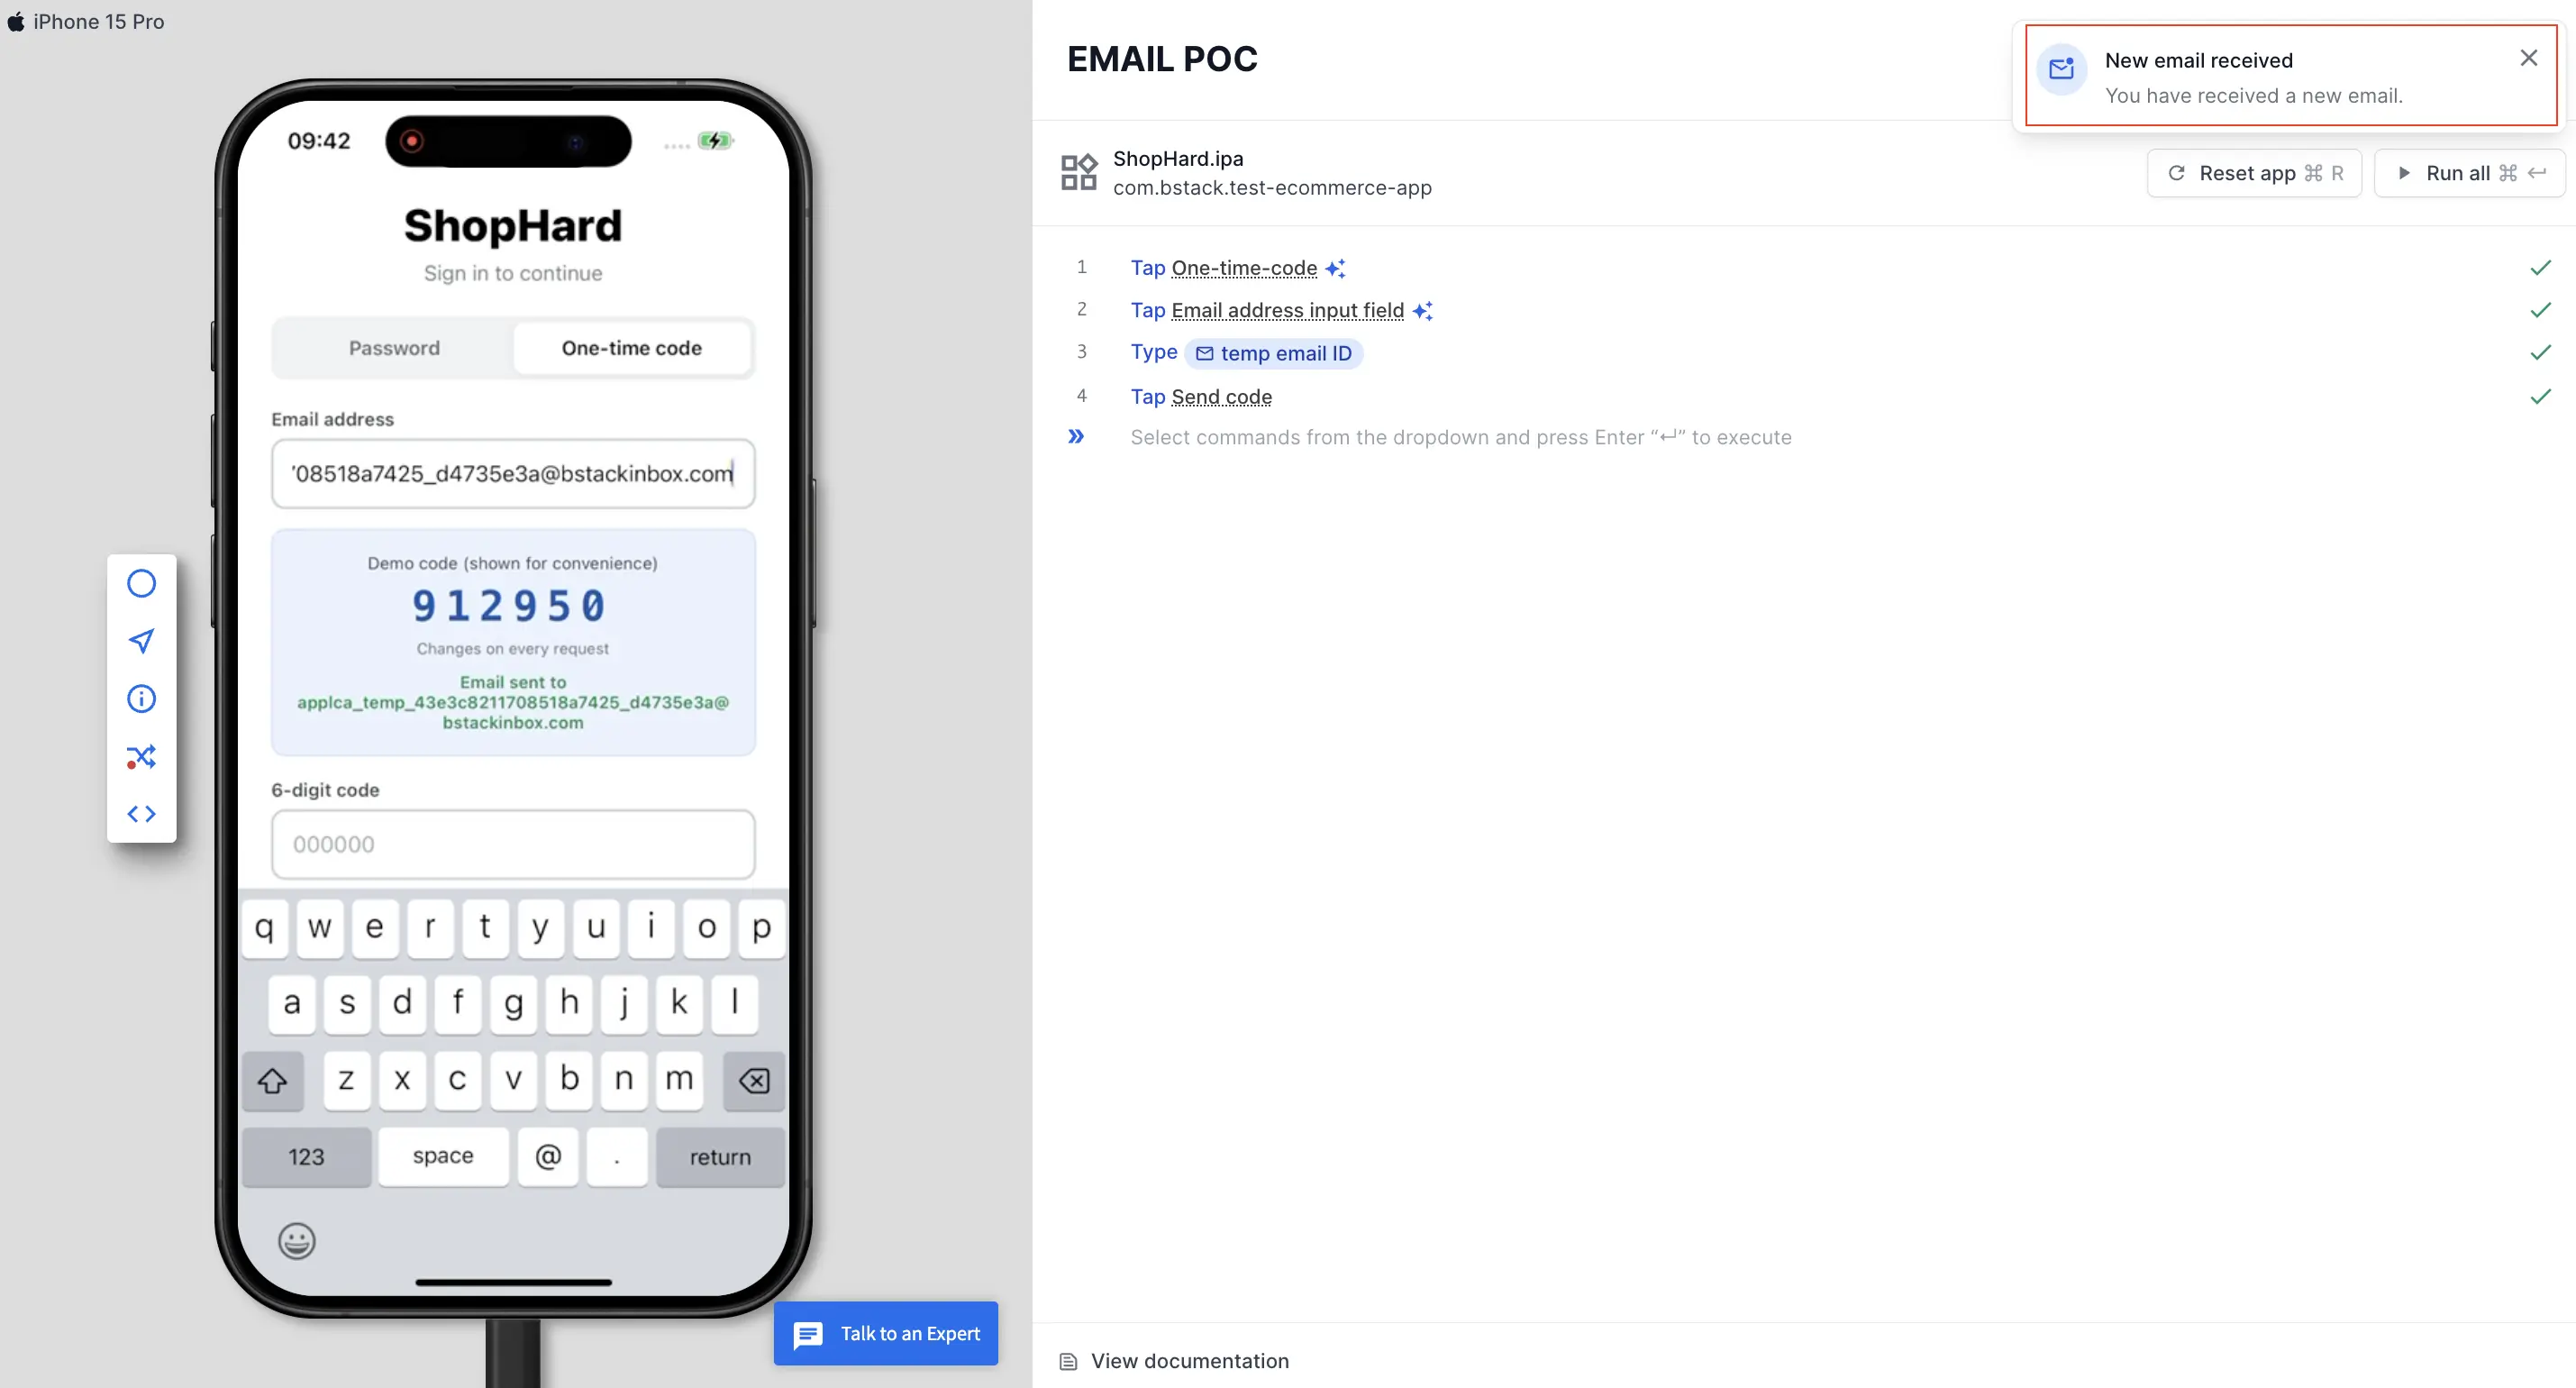
Record the step that sends the email. For example, Tap Send code. When the email reaches the inbox, a New email received notification appears.
Add the Open email step
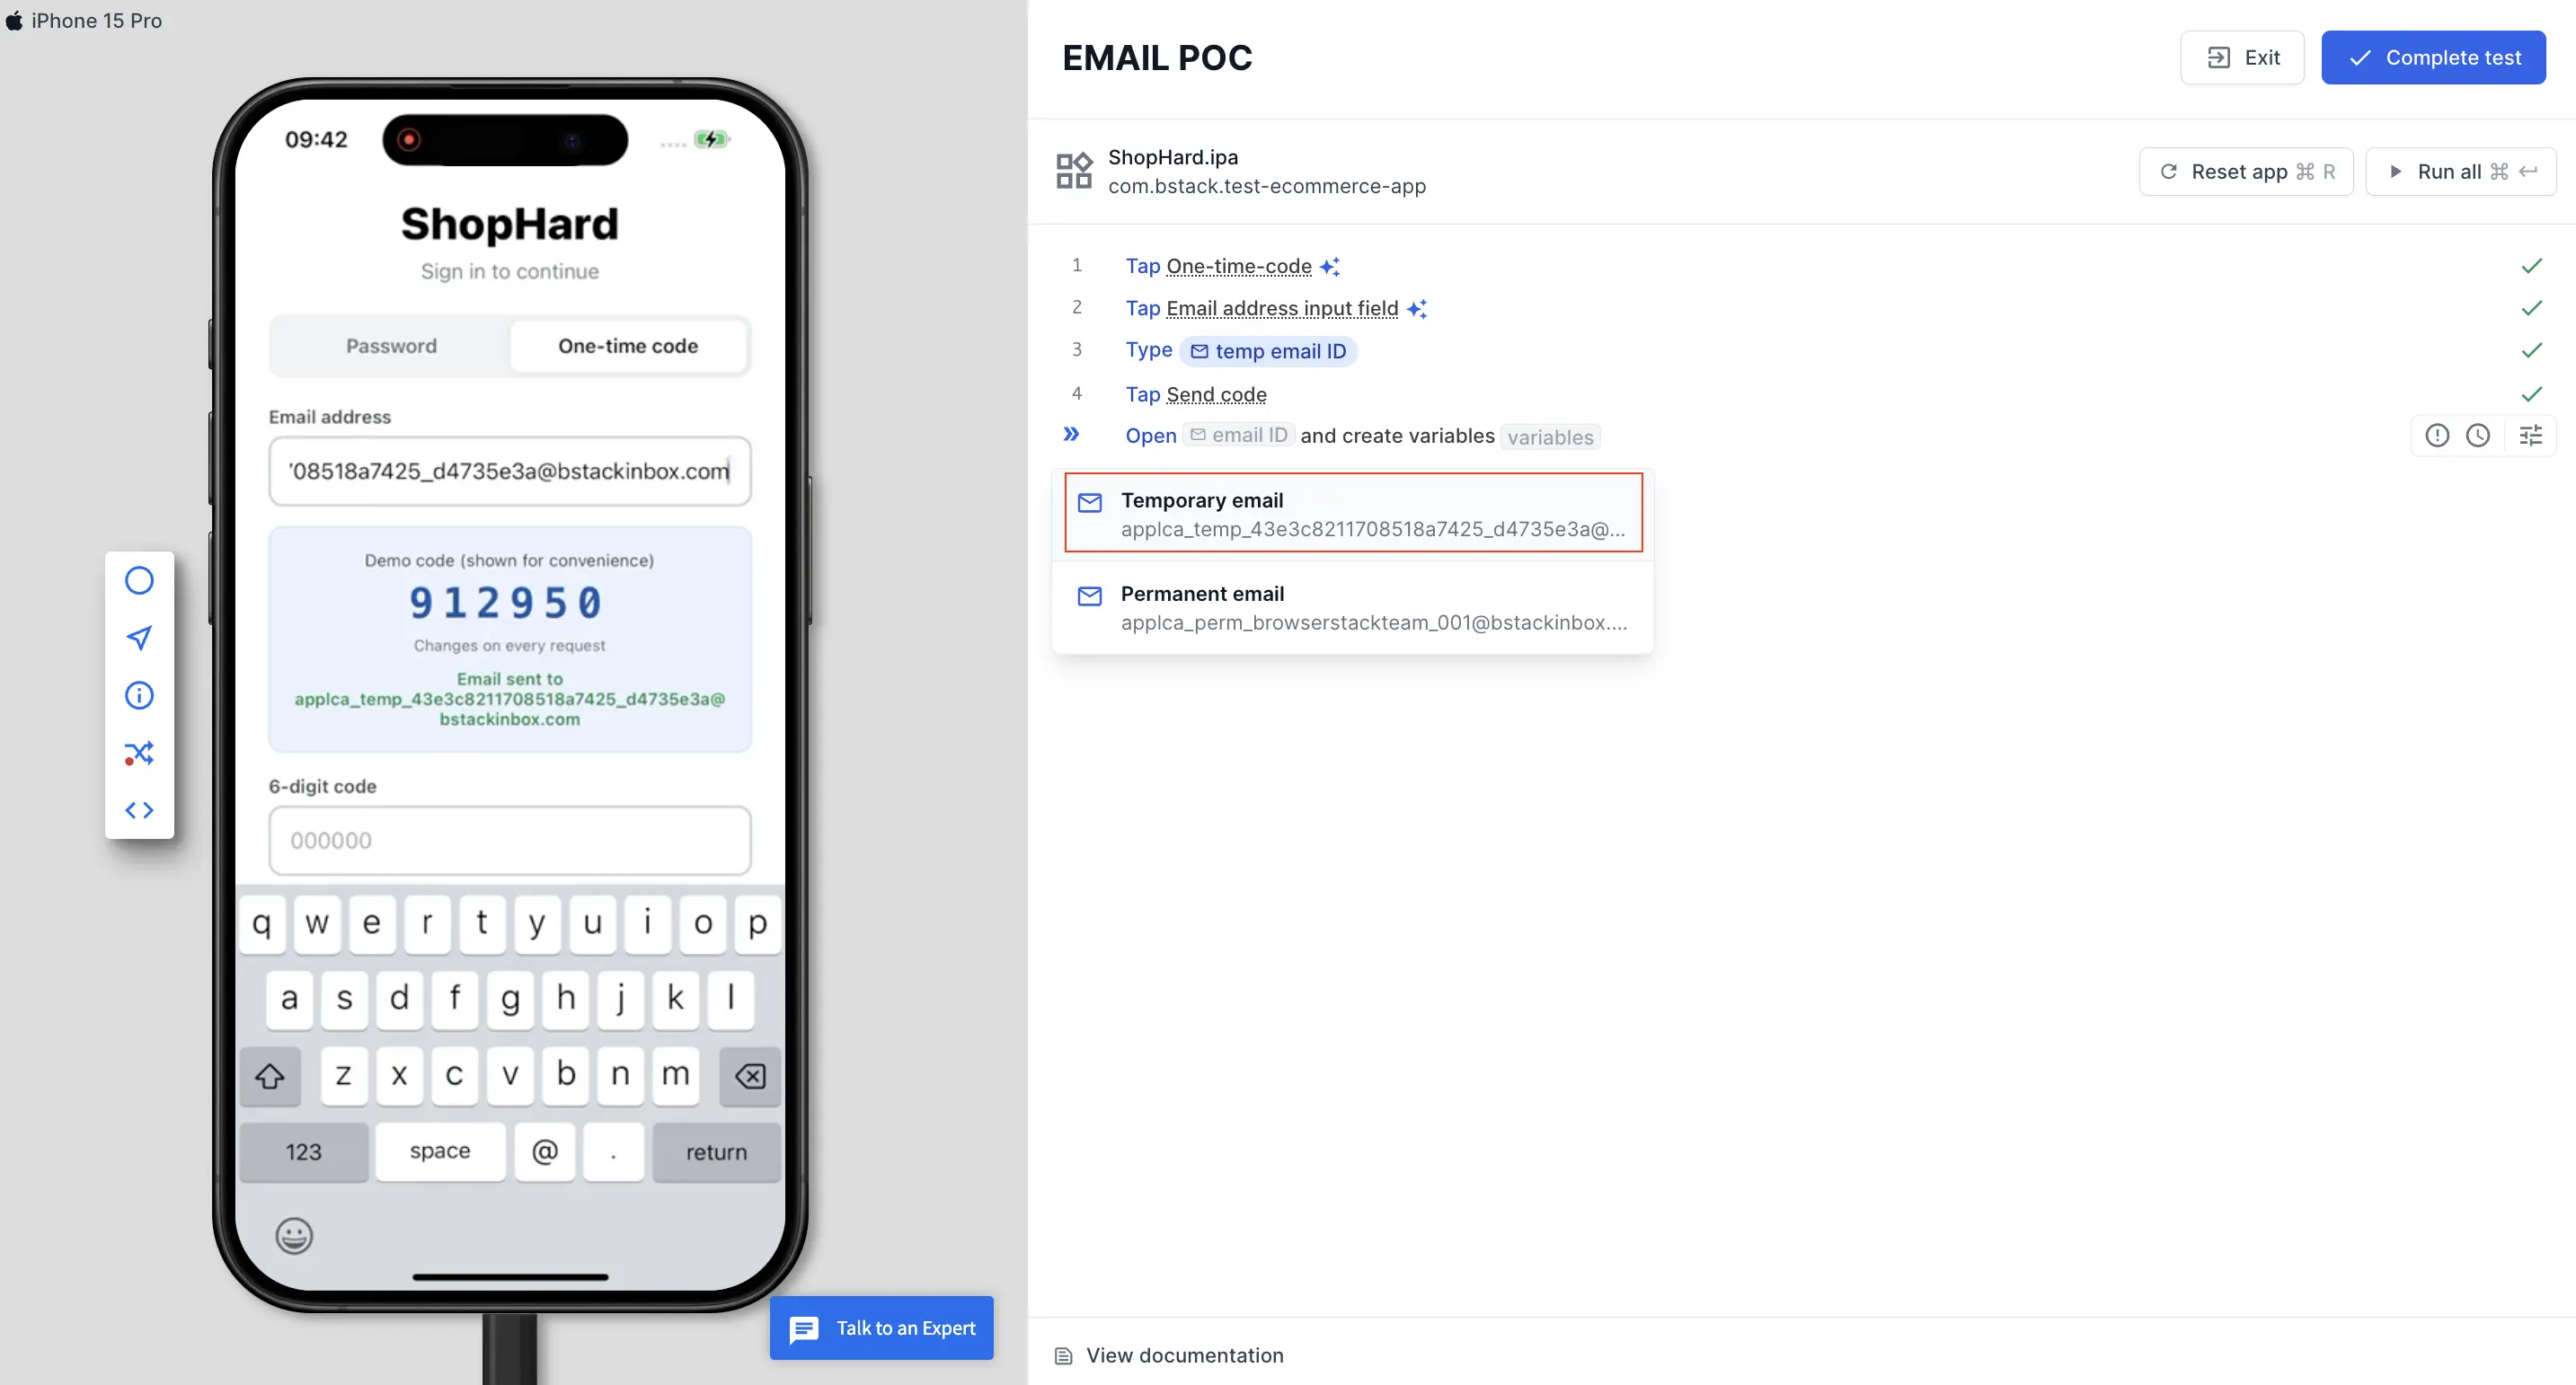
In a new step, type Open and select the Open email ID and create variables command.
Select the inbox to read
Select Temporary email or Permanent email. Use the same address you entered in the app.
Open the email you want
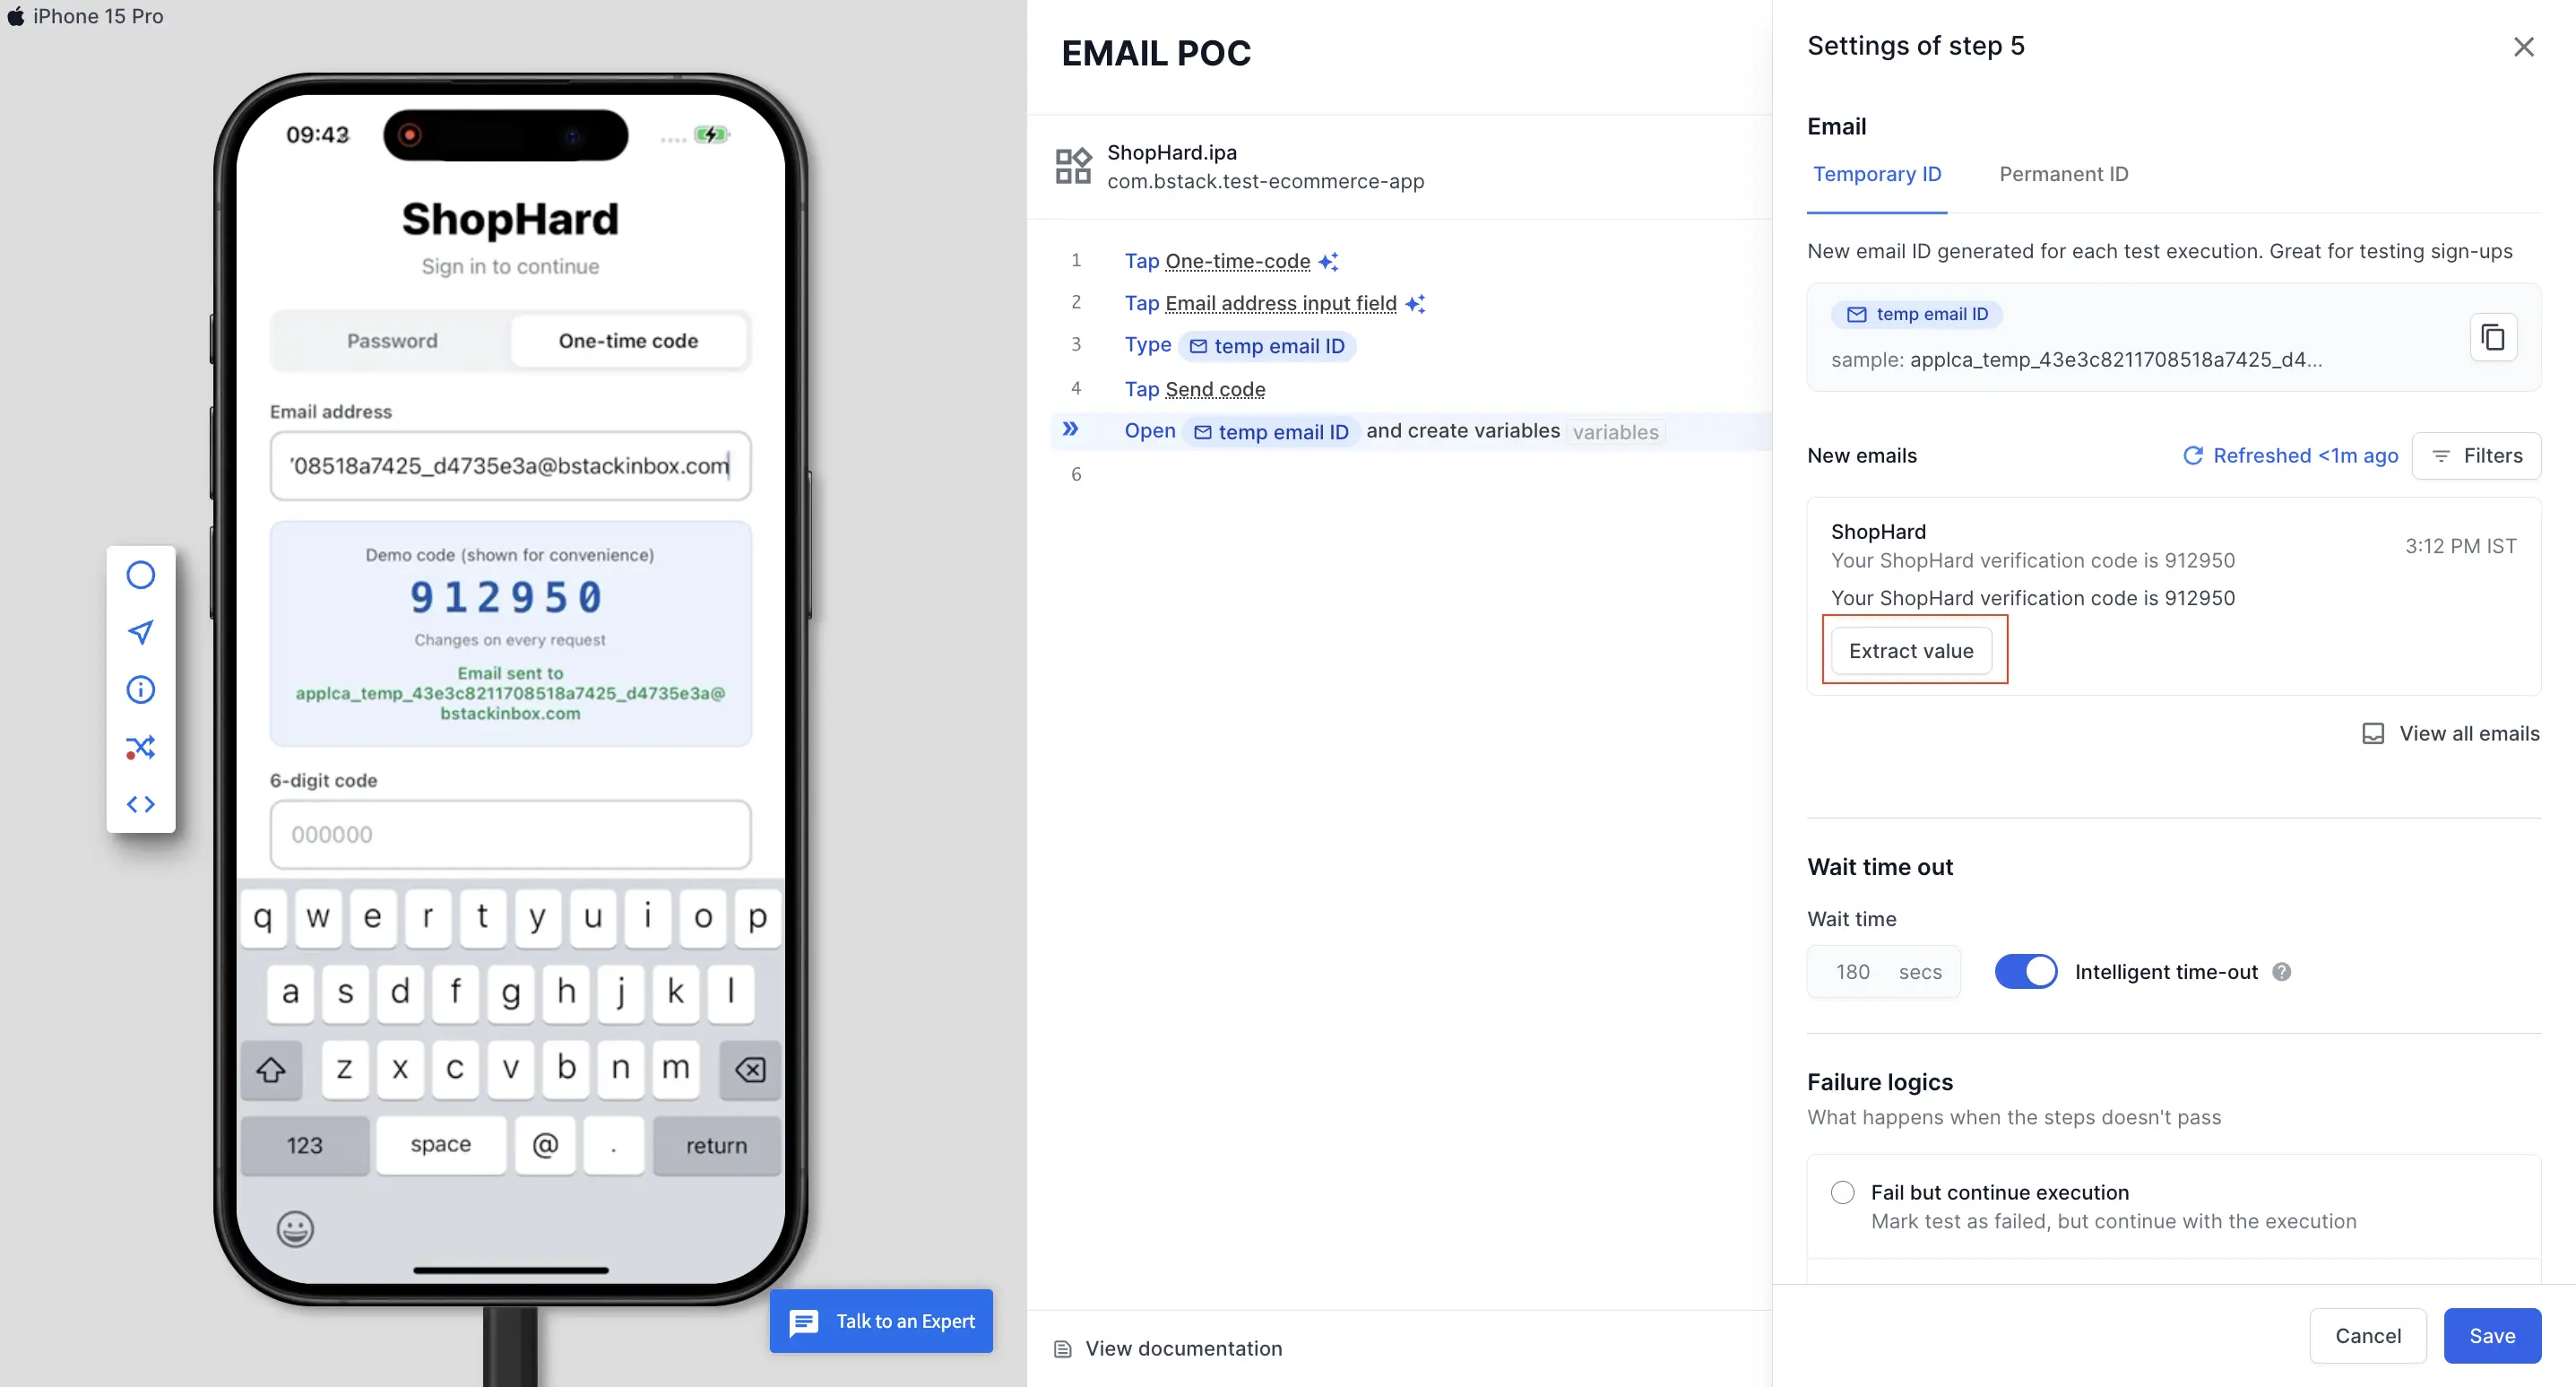
Click See details on the step. New emails lists the emails that arrived after the test started, newest first. To look through earlier emails for that address, click View all emails.
Extract a value from the email
Click Extract value on the email you want. In the Save extracted value dialog, enter a name in Name of the variable, then select an option under Extracted value:
- Entire text: saves the full text you selected.
-
Filter specific text: saves only the part that matches a regular expression. A pattern that matches the first 4- to 8-digit number is prefilled in Enter regex, and you can edit it. For example, use
\b\d{6}\bfor a 6-digit OTP. Value shows what the pattern matches.
Click Create. You can use the saved value as a variable in later steps.
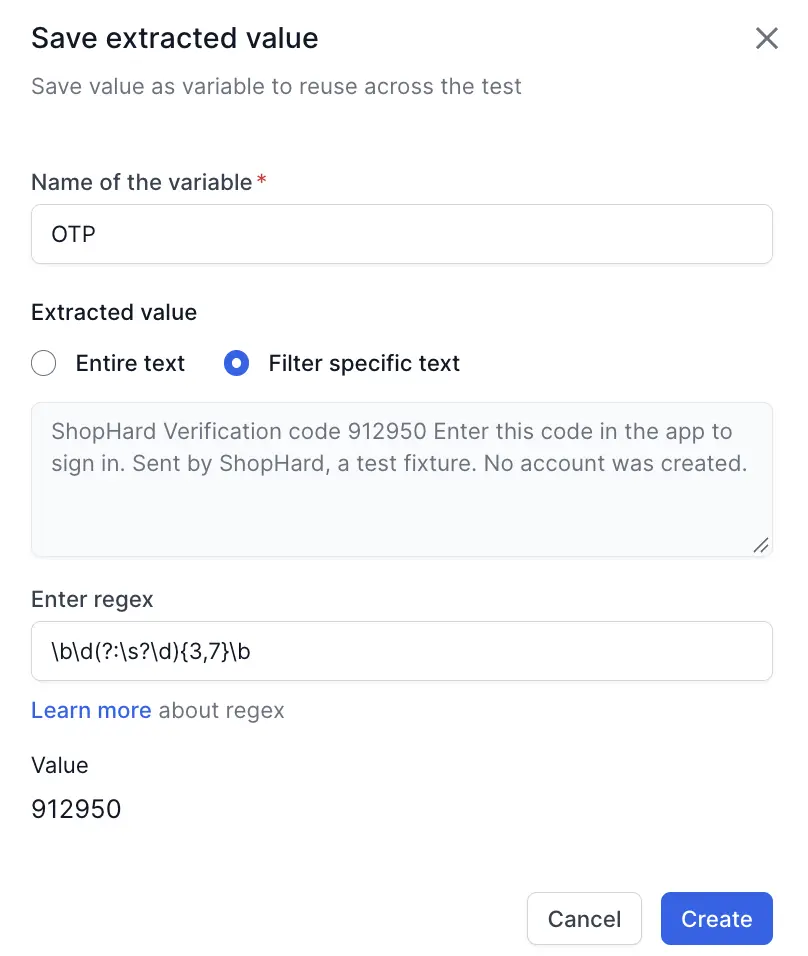
On every run, the Open email step reads the inbox again and extracts the value from the latest matching email.
Execution of email workflow
The following video runs the OTP login end to end, from typing the test email ID in the app to entering the extracted code:
Set conditions to filter the email
Your inbox can hold several emails, so set conditions that tell the step which email to pick during replay.
Open the step settings
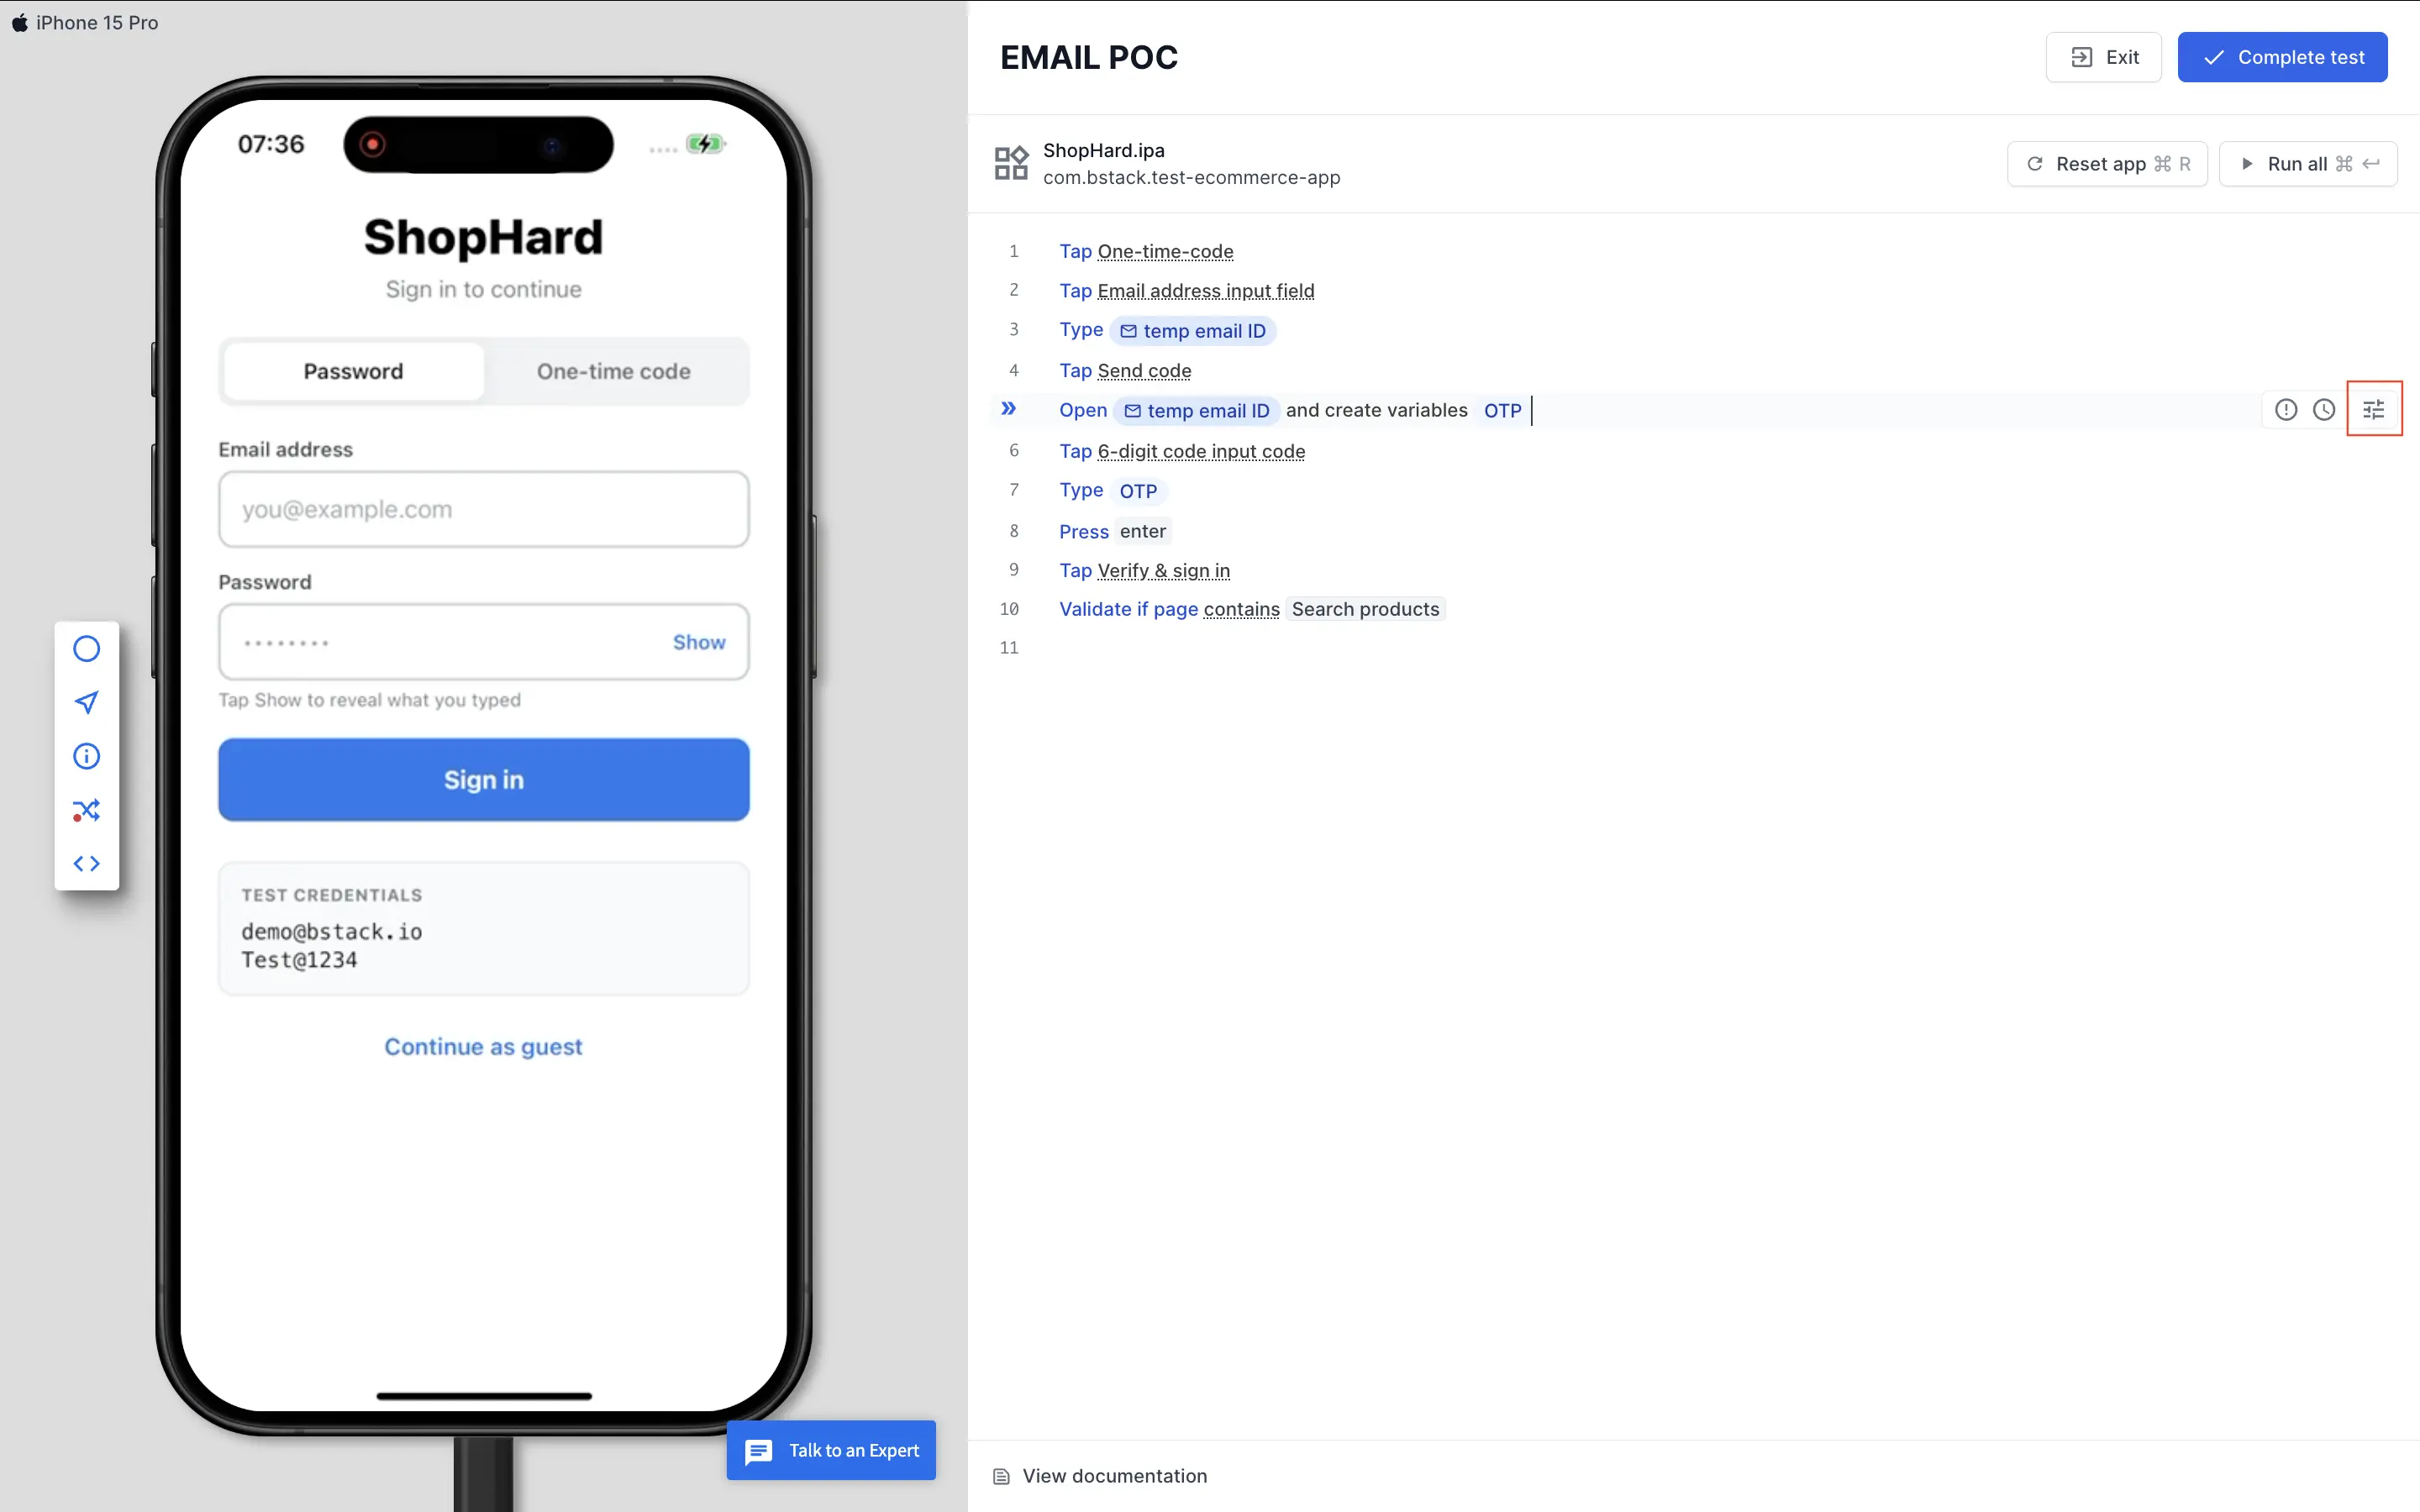
In the test editor, hover over the Open email step and click the settings icon at the right end of the step. The Settings of step panel opens.
Open the conditions panel
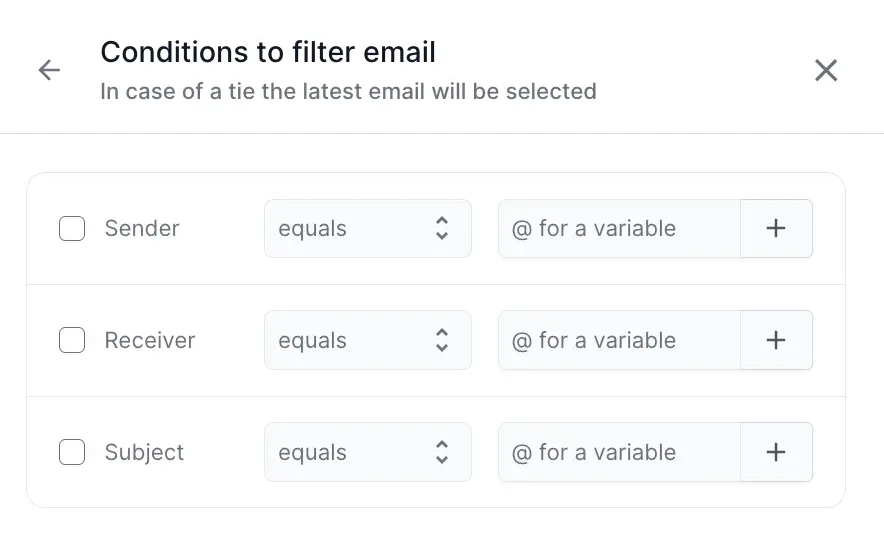
Next to New emails, click Filters. The Conditions to filter email panel opens.
Select the conditions to apply
Select the Sender, Receiver, or Subject checkbox, and choose an operator such as equals or contains. Clear the checkbox of any condition you don’t want the step to apply.
Enter the values to match
Enter the value for each selected condition. Type @ to insert a variable or dataset column, or click + to add another value for the same condition. Click Done to save.
The step picks the latest email if more than one email matches your conditions, or if you leave a selected condition’s value empty.
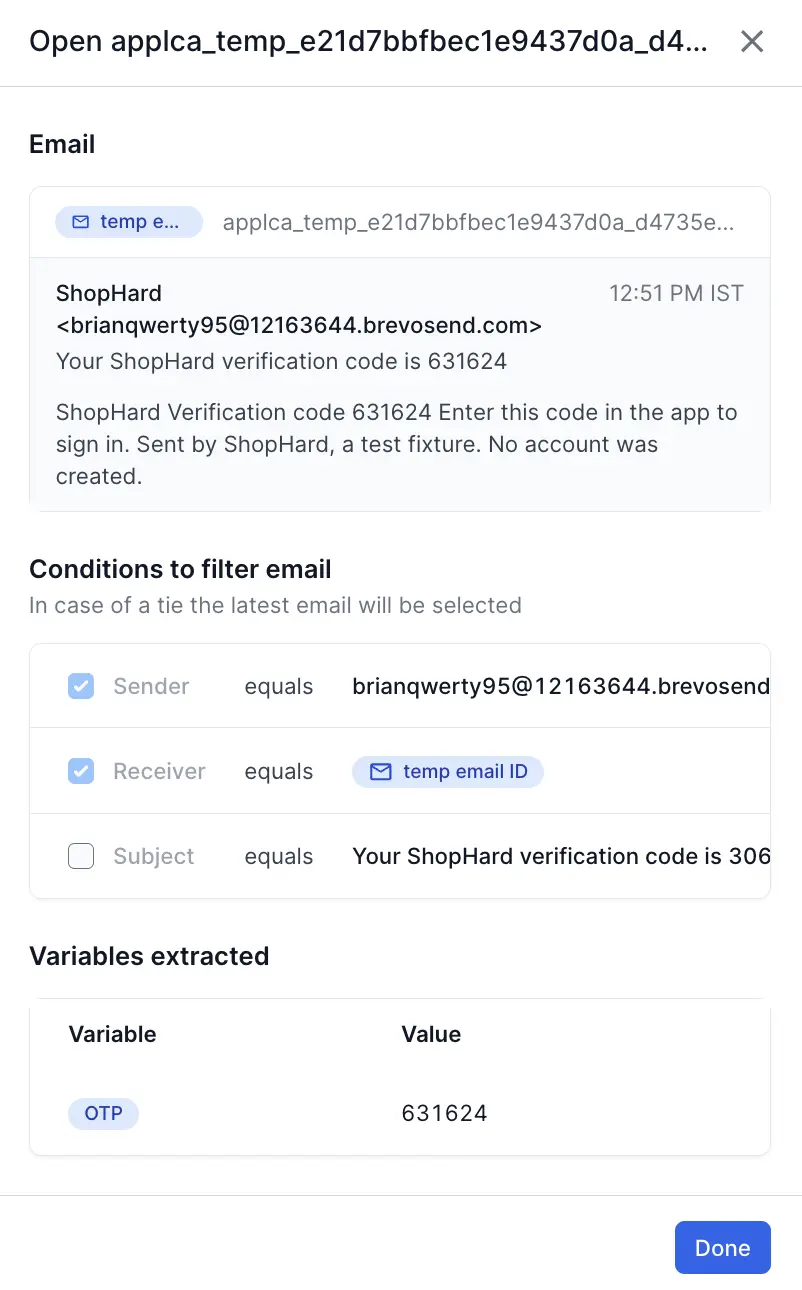
Check the email used in a build run
Each run creates a new temporary email address. The address shown in the test editor isn’t the one a completed run used.
To check the address and the email used in a test execution, go to Build runs, open the build, and select the test.
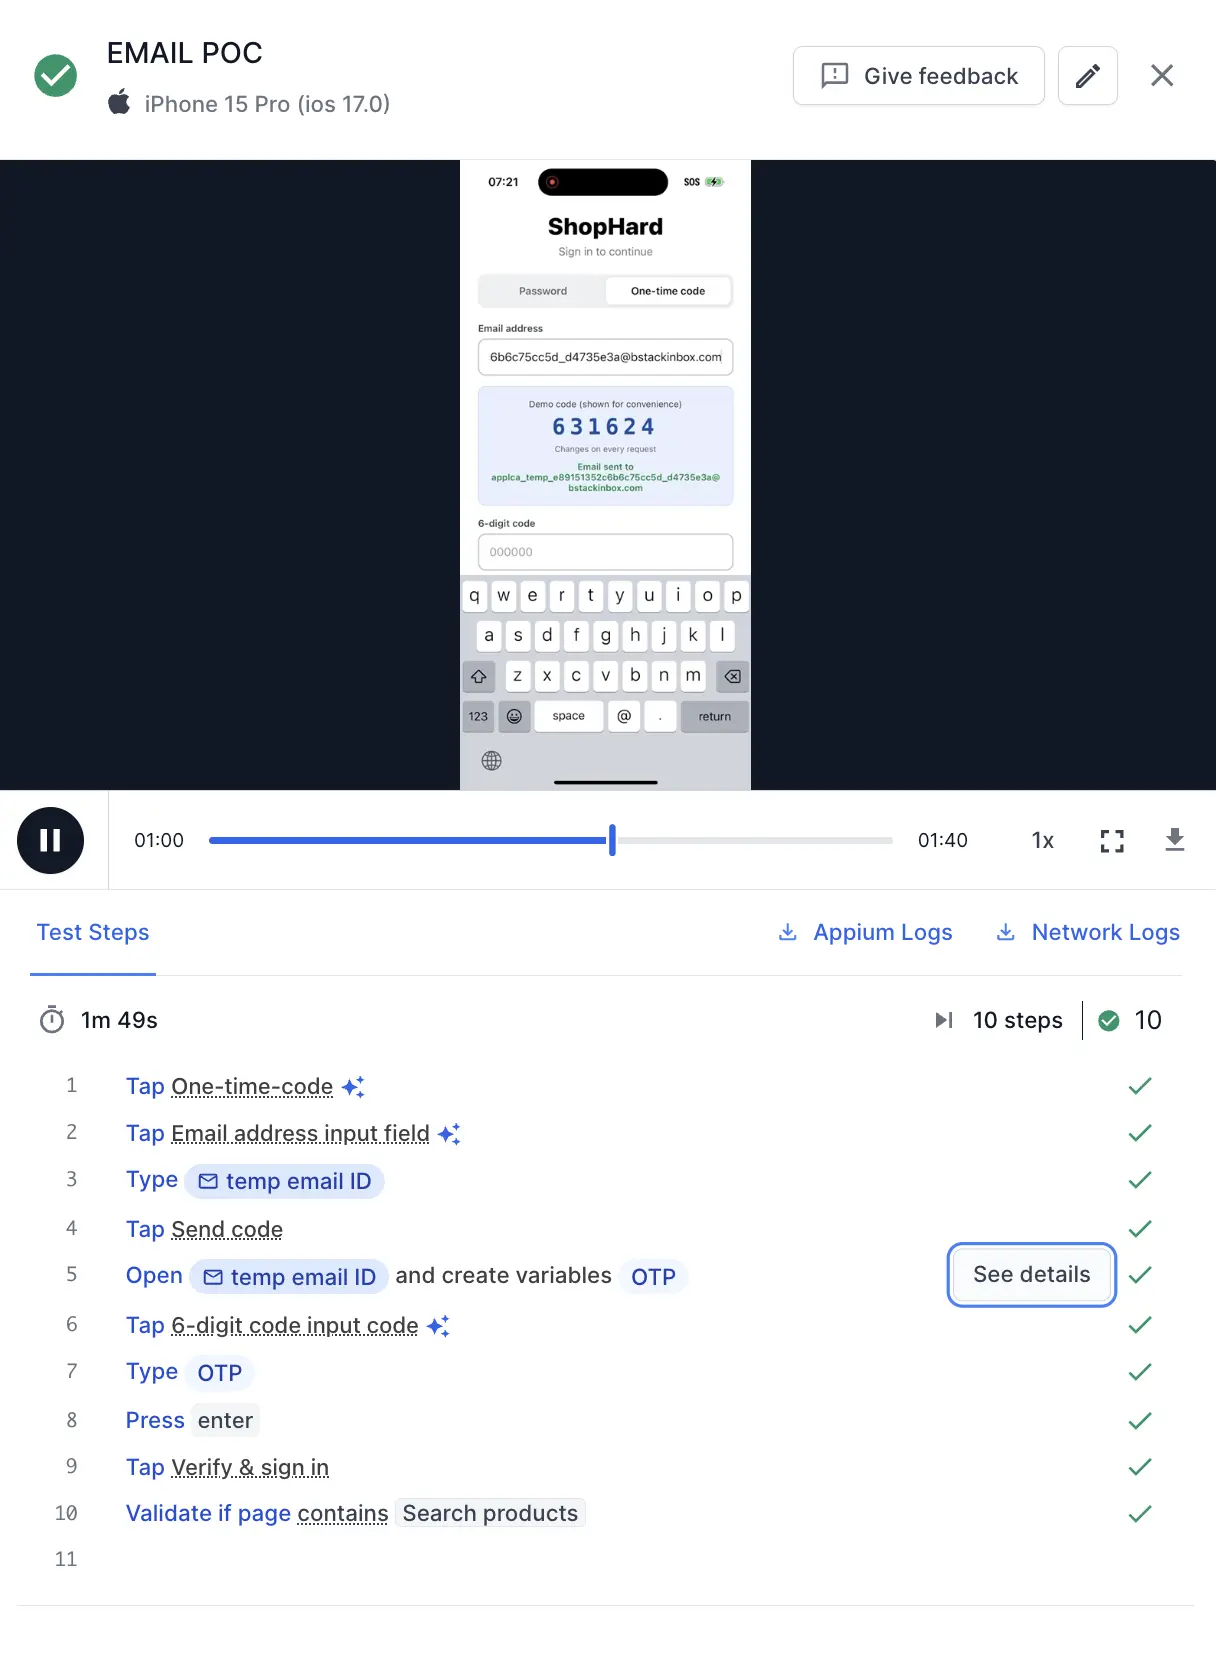
On the Open email step, click See details. This shows the email address the run used and the email it read the value from.
We're sorry to hear that. Please share your feedback so we can do better
Contact our Support team for immediate help while we work on improving our docs.
We're continuously improving our docs. We'd love to know what you liked
We're sorry to hear that. Please share your feedback so we can do better
Contact our Support team for immediate help while we work on improving our docs.
We're continuously improving our docs. We'd love to know what you liked
Thank you for your valuable feedback!