Write tests using natural language syntax
Write tests using natural language syntax in App Low Code Automation.
App Low Code Automation allows you to create automated tests using simple and natural language commands. You can describe user interactions in plain English in the test editor. This makes test writing faster, easier, and more intuitive, even for those without a programming background.
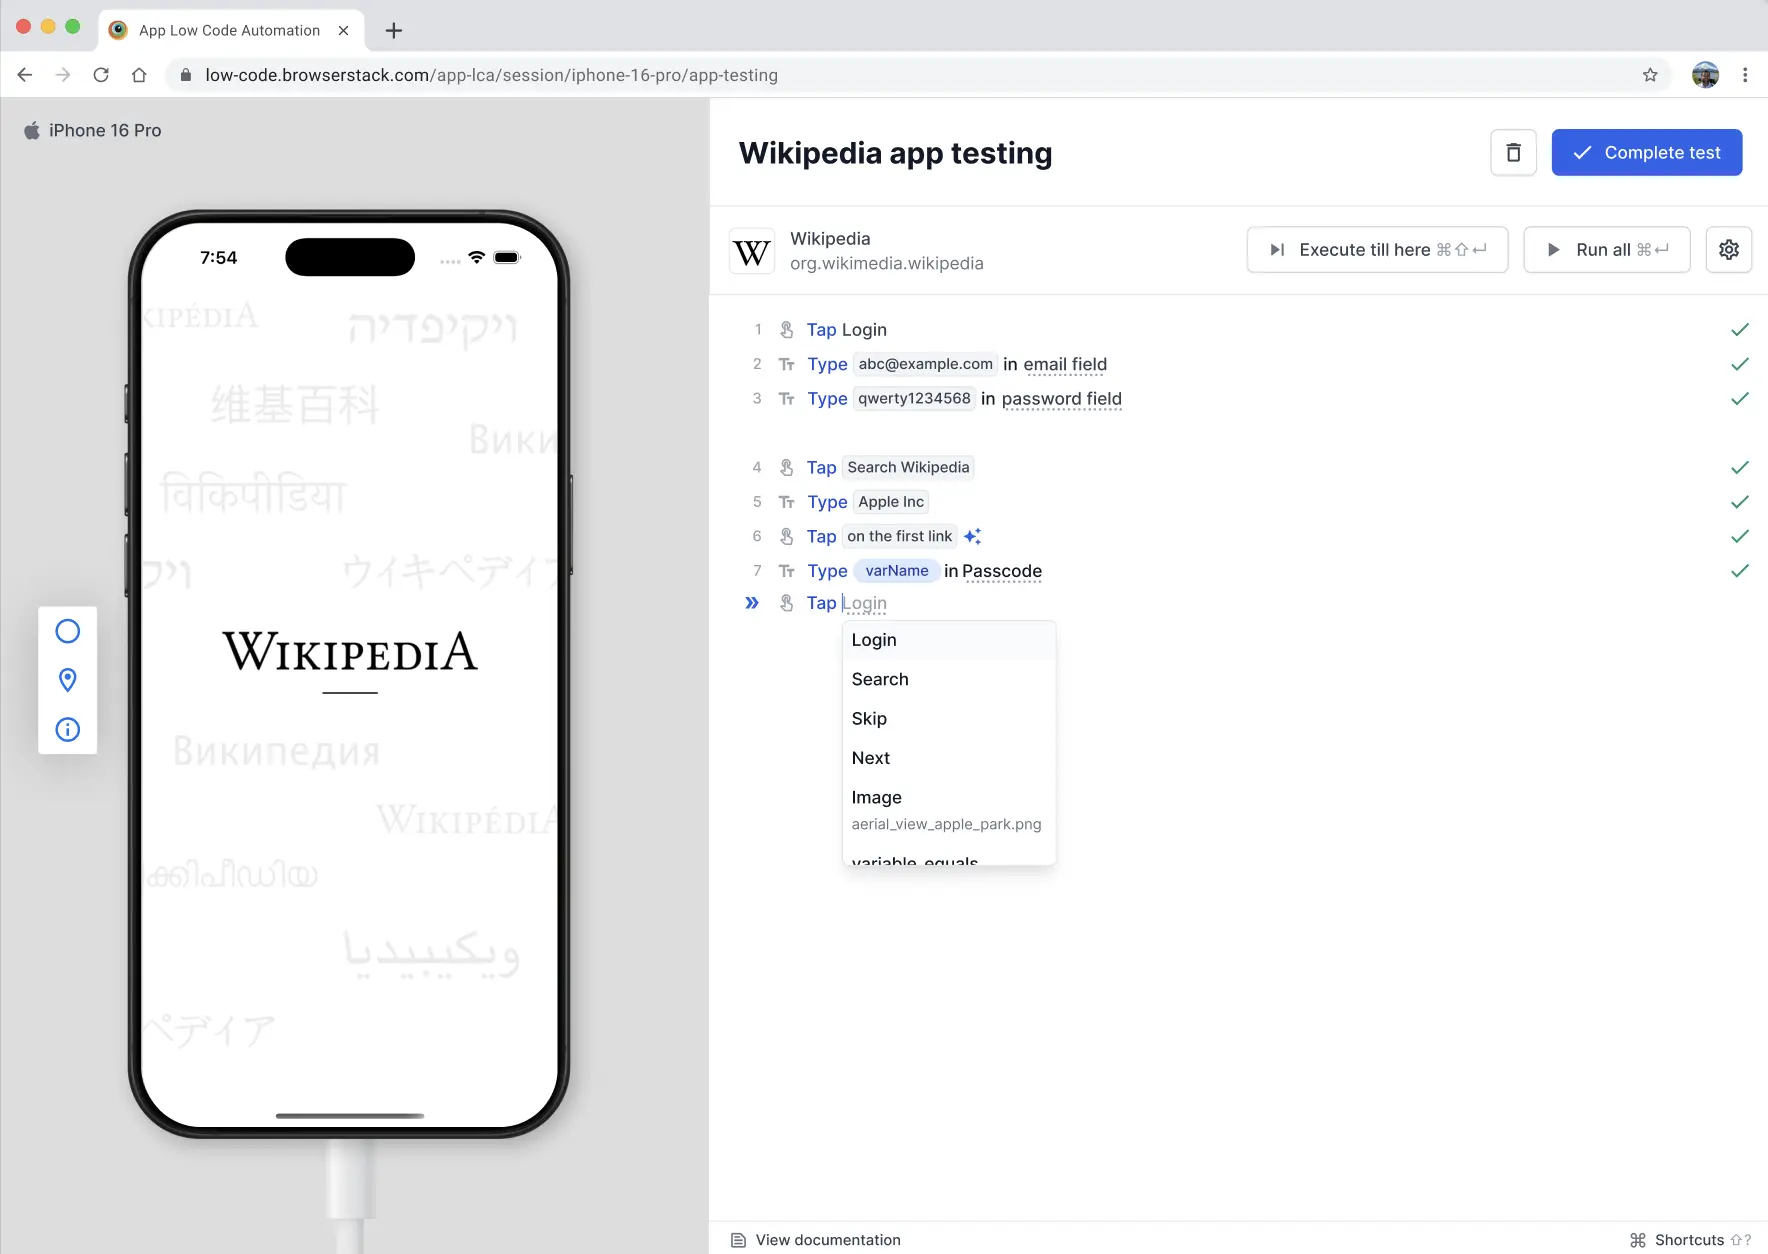
As you write on the test editor, App Low Code Automation automatically suggests valid commands, reducing guesswork and speeding up test creation. You can manually enter the name of the element you want to perform an action on. For example, you can use commands like Tap <element> or Long press <element> to specify interactions.
- When the user presses the
Esckey, the current suggestion is closed. After closing the suggestion, the user can start typing again. - If the new input matches a command, a relevant suggestion is shown.
- If the new input does not match any known command, an error message is shown.
This section covers the following supported UI gestures or interactions, the command to use, a brief description, and real-world examples to guide you.
- Single tap
- Double tap
- Long press
- Keyboard input
- Swipe
- Scroll
- Variables
- Validations
- Conditional flows
- Wait time
- Execute selected steps
- Launch app
- Kill app
- Open deeplink
Single tap
Simulates a single tap on a visible and interactive UI element.
Command: Tap <Element>
Example: Tap Login
You can manually enter the specific UI element name you want to tap.
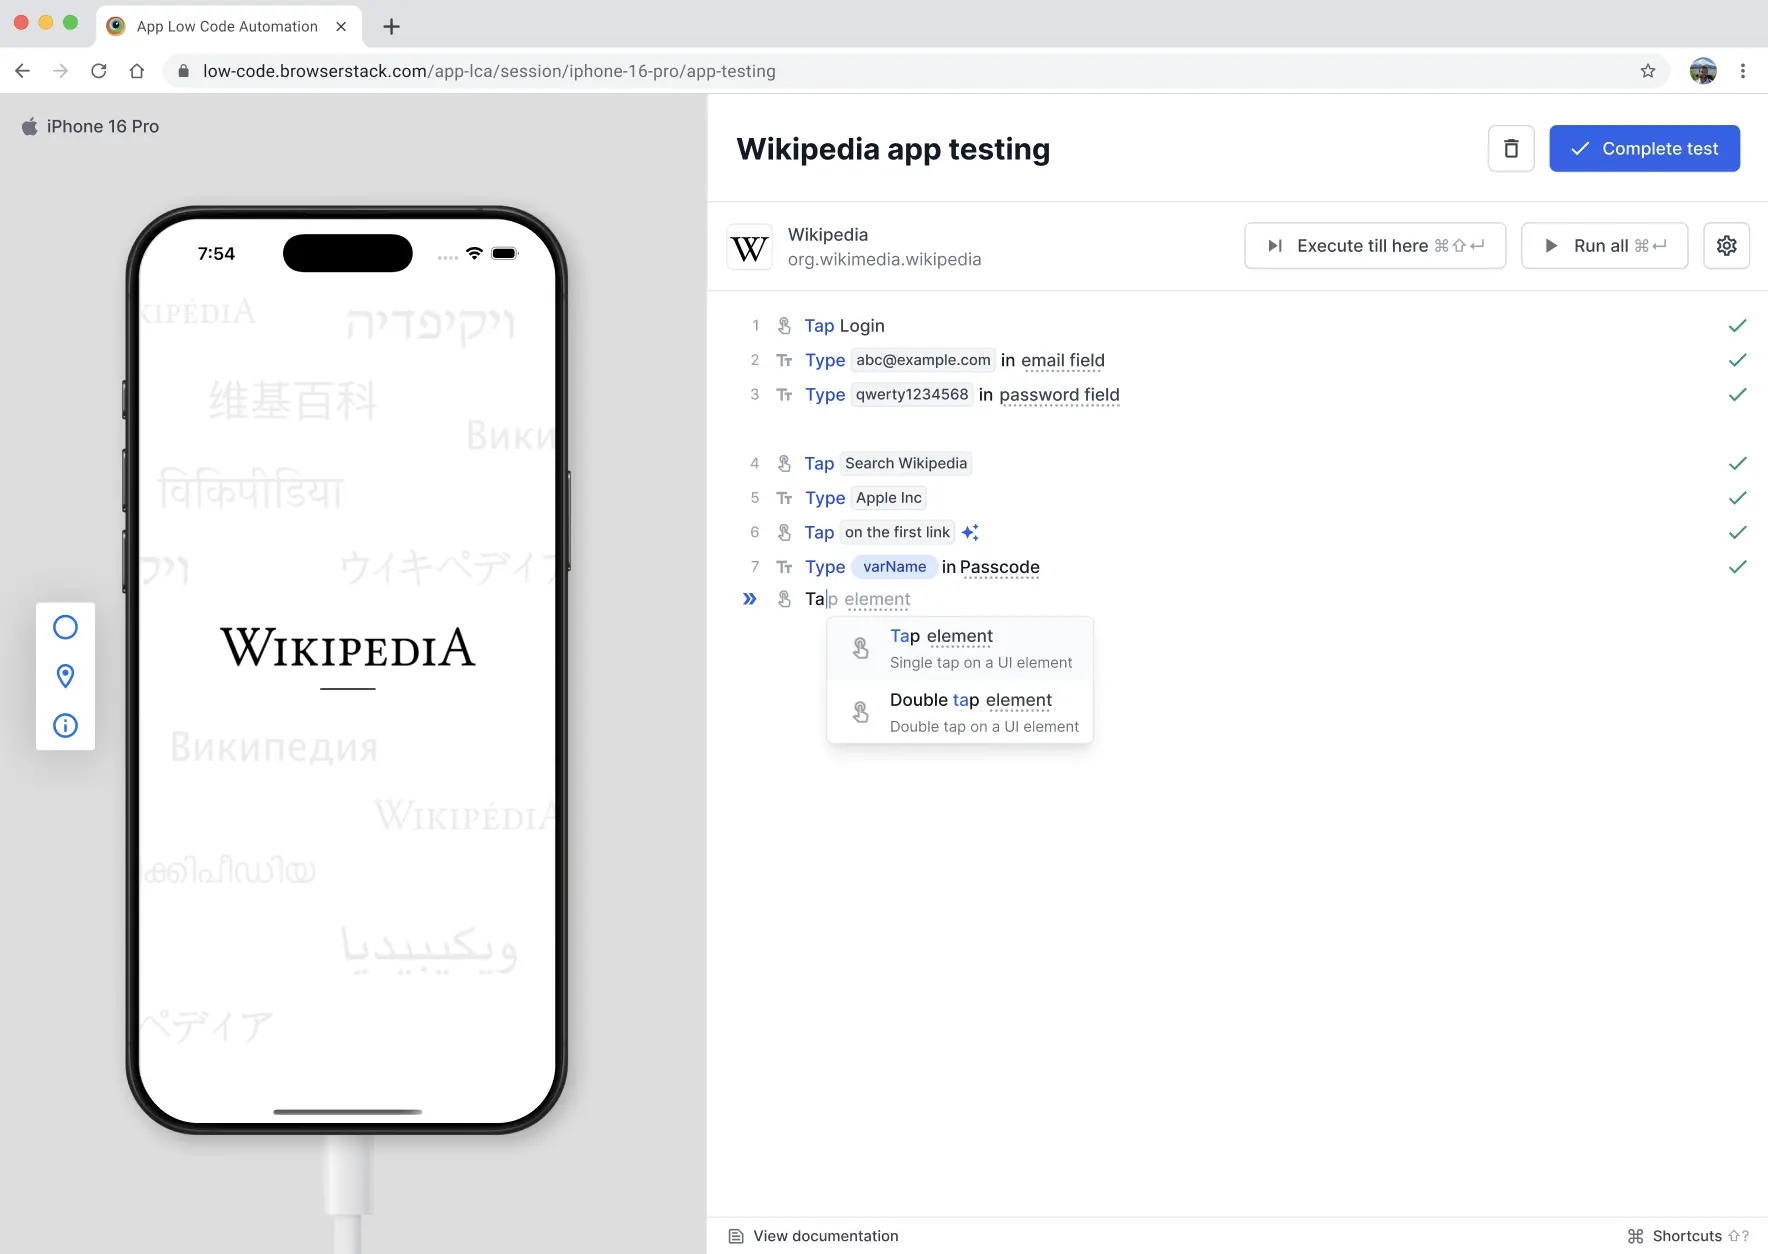
Double tap
Performs a quick double tap gesture on the specified element. You can manually enter the specific UI element name you want to double tap.
Command: Double tap <Element>
Example: Double tap Profile Picture
Long press
Simulates a long press gesture on a UI element for a specified duration. By default, App Low Code Automation performs a long press for 3 seconds, but you can customize the duration as needed.
Command:
- Long press
<Element> - Long press
<Element>for<seconds>
Examples:
- Long press
Cancel - Long press
Cancelfor 5

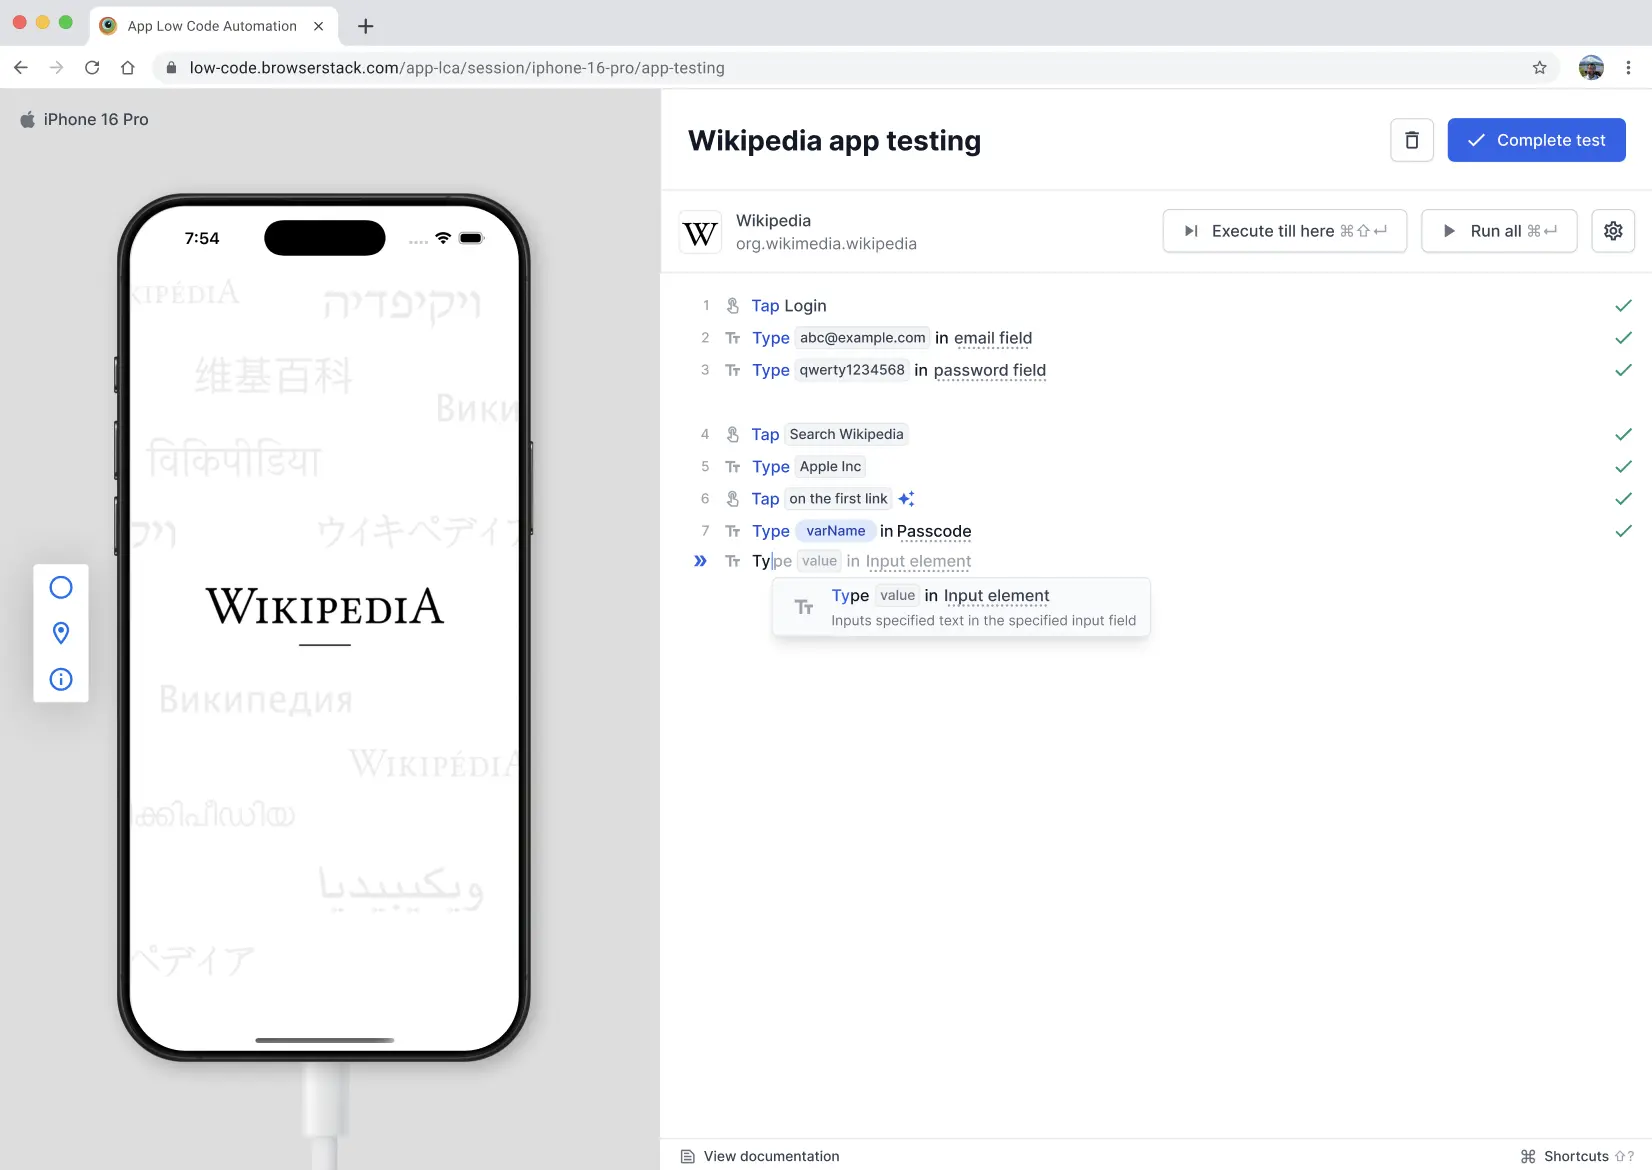
Keyboard input
Enables you to automate text entry, field clearing, and key presses in input fields and other interactive elements using natural language commands.
Commands:
- Enter
<Text>in<Input_Field> - Type
<Text> - Clear
<Input_Field> - Press
<Key>
Examples:
- Enter
john.doe@example.cominEmail address - Clear
Search Bar - Press
Enter - Type
BrowserStack
Swipe
Simulates a swipe gesture across the screen or within a specified scrollable element.
As you type the Swipe command, App Low Code Automation suggests available directions and elements based on the current app screen. The interface displays contextual options to help you select the right swipe action, making it easier to automate navigation through carousels, lists, or other interactive areas.
Commands:
- Swipe
<Direction> - Swipe
<Direction>on<Element>
Examples:
- Swipe
Up - Swipe
LeftonImage Carousel

After you enter the Swipe command, App Low Code Automation automatically suggests available directions for you to select, making it easier to choose the appropriate swipe direction.

Scroll
Scroll a scrollable area in a specified direction, or until a particular element becomes visible. You can also scroll up to a specific element within a defined scrollable area. By default, App Low Code Automation scrolls 50% of the area.
As you type a scroll command, App Low Code Automation suggests available directions, scrollable areas, and elements based on the current app screen. The interface displays contextual options to help you select the right scroll action, making it easier to automate navigation through lists, forms, or long pages.
Commands:
- Scroll
<Direction> - Scroll
<Direction>in<Scrollable_Area> - Scroll to
<Element>in<Scrollable_Area>
Examples:
- Scroll up
- Scroll down in
Terms and Conditions - Scroll to
Privacy Policy LinkinSettings Page

Variables
Stores and manages data during the test run for use in later steps. You can set variables to static values. You can type the @ symbol and choose a variable from the dropdown to insert its value into your command. Supported types include strings, numbers, and boolean. For more information on how to create and import variables, refer to the Variables document.
Command:
- Set
<Variable>to<DATA> - Use variable with
@- at symbol
Examples:
- Set
emailtoexample@browserstack.com - Enter
@variable_nameinUsername. When you type@, a dropdown appears with suggested variable values. Select the variable you want to use.

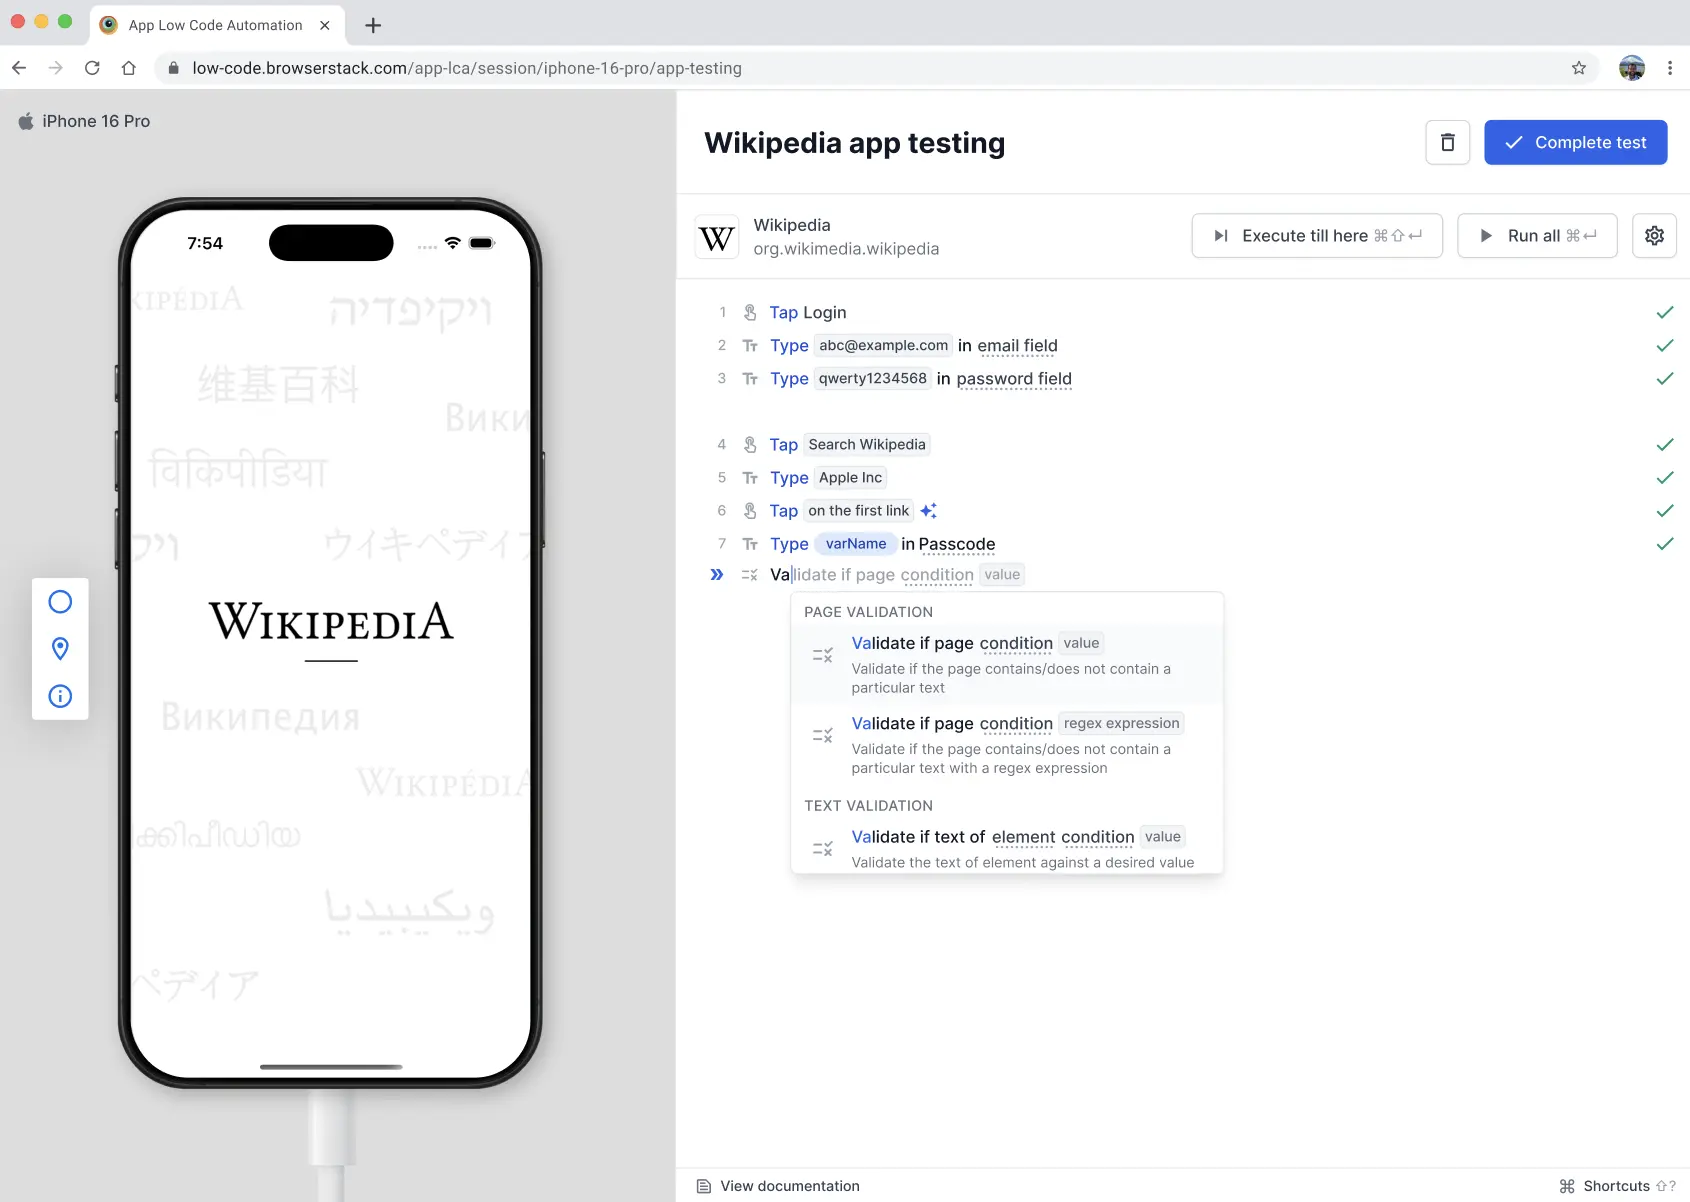
Validations
Validations let you check the state, content, and value of UI elements during your test. Use these commands to assert expected outcomes, compare text, and verify element properties.
Page validation
Checks if the specified value/text or regular expression pattern exists or does not exist on the current screen.
Command:
- Validate if page contains
<value/regex> - Validate if page does not contain
<value/regex>
Examples:
- Validate if page contains
Welcome, User - Validate if page contains regex
Order ID: [0-9]{5} - Validate if page does not contain
Error 404
Element validation
Checks the current state or availability of UI elements.
Command:
- Validate if
<Element>is visible / is not visible - Validate if
<Element>is enabled / disabled - Validate if
<Element>is selected / not selected - Validate if
<Element>is checked / selected - Validate if
Select elementis empty / is not empty
Examples:
- Validate if
Submit buttonis visible - Validate if
success messageis not visible - Validate if
button Proceed to Checkoutis enabled - Validate if
Apply Coupon buttonis disabled - Validate if
radio button Credit Cardis selected - Validate if
radio button Cashis not selected - Validate if
checkbox Agree to Termsis checked - Validate if
toggle Dark Modeis unchecked - Validate if
Hidden Debug Logexists

Text validation
Text validation lets you check if the text content of an element or a variable matches your expected value. You can validate against both string values and numbers. If the keyword number is included, the validation is performed numerically; otherwise, it defaults to a lexicographic (string-based) comparison. The following comparison operators are supported:
- contains
- does not contain
- equals
- does not equal
- starts with
- does not start with
- matches regex
Command:
- Validate if text of
<Element>is<expected text> - Validate if text of
<Element>contains<partial text> - Validate if text of
<Element>matches regex<pattern> - Validate if text of
<Element>equals [number]<value> - Validate if
<Element locator>isempty - Validate if text of
<variable>equals<value> - Validate if text of
<variable>contains<number>
Examples:
- Validate if text of
Username fieldisjohn.doe - Validate if text of
PriceisRs. 1200 - Validate if text of
Element left to Product titlecontainsPro Max - Validate if text of
orderTotalequals1200 - Validate if text of
discountdoes not equal0 - Validate if text of
scoreequalsnumber

Conditional flows
Conditional flows let you run different steps based on the state of your app using if-else blocks. Use If, Else if, and Else conditions to branch your test flow at runtime. A condition can check the page, an element, a variable, or the device and OS. You can combine two conditions in a block with and or or. For more information, refer to the Record conditional flows with if-else document.
Commands:
- If
<Condition> - Else if
<Condition> - Else
Examples:
- If
page contains Promo code - Else if
device.os is iOS - Else
Supported conditions
A condition can check the page, an element, a variable, or the device and OS. Everything supported in the Validate if commands is also supported as a condition. The following are the supported condition types.
Page conditions: Check the content of the current screen.
- page contains
<text> - page contains regex
<regex> - page does not contain
<text> - page does not contain regex
<regex>
Element conditions: Check the text, state, or availability of a UI element.
- text of
<element>is<expected text> - text of
<element>contains<partial text> - text of
<element>matches regex<pattern> - text of
<element>is equal to number<value> - text of
<element>is greater than number<value> - text of
<element>is less than number<value> - text of
<element>is not equal to number<value> - text of
<element>is greater than or equal to number<value> - text of
<element>is less than or equal to number<value> -
<element>is empty or is not empty -
<element>is visible or not visible -
<element>is enabled or disabled -
<element>is selected or not selected -
<element>is checked or unchecked -
<element>exists or does not exist
Variable conditions: Check the value of a variable defined in your test.
-
<variable>is<expected text> -
<variable>contains<partial text> -
<variable>matches regex<pattern> -
<variable>is equal to number<value> -
<variable>is greater than number<value> -
<variable>is less than number<value> -
<variable>is not equal to number<value> -
<variable>is greater than or equal to number<value> -
<variable>is less than or equal to number<value>
Device and OS conditions: Check the device the test runs on.
- device.os is
AndroidoriOS - device.type is
phoneortablet
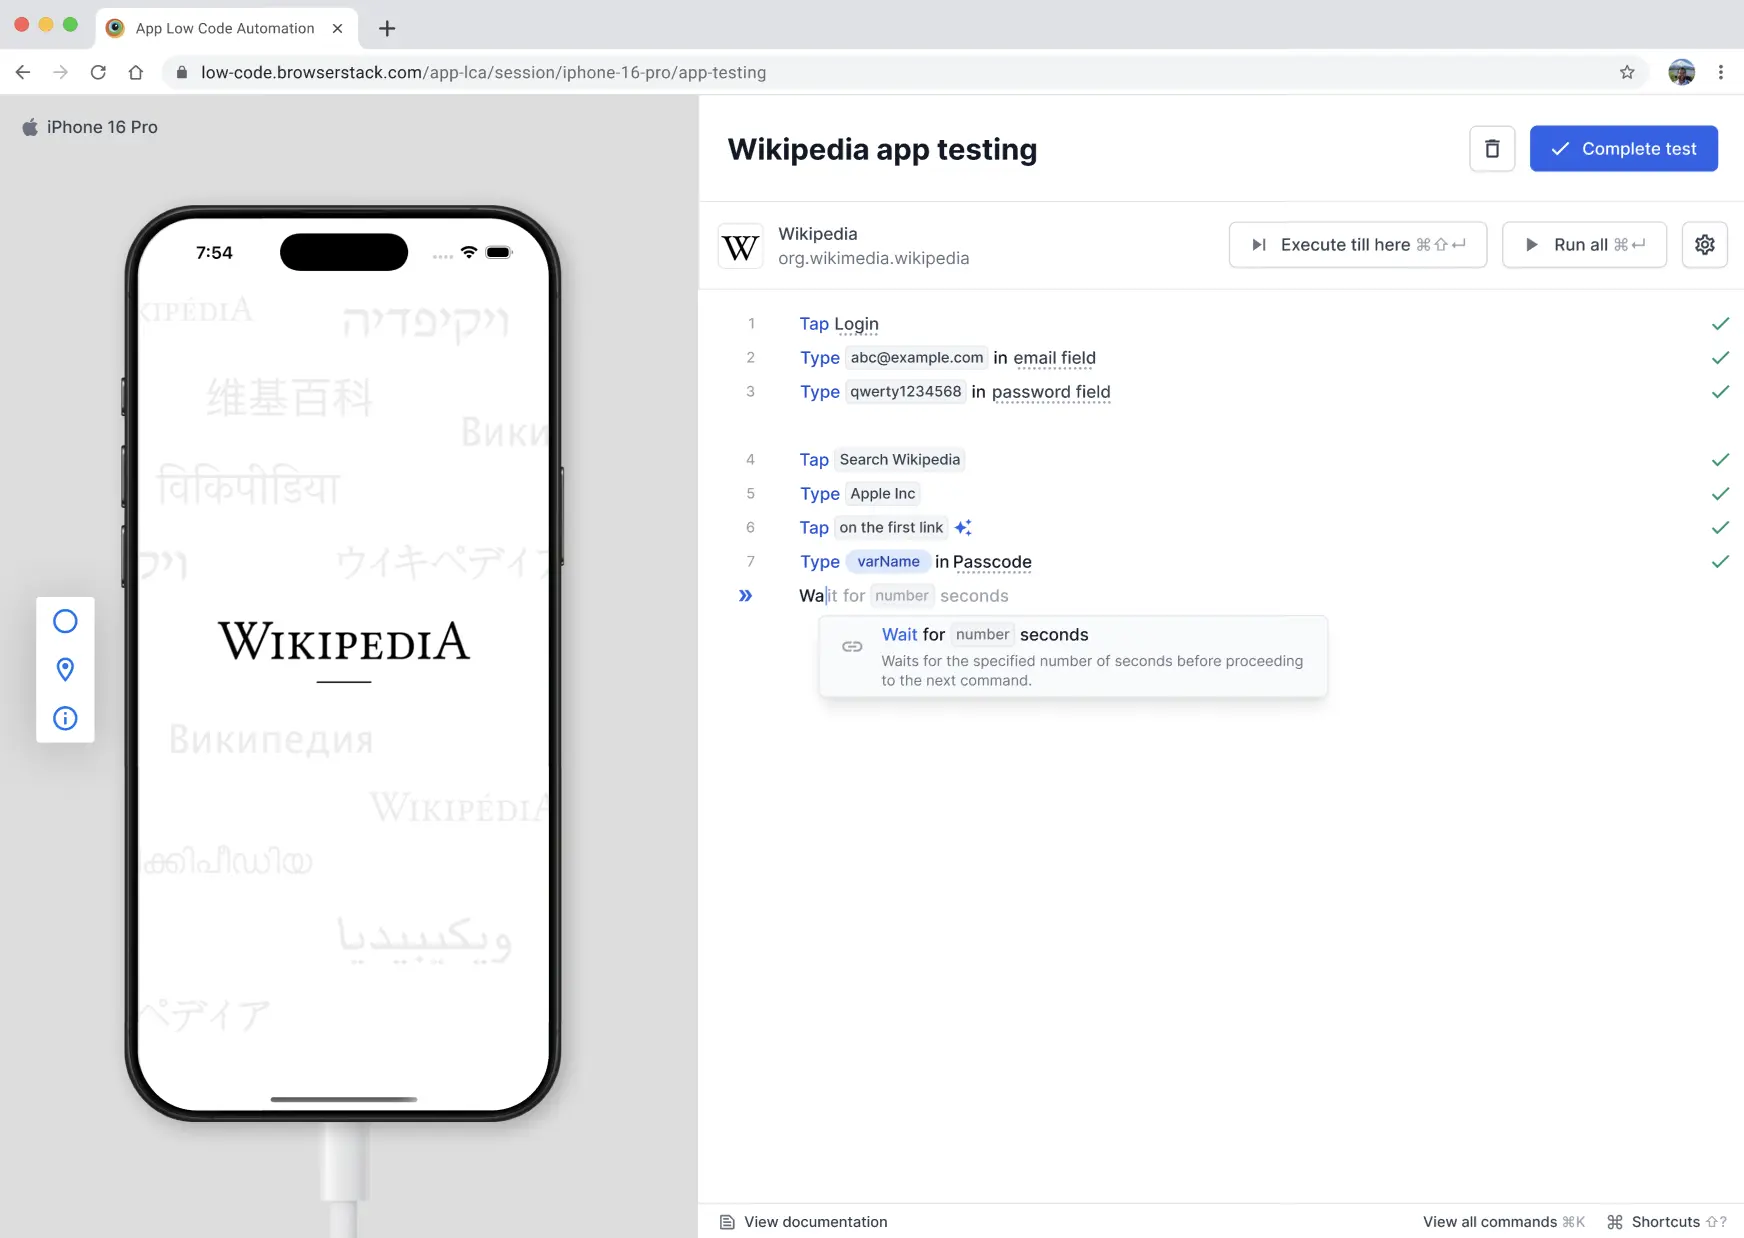
Wait time
Wait time lets you explicitly pause the execution for a specified number of seconds (up to a maximum of 180 seconds) before continuing with the next action.
Command:
Wait for <number> seconds
Rules & constraints:
- Number of seconds must be greater than
0 - Maximum allowed value:
180seconds - Supports up to 1 decimal point value.
- Supported:
0.1,0.5,1,1.5,10 - Not supported:
0,1.55,200
- Supported:
Examples:
- Wait for
0.5seconds - Wait for
5seconds - Wait for
10seconds - Wait for
1.5seconds
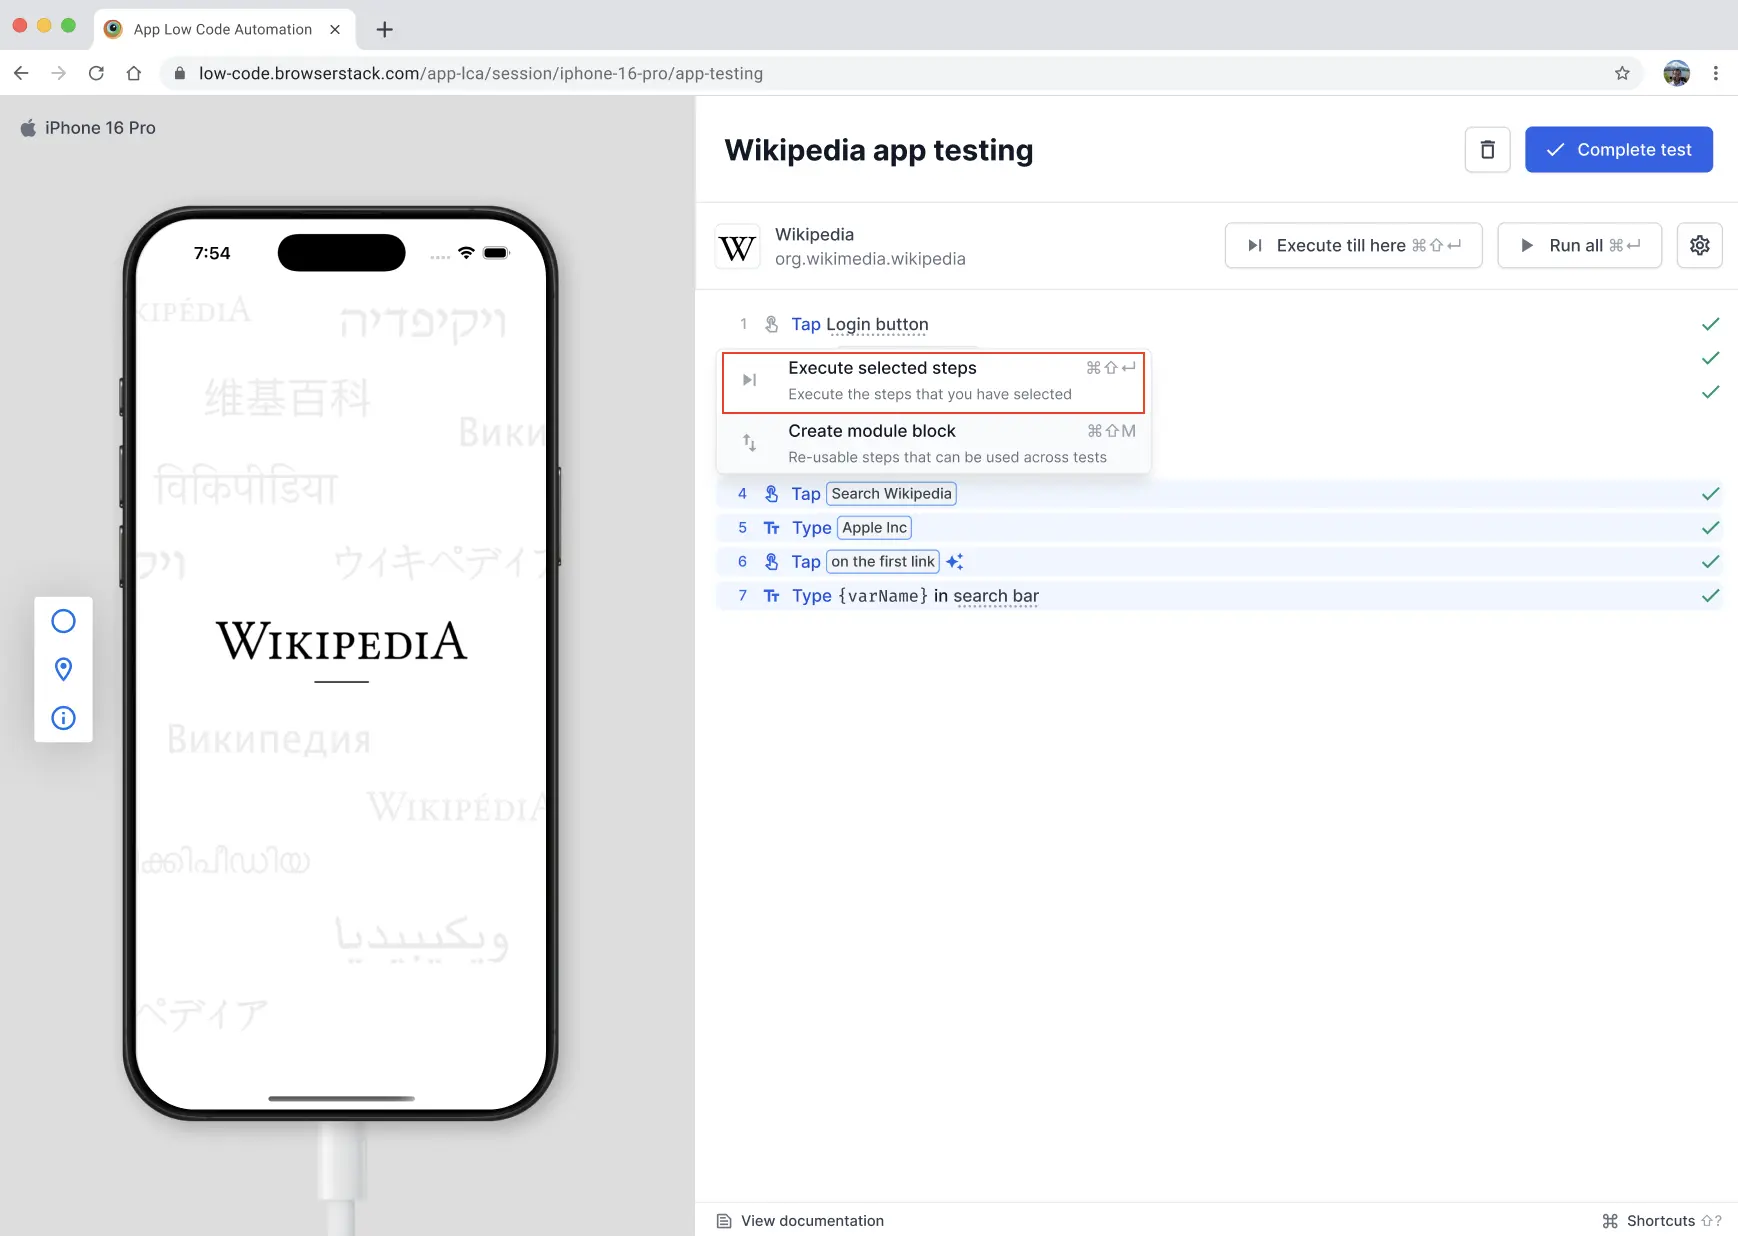
Execute selected steps
Execute selected steps command lets you run only the steps you select in your test flow, instead of executing the entire test case. You can select the required steps using cursor or Shift + ↑ or Shift + ↓ keys and click Execute selected steps.
For example, you can select steps 4, 5, and 6 while skipping steps 1, 2, and 3. Ensure the app is already in the correct state so execution can begin directly from step 4.
Command: Execute selected steps
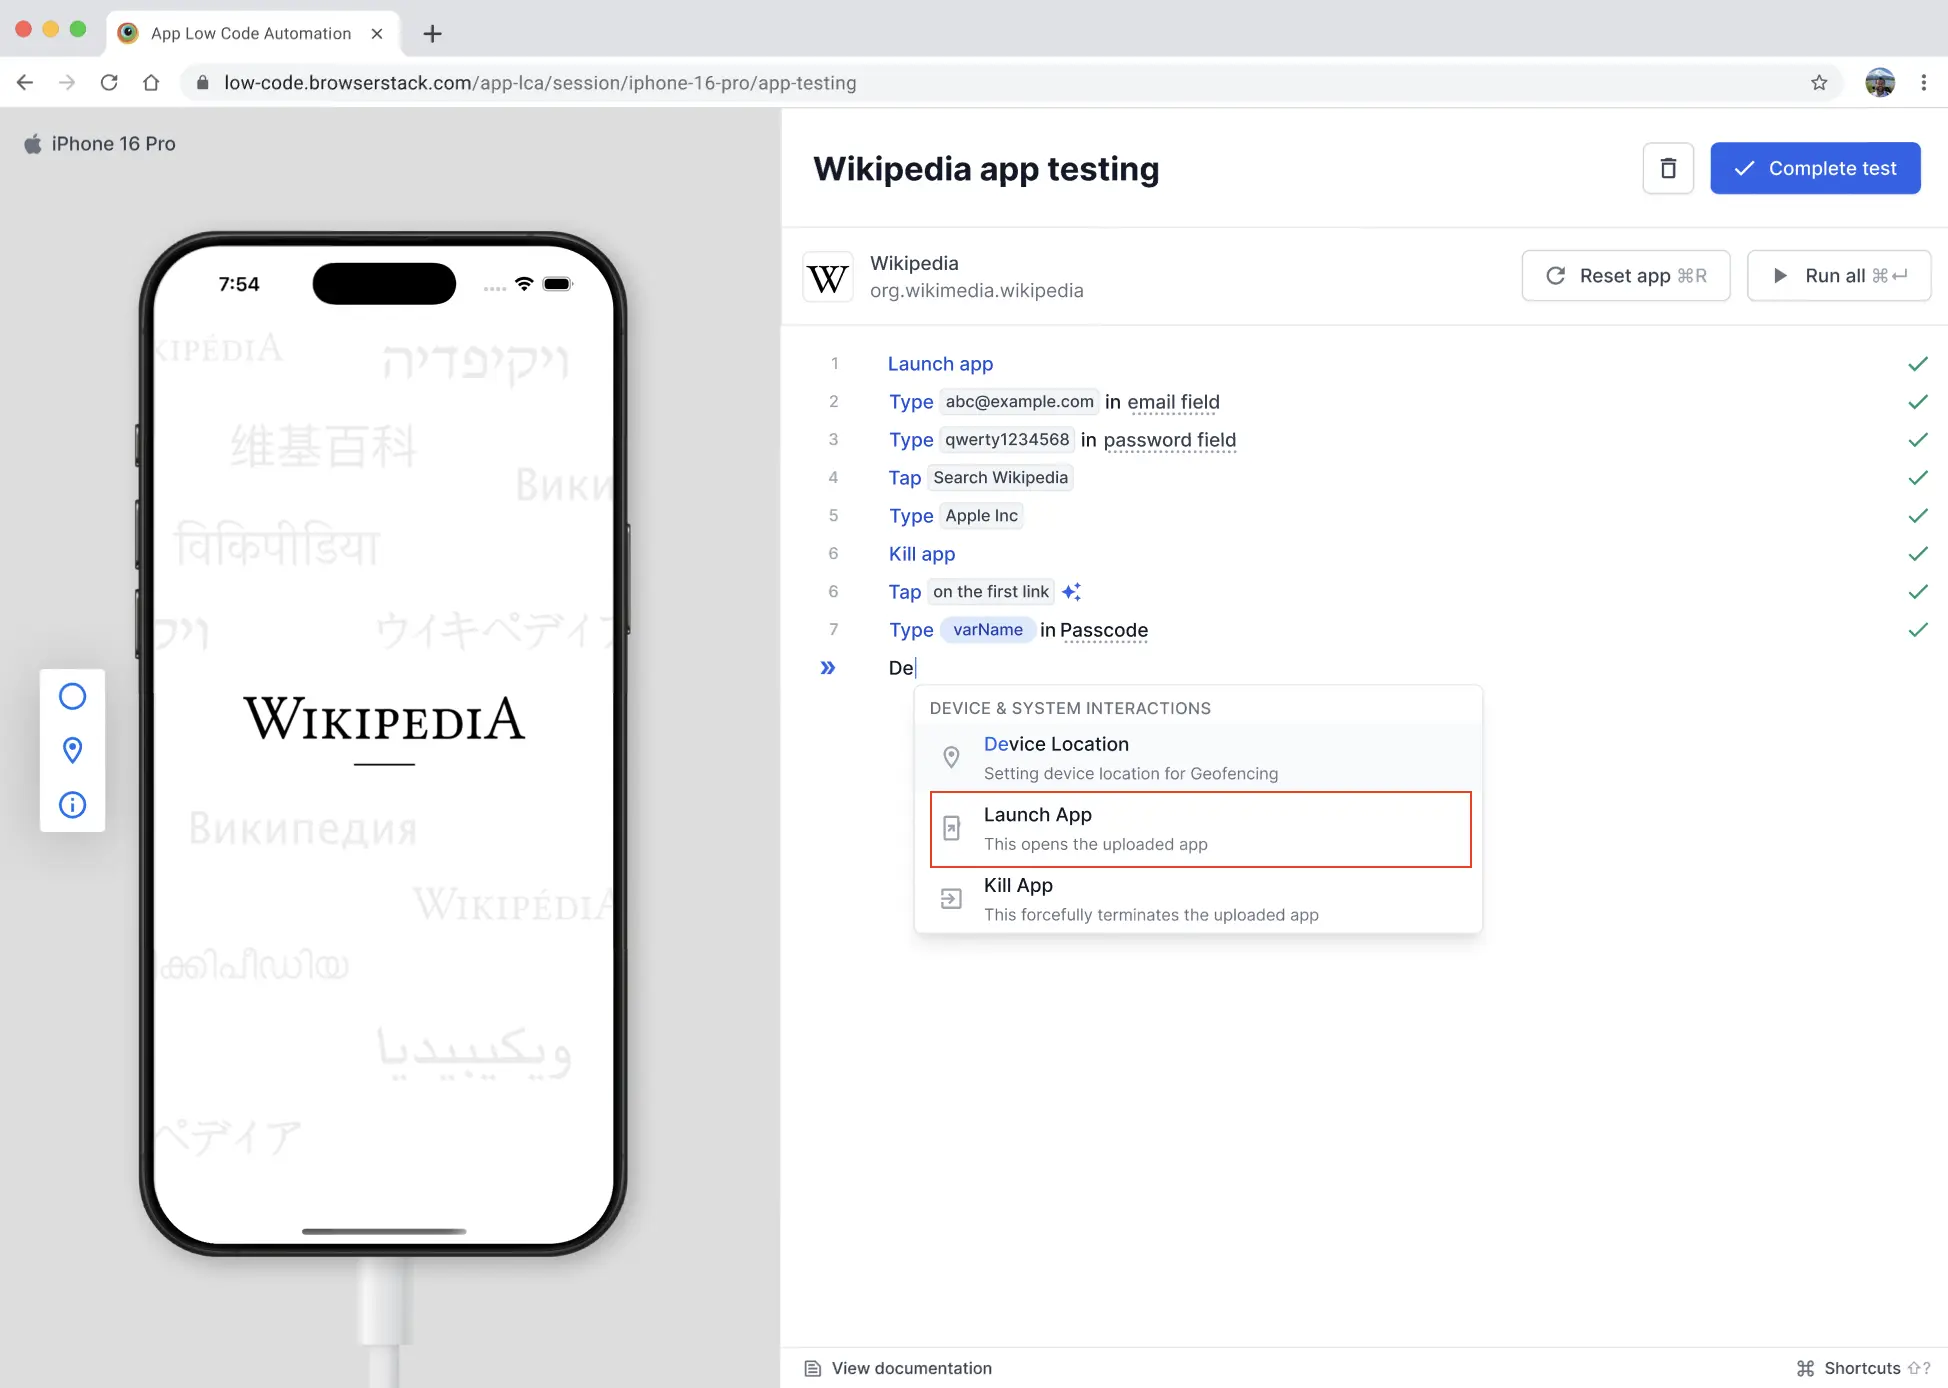
Launch app
Launch app command lets you open the uploaded app during test execution. This is useful when you want to restart the app or launch the app after performing other device interactions.
Command: Launch app
Example: Launch app
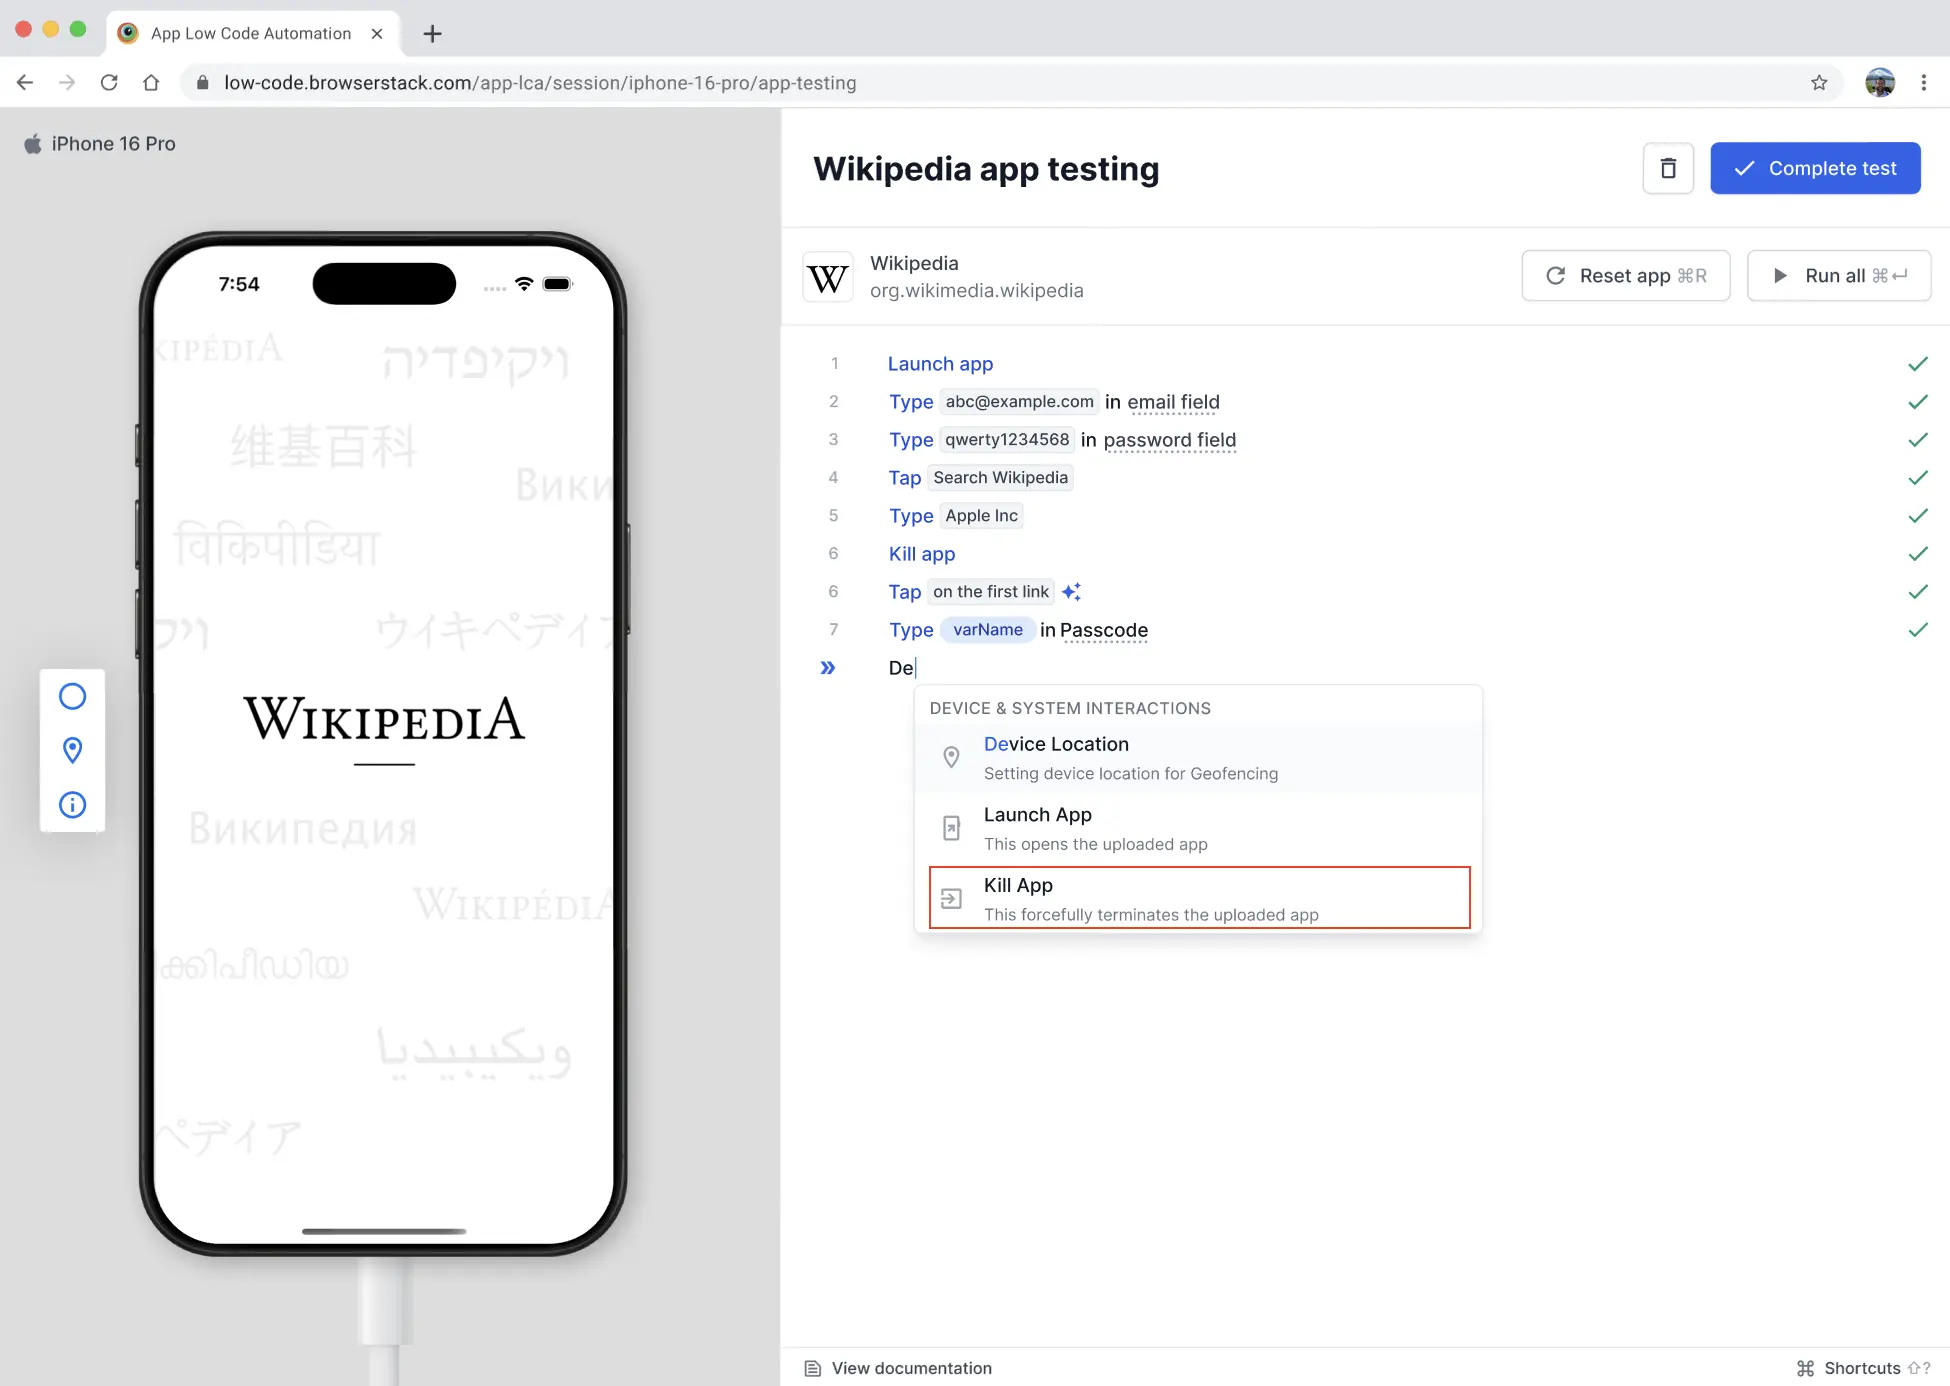
Kill app
Kill app command lets you forcefully terminate the uploaded app during test execution. This is useful for testing app restart scenarios or simulating app crashes.
Command: Kill app
Example: Kill app
Open deeplink
The Open Deeplink command lets you navigate directly to a specific screen or state within your app using a URI scheme, such as myapp://product/123. This is useful for testing deep link navigation, state restoration, and external entry points without manually moving through the app.
When you select the Open Deeplink command, a configuration panel opens where you enter the deep link and an optional alias name. You can insert variables into the link by typing the @ symbol, and App Low Code Automation automatically URL-encodes the variable values before running the link.
Command: Open Deeplink
Examples:
- Open Deeplink
myapp://home/settings - Open Deeplink
myapp://product/@product_id

In the configuration modal, enter the deep link in the link field. To make the step easier to read in the test editor, enter a human-readable name in the Alias name field. If you provide an alias, the step appears as Open Deeplink [Alias name]. Otherwise, it shows the app name and the URL
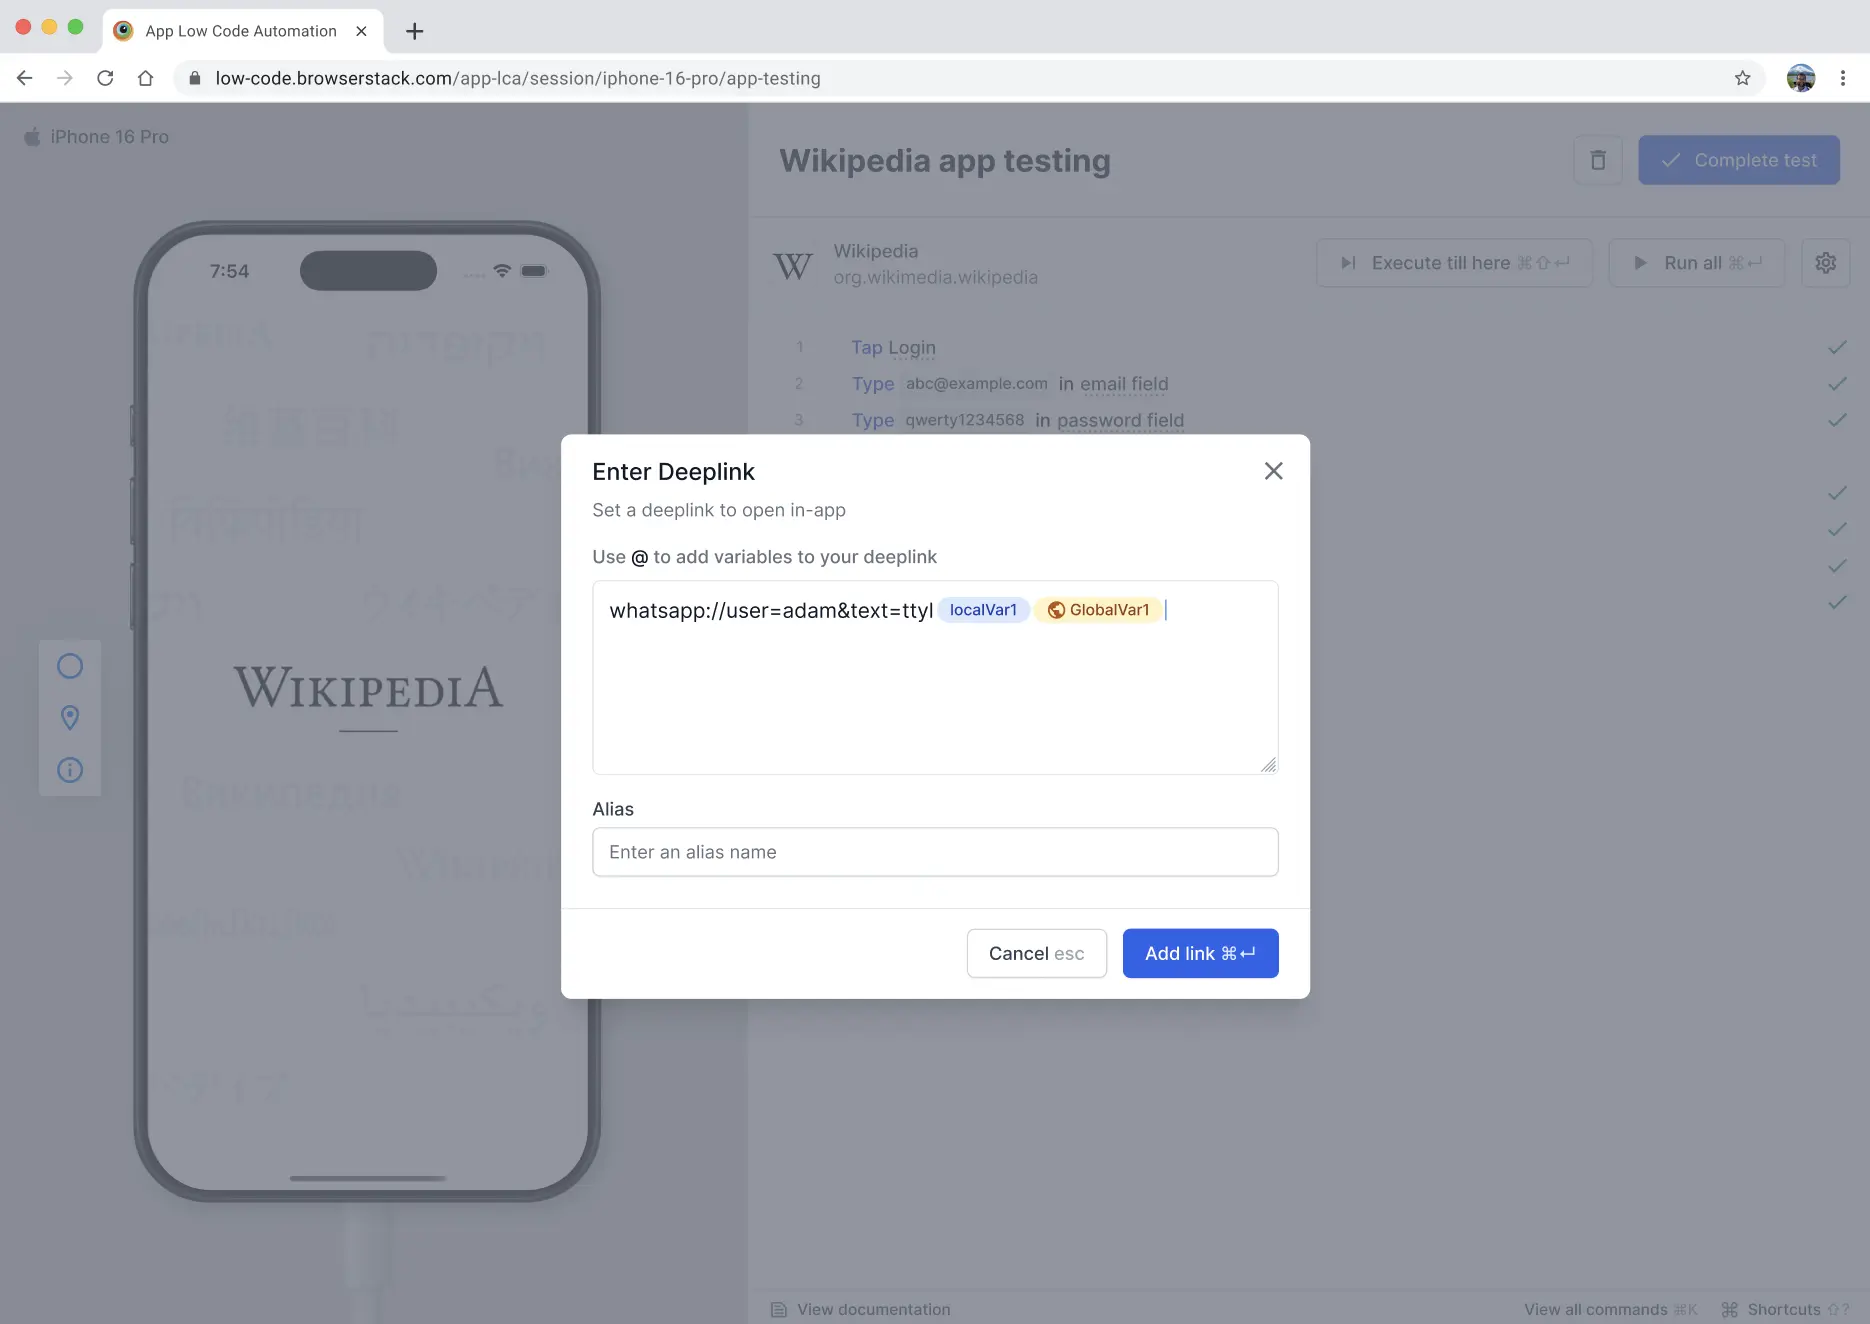
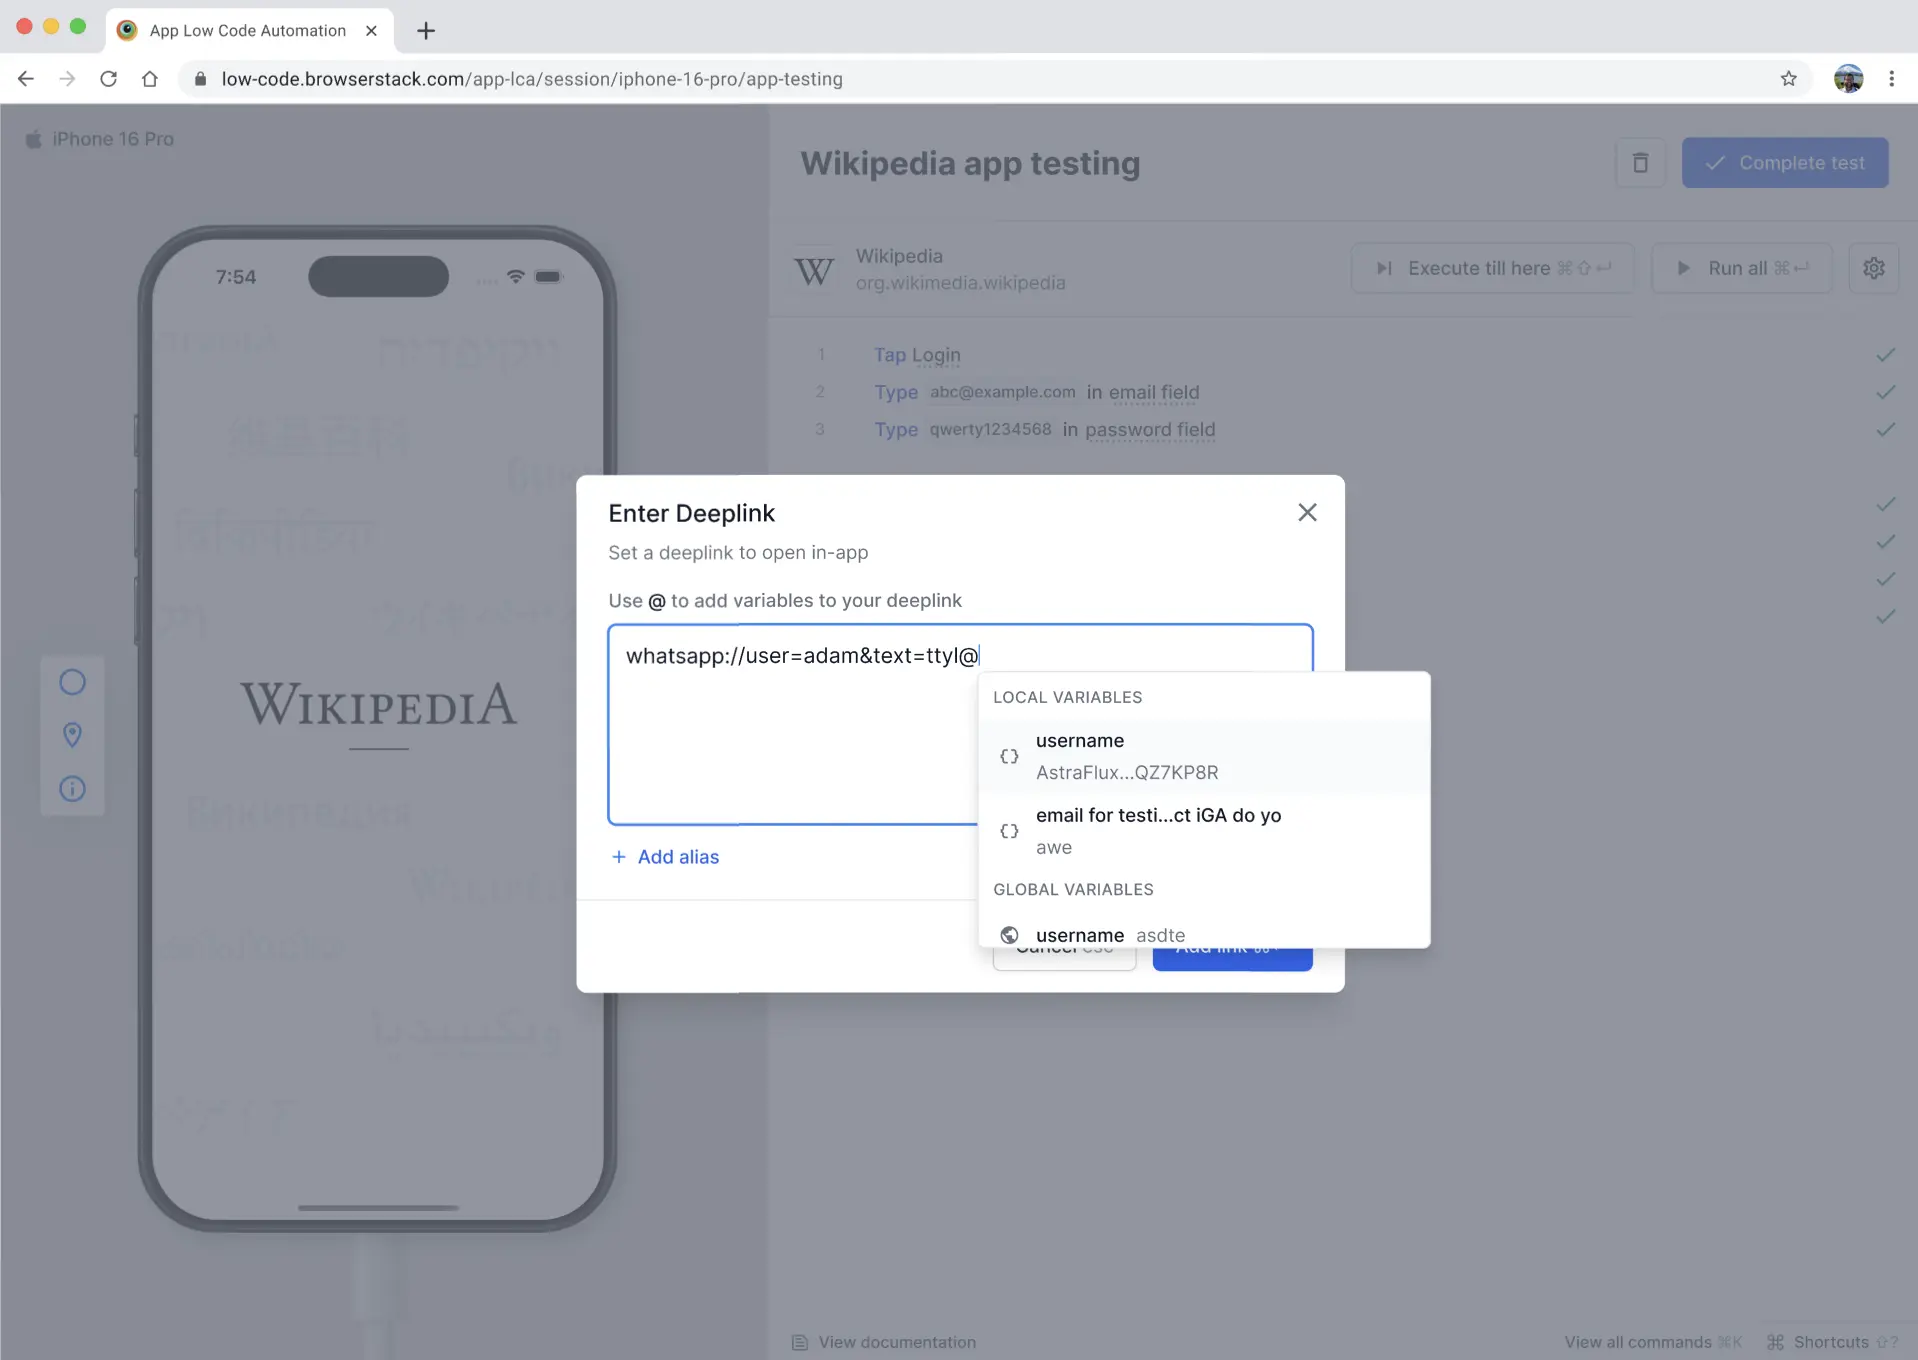
To insert a variable, type @ in the link field. A dropdown lists the available local and global variables. Select a variable to insert it into the deep link as a chip.
Rules and constraints:
- The link field cannot be empty. If you try to add an empty link, App Low Code Automation shows an error.
- The link must match a valid URI scheme. If the format is invalid, App Low Code Automation shows an error.
- To edit a saved deep link, click the Open Deeplink step in the test editor to open the preview, then click Edit to reopen the configuration modal.
Reset the app during test execution
You can reset the app to its initial state during test execution to ensure a clean testing environment. Resetting the app clears all data, cache, and session information, returning the app to its freshly installed state without reinstalling it.
When to reset the app:
- Before starting a new test scenario to ensure a clean state
- After completing a test flow that modifies app data
- When testing the initial app launch experience
- To clear user sessions between different test cases
To reset the app:
You can reset the app in two ways:
Option 1: Reset during test run
- In the test editor, click Run all to execute your test steps.
- A Clear app state before running steps? dialog appears, explaining that clearing app state resets the app data to ensure it starts in the correct state.
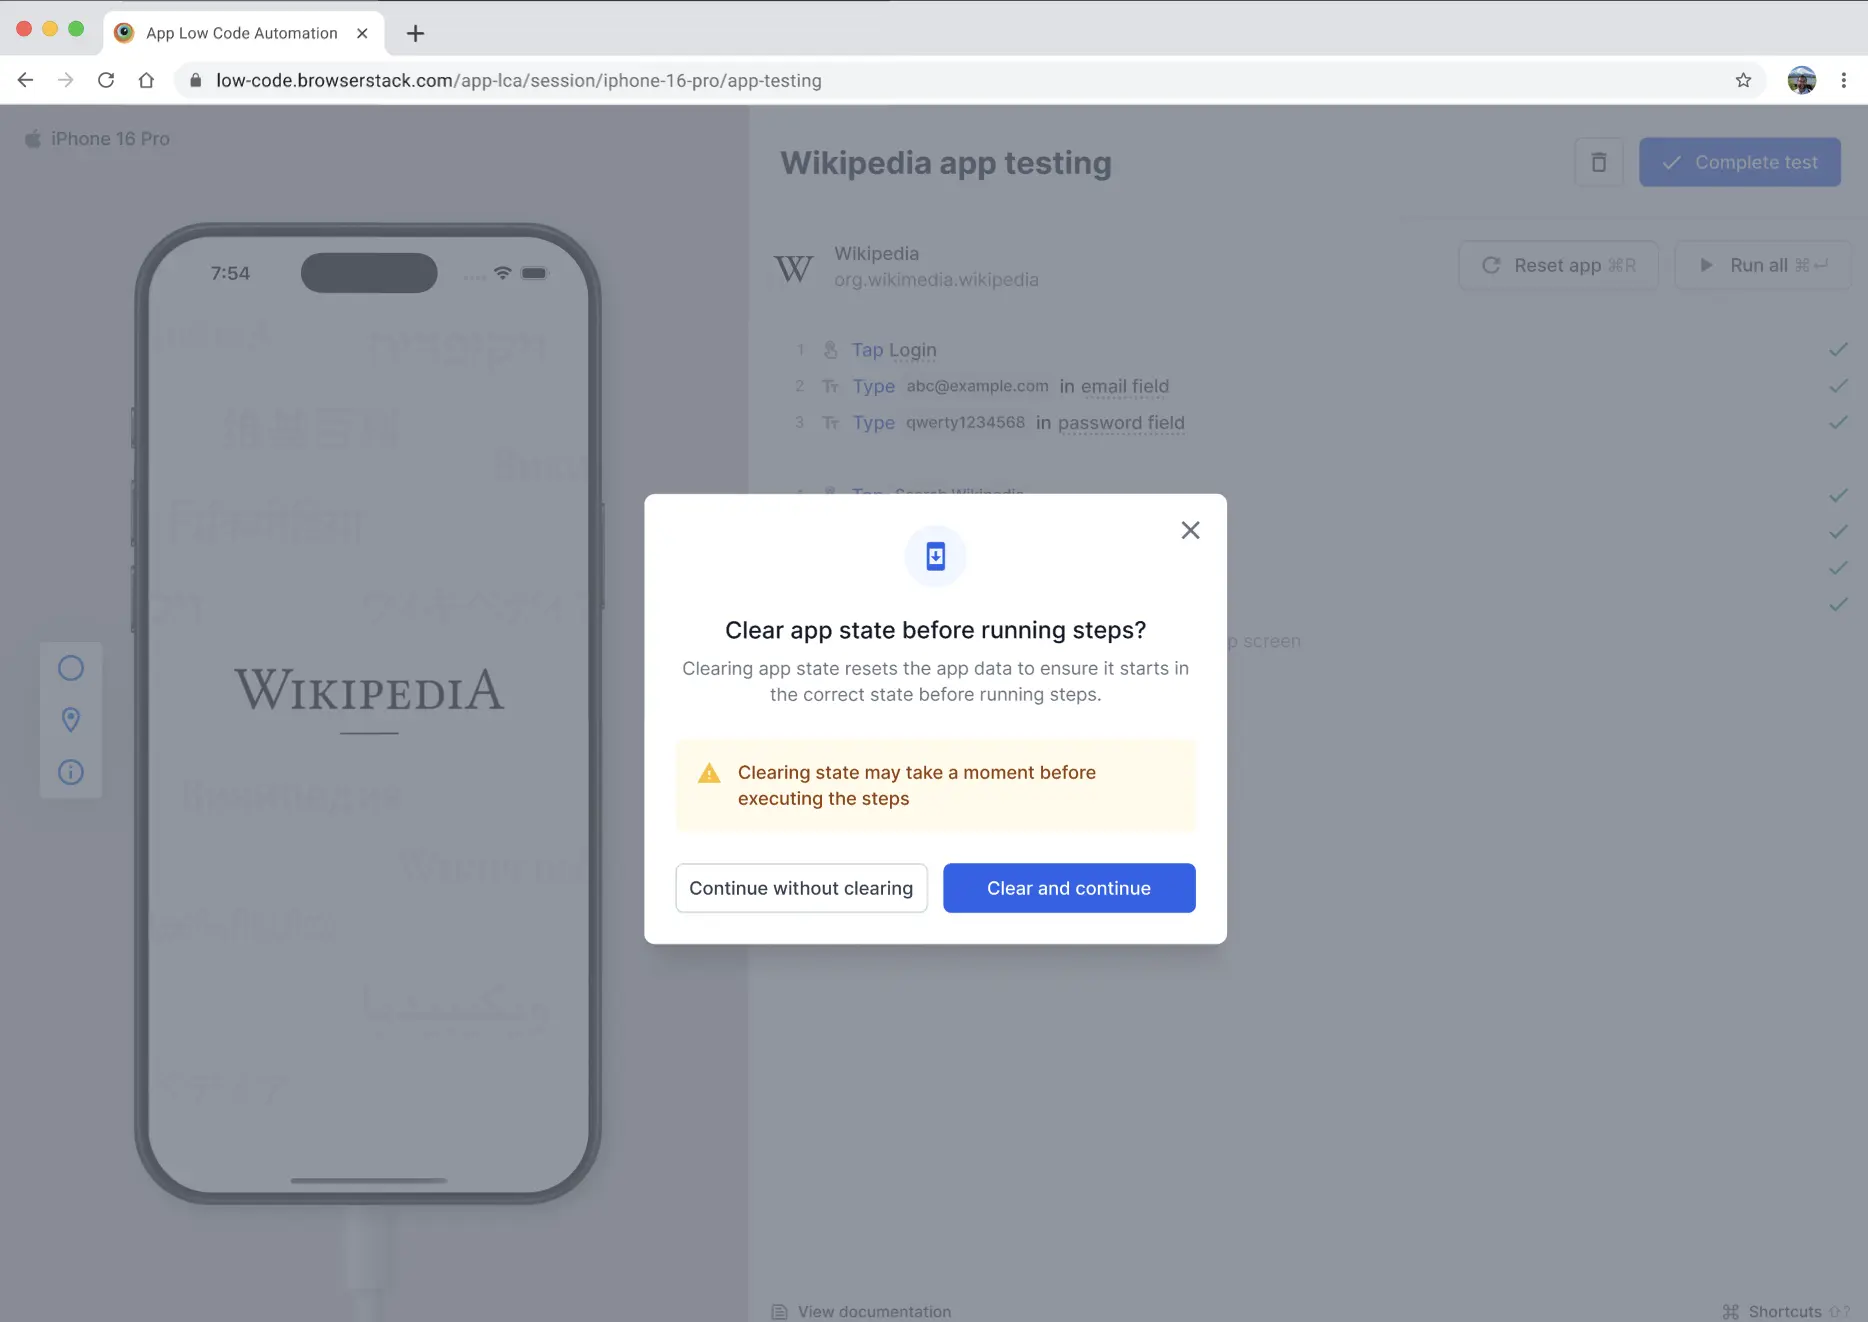
- Click Clear and continue to reset the app, or Continue without clearing to proceed without resetting. The warning indicates that clearing state may take a moment before executing the steps.
- The app resets to its initial state and your test steps execute.
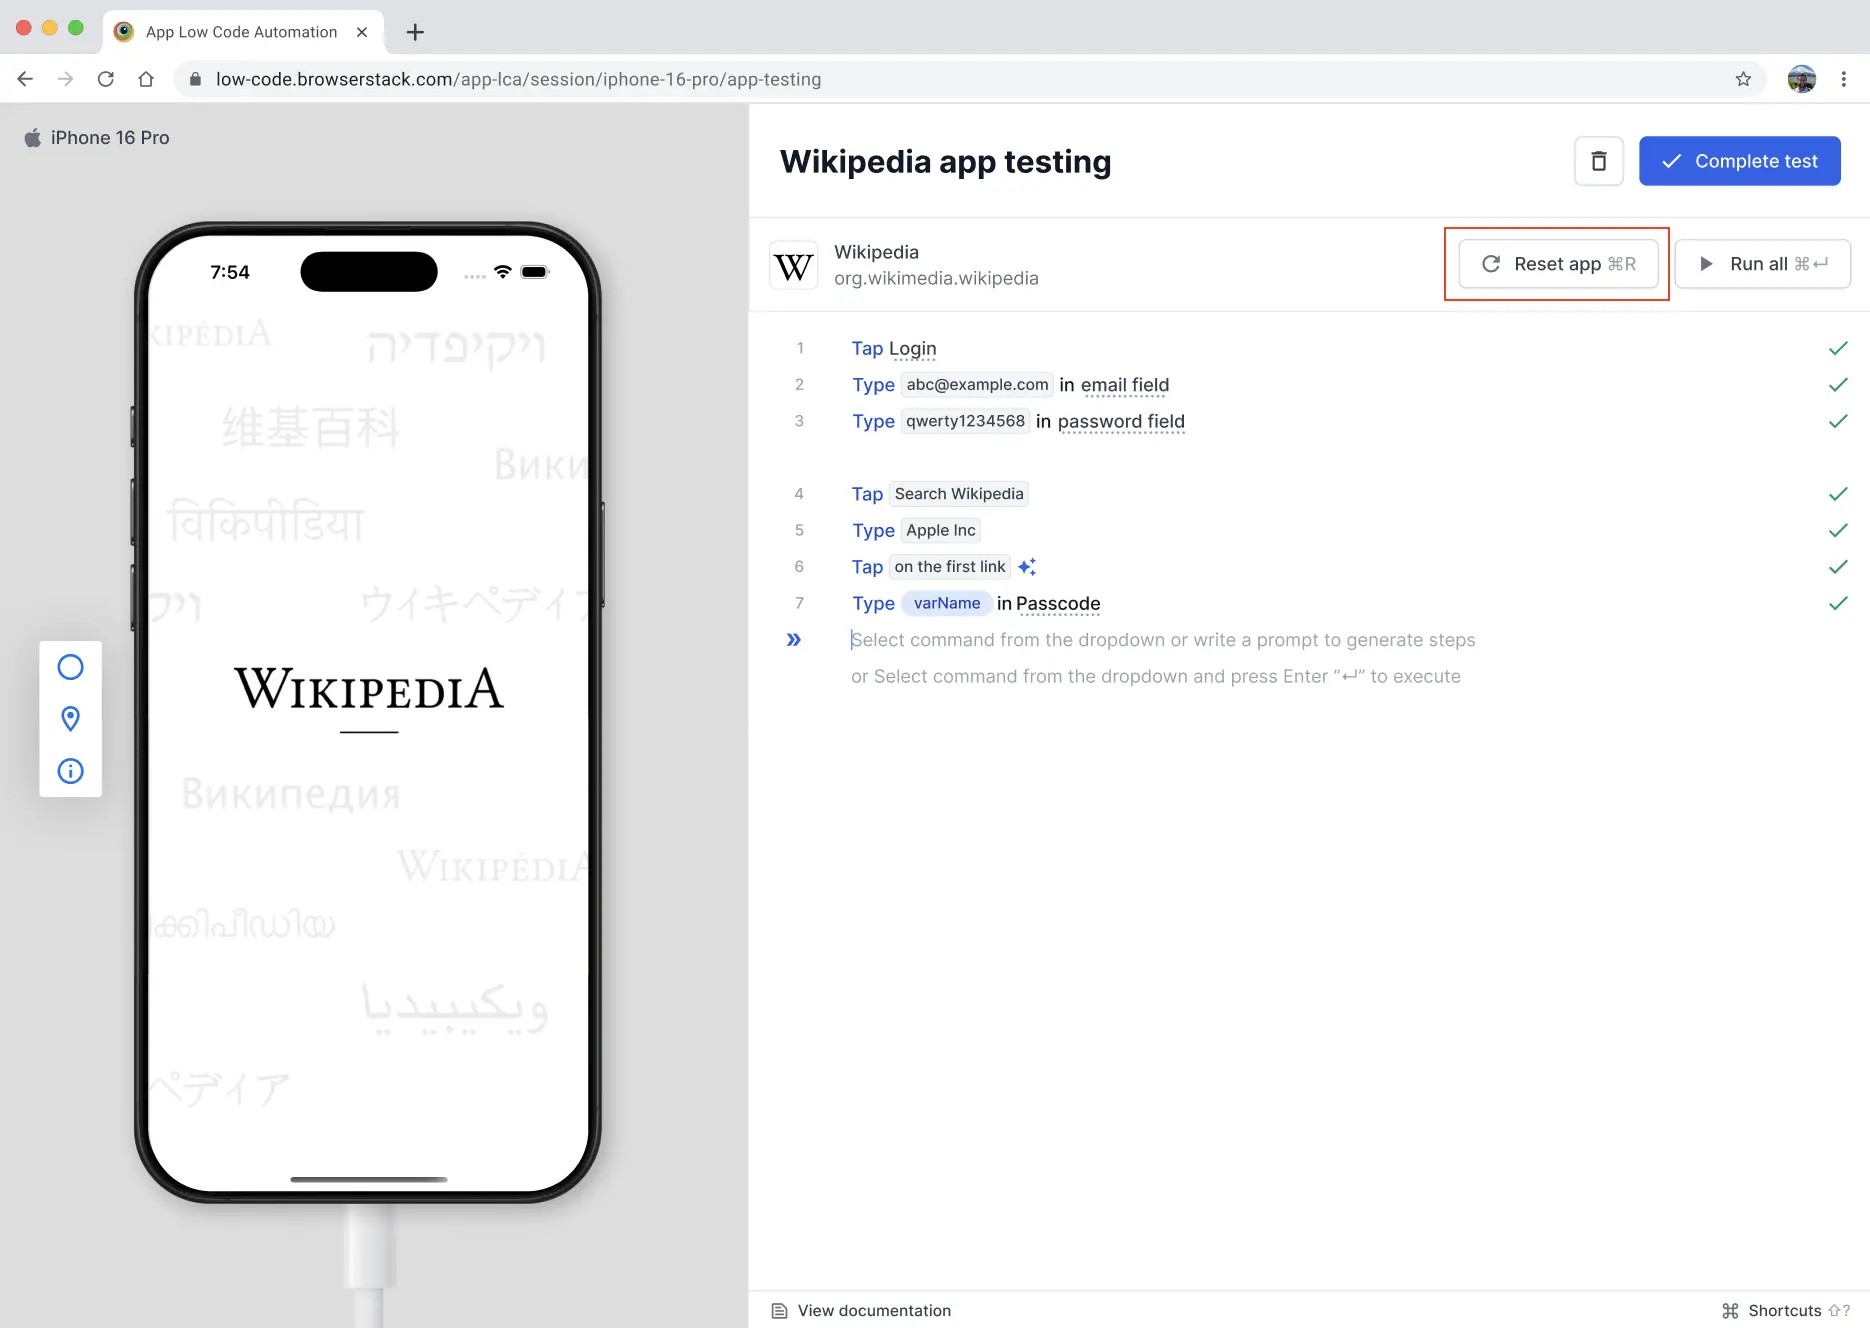
Option 2: Reset using the Reset app button
- In the test editor, click the Reset app button in the toolbar. On macOS, you can also use the keyboard shortcut ⌘+R.
- A Reset app state dialog appears with the message “This will clear app data and restart the app to its initial state.”
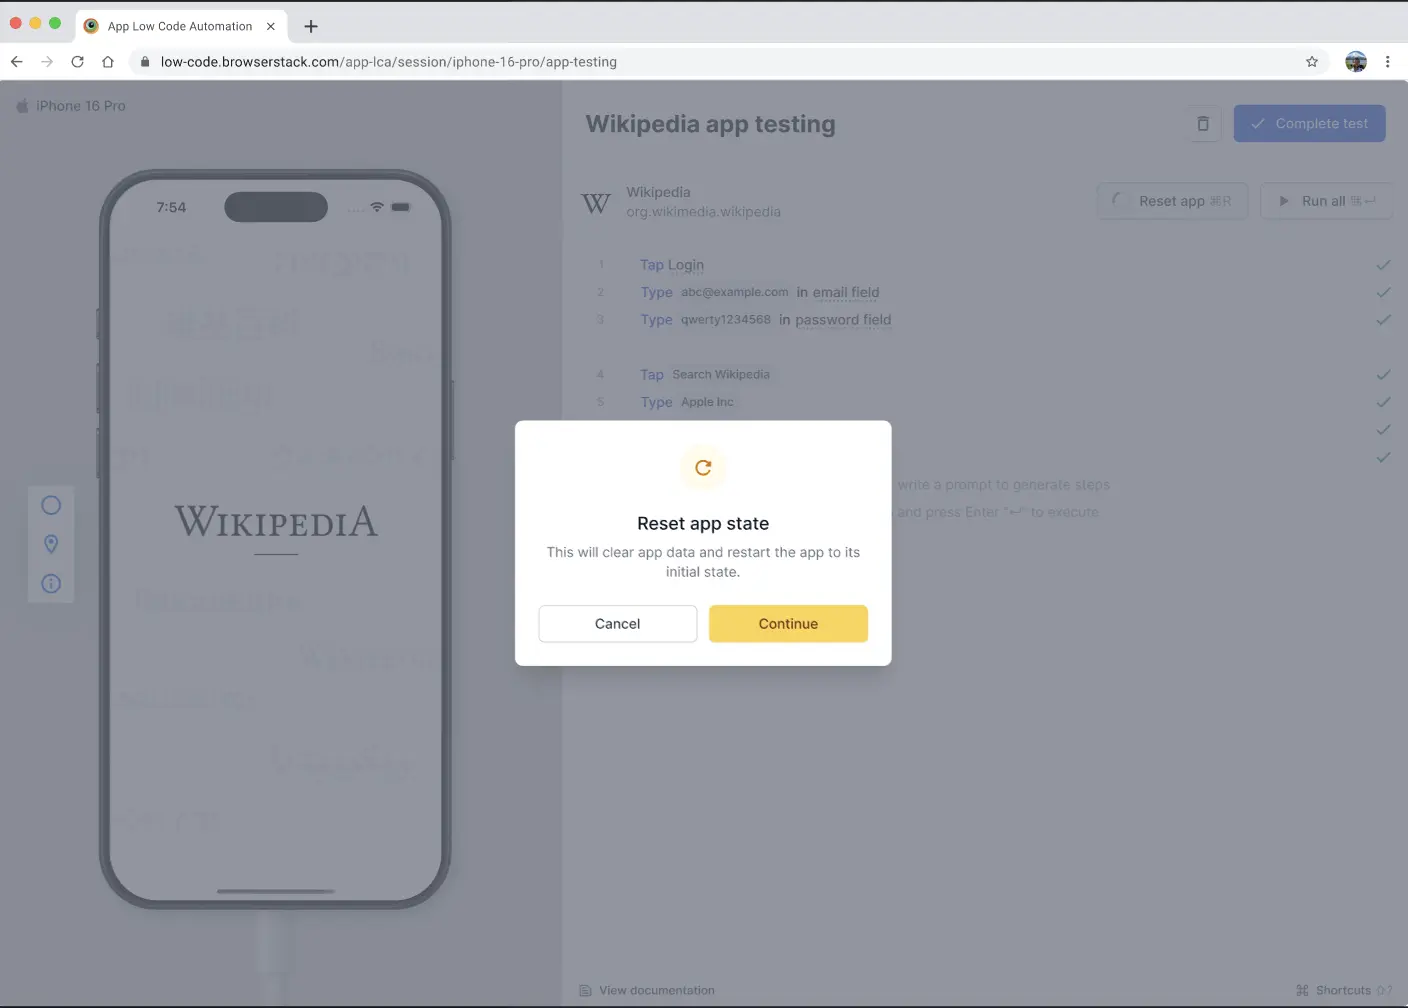
- Click Continue to reset the app before running the steps, or click Cancel to run without resetting.
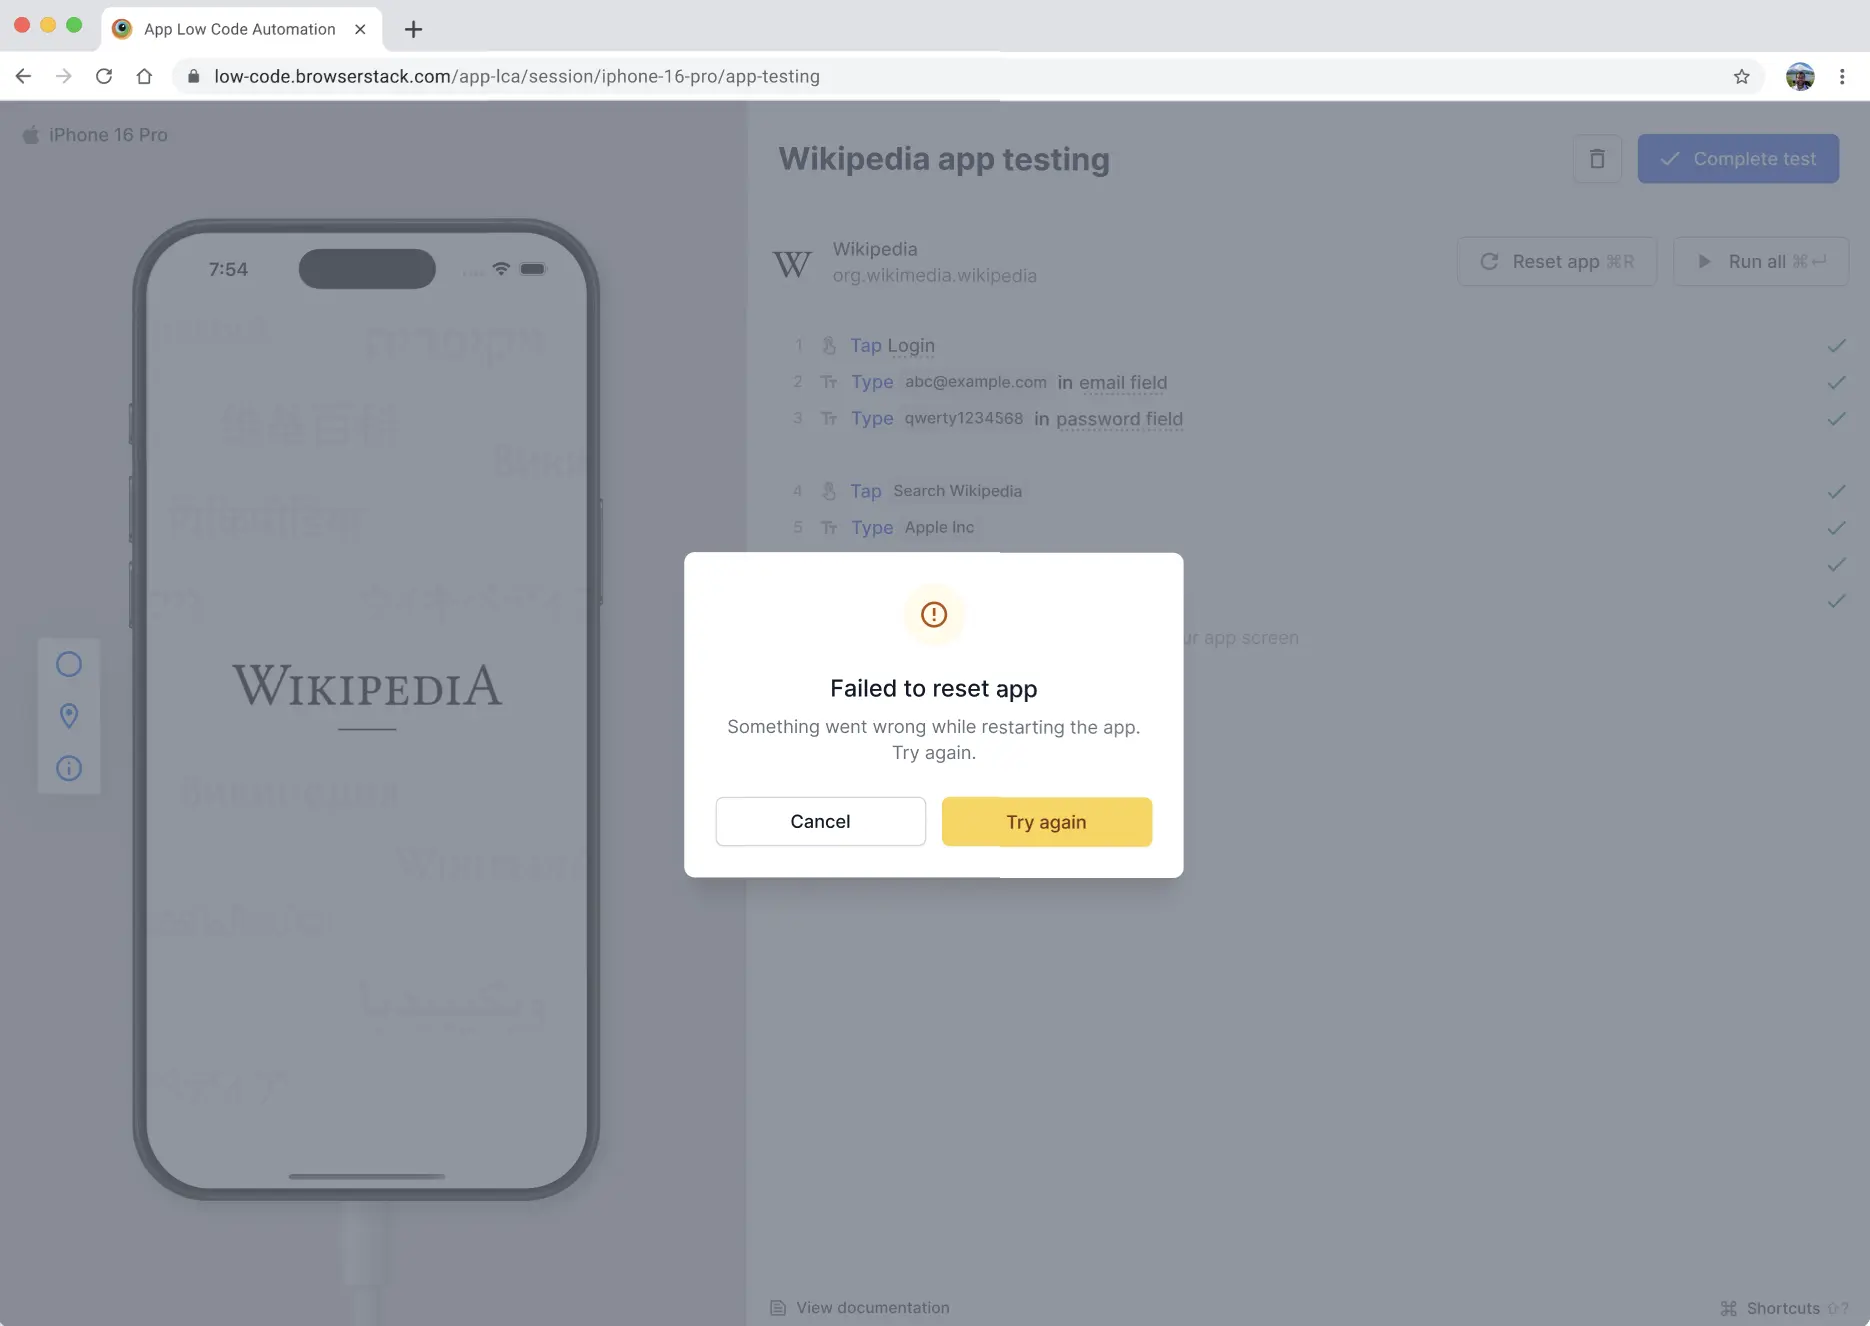
What happens if reset fails:
If the reset operation fails during test execution, an error dialog appears with the message Failed to reset app. You can:
- Click Try again to retry the reset operation
- Click Cancel to stop the reset and continue with your current test session
Intelligent step descriptions
App Low Code Automation’s natural language syntax captures your actions and translates them into plain, easy-to-understand English, making step descriptions accessible even to non-technical users. It understands the context and intent behind each step the same way you naturally think about how an app should behave.
Best practices for entering commands
Follow these best practices to ensure your tests are simple, fast, and reliable:
-
Use the label value of the element:
Enter the exact label, such asLoginfor a Login button. Avoid adding extra words likeLogin button. App Low Code Automation uses exact string matching for labels, making this approach simple, fast, and reliable. -
Use natural language descriptions:
You can describe elements in natural language, for example,Home button icon at bottom of screen. This method relies on AI to interpret your intent. It is simple, but may be slower and somewhat reliable than using exact labels. -
Use accessibility ID or XPath:
For complex scenarios, use the accessibility ID or XPath of the element. This approach is fast and reliable, but requires more effort to identify and enter the correct locator.
We're sorry to hear that. Please share your feedback so we can do better
Contact our Support team for immediate help while we work on improving our docs.
We're continuously improving our docs. We'd love to know what you liked
We're sorry to hear that. Please share your feedback so we can do better
Contact our Support team for immediate help while we work on improving our docs.
We're continuously improving our docs. We'd love to know what you liked
Thank you for your valuable feedback!