Test with browser extensions
Learn how to pre-load browser extensions or upload local extension builds to your BrowserStack Live dashboard and use them in your test sessions.
This feature is available only under Team Pro and Enterprise Pro plans. For more details, check out our pricing page.
When testing on BrowserStack Live, you can use browser extensions to test various scenarios based on your requirements, such as debugging with developer tools, accessibility testing, and more.
You can add browser extensions from the Chrome Web Store or you can develop your own extensions and upload them as local builds to test them on various browsers and OS versions.
Uploaded or added browser extensions persist across sessions and automatically install when you start a new test session. You can disable auto-installation by switching off the toggle next to the uploaded extension in the Chrome & Edge Extensions window.
Use cases
Use browser extensions to streamline your testing workflow, reduce setup time across sessions, and test in-development extensions before publishing. Here are common scenarios:
- Extension development: Test your in-development browser extensions, new features, and bug fixes across different browsers and OS versions. Upload multiple versions simultaneously to validate changes before publishing to the Chrome Web Store.
- Testing with utility extensions: Use browser extensions to support various testing requirements, such as Requestly.
- Accessibility testing: Identify accessibility issues using extensions like the BrowserStack Accessibility Toolkit.
- Compatibility testing: Validate how your website or web application interacts with third-party browser extensions.
Supported browsers
This feature is currently available only in desktop sessions and supports the following OS and browser combinations:
| Operating System | Supported Browsers |
|---|---|
| Windows | Chrome, Edge |
| macOS | Chrome, Edge |
Supported file formats and size
You can upload the following file formats as local extension builds:
| File formats | Maximum file size |
|---|---|
.zip |
100 MB |
.crx |
100 MB |
Add extensions from the Chrome Web Store
You can add extensions from the Chrome Web Store to your BrowserStack Live dashboard before you start a session. These extensions persist across sessions.
You can add and enable a total of up to 10 Chrome Web Store extensions to your dashboard.
To add extensions from the Chrome Web Store:
- Log in to the Live dashboard.
- On the Live dashboard, click the Chrome & Edge Extensions button next to the URL bar.
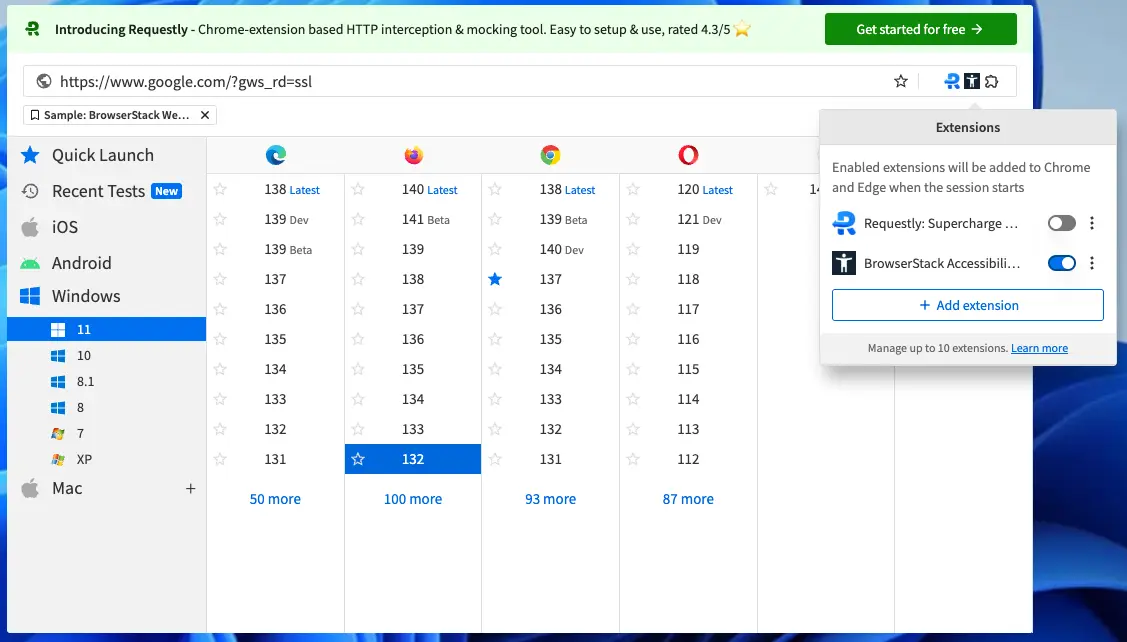
The Chrome & Edge Extensions window opens with the Requestly extension added by default.
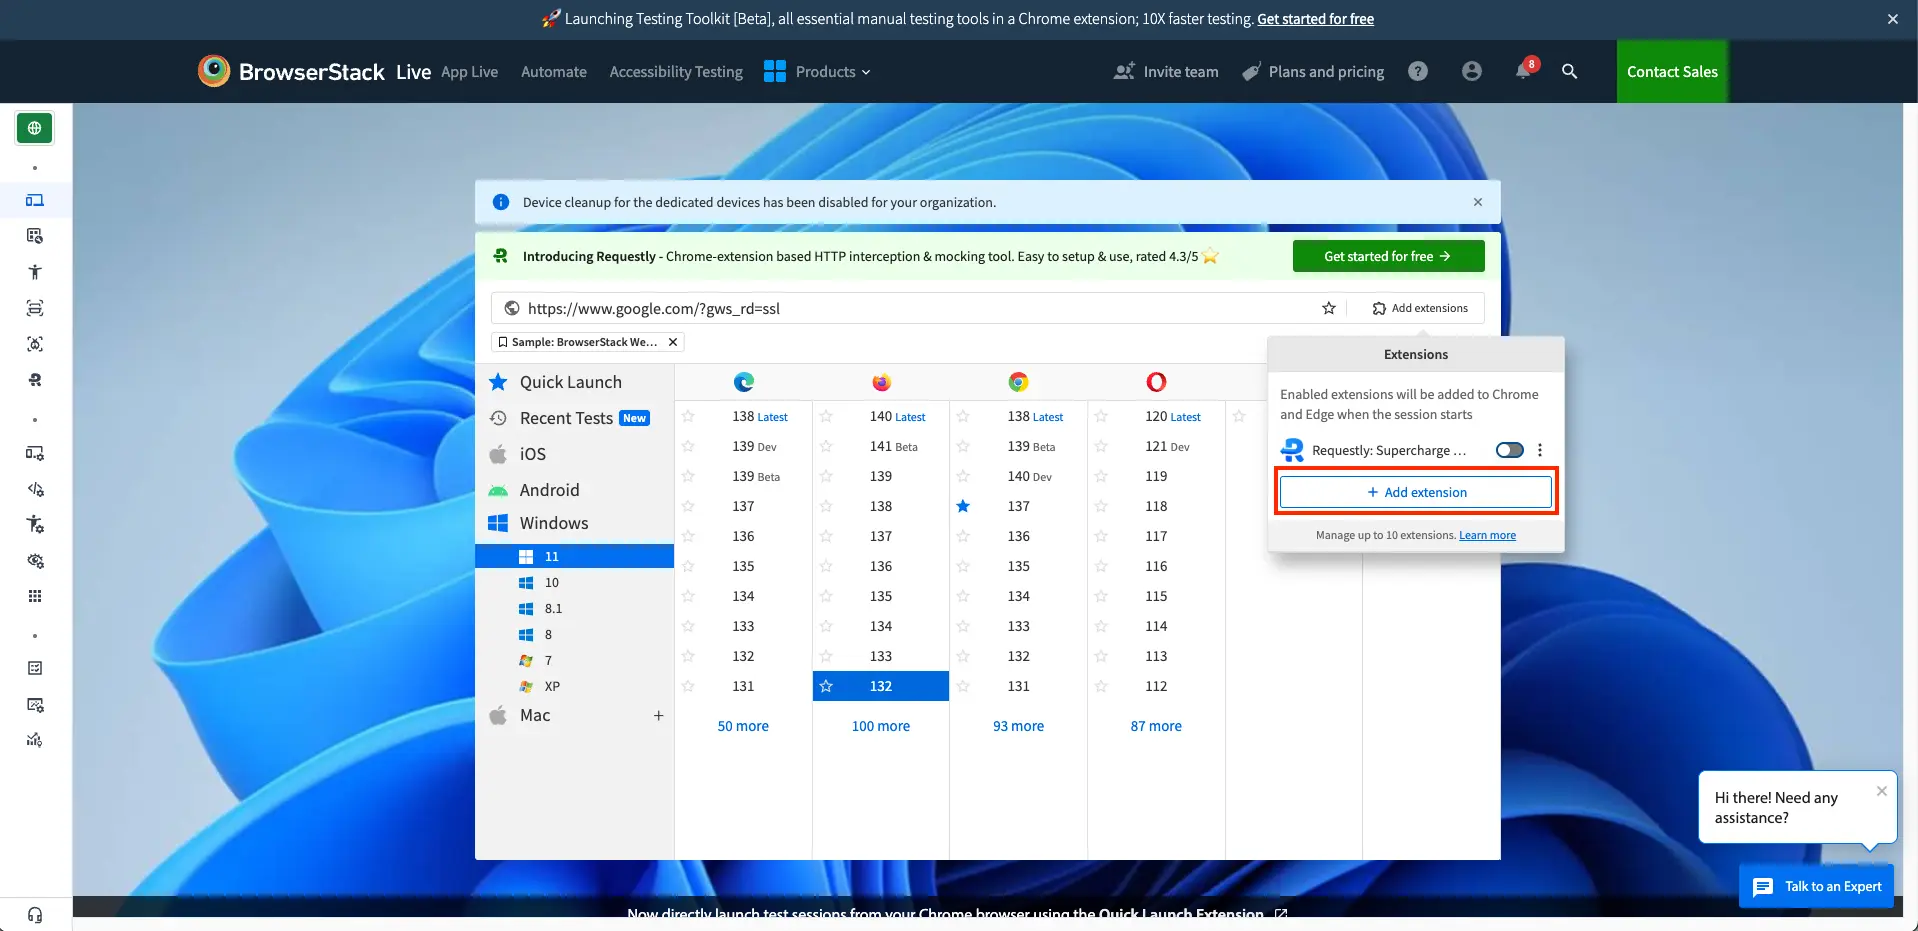
- In the Public extension URL field, enter the URL of the extension as it appears in the Chrome Web Store.
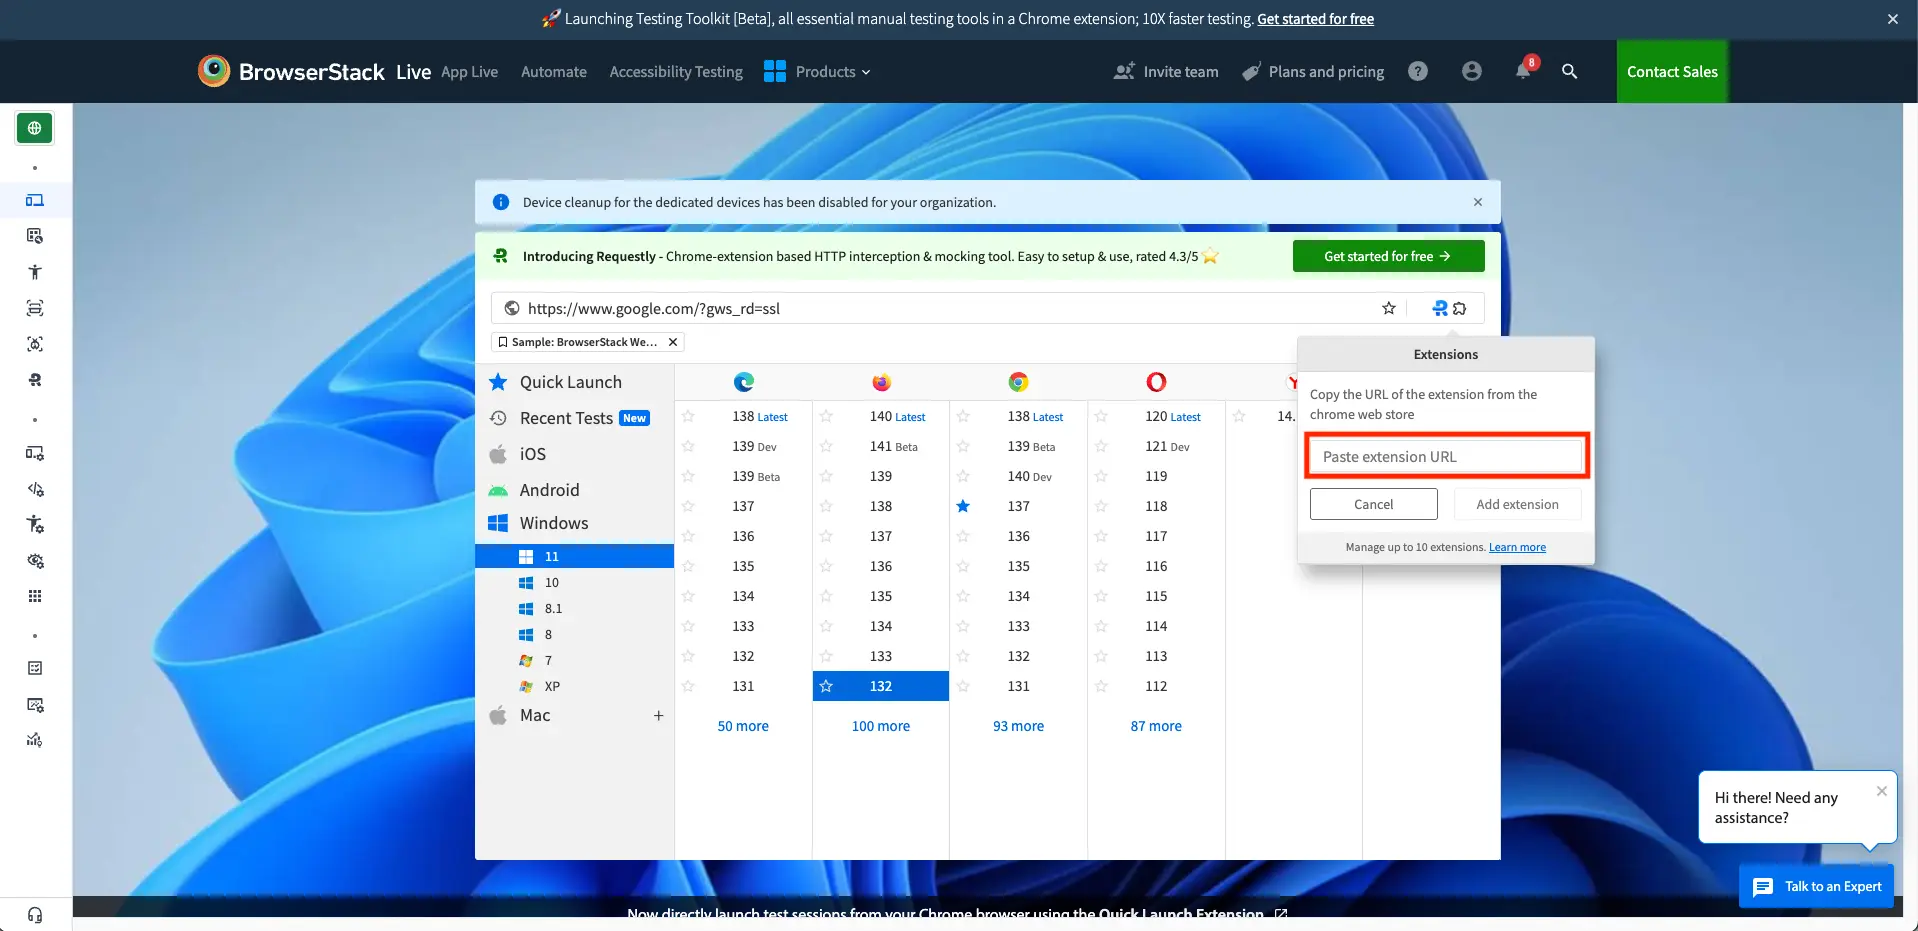
- Click the arrow next to the Public extension URL field to add the extension.
A banner appears confirming that the extension was added successfully and will be added to the browser when you start a new session. - Optional: Enable the extension by switching the toggle next to it. You can also enable the extension after you start a session.
- Choose a supported OS and browser combination to start a test session. The extension is available in the browser.
Test with local extension builds
You can upload local extension builds to test in-development extensions without publishing them to the Chrome Web Store. Uploaded extensions persist across sessions.
- You can upload up to 10 local extension builds to your dashboard. However, you can enable only 2 local extension builds in a single test session.
- If you want to upload more than one version of the same extension, provide unique filenames for each version during upload. The filename is displayed in the extensions list instead of the extension name, allowing you to differentiate between versions.
To upload local extension builds:
- Log in to the Live dashboard.
- On the Live dashboard, click the Chrome & Edge Extensions button next to the URL bar.
The Chrome & Edge Extensions window opens with the Requestly extension added by default.
- In the Chrome & Edge Extensions window, click the Upload build button below the Public extension URL field. The file picker opens.
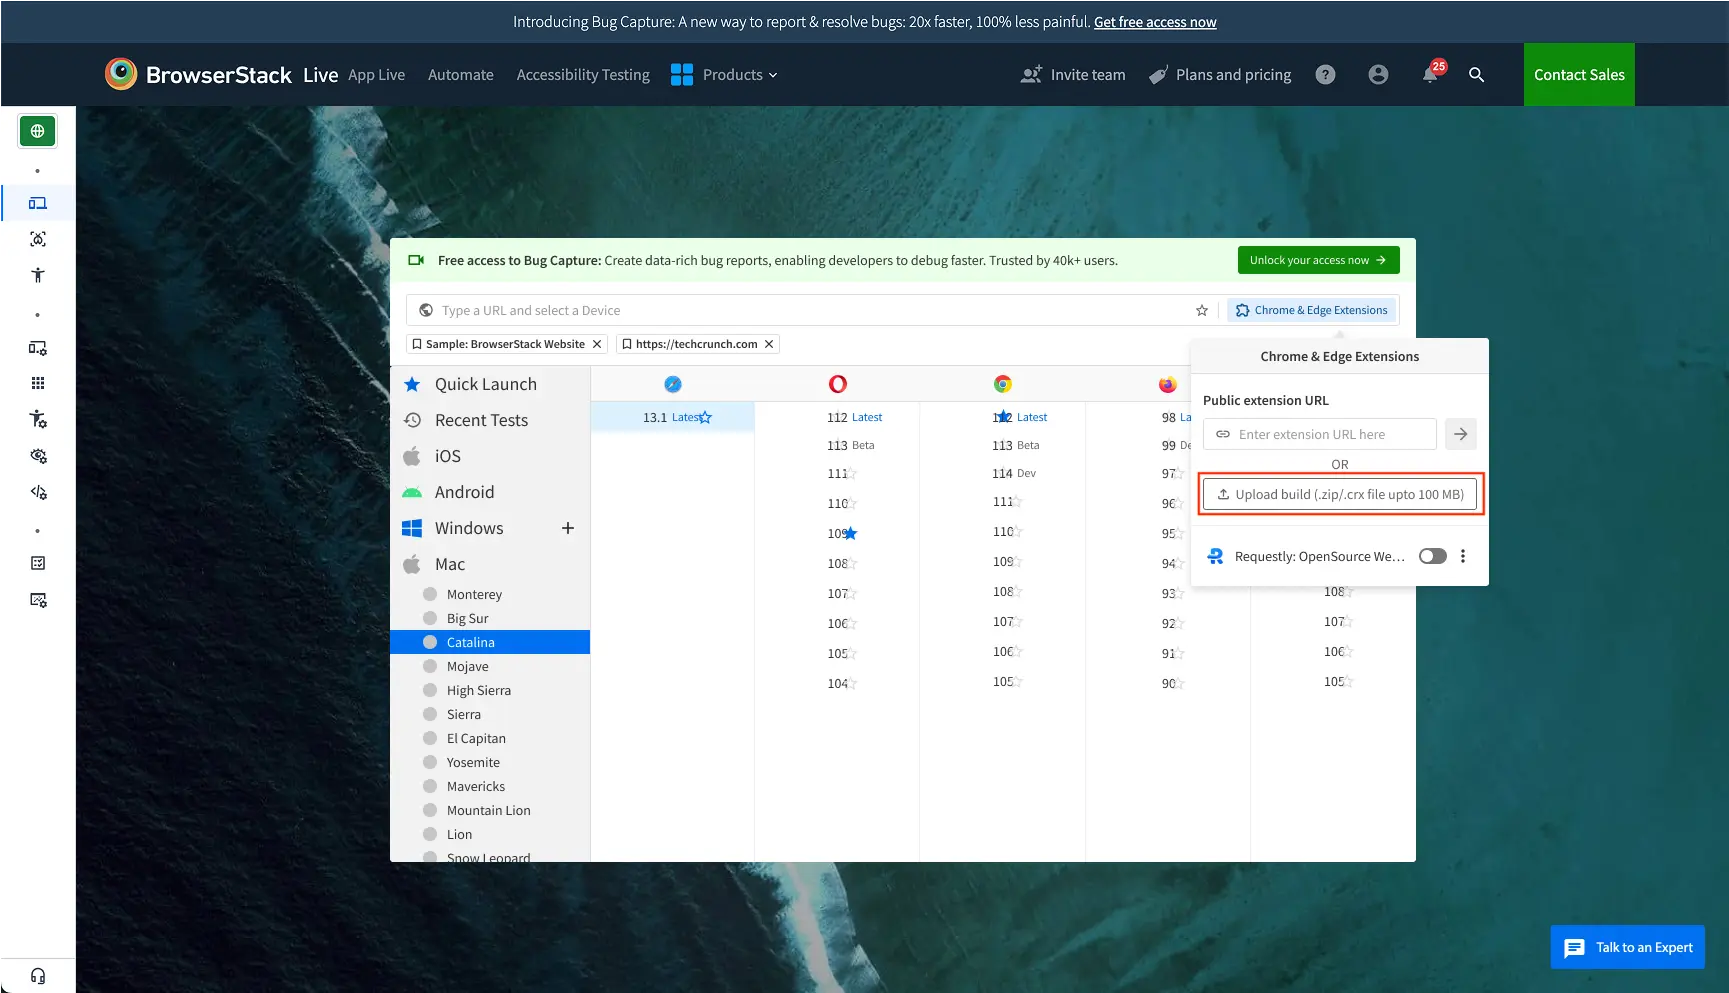
- Select the extension file (
.zipor.crx) from your local system. The extension is uploaded and added to your extensions list.
A banner appears confirming that the extension was uploaded successfully and will be added to the browser when you start a new session. - Optional: Switch on the toggle next to the extension to auto-install and enable it for your test session. You can also enable the extension after you start a session.
- Choose a supported OS and browser combination to start a test session. The extension is available in the browser.
Enable or disable extensions
You can enable or disable extensions in the Chrome & Edge Extensions window. All enabled extensions automatically pre-install when you start a new session.
You can enable up to 10 extensions in a single test session. However, the maximum number of local extension builds that you can enable in a single test session is 2.
To enable or disable extensions:
- Log in to the Live dashboard.
- On the Live dashboard, click the Chrome & Edge Extensions button next to the URL bar.
The Chrome & Edge Extensions window opens with the Requestly extension added by default.
- In the Chrome & Edge Extensions window, switch the toggle next to the extension you want to enable or disable.Enabled extensions automatically pre-install when you start a new session.
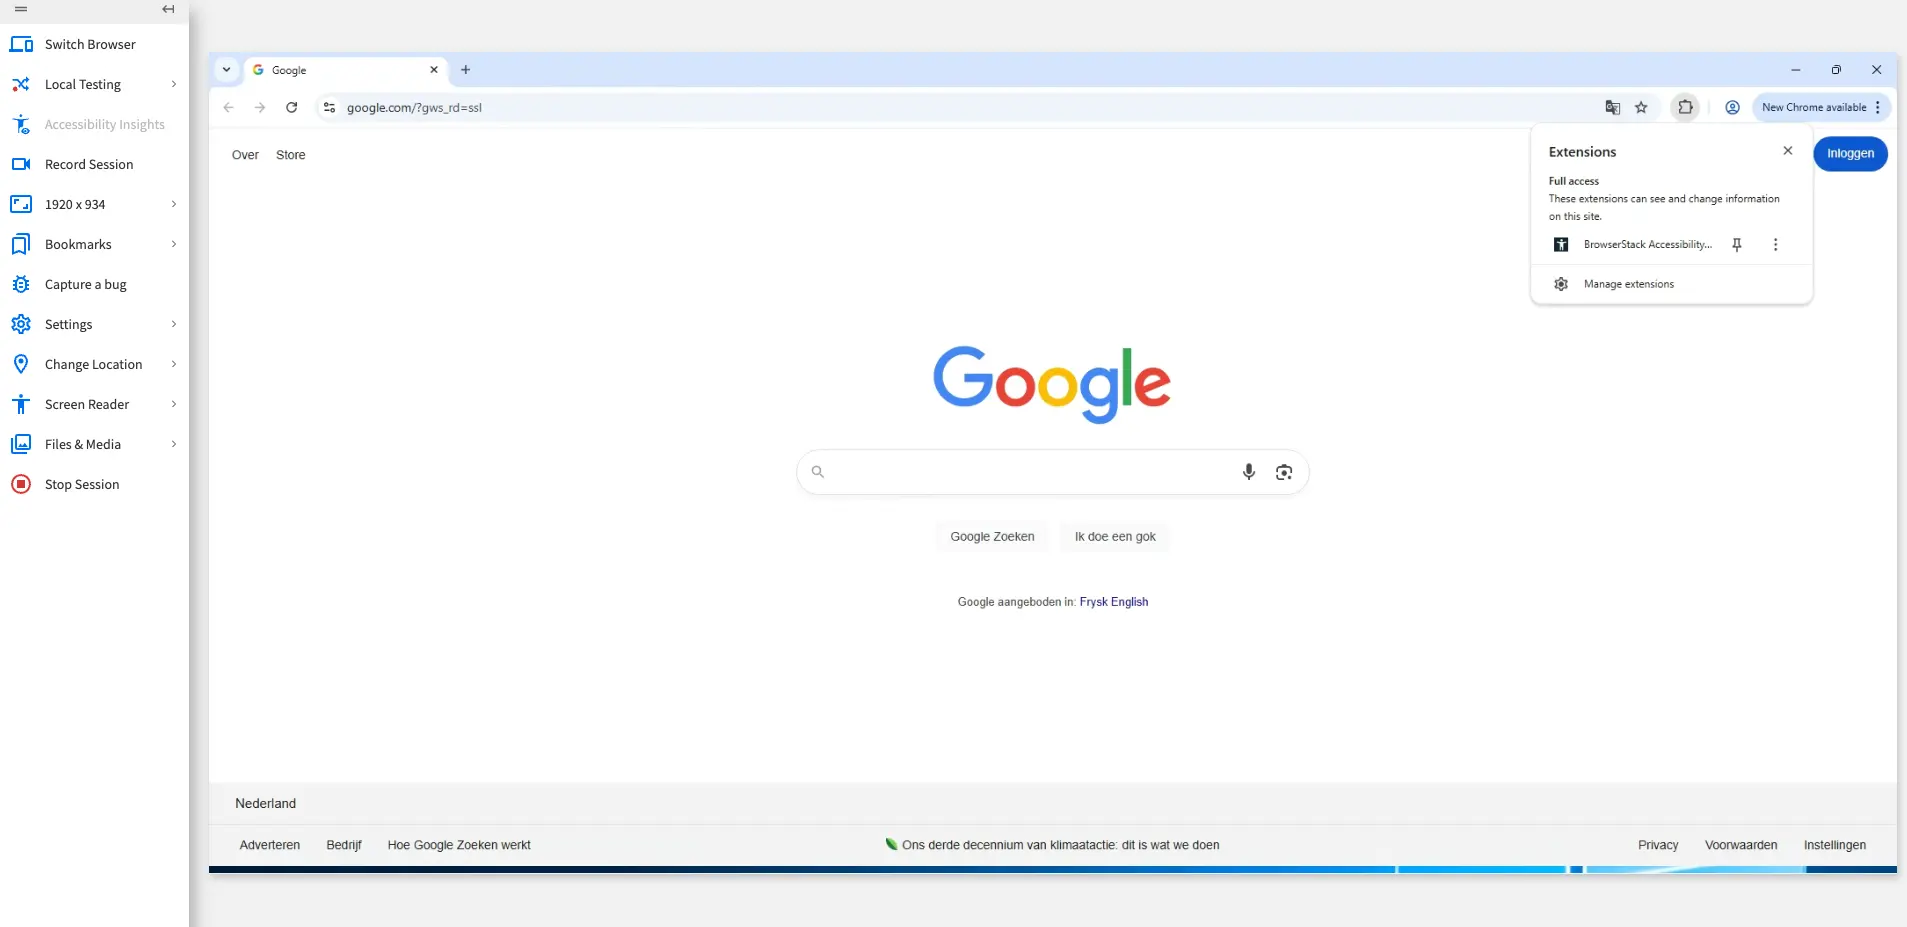
Alternatively, you can also enable or disable extensions during an active test session from the Manage extensions option in the browser toolbar.
Delete extensions
You can delete extensions from the Chrome & Edge Extensions window if you no longer need them.
To delete an extension:
- Log in to the Live dashboard.
- On the Live dashboard, click the Chrome & Edge Extensions button next to the URL bar.
The Chrome & Edge Extensions window opens with a list of extensions that you have added.
- In the Chrome & Edge Extensions window, click the more options button (⋮) next to the extension you want to delete.
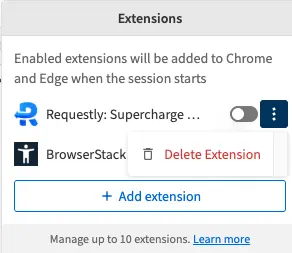
- Click Delete extension. The extension is removed from the list and a banner appears confirming that the extension is deleted successfully.
We're sorry to hear that. Please share your feedback so we can do better
Contact our Support team for immediate help while we work on improving our docs.
We're continuously improving our docs. We'd love to know what you liked
We're sorry to hear that. Please share your feedback so we can do better
Contact our Support team for immediate help while we work on improving our docs.
We're continuously improving our docs. We'd love to know what you liked
Thank you for your valuable feedback!