
 Join our Discord
Schedule a load test
Schedule a saved load test to run automatically on set days or at regular intervals.
Use schedules to run recurring load tests without starting each run manually, such as a nightly baseline or a check every few hours. Each scheduled run uses the latest saved settings of the load test and appears in Test Runs alongside your other runs, with the label via schedule.
Prerequisites
Before you create a schedule, make sure that:
- You saved the load test.
- You have permission to run tests in the project. Viewers can see schedules, but they can’t create or change them. For more information, see Roles and permissions.
Create a schedule
To create a schedule for a load test, follow these steps:
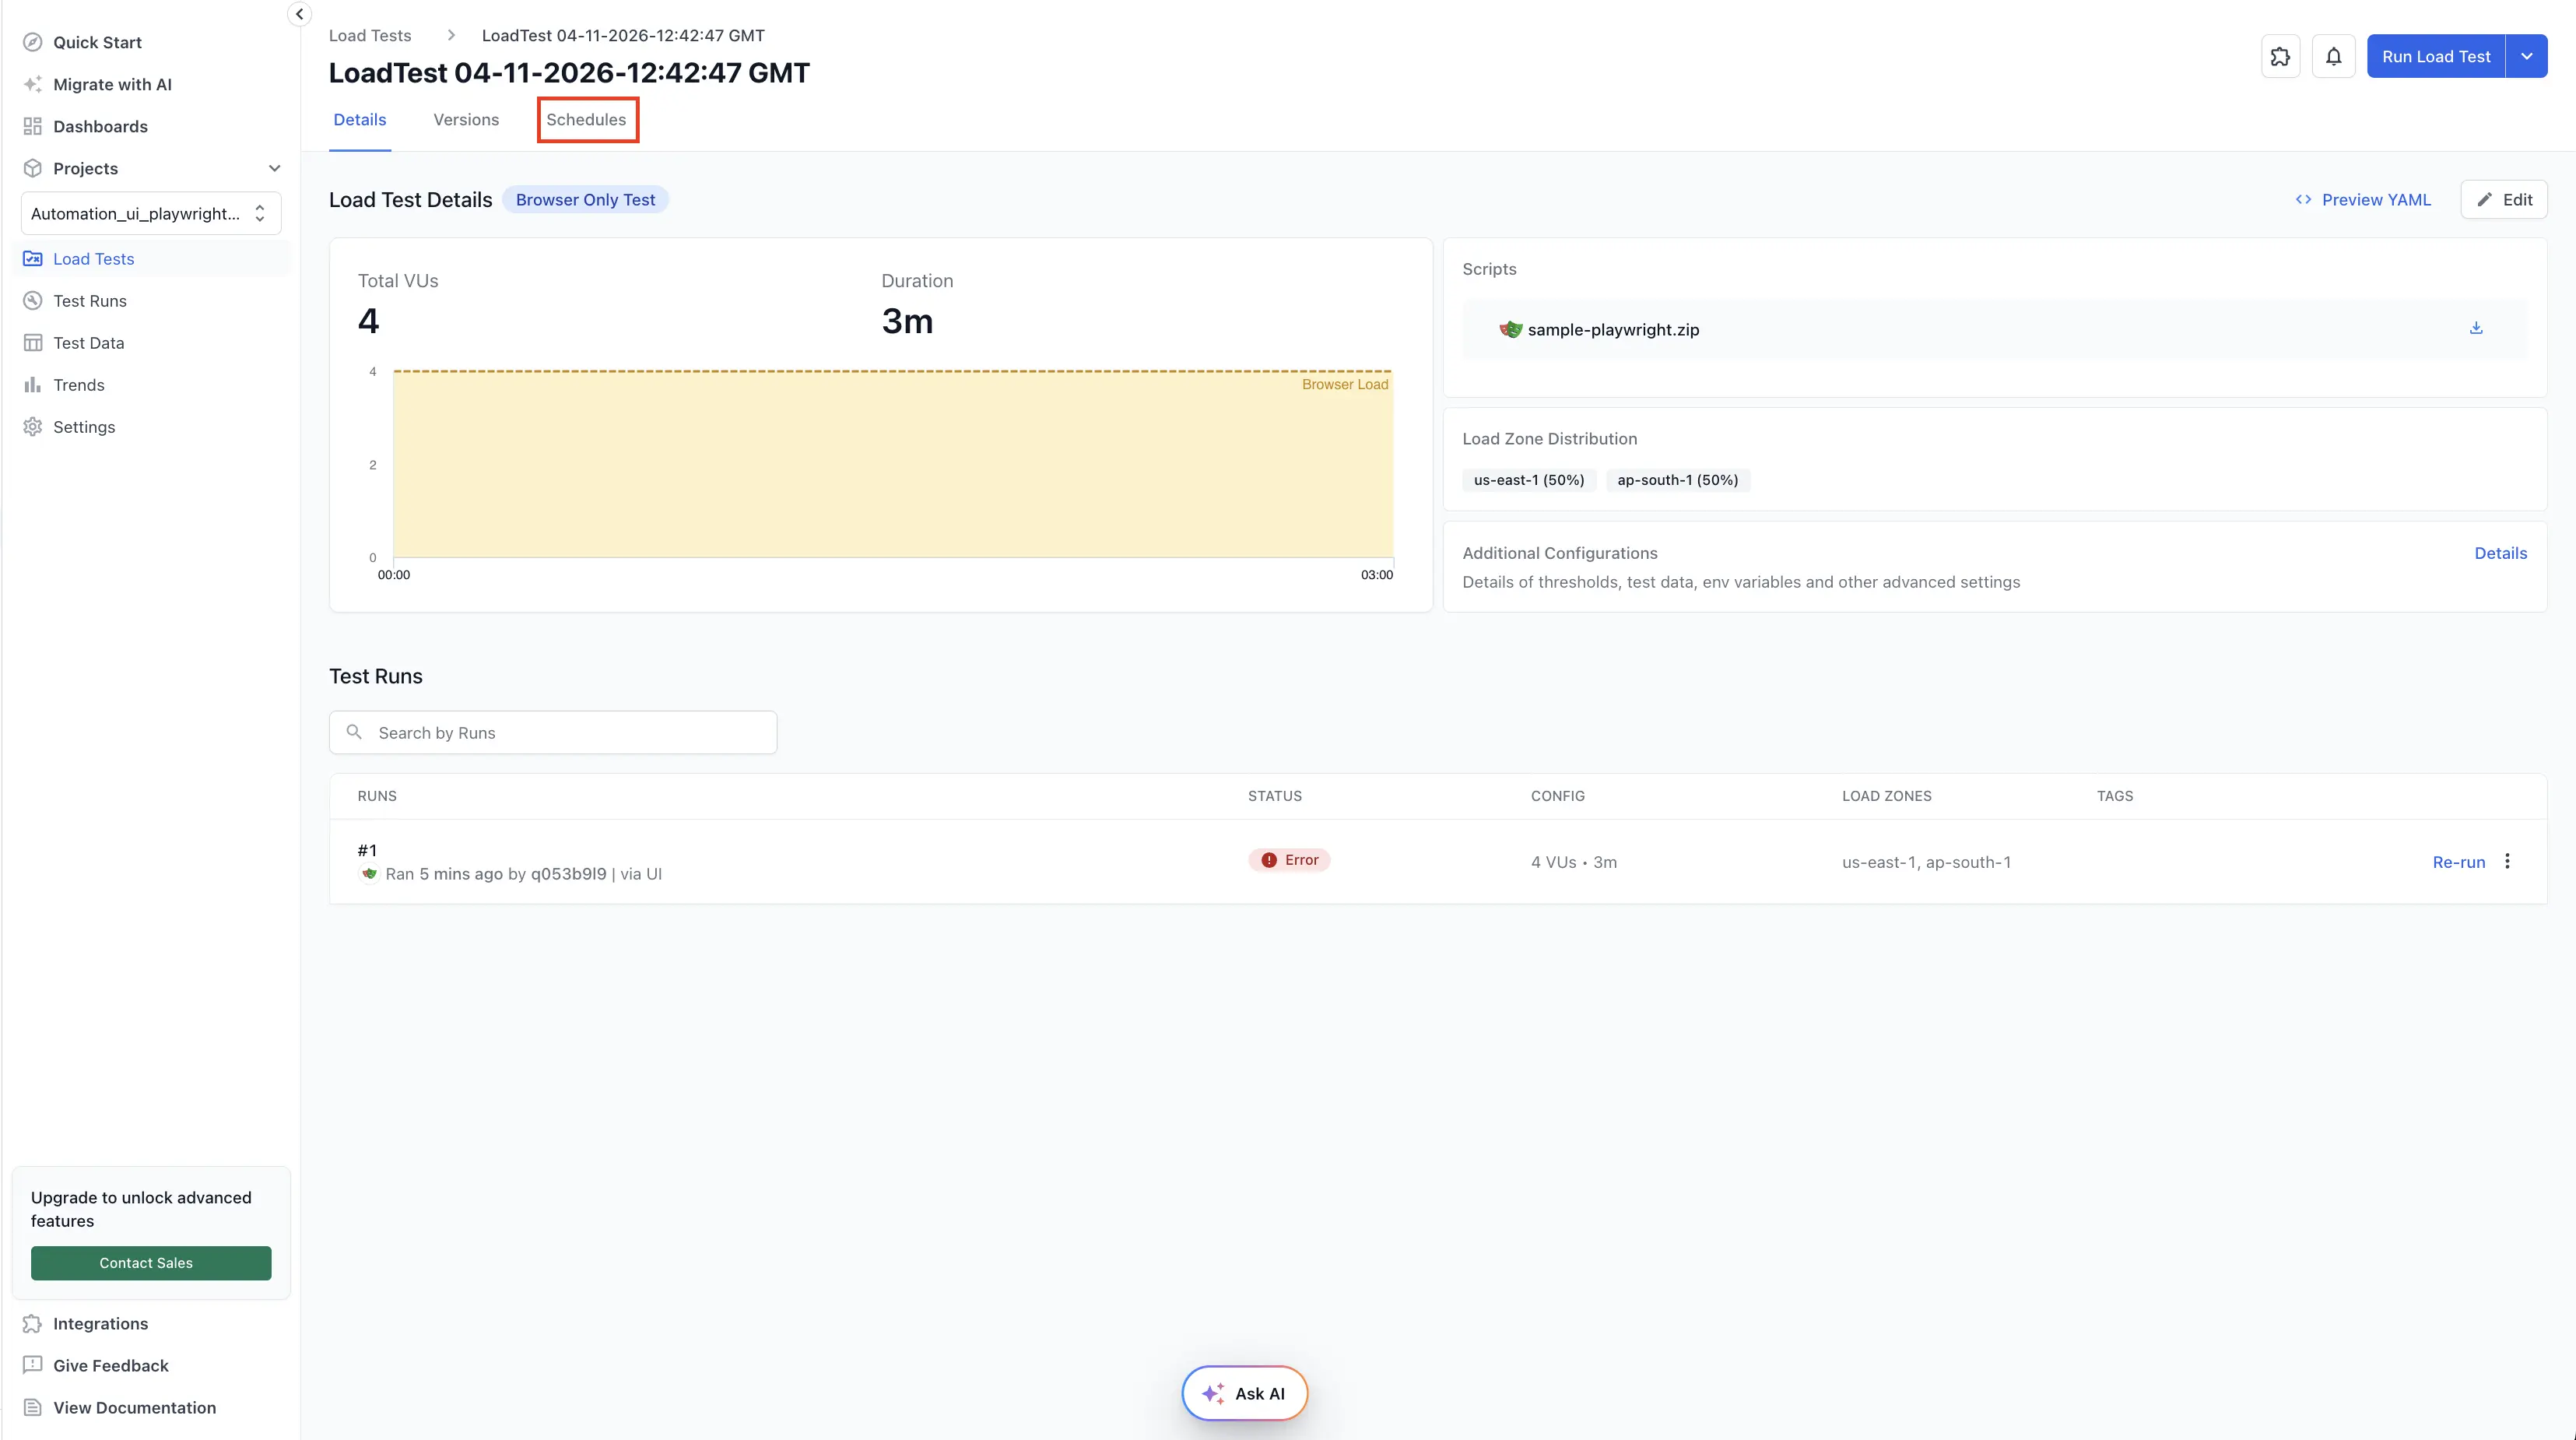
Open the load test, and select the Schedules tab.
Click Schedule test. The New schedule screen opens.
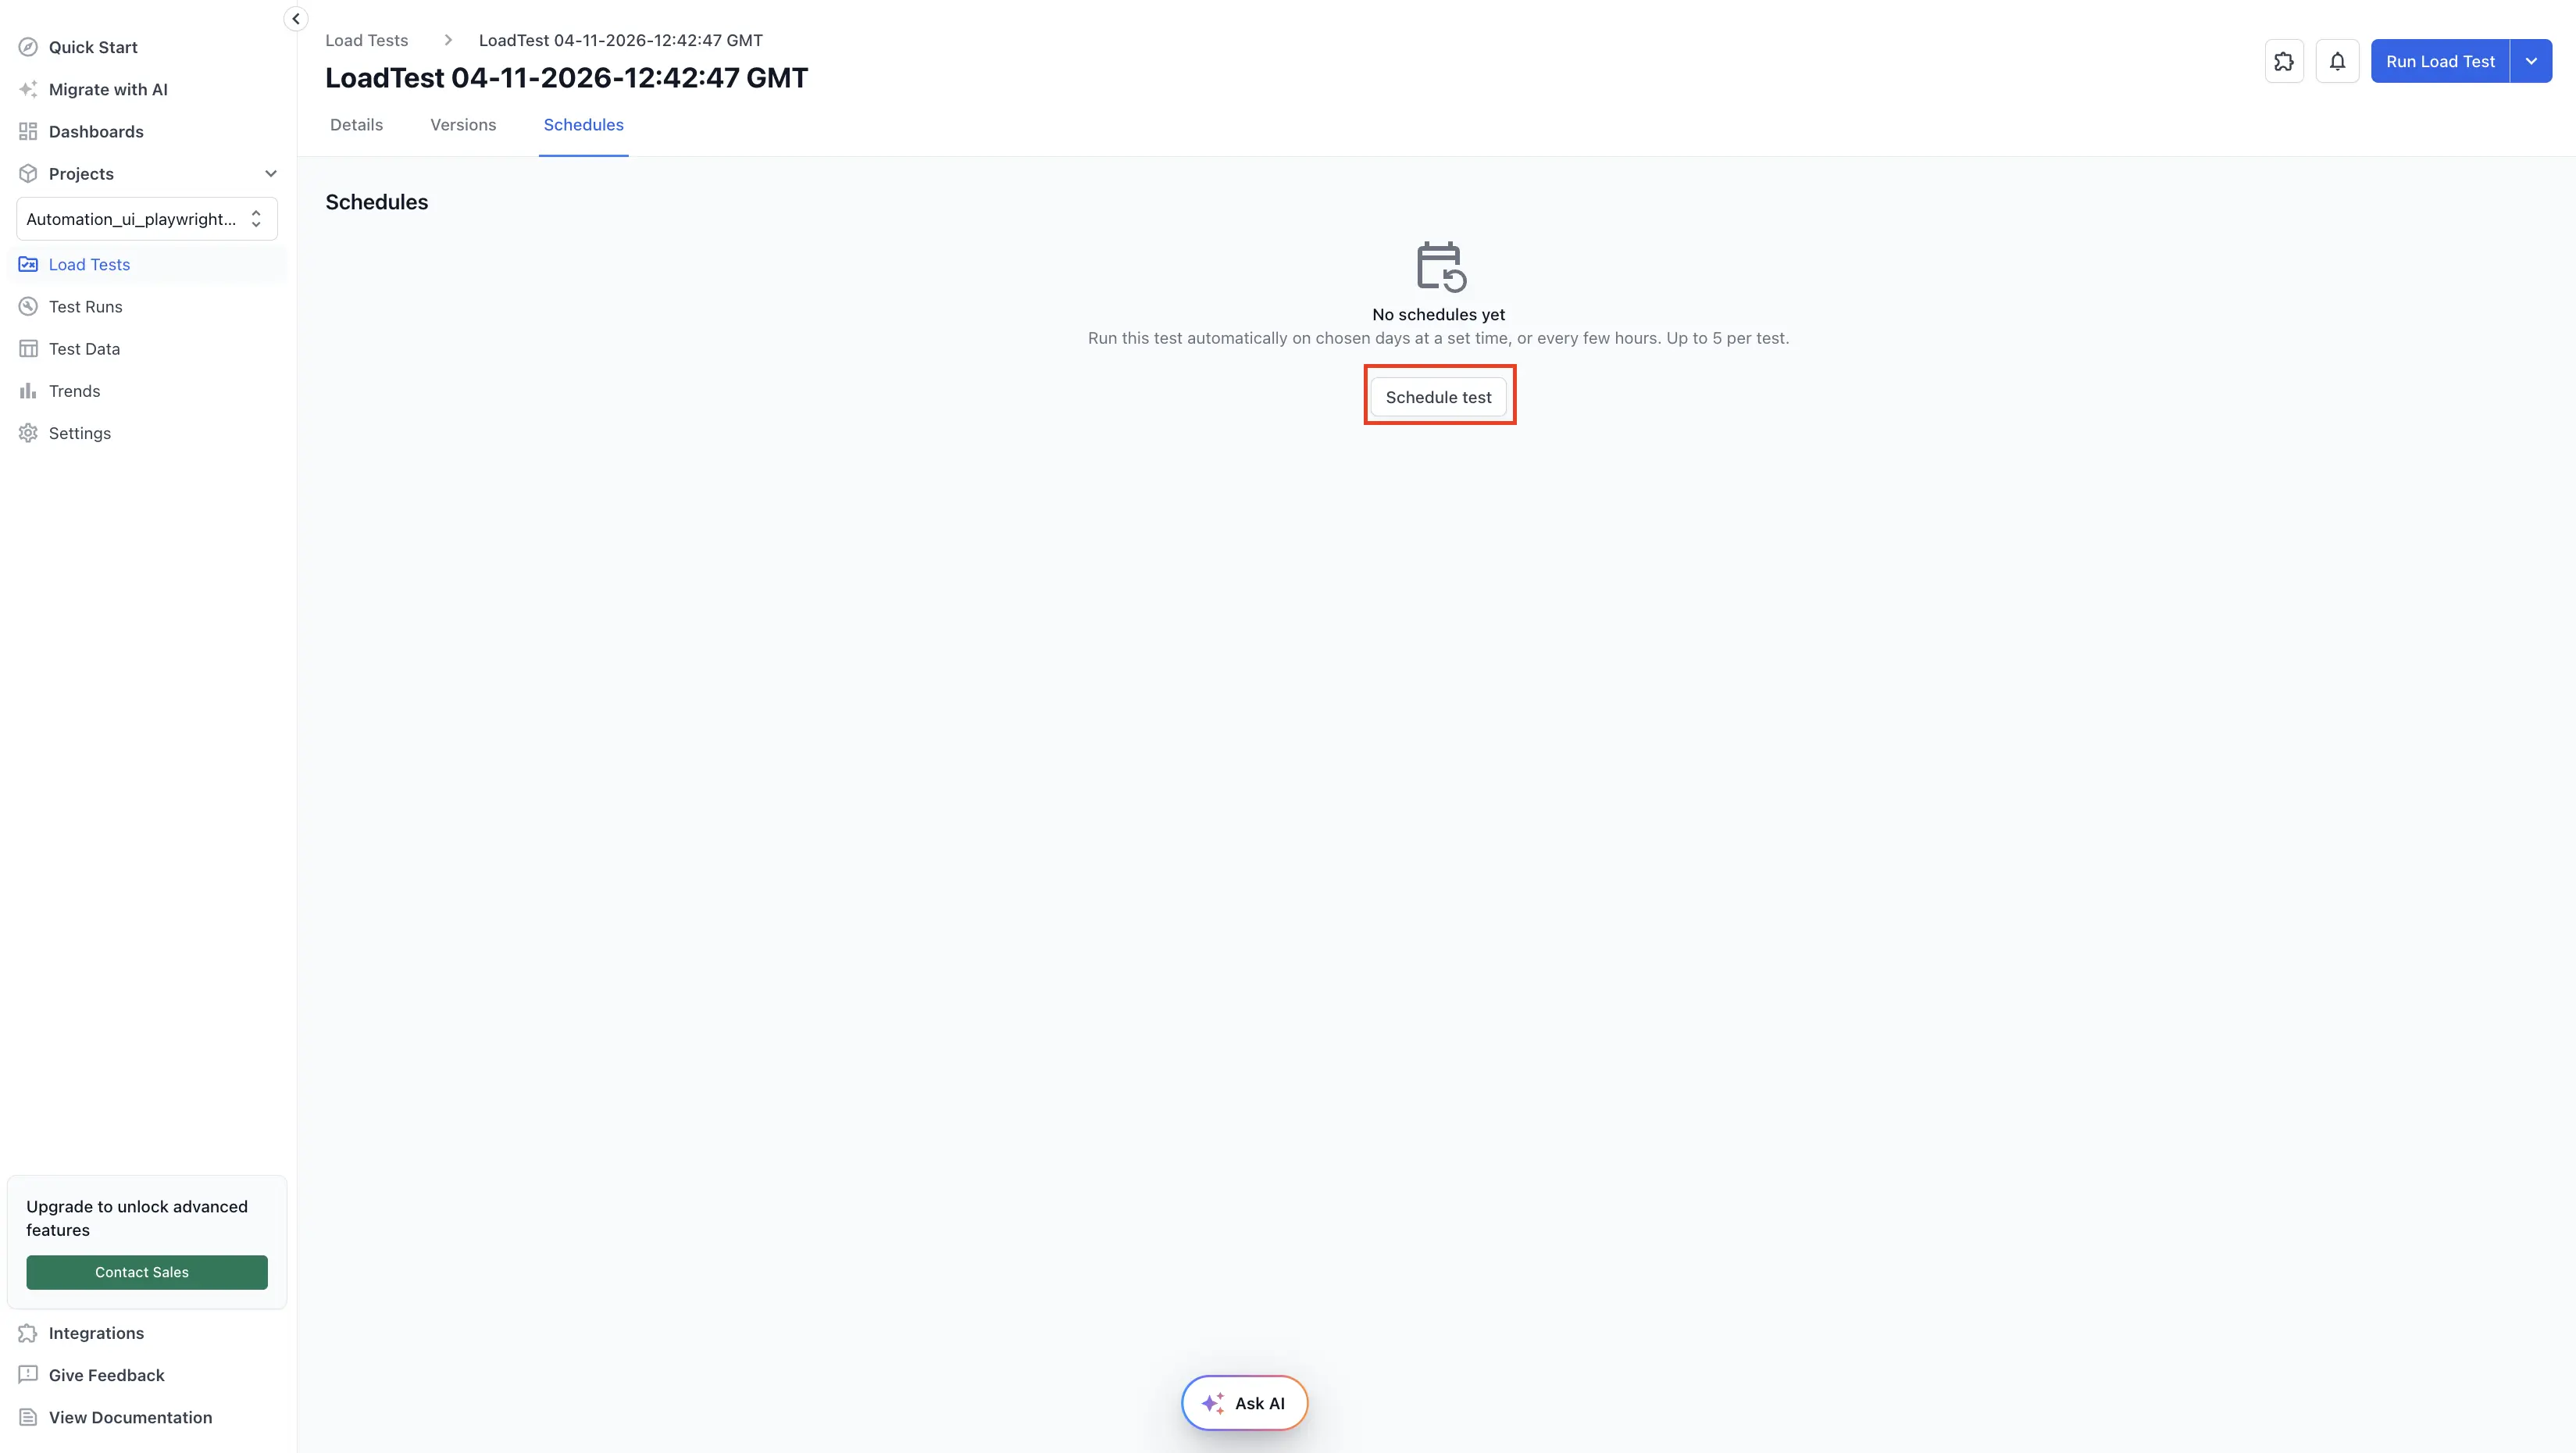
In the Name field, enter a name for the schedule, or keep the suggested name.
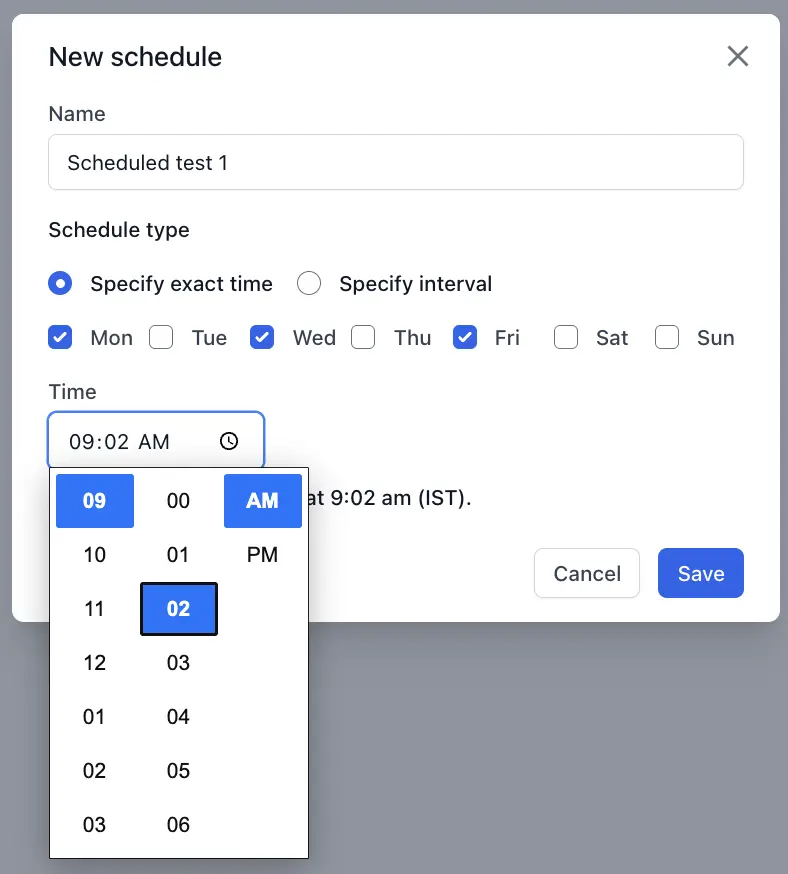
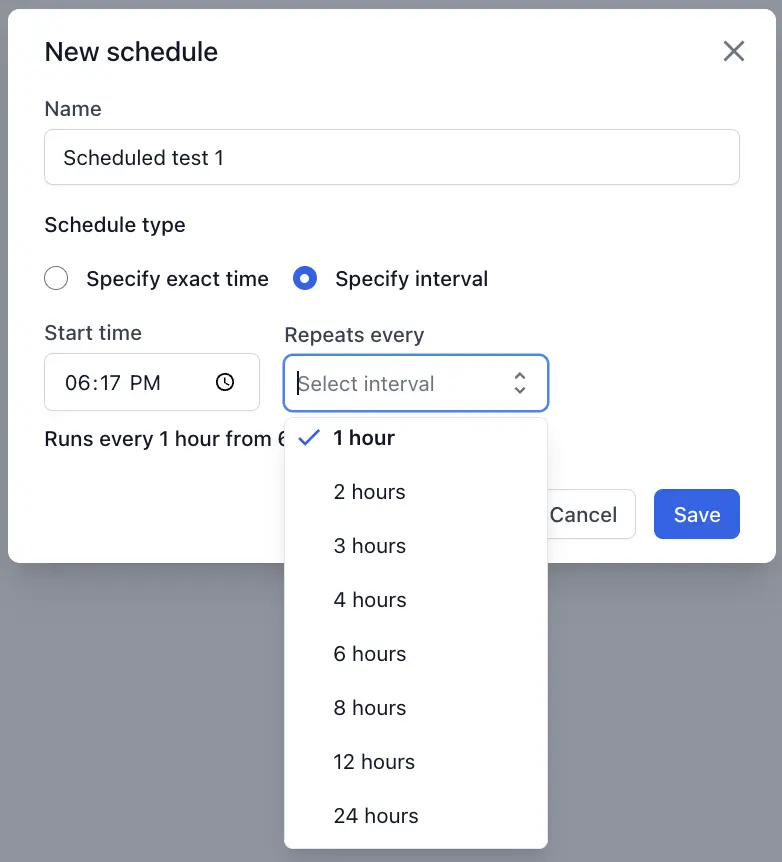
Under Schedule type, select one of the following options:
-
Specify exact time: Select one or more days, and set a Time.
-
Specify interval: Set a Start time, and select an interval from the Repeats every list. You can choose 1, 2, 3, 4, 6, 8, 12, or 24 hours.
Review the summary line below the schedule settings to confirm when the test runs, and click Save.
After you save the schedule, it appears on the Schedules tab of the load test.
Schedule rules
BrowserStack applies the following rules to every schedule:
| Rule | Details |
|---|---|
| Time zone | All schedules run in the local time zone of the person who created them. |
| Run owner | Scheduled runs use the permissions of the person who last saved the schedule. The tooltip in Last 5 runs shows this person next to Scheduled by. To run the schedule under your account, edit it and save it. |
| Minimum interval | An interval must equal or exceed the duration of the test plus 10 minutes. For example, a 70-minute test needs an interval of at least two hours. |
| Schedules per load test | You can add up to five schedules to a load test. |
| Schedules per account | You can add up to 50 schedules across your account. |
| Low Code Automation tests | Scheduled runs use the recording as it was when you last saved the load test. After you change the recording, save the load test again. |
| Sample Project | You can’t add schedules to the read-only Sample Project. |
Manage schedules
The Schedules tab lists every schedule for the load test, with the following columns:
| Column | Description |
|---|---|
| Name | The name of the schedule. |
| Next run | The date and time of the next scheduled run. A paused schedule shows no date. |
| Last 5 runs | A mark for each of the five most recent scheduled runs. Hover over a mark to see the outcome, the run number, and who scheduled the run. For a run that didn’t start, the tooltip shows the reason. Click a mark to open that run. A new schedule shows No runs yet. |
| Status | The current state of the schedule, such as Active, Paused, or Auto-paused. An auto-paused schedule also shows the message 3 runs in a row didn't start. Check why, then resume.
|
| Actions | The menu that you use to pause, resume, edit, or delete the schedule. |
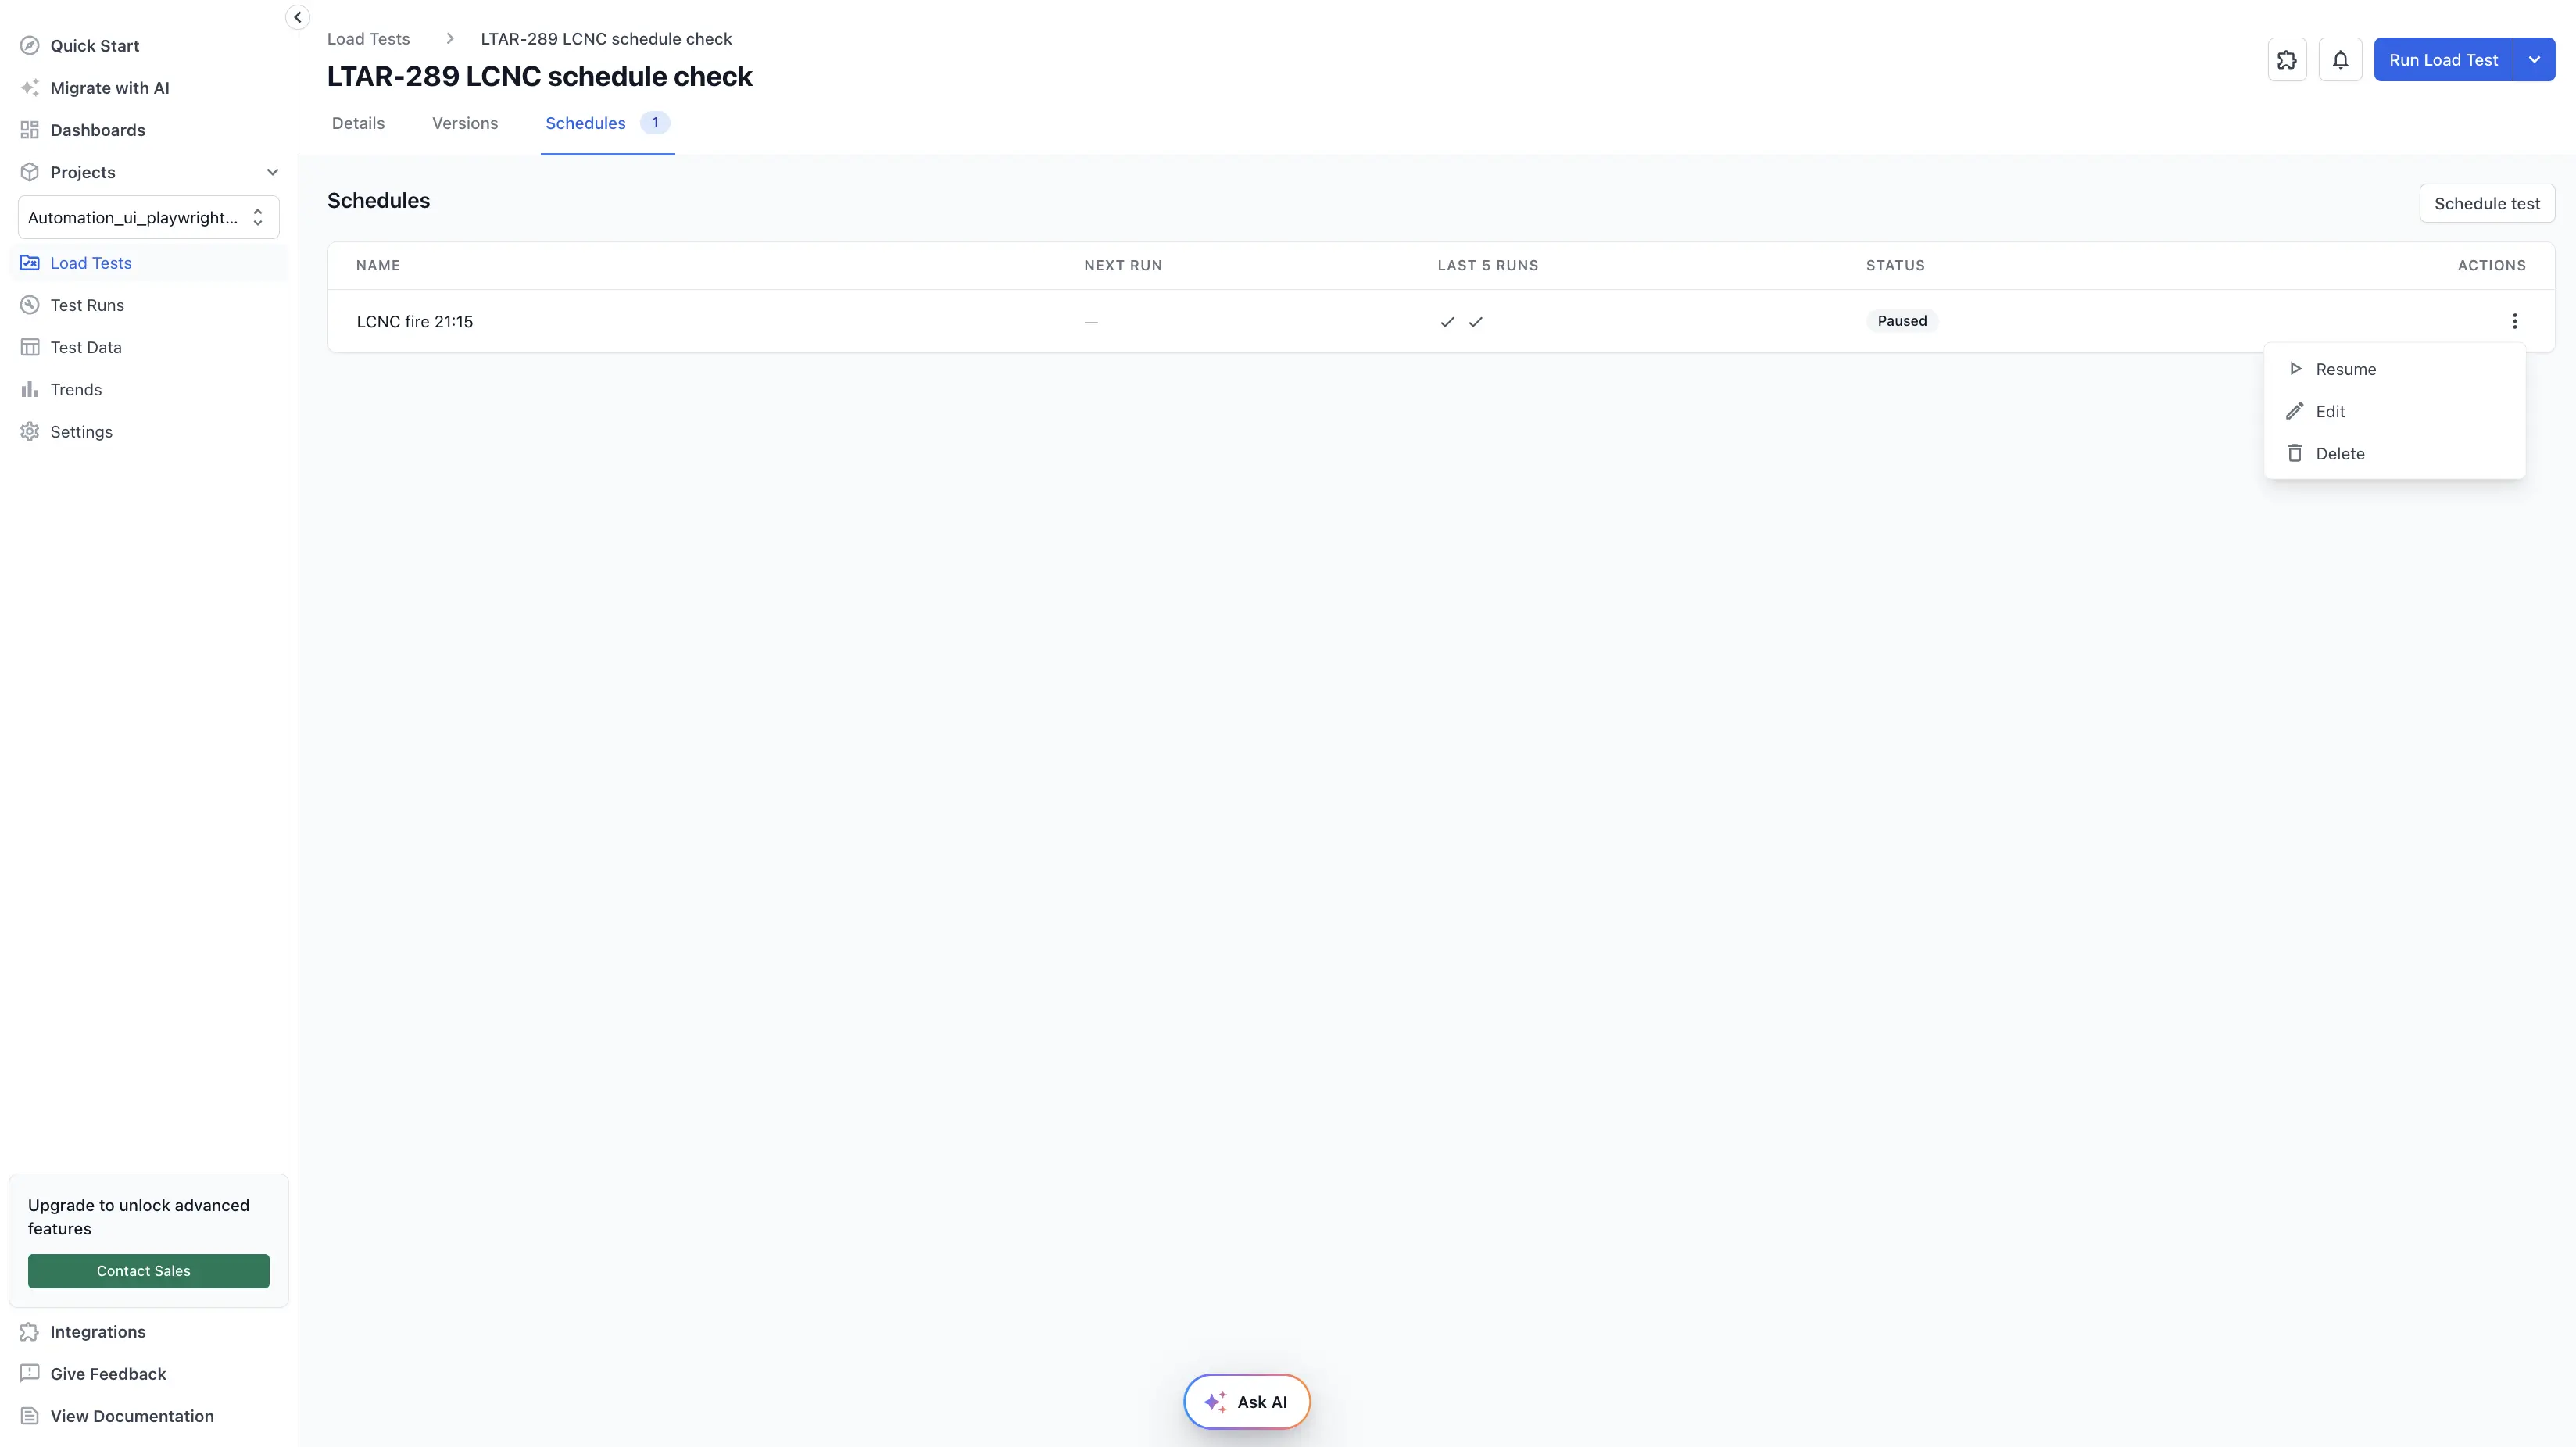
To change a schedule, open the actions menu on its row and select one of the following options:
- Pause: Stop the schedule from starting new runs.
- Resume: Restart a paused or auto-paused schedule. This option replaces Pause in the menu after you pause a schedule.
- Edit: Change the name, schedule type, days, or times of the schedule.
- Delete: Remove the schedule from the load test.
When a scheduled run doesn’t start
A scheduled run can’t start for reasons such as another test already running, your account running out of VU Hours, or the run not starting within 10 minutes of its scheduled time. When this happens, BrowserStack does the following:
- Skips the run and marks it as Didn’t run in Last 5 runs, along with the reason.
- Tries again at the next scheduled run time.
- Sends an email to the person who last saved the schedule when the cause needs action. If BrowserStack skips runs because another test is running, it sends this email at most once a day.
If three runs in a row can’t start because of a problem with the test, your plan, or your permissions, BrowserStack auto-pauses the schedule and sets its status to Auto-paused. Runs that BrowserStack skips because another test is running, because the run missed its start time, or because of a temporary BrowserStack issue don’t count. A run that starts resets the count. To restart the schedule, fix the cause, and then select Resume from the actions menu on the schedule’s row.
BrowserStack also stops scheduled runs in the following cases:
- Your plan expires: BrowserStack pauses every schedule in your account and resumes them automatically when you renew your plan.
- You delete the load test: BrowserStack turns off the schedules of that load test permanently.
Related topics
- How VU Hours are calculated: Understand how scheduled runs consume your VU Hours.
- Roles and permissions: Check which roles can create and manage schedules.
- Email notifications: Set up email alerts for your load test runs.
We're sorry to hear that. Please share your feedback so we can do better
Contact our Support team for immediate help while we work on improving our docs.
We're continuously improving our docs. We'd love to know what you liked
We're sorry to hear that. Please share your feedback so we can do better
Contact our Support team for immediate help while we work on improving our docs.
We're continuously improving our docs. We'd love to know what you liked
Thank you for your valuable feedback!