Use browser flags in Low Code Automation
Learn how to configure and use browser flags in Low Code Automation to customize browser behavior for your automated tests.
You can use browser flags in Low Code Automation to customize browser behavior during automated tests. By passing specific command-line switches, you can modify browser features to simulate different user scenarios.
Here are a few use cases where you can add browser flags:
- Automatically select a screen share source to streamline screen sharing during tests.
- Enable camera and microphone access to test features that require audio or video input. Note: Enabling camera access displays an emulated test screen rather than real video from your device.
- Allow location access to simulate geolocation scenarios in your application.
- Grant clipboard access to test copy and paste functionality.
Enable browser flags
To enable browser flags in Low Code Automation:
- You can only select flags from the available options.
- Changes to browser flags take effect only on the next run.
- Be cautious when adding flags, as some flags may override others.
- System-level browser settings take precedence over browser flags configured in the Advanced options. For example, if location access is disabled at the Chrome system level, enabling the location flag in BrowserStack does not override this restriction.
- You can configure browser flags at three stages in your workflow:
-
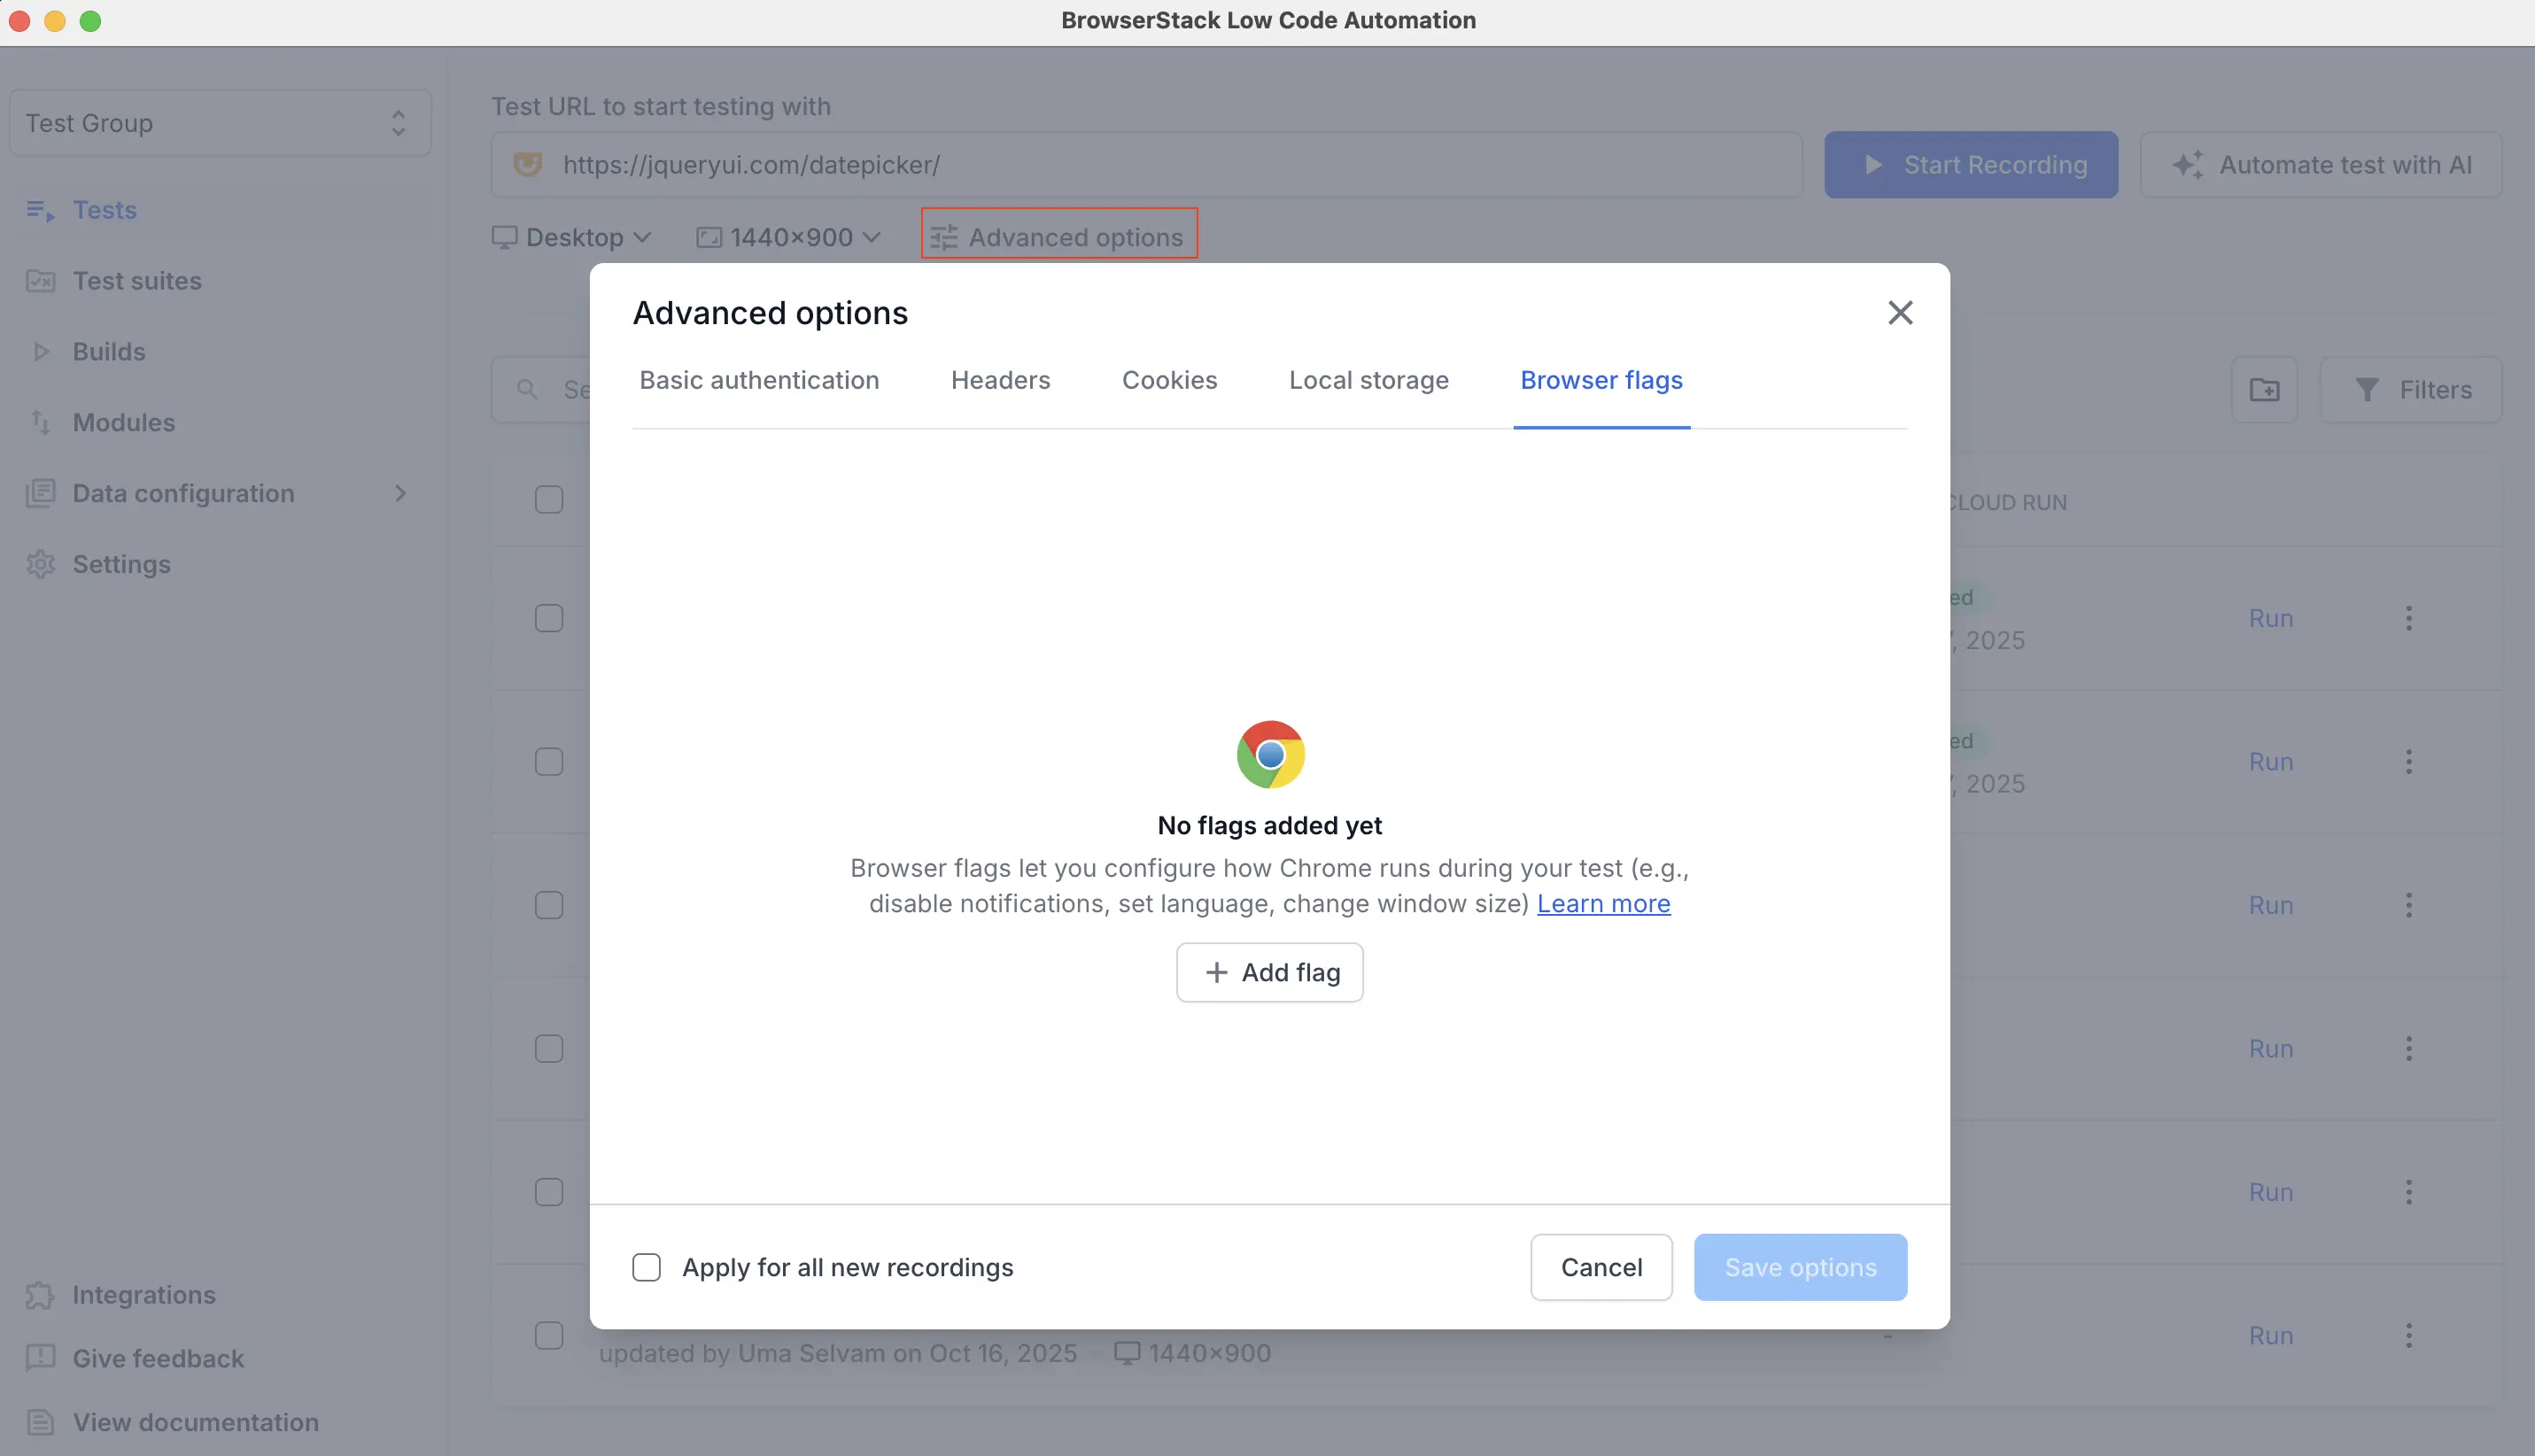
Before recording: On Low Code Automation, click Advanced options and go to the Browser Flags section.
- While recording: In the recorder, select the Settings icon, then click Advanced options and go to the Browser Flags section.
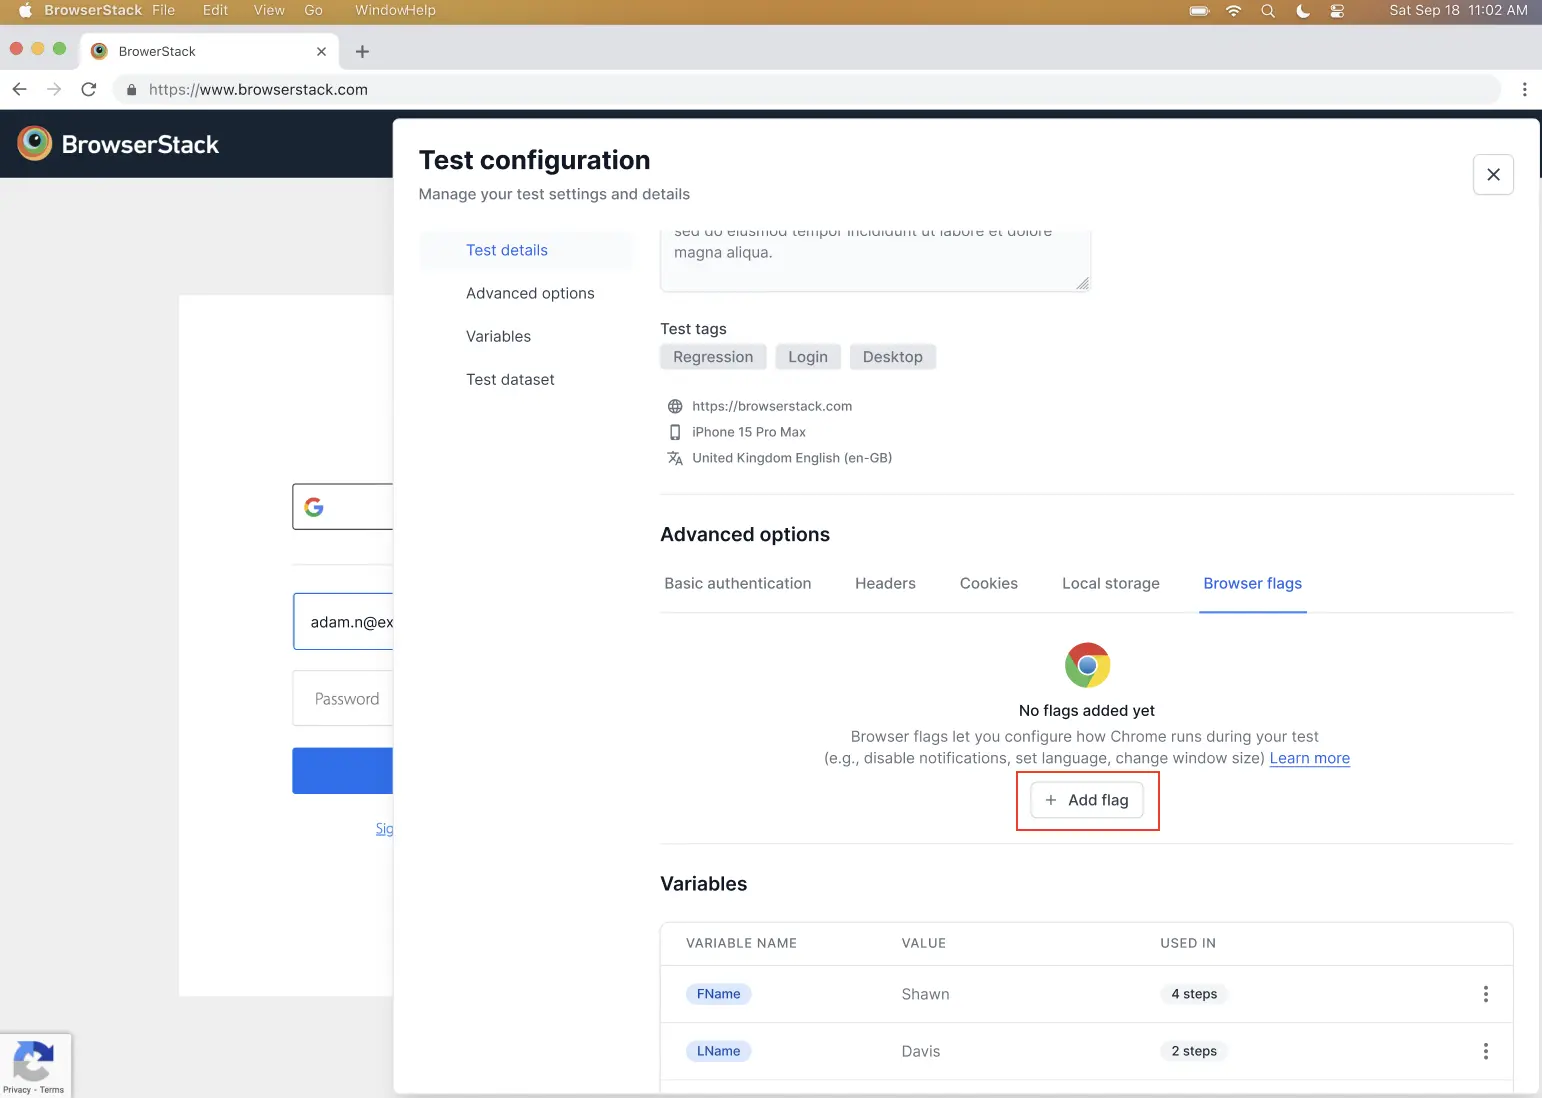
- After saving the test: Open the test, click the Configurations tab, select Advanced options, and go to the Browser Flags section.
-
Before recording: On Low Code Automation, click Advanced options and go to the Browser Flags section.
- Click + Add flag.
-
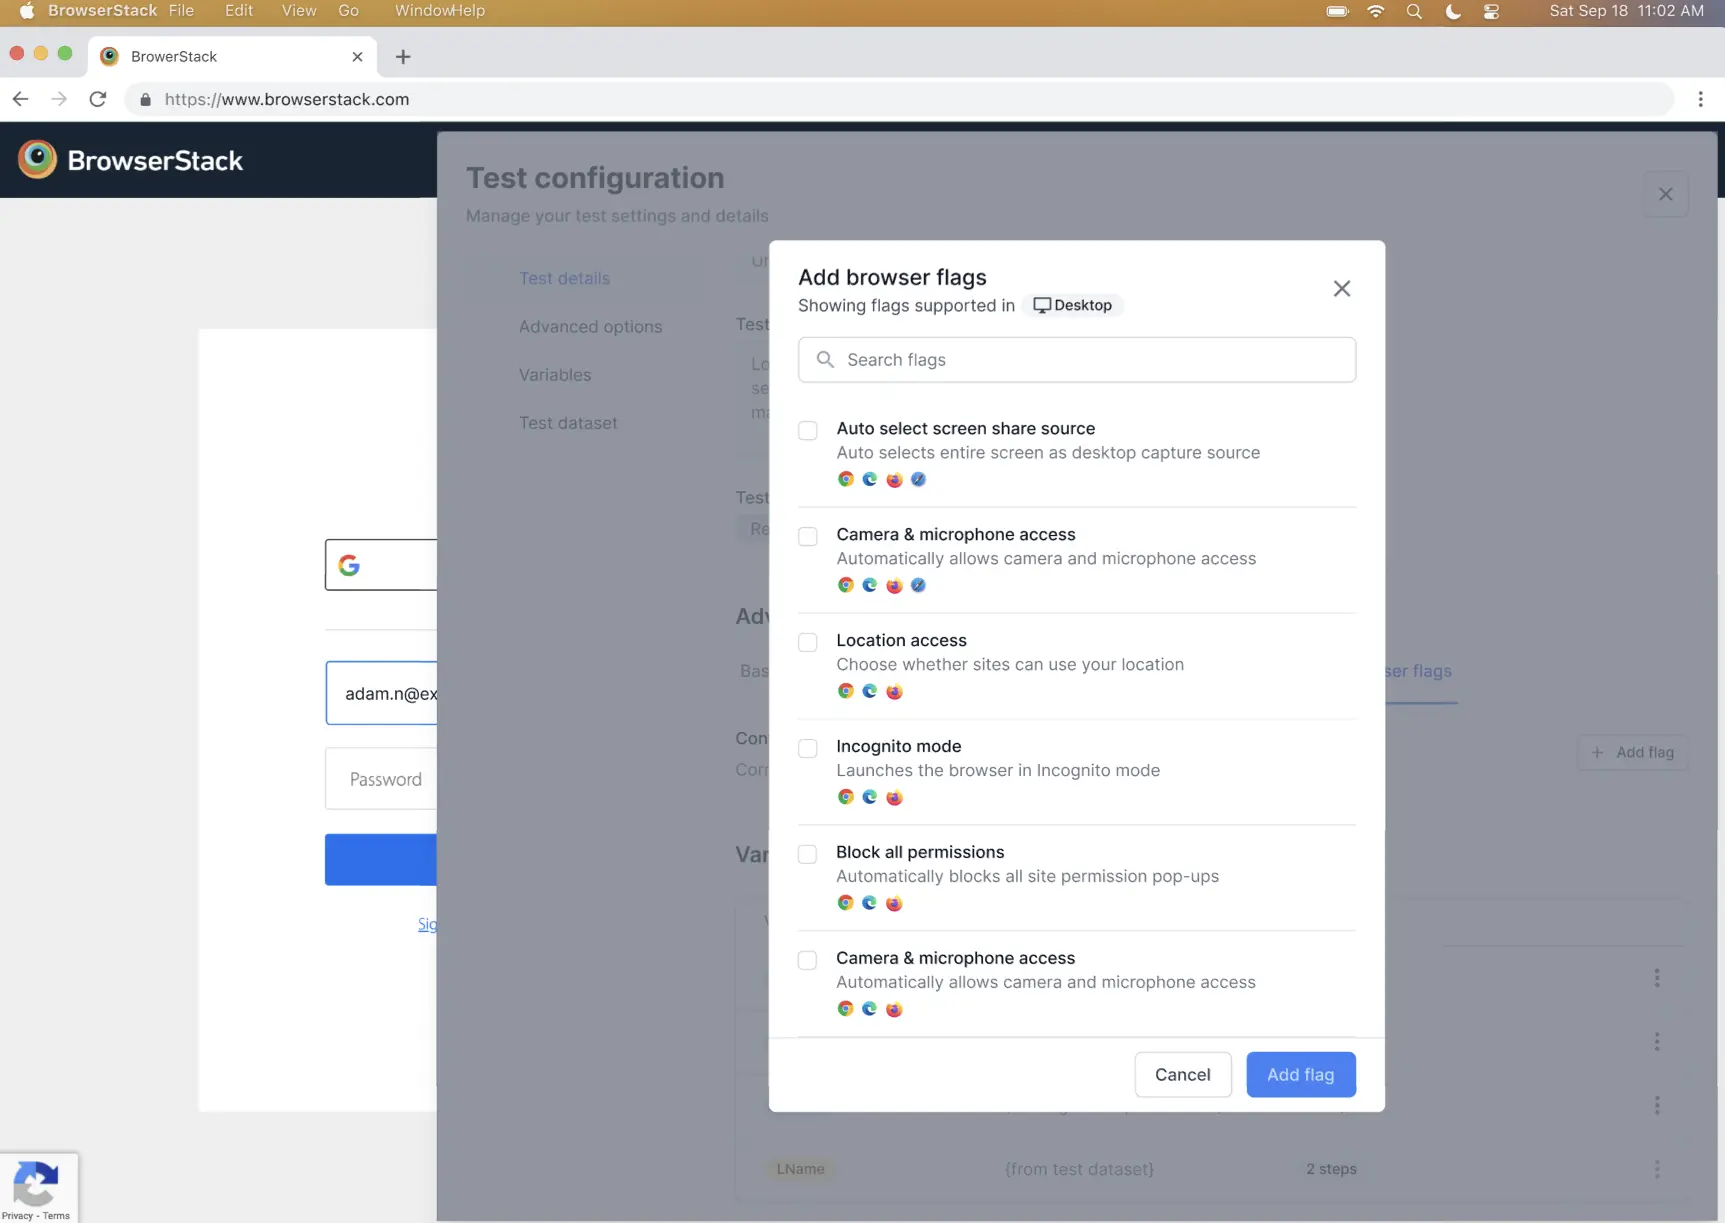
Choose a flag from the list or use the search bar to find one. The interface displays a description for each flag and lists the supported browsers. Not all flags are compatible with every browser, so check compatibility before adding a flag.
You can enable the following browser flags, depending on your device type:
-
For desktop browsers:
- Auto select screen share source: Automatically selects the entire screen as the screen share source, without showing the pop-up that asks what you want to share.
- Camera and microphone access: Auto-grants camera and microphone permissions without a prompt.
- Location access: Choose whether sites can use your location.
- Clipboard access: Grants the browser read and write access to the clipboard.
- Incognito mode: Launches the browser in incognito with no saved history, cookies, or cache.
- Block all permissions: Automatically denies all permission requests.
- Dark mode: Renders web content using a dark theme.
- Browser language: Sets the browser’s preferred language.
-
For mobile and tablet browsers:
- Camera and microphone access: Auto-grants camera and microphone permissions without a prompt.
- Block all permissions: Automatically denies all permission requests.
- Dark mode: Renders web content using a dark theme.
-
For desktop browsers:
- After you select the required flags, click Add flag to include them in your configuration.
- Click Save options.
When you run your tests, the specified flags are passed to the local instance of the browser, and the browser launches with the customized settings.
We're sorry to hear that. Please share your feedback so we can do better
Contact our Support team for immediate help while we work on improving our docs.
We're continuously improving our docs. We'd love to know what you liked
We're sorry to hear that. Please share your feedback so we can do better
Contact our Support team for immediate help while we work on improving our docs.
We're continuously improving our docs. We'd love to know what you liked
Thank you for your valuable feedback!