Integrate TestRail with Low Code Automation
Learn how to integrate with TestRail with Low Code Automation to map test cases easily and sync build results.
This document explains how to connect your Low Code Automation tests with TestRail test cases.
TestRail integration is available for both the Essentials and Pro plans. For more details, contact us.
Prerequisites
Before you can map test cases, you need to connect your TestRail account to Low Code Automation. This is a one-time setup.
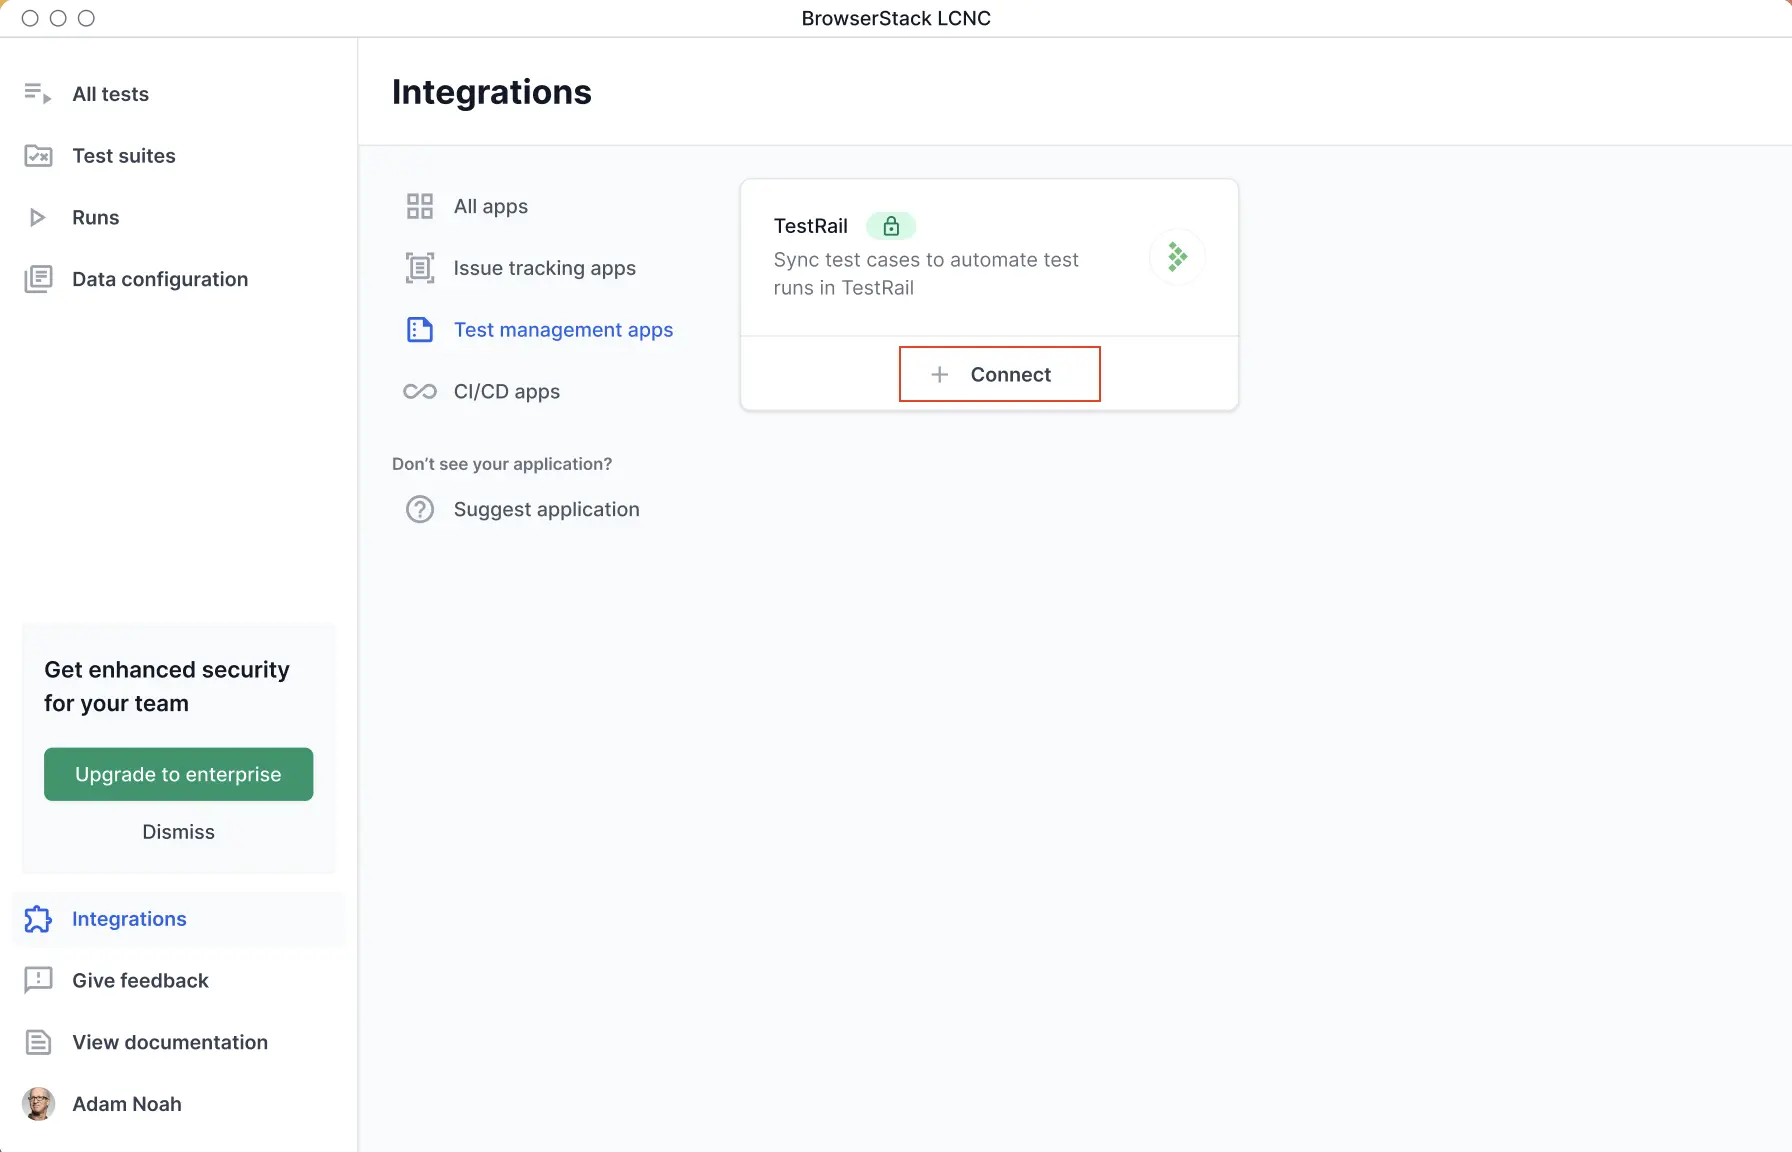
To connect TestRail with Low Code Automation:
- Go to the Integrations page, and click + Connect on TestRail card.
- In the Connect TestRail using API Key/Password dialog, enter your TestRail host URL, email ID, and API key.
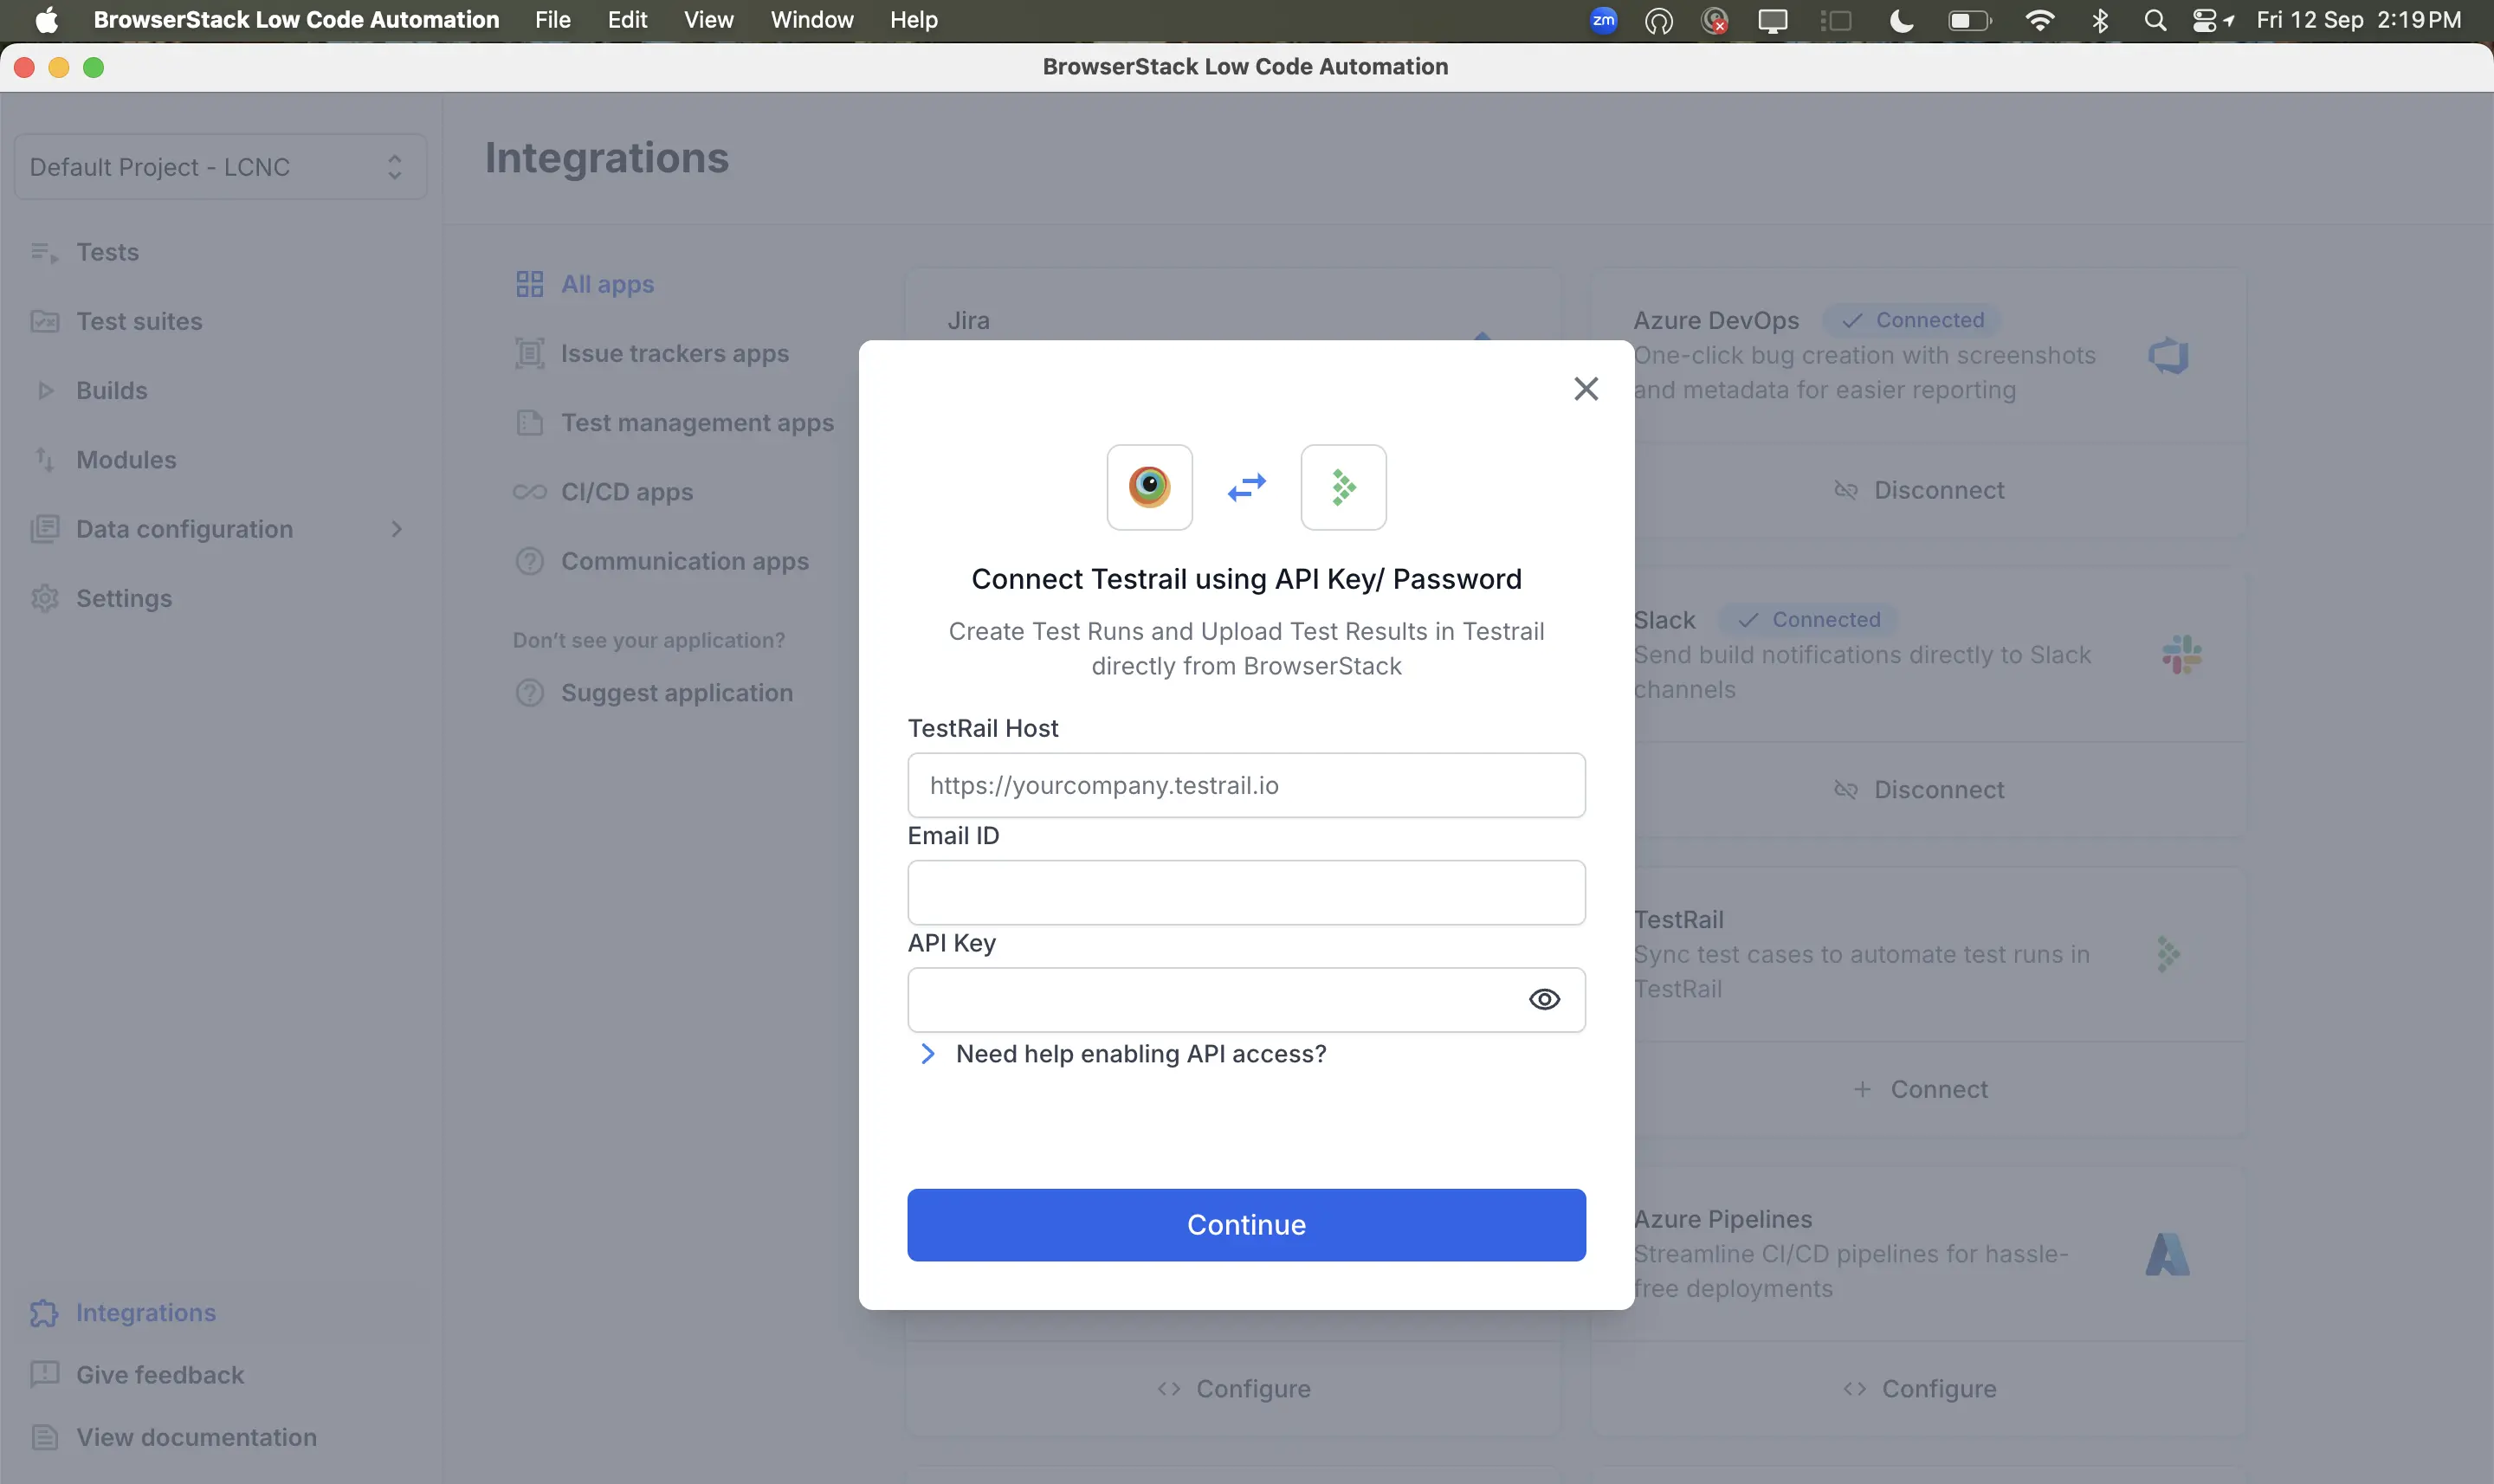
- Click Continue to complete authentication.
Your TestRail account is now connected, and you can begin mapping tests to your TestRail cases.
To link TestRail with Low Code Automation:
- Open Low Code Automation and record a test.
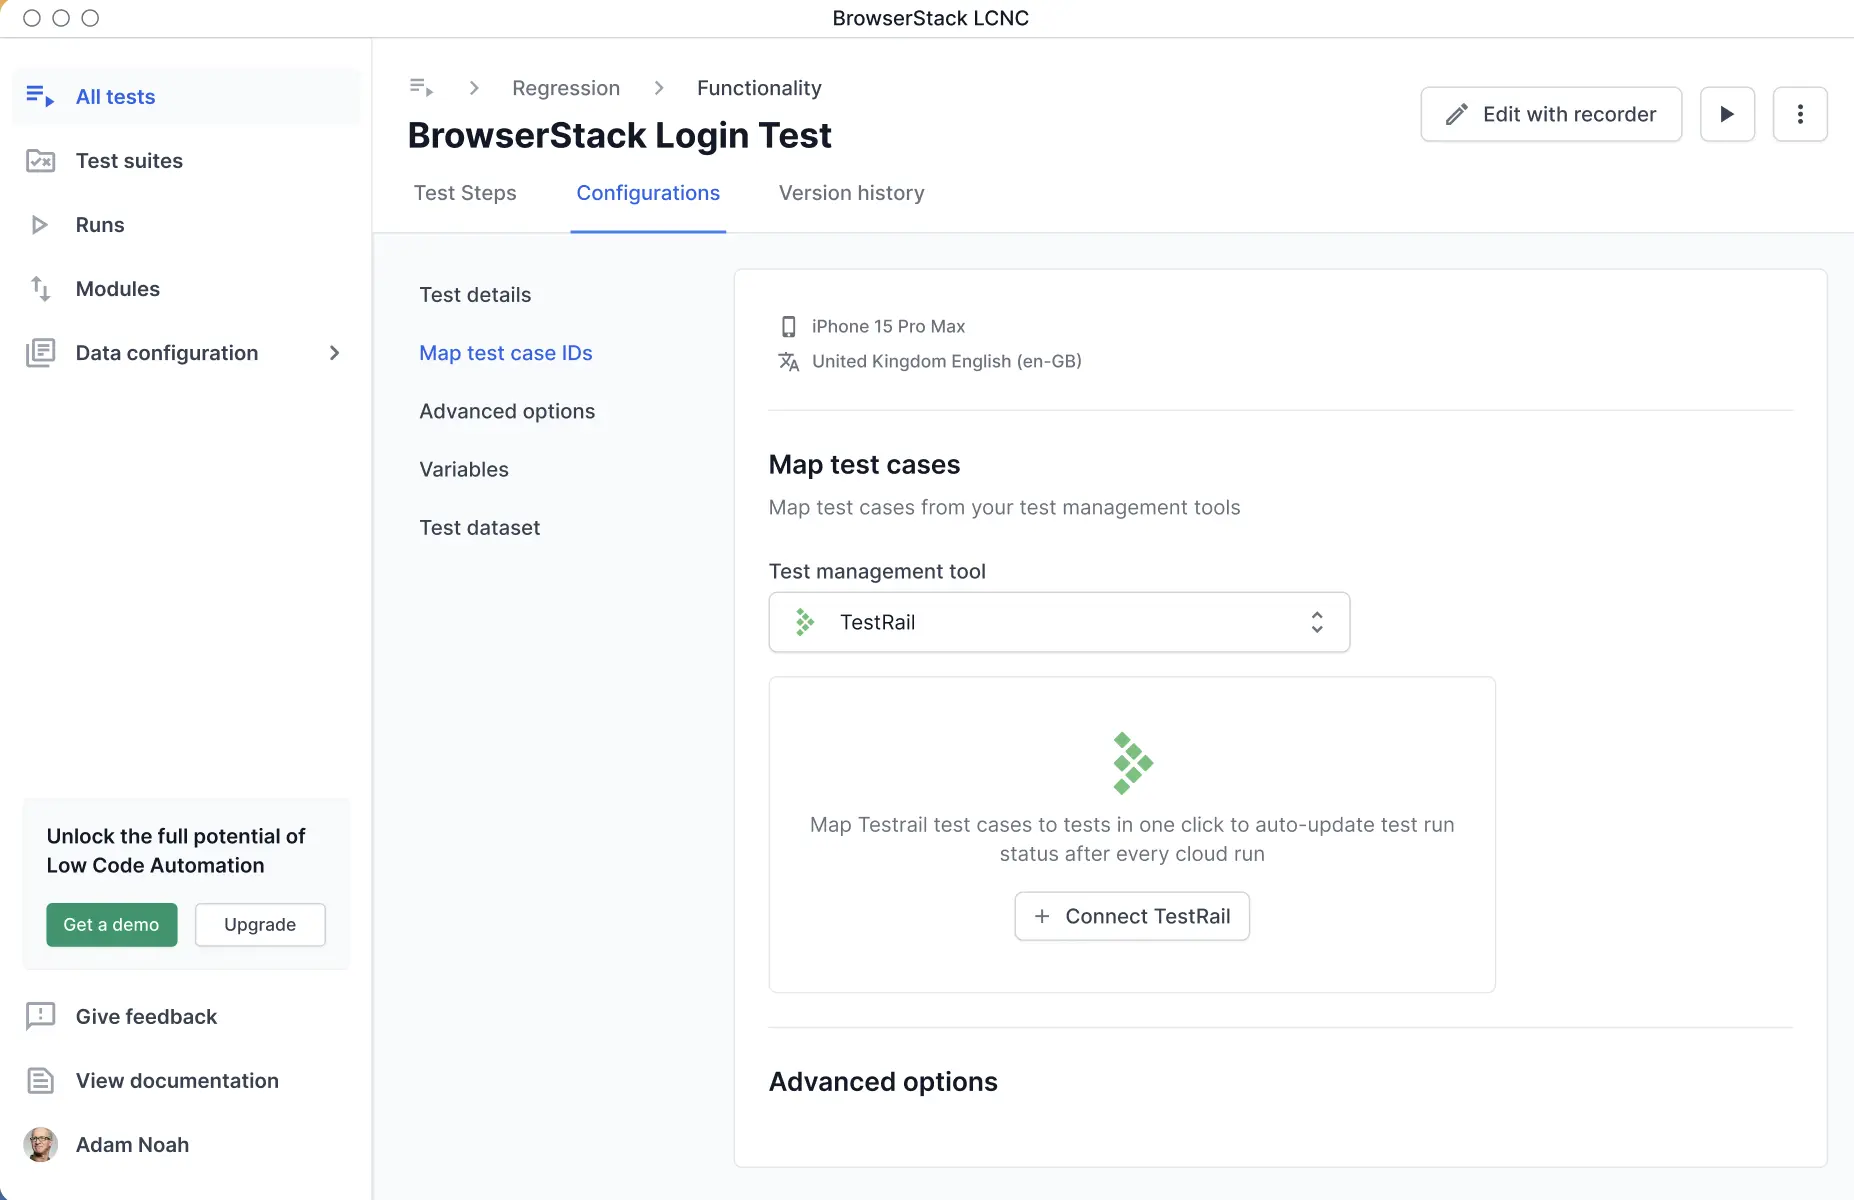
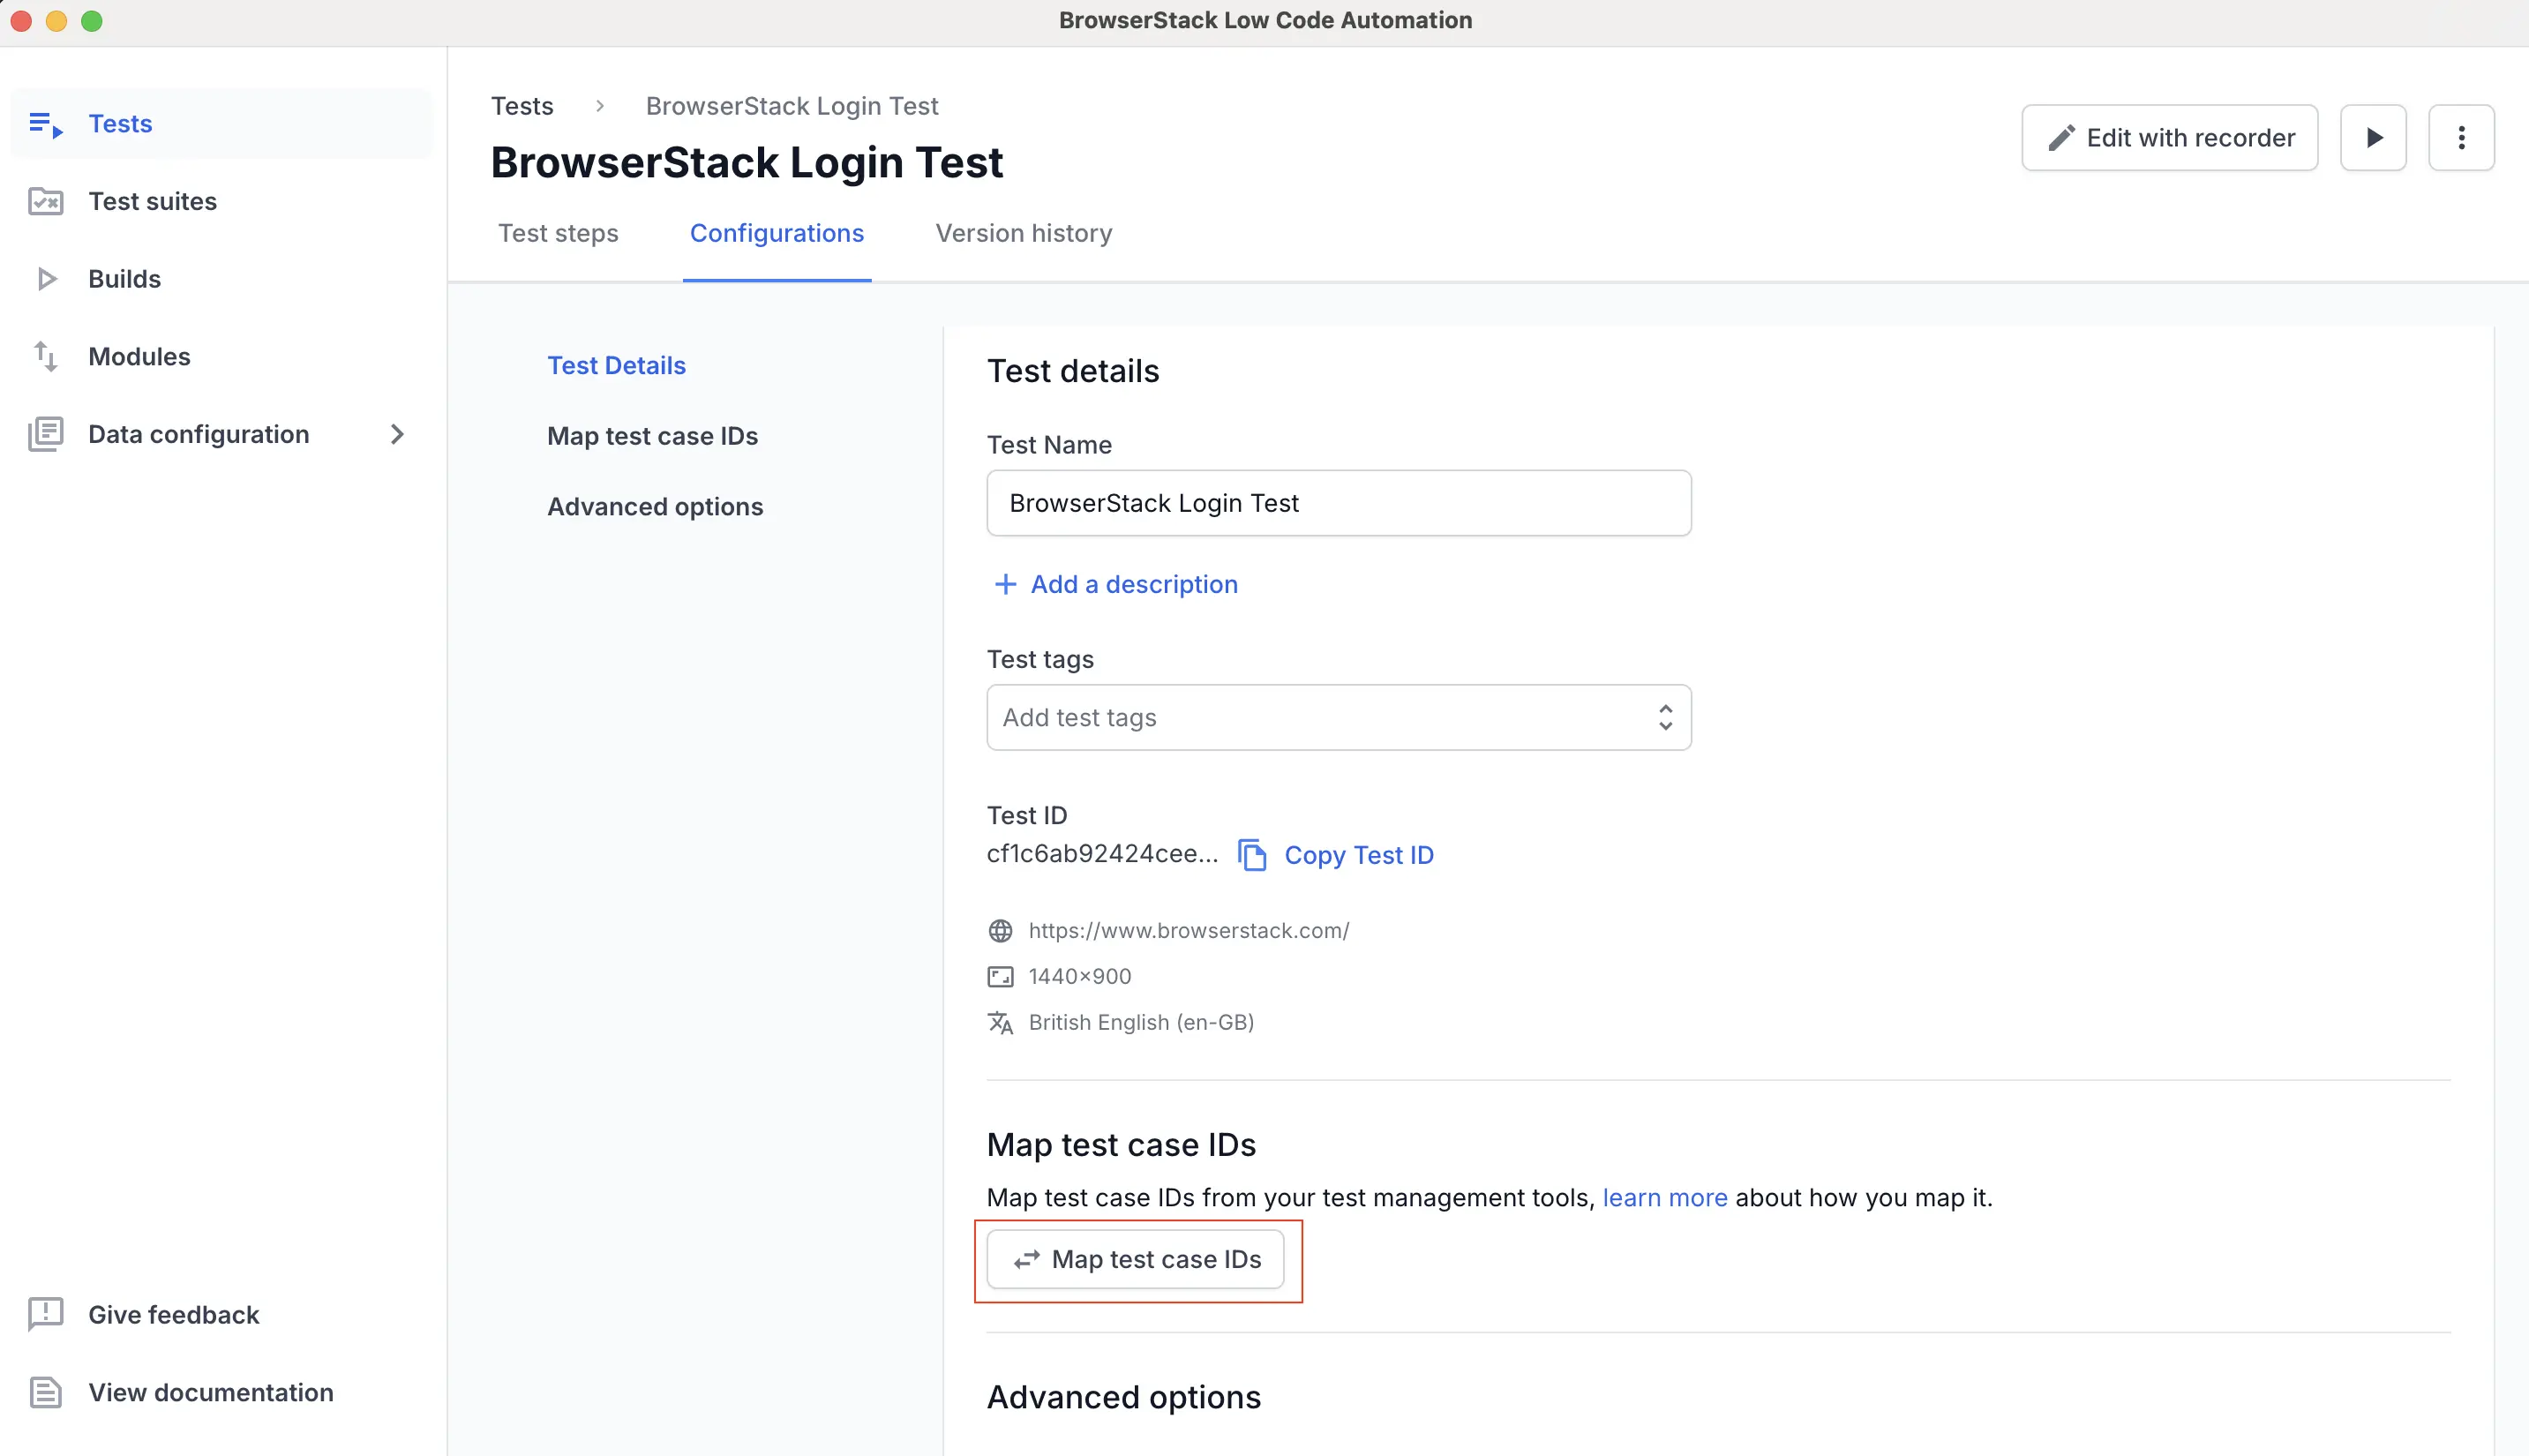
- Click the Configurations tab in your test details view.
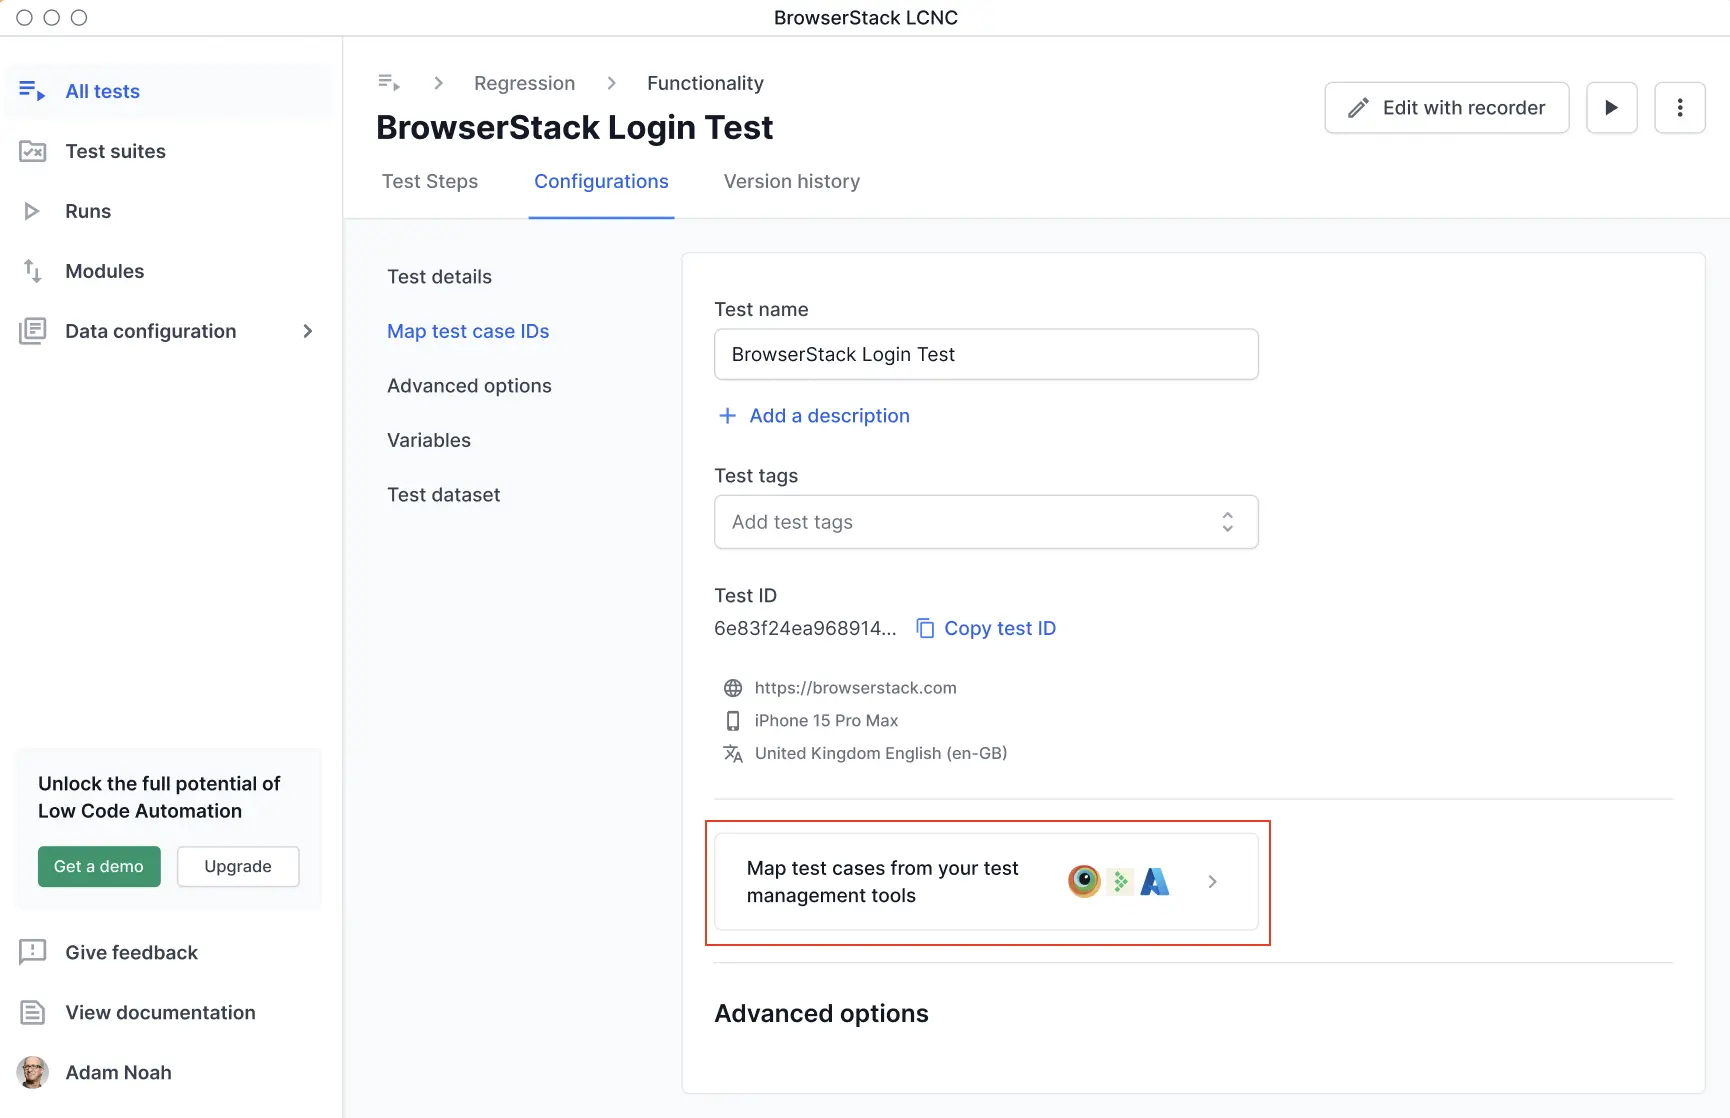
- Click Map test case IDs under Test details.
- In the Map test cases section, select TestRail from the Test management tool dropdown.
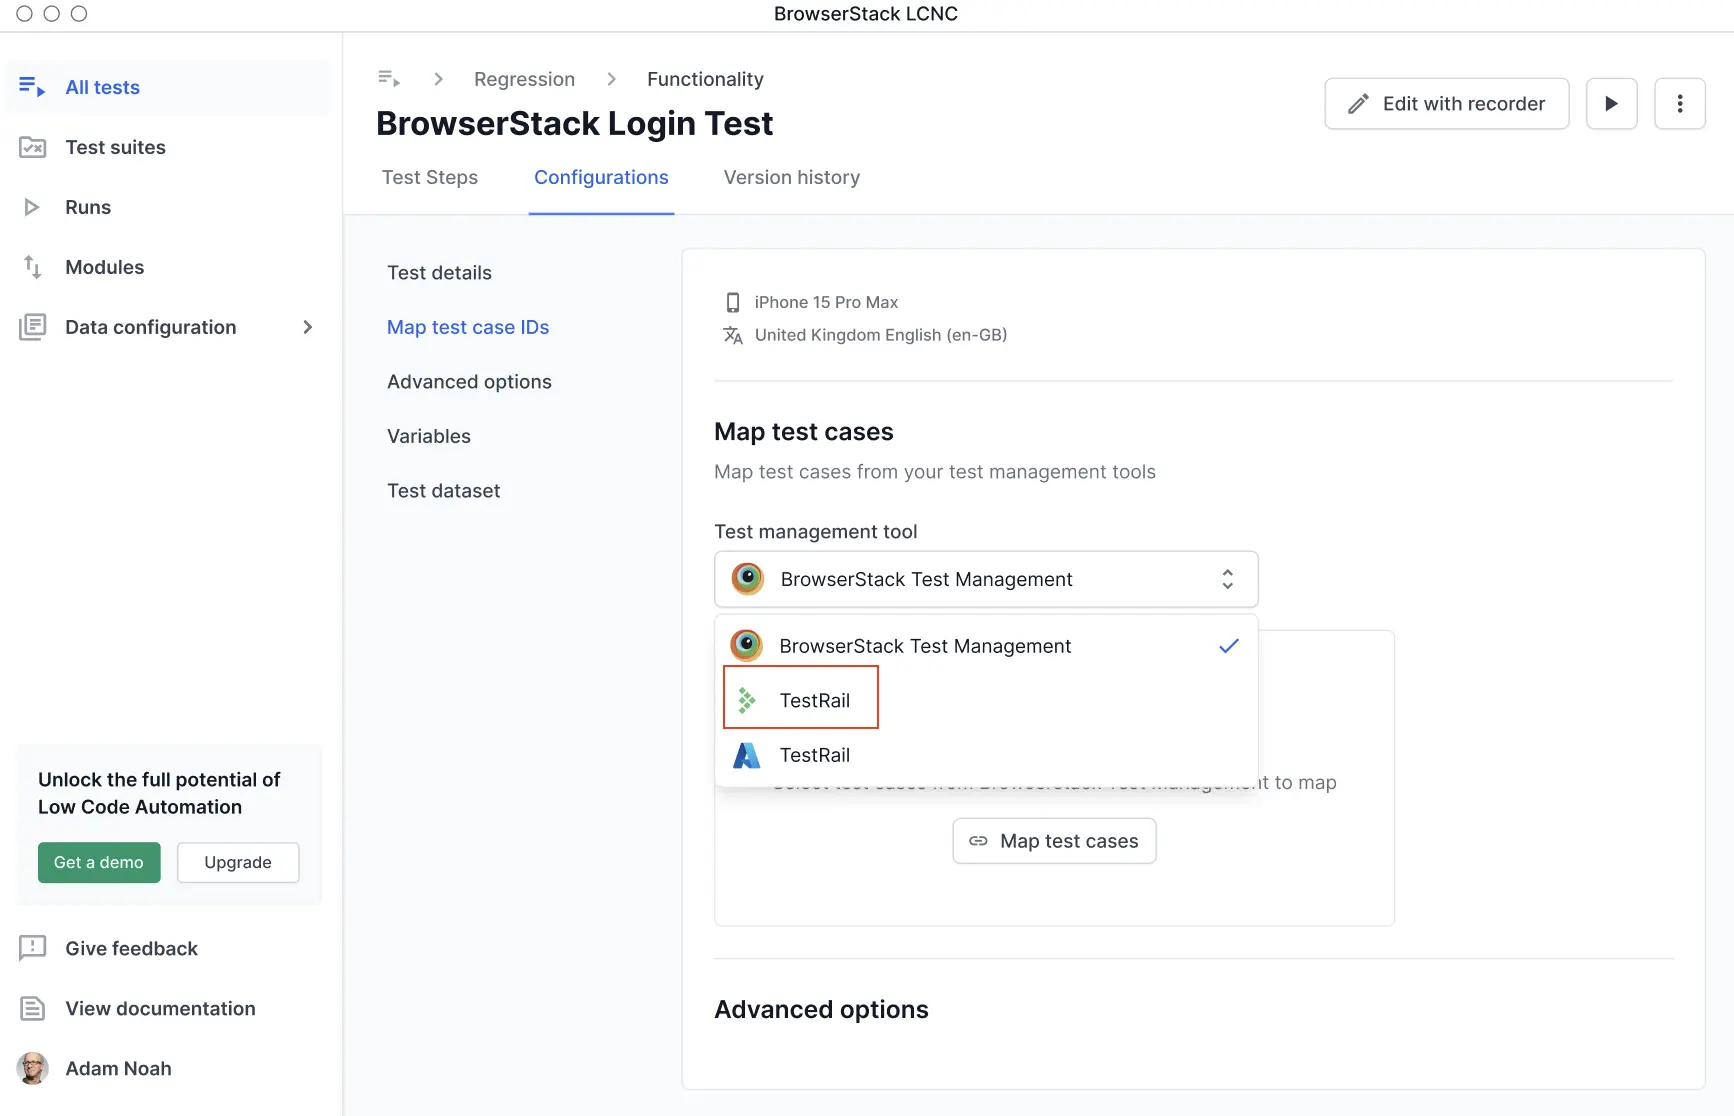
- Click Connect TestRail.
- Select your TestRail project from the dropdown.
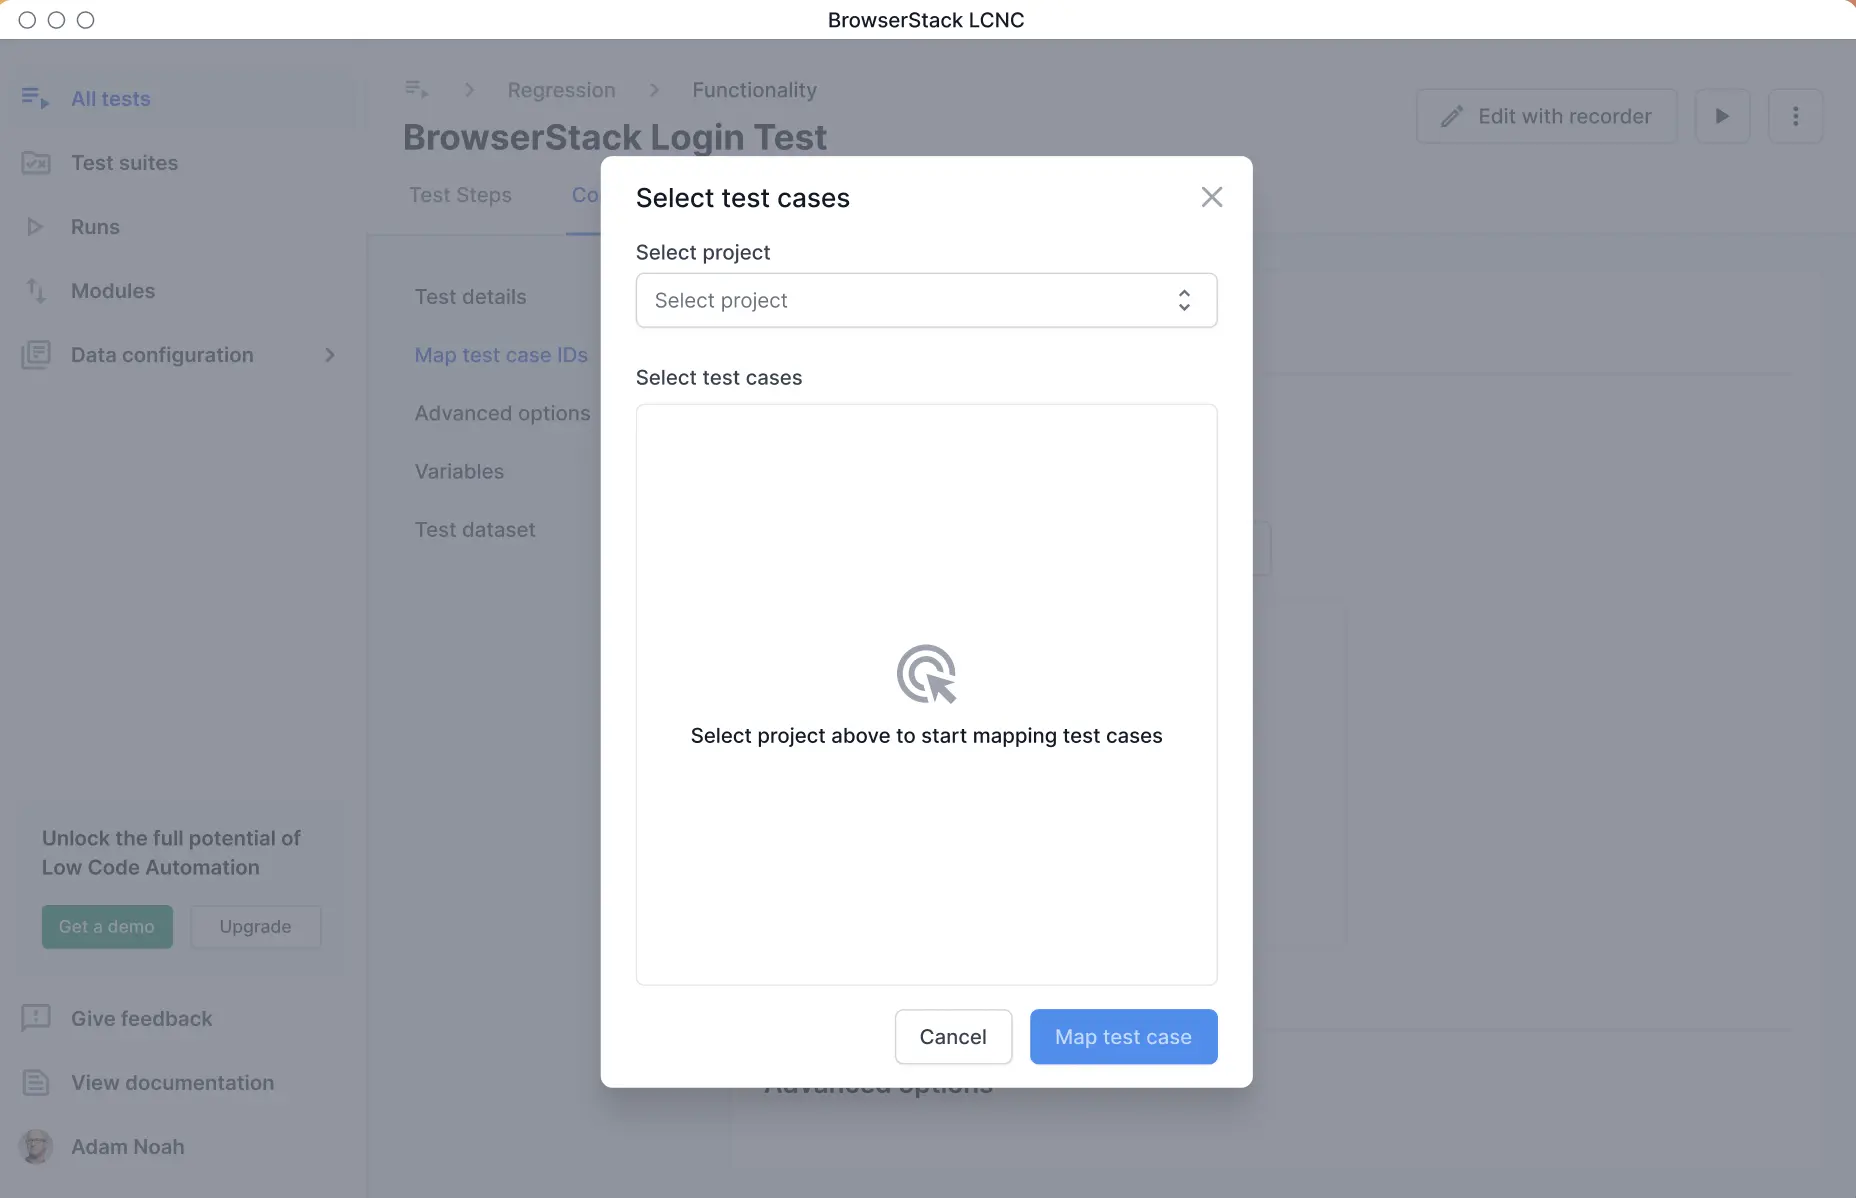
- Select the test cases you want to map. If required, you can also select the test suite.
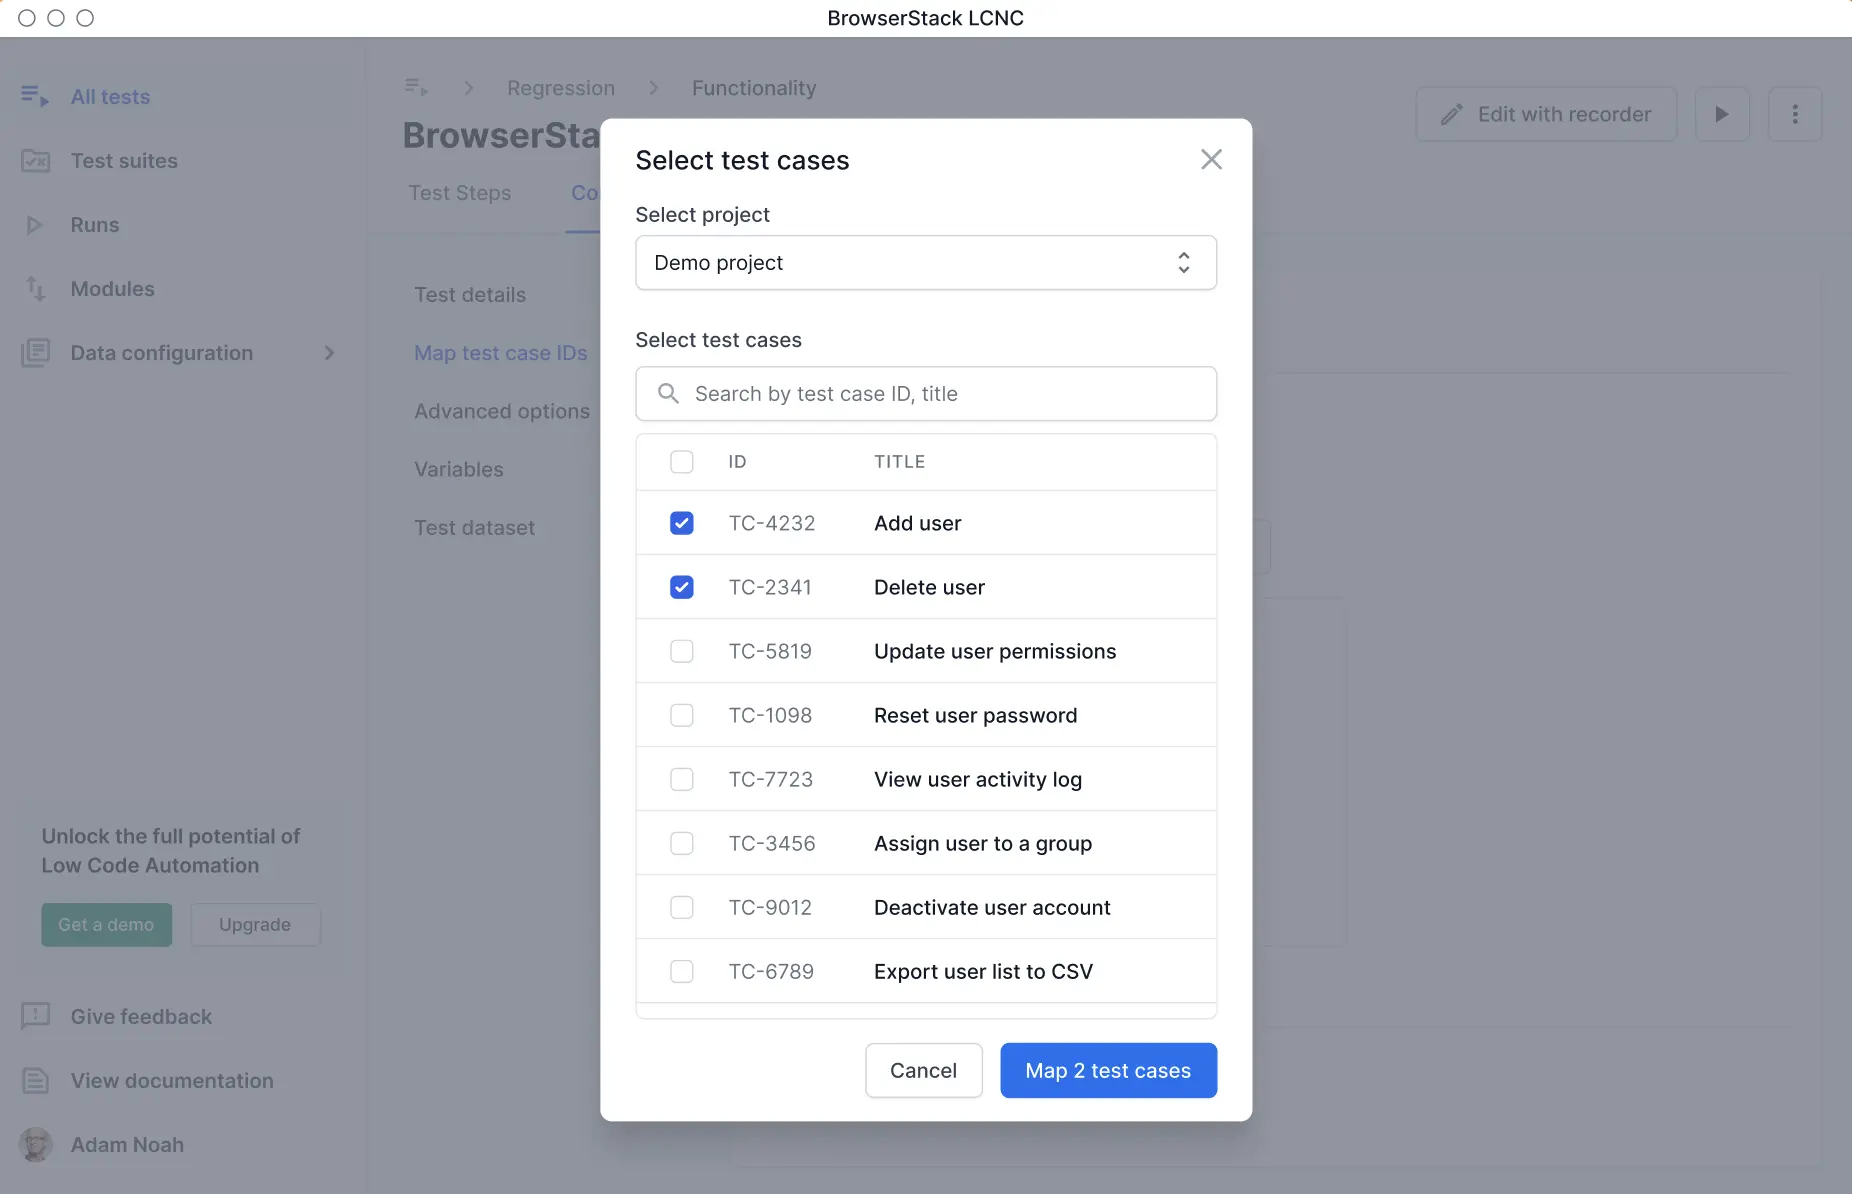
- Click Map test cases to link the selected cases to your test.
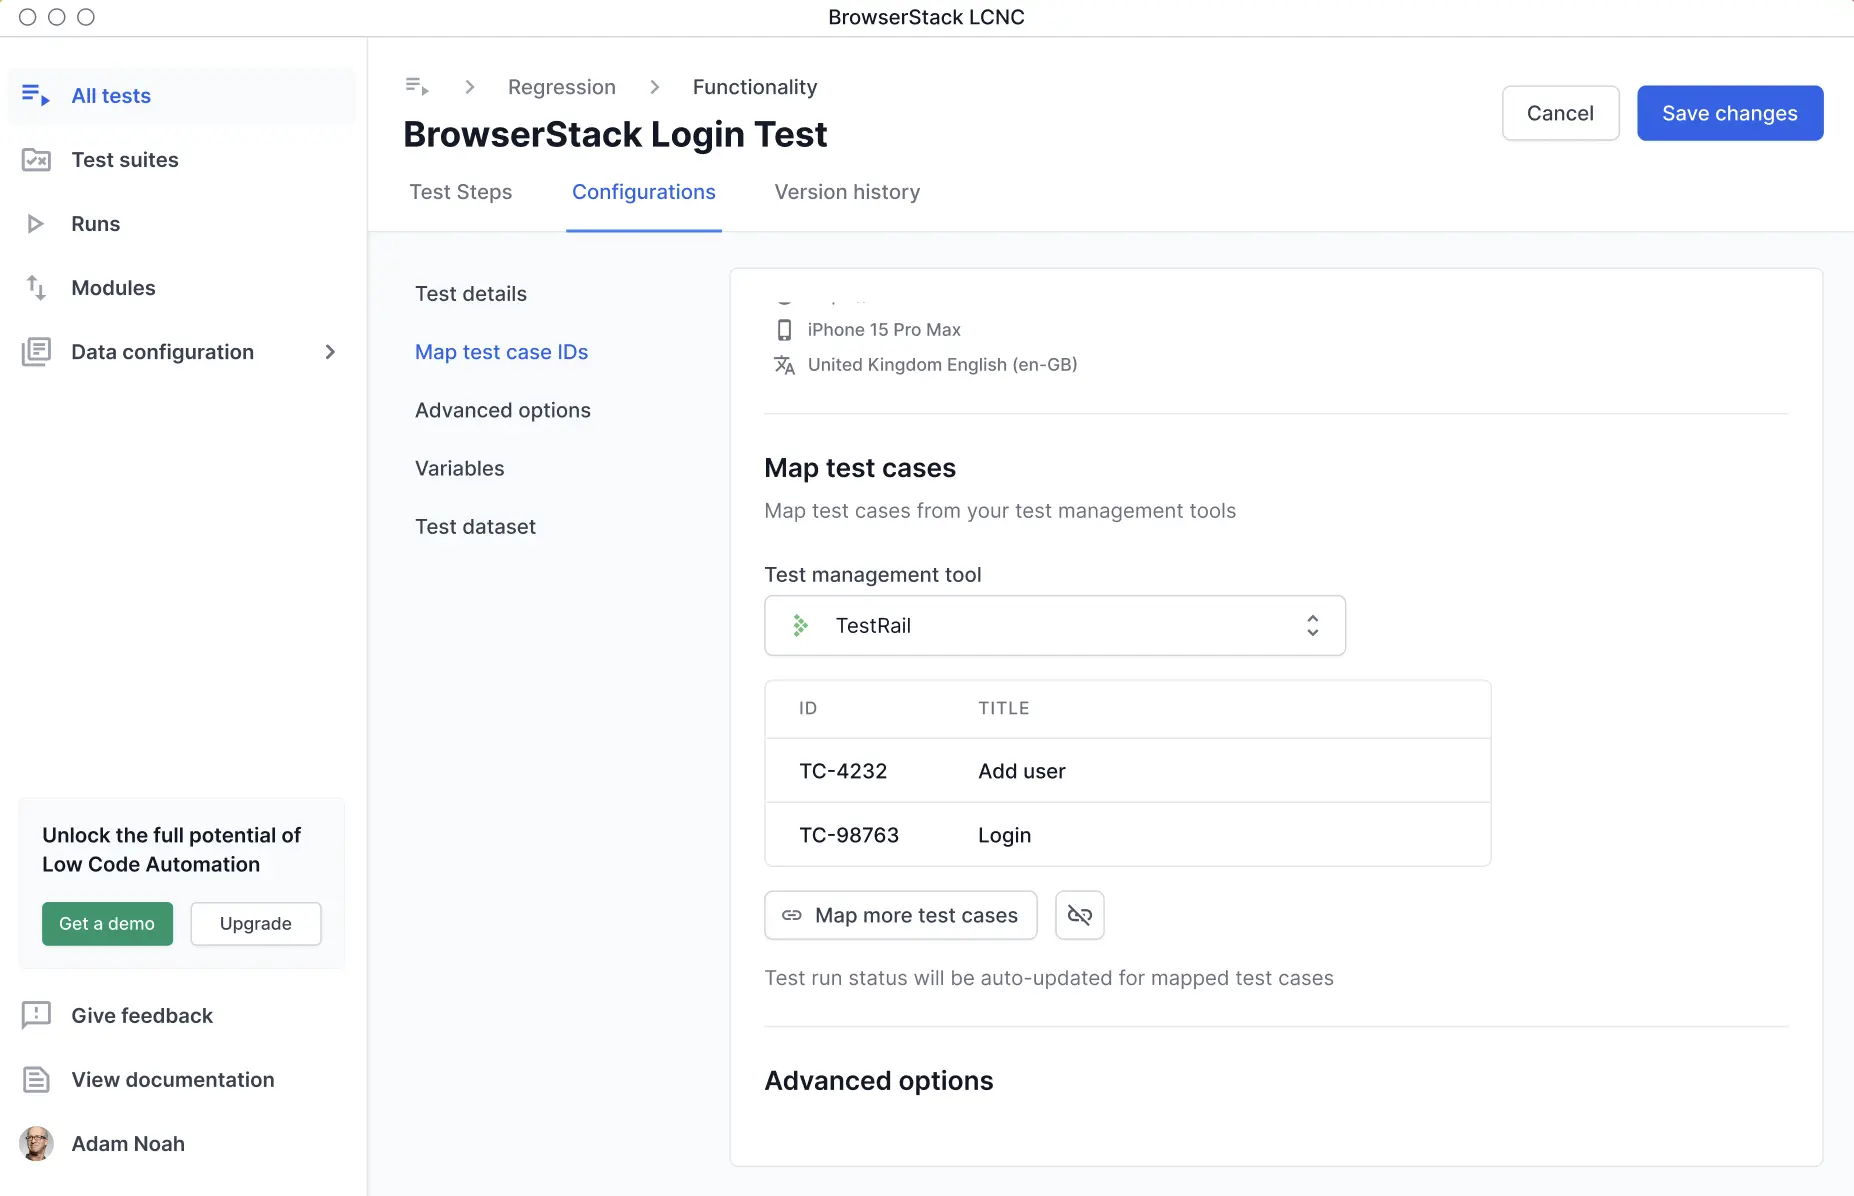
- The mapped test cases appear in the configurations panel. Click Save changes.
- Alternatively, you can also map test cases from the recorder and follow the same steps as above.
After the mapping, build reports are automatically uploaded to your TestRail account.
Points to remember
- Constraints on Projects and Test Suites: For a test, you can only map test cases from a single project. If the project is in multi-suite mode, you need to select one test suite. In this case, you can only map test cases from a single test suite. If you change mandatory fields (projects/suites), existing mapping will be lost.
- For migration: If you have mapped test cases in a comma-separated format earlier, you must provide the project IDs and suite IDs after migrating to the Pro plan. This ensures that build results continue to sync.
- Results from re-run are not synced to TestRail.
- Partial, incomplete, or stopped builds are not synced to TestRail.
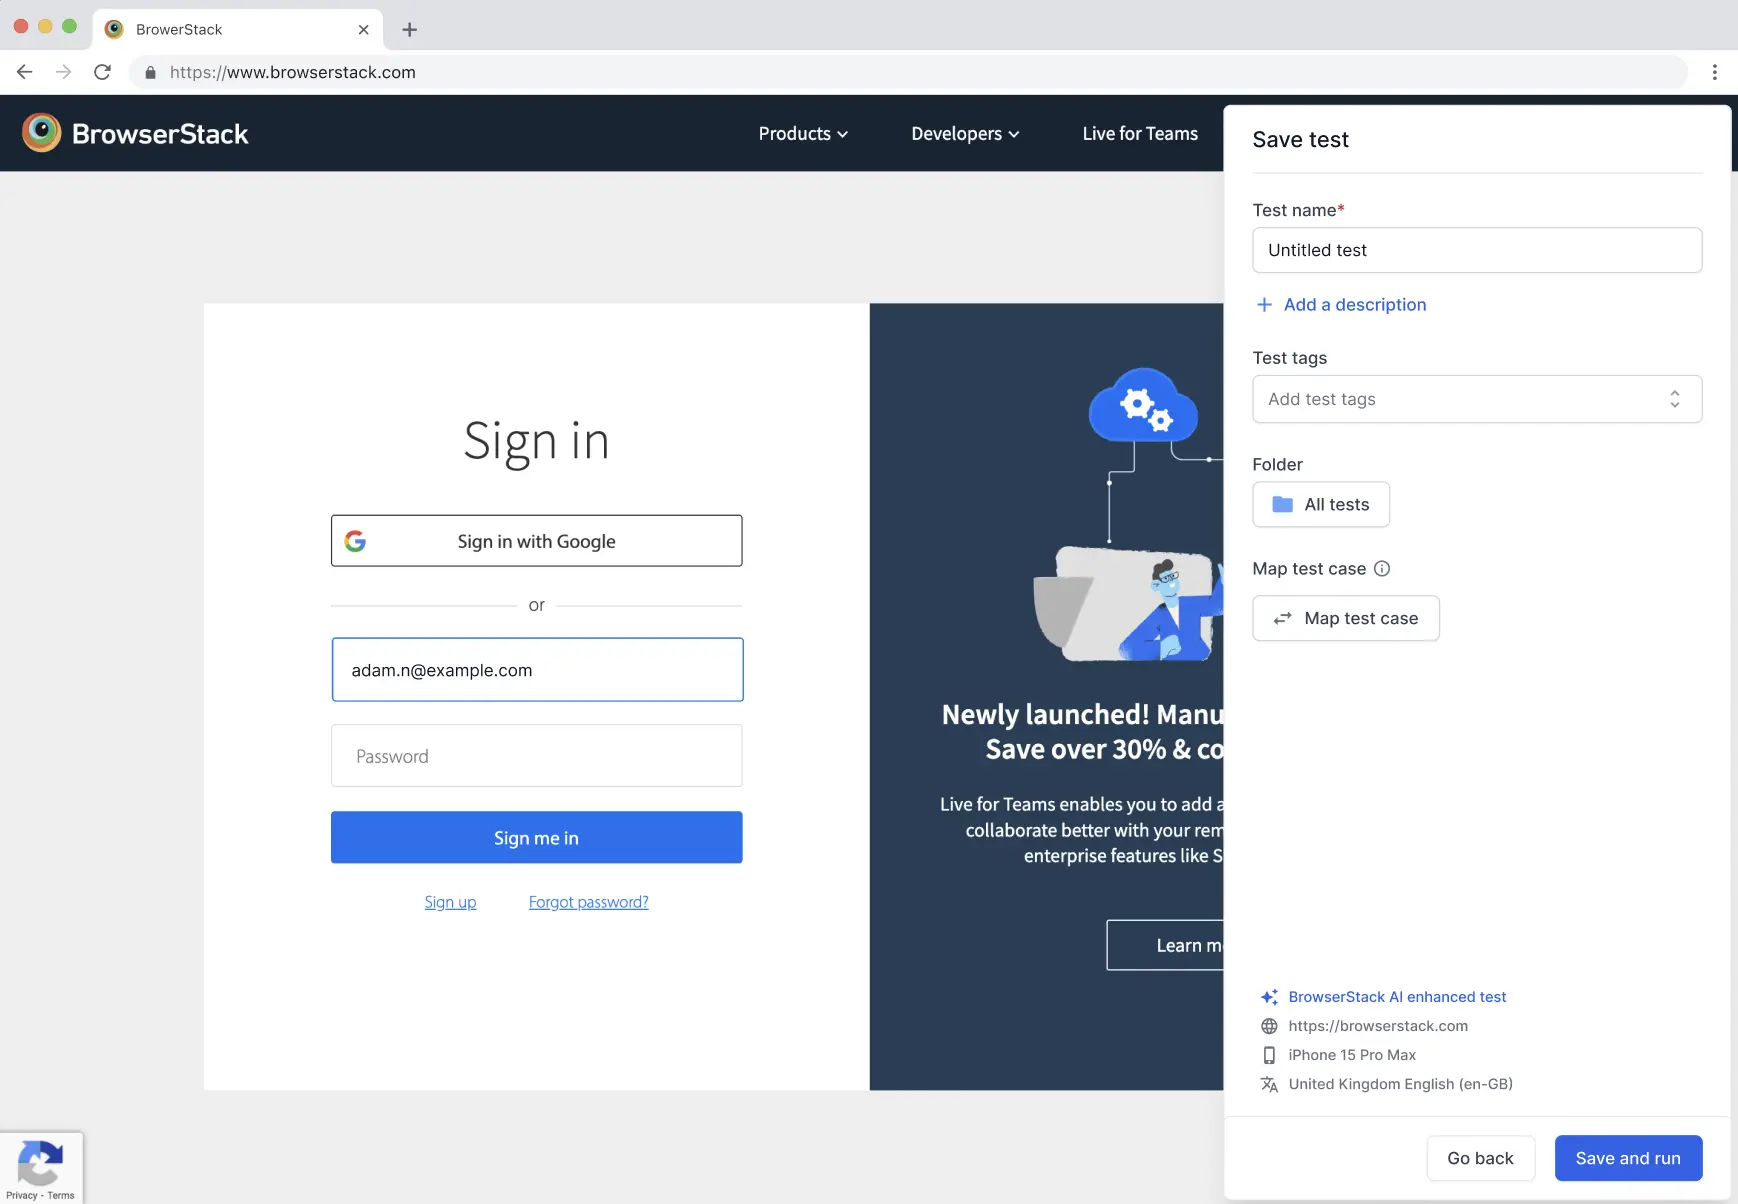
To link TestRail with Low-Code Automation:
- Open Low Code Automation and record a test.
- Click the Map test case IDs button while saving the test.
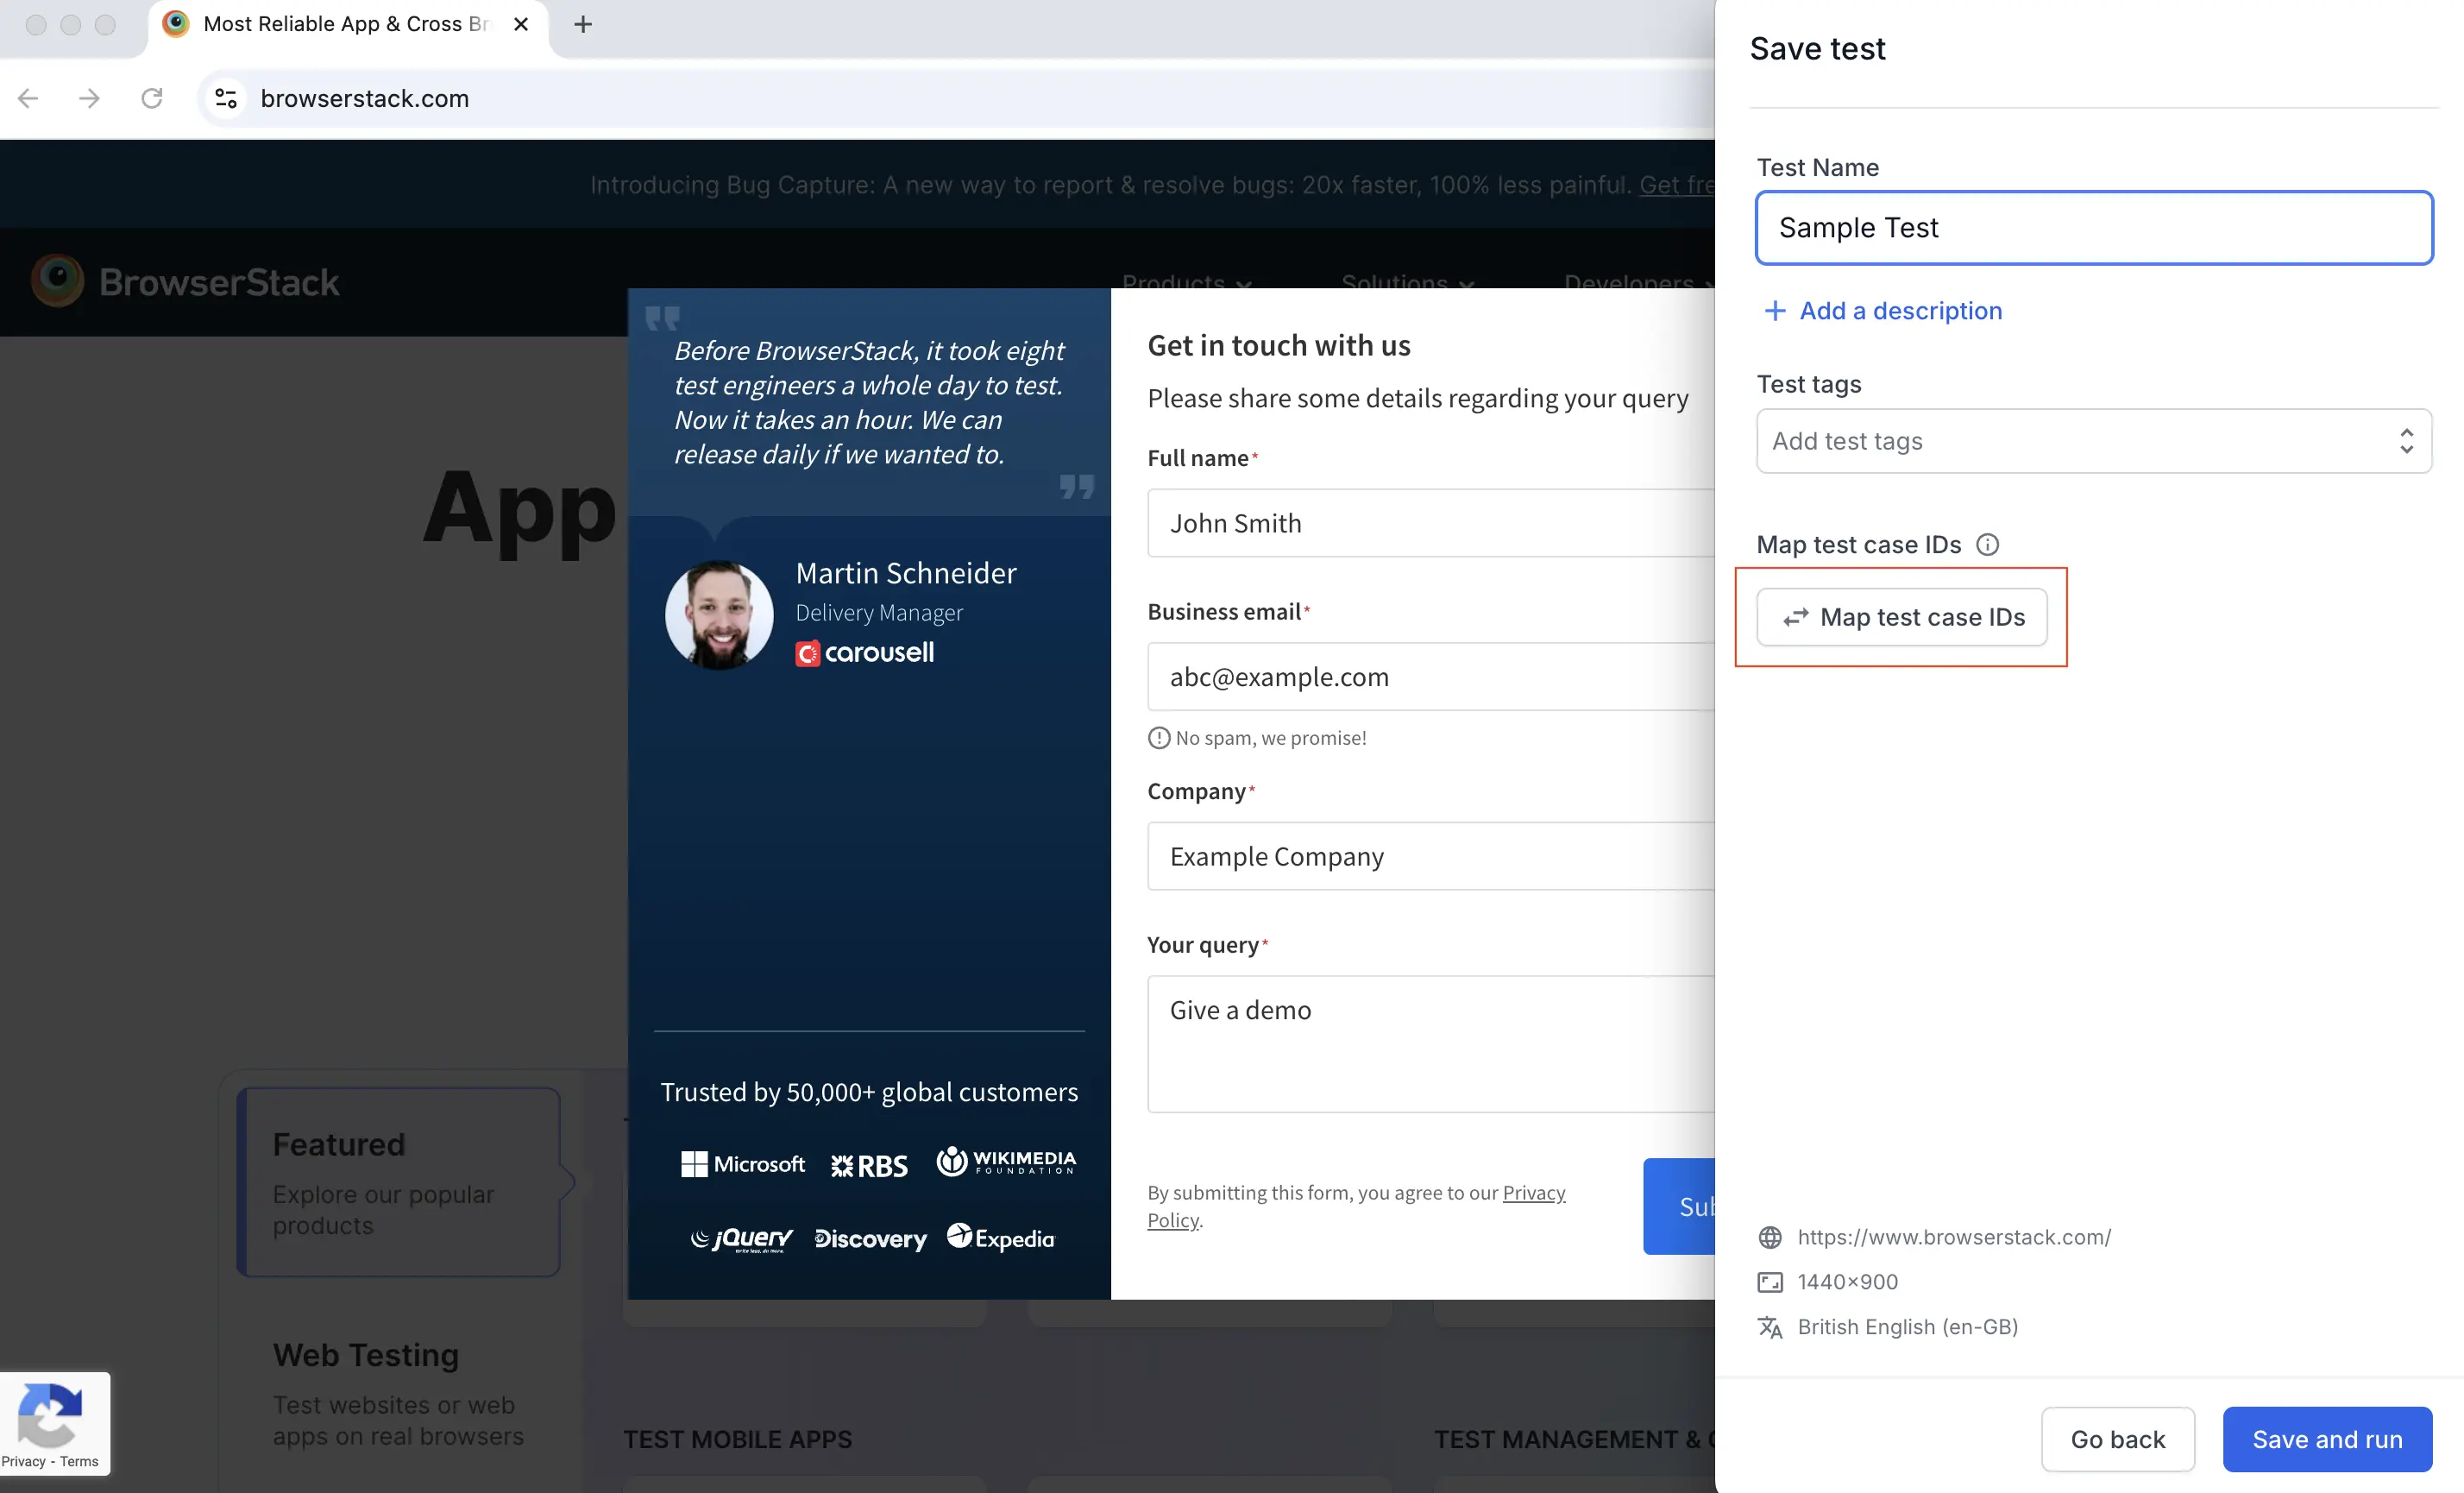
- In the Map test case IDs dialog, select TestRail from the Test management tool menu.
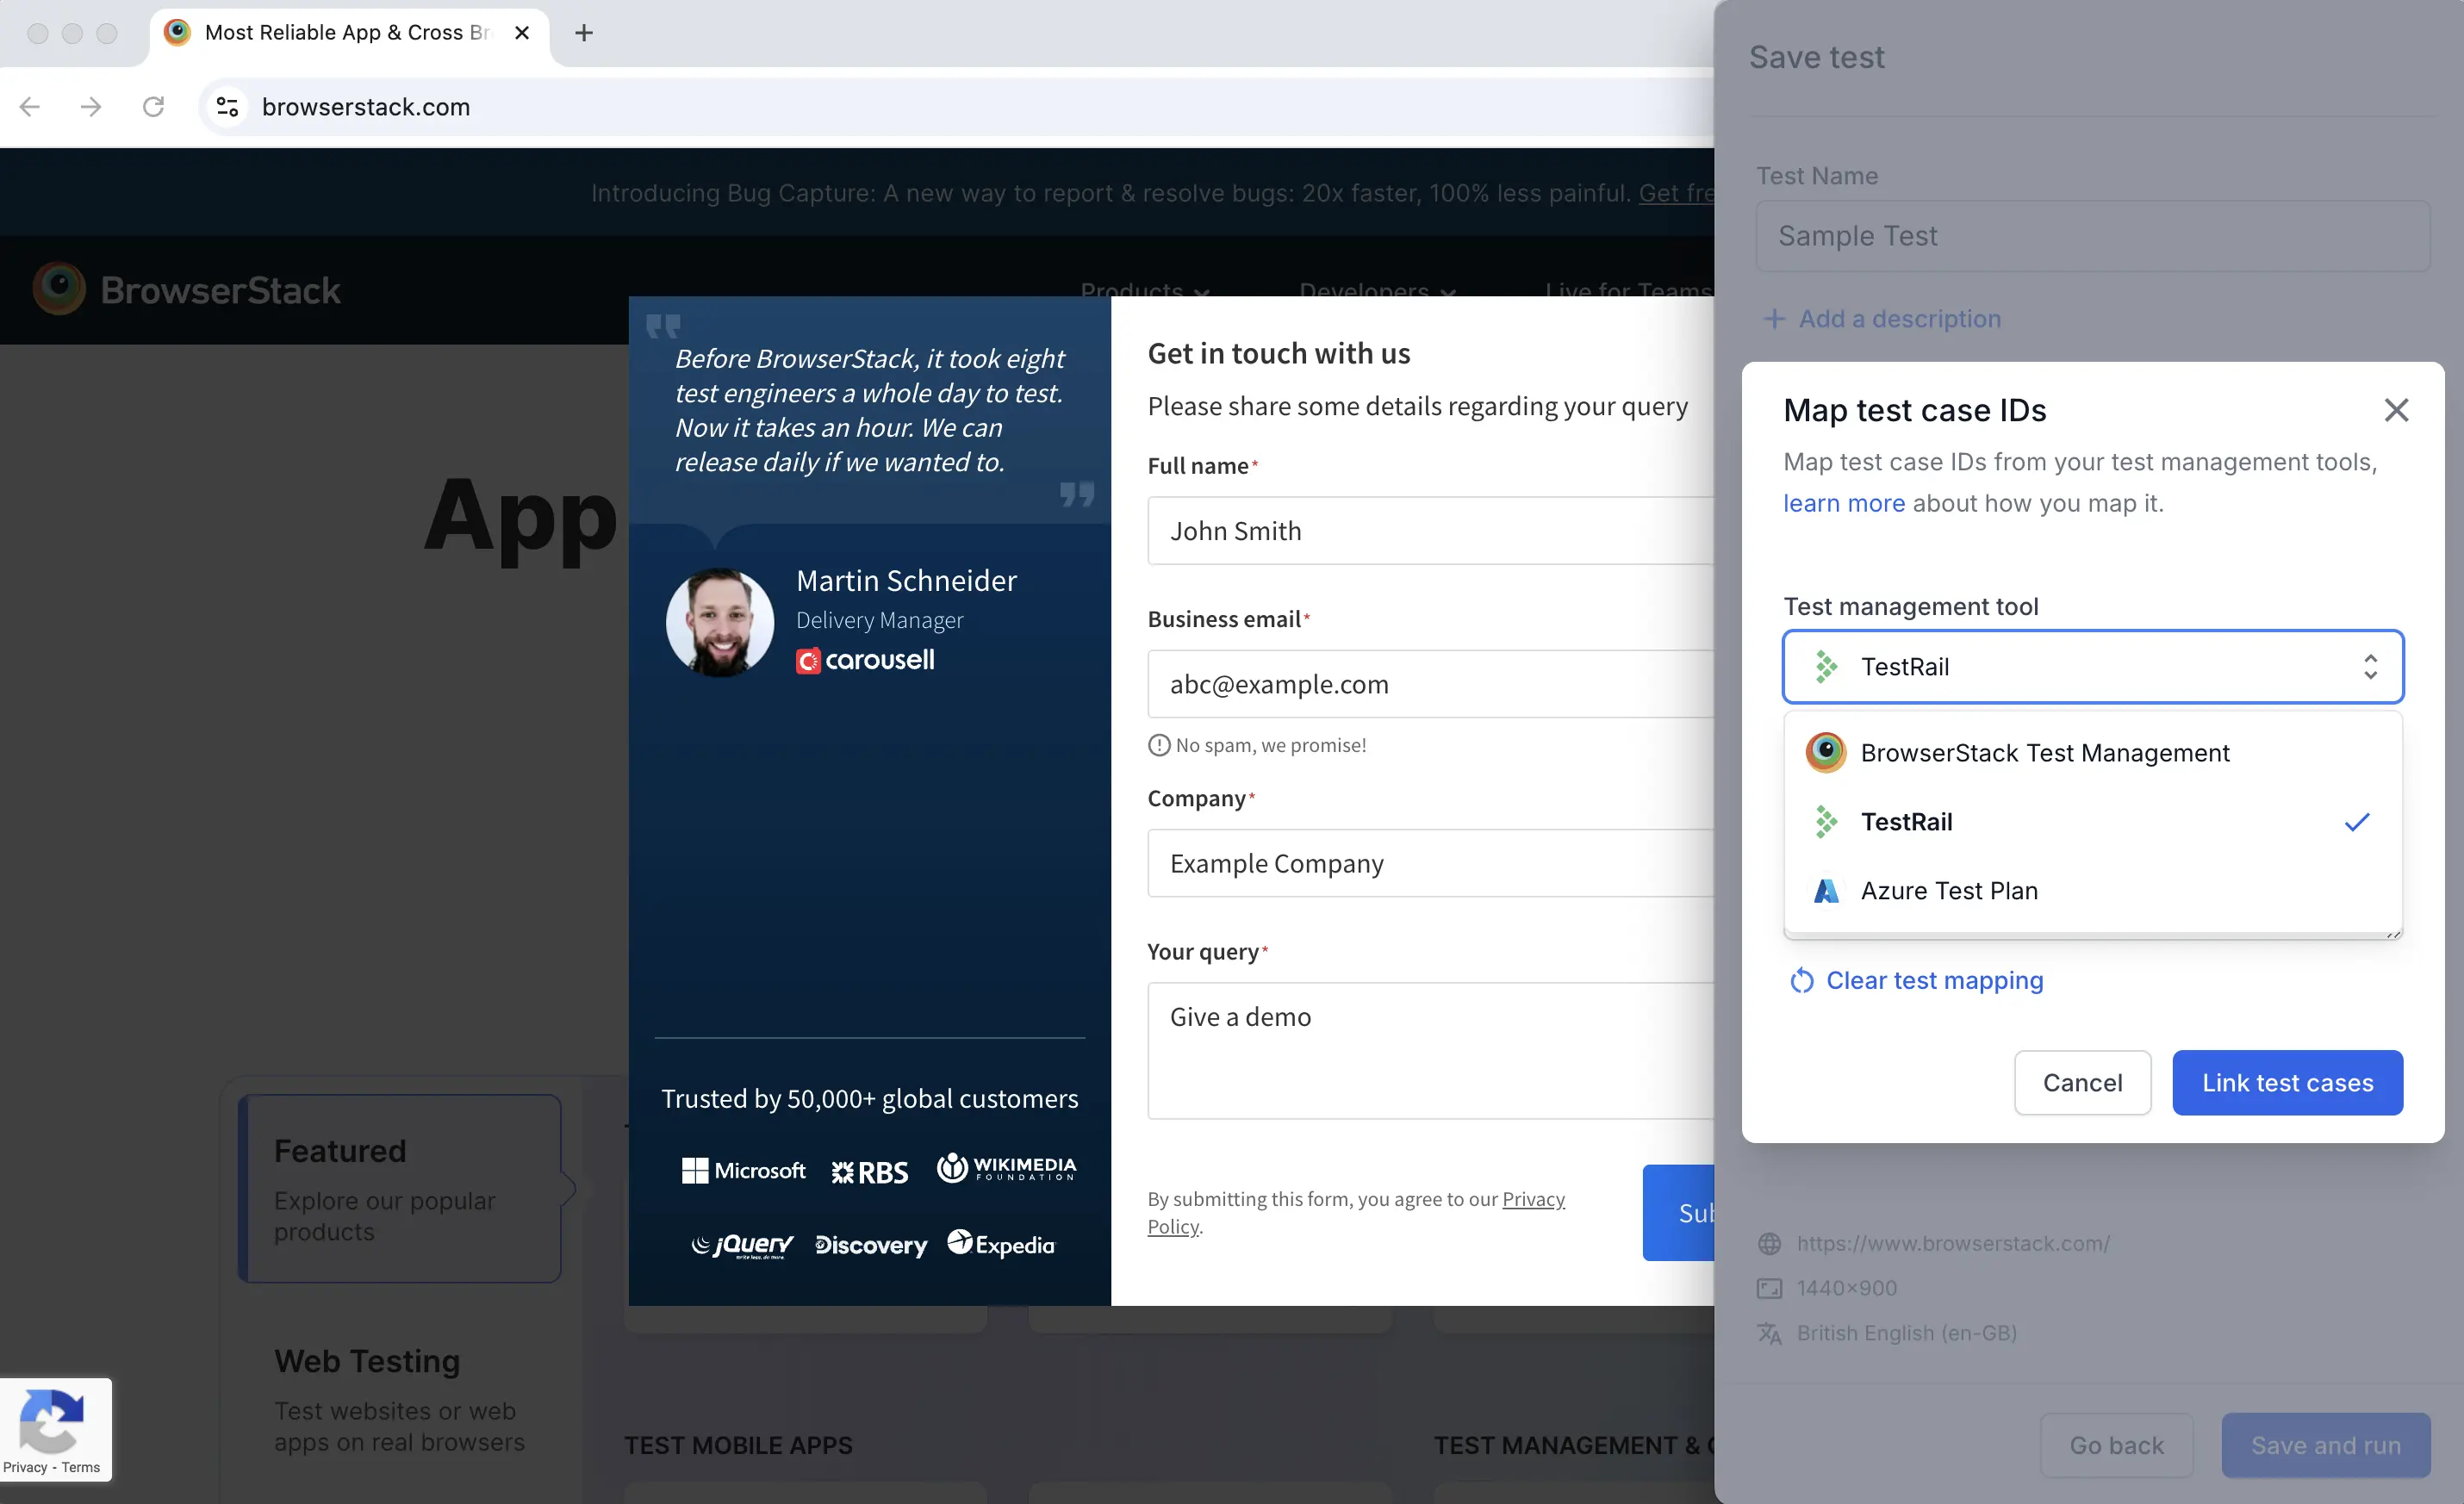
- In the Test case IDs field, enter the test case IDs, separated by commas. Click Link test cases.
- Alternatively, link the test cases while editing the test. Click the Configurations tab. Under the Map Test Case IDs section, click the Map Test Case IDs button, then repeat Steps 3 and 4.
- Enter the name and click Save changes.
Export the test data in XML format
After test execution, go to the Builds section, select the desired build, and click Download.
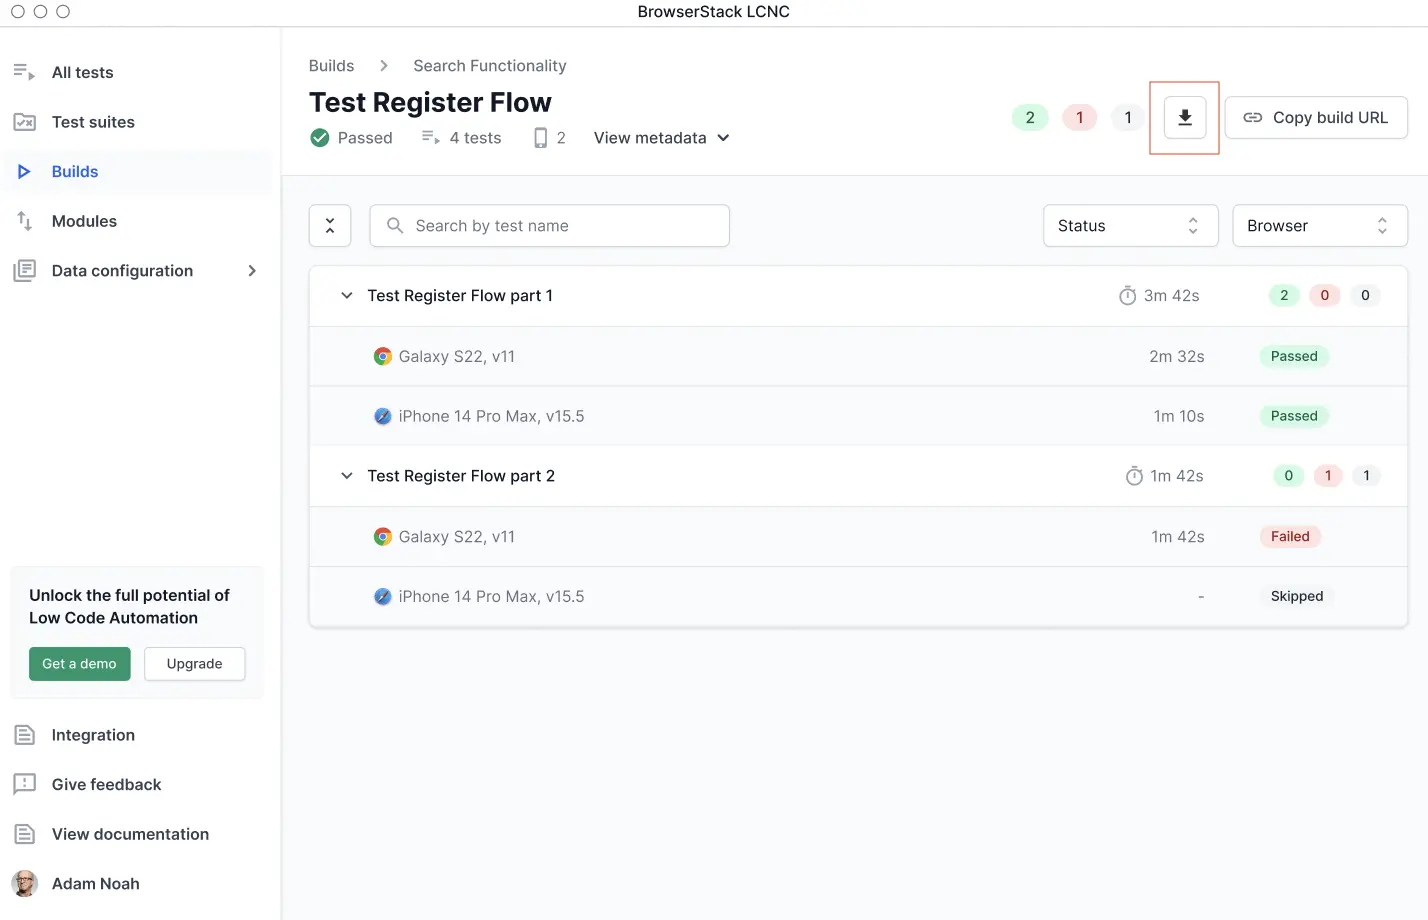
You can also use the Reports API to download the XML, in addition to using the Download icon.
The XML file will be saved to your system in the following format:
Import test data XML into Test Case Management
After the test execution is complete and the XML file has been exported, you can import it into your TCM tool.
To import test results into TestRail, use the trcli command-line tool.
For more information, see the TestRail documentation.
We're sorry to hear that. Please share your feedback so we can do better
Contact our Support team for immediate help while we work on improving our docs.
We're continuously improving our docs. We'd love to know what you liked
We're sorry to hear that. Please share your feedback so we can do better
Contact our Support team for immediate help while we work on improving our docs.
We're continuously improving our docs. We'd love to know what you liked
Thank you for your valuable feedback!