Test your website for Accessibility using Low Code Automation
Learn how to perform accessibility testing on your website using Low Code Automation.
Low Code Automation now supports automated Accessibility Testing within your test workflows. Accessibility tests help ensure that your webpages are usable and navigable by all users, including those with disabilities. For instance, they verify if images include alternative text for screen reader compatibility. With this feature, you can identify common accessibility issues without writing any code. Simply integrate accessibility testing into your workflows, and each time you run a build, it will automatically scan for violations thereby helping you deliver a more inclusive and compliant user experience.
You can choose to scan the entire page or focus on specific components with a partial page scan. This flexibility lets you target accessibility checks where they matter most.
- If you are using Low Code Automation (LCA) as part of your Accessibility license, please note the following:
- Some advanced LCA features are currently visible and usable, but this access is temporary.
- In upcoming releases, LCA feature access will be aligned strictly with your license entitlements.
- As a result, certain LCA features may become unavailable unless you have an explicit Low Code Automation license.
Prerequisite
You must have an account with the BrowserStack’s Accessibility Testing product.
Run Accessibility Tests in Low Code Automation
Accessibility testing is only supported on Chrome browser for desktop tests.
- Go to Test suites and create a new test suite or update existing test suite.
- In the Additional configurations section, toggle on the Accessibility testing switch to enable it.
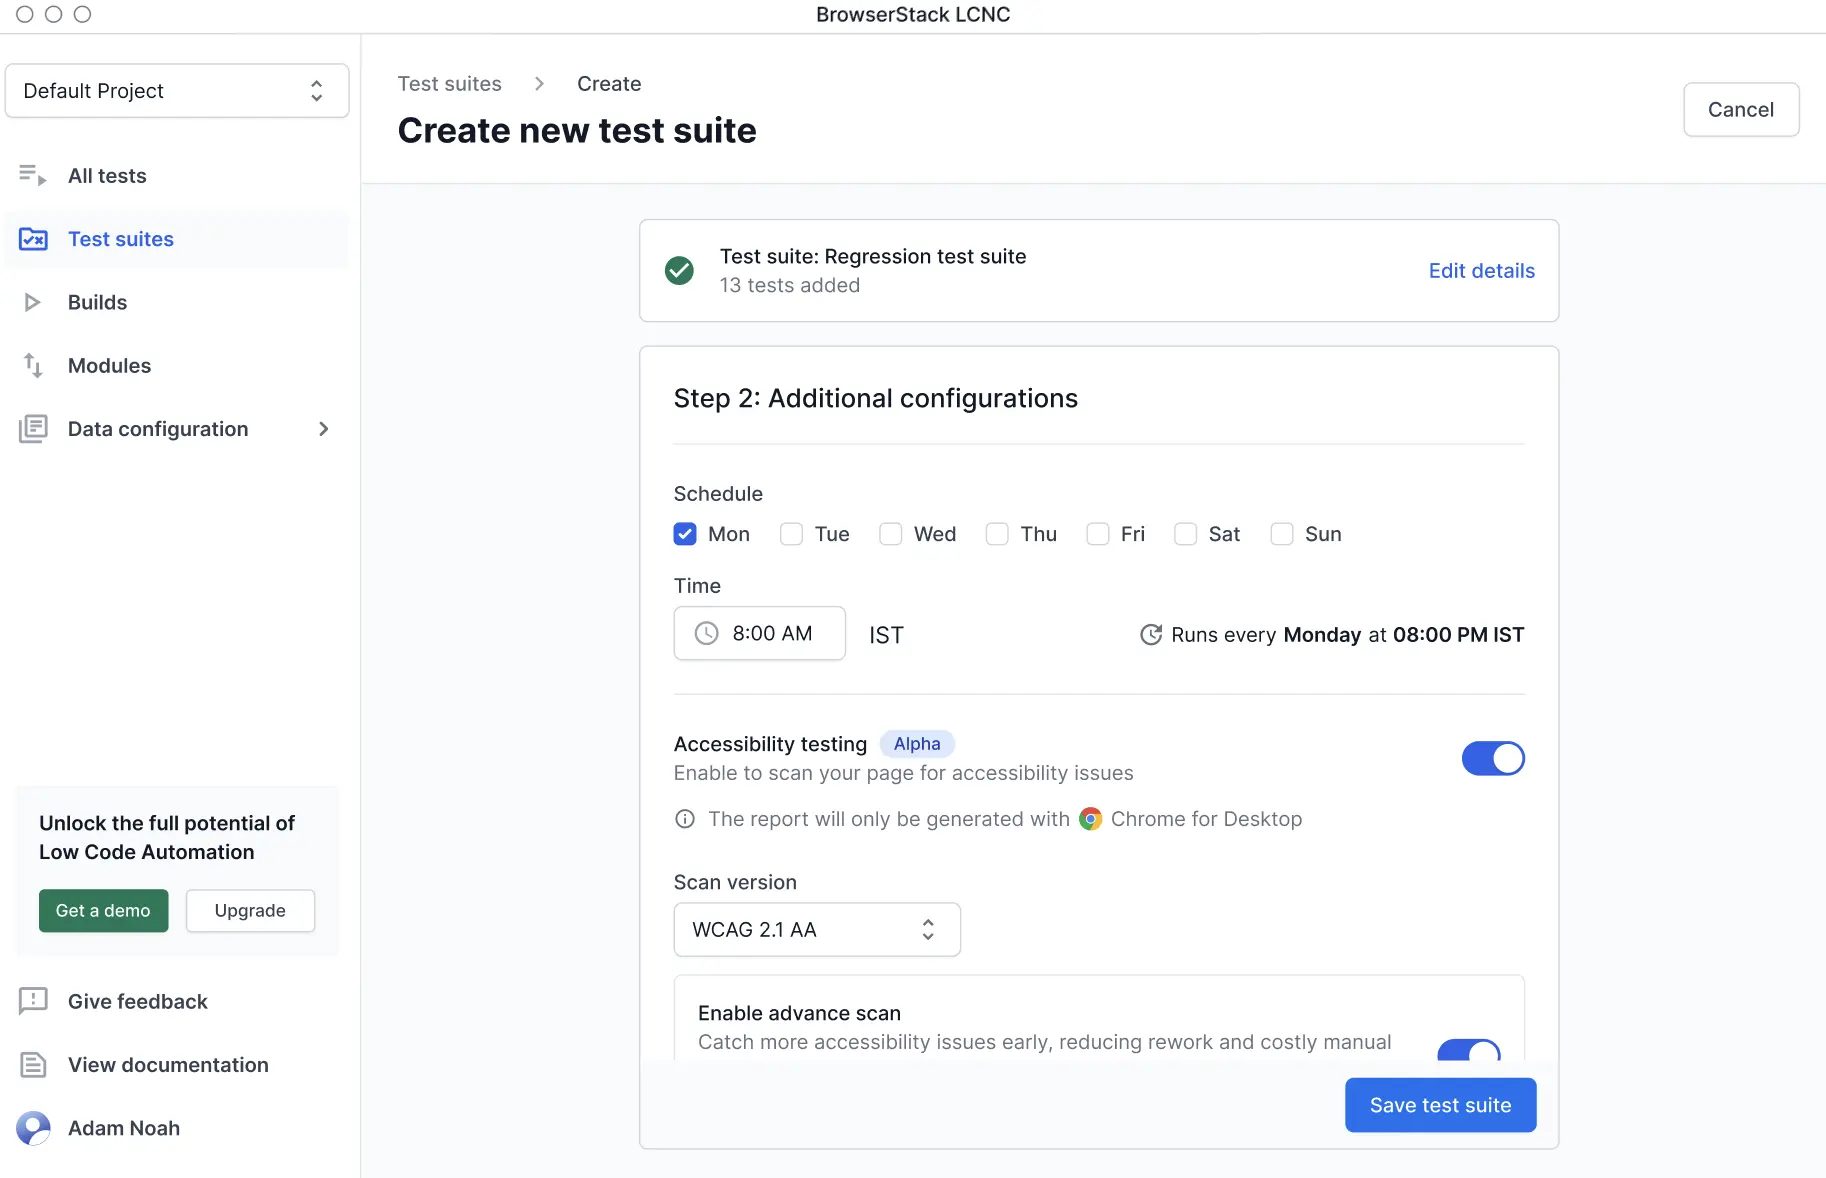
- Configure the following settings:
- Scan version: Select the Web Content Accessibility Guidelines (WCAG) version. Identifies barriers that stop users from accessing content, like missing alt text for images. We recommend using WCAG 2.1 AA.
- Enable advance scan: Turn this on to identify critical accessibility issues that basic scans can miss. For example, focus visibility, text resizing, keyboard navigation, the use of images of text, and many more.
- Include Potential issues: Turn this on to flag possible problems that need a manual check. These may not be violations but still need attention. Decide if items marked Potential issue are valid. When you make a decision, you can also choose to save it for future reports.
-
Include Best Practice issues: Turn this on to find non-violation issues that can improve the user experience. These aren’t direct violations of accessibility guidelines. However, resolving them can significantly improve the overall user experience.
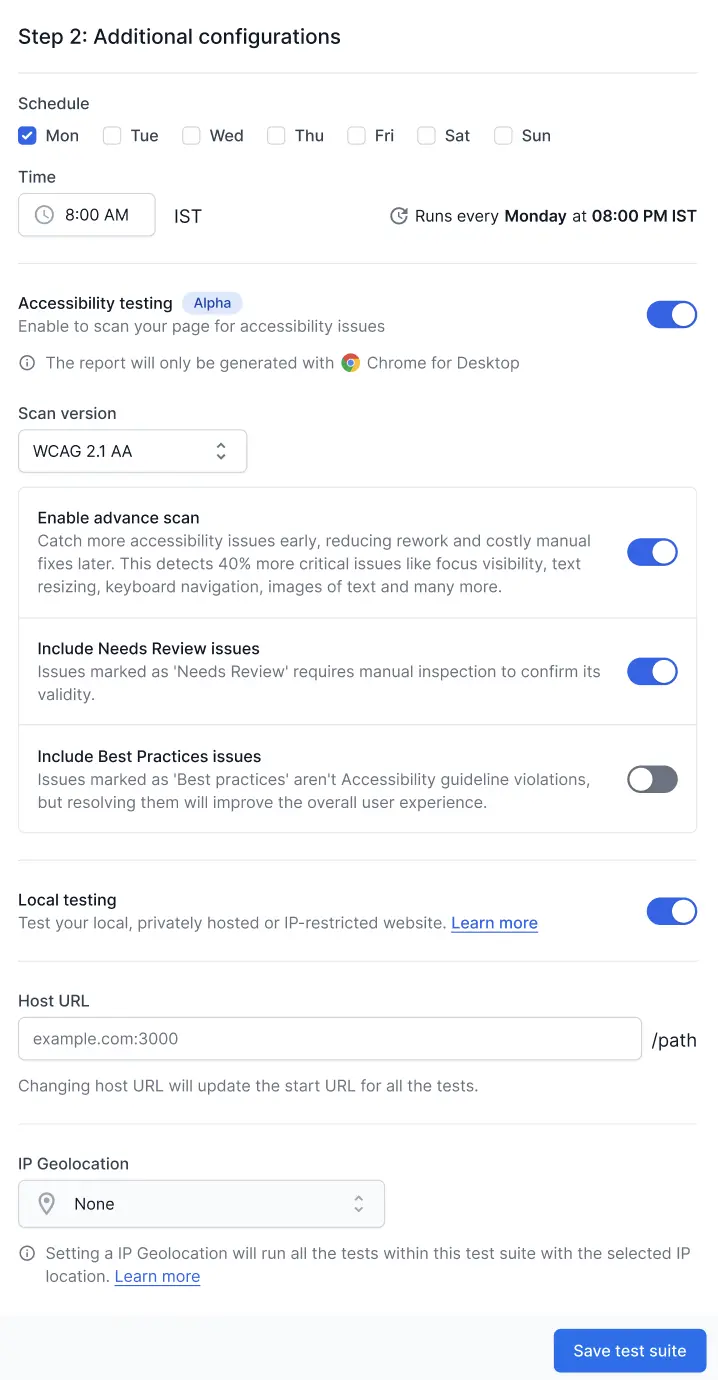
- Click Save test suite.
Run a partial page scan for accessibility tests
A partial page scan allows you to scan specific components or sections of a webpage for accessibility violations instead of scanning the entire page. This is useful when you want to focus on testing a particular feature, widget, or dynamic content area without running a full page scan.
Prerequisite
Accessibility testing must be enabled in your test suite configuration. For details, refer to Run Accessibility Tests in Low Code Automation.
Add a partial page scan
- By default, the system scans the entire page for accessibility issues.
- You can select a single component to test per run.
- The selected component will be scanned wherever it appears in the test.
To scan only specific components:
- While recording your test or editing an existing test, navigate to the page where you want to scan a specific component.
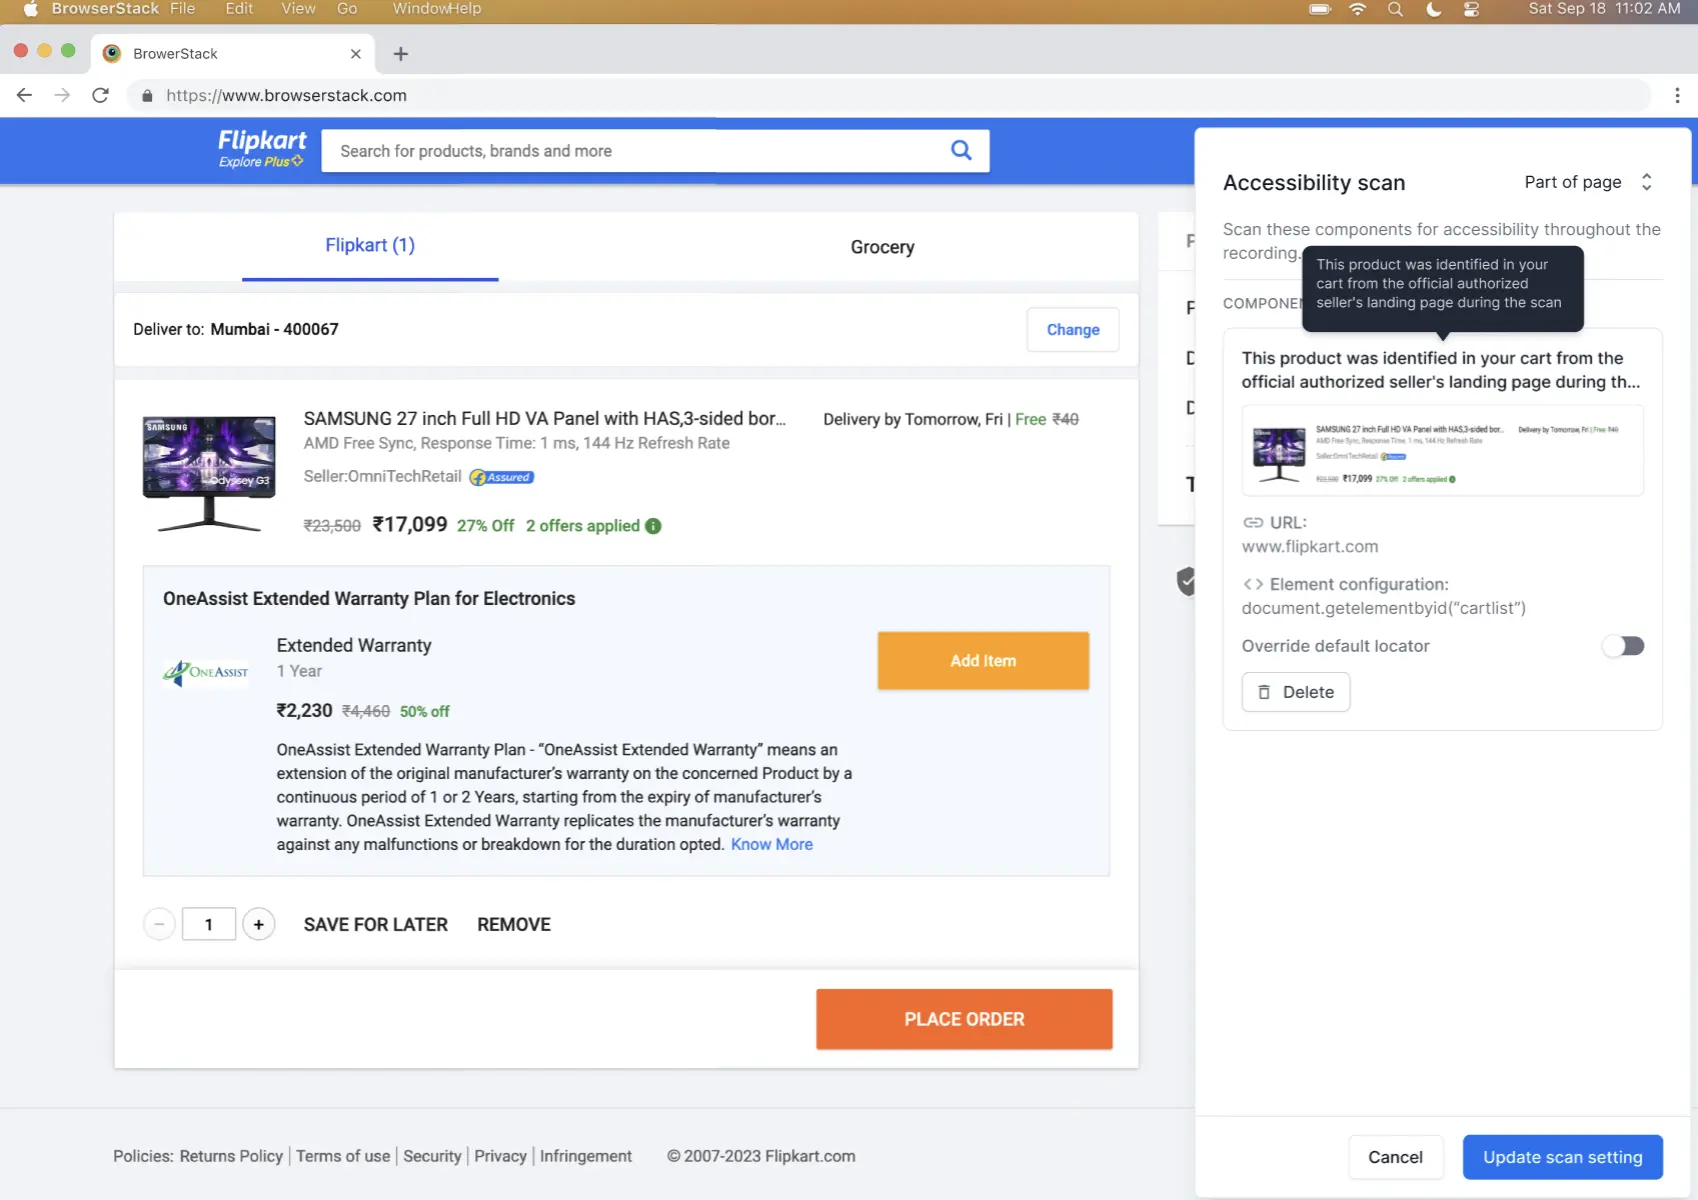
- In the test recorder panel, click the Accessibility scan for part of page option from the actions menu.
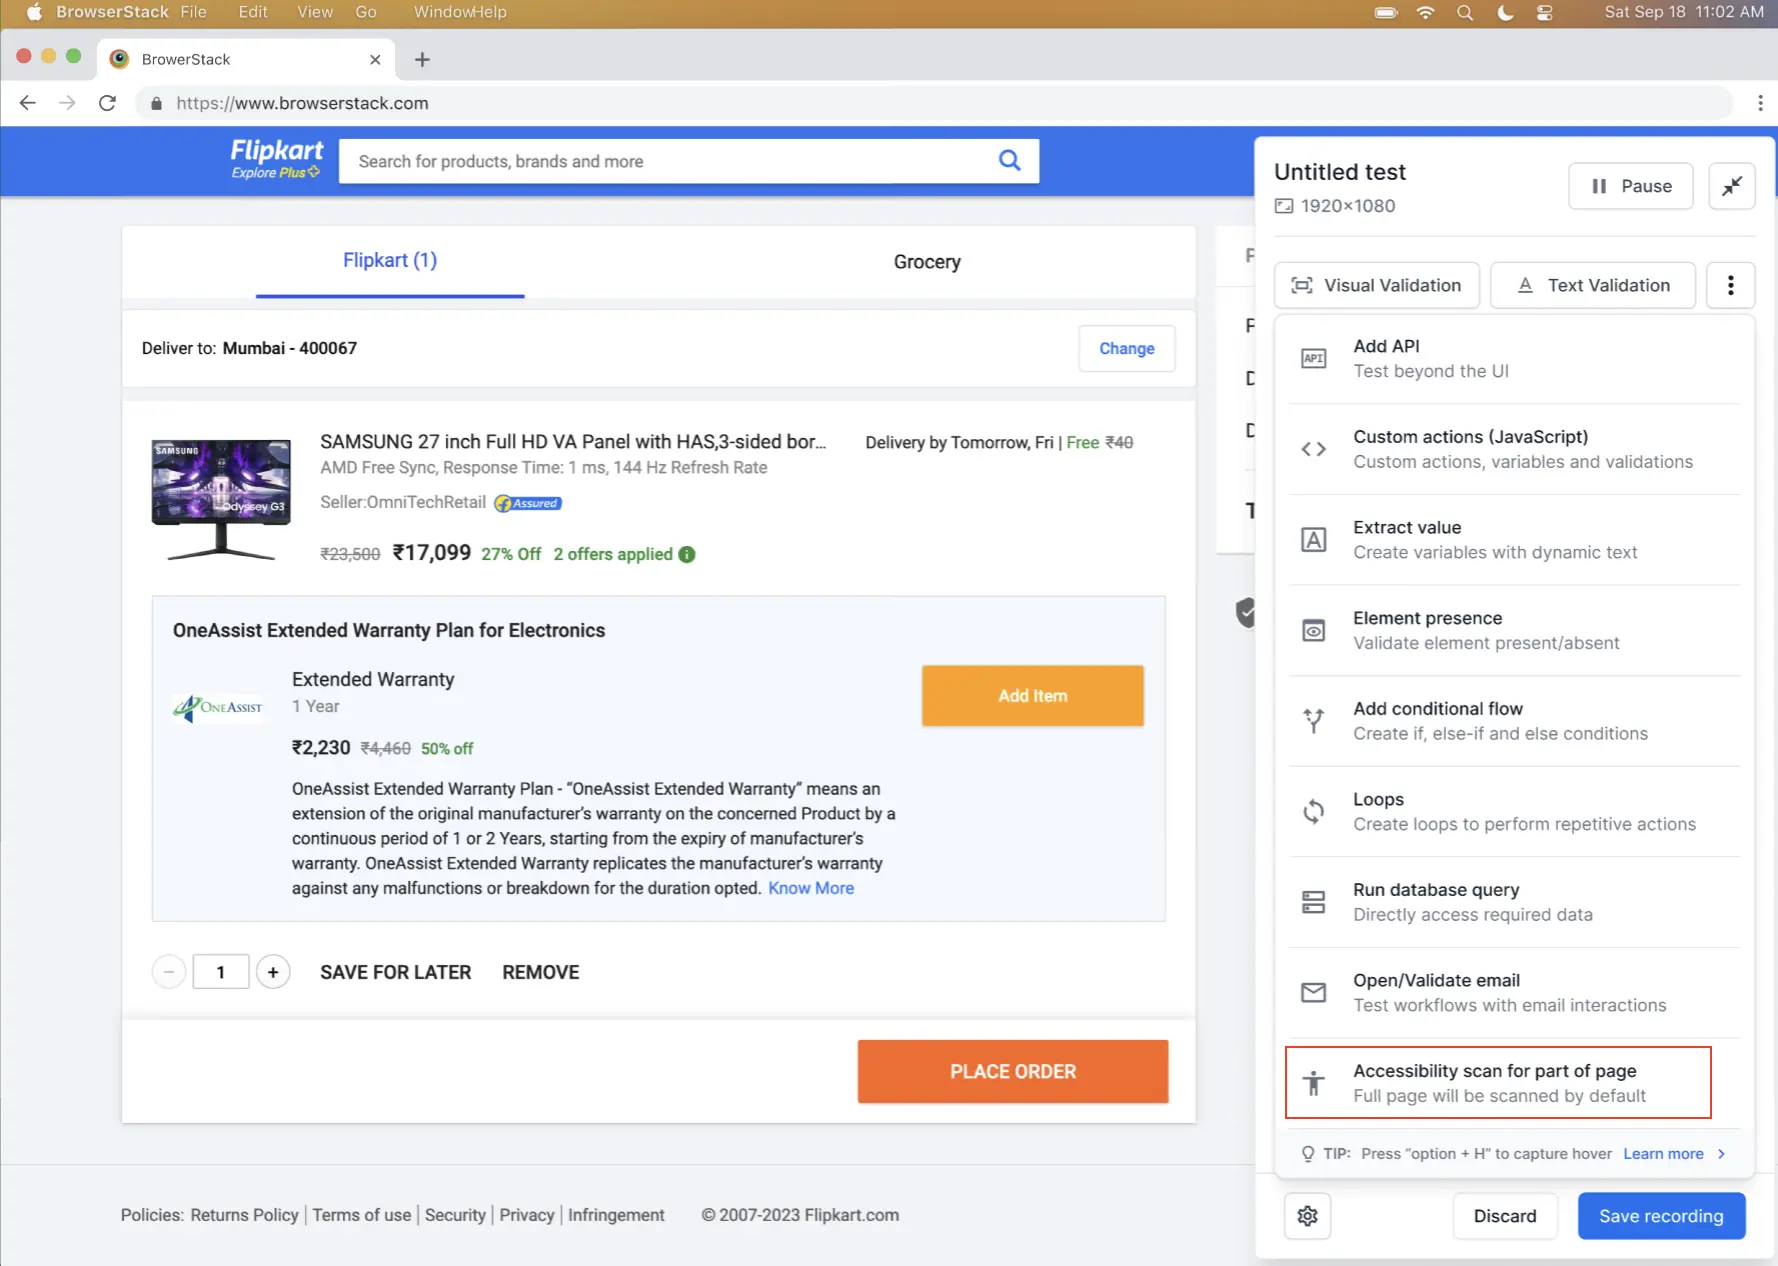
- A confirmation dialog appears. Click Continue to proceed.
- Click on the component or section of the page you want to scan. The selected element is highlighted with a border.
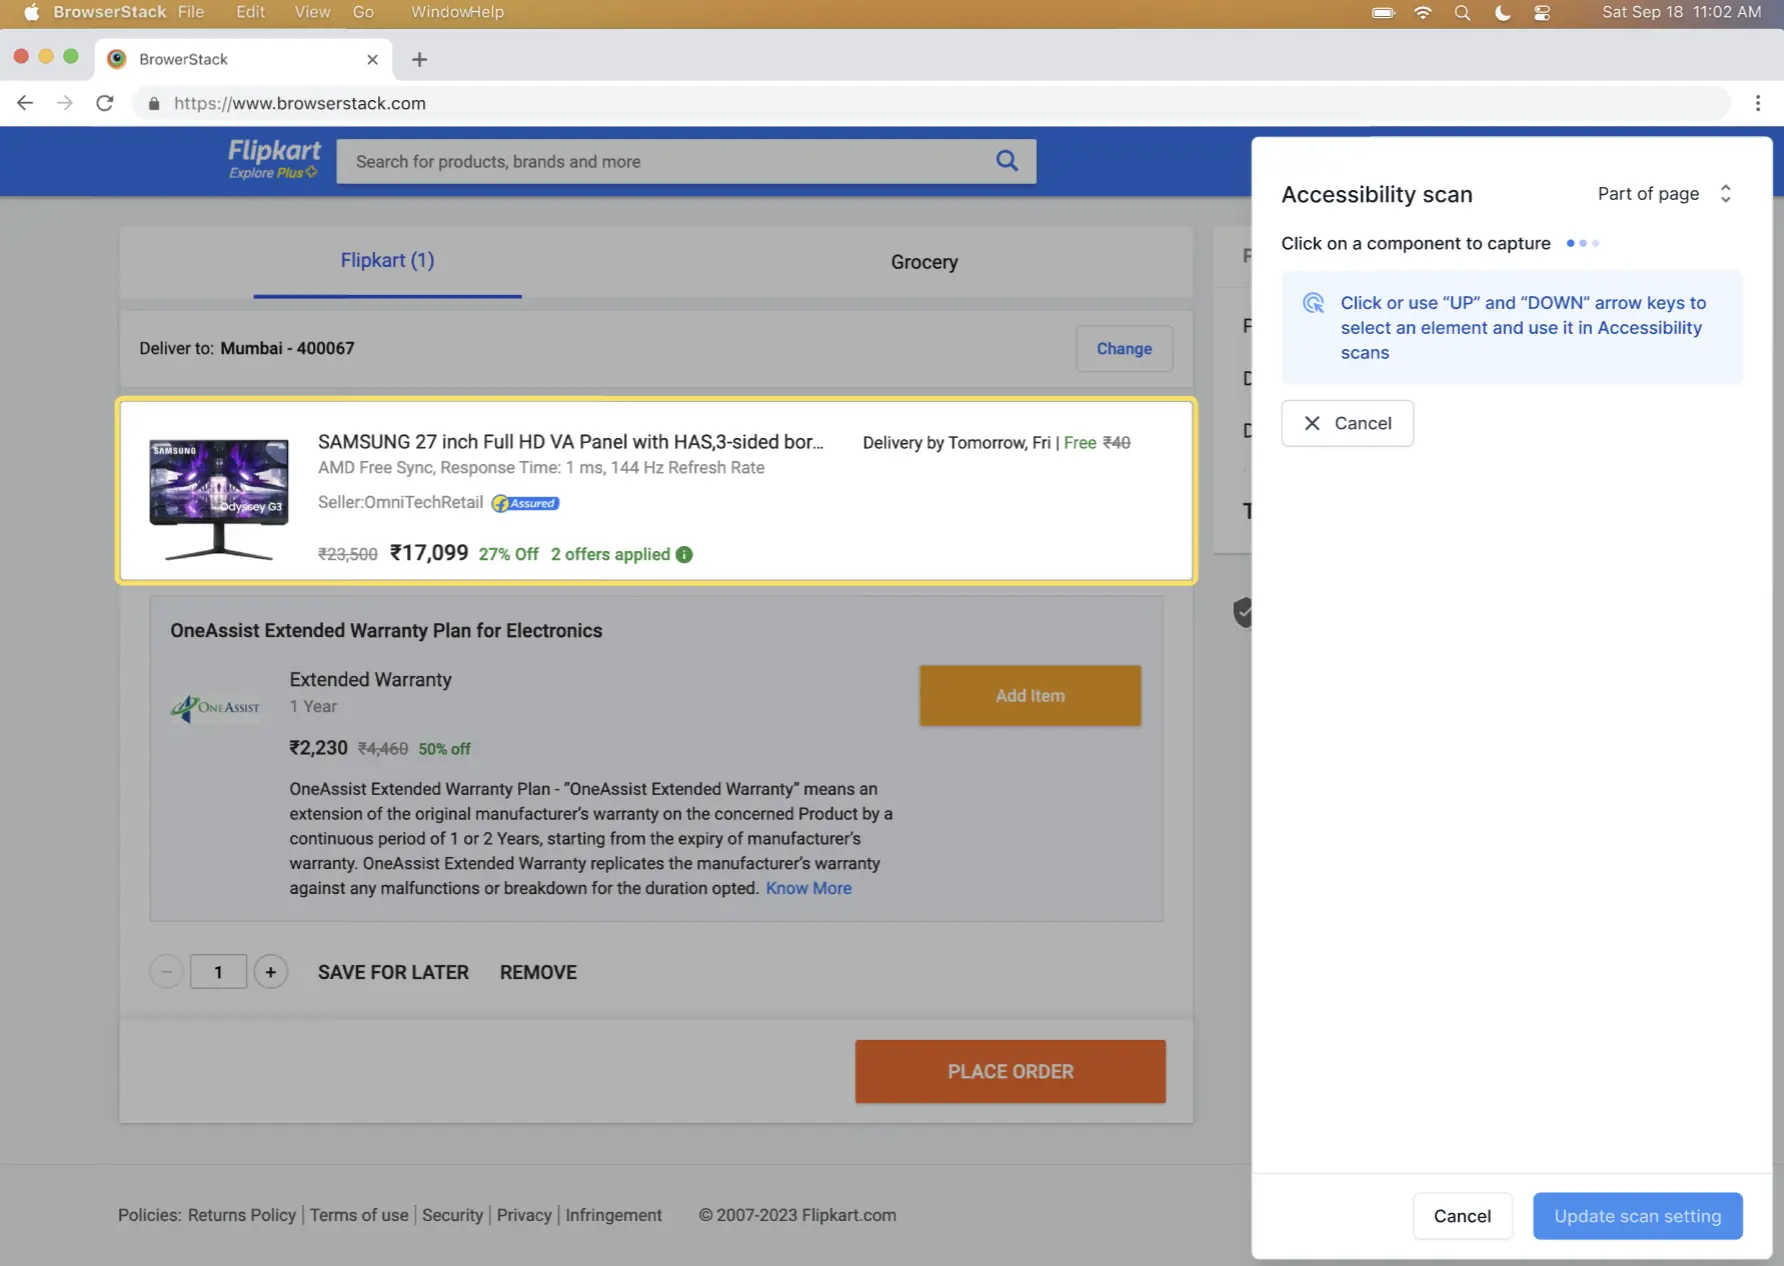
- The component is added to the accessibility scan configuration. You can view the selected component details including the URL and element locator.
Delete a component from partial page scan
- On the recorder panel, locate the component you want to remove.
- Click the Delete button next to the component. The component is removed from the partial page scan configuration.
View partial page scan settings in test configuration
After adding a partial page scan, you can view and manage the settings in the test configuration:
- Navigate to Test details > Accessibility testing in the test configuration panel.
- Select Part of page scan to view the components configured for partial scanning.

You can review the selected components and their locators in this section. Each test run will scan only these specified components for accessibility violations.
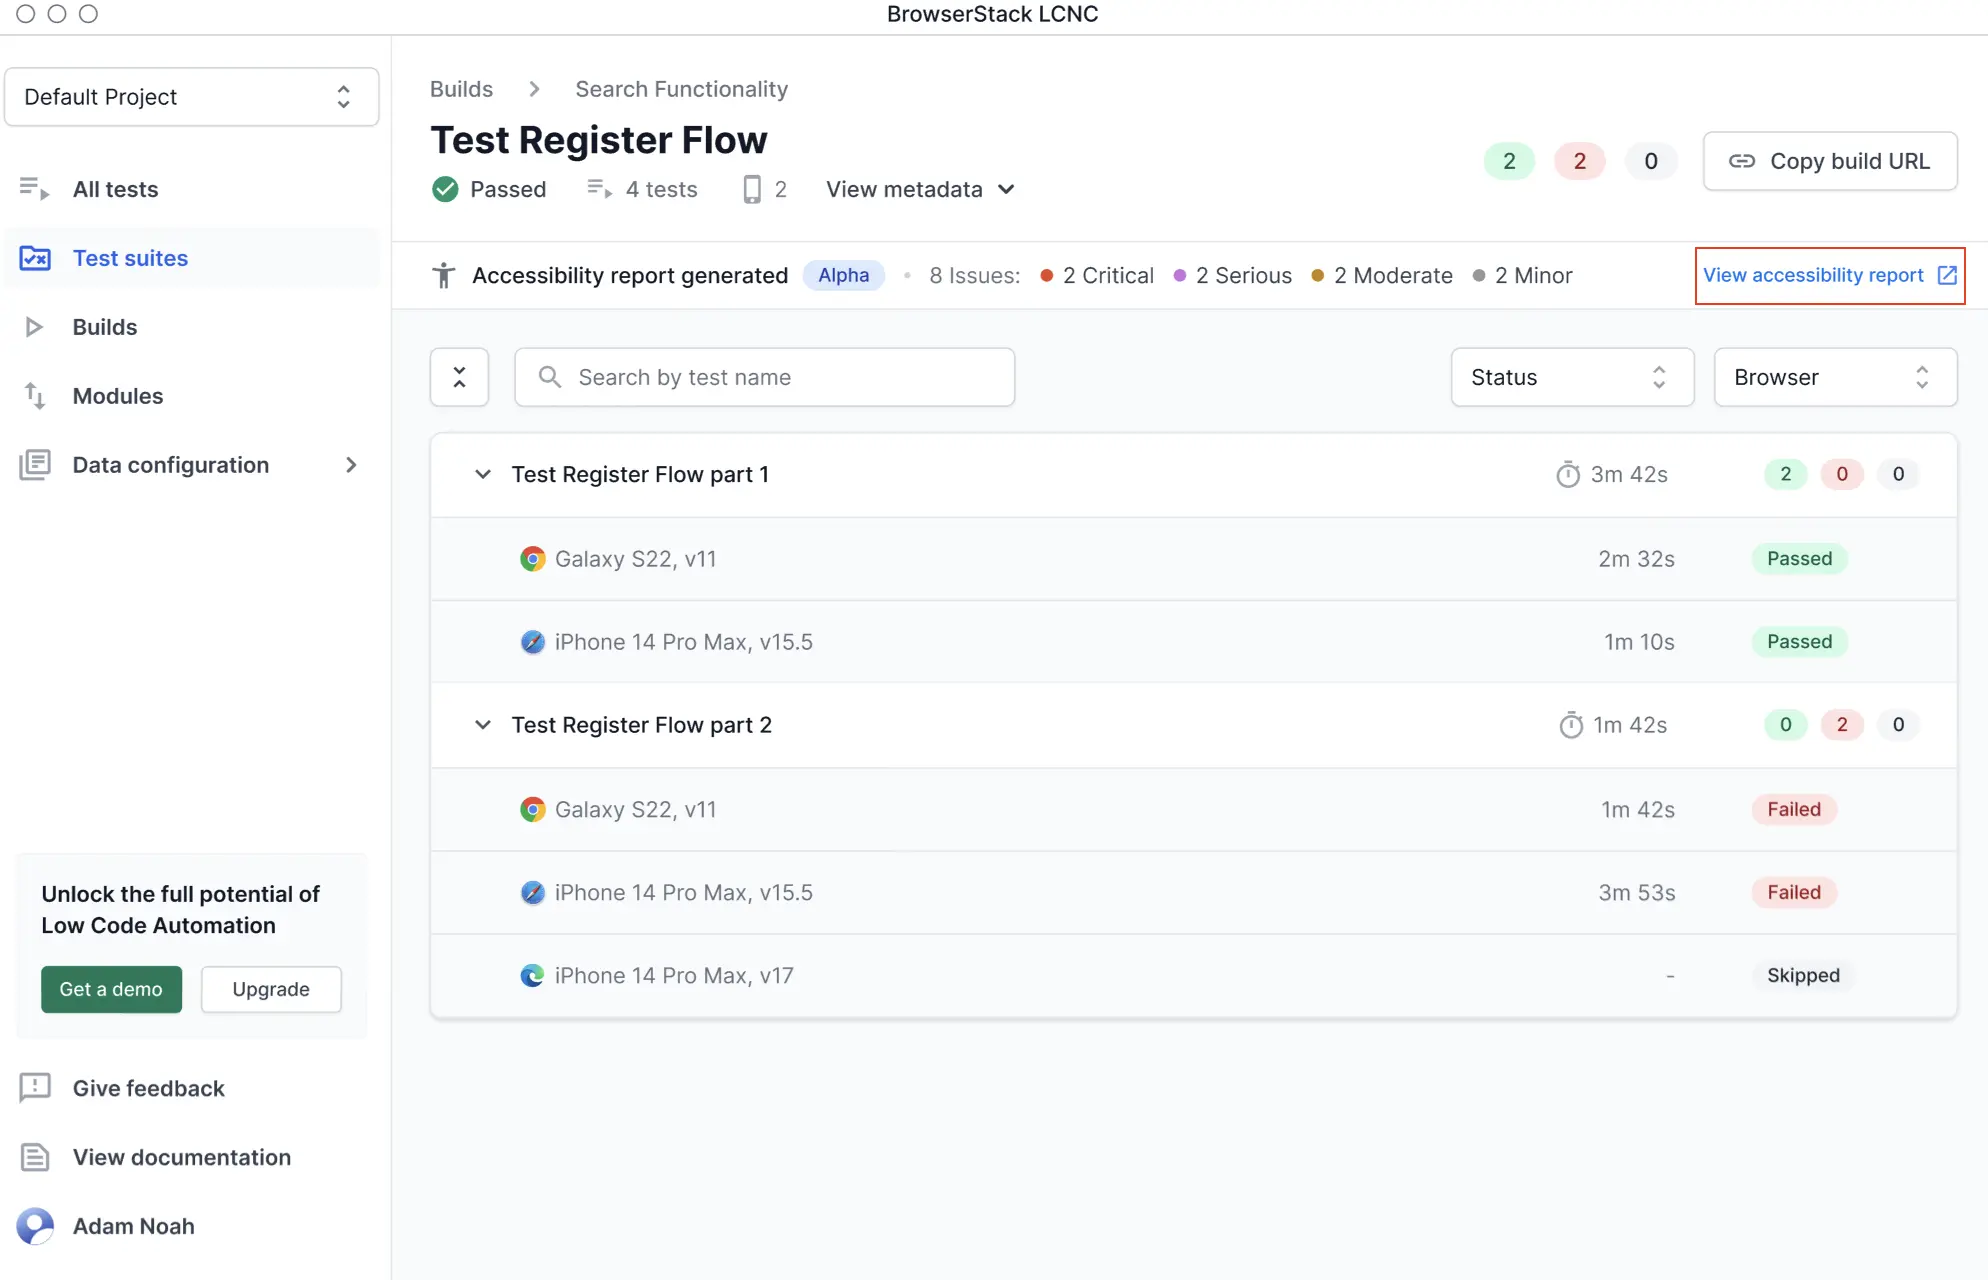
View accessibility report
After creating your test suite, run your build. The accessibility report is automatically generated. Click the View accessibility report link to view a more comprehensive report on the Accessibility dashboard.
We're sorry to hear that. Please share your feedback so we can do better
Contact our Support team for immediate help while we work on improving our docs.
We're continuously improving our docs. We'd love to know what you liked
We're sorry to hear that. Please share your feedback so we can do better
Contact our Support team for immediate help while we work on improving our docs.
We're continuously improving our docs. We'd love to know what you liked
Thank you for your valuable feedback!