Visual testing in Low Code Automation
Learn how to enable and use visual testing in Low Code Automation (LCA) to improve UI reliability and catch visual regressions.
Low Code Automation (LCA) supports visual testing through integration with Percy. This integration helps you automatically detect visual changes and regressions in your application’s user interface.
Visual testing uses Percy to compare full page screenshots of your application’s UI against a baseline. You can use visual testing to:
- Detect unintended visual changes before anyone sees them.
- Ensure your UI looks consistent across browsers and devices.
- Speed up releases by automating visual checks.
Low Code Automation (LCA) integrates with Percy to capture and analyze UI snapshots, helping you maintain visual quality throughout your development workflow.
- Visual testing for Low Code Automation is currently in Beta.
- Visual testing is available only in the Low Code Automation Ultimate plan. For more details, contact us.
Enable visual testing in Low Code Automation
Visual testing is currently unavailable for local testing and private/internal URLs.
You can enable visual testing in Low Code Automation (LCA) in two ways:
-
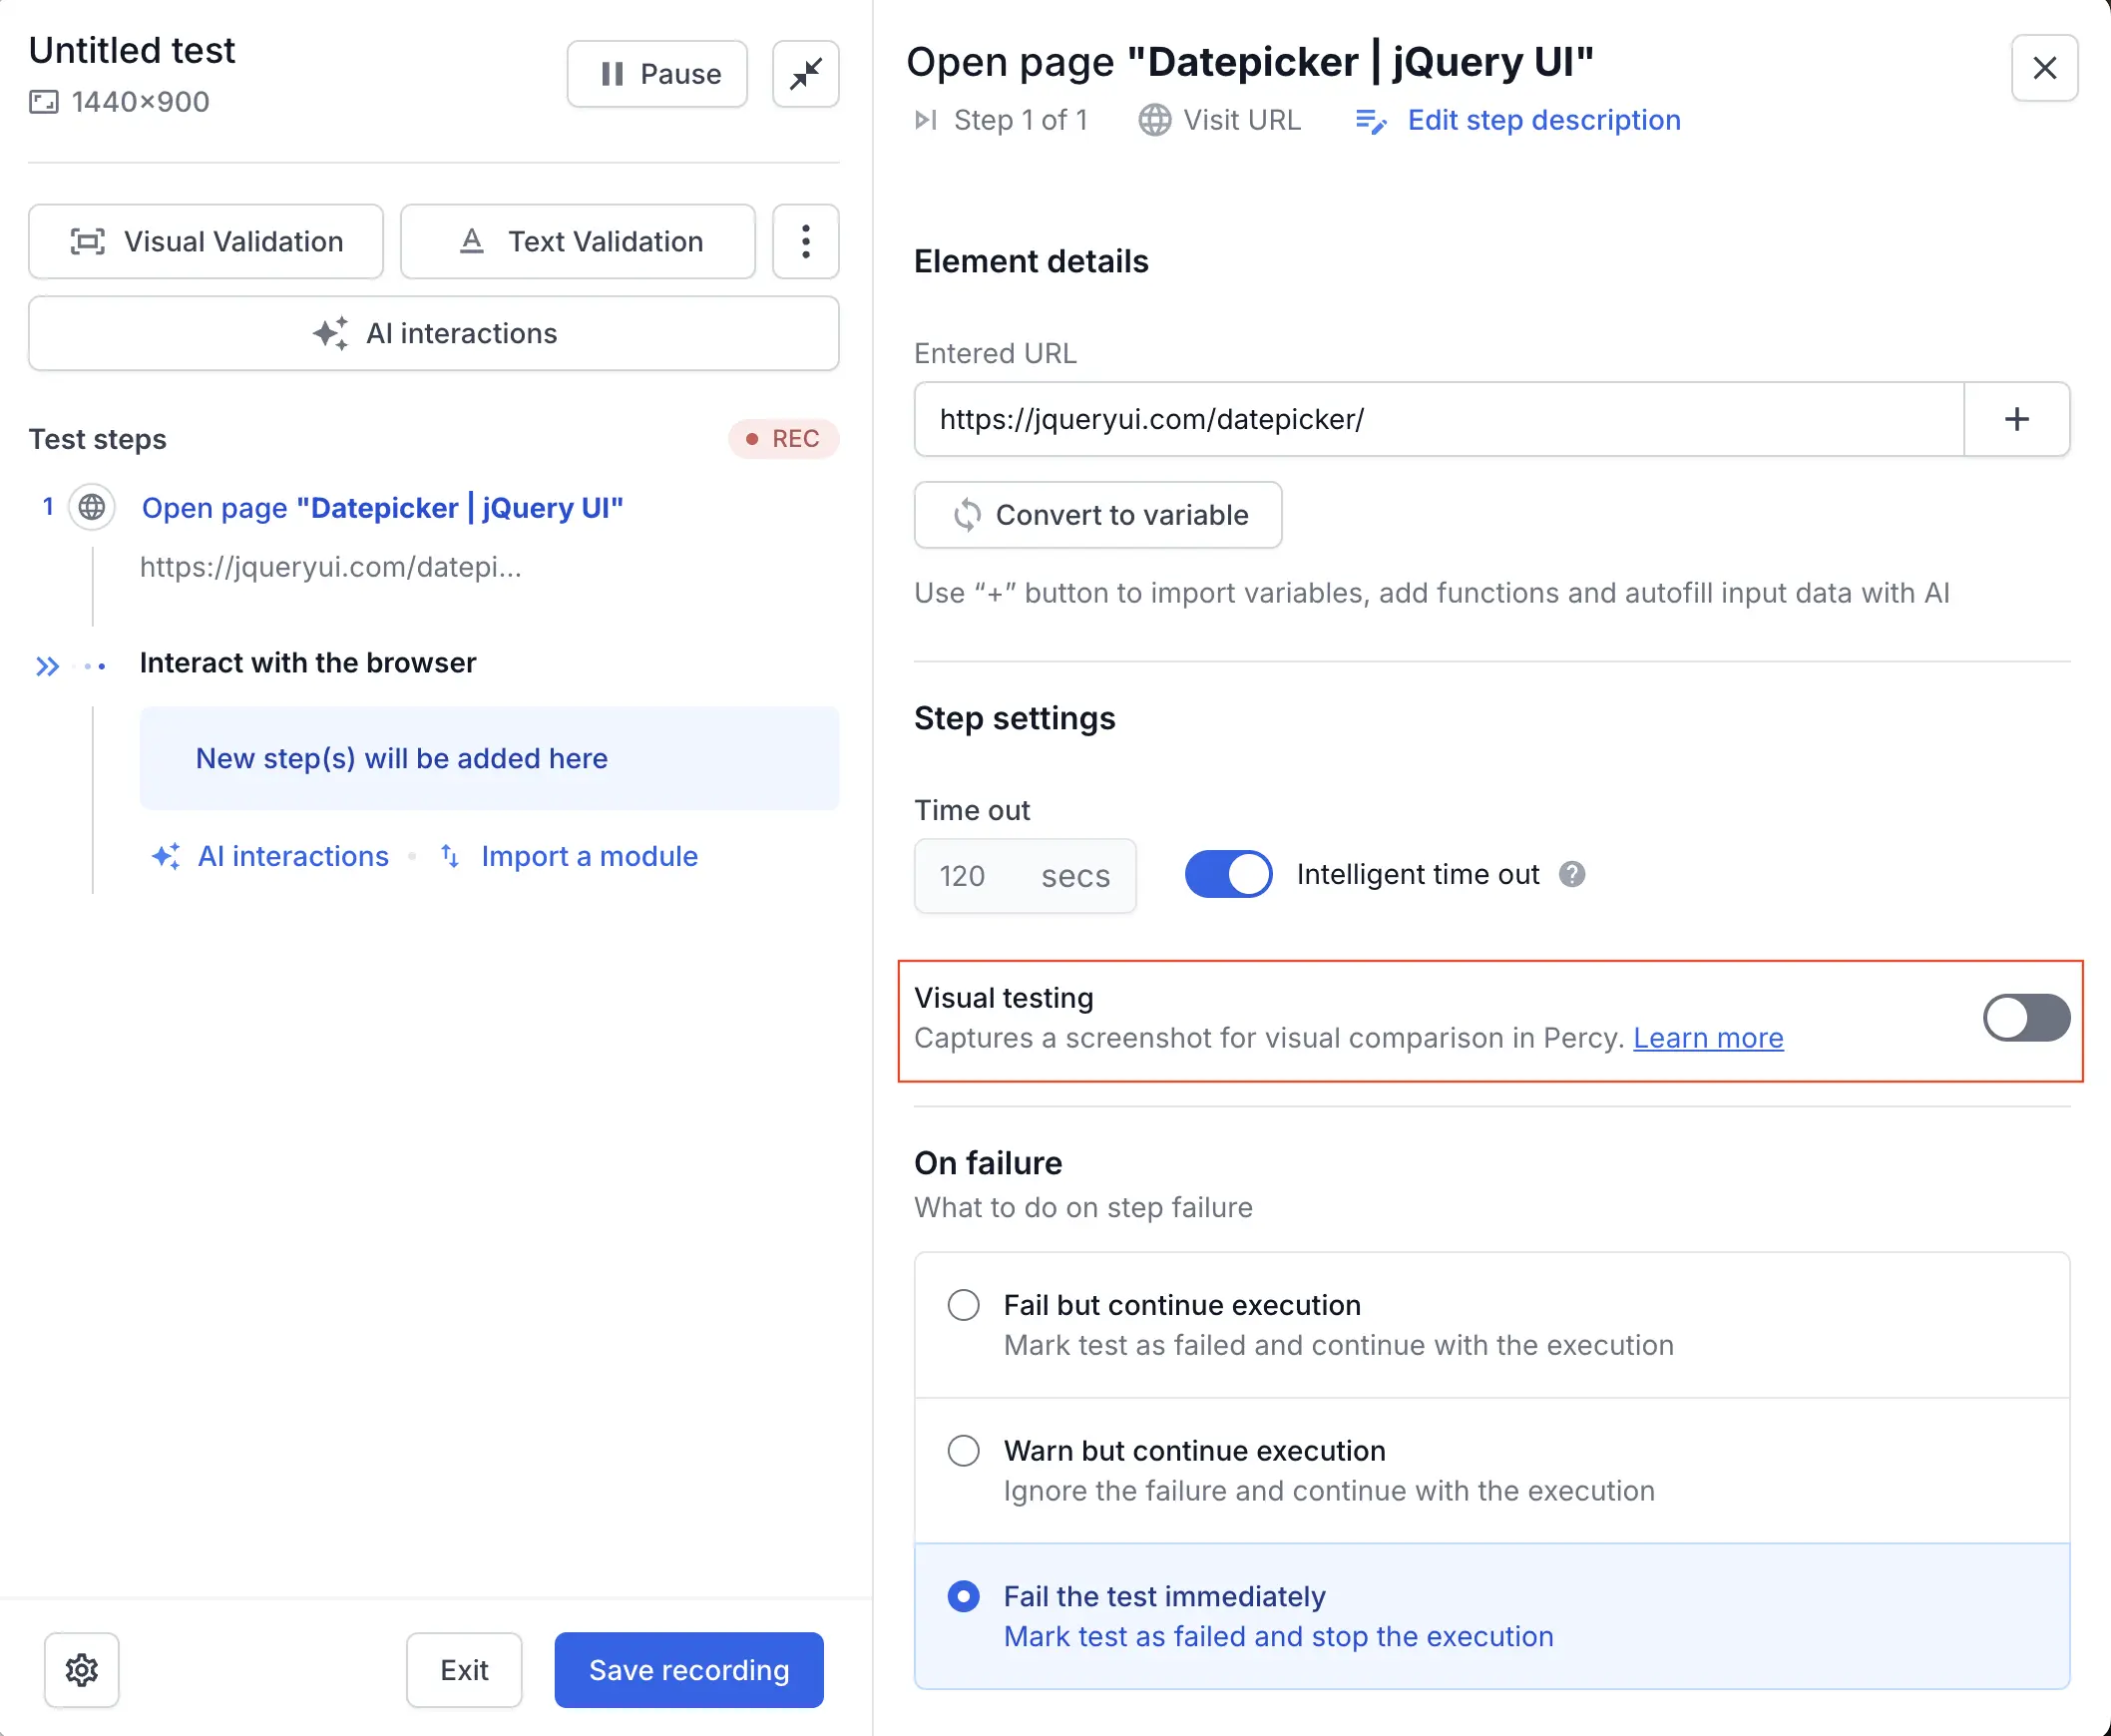
On the recorder: Click the step, and turn on the Visual testing toggle in Step Details section. The screenshot is captured after the successful execution of the test step where you enabled visual testing.
-
On the test editor page: Enable the Visual testing option on the edit test page.
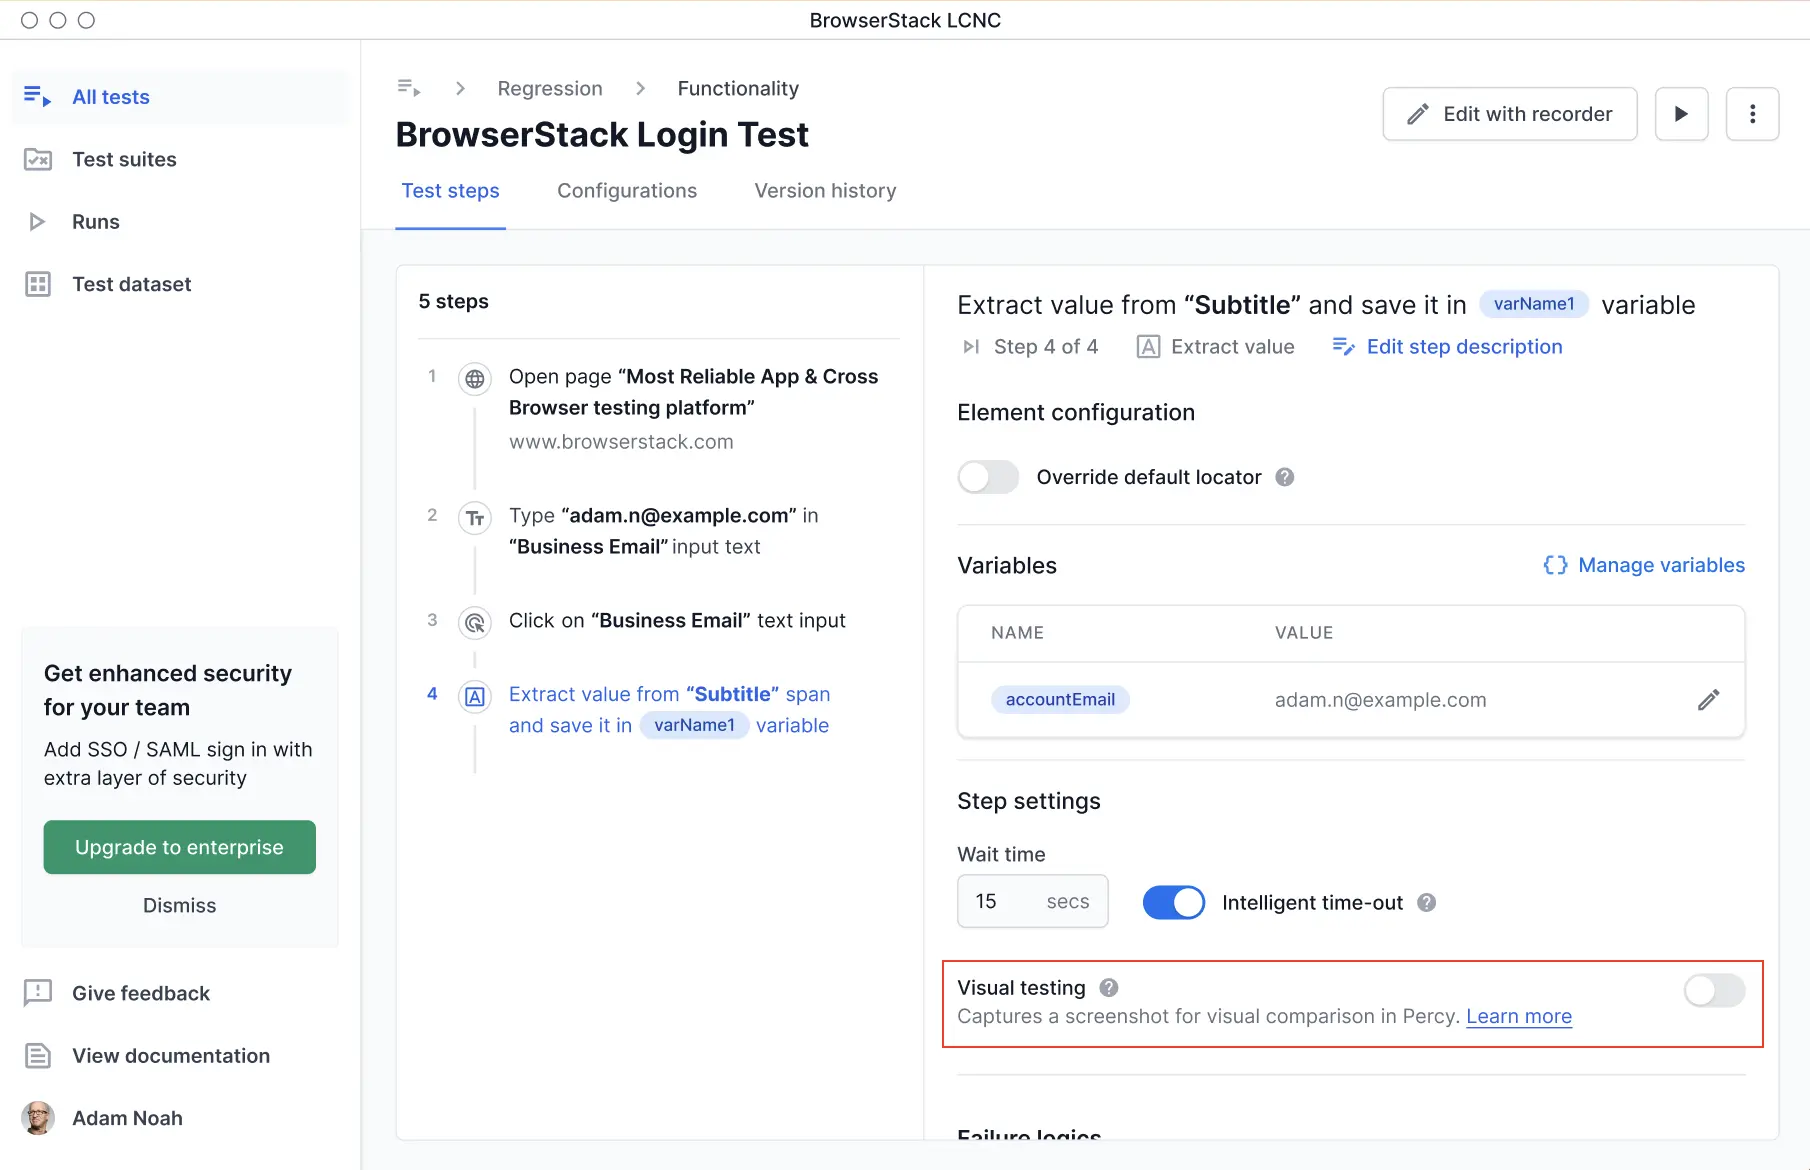
This captures screenshots for visual comparison in Percy.
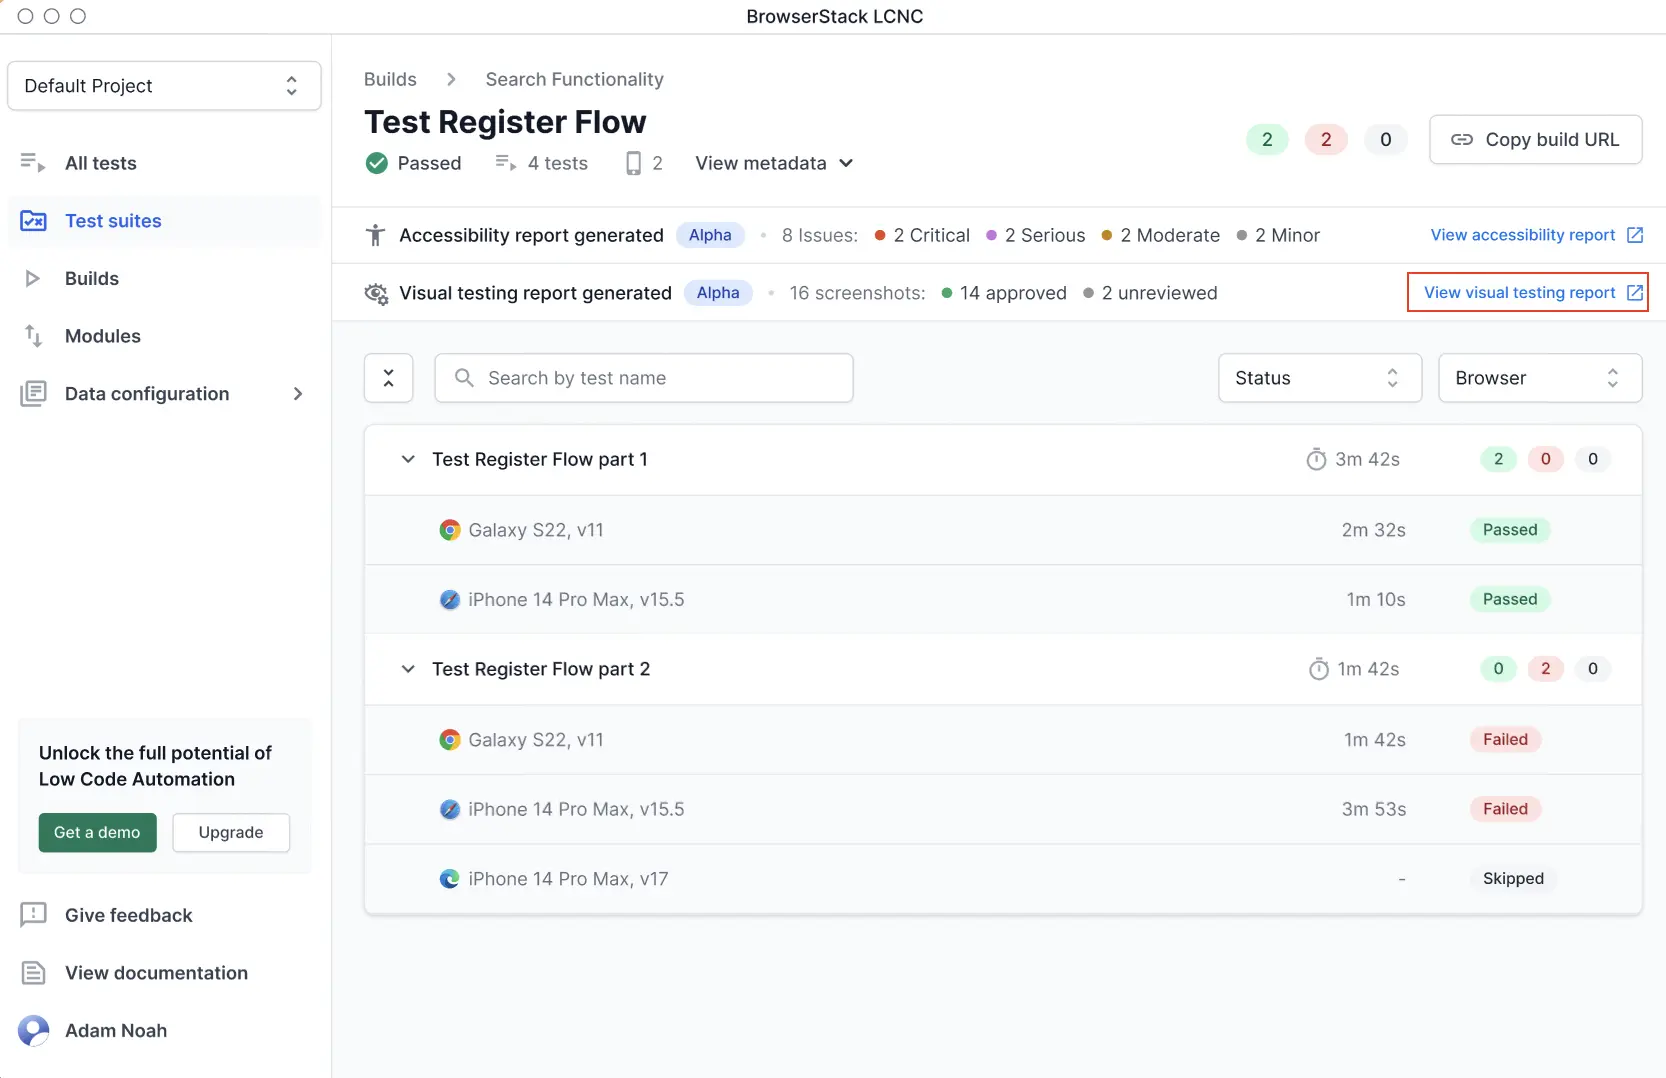
After the tests finish running, the test execution page displays a Visual testing report link. Click this link to view detailed visual test results in Percy. You can review screenshots, approve changes, and identify visual regressions before they reach users. You will also receive an email notification with a link to the visual testing report once the test run is complete..
The initial build serves as the baseline for visual testing. The visual comparison happens across builds, so each new build is compared against the baseline. After you approve UI changes in later builds, you need to update the baseline. You can update the baseline directly in Percy.
You can also set a Figma design as the baseline for a test suite. For details, see Integrate with Figma.
- You can run visual tests only during cloud executions. Local runs and replays do not support visual testing.
- If you rerun an LCA build with visual testing steps, only the functional tests run again. A new Percy build or report is not generated.
Here is an example Percy report generated during visual testing in Low Code Automation:

Best practices
- Use clear names for visual test steps.
- Review differences promptly to maintain UI quality.
- Visual testing does not apply to non-UI test steps, such as API steps or database queries.
- Visual testing for mobile browser test suites is device-agnostic. If you select multiple devices within the same browser family (for example, three different iPhone models), the system generates a single visual testing report for that browser.
Comparison of visual testing and visual validation
Low Code Automation provides both visual testing and visual validation features. Let’s understand the key differences between these two approaches:
| Aspect | Visual validation | Visual testing |
|---|---|---|
| Use case | Functional step/inline assertion | Non-functional style and layout testing |
| When to use? | Use when you need to verify that a specific UI element appears as expected during a test step. | Use when you want to detect unintended visual changes across the entire UI, such as layout shifts, color changes, or missing images. |
| Failure behavior | The test fails immediately if the visual assertion fails. | Visual testing does not impact the test status. All screenshots are reviewed separately. |
| Capture scope | Screenshot of a single, selected element | Full-page screenshot of the current viewport, including: • Styles (color differences, fonts) • Broken images • Layout mismatches |
We're sorry to hear that. Please share your feedback so we can do better
Contact our Support team for immediate help while we work on improving our docs.
We're continuously improving our docs. We'd love to know what you liked
We're sorry to hear that. Please share your feedback so we can do better
Contact our Support team for immediate help while we work on improving our docs.
We're continuously improving our docs. We'd love to know what you liked
Thank you for your valuable feedback!