
 Join our Discord
Connect Figma to Test Companion
Connect Figma to Test Companion to generate UI/UX test cases and automation scripts directly from your designs.
Your Figma designs already contain the screens, layouts, and interaction details you need to test. When you connect Figma to Test Companion, you can paste a Figma link in chat to give Test Companion the design context automatically. You no longer need to describe the design manually.
This helps you generate UI/UX test cases and automation scripts faster while staying inside your Test Companion.
After you connect Figma, you can:
- Generate test cases from any design by pasting a Figma link in chat and describing what to build.
- Turn design-driven scenarios into automation code by asking for scripts in your framework.
Test Companion can only read Figma files that your connected Figma account can access. Your Figma permissions still apply when Test Companion reads design context.
Prerequisites
Ensure you have the following:
- Test Companion is installed in your IDE and you are signed in.
- You have view access to the Figma file you want to use.
Connect your Figma account
You only need to complete this step once for your account.
- Navigate to the BrowserStack Integrations page.
- Locate the Figma integration, or search for it by name.
- On the Figma tile, click Connect and choose an authentication method:
- Connect with OAuth: Sign in to Figma and grant BrowserStack access. This is the recommended method.
- Continue with PAT: Provide a Figma Personal Access Token.
You can also start this flow from Test Companion. If you paste a Figma link before you connect, Test Companion shows the Link your Figma account to fetch details prompt. Click Connect now in the prompt to open the same BrowserStack Integrations page.
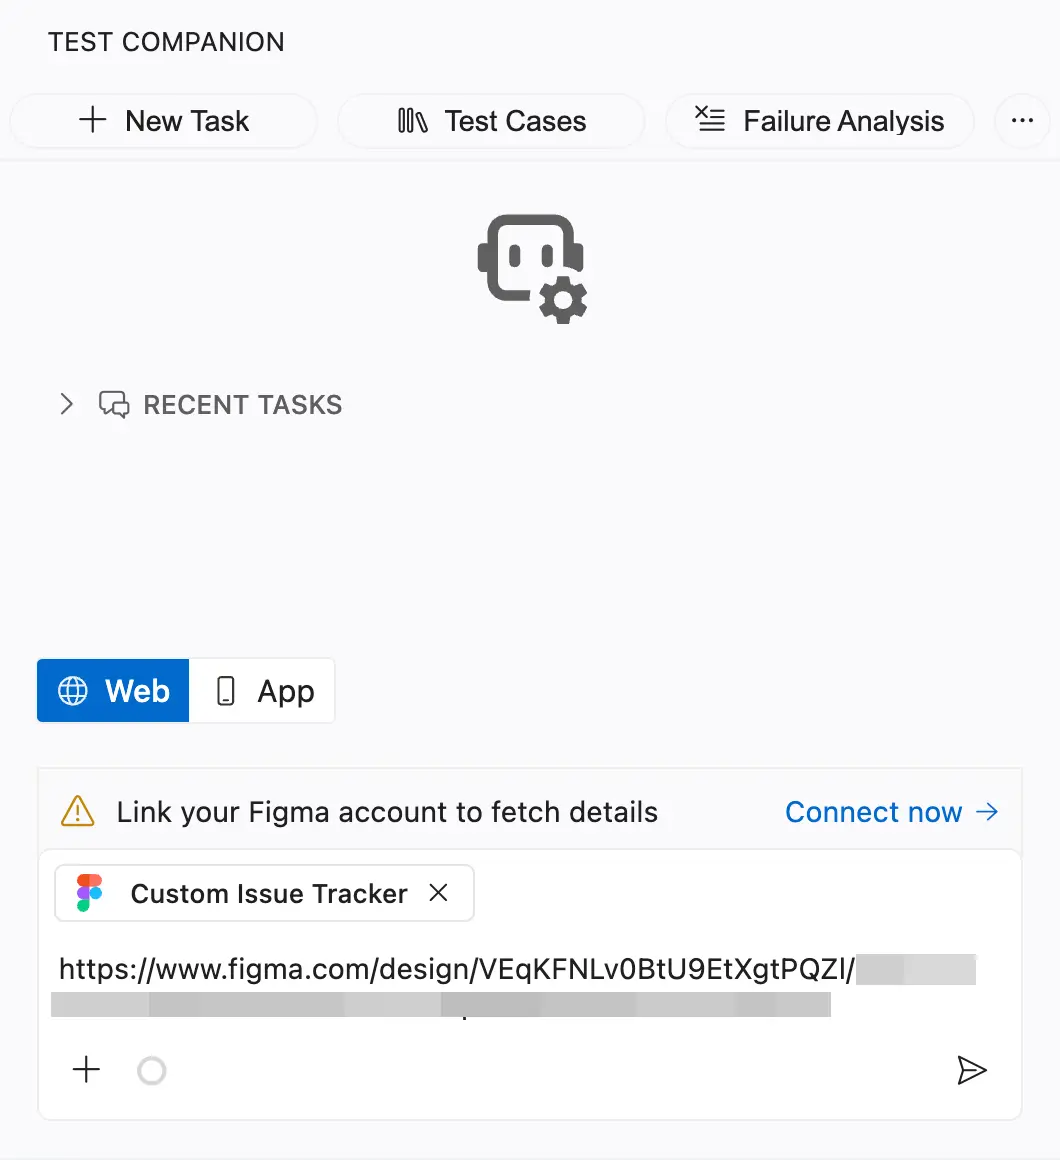
After you connect Figma, Test Companion can read design files that your Figma account can access.
Use Figma links in Test Companion chat
After you connect Figma, paste Figma links directly in the Test Companion chat. Test Companion reads the frames and sections from the linked design and uses them as context for your request.
Before it generates anything, Test Companion needs two things: what you want it to produce, and how much of the design to use. You can name the action in your message, or let Test Companion prompt you for it. Test Companion always asks you to confirm the scope.
Send a Figma link
- Open Test Companion in your IDE.
-
Paste one or more Figma links in the chat message.
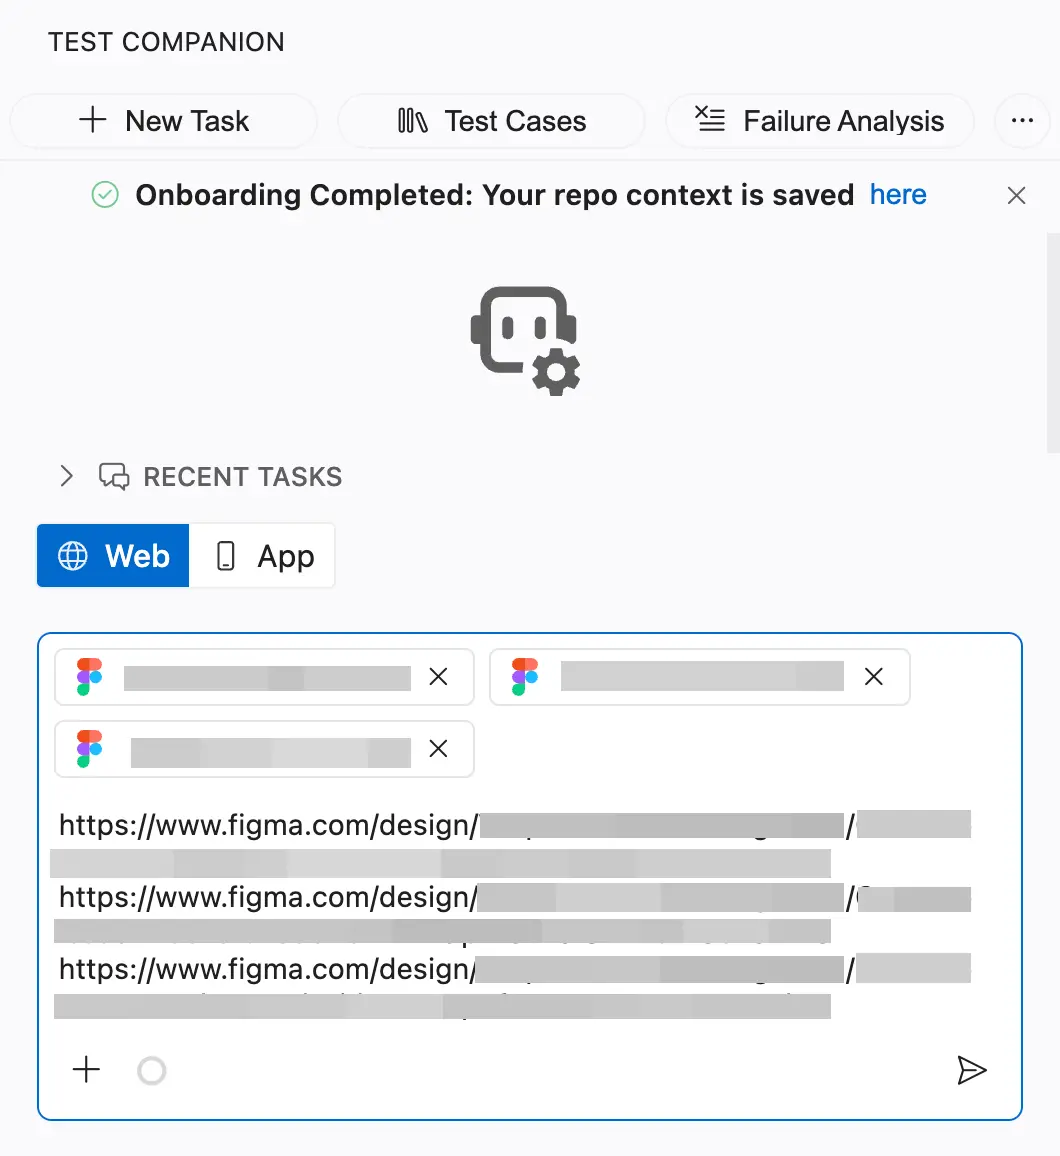
Each link appears as a chip. File, design, and prototype links are supported, with or without a specific frame selected.
- Optionally, enter an instruction that tells Test Companion what to do, such as
Generate test cases for this design. If you skip this, Test Companion asks you after you send. - Click Send message (➤).
Answer Test Companion’s questions
After you send the links, Test Companion asks up to two questions in order before it starts work:
- What to do: Test Companion asks this only when your message did not include an instruction. Choose Generate test cases from the design or Generate automated test scripts from the design. For anything else, type it in your next message.
- Scope: Test Companion always asks this. Choose The entire design or Let me pick specific frames / sections. Selecting Let me pick specific frames / sections opens the Select Figma frames and sections picker, where you search for the frames or sections you want and add them.
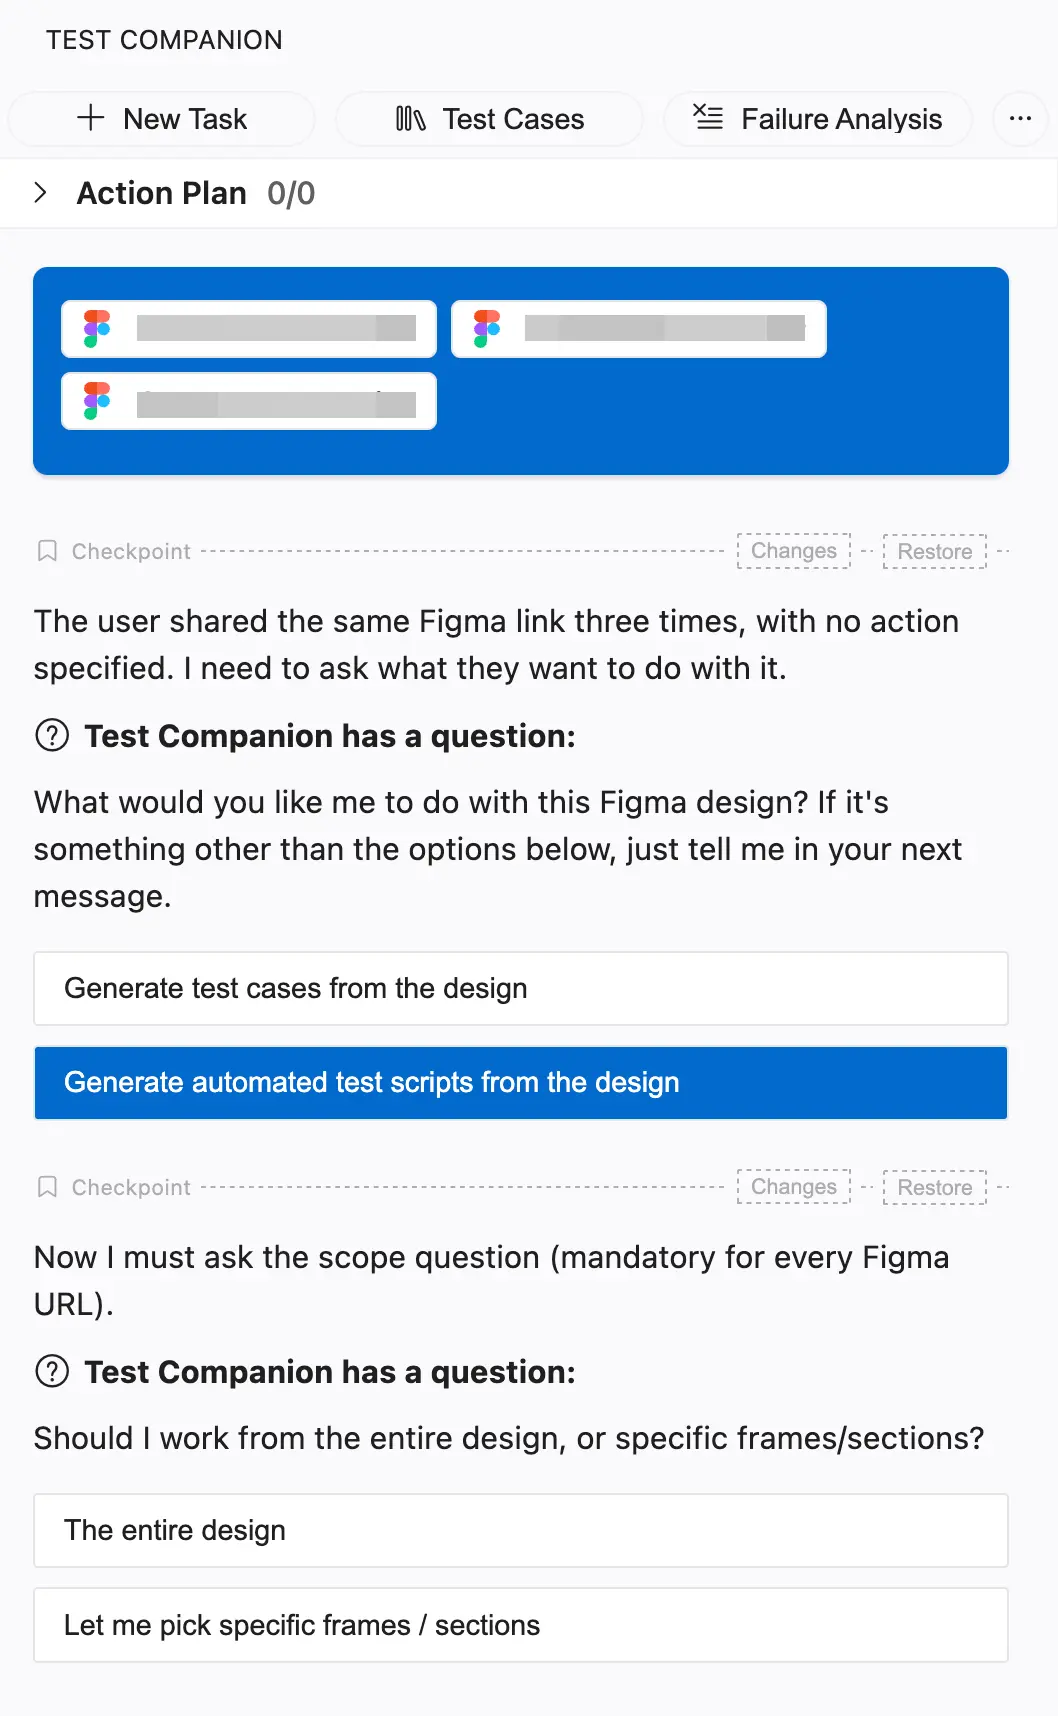
After you answer, Test Companion processes the design and generates the result. When you generate test cases, it opens the Test Cases view. In that view, you can review and edit the cases, automate them, and add them to a project.
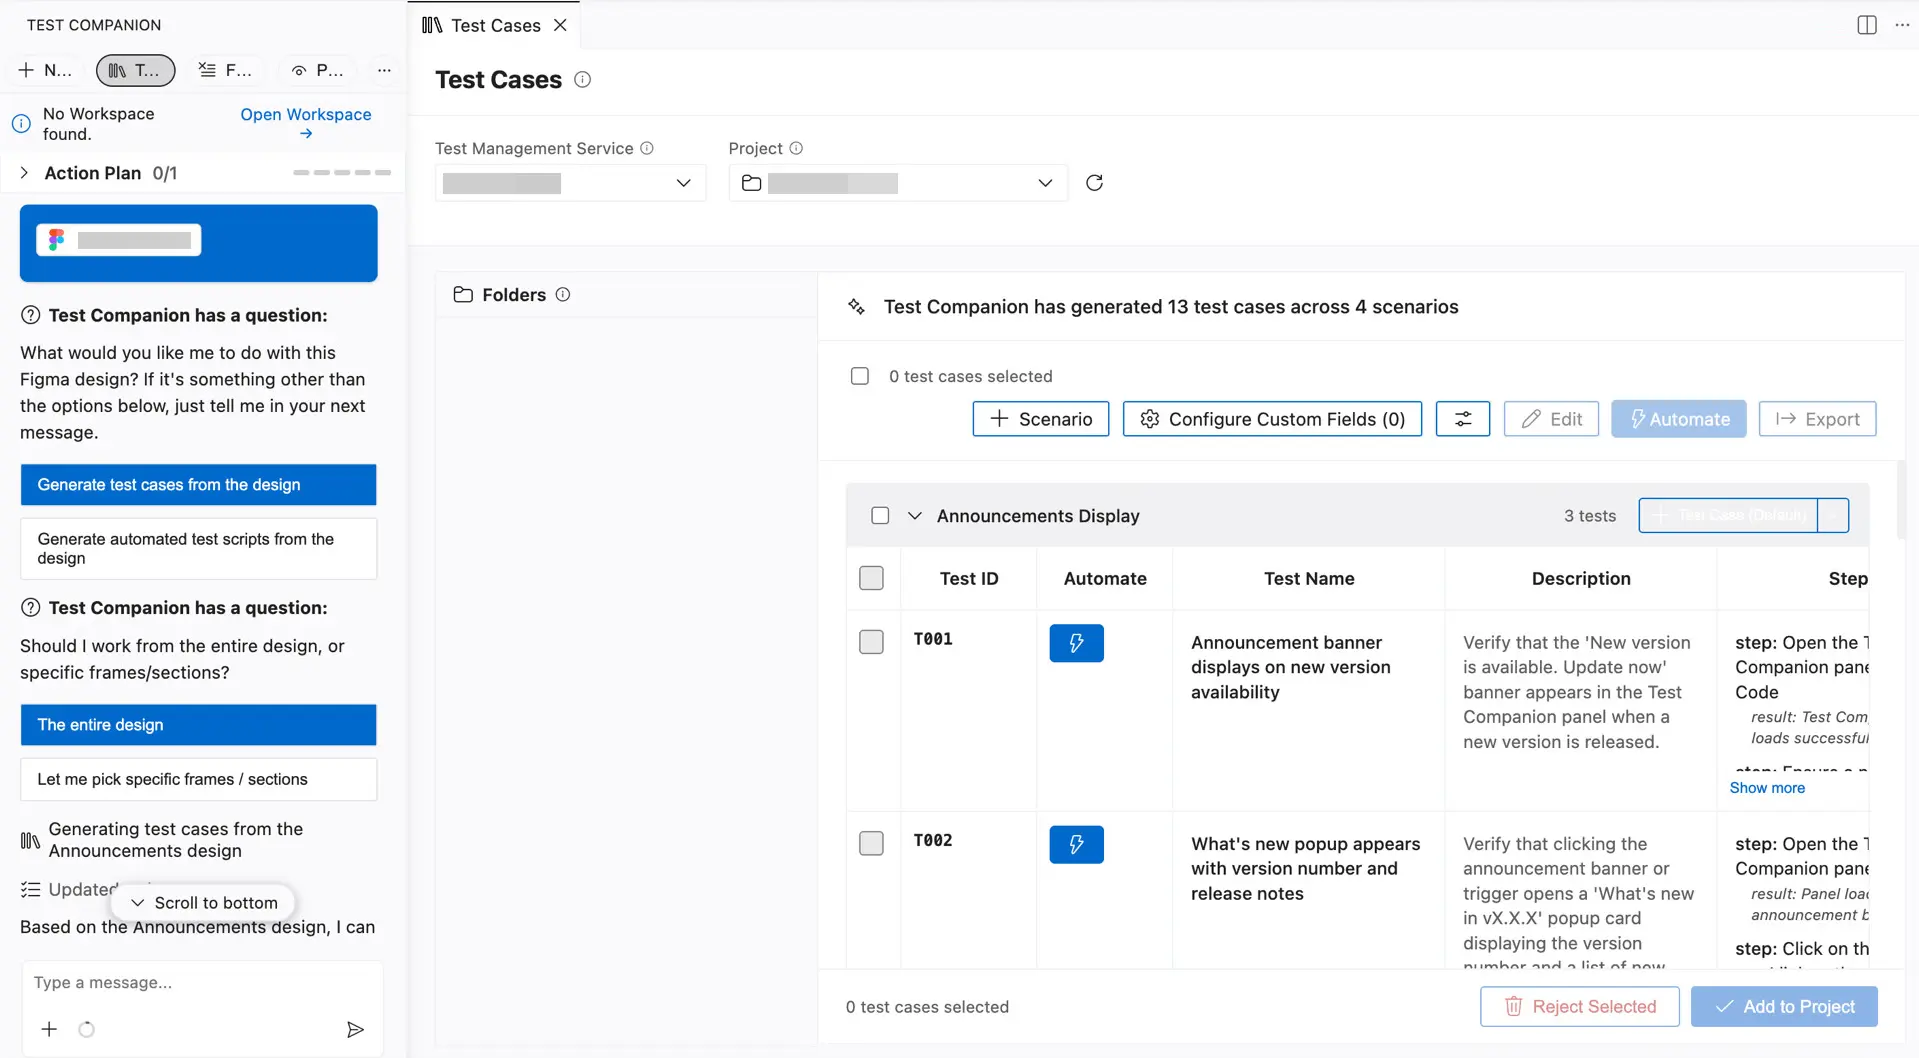
If the task is interrupted because Figma was not connected yet, complete the integration flow and then repeat the same prompt.
What Test Companion reads from Figma
Test Companion fetches the following from your selected frames and sections:
| Field | Description |
|---|---|
| Frame or section name | The name of each selected frame or section |
| Text content | The text layers inside the selected frames and sections |
| Layout and component structure | The arrangement of layers and components that make up the design |
| Rendered image | A rendered image of each selected frame or section, attached as visual context |
Supported link formats
Test Companion recognizes standard Figma URLs, including file, design, and prototype links. A link can point to the whole file, or to a specific frame when the URL includes a node-id parameter.
Known limitations
- Read-only access: Test Companion reads design context from Figma. It does not create, edit, or comment on files in Figma.
- Frames and sections only: When you pick specific parts of a design, you can select frames and sections. You cannot directly select other node types, such as individual layers, components, or entire pages.
- Up to 10 frames per request: Test Companion reads at most 10 frames in a single fetch. If a file has more, select the frames to prioritize, or split the work across multiple requests.
- Figma API rate limits: Figma limits how many API requests Test Companion can make on your behalf. The limit depends on your Figma seat type, the plan the file belongs to, and which endpoint Test Companion calls. A View or Collab seat runs out sooner than a Dev or Full seat. Test Companion stops processing your request when you reach the limit. It keeps your request, so you can retry after the limit resets. For the current limits, see Figma’s rate limits documentation.
Next steps
- Generate test cases: Learn how to generate test cases from requirements, documents, or designs.
- Automate tests: Convert manual test cases into automation scripts.
We're sorry to hear that. Please share your feedback so we can do better
Contact our Support team for immediate help while we work on improving our docs.
We're continuously improving our docs. We'd love to know what you liked
We're sorry to hear that. Please share your feedback so we can do better
Contact our Support team for immediate help while we work on improving our docs.
We're continuously improving our docs. We'd love to know what you liked
Thank you for your valuable feedback!