
 Join our Discord
Manage dashboards and gadgets
Share a Jira dashboard with your team, copy or trash it, and arrange, duplicate, or remove the BrowserStack gadgets on it.
Dashboards are a Jira feature. The steps here are the same whether the dashboard holds BrowserStack gadgets, Atlassian gadgets, or both.
Share a dashboard
A new dashboard is private. To let other people see or change it, follow these steps:
- Open the dashboard.
-
Click More dashboard actions and select Rename or share.
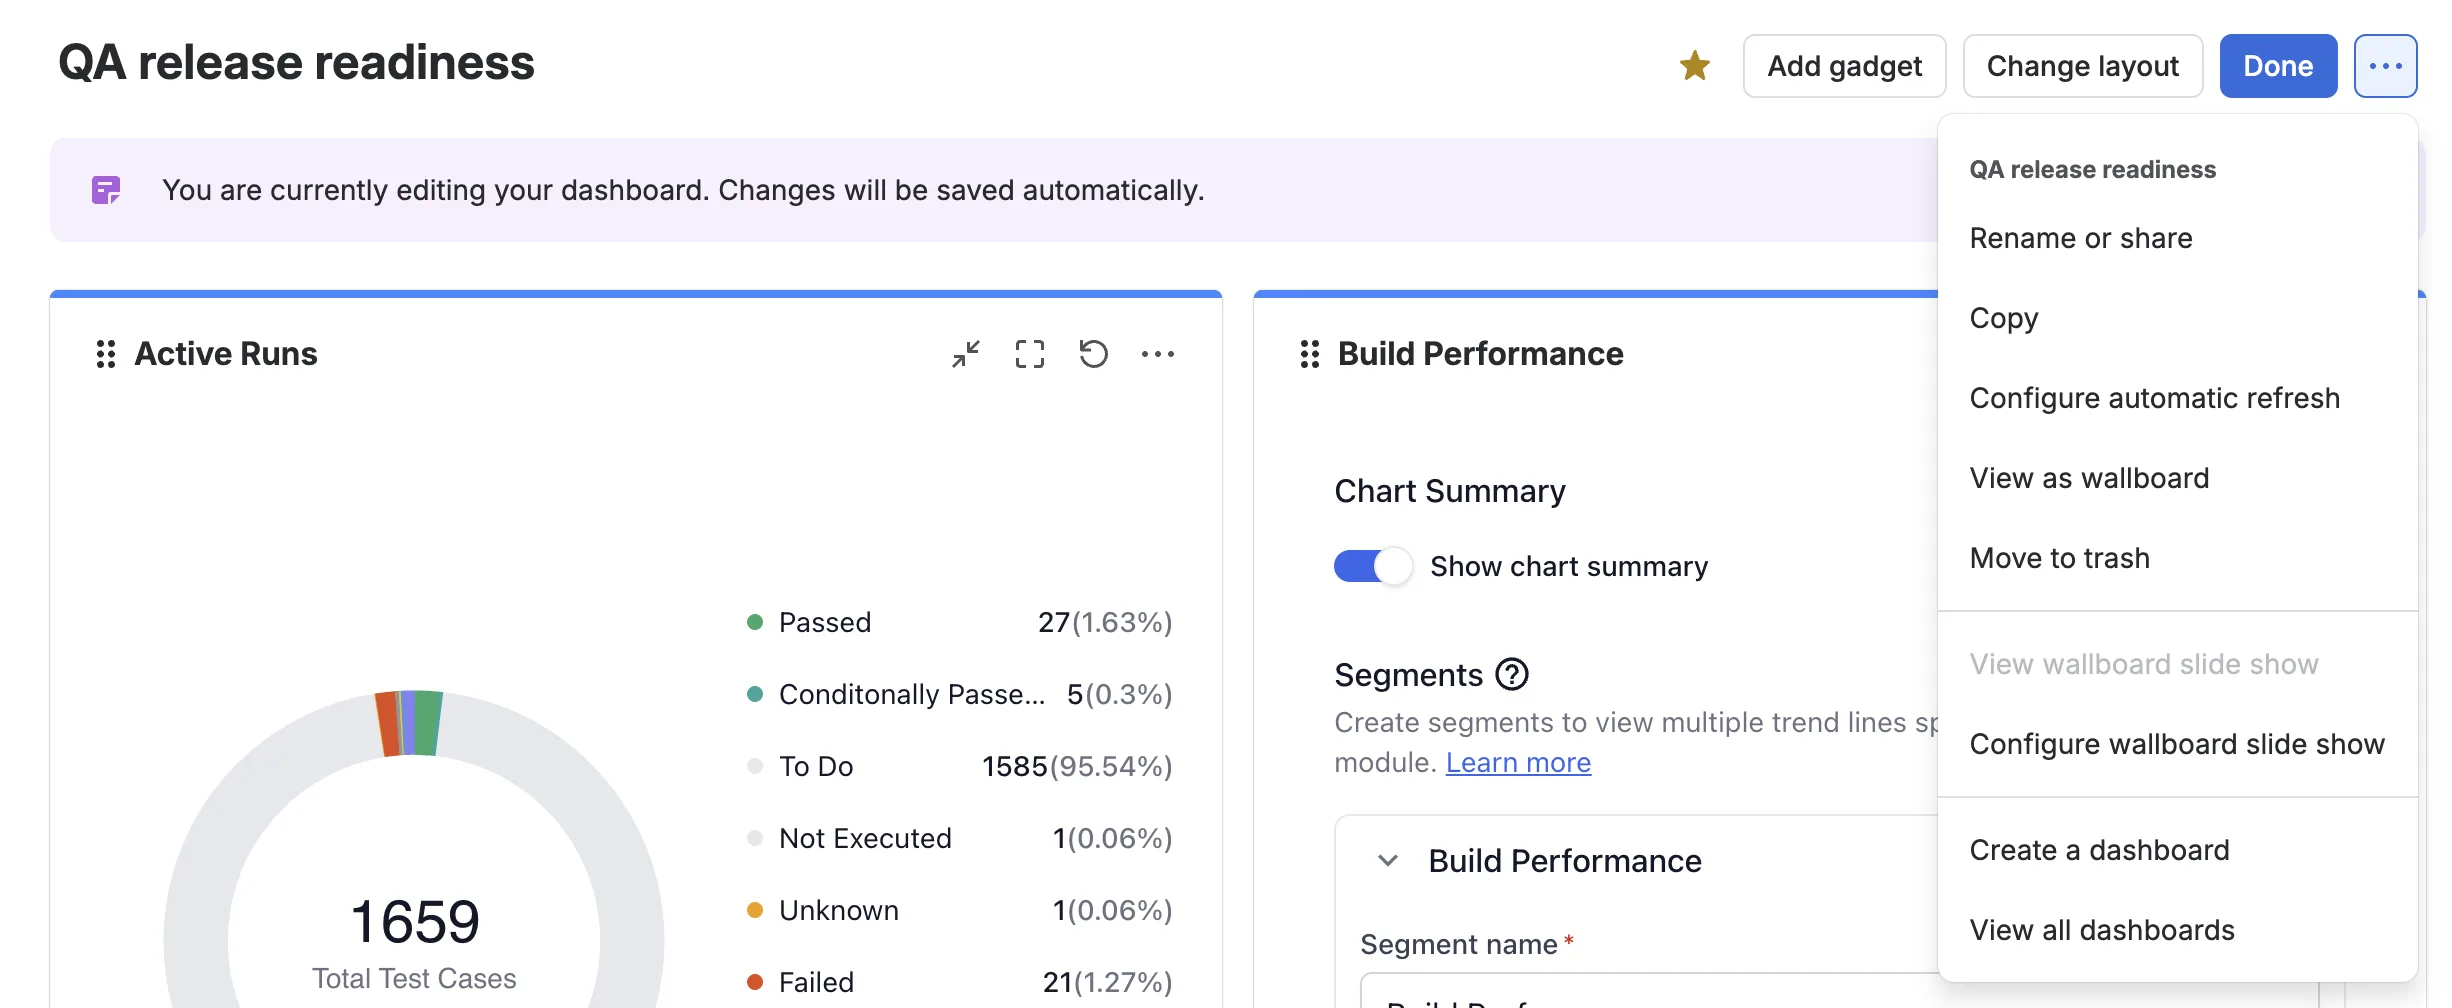
- In Viewers or Editors, pick an option from the list.
-
Choose the space, group, or user, then click Add. If the space or group you want does not appear, enter a keyword to search for it.
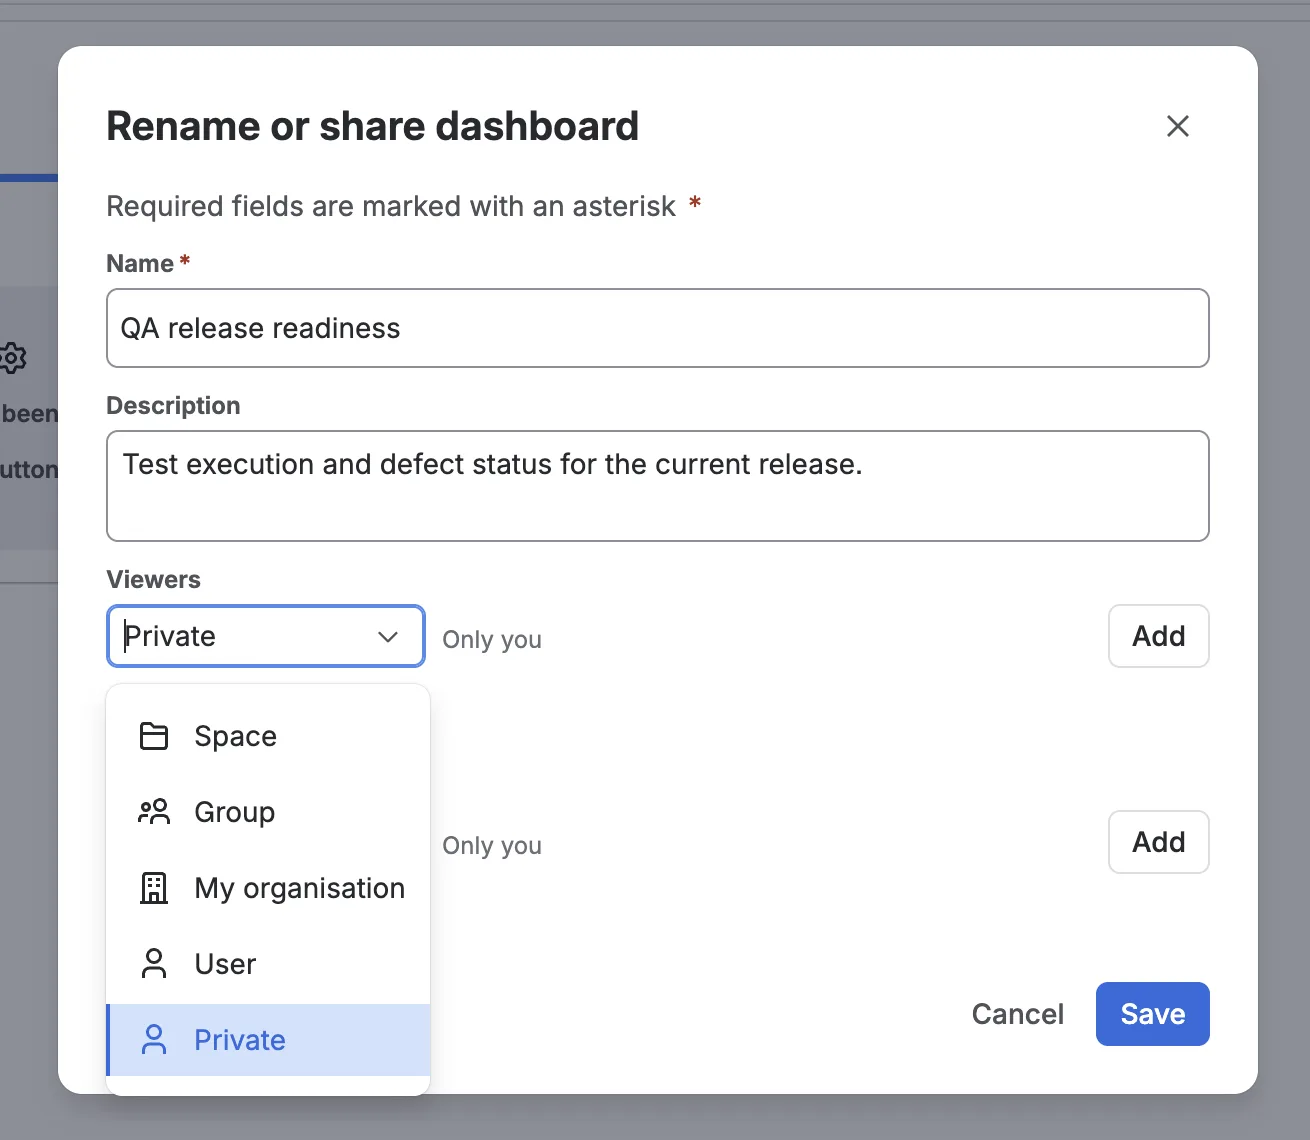
- Click Save.
Viewers sets who can open the dashboard. Editors sets who can change it. The options are the same for each:
| Option | Access |
|---|---|
| Private | Only you. |
| Space | Everyone in a Jira space that you choose. |
| Group | Everyone in a Jira group that you choose. |
| My organization | Everyone in your Atlassian organization. |
| User | One Jira user that you choose. |
You need two global permissions to share a dashboard: Share dashboards and filters, and Browse users and groups. Without Share dashboards and filters, Private is the only option in the list. Ask your Jira admin to grant them.
The same dialog changes the dashboard name and description.
Copy a dashboard
Copying gives you a second dashboard that you can change without touching the original. To copy a dashboard, follow these steps:
- Open the dashboard.
-
Click More dashboard actions and select Copy.
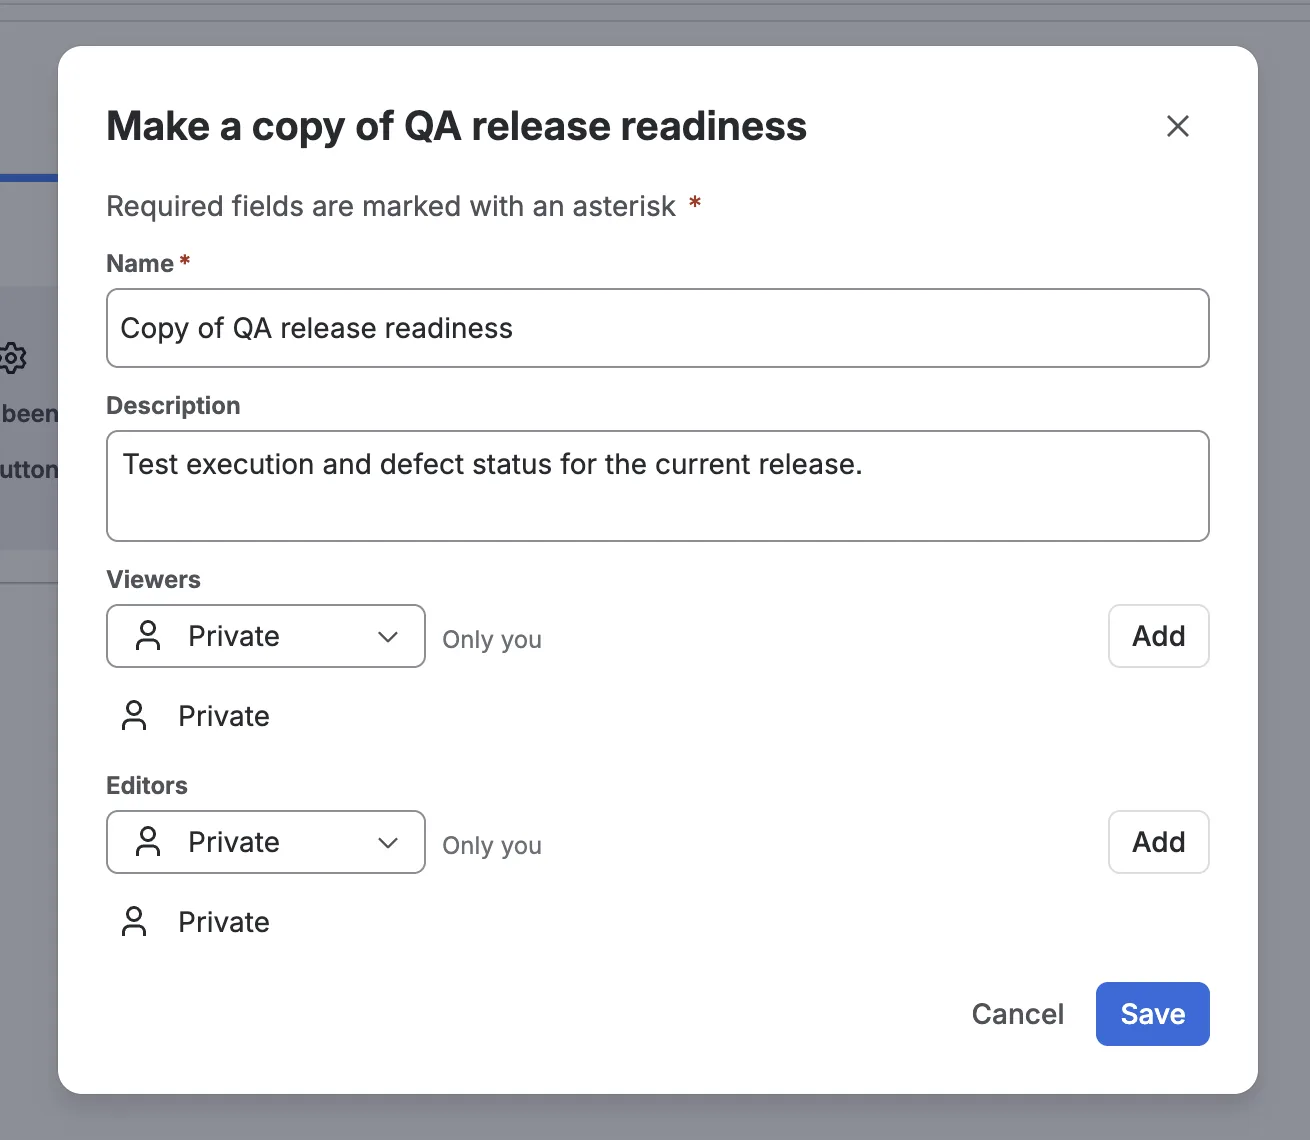
- Change Name, Description, Viewers, and Editors as needed.
- Click Save.
Jira prefills the name with Copy of followed by the original name. It also copies the original description into the new dashboard.
Move a dashboard to trash
To take a dashboard out of use, follow these steps:
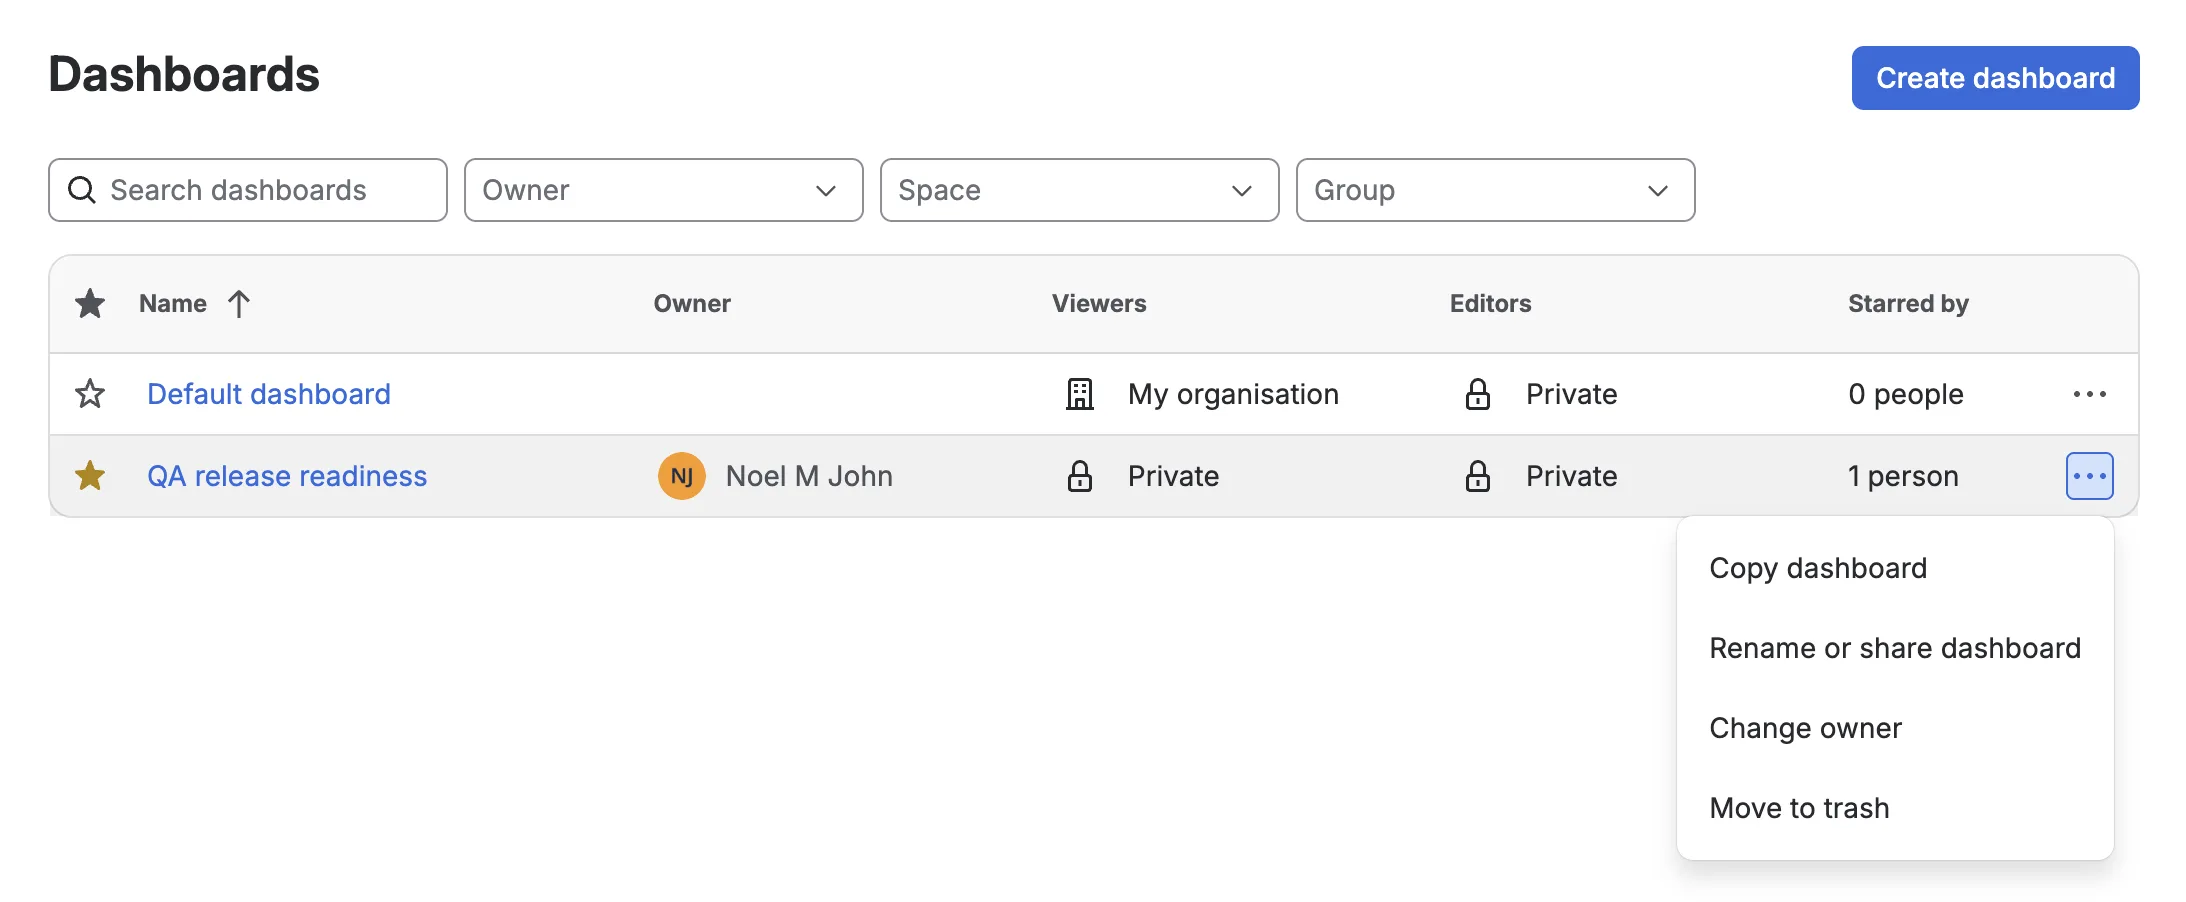
- From your Jira sidebar, select Dashboards > View all dashboards.
-
In the row of the dashboard, click More actions and select Move to trash.
-
Click Move to trash to confirm.
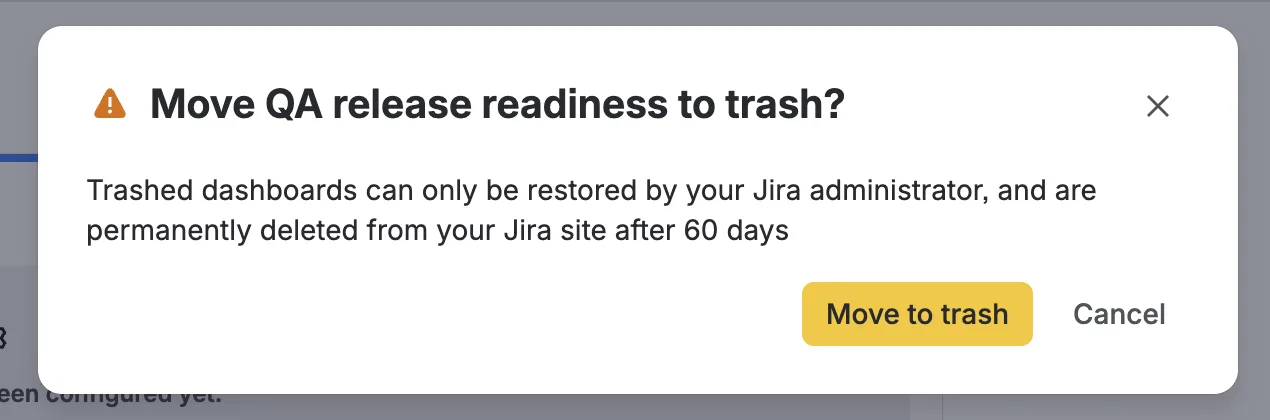
Only a Jira admin can restore a dashboard from the trash. Jira deletes a trashed dashboard permanently after 60 days.
Arrange gadgets and change the layout
To move a gadget, click Edit on the dashboard. Then drag the gadget by the handle to the left of its title.

You can move it within its column or into another column.
To change the number of columns, click Change layout and pick one of these options:
- One column
- Two columns
- Three columns
- Left sidebar
- Right sidebar
A new dashboard starts with Two columns.

Change, duplicate, or remove a gadget
In edit mode, click More actions on the gadget.
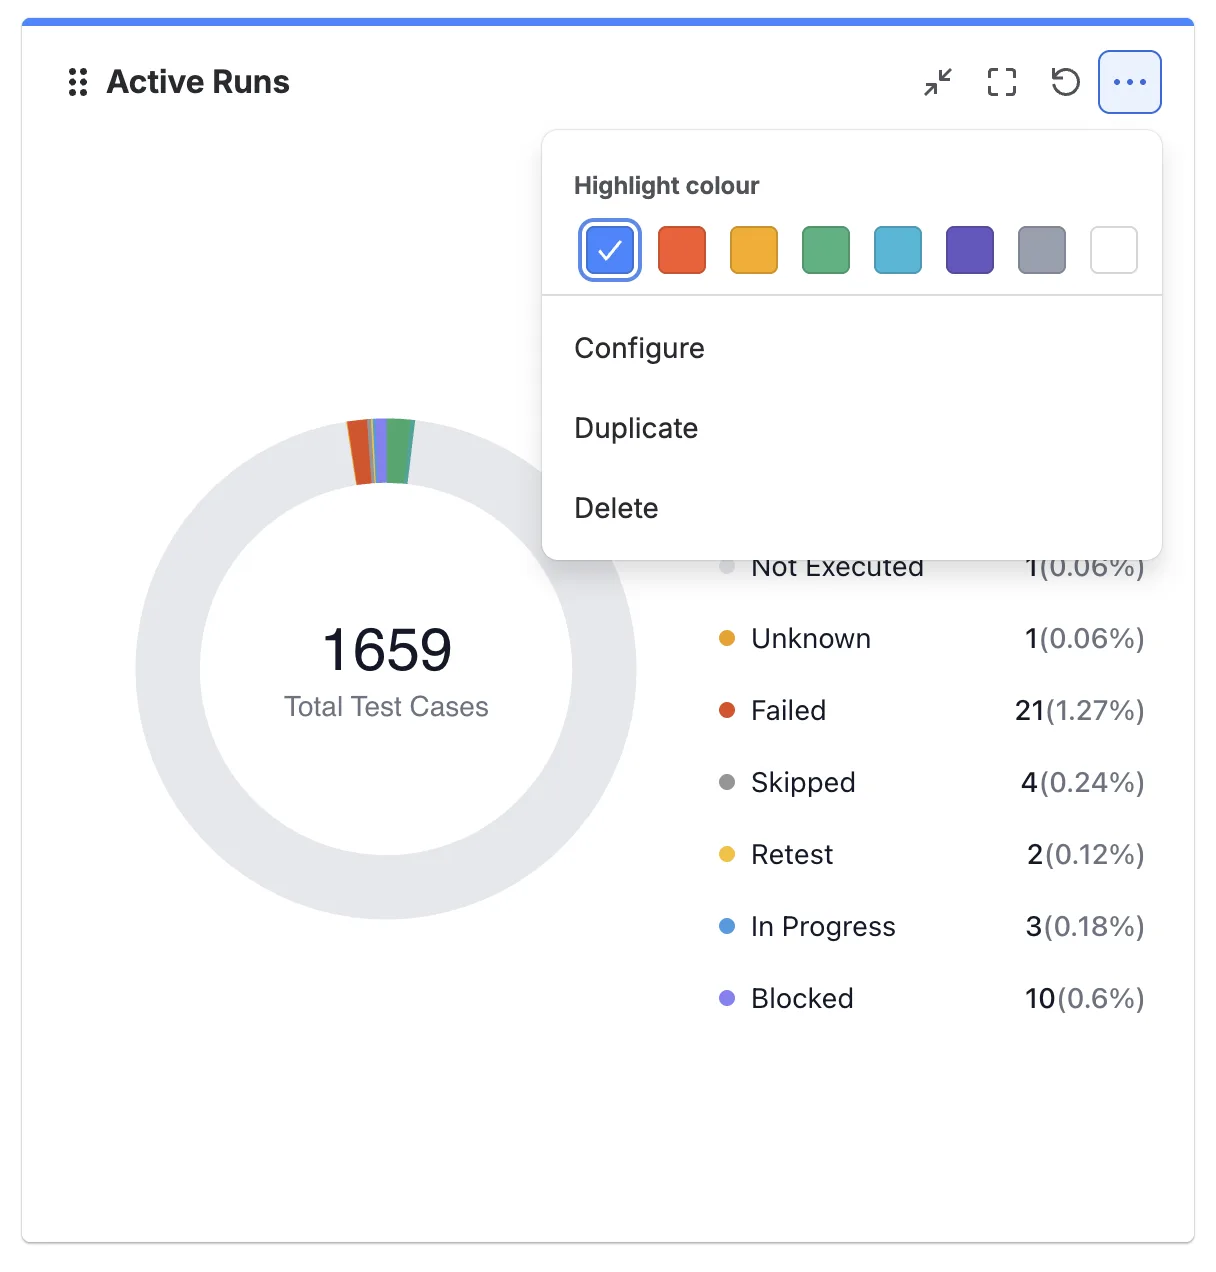
The menu holds these options:
| Option | Details |
|---|---|
| Highlight colour | Sets the color of the bar across the top of the gadget. |
| Configure | Reopens the gadget settings, so you can change the filters, time period, or refresh interval. |
| Duplicate | Adds a copy of the gadget, with the same settings, at the top of the leftmost column. |
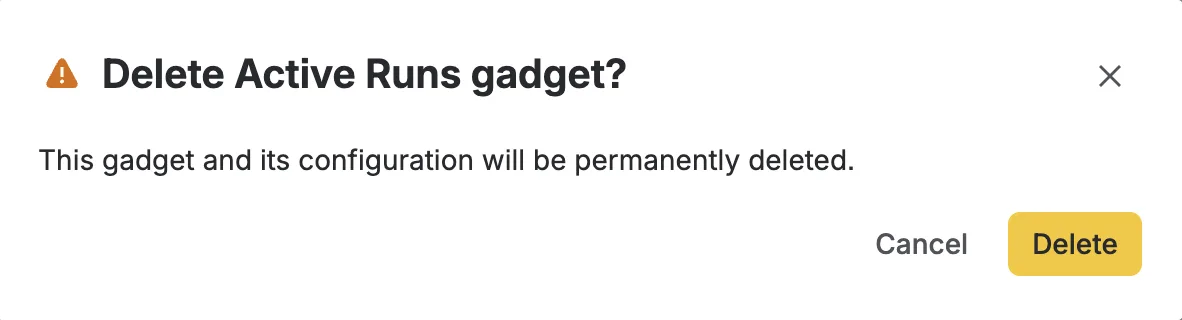
| Delete | Removes the gadget from the dashboard. Jira asks you to confirm first. |
When you select Delete, Jira asks you to confirm. The gadget and its configuration are removed permanently.
Click Done to leave edit mode. Jira saves each change as you make it.
Next steps
- Dashboards and gadgets: build a dashboard and add your first BrowserStack gadget.
- BrowserStack gadgets reference: find the gadget that answers your question.
We're sorry to hear that. Please share your feedback so we can do better
Contact our Support team for immediate help while we work on improving our docs.
We're continuously improving our docs. We'd love to know what you liked
We're sorry to hear that. Please share your feedback so we can do better
Contact our Support team for immediate help while we work on improving our docs.
We're continuously improving our docs. We'd love to know what you liked
Thank you for your valuable feedback!