
 Join our Discord
Manage UI Scripts
Create, edit, enable, and disable UI Scripts from Global Settings, and learn how one script reaches every project in your organization.
Every UI Script carries a name, one surface, and a body of JavaScript. You manage all of them from one settings page. A saved script reaches every project in the organization, so treat the page as a live control rather than a draft space.
Only an admin can configure UI Scripts. You need the IAM Owner or Admin role, or the Product Admin role in Test Management. Every other role works under the rules an enabled script enforces, but cannot open the UI Scripts page or edit a script. For the full role breakdown, see Role-Based Access Control.
Create a UI Script
The UI Scripts page lists every script with its Surfaces and Status, and each row carries an action menu. Follow these steps to add a script:
-
Navigate to Global Settings and select UI Scripts.
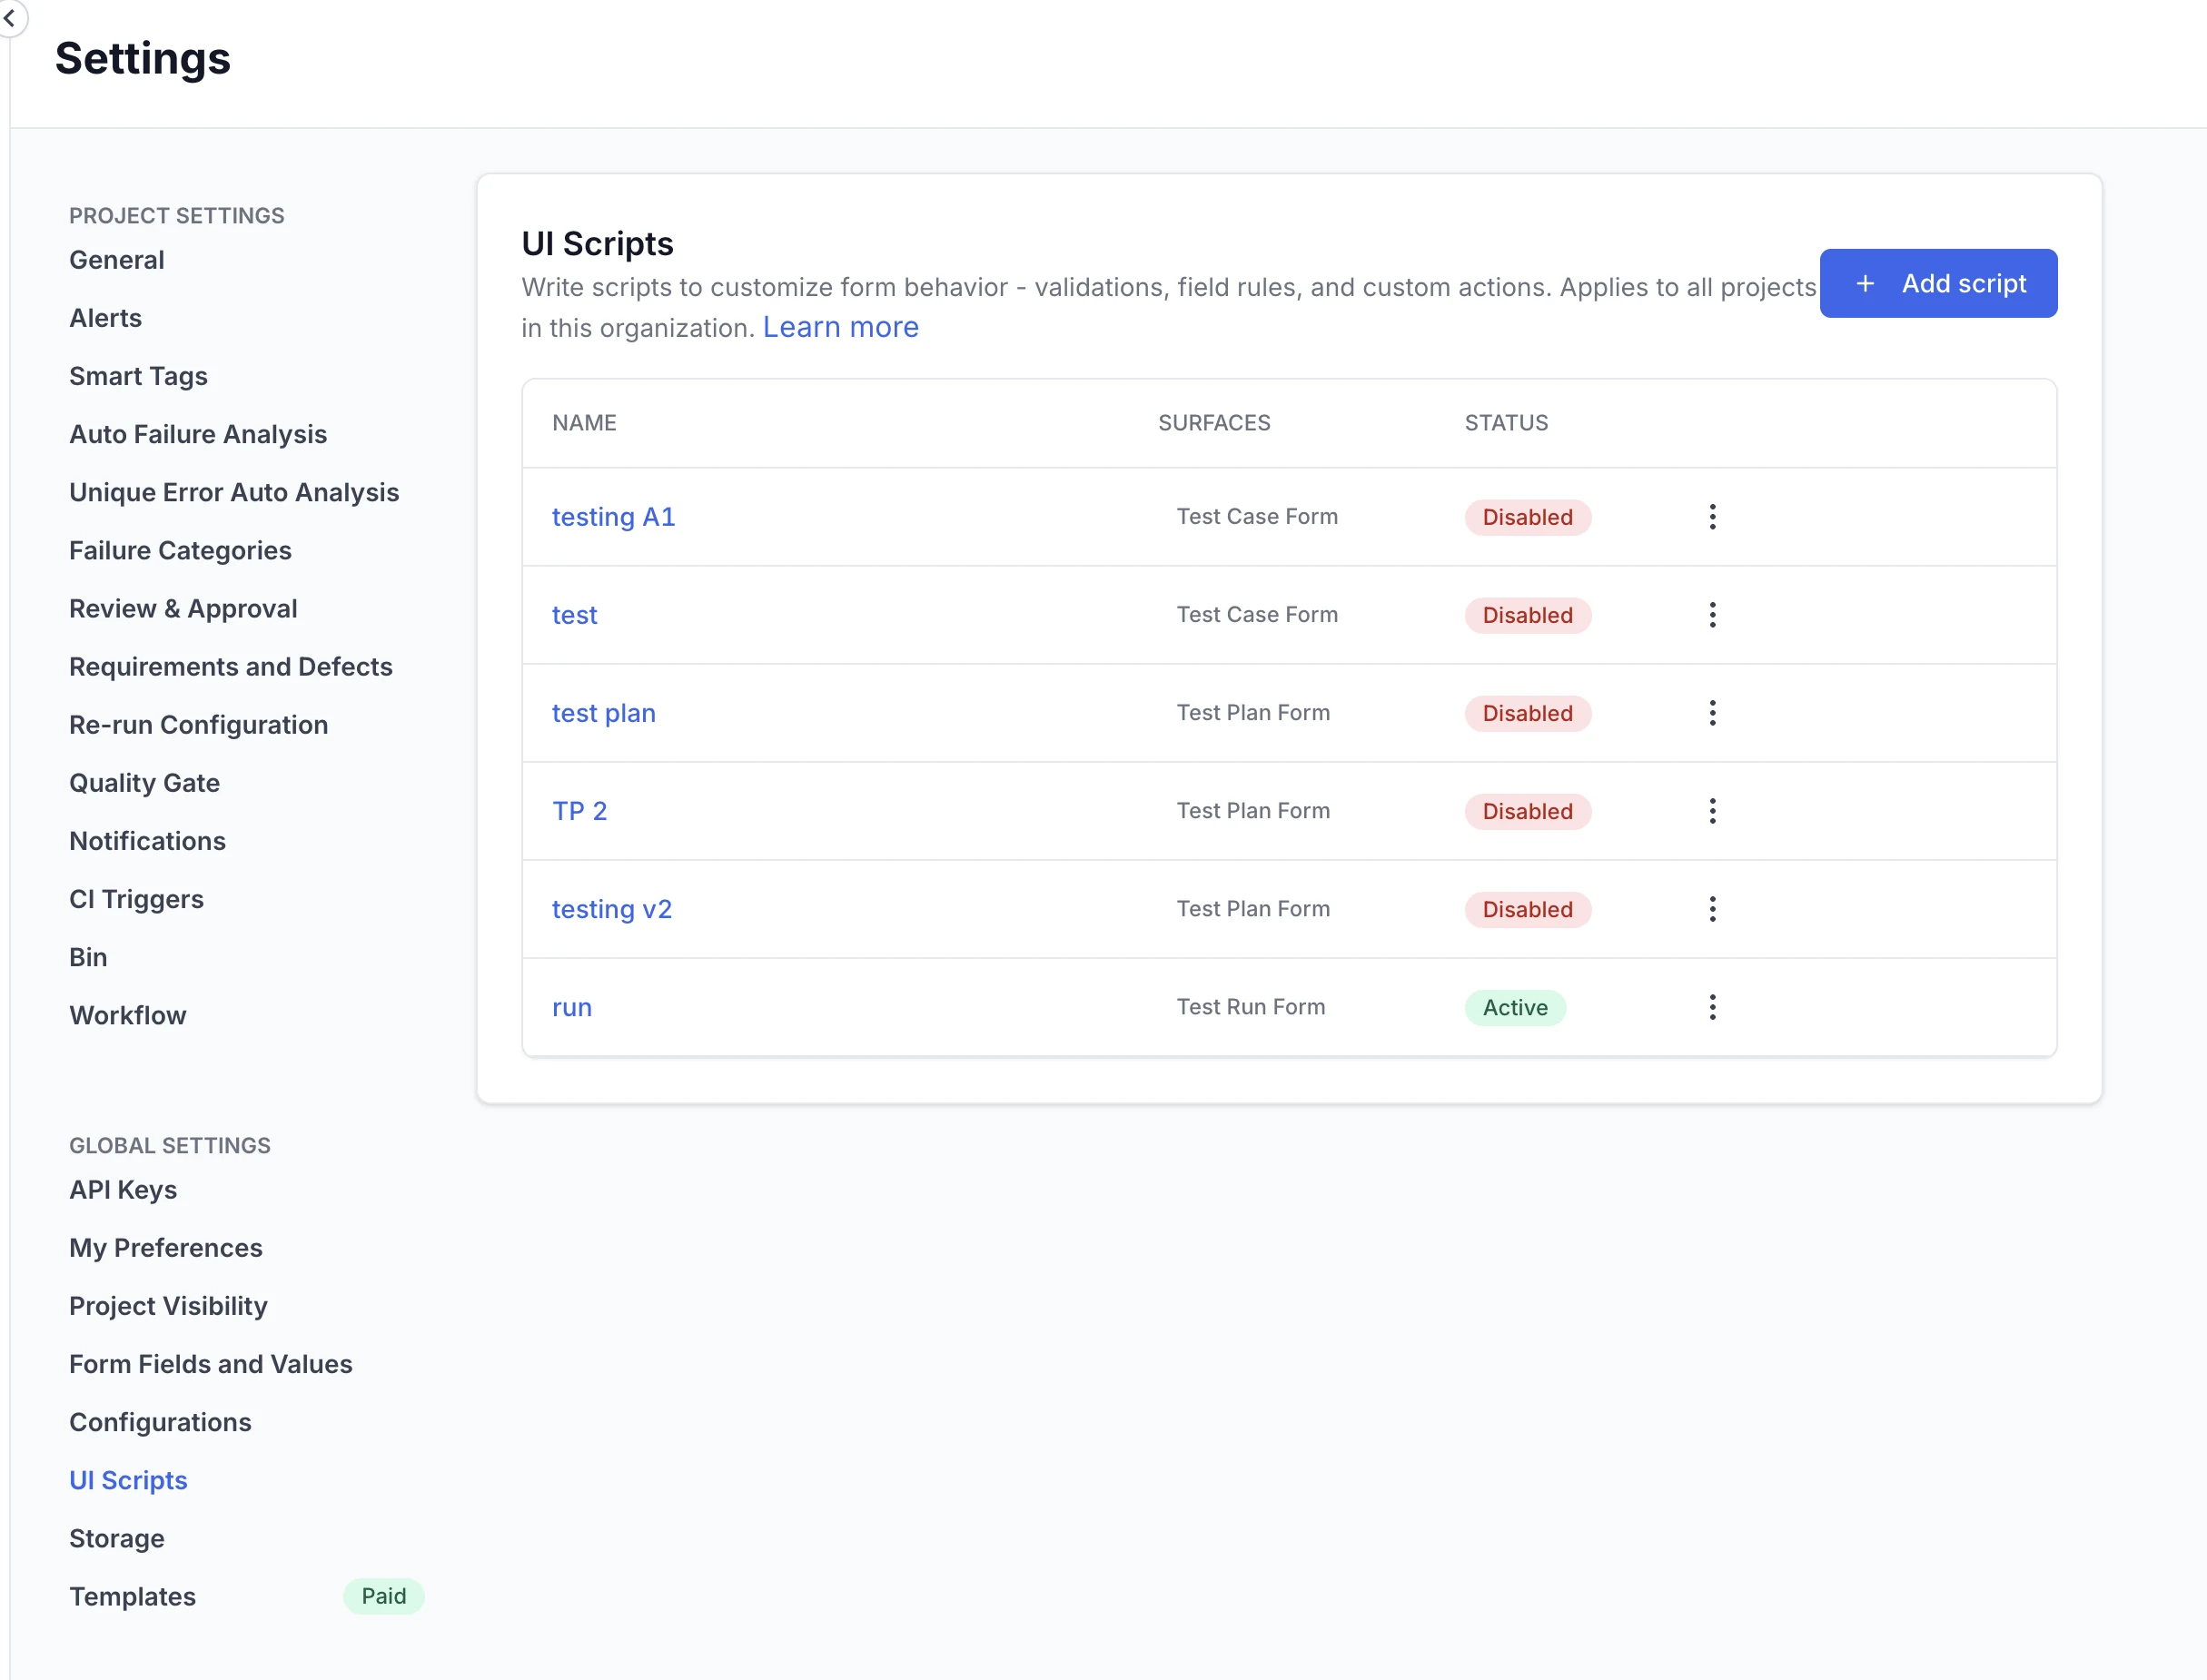
- Click Add script.
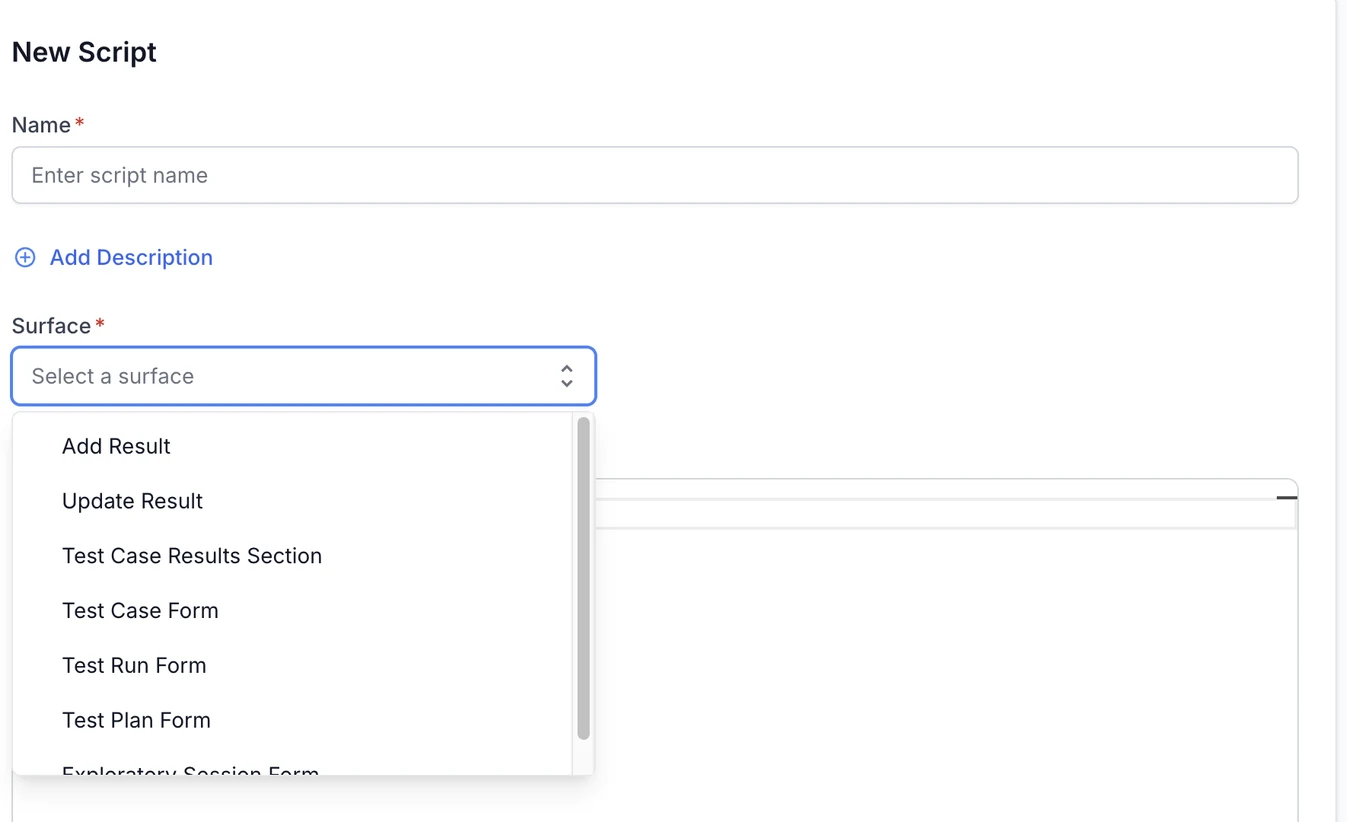
- Fill in the script details:
- Name, which is required.
- Description, which is optional. Click Add Description to enter one.
- Surface, which is required. Select the one surface where the script runs.
- Script Content, which is required. It contains the JavaScript that runs on that surface.
-
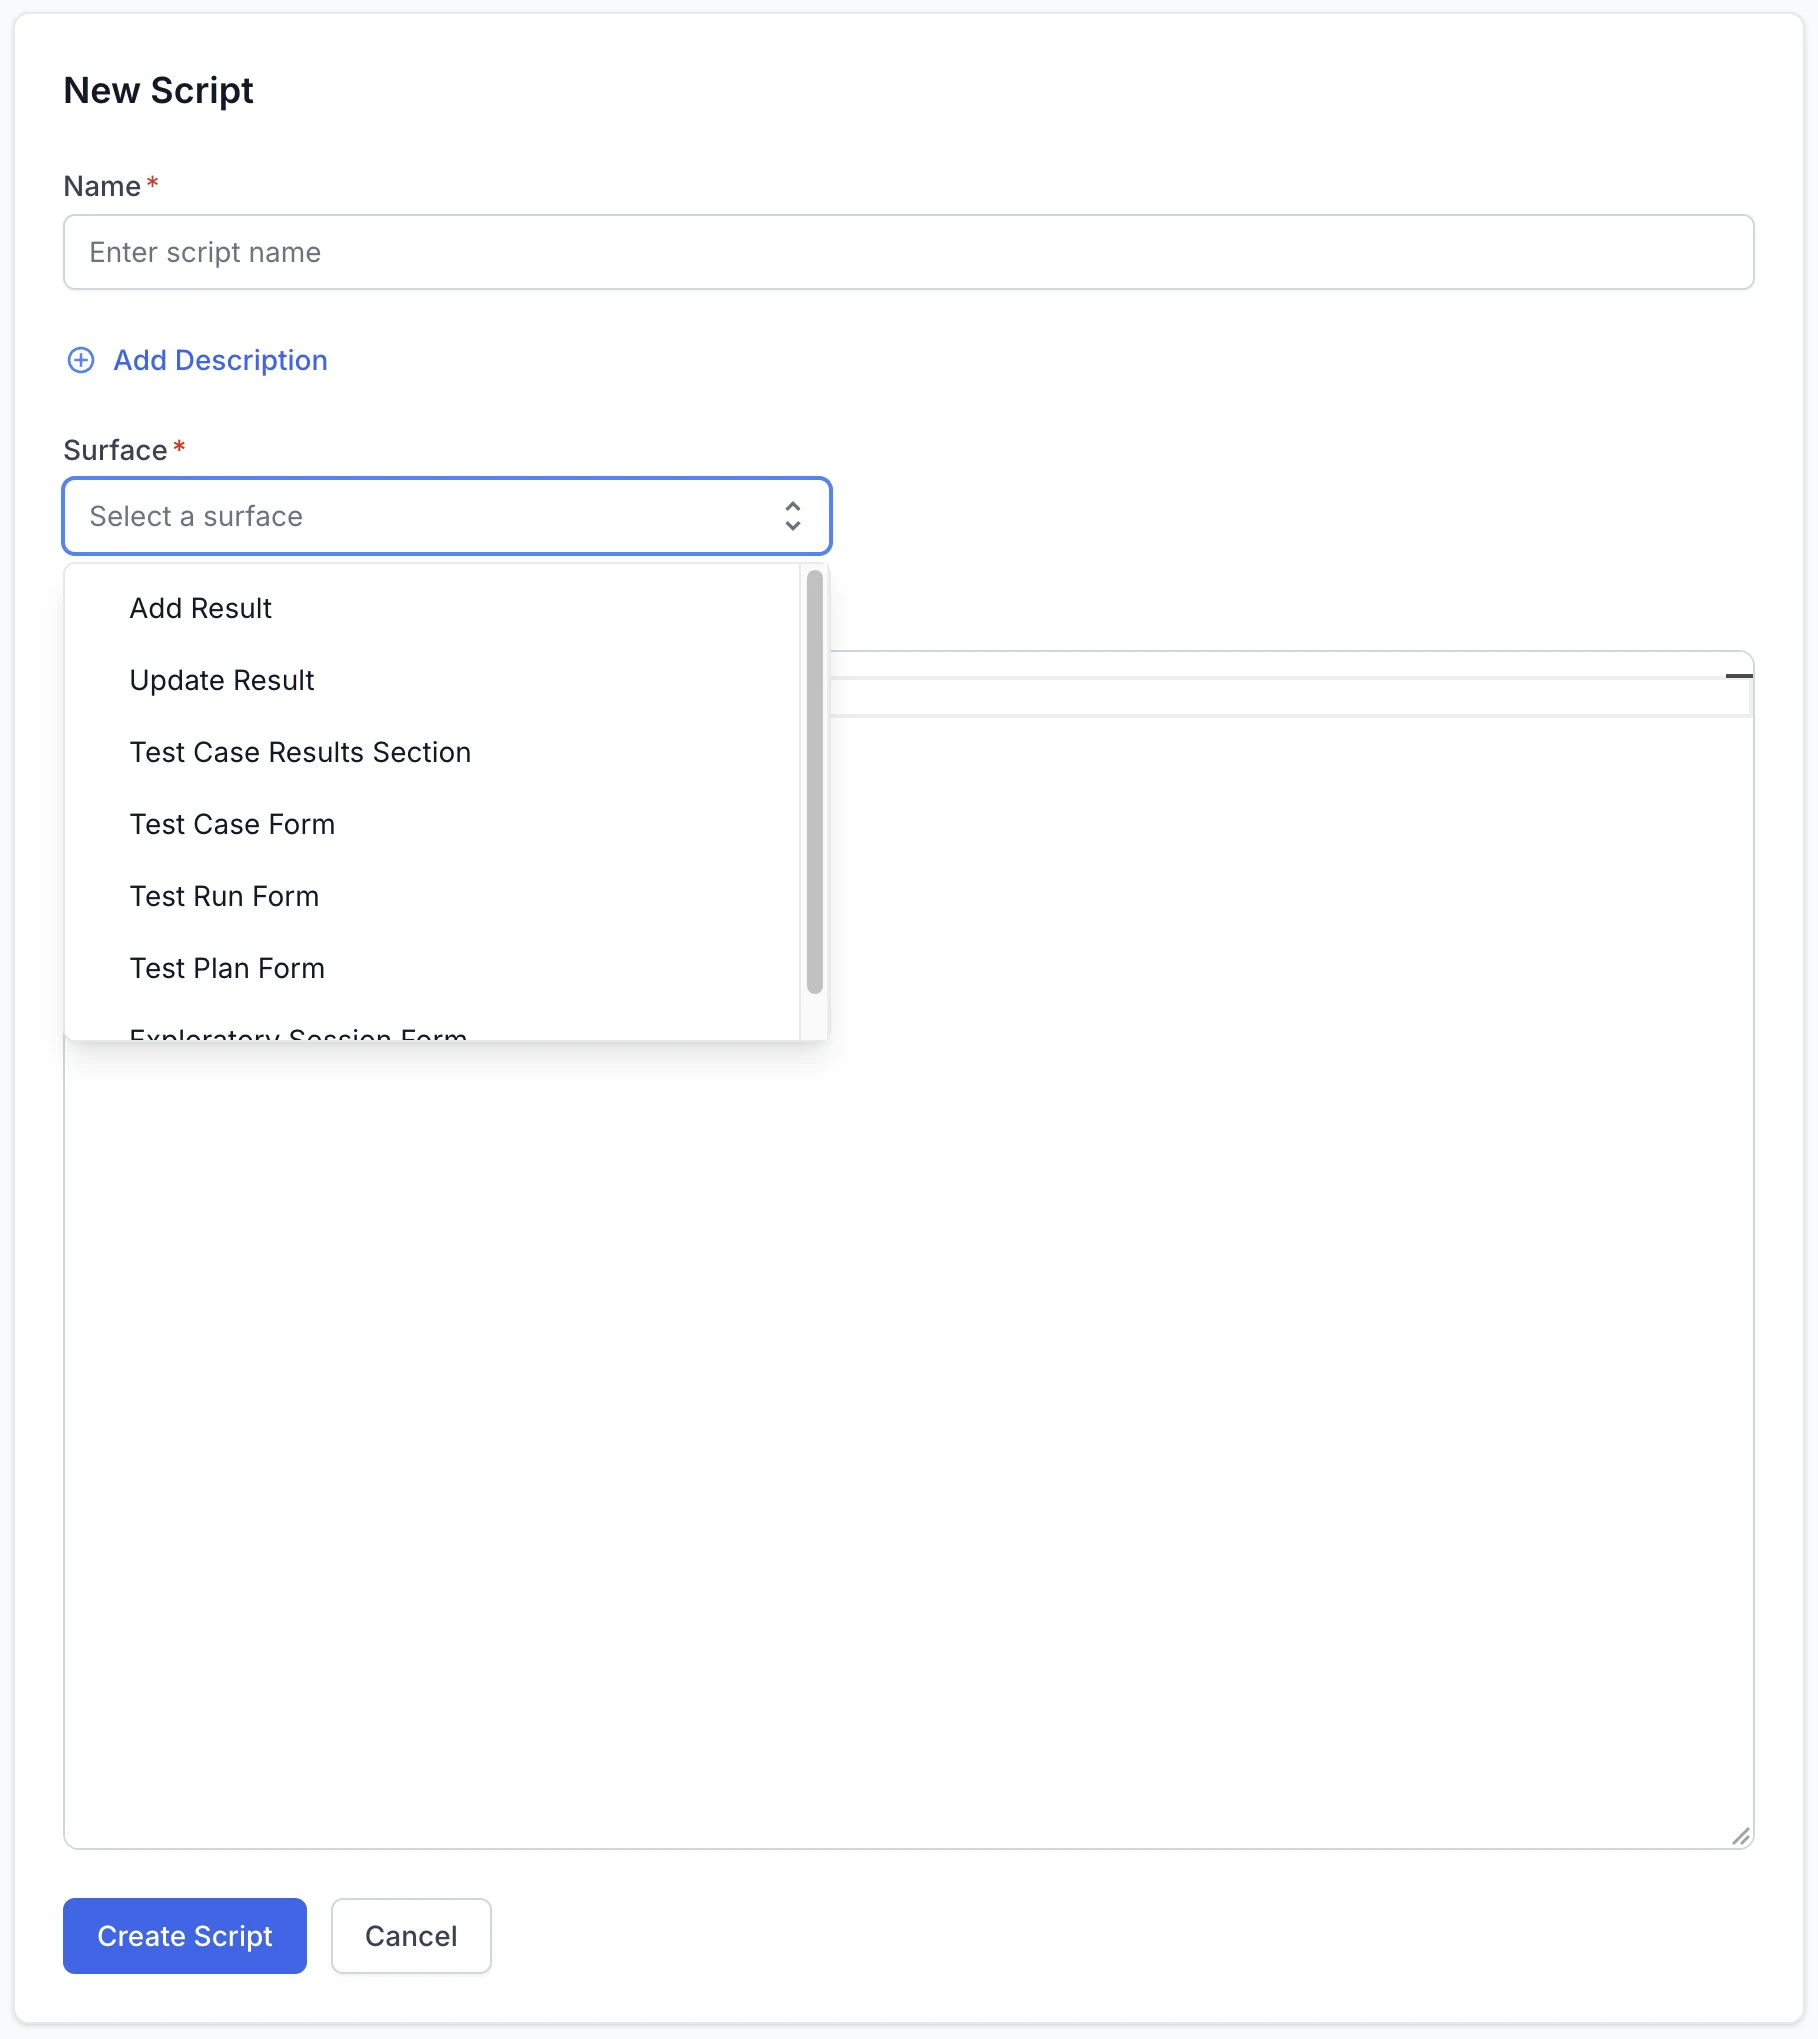
Click Create Script.
One script targets one surface
The Surface list contains one value at a time, so a script cannot span two surfaces. A rule that has to cover both Add Result and Update Result therefore needs one script for each. Keep the two copies in step whenever you change either one.
Reload before you test a change
The script engine loads every active script once, when Test Management loads. A script you create, edit, enable, disable, or delete therefore takes effect on the next page load, not in the tab you are already working in. Reload the app, then open the form or dialog the script targets.
Edit a script
Editing changes the script every project in the organization runs. The engine loads scripts at page load, so the change reaches a project member on their next load rather than in the form they have open.
- Navigate to Global Settings and select UI Scripts.
-
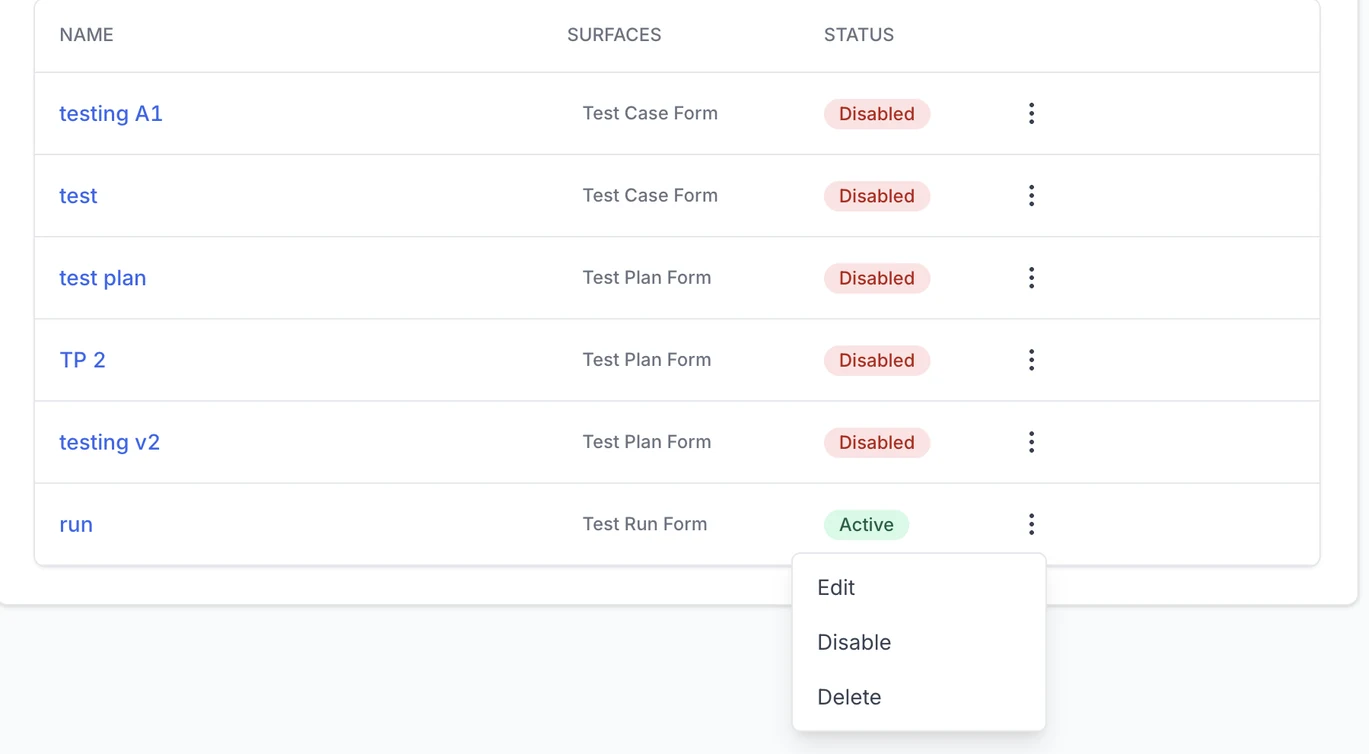
Click the three-dot menu on the script row, then select Edit.
- Update the Name, Description, Surface, or Script Content.
-
Click Save Changes.
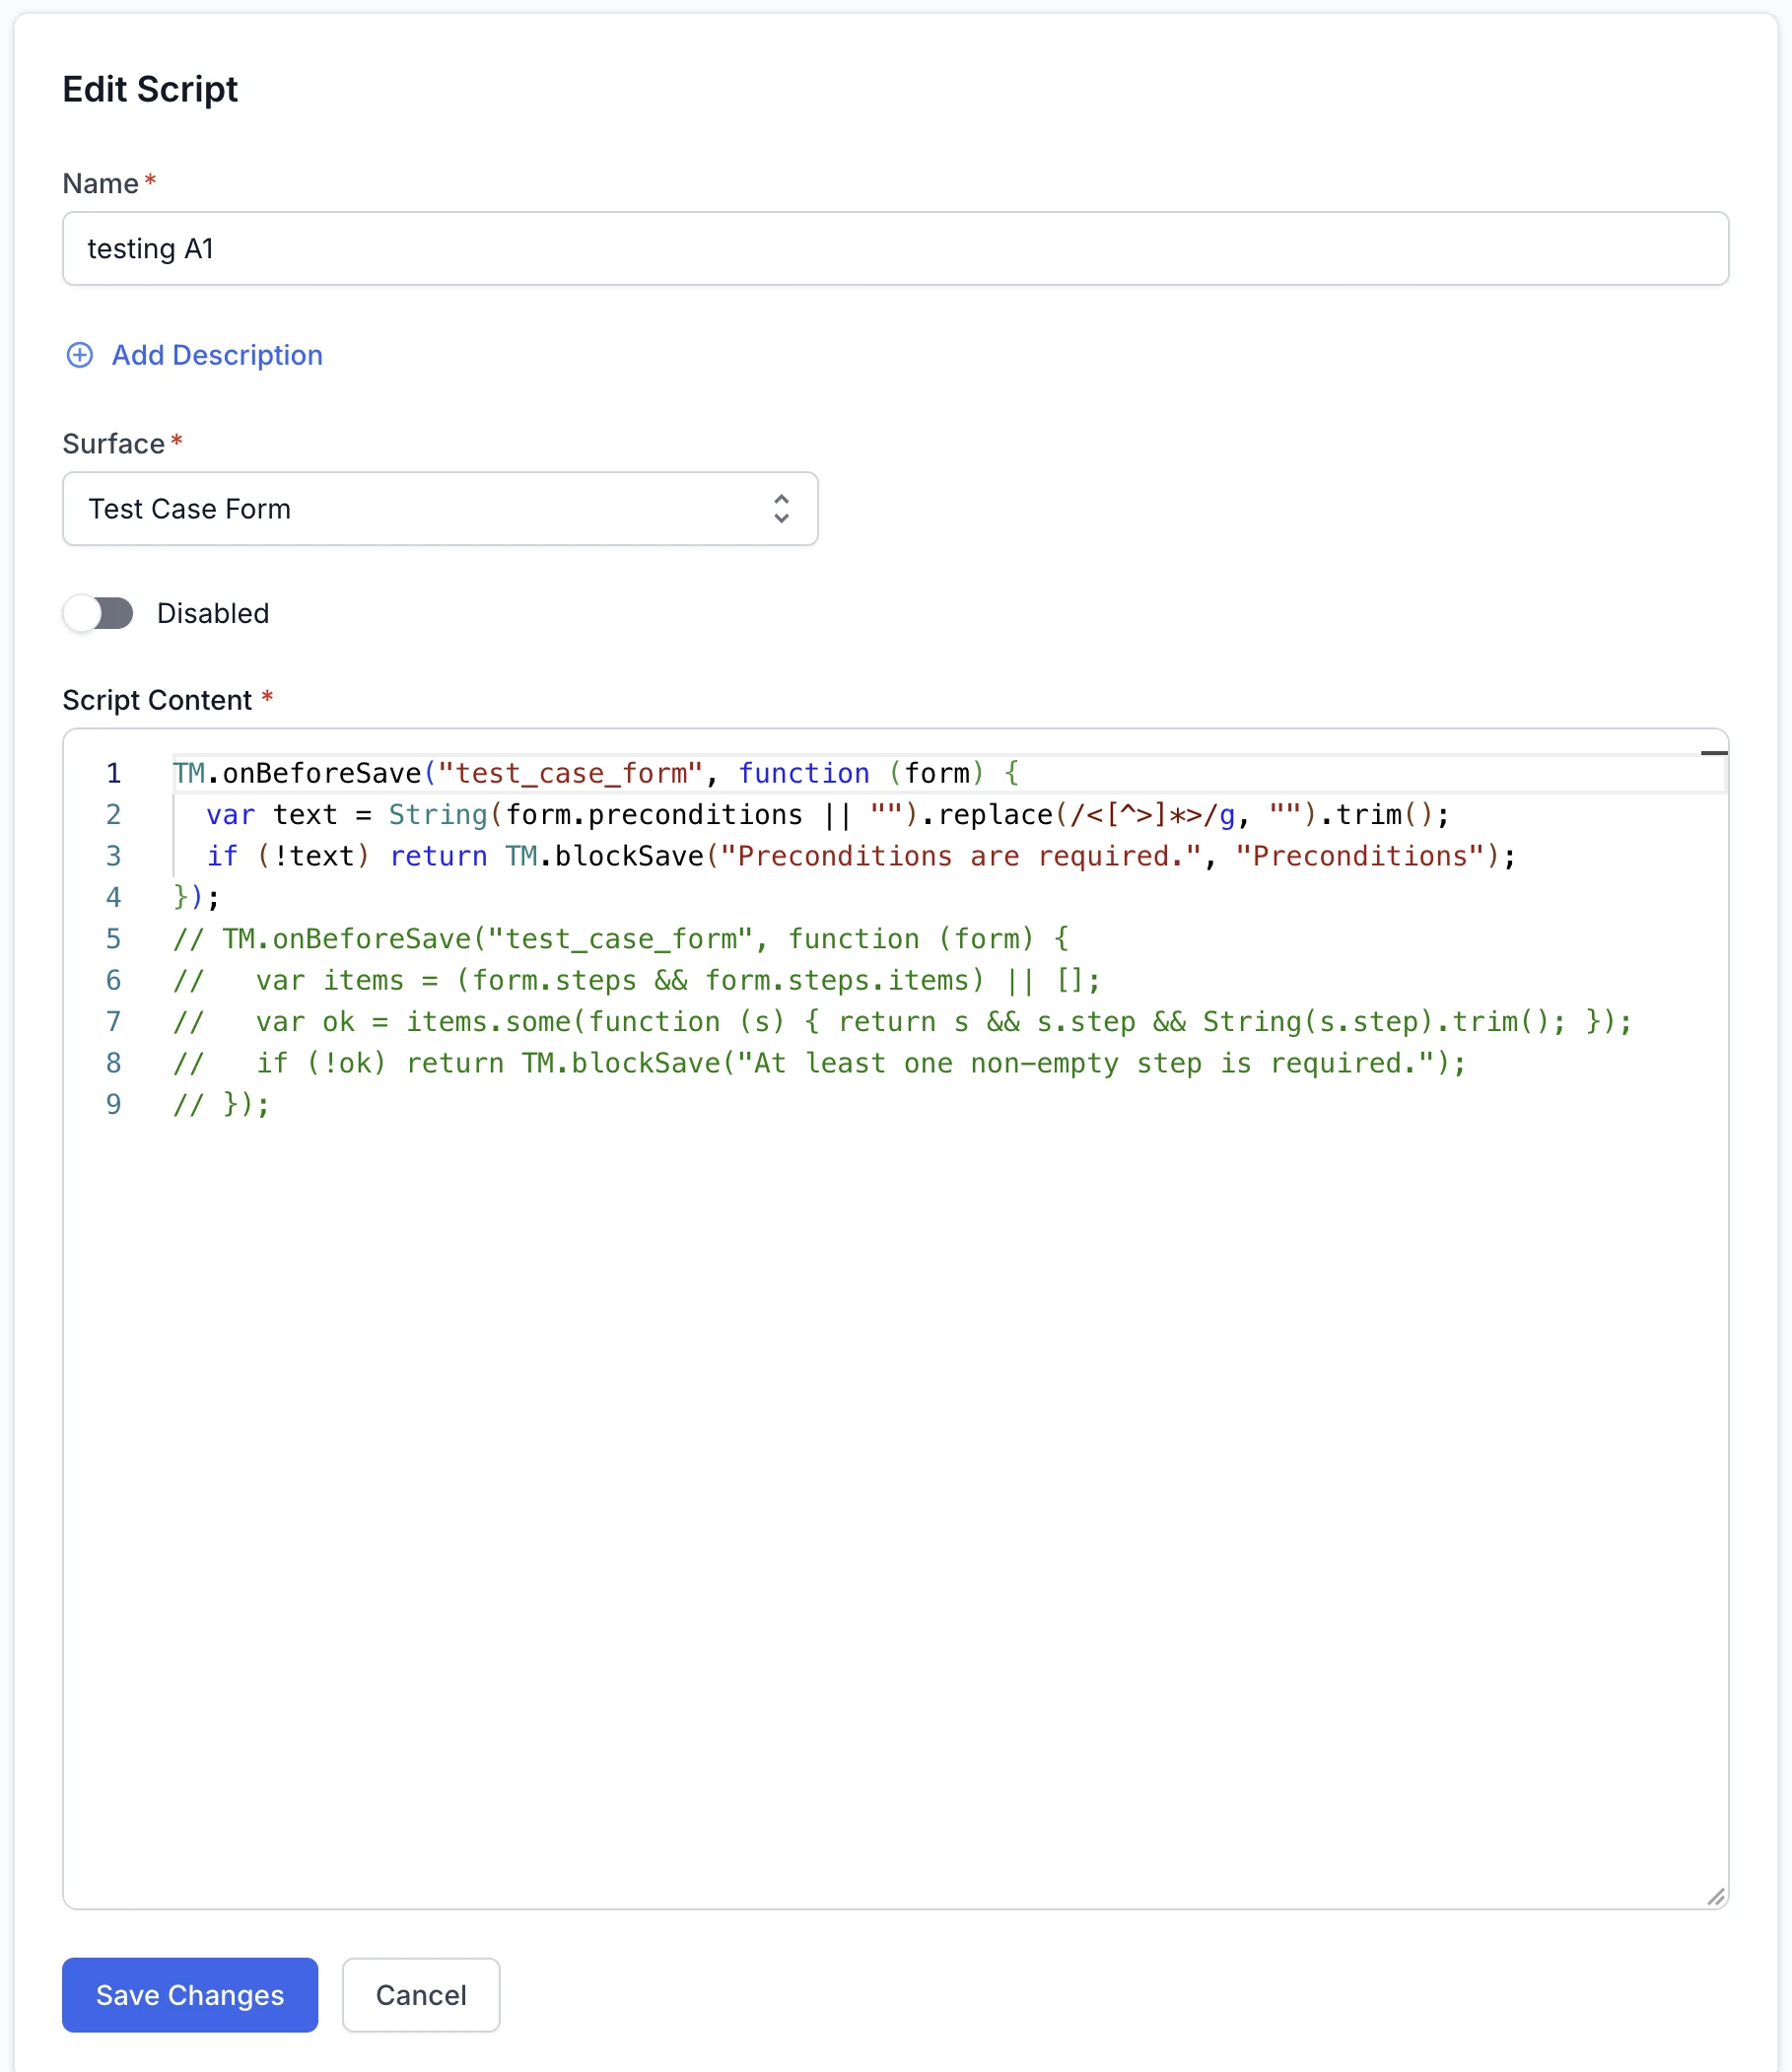
The toggle above Script Content carries the script’s current state. It reads Enabled on an active script and Disabled on an inactive one, so you can change the code and the state in one save.
Enable or disable a script
Disabling stops a script from running without losing its code, so it is the safest way to switch a rule off while you investigate. The script keeps its name, surface, and content, and you can enable it again at any time.
- Navigate to Global Settings and select UI Scripts. The Status column reads Active or Disabled for every script.
- Click the three-dot menu on the script row.
-
Select Disable on an active script, or Enable on a disabled one. The new status applies at once, with no confirmation step, and the Status badge updates in the list.
The edit form offers the same control through its state toggle. Flip the toggle, then click Save Changes.
Delete a script
Deleting removes the script and its code for good. Nothing restores it afterwards, so disable the script instead when you might want the rule back. Delete is the one row action that asks you to confirm.
- Navigate to Global Settings and select UI Scripts.
- Click the three-dot menu on the script row, then select Delete.
-
In the Delete Script dialog, click Delete to confirm. Click Cancel to keep the script.
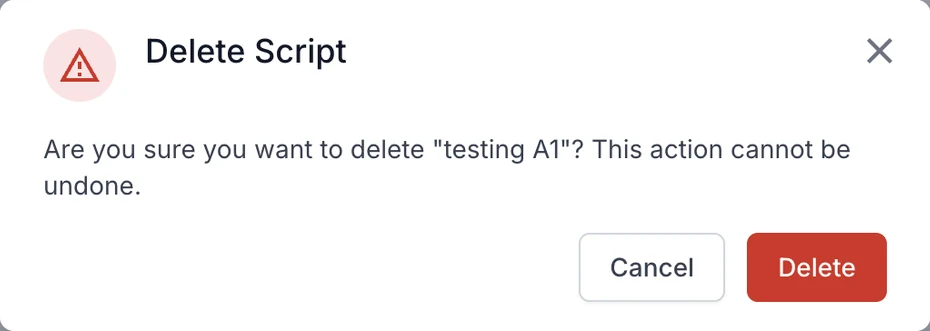
The dialog names the script it is about to remove. Read that name before you confirm, because the list contains every script in the organization.
Autocomplete in the script editor
The Script Content editor autocompletes as you type. Type TM. to list every function with its description. Inside a form callback, type form. or context. to list the fields available on that surface.
Practices that keep scripts manageable
Follow these habits as the number of scripts grows:
- Write one script per behavior. Several small scripts are easier to trace than one large script.
- Keep a new script disabled until you have reviewed it, because enabling it reaches every project in the organization.
- Limit a rule to certain projects by checking
context.projectIdinside the script. The toolbar scripts in the script library show the pattern. - Keep rules from contradicting each other. Every enabled script on a surface runs together, in priority order, and stops at the first script that blocks a save.
Next steps
We're sorry to hear that. Please share your feedback so we can do better
Contact our Support team for immediate help while we work on improving our docs.
We're continuously improving our docs. We'd love to know what you liked
We're sorry to hear that. Please share your feedback so we can do better
Contact our Support team for immediate help while we work on improving our docs.
We're continuously improving our docs. We'd love to know what you liked
Thank you for your valuable feedback!