Use Screen Reader on iOS in App Accessibility
Test screen reader accessibility using the VoiceOver feature on actual iOS devices in App Accessibility.
This feature is available only under the Ultimate plan. For more details, check the pricing page.
Create an inclusive app experience for everyone by testing its accessibility with VoiceOver, the built-in screen reader on iOS devices. VoiceOver reads aloud on-screen elements, helping you identify areas where users who rely on assistive technologies might encounter difficulties. Manual accessibility testing is essential for ensuring that your app meets Web Content Accessibility Guidelines (WCAG) and provides users a smooth and intuitive experience.
Launch a Screen Reader Testing session
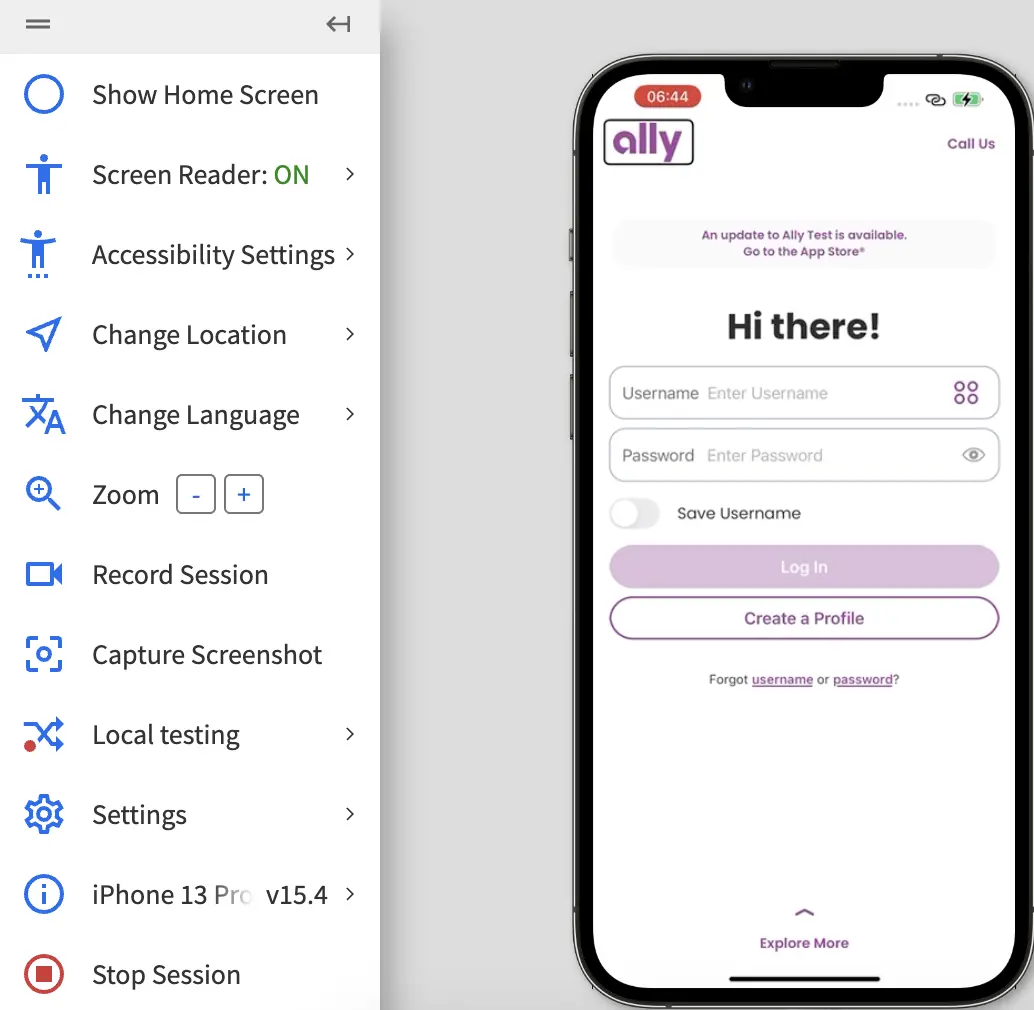
Follow these steps to turn the Screen Reader on:
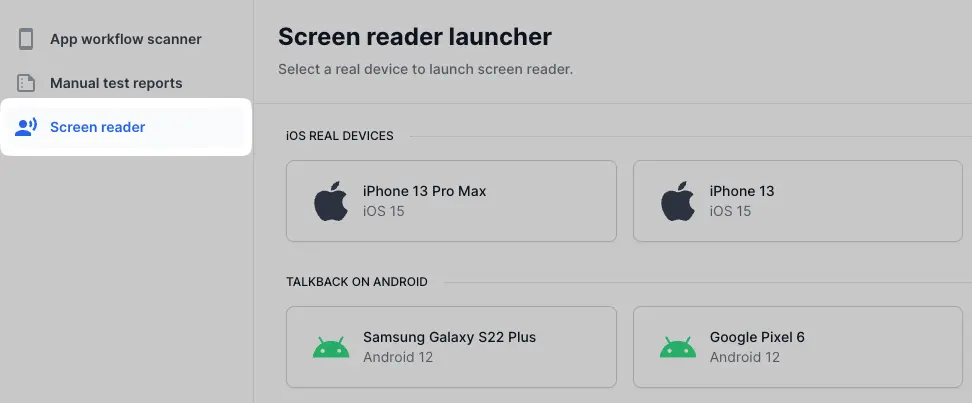
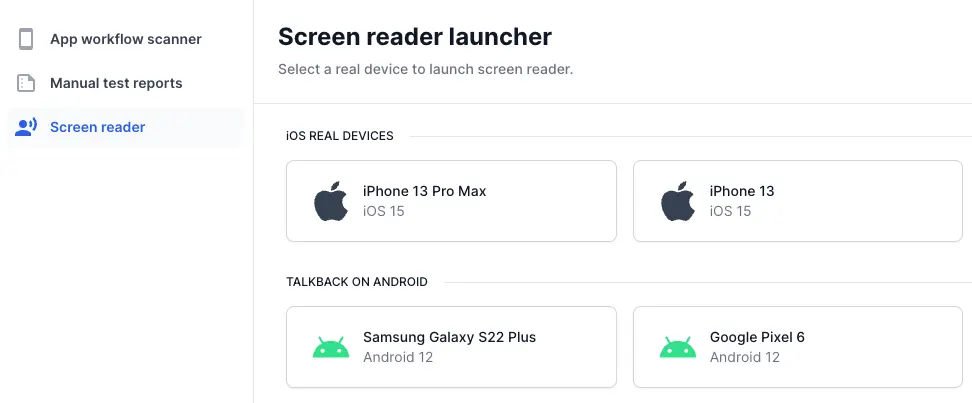
- Go to the App Accessibility dashboard.
-
On the left menu of the App Accessibility dashboard, click Screen Reader.
-
Choose your device and OS combination to start a session.
A new screen reader device window appears. - Install the app from any of the following sources:
- Upload the app: Select and upload the app file directly from your computer or provide a URL link.
- Install from Apple App Store, or TestFlight: Access and install the app directly from the Apple App Store or via Test Flight.
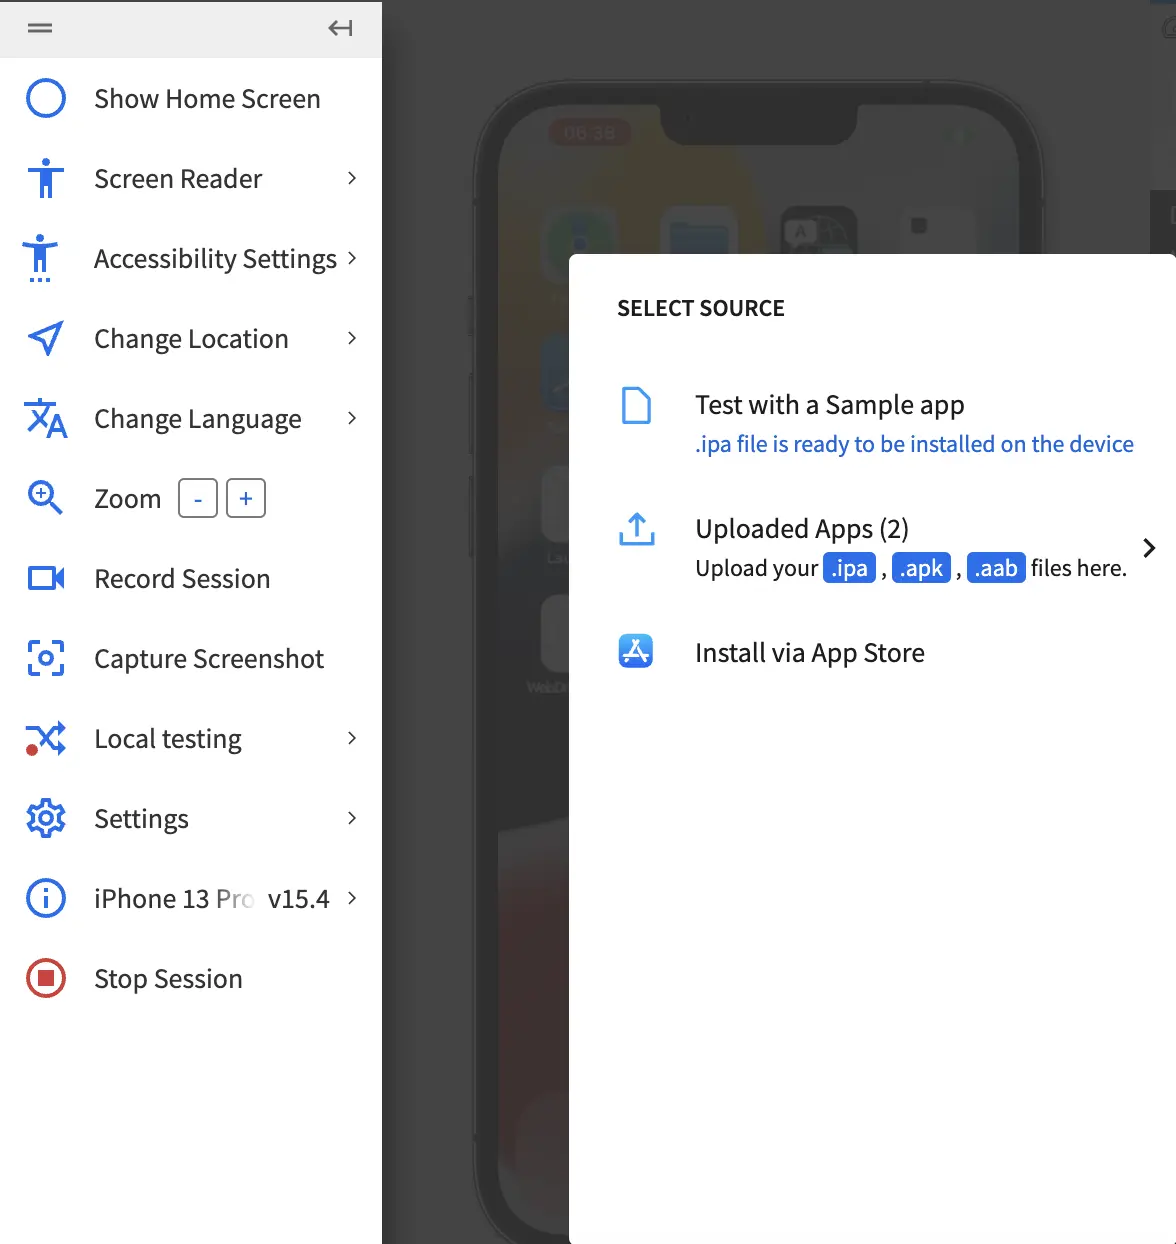
The app is being uploaded and installed on the iOS. - Customize the scan by configuring the following settings (optional).
- Change the test location using GPS-based and IP-based geolocation changes (see annotation 1). Learn more about location testing.
- Change the language to test the accuracy of localized content and functionality across multiple languages (see annotation 2). Learn more about localization testing.
- Enable Local Testing to retrieve data from your pre-production environment (see annotation 3). Learn more about Local Testing.
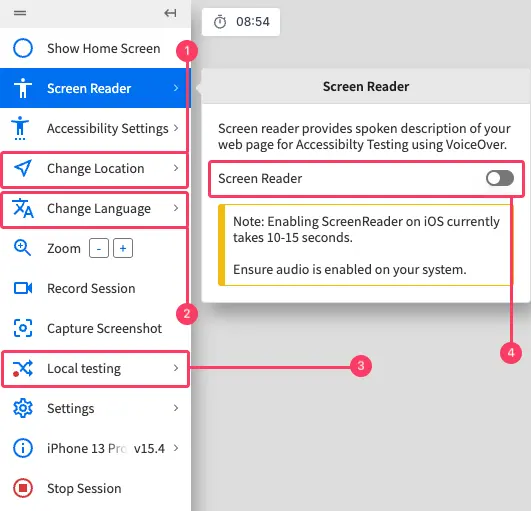
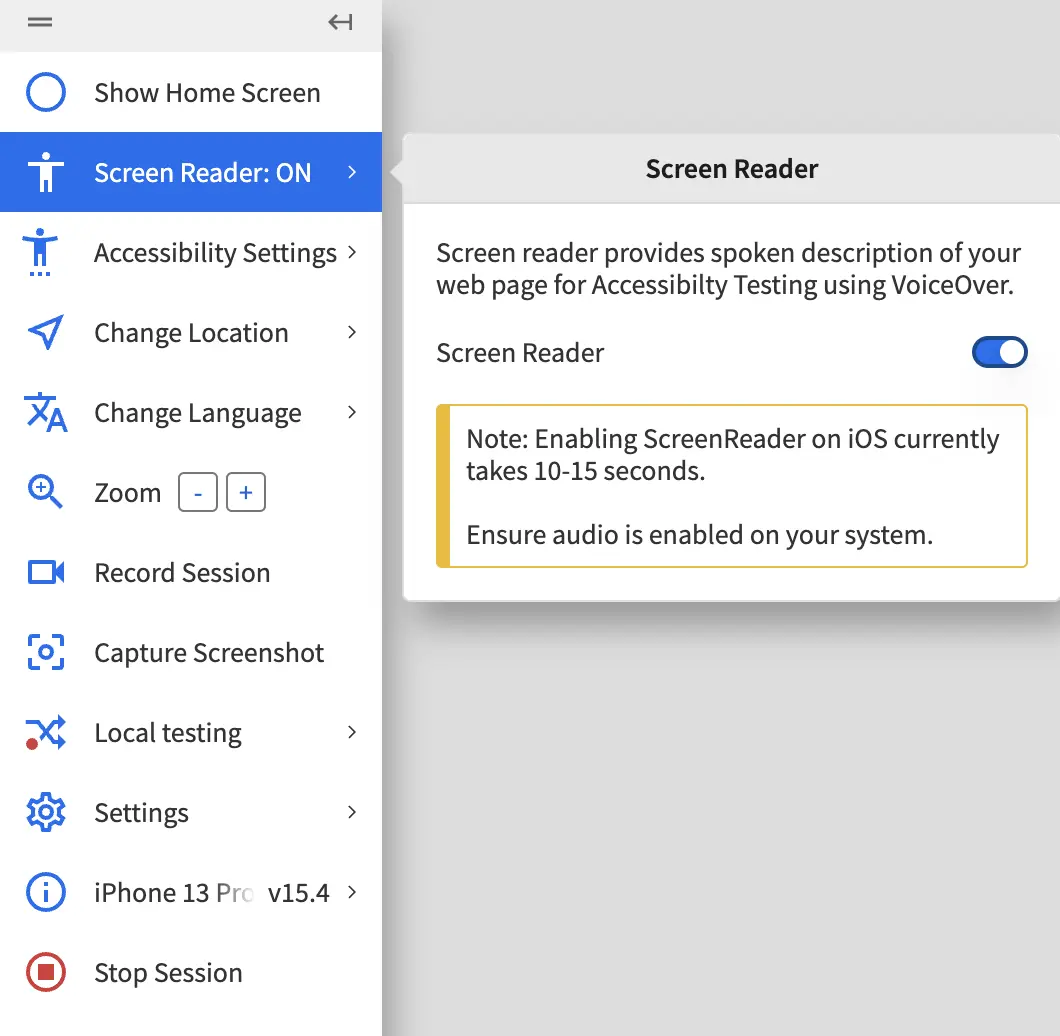
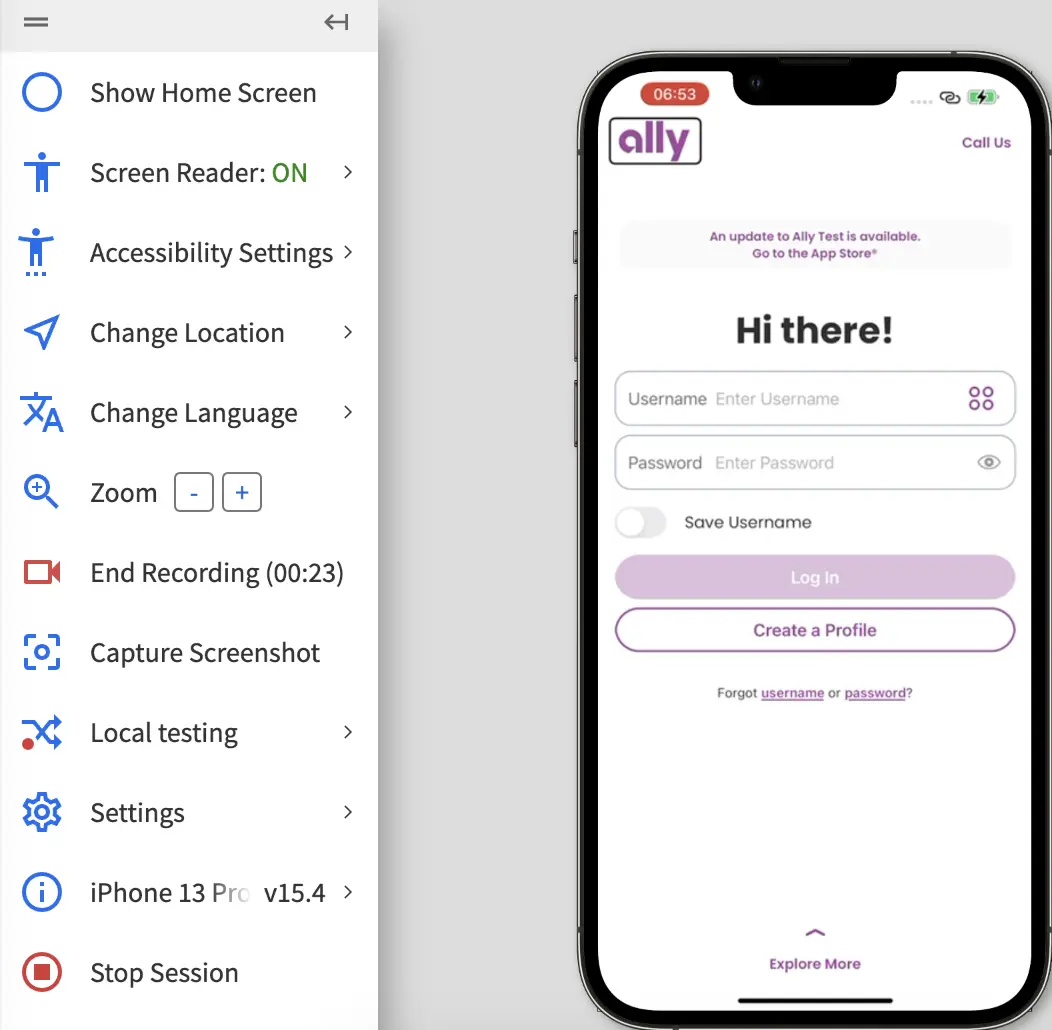
- To start the screen reader, turn the Screen Reader toggle on from the left menu (see annotation 4).
A Screen Reader has been enabled successfully notification appears. Start exploring your app with screen reader and identify any areas for accessibility improvements.
Navigation when using Screen Reader
Your end-users navigate your website on a VoiceOver-enabled iOS device using one of the following ways:
The navigation behavior on iOS (such as moving to the next or previous element or auto-reading from the start of the page) that can be performed with these two methods will be referred to as VoiceOver actions from here on.
On an iOS device, you can perform VoiceOver actions using keyboard shortcuts or touch gestures. However, to perform such actions in an App Accessibility test session, you must use keyboard shortcuts.
Test accessibility with Screen Reader using keyboard shortcuts
Ensuring that your website is accessible with keyboard shortcuts also ensures that it is accessible with touch gestures. To learn more, see Accessibility with keyboard shortcuts ensures Accessibility with touch gestures.
For the Screen Reader feature on iOS devices in App Accessibility, use the following keyboard shortcuts to trigger VoiceOver actions:
| VoiceOver action | macOS keyboard layout shortcut | Windows keyboard layout shortcut |
|---|---|---|
| Move to previous/next item | Left / Right Arrow | Left / Right Arrow |
| Activate / open element | Control + Option + Space or Control + Space |
Ctrl + Shift + Space or Ctrl + Space |
| Go back / Return to previous screen | Esc | Esc |
| Select the first item | Fn + Left Arrow | Home |
| Select the last item | Fn + Right Arrow | End |
| Go to first element and continue reading | Control + Option + B | Ctrl + B |
| Continue reading from current element | Control + Option + A | Ctrl + A |
| Rotor Next - Next rotor item | Control + Option + Right Arrow | Ctrl + Alt + Right Arrow |
| Rotor Prev - Previous rotor item | Control + Option + Left Arrow | Ctrl + Alt + Left Arrow |
| Rotor Down - Decrement current rotor item | Control + Option + Down Arrow | Ctrl + Alt + Down Arrow |
| Rotor Up - Increment current rotor item | Control + Option + Up Arrow | Ctrl + Alt + Up Arrow |
If your keyboard shortcuts do not work, click on the device screen on the App Accessibility dashboard after you enable Screen Reader to ensure it is in focus.
Change the screen reader language using keyboard shortcuts
In iOS 18, the Language rotor option has been replaced with Voices.
For a list of supported voices and their corresponding languages, refer to Apple’s official VoiceOver voice support documentation.
Use the rotor keyboard shortcuts to switch the screen reader language or voice:
- On a supported iOS device, enable screen reader. For steps-by-step instructions, see Start Screen Reader Testing.
- Open an app and set the rotor using the rotor left or rotor right shortcuts:
- iOS 17 and earlier: Set it to Language.
- iOS 18: Set it to Voice instead of Language.
- Toggle between languages or voices using the rotor up and rotor down shortcuts.
| VoiceOver action | MacOS keyboard layout shortcut | Windows keyboard layout shortcut |
|---|---|---|
| Change rotor settings | Control + Option + Left/Right arrow key | Ctrl + Alt + Left/Right arrow key |
| Next language/voice | Control + Option + Up arrow key | Ctrl + Alt + Up arrow key |
| Previous language/voice | Control + Option + Down arrow key | Ctrl + Alt + Down arrow key |
Accessibility with keyboard shortcuts ensures Accessibility with touch gestures
When you use an iOS device in regular mode, when VoiceOver is off, a swipe left or swipe right gesture might take you to the previous or next screen on the home page. When VoiceOver is on, the same swipe left or swipe right gesture triggers a VoiceOver action, that is, moving focus to the previous or the next UI element on the screen.
However, in App Accessibility, even when VoiceOver is enabled using the Screen Reader feature, touch gestures trigger regular usage actions, not VoiceOver actions.
WCAG compliance and Accessibility ensure aspects such as:
- UI elements and controls on your website are reachable and in the correct order when traversed in linear order via touch gestures like swipe left/right or corresponding keyboard shortcuts for moving to the previous or next element.
- The description of UI elements and controls on your website is such that it makes sense to a user hearing them via the VoiceOver audio readout.
Hence, it makes no difference to your website’s accessibility rating whether the end user navigates the website using the keyboard or touch gestures when VoiceOver is enabled. The ordering of UI elements, reachability, and description remains unchanged regardless of the navigation method.
When testing with the Screen Reader feature, if your website is accessible with keyboard shortcuts, it is also accessible with touch gestures.
Stop Screen Reader Testing
To turn off the screen reader session, click the Screen Reader icon on the left menu and turn the Screen Reader toggle off. This will end your screen reader testing session.
A Screen Reader has been disabled successfully notification appears and the screen reader stops.
Record a Screen Reader Session
Capturing a screen reader session lets you review how your app sounds to users who rely on screen readers and pinpoint areas for improvement.
Follow these steps to record an ongoing session:
-
Click Record Session from the left menu.

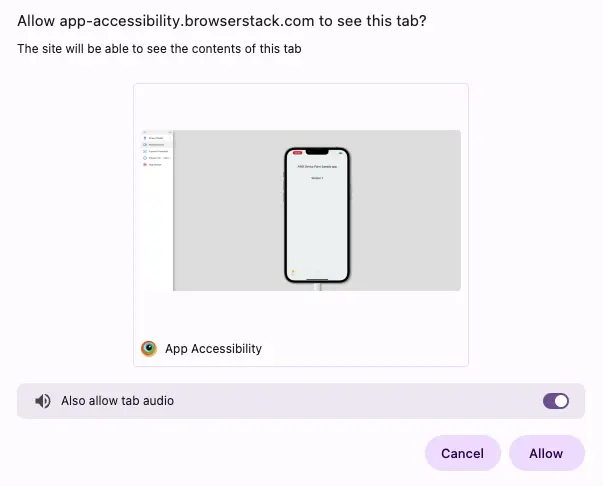
A permission confirmation window appears. -
Click Allow to grant permissions. Turn the Also allow tab audio toggle on to include the tab audio if desired.
- Use your app with VoiceOver active.
-
Click End Recording to stop.
A download window appears. -
Choose Download to save the session.
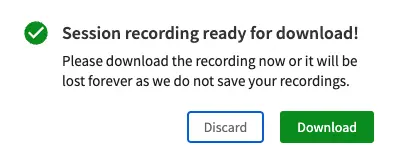
If you click Discard, the recording will be permanently deleted and cannot be retrieved.
The screen reader recording is now complete.
End Screen Reader Session
After you have finished your testing session, follow these steps to close it:
- Click Stop Session to close the session and browser window.
We're sorry to hear that. Please share your feedback so we can do better
Contact our Support team for immediate help while we work on improving our docs.
We're continuously improving our docs. We'd love to know what you liked
We're sorry to hear that. Please share your feedback so we can do better
Contact our Support team for immediate help while we work on improving our docs.
We're continuously improving our docs. We'd love to know what you liked
Thank you for your valuable feedback!