Upload and install custom certificates
Upload and install custom certificates to test apps that use SSL pinning or self-signed certificates.
This feature is currently available only on request for Enterprise plan customers of App Live. If you’re an Enterprise customer and would like to enable this feature, contact the BrowserStack support team.
Many enterprise apps, particularly in banking, use SSL pinning to prevent Man-in-the-Middle (MITM) attacks. SSL pinning configures your app to accept only a specific, trusted security certificate from a server. Similarly, apps in development or staging environments often use self-signed certificates to securely exchange network traffic.
Using Certificate Injection on App Live, you can upload and install your app’s trusted certificates directly onto BrowserStack real devices. This enables you to test apps that use SSL pinning or self-signed certificates, and also use features like Network Logs.
Supported certificate formats
BrowserStack Certificate Injection supports the following certificate formats:
| Certificate Format | Supported Devices |
|---|---|
.cer |
Android, iOS |
.mobileconfig |
iOS |
Use Cases
Certificate Injection is particularly useful for:
- Use self-signed certificates for development and testing purposes.
- Verifying app functionality in environments where SSL pinning is standard.
- Debugging network issues in apps that integrate SSL pinning checks.
Upload certificates before a test session
You can upload a maximum of 20 certificates.
To upload certificates:
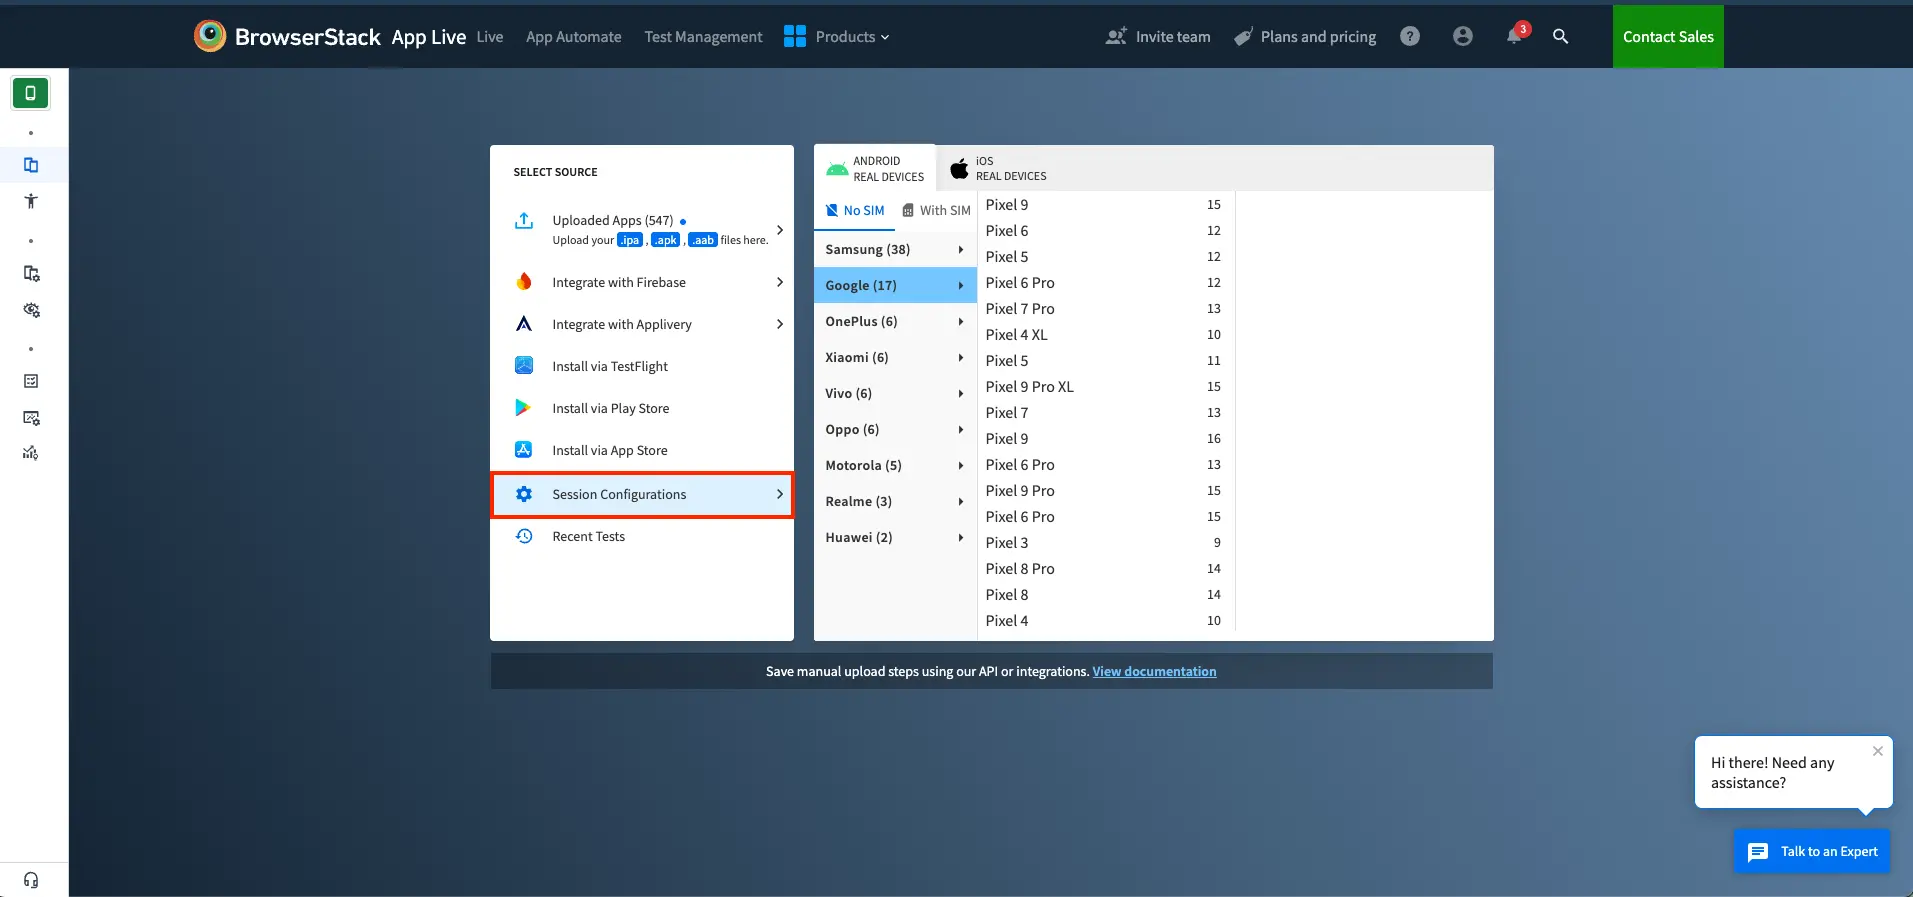
- Log in to the App Live dashboard.
- In the Select source section, click Session Configurations.
- In the Certificates tab, choose one of the following options:
- If you are uploading certificates for the first time, click the Upload button (annotation 2) next to the Manage certificates option.
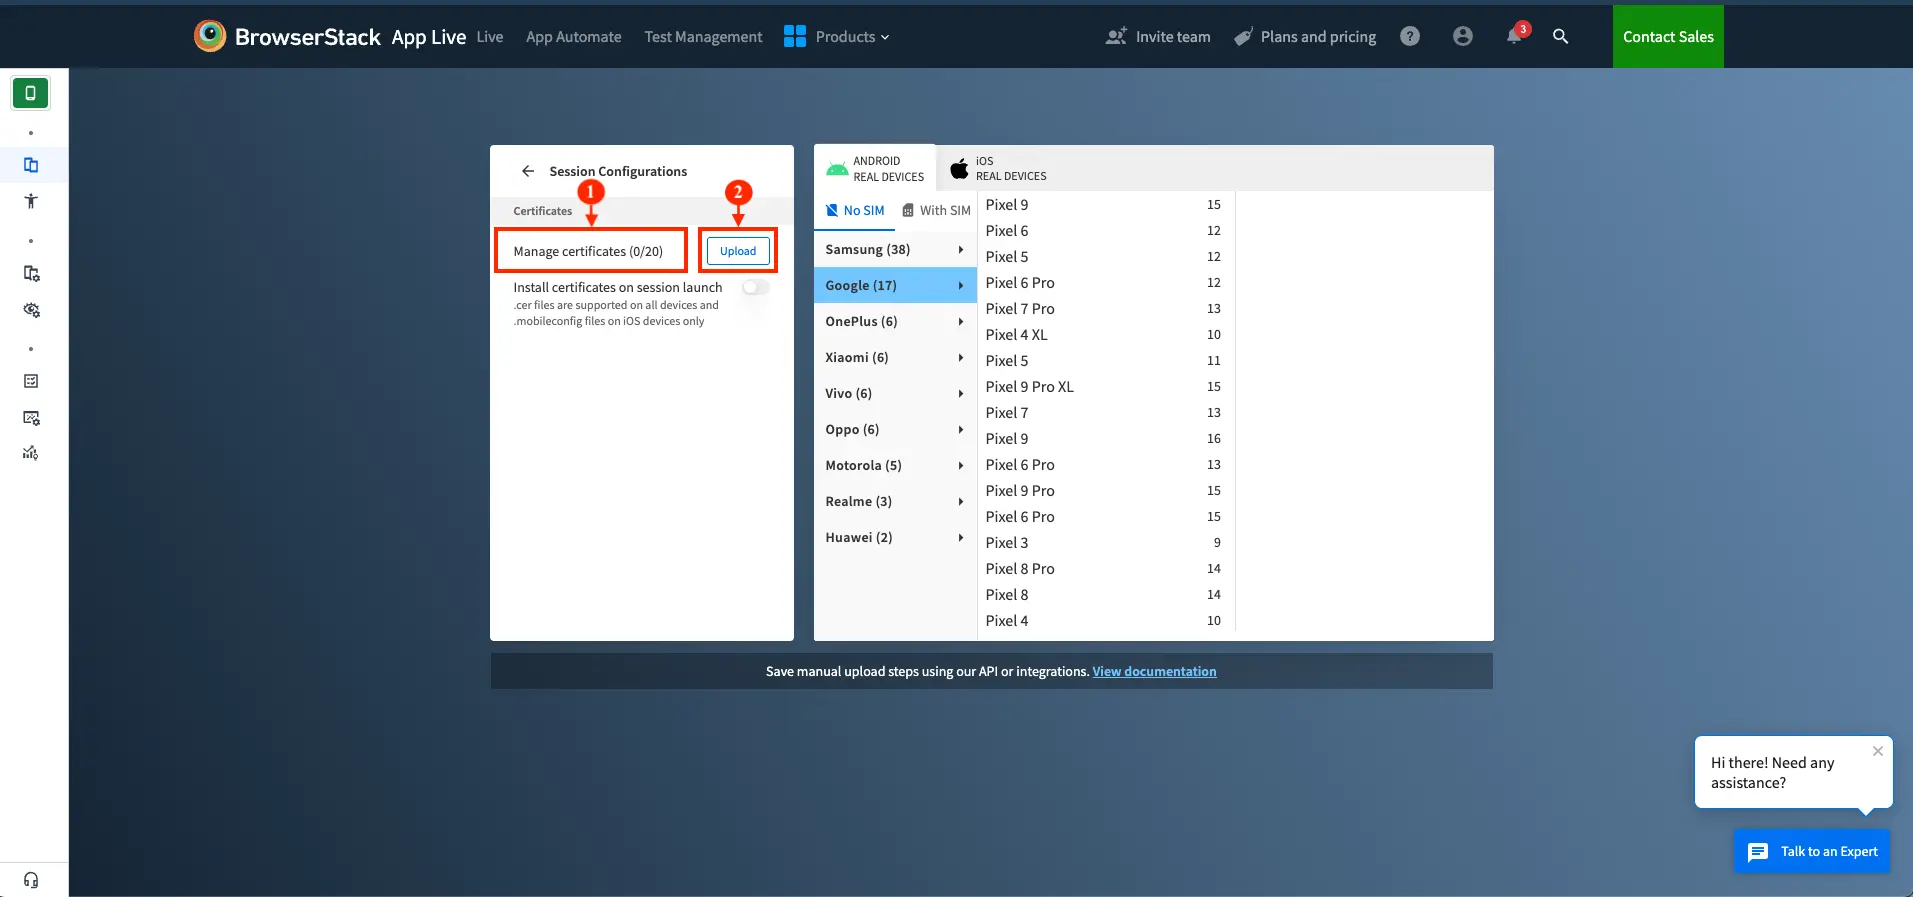
- If you had uploaded certificates previously, the Upload button is available in the Manage certificates tab:
- Click Manage certificates (annotation 1).
- In the Manage certificates tab, click the Upload button.

- If you are uploading certificates for the first time, click the Upload button (annotation 2) next to the Manage certificates option.
- Select the certificate file from your local machine.
The certificate is uploaded and listed in the Manage certificates section.

- To start a new test session with the uploaded certificates, navigate back to the App Live dashboard and launch a new session. For detailed instructions, see Launch session from App Live dashboard.
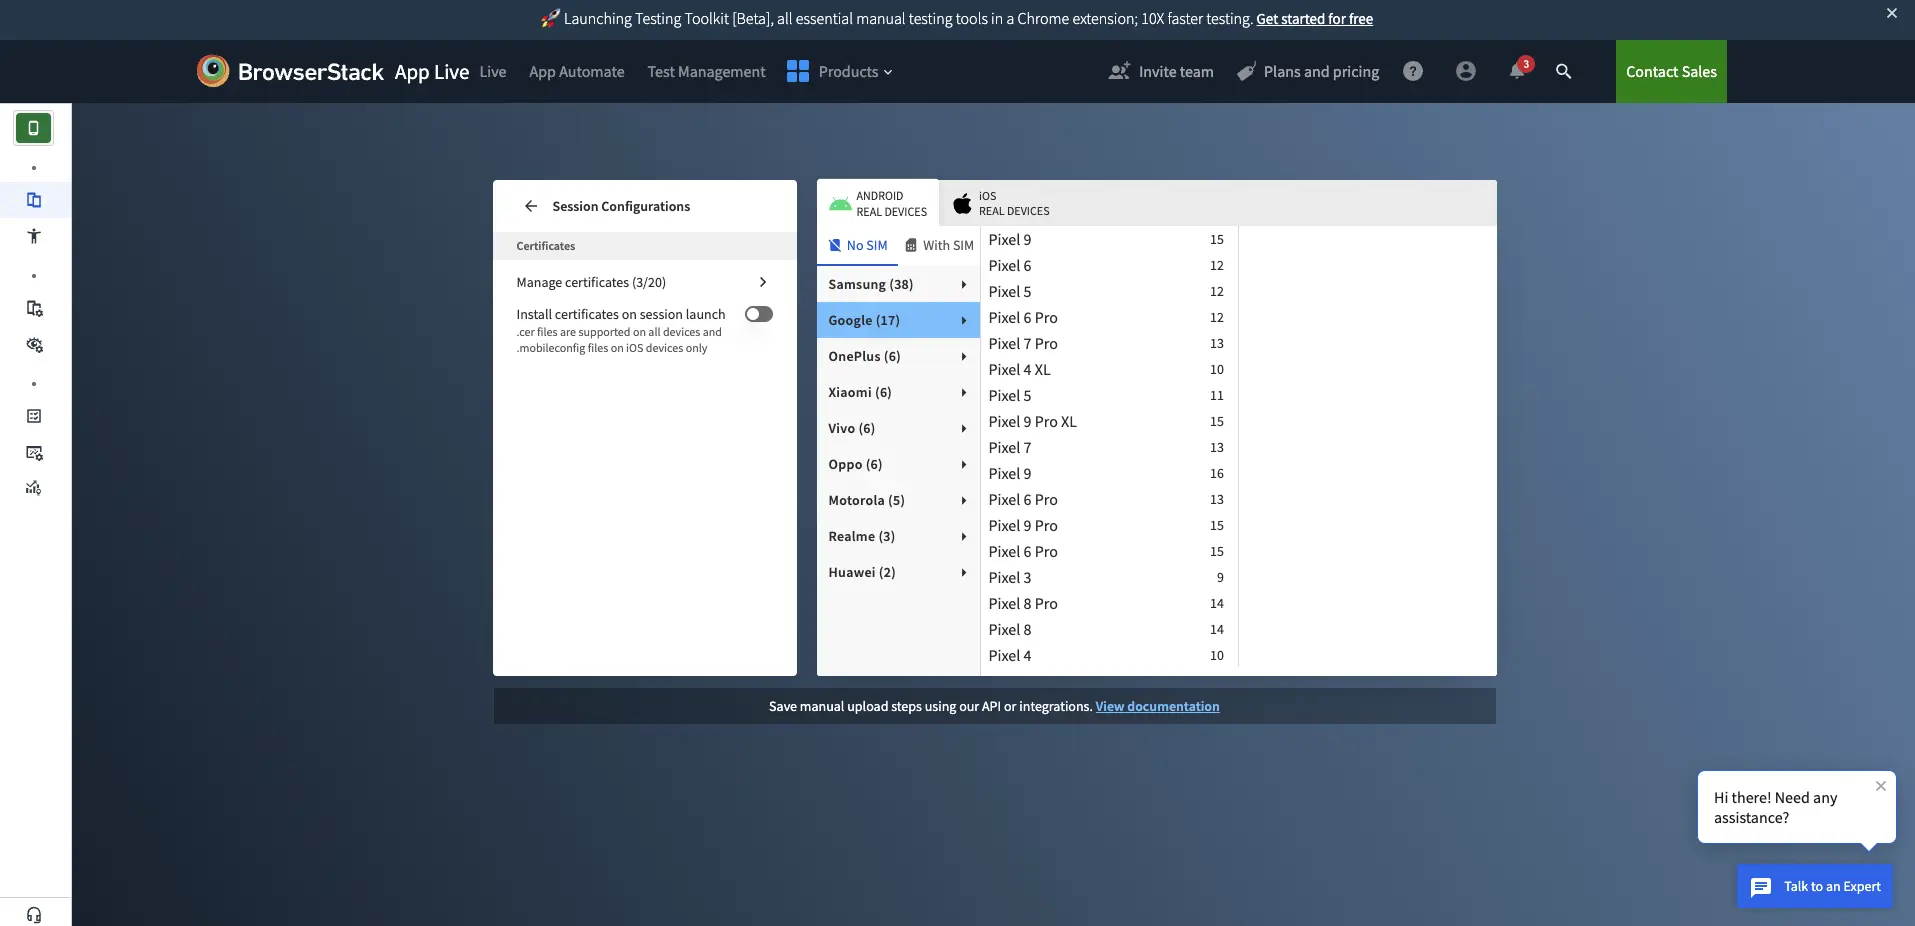
Optional: To automatically install the uploaded certificates when you launch a test session, turn on the Install certificates on session launch toggle in the Certificates tab.
Alternatively, you can also choose to install certificates manually during the session.
Manage certificates during a test session
You can manage uploaded certificates during an active test session. This allows you to install, uninstall, or delete certificates as needed without interrupting your testing workflow. You can also upload new certificates during a session.
To manage certificates:
- Log in to the App Live dashboard.
- Start a new test session. For detailed instructions, see Launch session from App Live dashboard.
- In the vertical toolbar, click iOS Settings or Android Settings based on your test device.

- In the settings menu, click Certificates.
The uploaded certificates are listed under the Uploaded Certificates section.
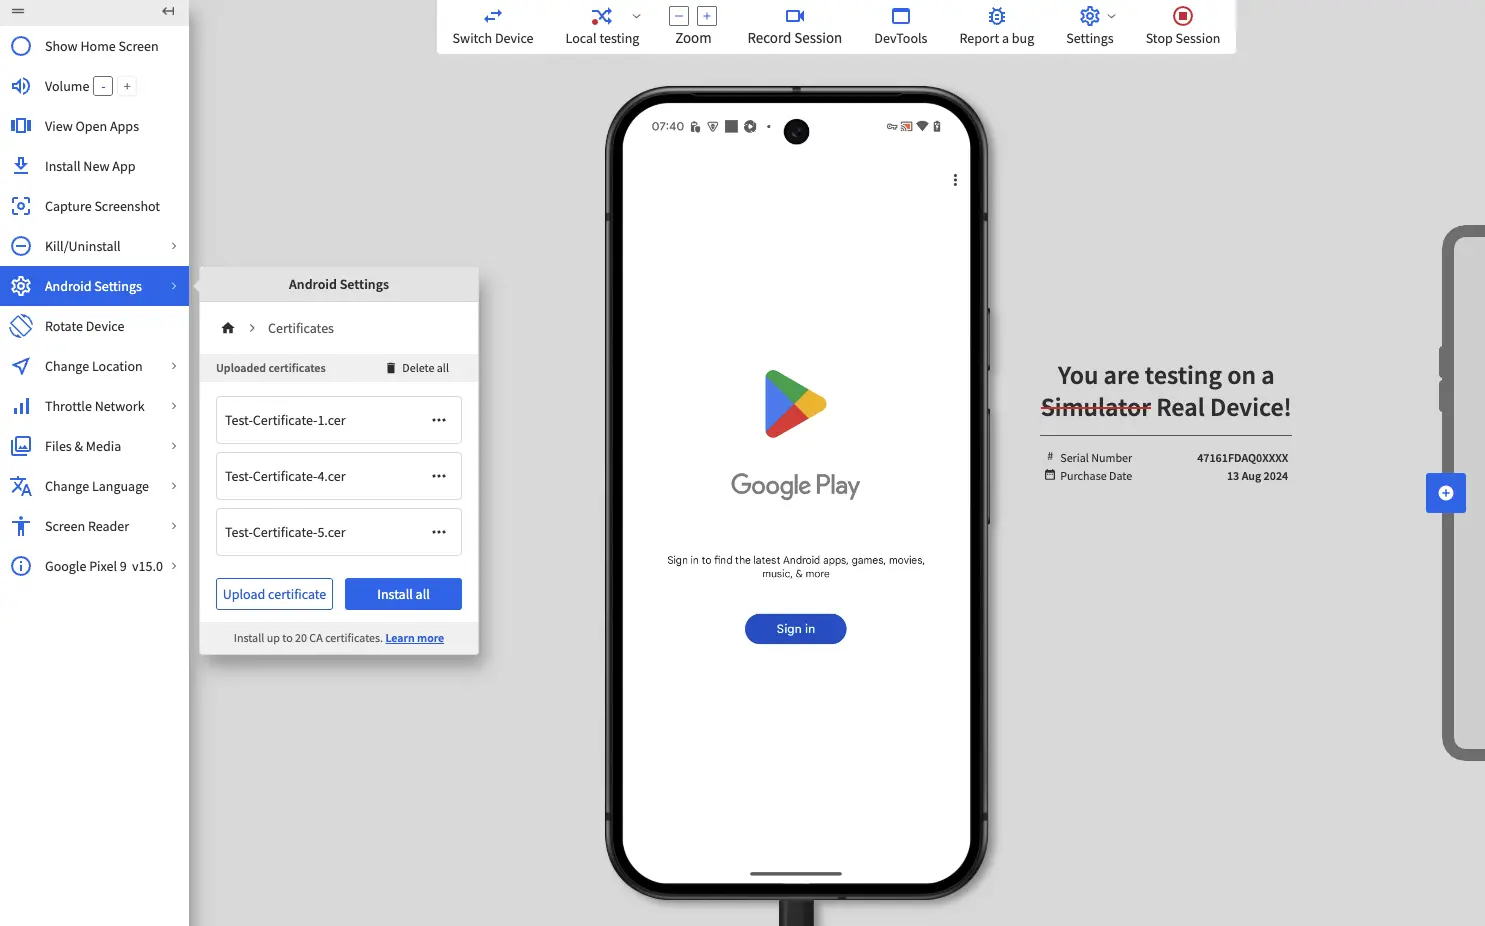
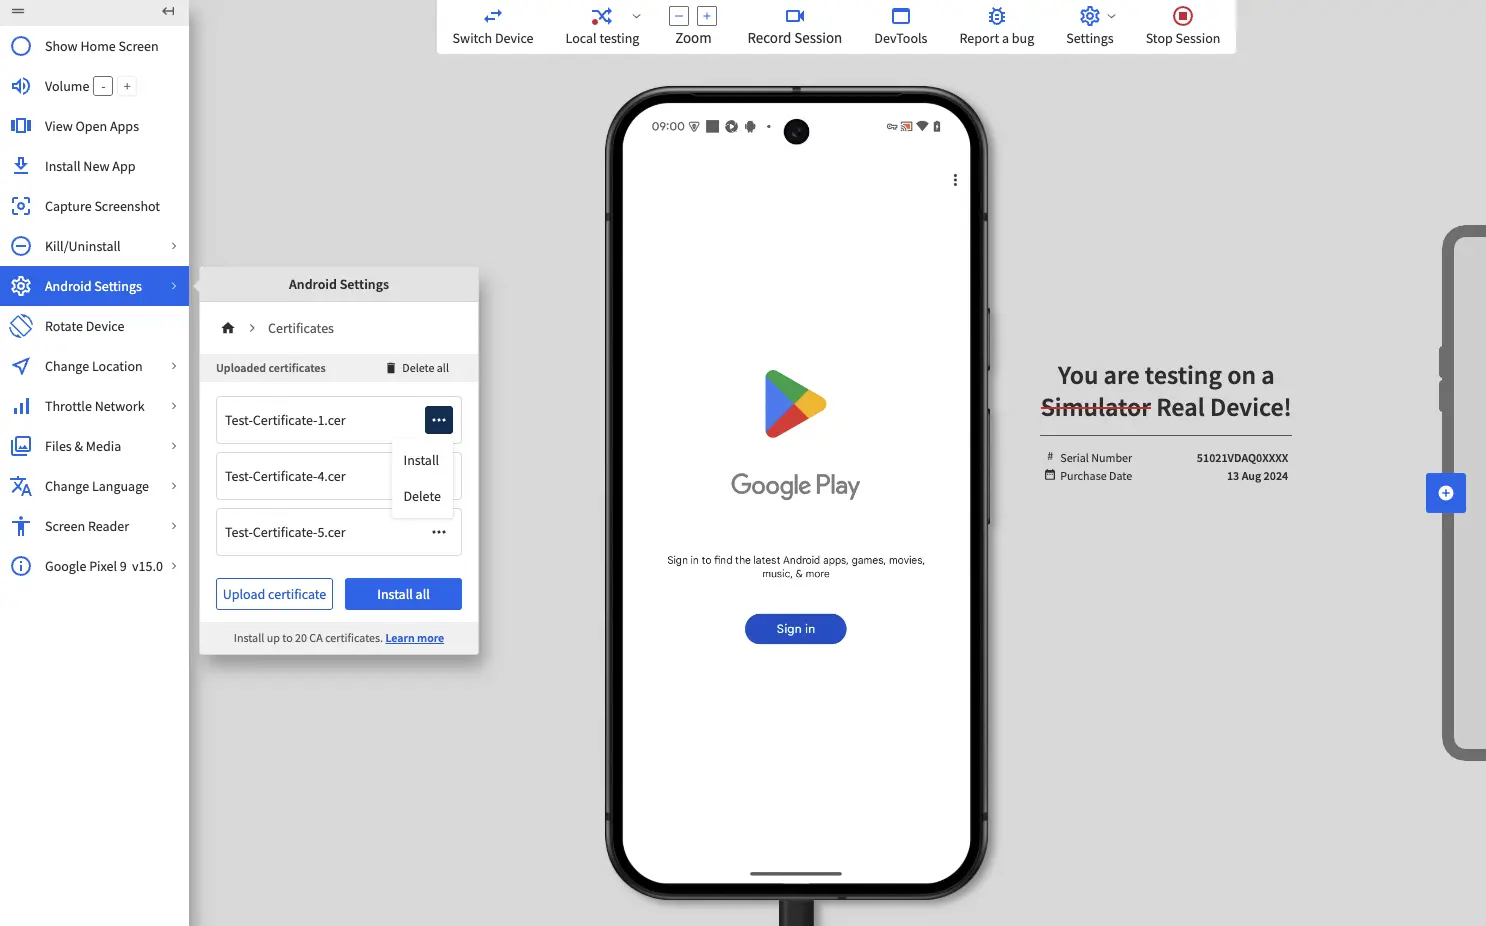
- Manage certificates based on your requirements.
- Upload: In the Certificates prompt, click the Upload certificate button to upload a new certificate from your local machine.
-
Install: In the Uploaded certificates section, click the more menu (⋮) icon next to an uploaded certificate and select Install.
To install all uploaded certificates at once, click the Install all button. - Uninstall: In the Uploaded certificates section, click the more menu (⋮) icon next to an installed certificate to uninstall it.
-
Delete: In the Uploaded certificates section, click the more menu (⋮) icon next to an uploaded certificate and select Delete.
Delete uploaded certificates from the dashboard
To delete uploaded certificates:
- Log in to the App Live dashboard.
- In the Select source section, click Session Configurations.
- In the Certificates tab, click Manage certificates.
- In the Manage certificates dialog, click the delete (🗑️) icon next to the Uploaded certificates tab title and certificate count.

- Select the certificates you want to delete and then click the Delete button.

The selected certificates are removed from the list of uploaded certificates.
We're sorry to hear that. Please share your feedback so we can do better
Contact our Support team for immediate help while we work on improving our docs.
We're continuously improving our docs. We'd love to know what you liked
We're sorry to hear that. Please share your feedback so we can do better
Contact our Support team for immediate help while we work on improving our docs.
We're continuously improving our docs. We'd love to know what you liked
Thank you for your valuable feedback!