
 Join our Discord
Centralized tag management
View, create, rename, merge, delete, and restore tags across BrowserStack products from one place.
Tags are labels you attach to builds, test runs, test cases, test plans, and other entities to group and filter them across BrowserStack products. Over time, tags get duplicated, misspelled, or abandoned. Tag Manager shows admins every tag in the organization, who created it, and where it’s used, so they can clean up the library without changing how teams apply tags.
Manage Tags is available only to organizations that have access to Project Management. Currently, only organization Owners and Admins can see Manage Tags.
Permissions to manage tags
Tag permissions are organization-level RBAC permissions and come from your BrowserStack organization role. The following table lists the tag permissions for each role:
| Action | Admin | User | Viewer |
|---|---|---|---|
| View tags and their usage | ✔️ | ✔️ | ✔️ |
| Create tags | ✔️ | ✔️ | ❌ |
| Edit (rename) tags | ✔️ | ✔️ | ❌ |
| Merge tags | ✔️ | ❌ | ❌ |
| Delete and restore tags | ✔️ | ❌ | ❌ |
Service accounts have their own roles:
| Action | SVC_Admin | SVC_User | SVC_Viewer | SVC_Ingestor |
|---|---|---|---|---|
| View tags and their usage | ✔️ | ✔️ | ✔️ | ❌ |
| Create tags | ✔️ | ✔️ | ❌ | ✔️ |
| Edit (rename) tags | ✔️ | ✔️ | ❌ | ❌ |
| Merge tags | ✔️ | ❌ | ❌ | ❌ |
| Delete and restore tags | ✔️ | ❌ | ❌ | ❌ |
The SVC_Ingestor role is meant for CI pipelines and other integrations that upload test results. It can create the tags that arrive with an upload, but it can’t browse or manage the tag library.
For all RBAC permissions, see Roles and permissions and Service account roles and permissions.
Tags applied through builds and test runs
Attaching or removing an existing tag needs no tag permission, only permission to update the entity. For example, tagging a test case requires permission to update test cases.
Creating a new tag from any source, including the product UIs, API, or automation runs such as builds and test runs, requires the Create tag permission.
Open Tag Manager
Log in to your BrowserStack account.
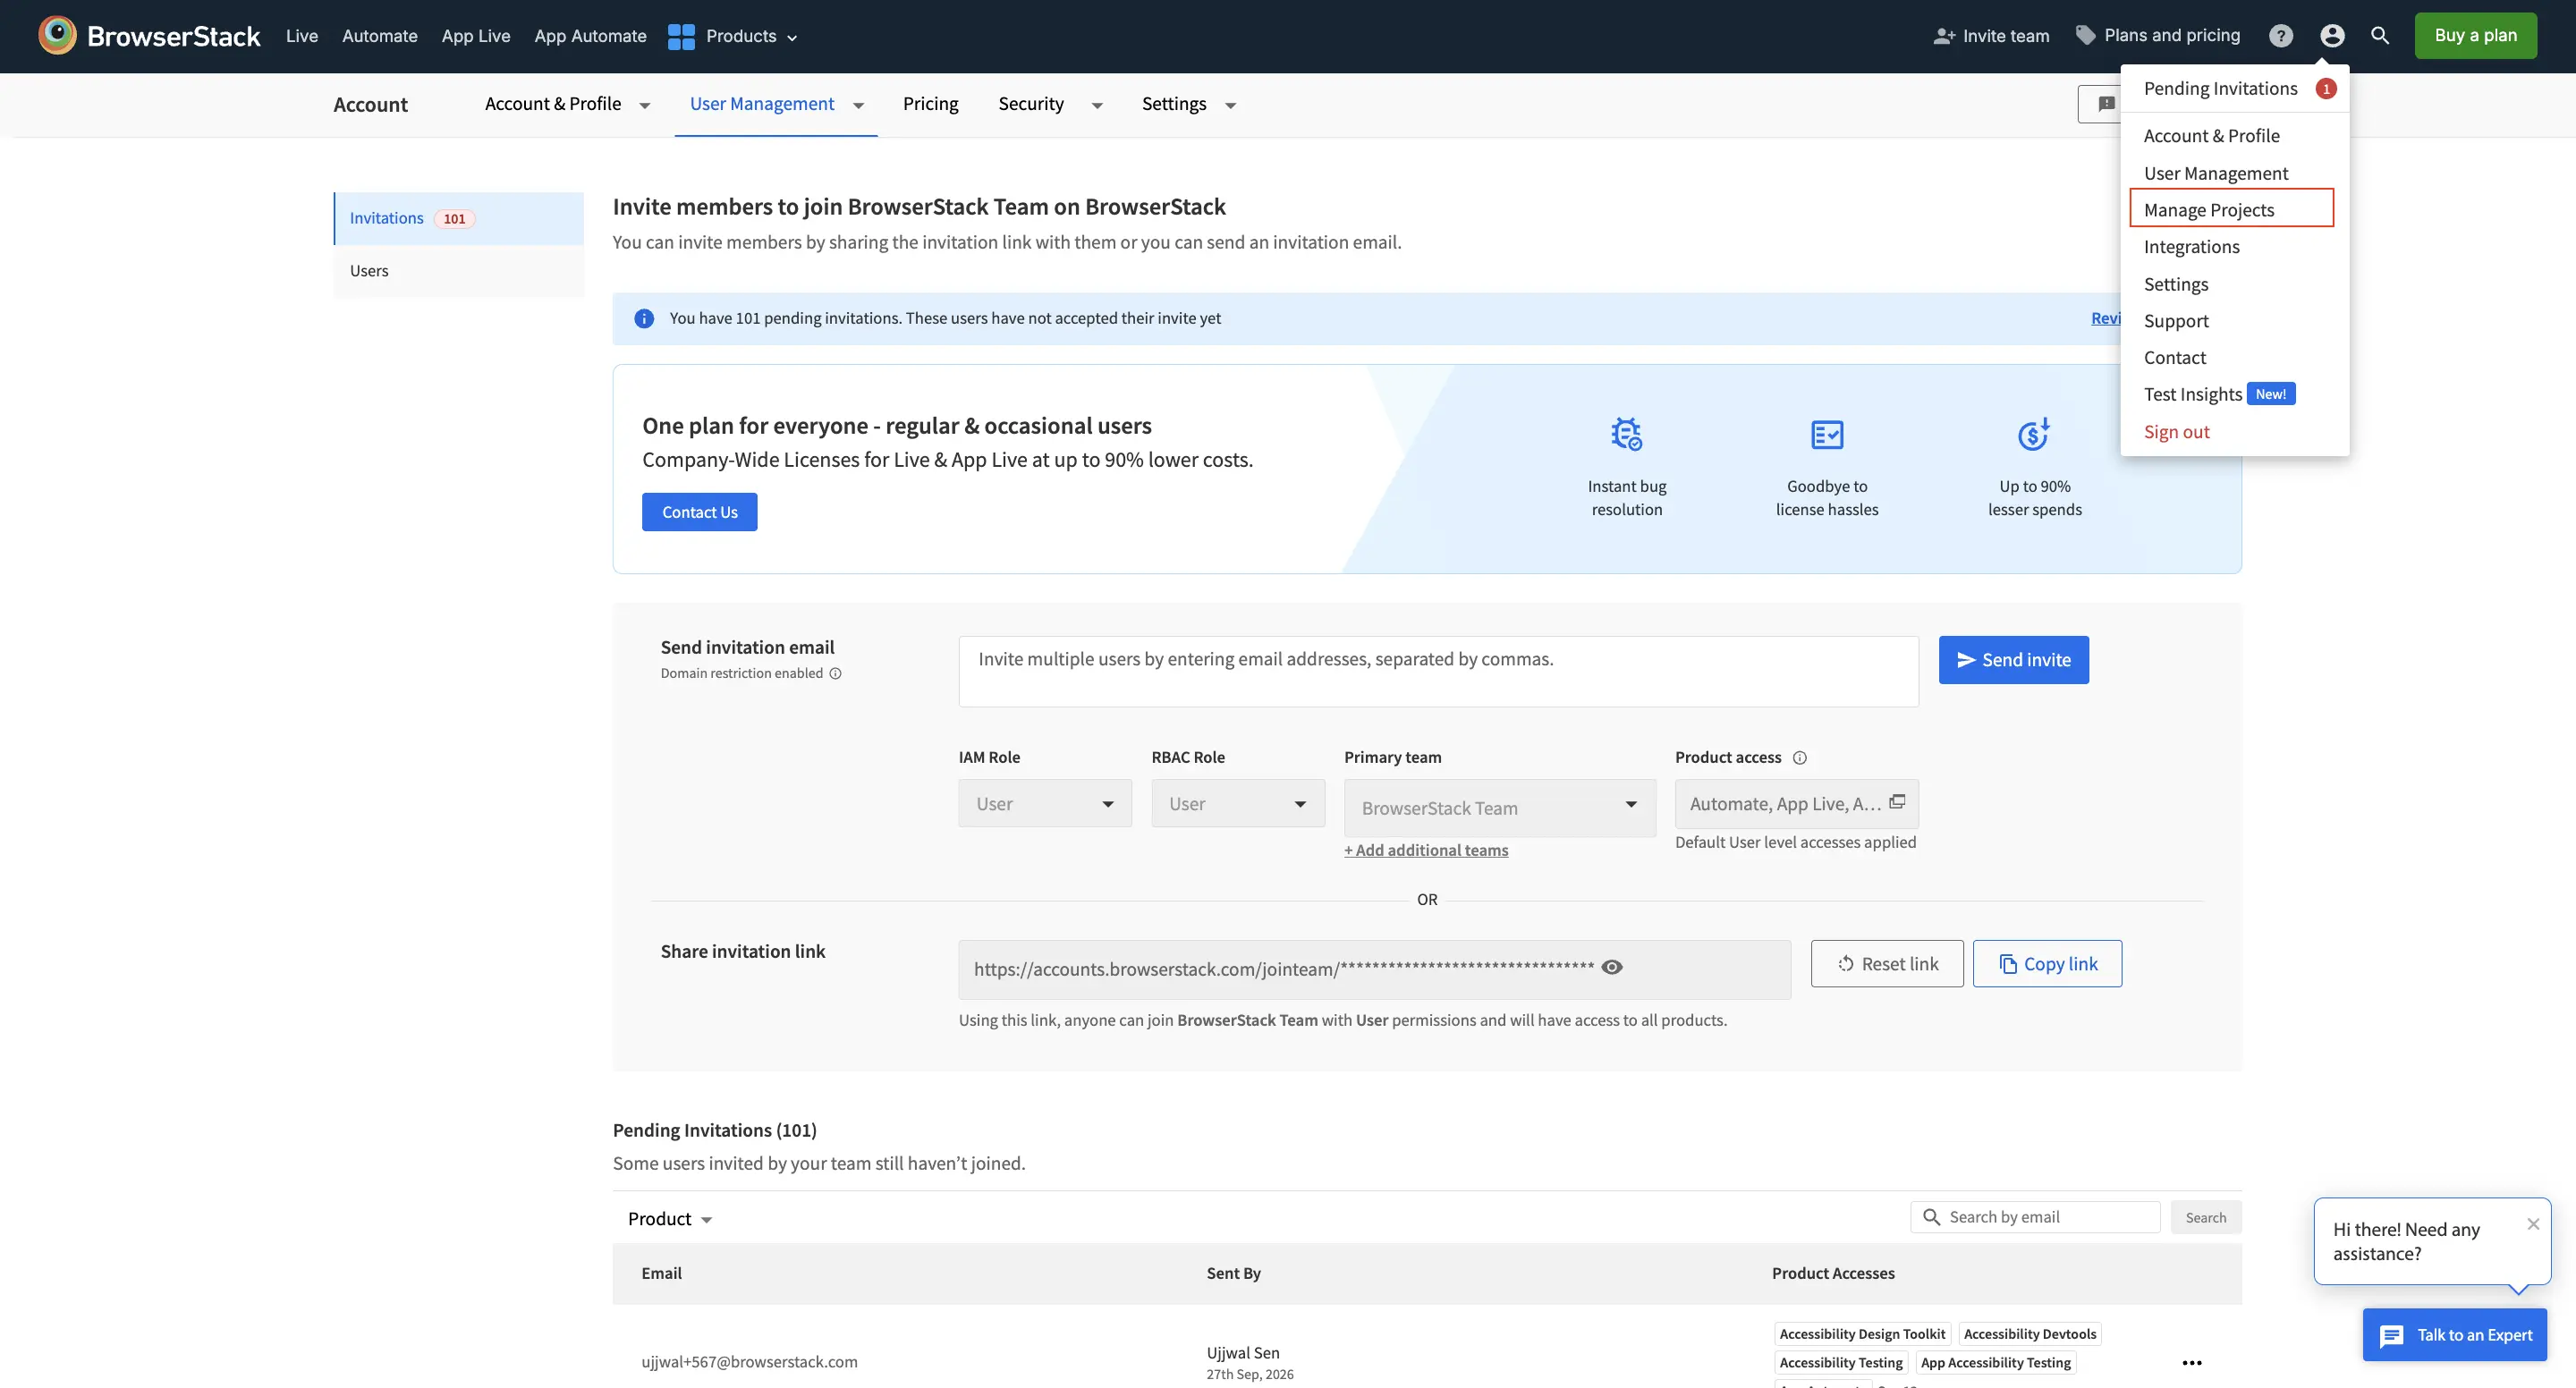
Click the User Profile icon in the top-right corner, then select Manage Projects.
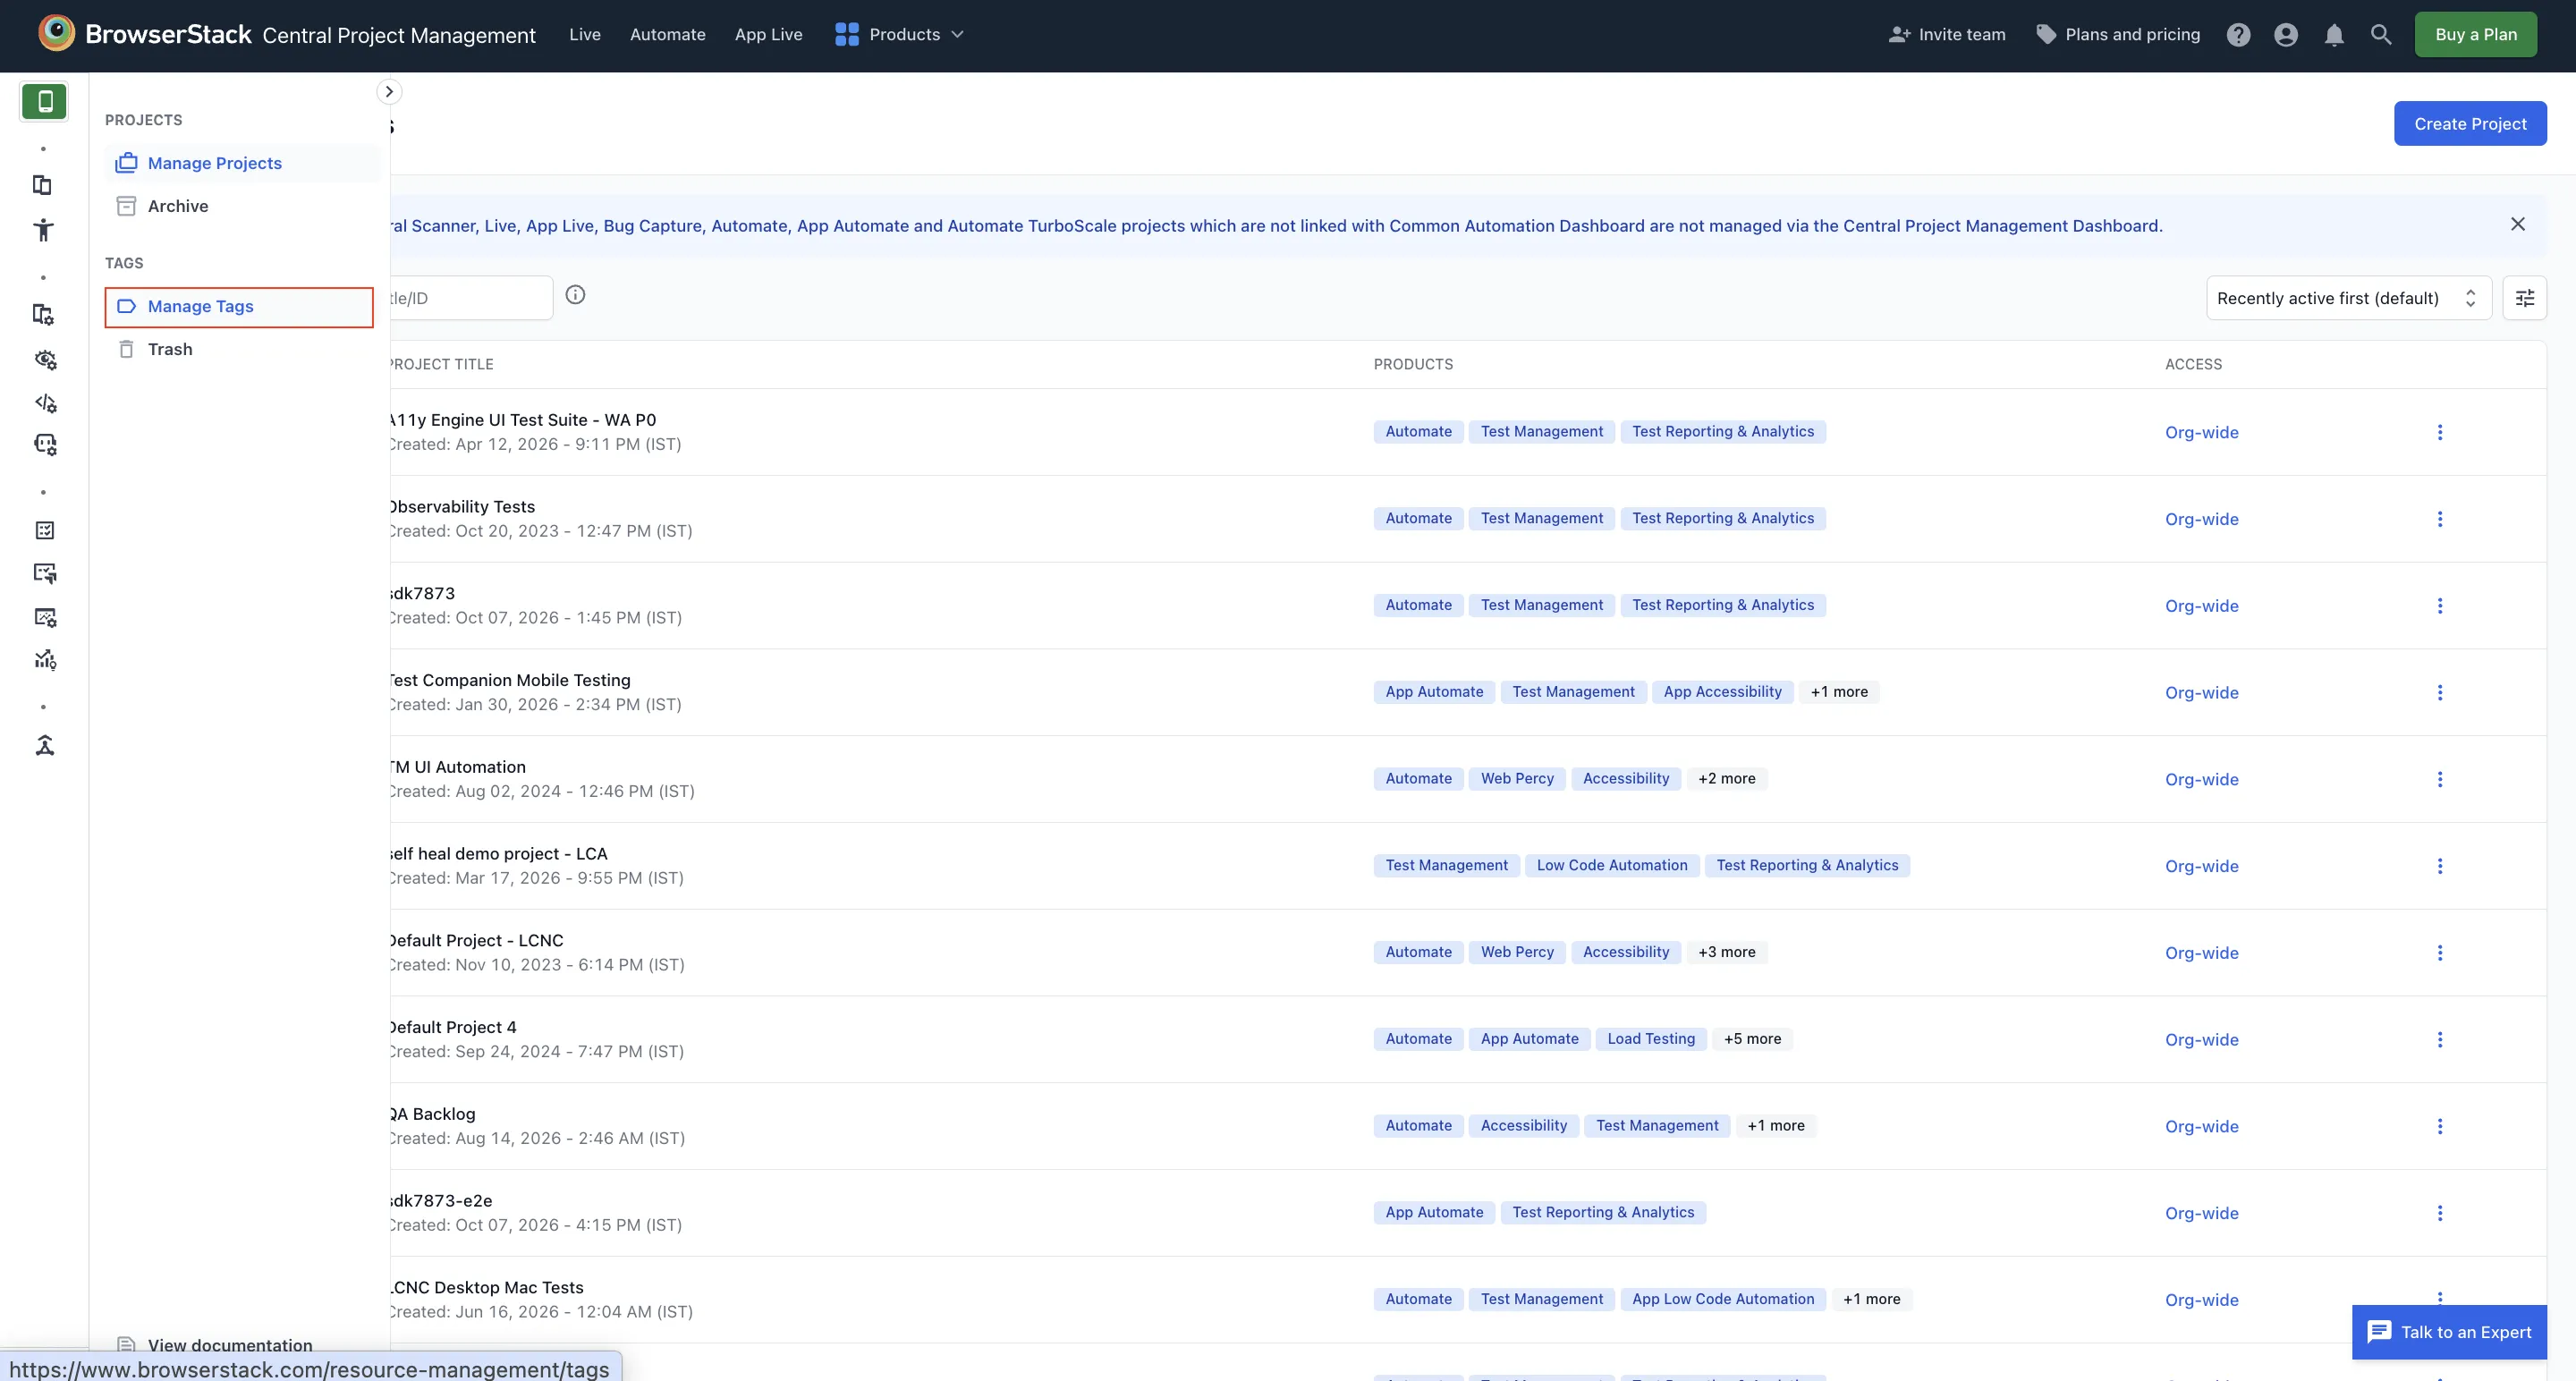
In the left navigation, click Manage Tags.
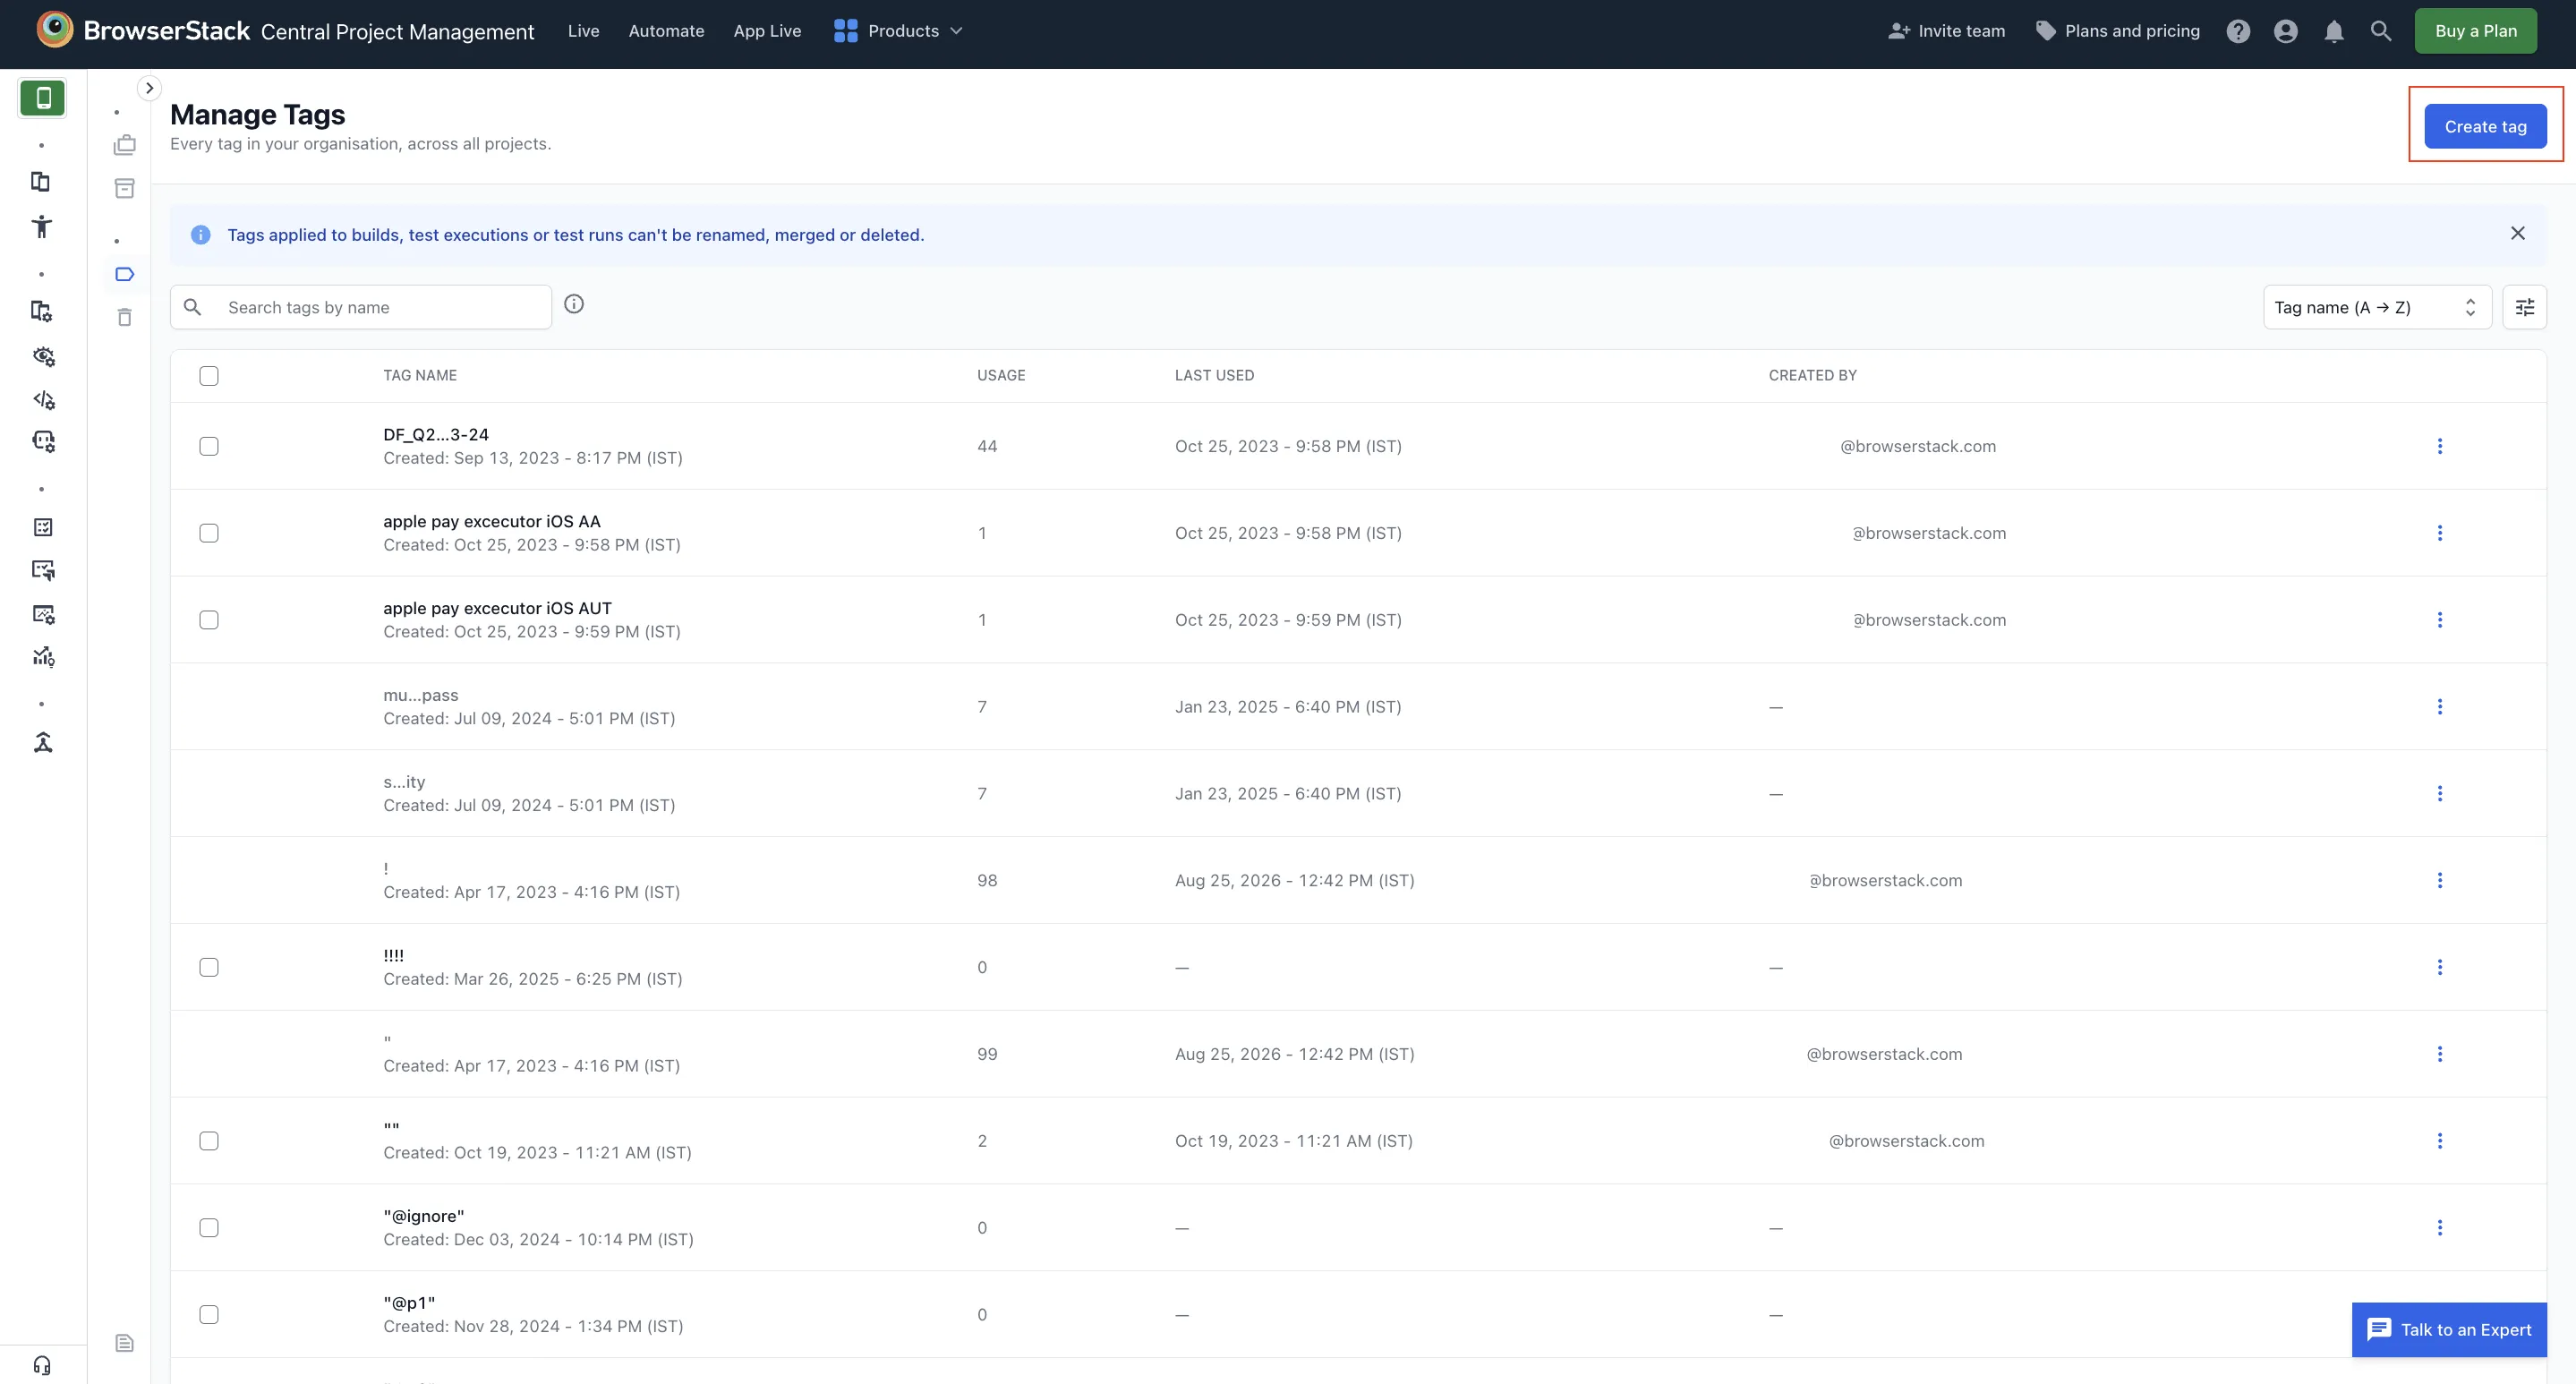
The Manage Tags dashboard appears.
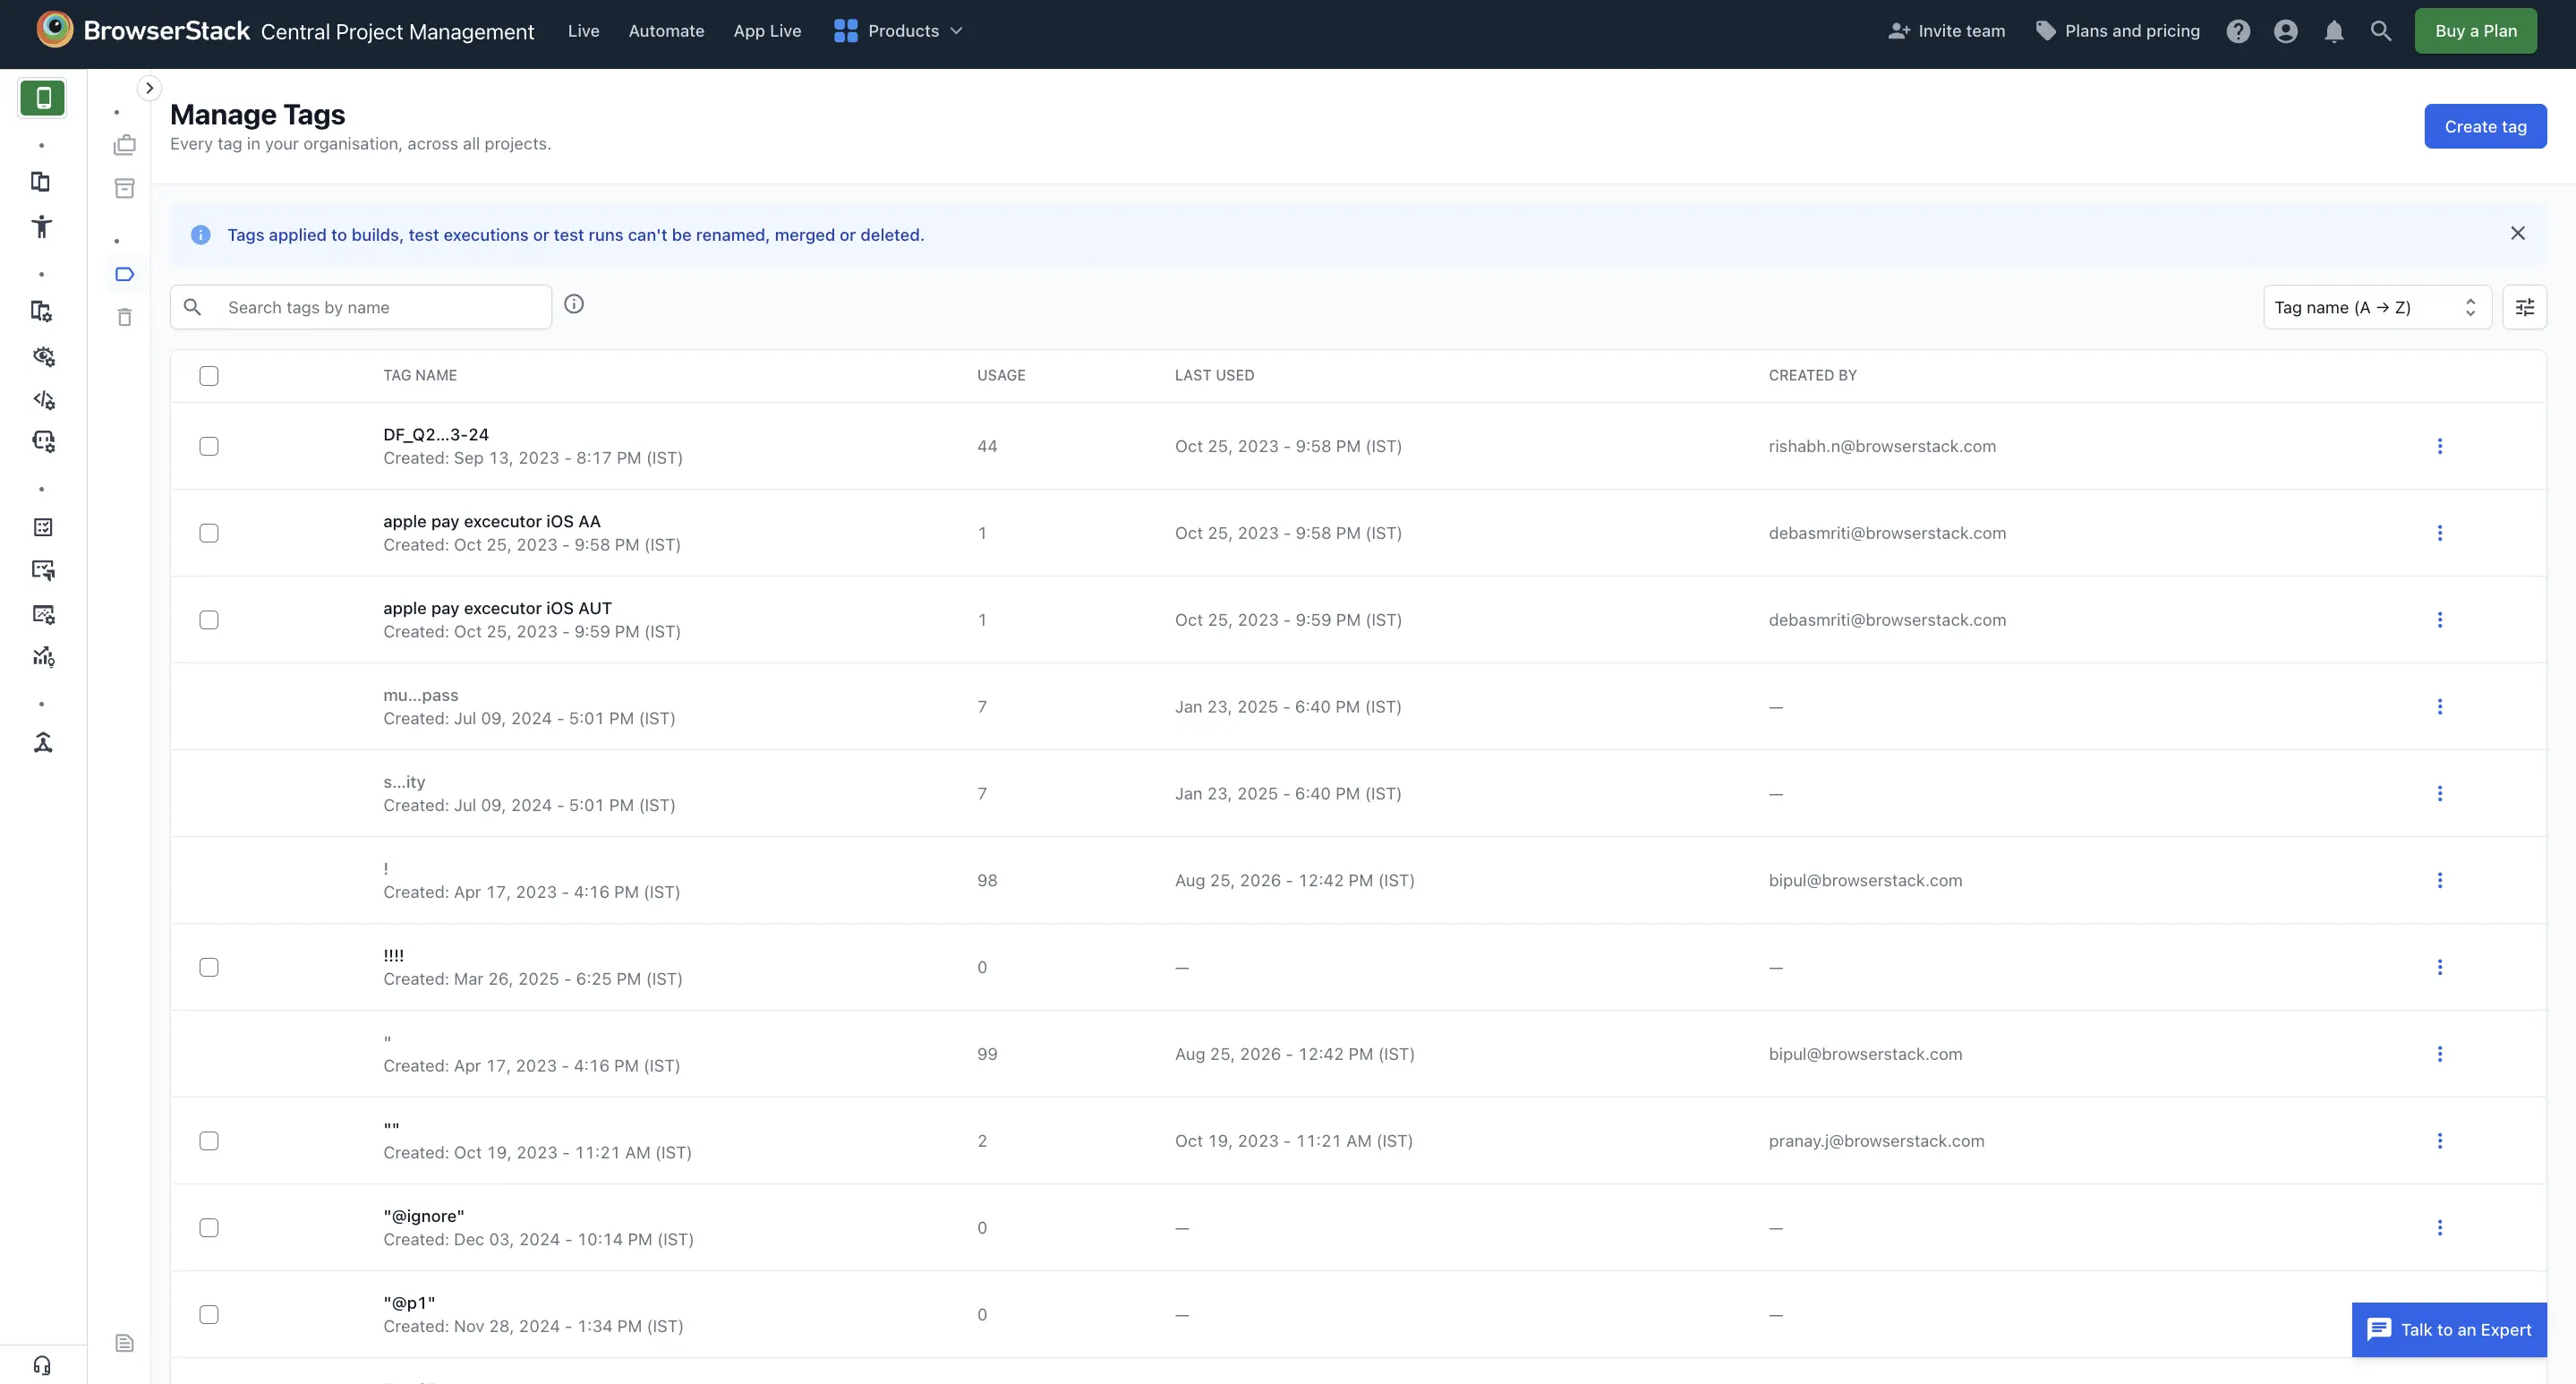
The tag list shows the following for each tag:
- Tag name: Unique name of the tag
- Usage: Number of entities the tag is attached to.
- Last used: When the tag was last attached to an entity.
- Created by: The user who created the tag. Older tags, and tags created by builds and uploads using a project token, have no recorded creator.
By default, tags are sorted by name in ascending order. To change the order, click Sort by and select one of the following options:
- Tag name (A → Z)
- Tag name (Z → A)
- Created (Newest first)
- Created (Oldest first)
Search and filter tags
Enter part of a tag name in the Search field. The list updates as you type.
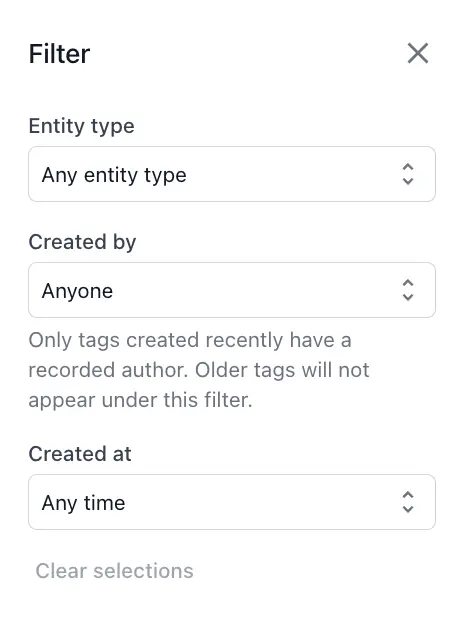
Click the Filter icon to filter by any of the following:
- Entity type: Tags attached to a type of entity. Select Test case, Test run, Test plan, Shared step, Build, Test execution, or Project. The default is Any entity type.
- Created by: Tags created by a specific user. Only recently created tags have a recorded creator, so older tags don’t appear in the results when you use this filter.
-
Created: Tags created within a time period. Select Last 7 days, Last 30 days, or This quarter. The default is Any time.
Create a tag
You can create tags in Tag Manager. Tags can also be created from existing flows, such as automation runs or product UIs.
To create a tag in Tag Manager:
In Manage Tags, click Create tag.
Enter a unique name for the tag. The name can have up to 255 characters. If a tag with the same name already exists, BrowserStack doesn’t create a duplicate.
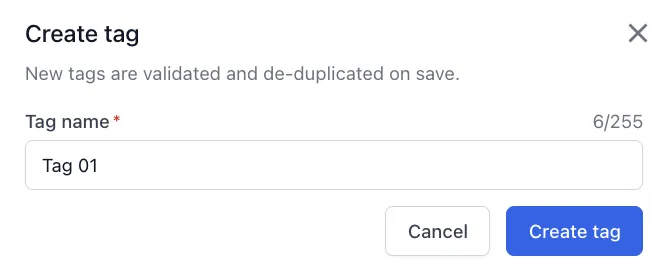
Click Create.
View tag details
Click a tag to open its details panel. The panel shows the tag name and the following details:
- Associations: Total number of entities the tag is attached to.
- Created by: The user who created the tag.
- Created on: The date and time the tag was created.
- Last used: The date and time the tag was last attached to an entity.
-
Usage: Entity count by entity type, such as test cases.
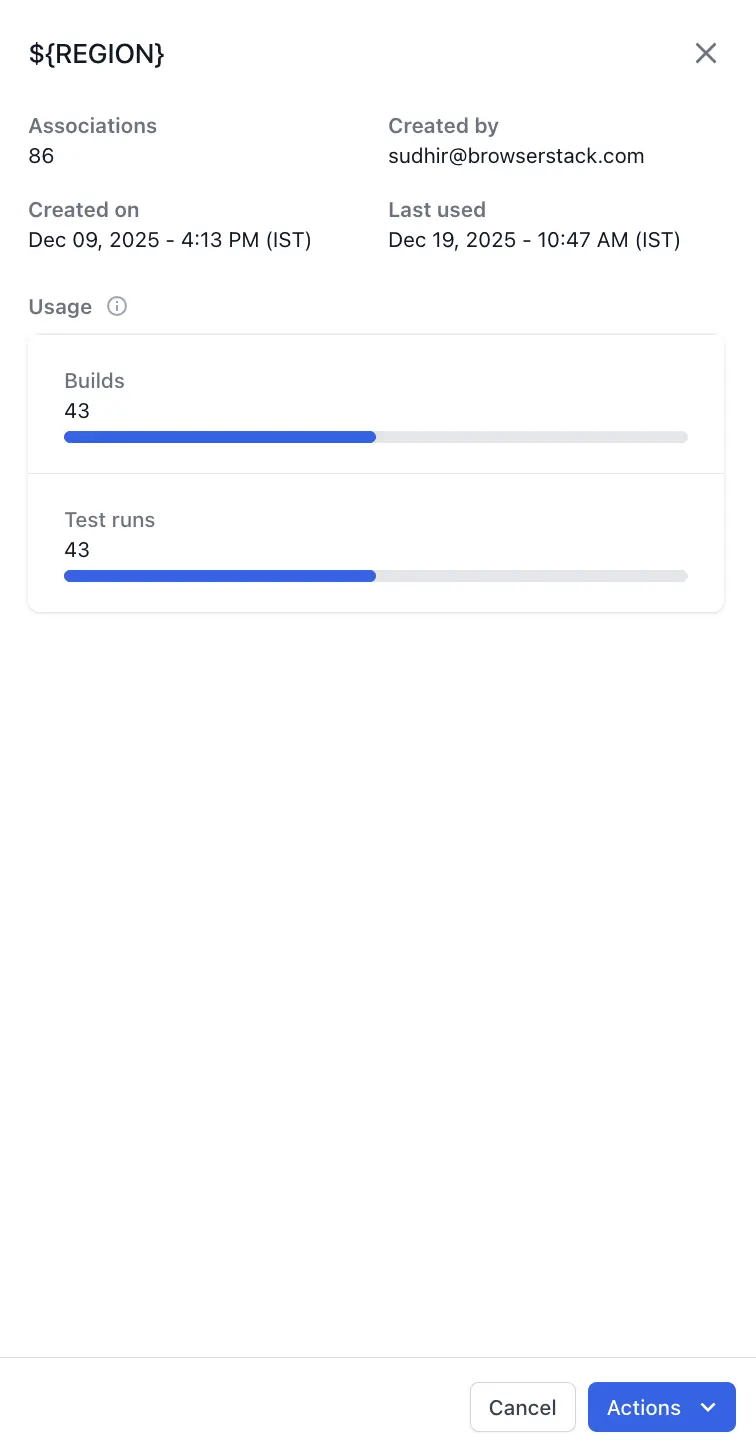
To rename, merge, or delete the tag, click Actions and select an option.
Rename a tag
Renaming requires the Edit tag permission.
In Manage Tags, click the ︙ icon next to the tag and select Edit.
In the Edit tag dialog, enter the new name in the Tag name field. The name can have up to 255 characters.
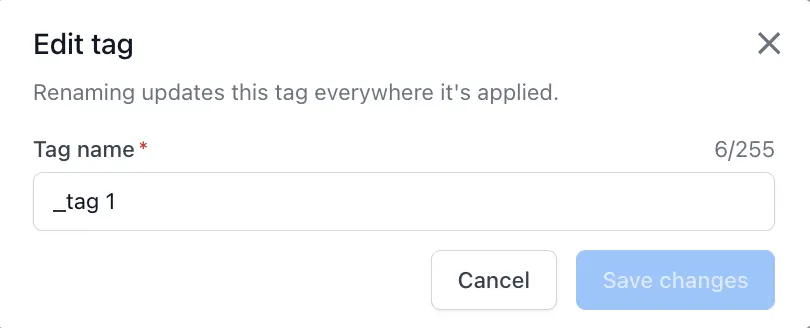
Click Save changes.
- You can’t rename, merge, or delete a tag attached to a build, test run, or test execution result.
- You can only edit tags that are attached to authoring entities, such as test cases, test plans, shared steps, datasets, recordings, or projects.
Merge tags
Merge combines multiple source tags into one target tag. You choose which tag survives as the target.
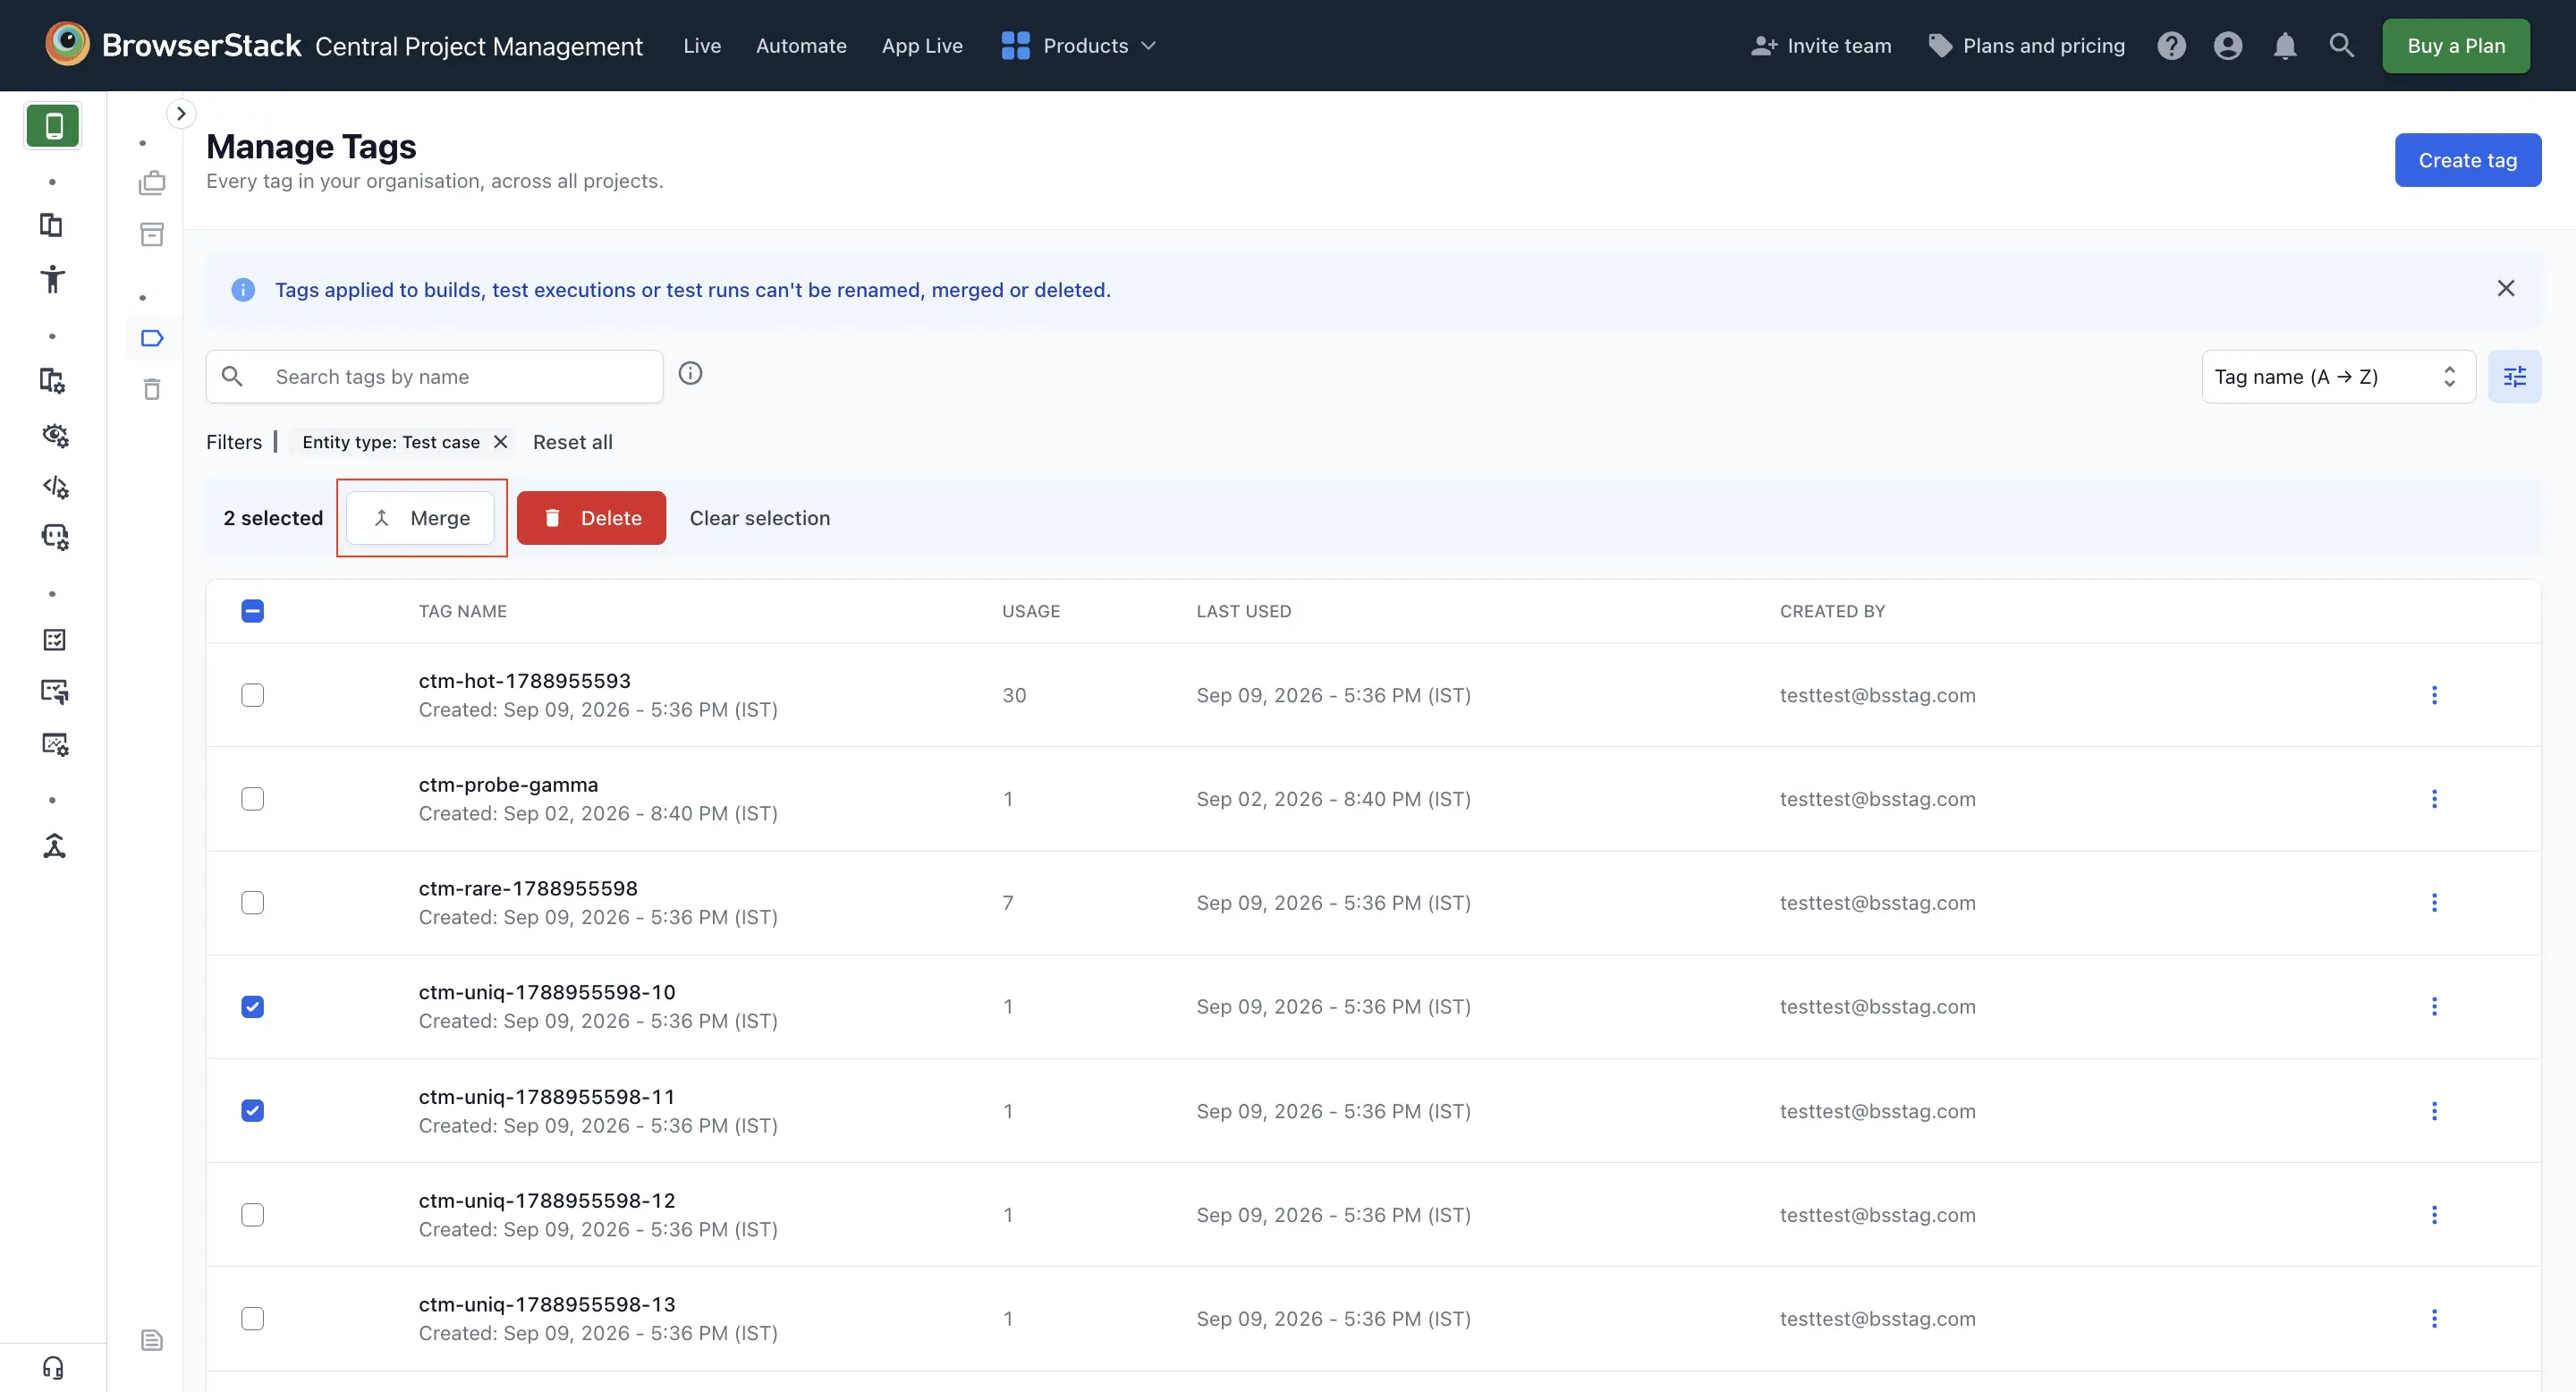
In Manage Tags, select the tags to merge. You can merge up to 20 source tags into one target tag at a time.
Click Merge.
In the Merge tags dialog, select the tag to keep from the Keep this tag list. Each tag in the list shows its number of associations.
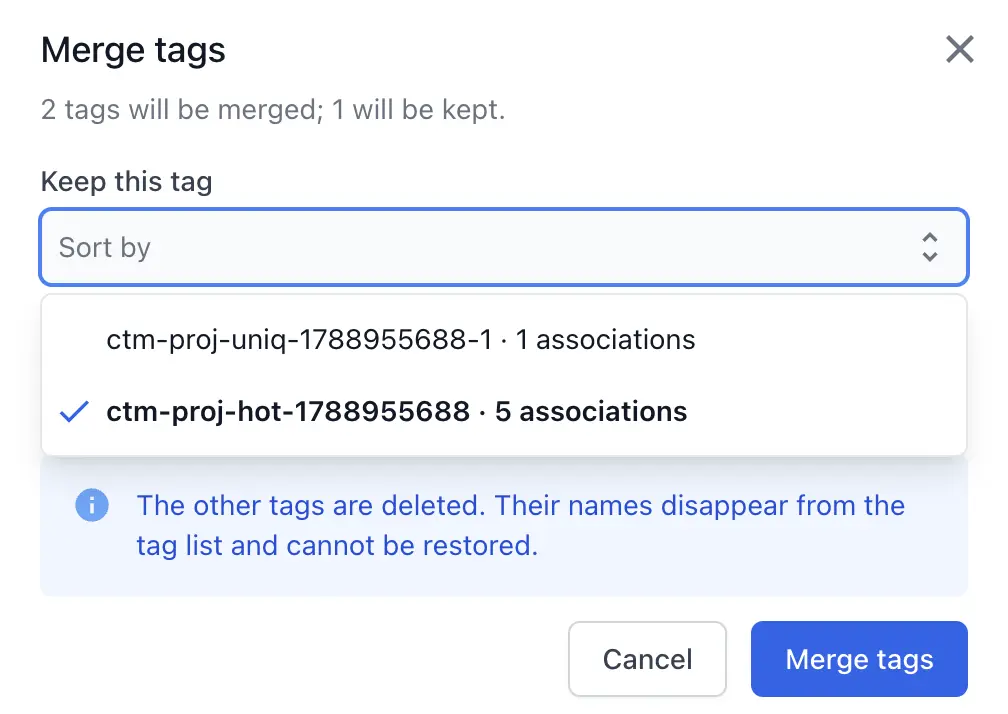
Click Merge tags.
Every mapping from the other tags moves onto the tag you keep. The other tags are permanently deleted, and their names disappear from the tag list.
Unlike deleted tags, merged tags don’t move to the Trash and can’t be restored.
Delete and restore tags
Deleted tags move to the Trash, where they stay recoverable for 30 days. After that, BrowserStack permanently removes them and their links to entities. You can’t permanently delete a tag from the trash yourself.
To delete tags:
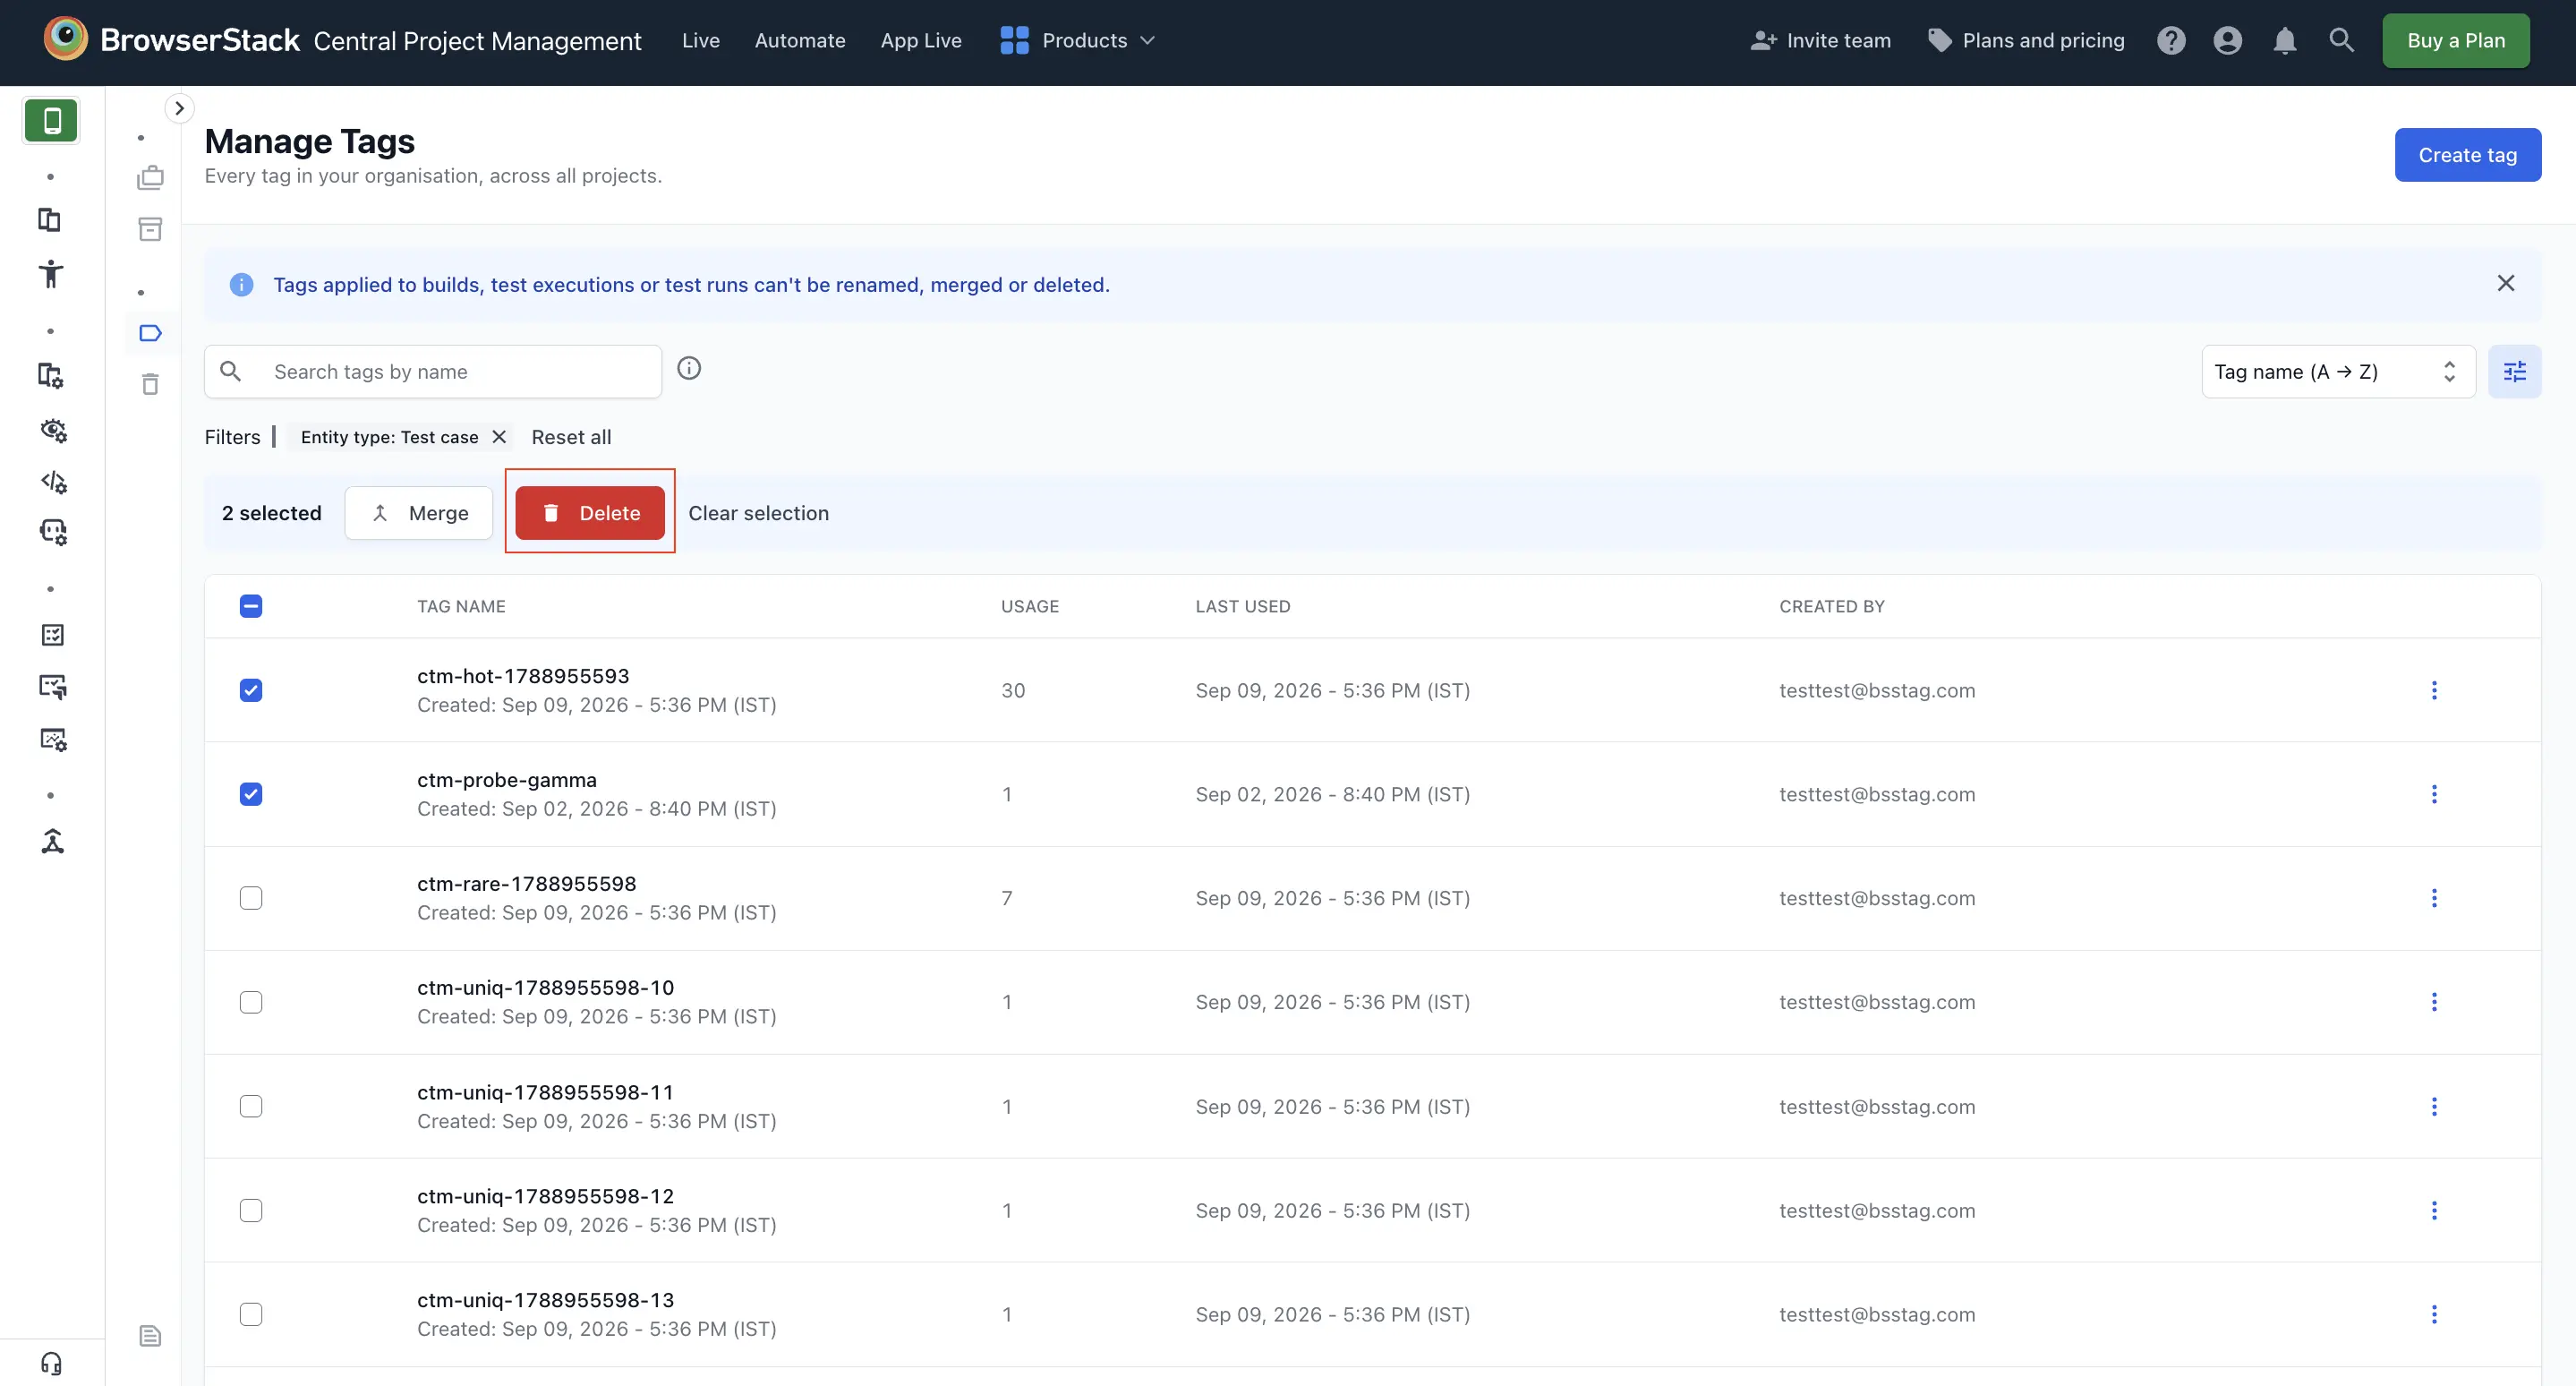
In Manage Tags, click the ︙ icon next to a tag and select Delete. To delete multiple tags at once, select their checkboxes and click Delete.
The dialog shows how many entities the tags are applied to. Deleting a tag detaches it from all of these entities.
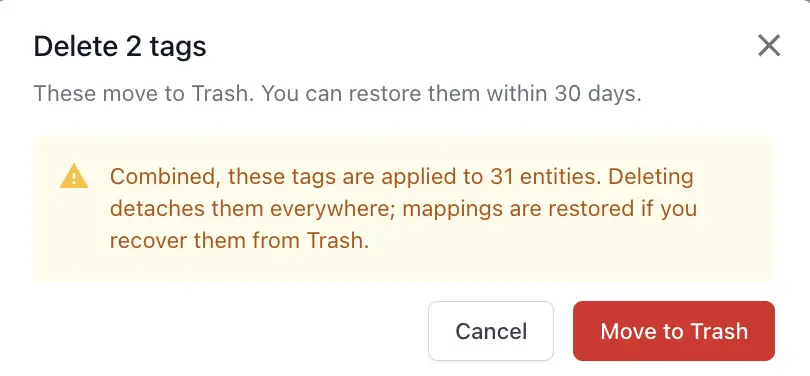
Click Move to Trash.
To restore tags:
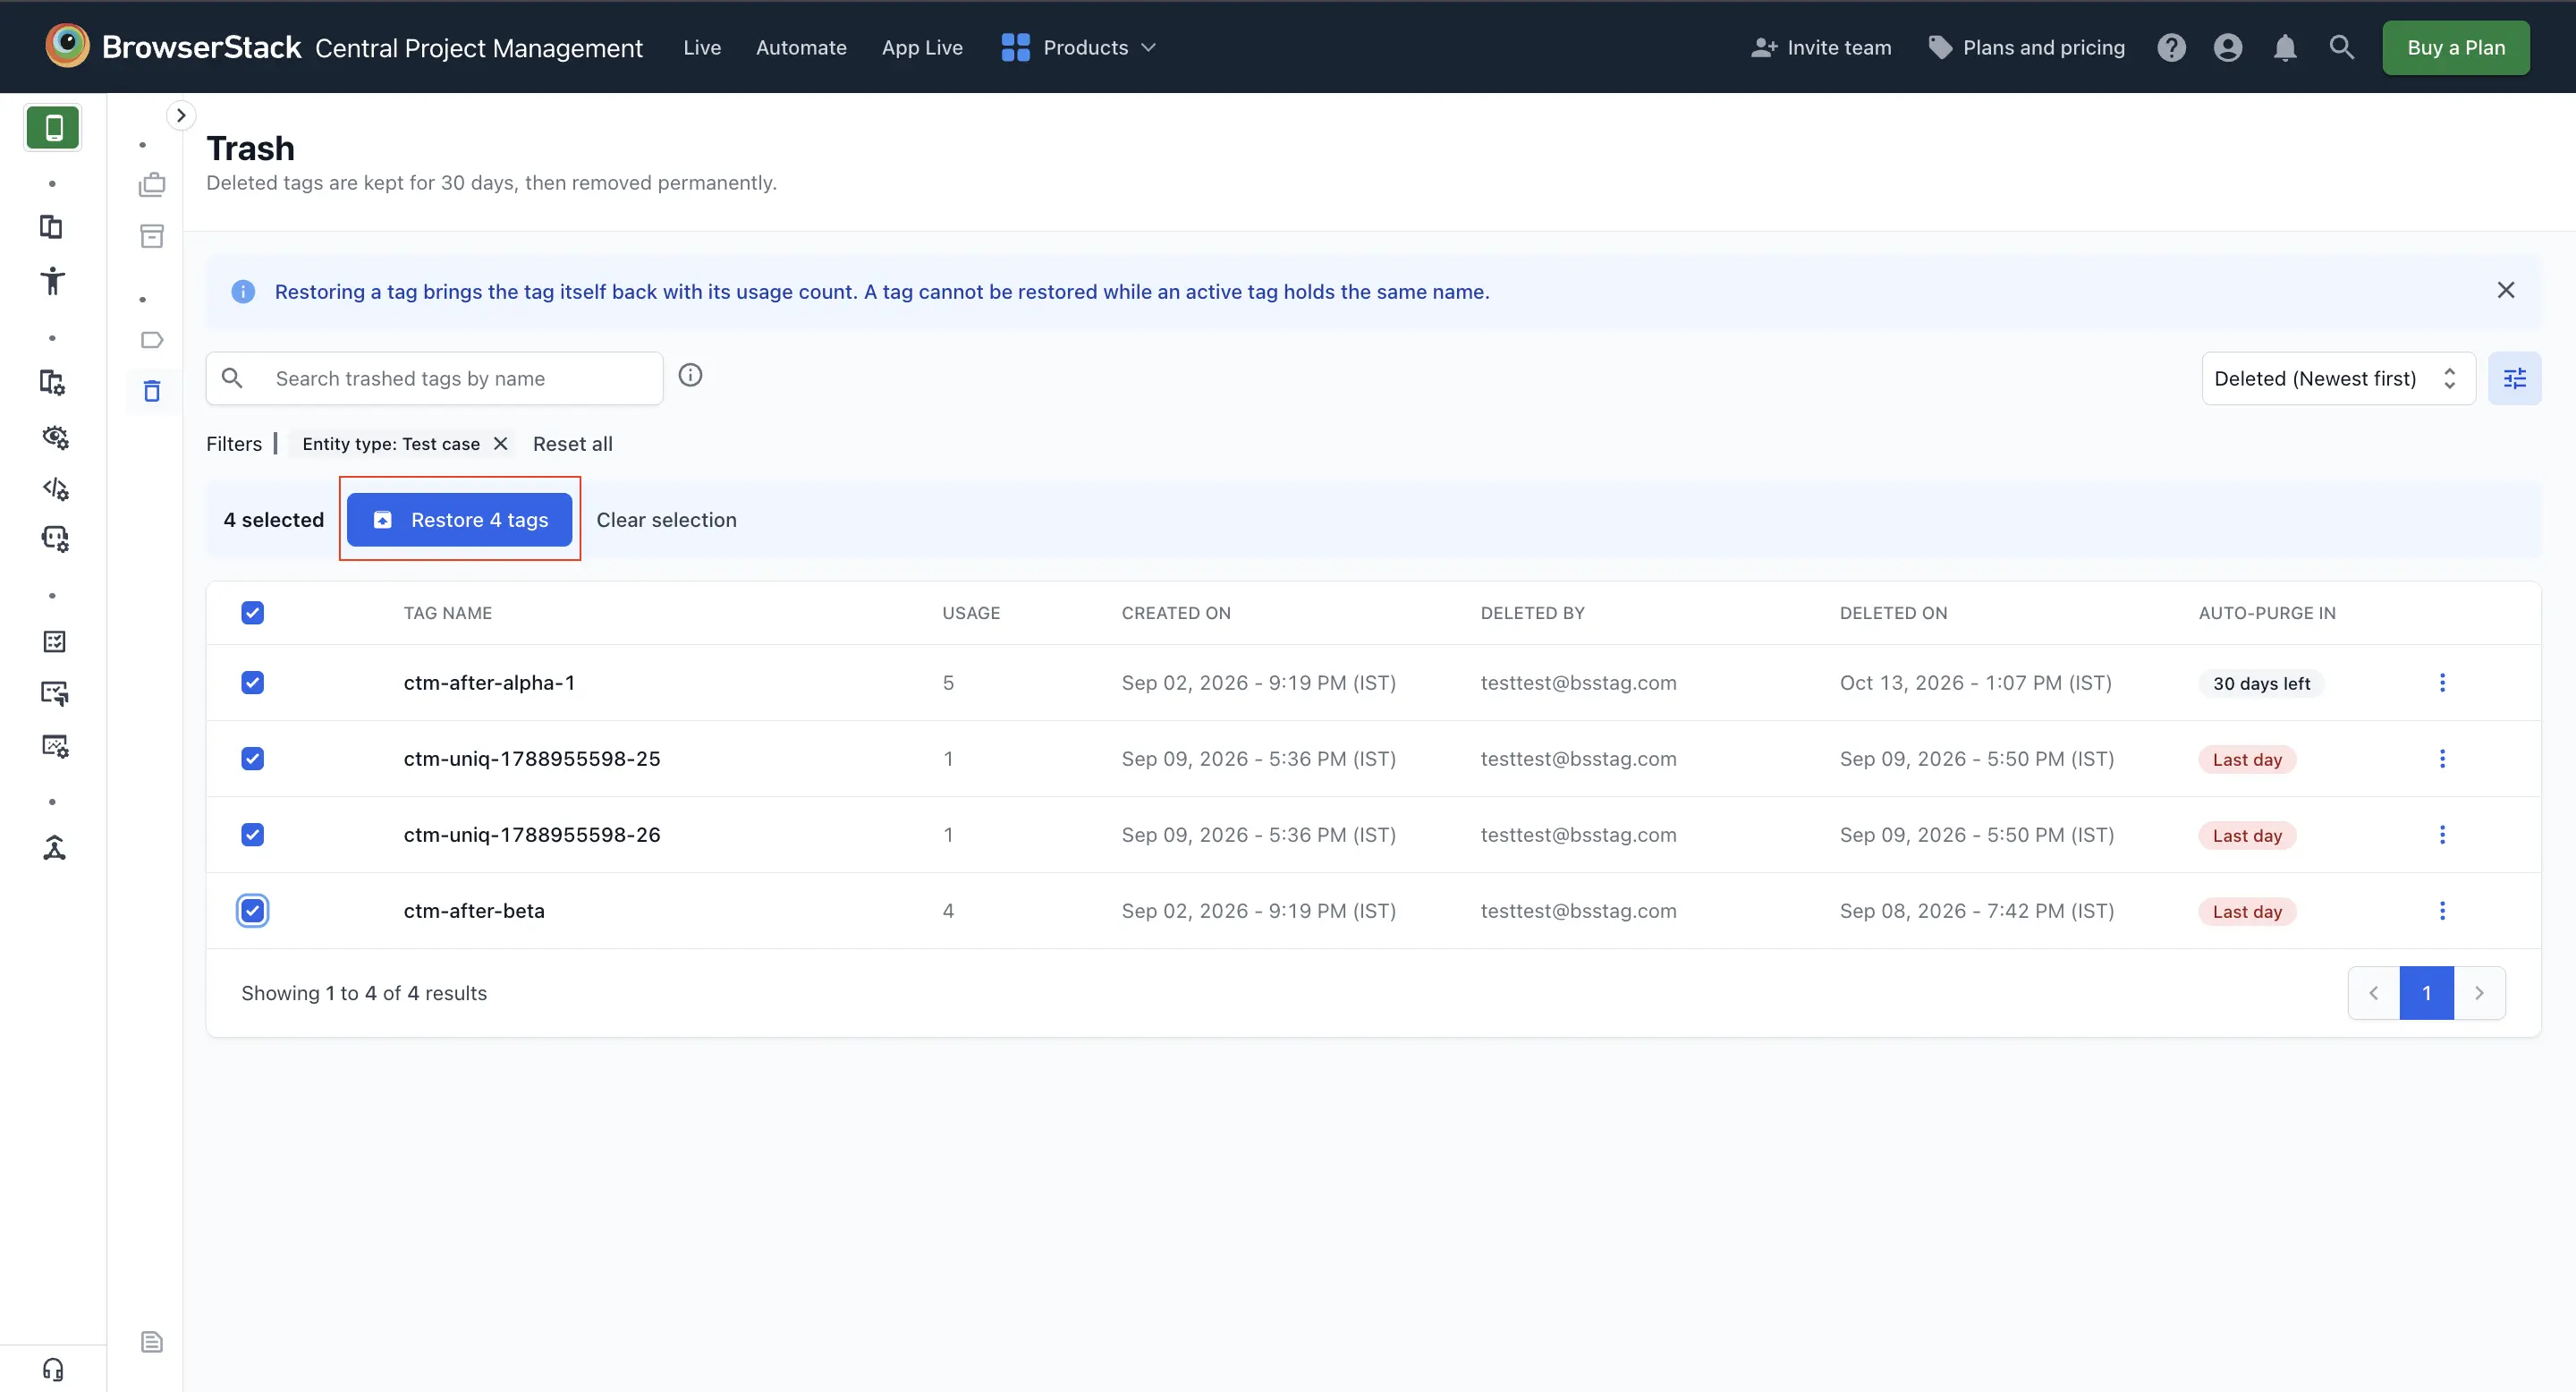
In the left navigation, click Trash.
Select the tags to restore. You can restore a single tag or multiple tags at once:
- Single tag: Click the ︙ icon next to the tag and select Restore.
- Multiple tags: Select the checkboxes next to the tags and click Restore N tags, where N is the number of selected tags.
The dialog shows how many associations the tags carried when they were deleted. Click Restore.
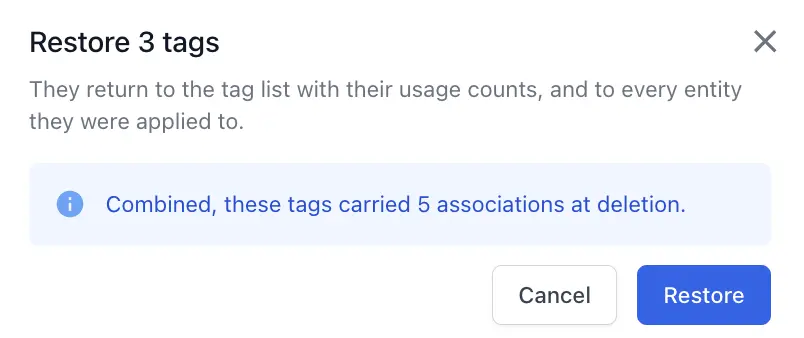
Restored tags return to the tag list with their usage counts and are re-attached to every entity they were applied to before deletion.
You can’t restore a tag while an active tag has the same name. In the Trash, such tags show An active tag already uses this name. To resolve the conflict, rename the active tag, or click the ︙ icon next to the deleted tag and select Rename.
We're sorry to hear that. Please share your feedback so we can do better
Contact our Support team for immediate help while we work on improving our docs.
We're continuously improving our docs. We'd love to know what you liked
We're sorry to hear that. Please share your feedback so we can do better
Contact our Support team for immediate help while we work on improving our docs.
We're continuously improving our docs. We'd love to know what you liked
Thank you for your valuable feedback!