
 Join our Discord
Create a connected app
Learn how to create a Salesforce connected app to securely connect your Salesforce environment to BrowserStack Low Code Automation.
To run automated tests, connect your Salesforce environment to BrowserStack Low Code Automation. This page covers creating a Connected App (or External Client App) in Salesforce to generate a Client ID and Client Secret, and assigning the execution user.
Prerequisites
To connect Salesforce and fetch the necessary metadata, the user account authenticating the connection must have the following permissions:
- API Enabled: Allows API access to Salesforce.
- View Setup and Configuration: Enables viewing of setup and configuration settings.
- Modify Metadata Through Metadata API Functions: Permits metadata modifications.
- View All Data: Grants read and write access to all data, or explicit access to specific objects you intend to test.
Choose a user account
You can use one of the following options to set up the connection:
- Option 1 (Recommended): Use an existing System Administrator account, which already has all required permissions.
- Option 2: Use an existing Standard User account, provided you assign them a permission set or profile containing the required permissions.
- Option 3: Create a dedicated Integration User account specifically for testing and assign the required permissions.
If you create a dedicated Integration User, you must complete the additional step to set the Run As execution user in Step 2.
Step 1: Create the connected app in Salesforce
The connected app securely links your Salesforce environment to BrowserStack Low Code Automation. Only a Salesforce System Administrator can create this app.
To create the connected app:
- Log in to your Salesforce org.
-
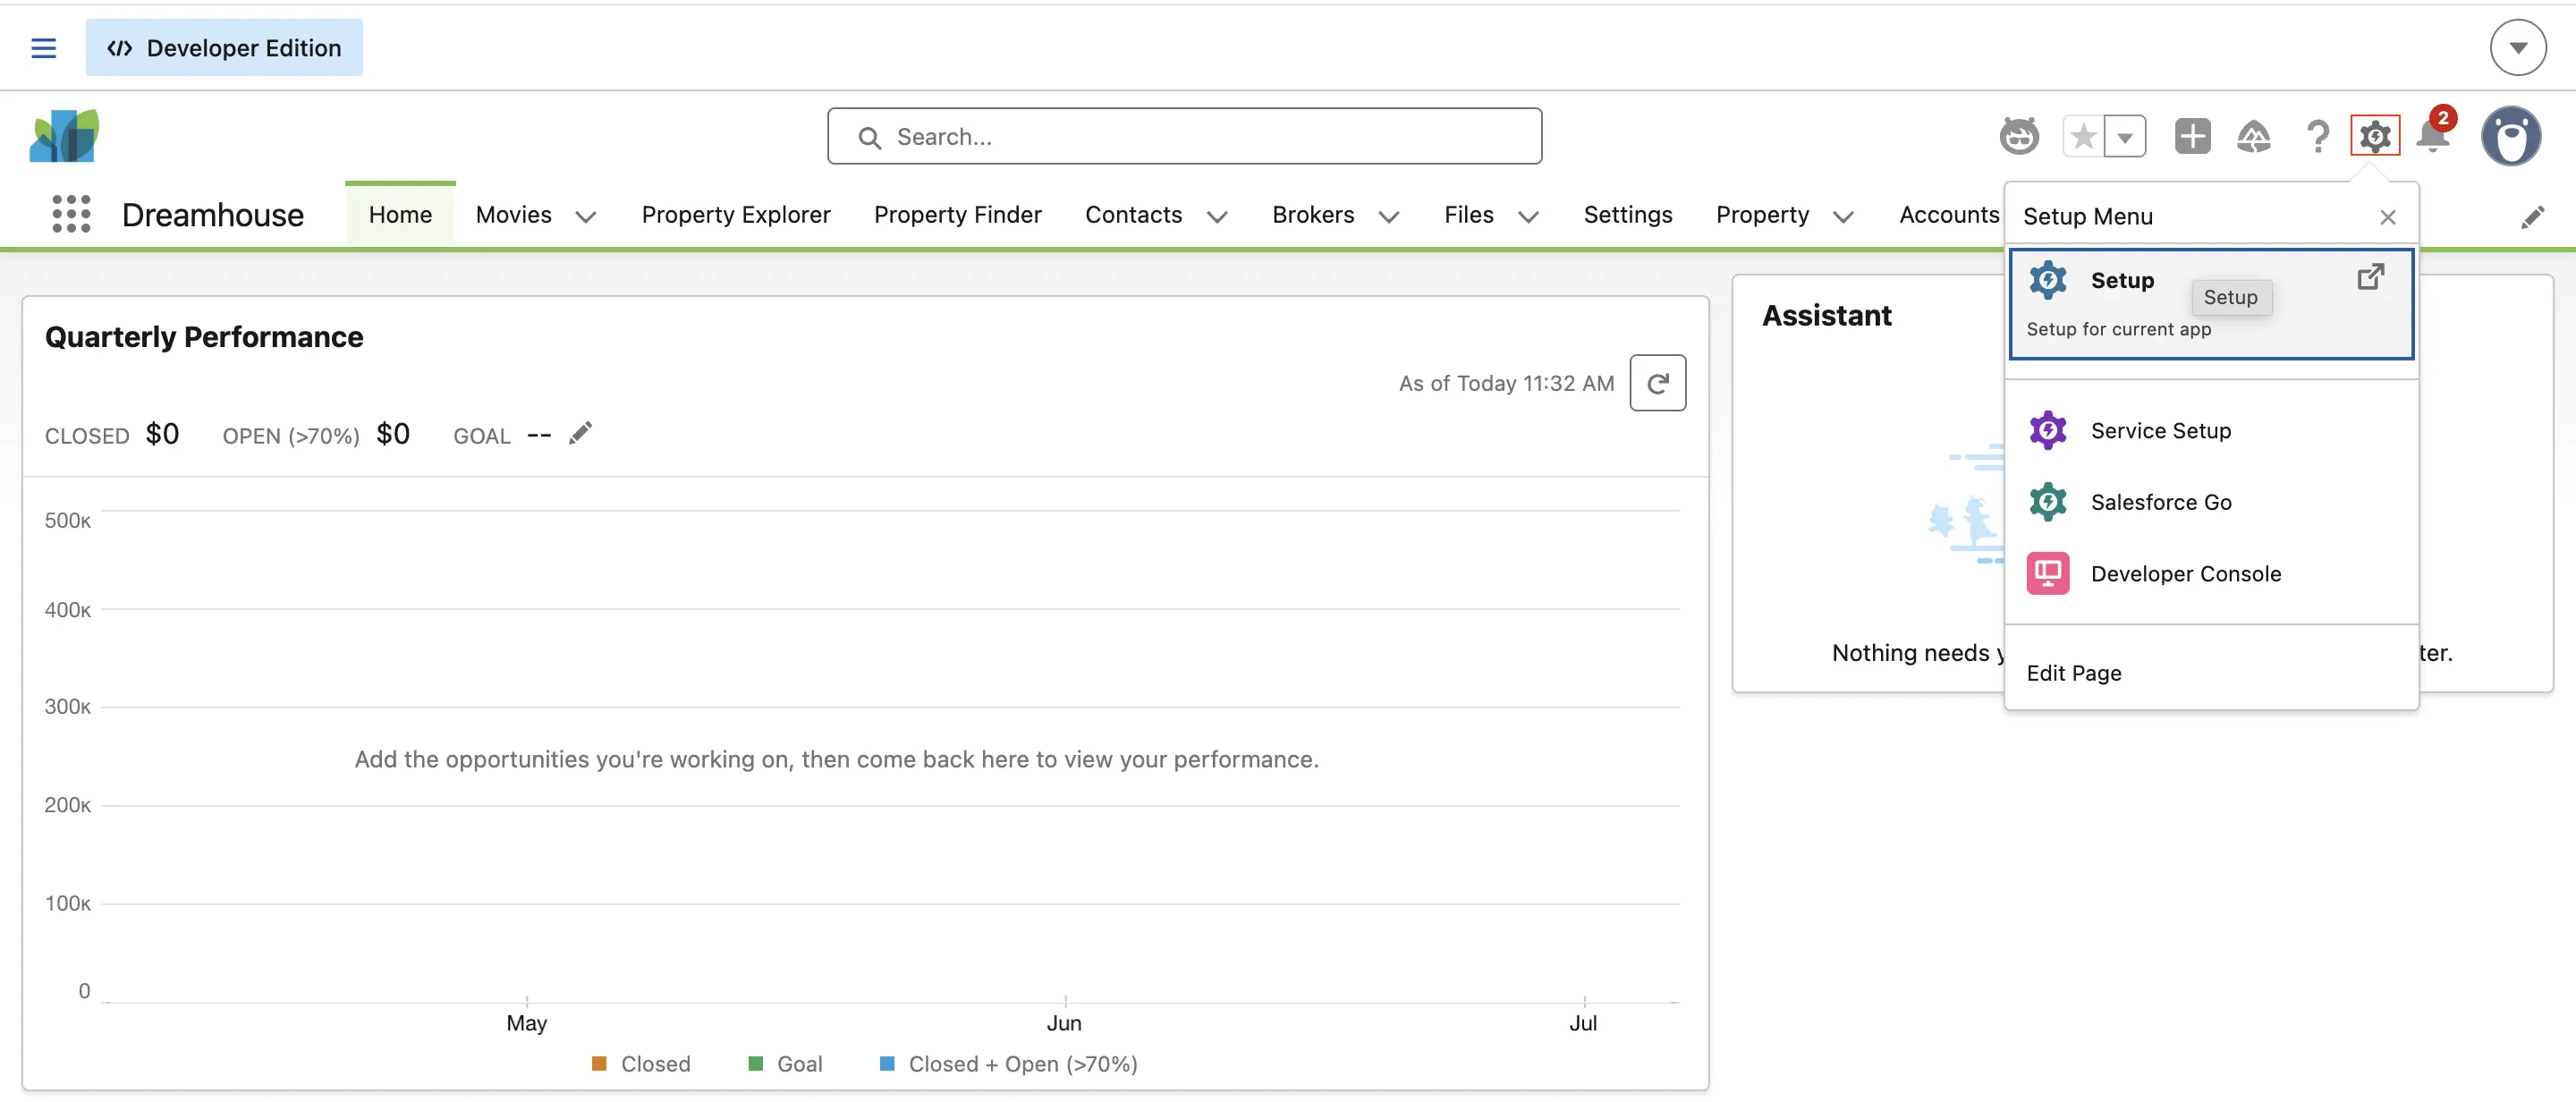
Click the Gear icon (⚙) in the top right and select Setup.
- In the Quick Find box, type
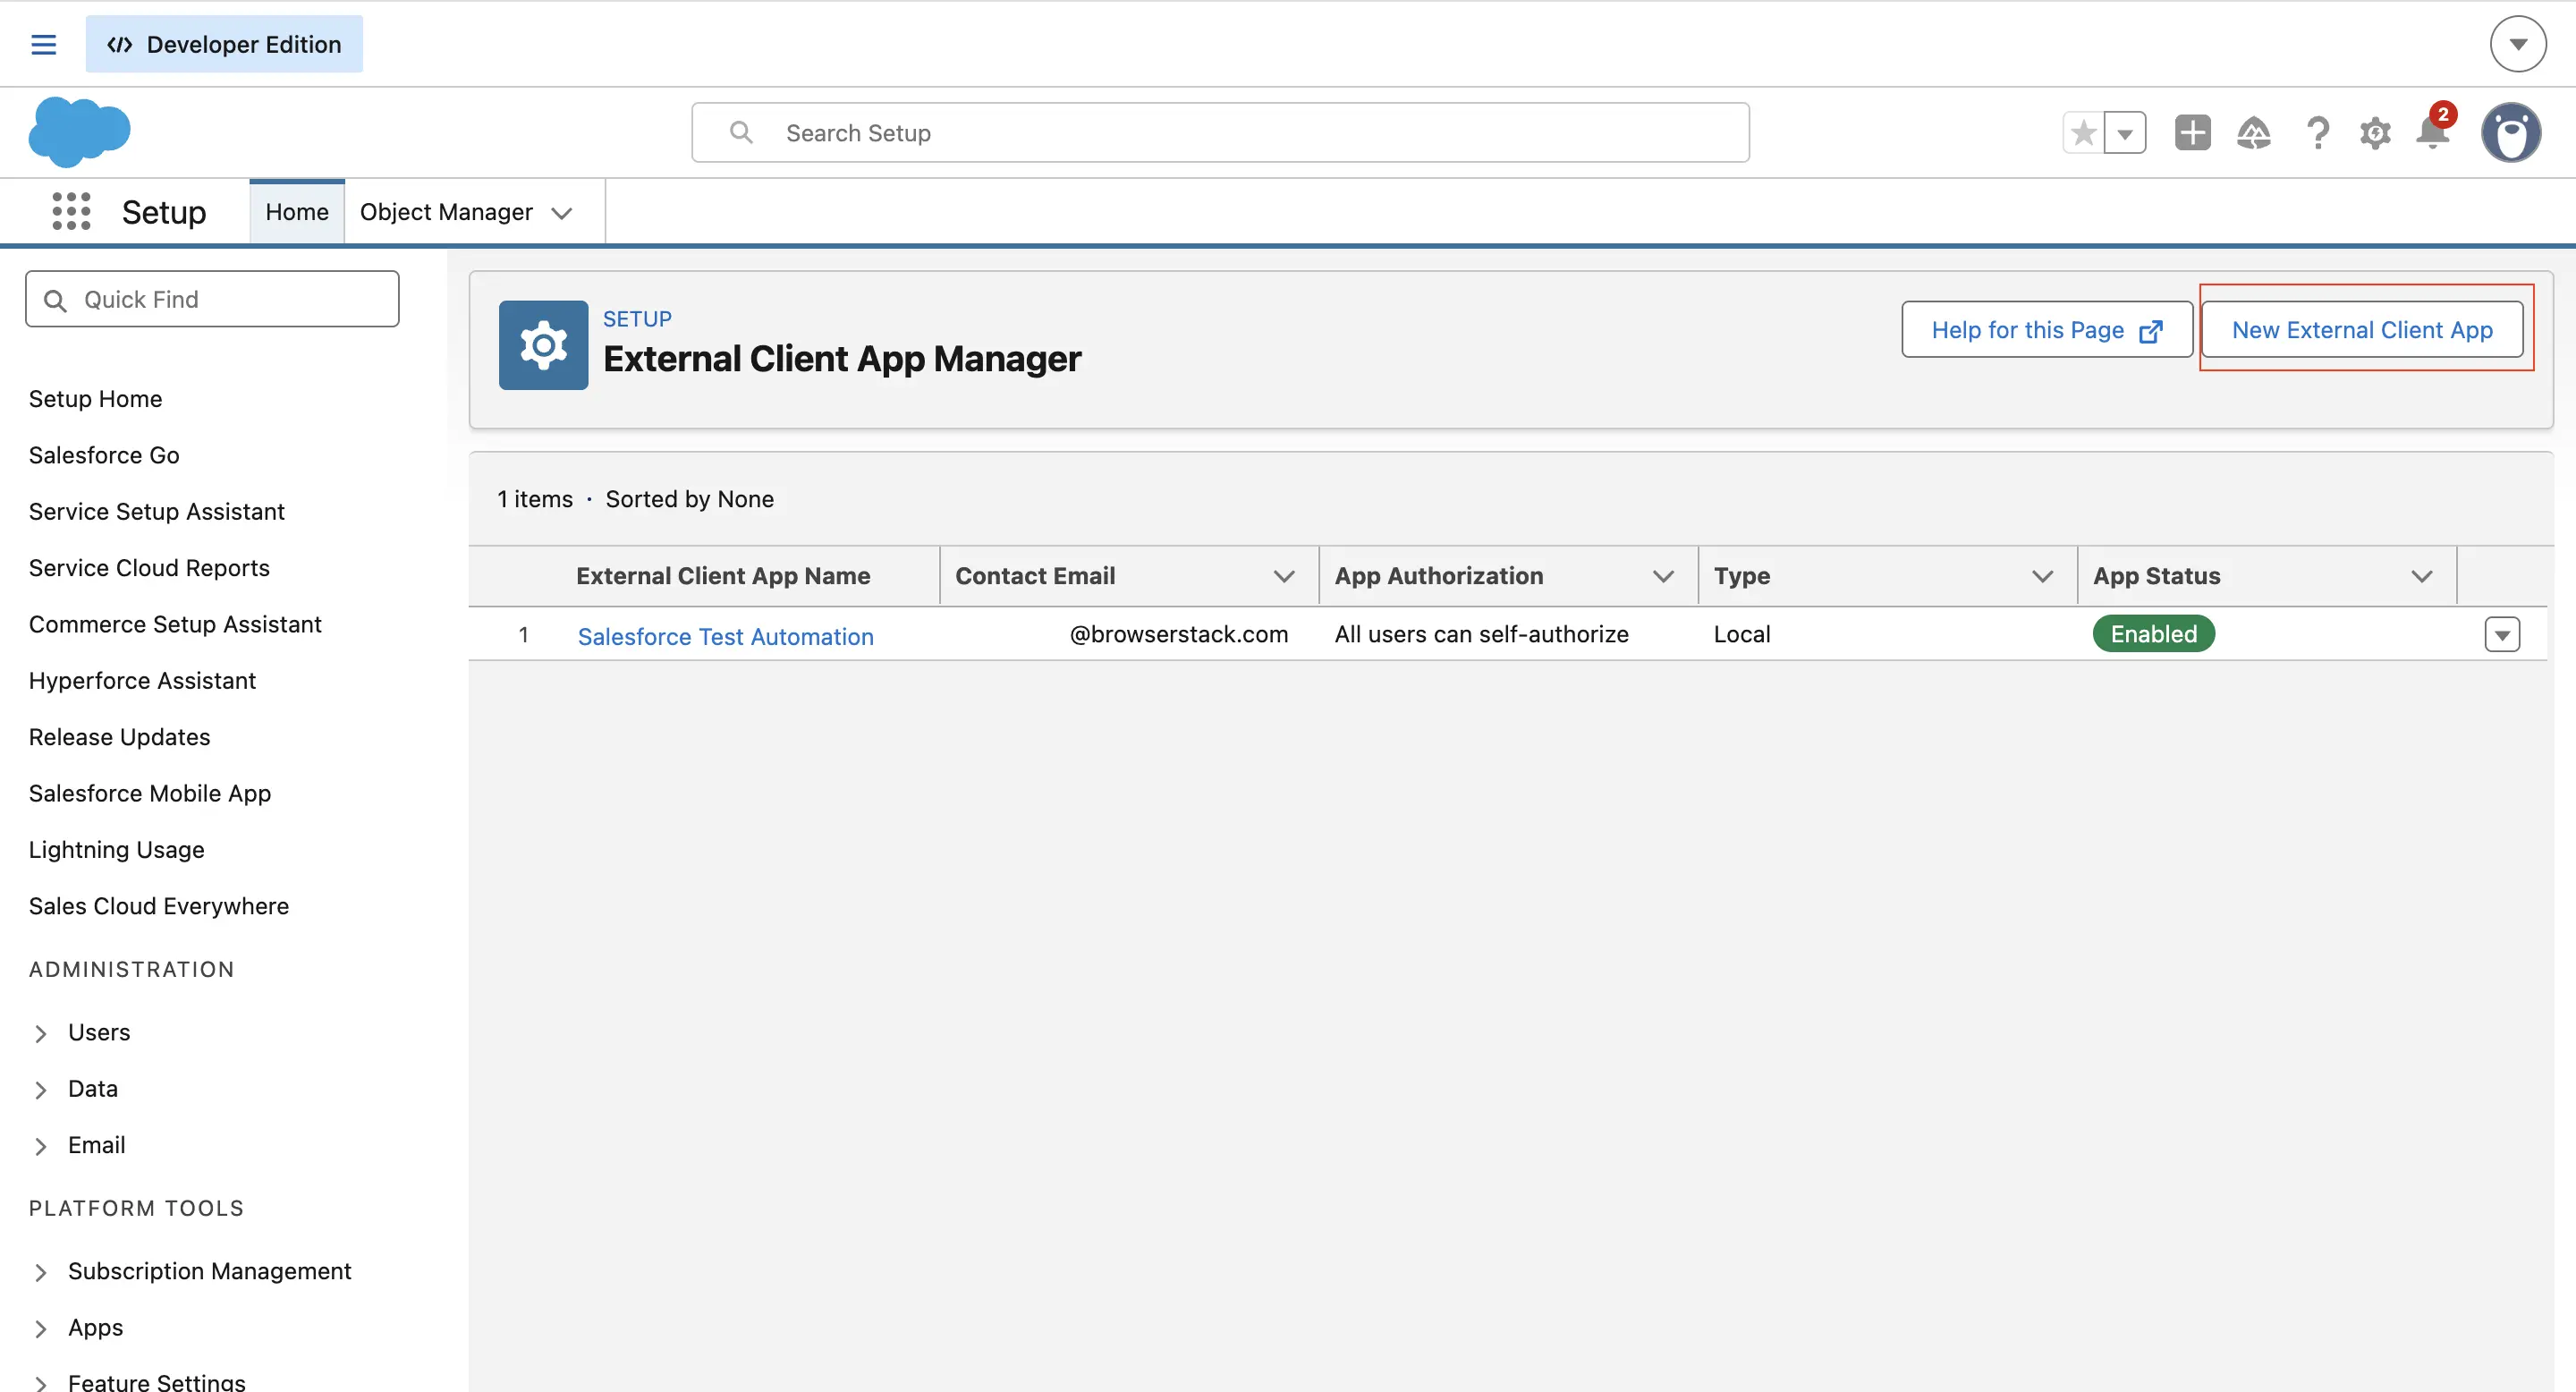
External client app managerand select it from the results. -
Click the New External Client App button in the top right corner.
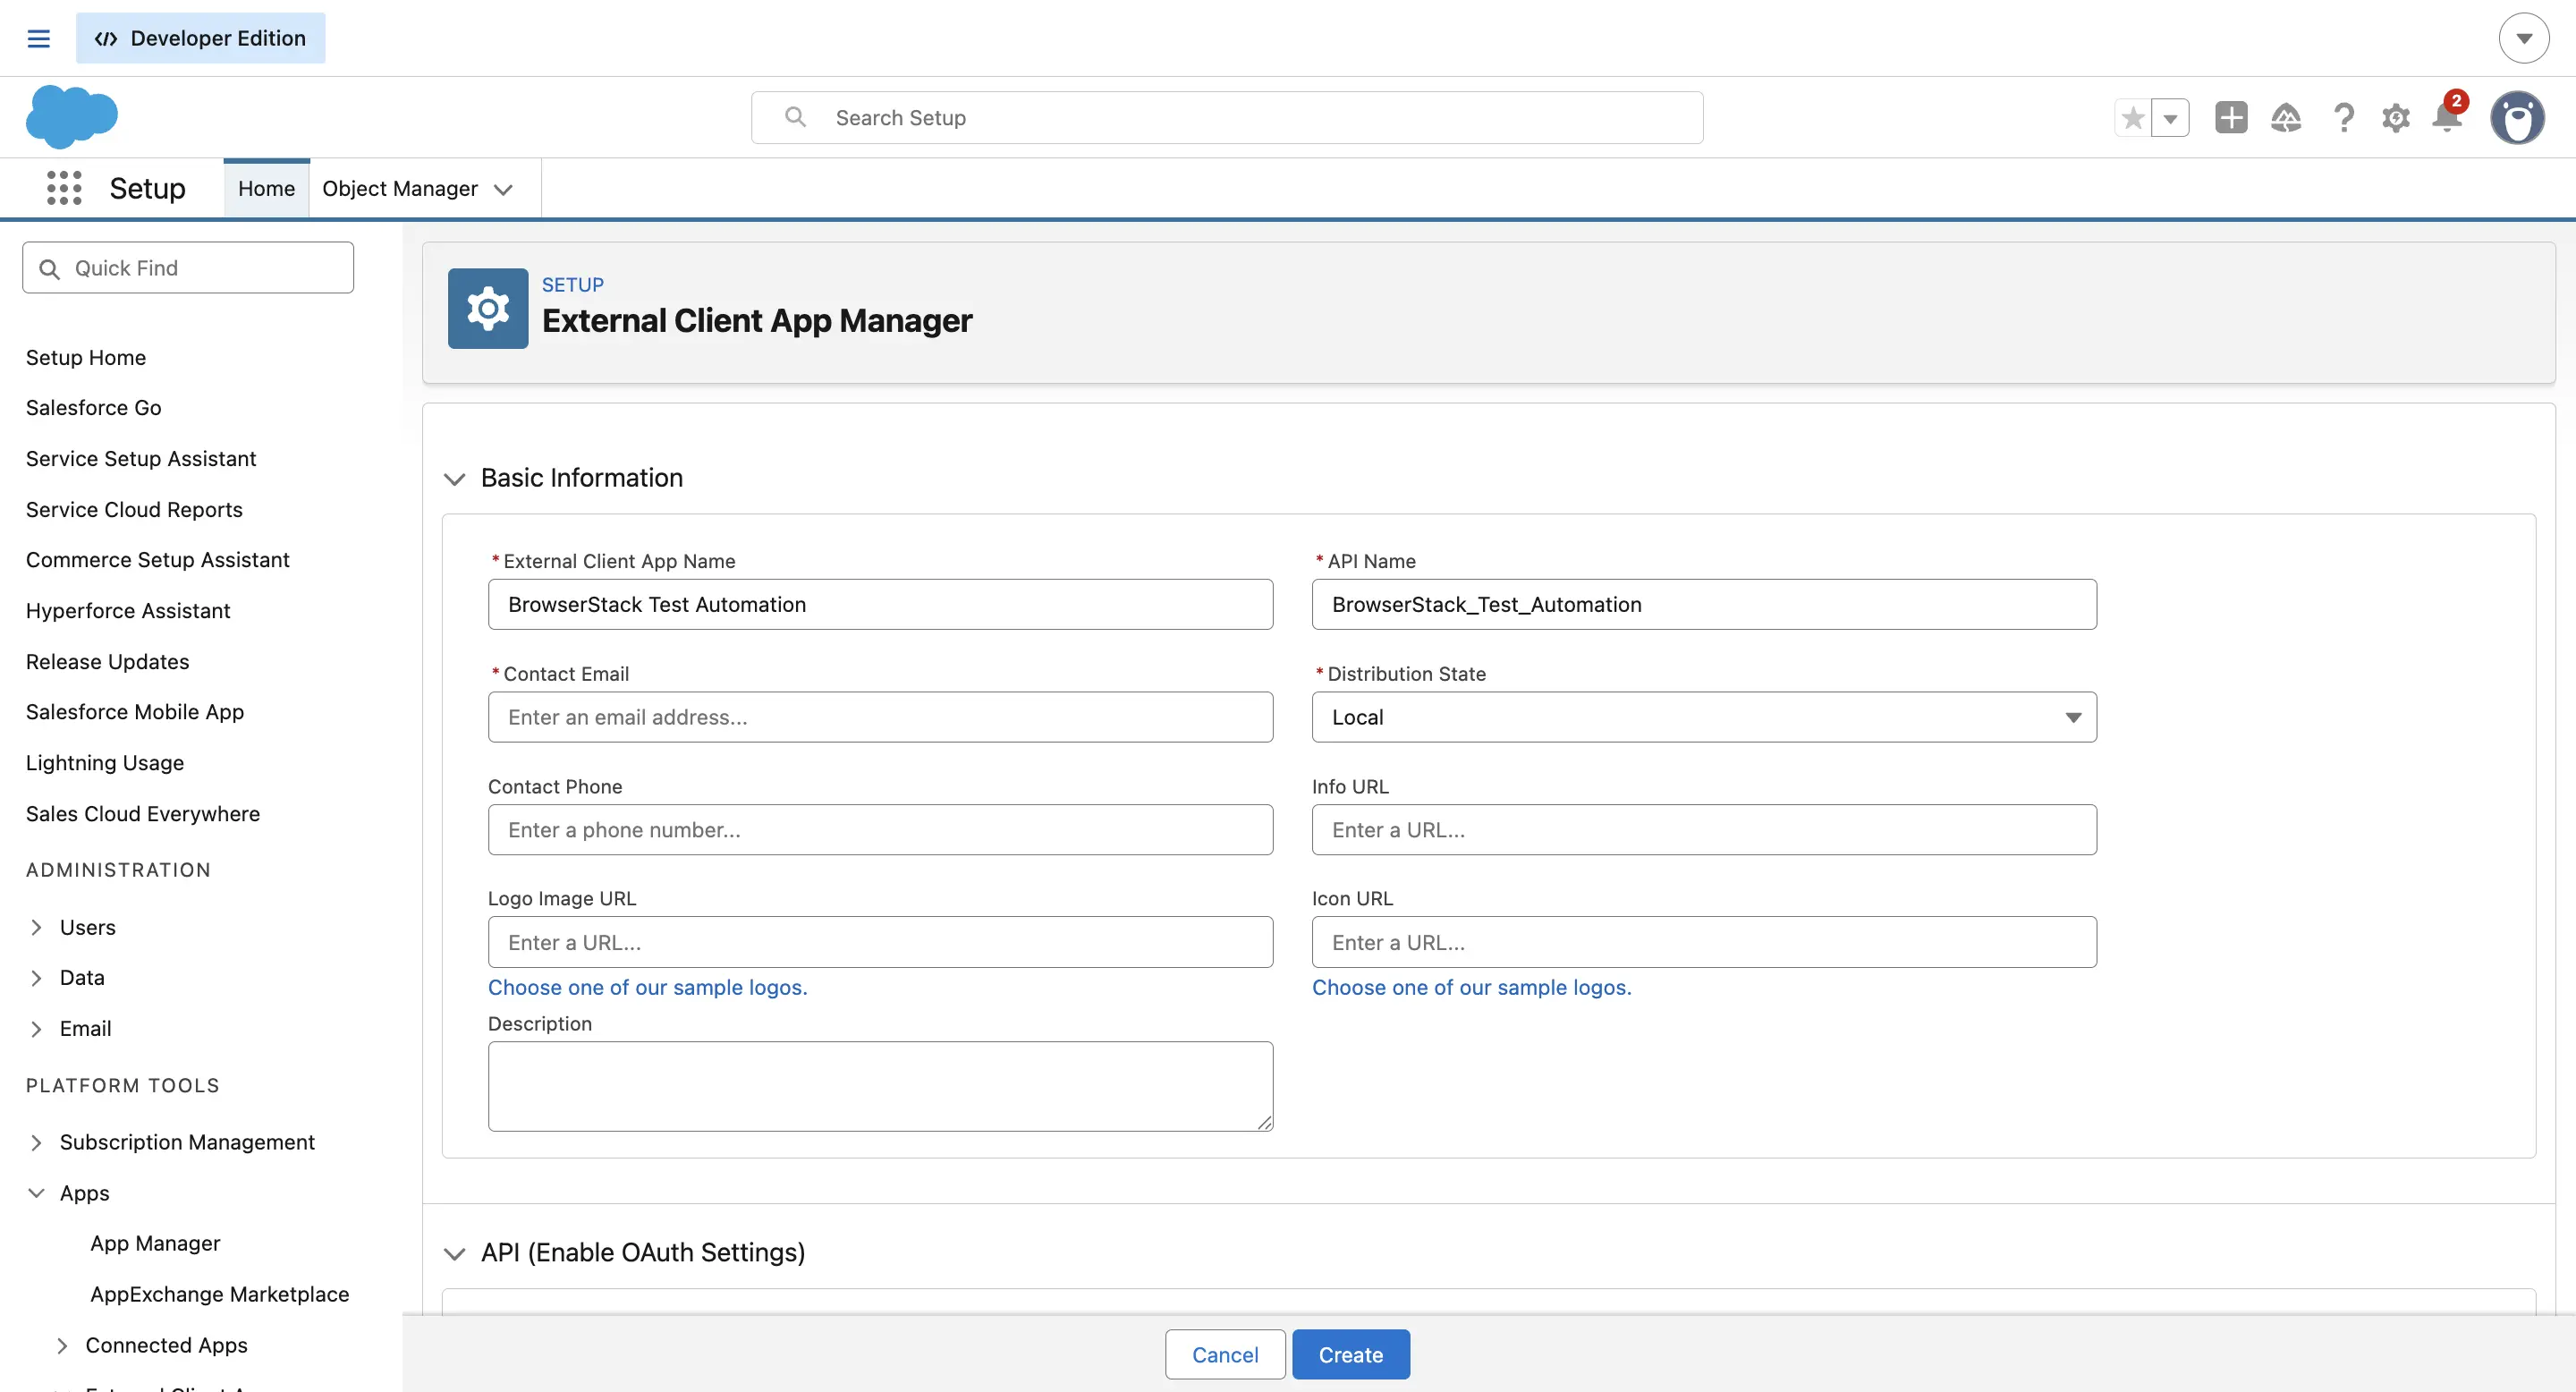
- Fill in the basic information:
-
Connected App Name: Enter
BrowserStack Low Code Automationor a similar descriptive name. - API Name: Auto-populates based on the app name.
- Contact Email: Enter your email address.
-
Connected App Name: Enter
-
Scroll down to API (Enable OAuth Settings) and select Enable OAuth.
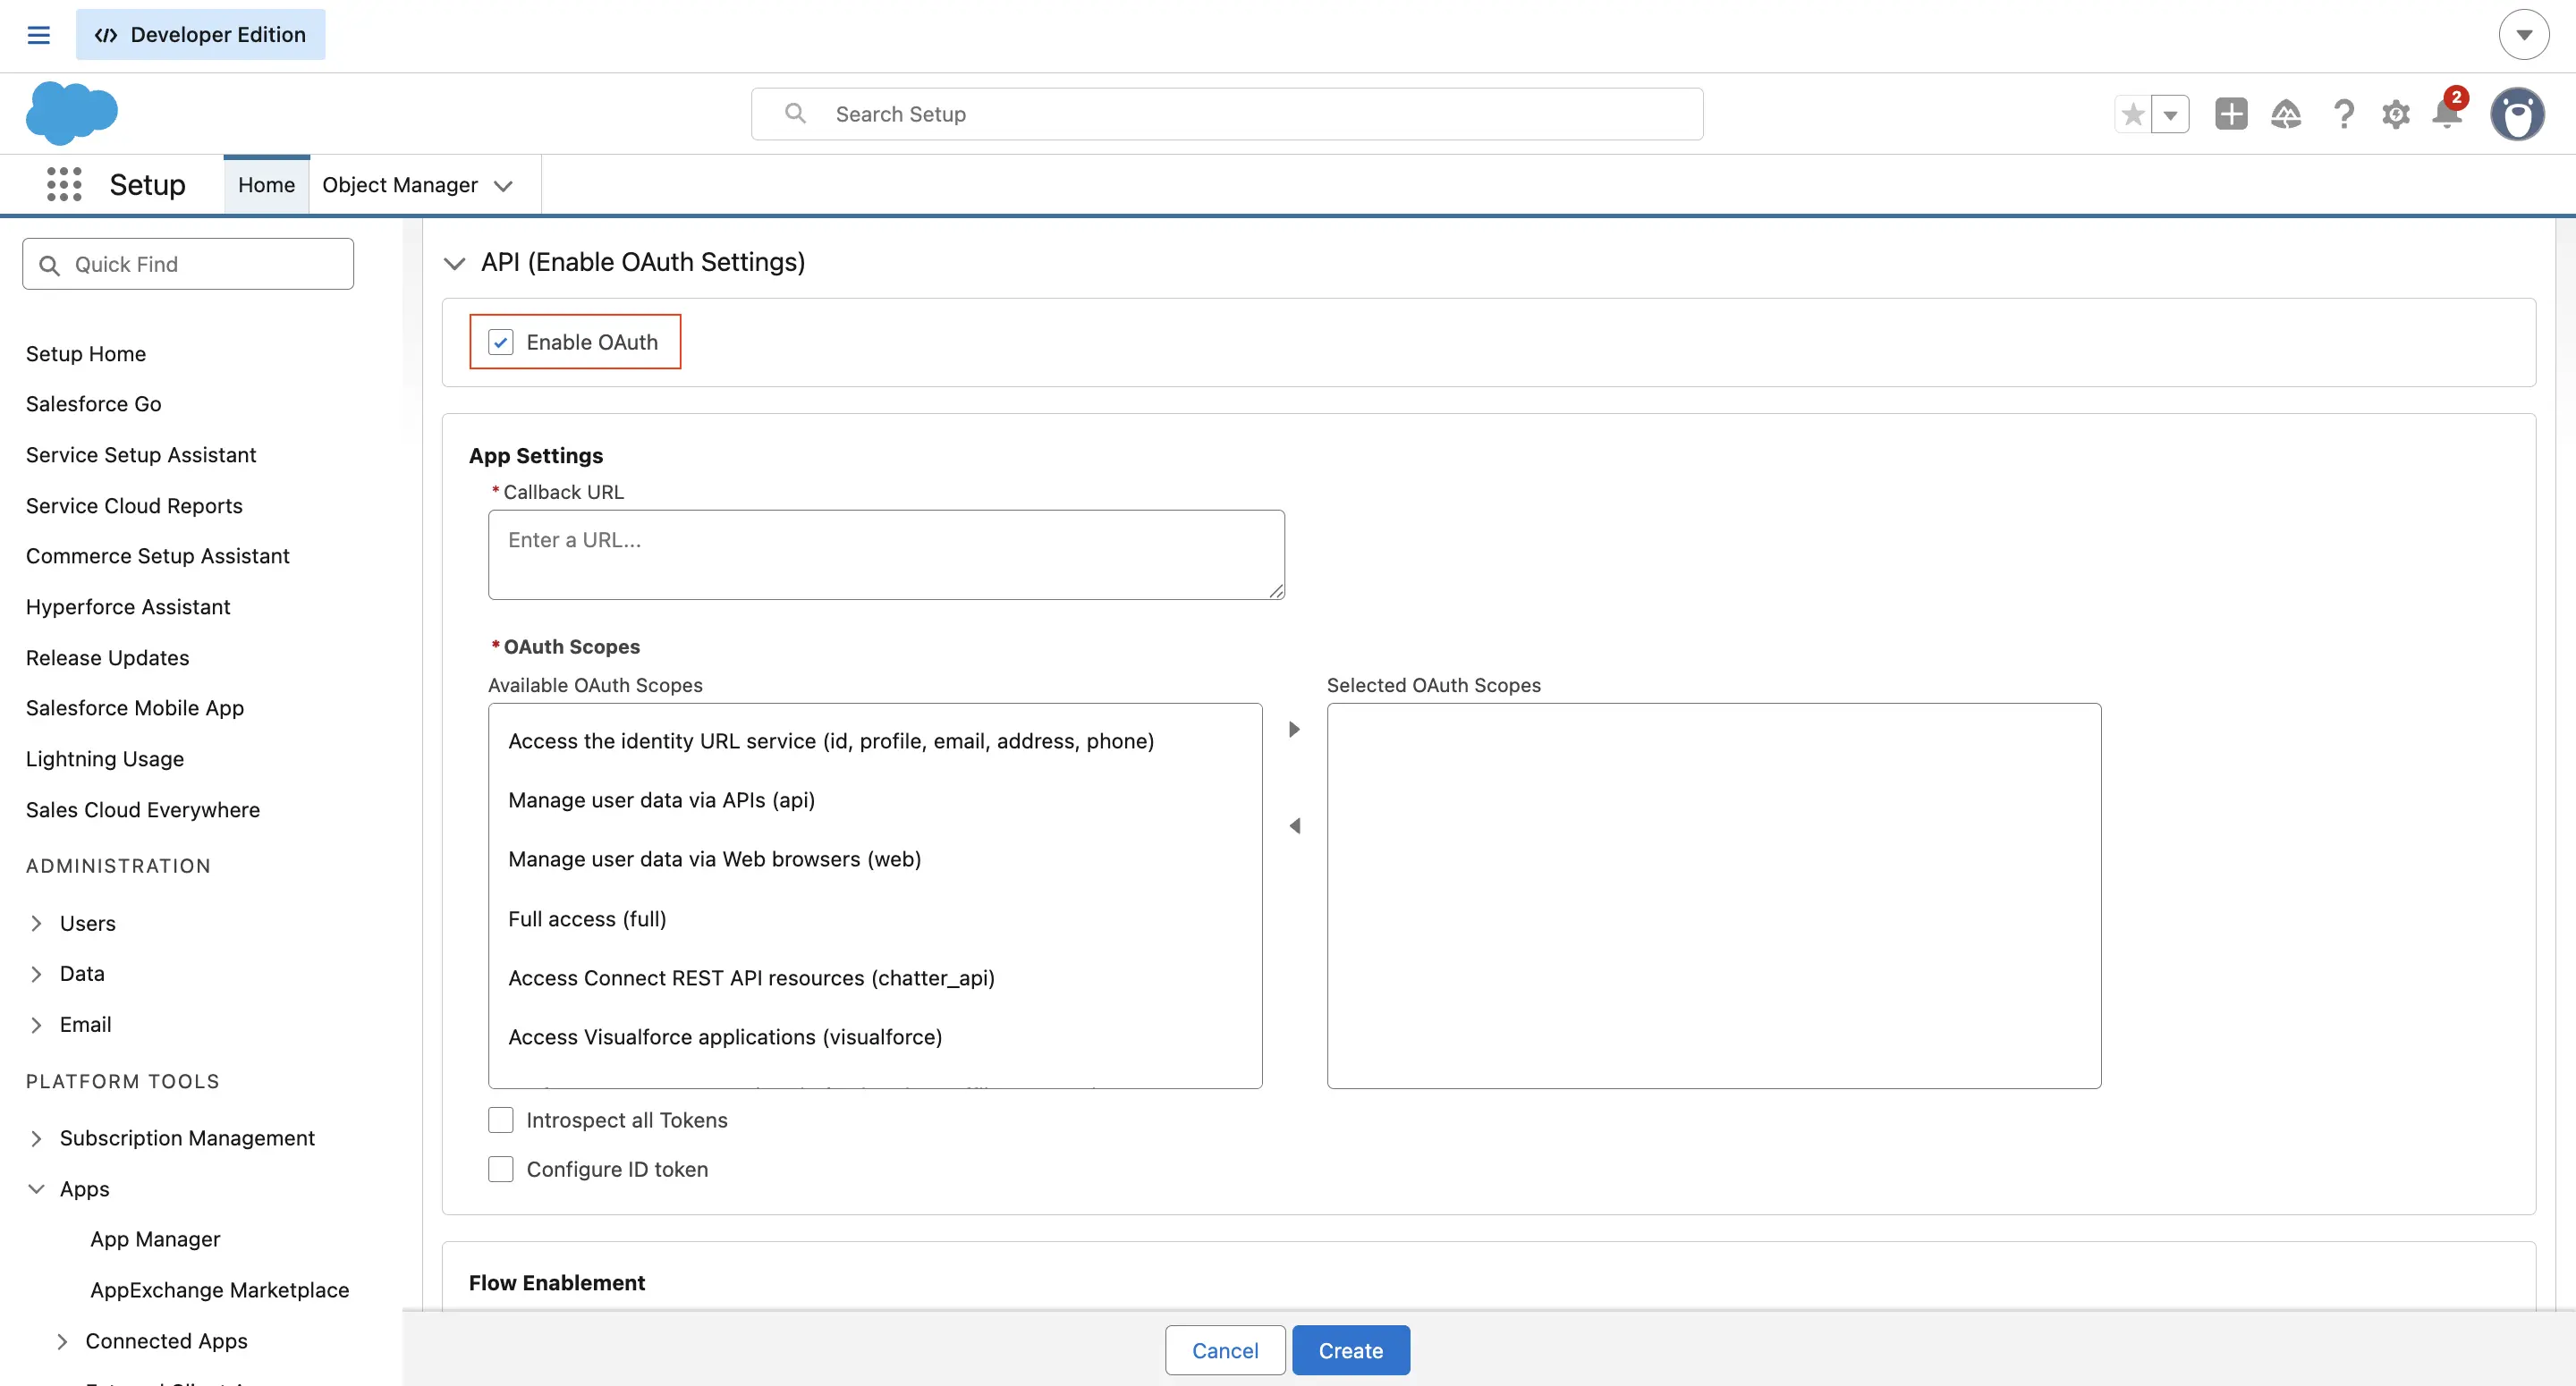
- In the Callback URL field, enter the following URL exactly as shown:
https://elca-api.browserstack.com/api/v1/sfdc-auth/callback - Under Selected OAuth Scopes, add the following scopes by moving them from the Available OAuth Scopes column to the Selected OAuth Scopes column:
- Access the identity URL service (id, profile, email, address, phone)
- Manage user data via APIs (api)
- Manage user data via Web browsers (web)
- Perform requests at any time (refresh_token, offline_access)
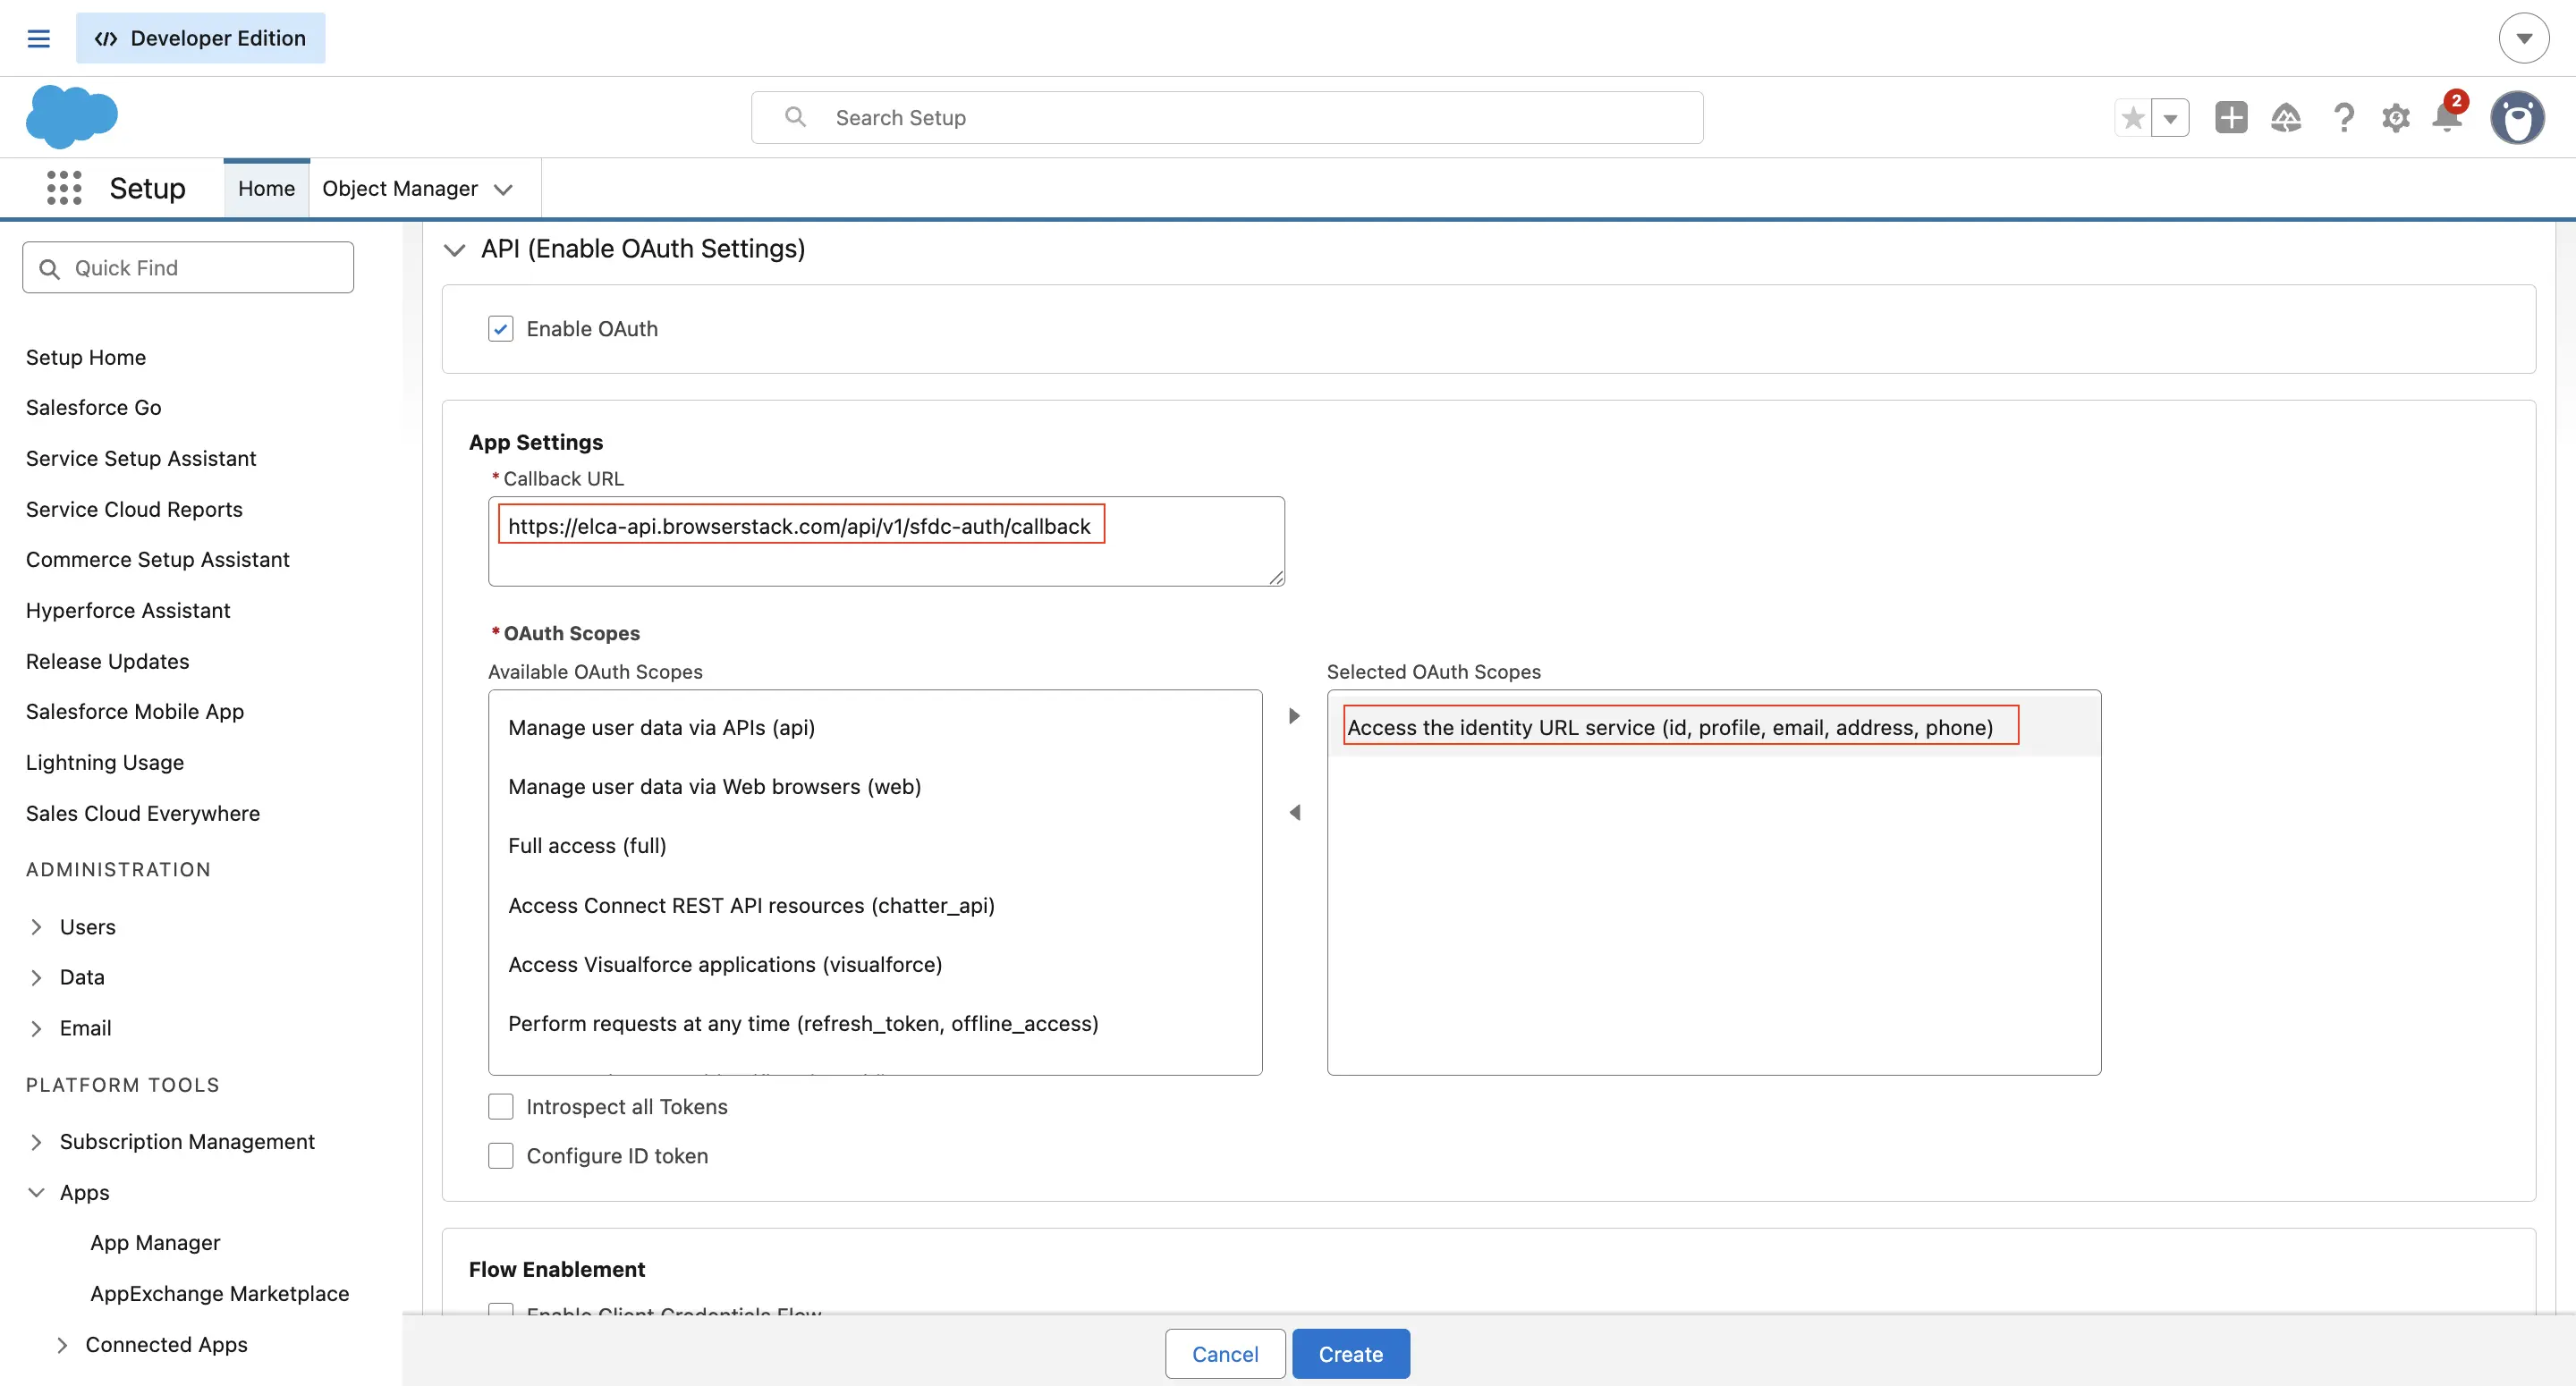
- Click Save.
Salesforce takes 2 to 10 minutes for a new app to propagate across its servers. Attempting to connect immediately may result in an error. Wait at least 5 minutes before you proceed to Step 4.
Step 2: Set the Run As execution user
This step is only required if you created a dedicated Integration User in the prerequisites. If you are using a System Administrator or Standard User account, skip this step and proceed to Step 3.
Because this app runs automated tasks in the background, you must specify which user account Salesforce uses to execute API calls.
To set the execution user:
- In the External Client App Manager, find your newly created app and click it.
-
Click the Edit button inside the Policies section.
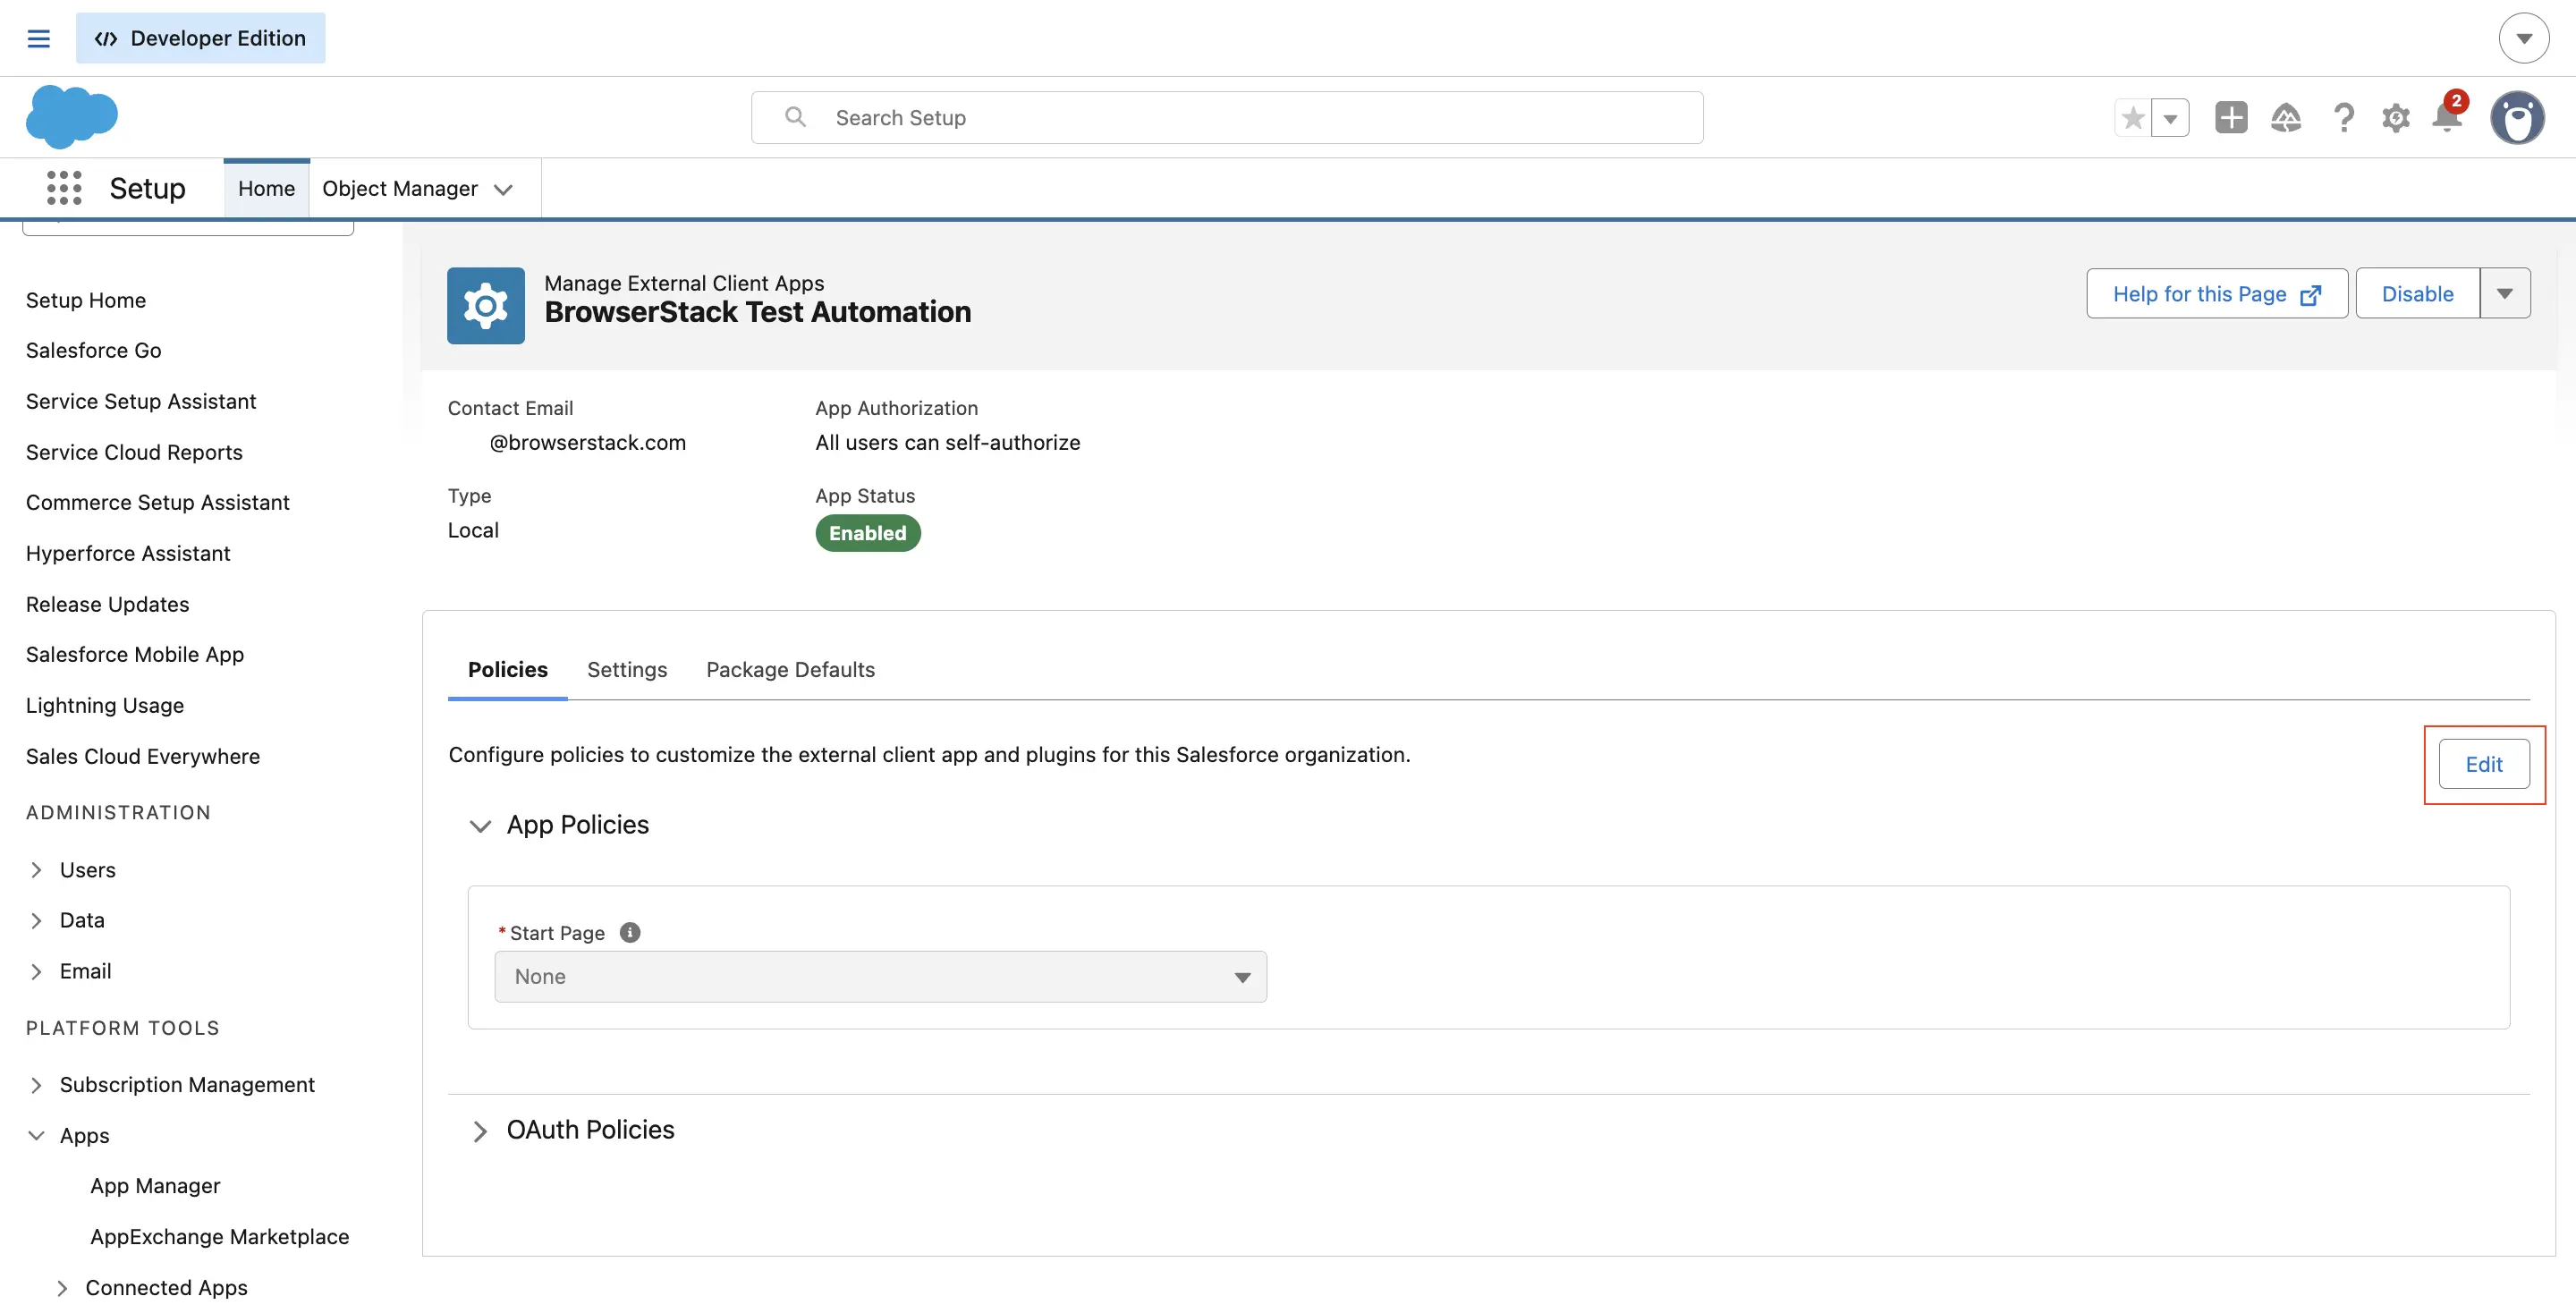
- Expand OAuth Policies.
-
Under OAuth Flows and External Client App Enhancements, enable Client credentials flow.

- Under Run As, enter the username of your dedicated Integration User.
- Click Save.
Step 3: Retrieve your client ID and client secret
To retrieve your credentials:
- In the External Client App Manager, find your app and click it.
- Go to the Settings tab.
-
Expand OAuth settings and click the Consumer Key and Secret button. Salesforce emails you a verification code to access this screen.
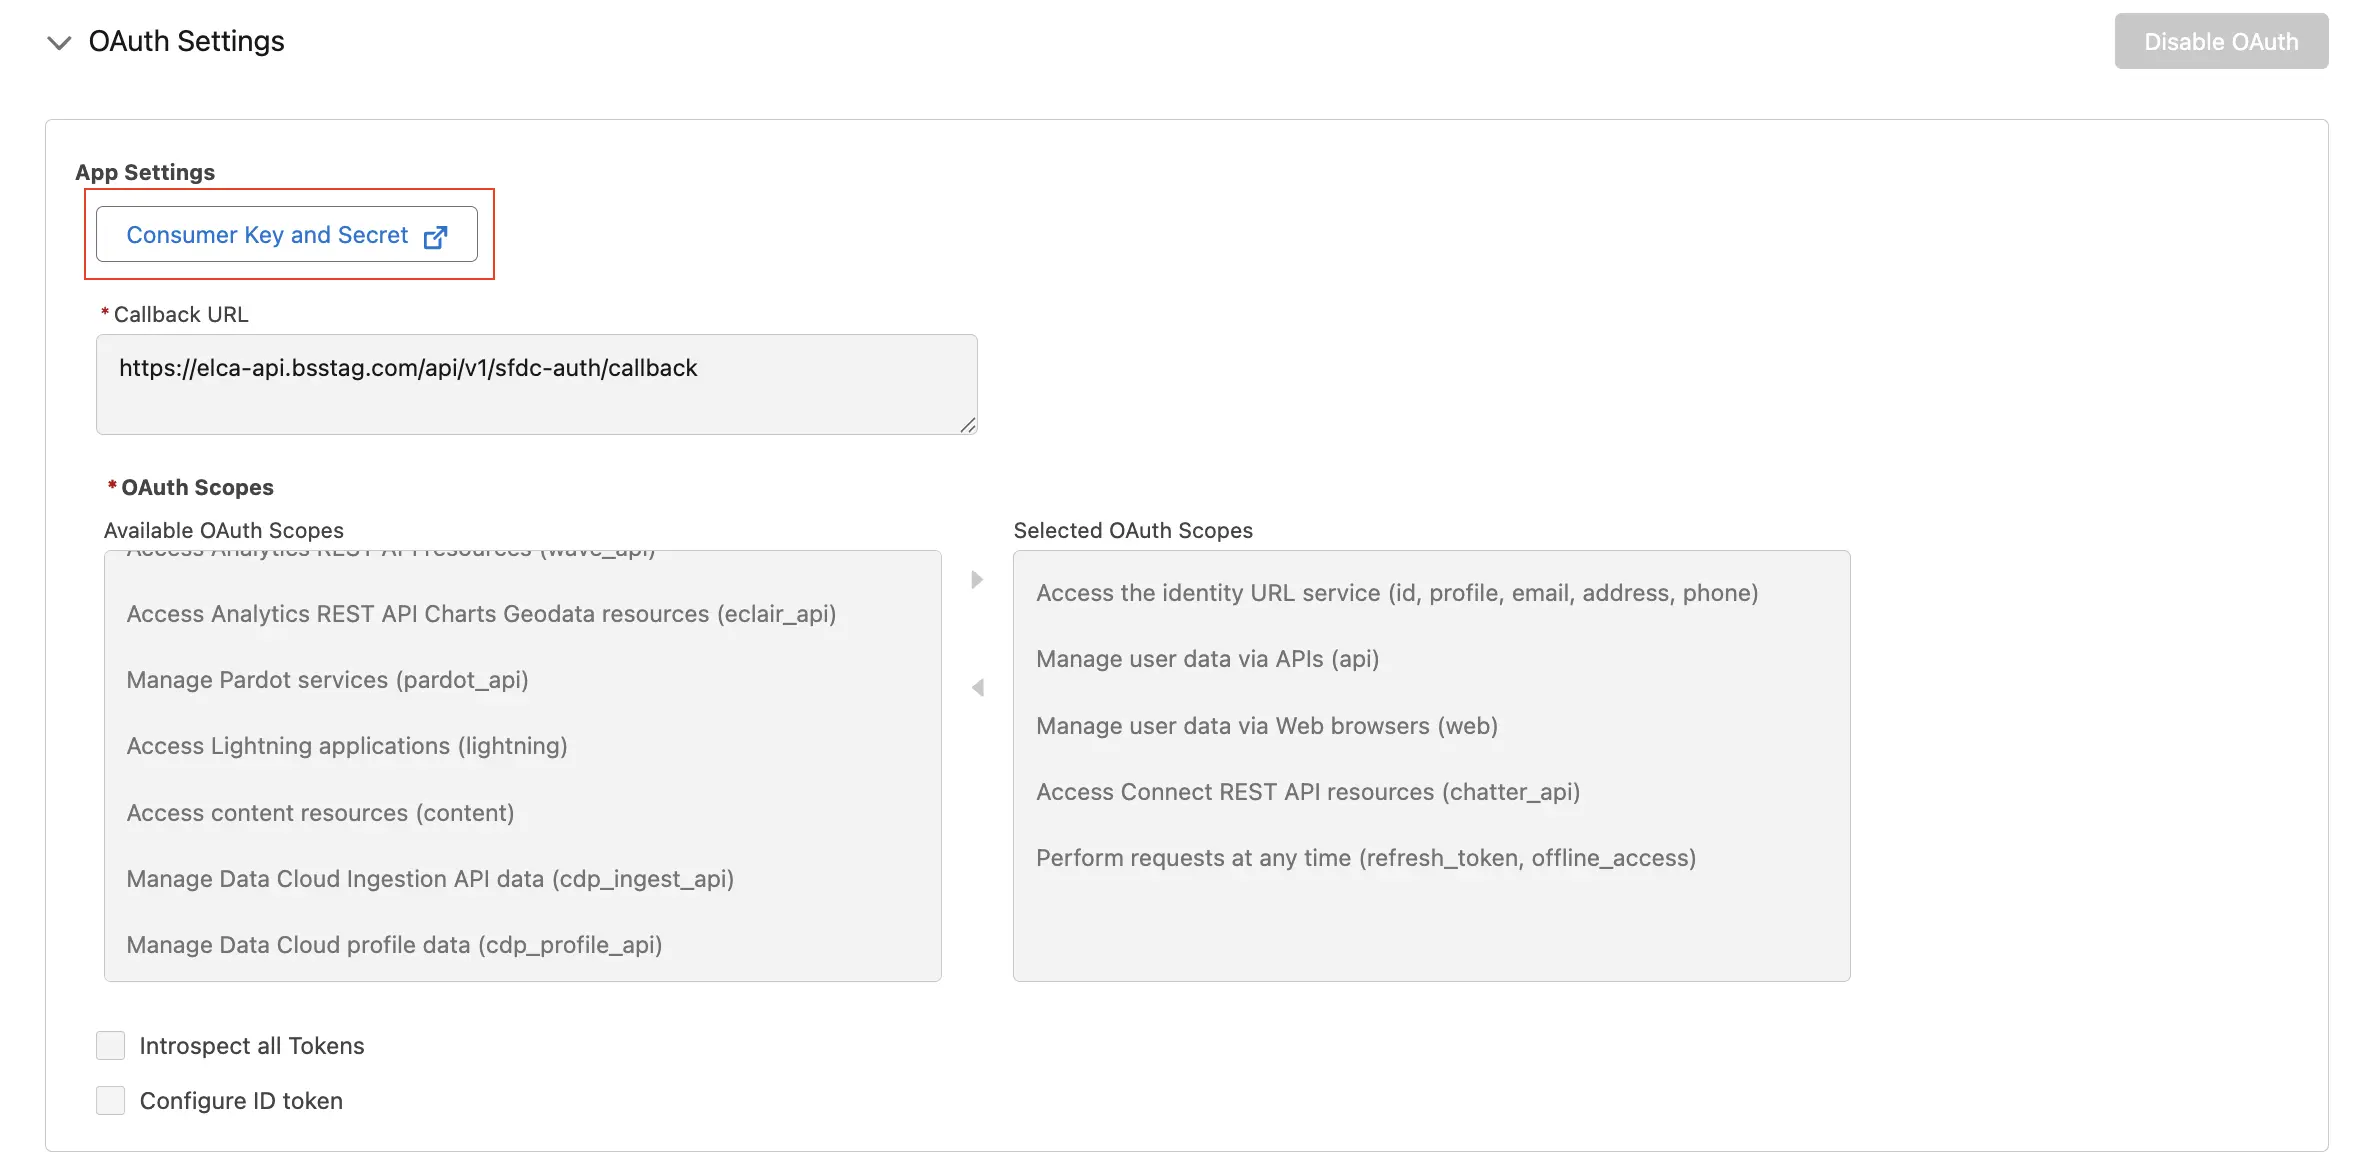
- Enter the verification code when prompted.
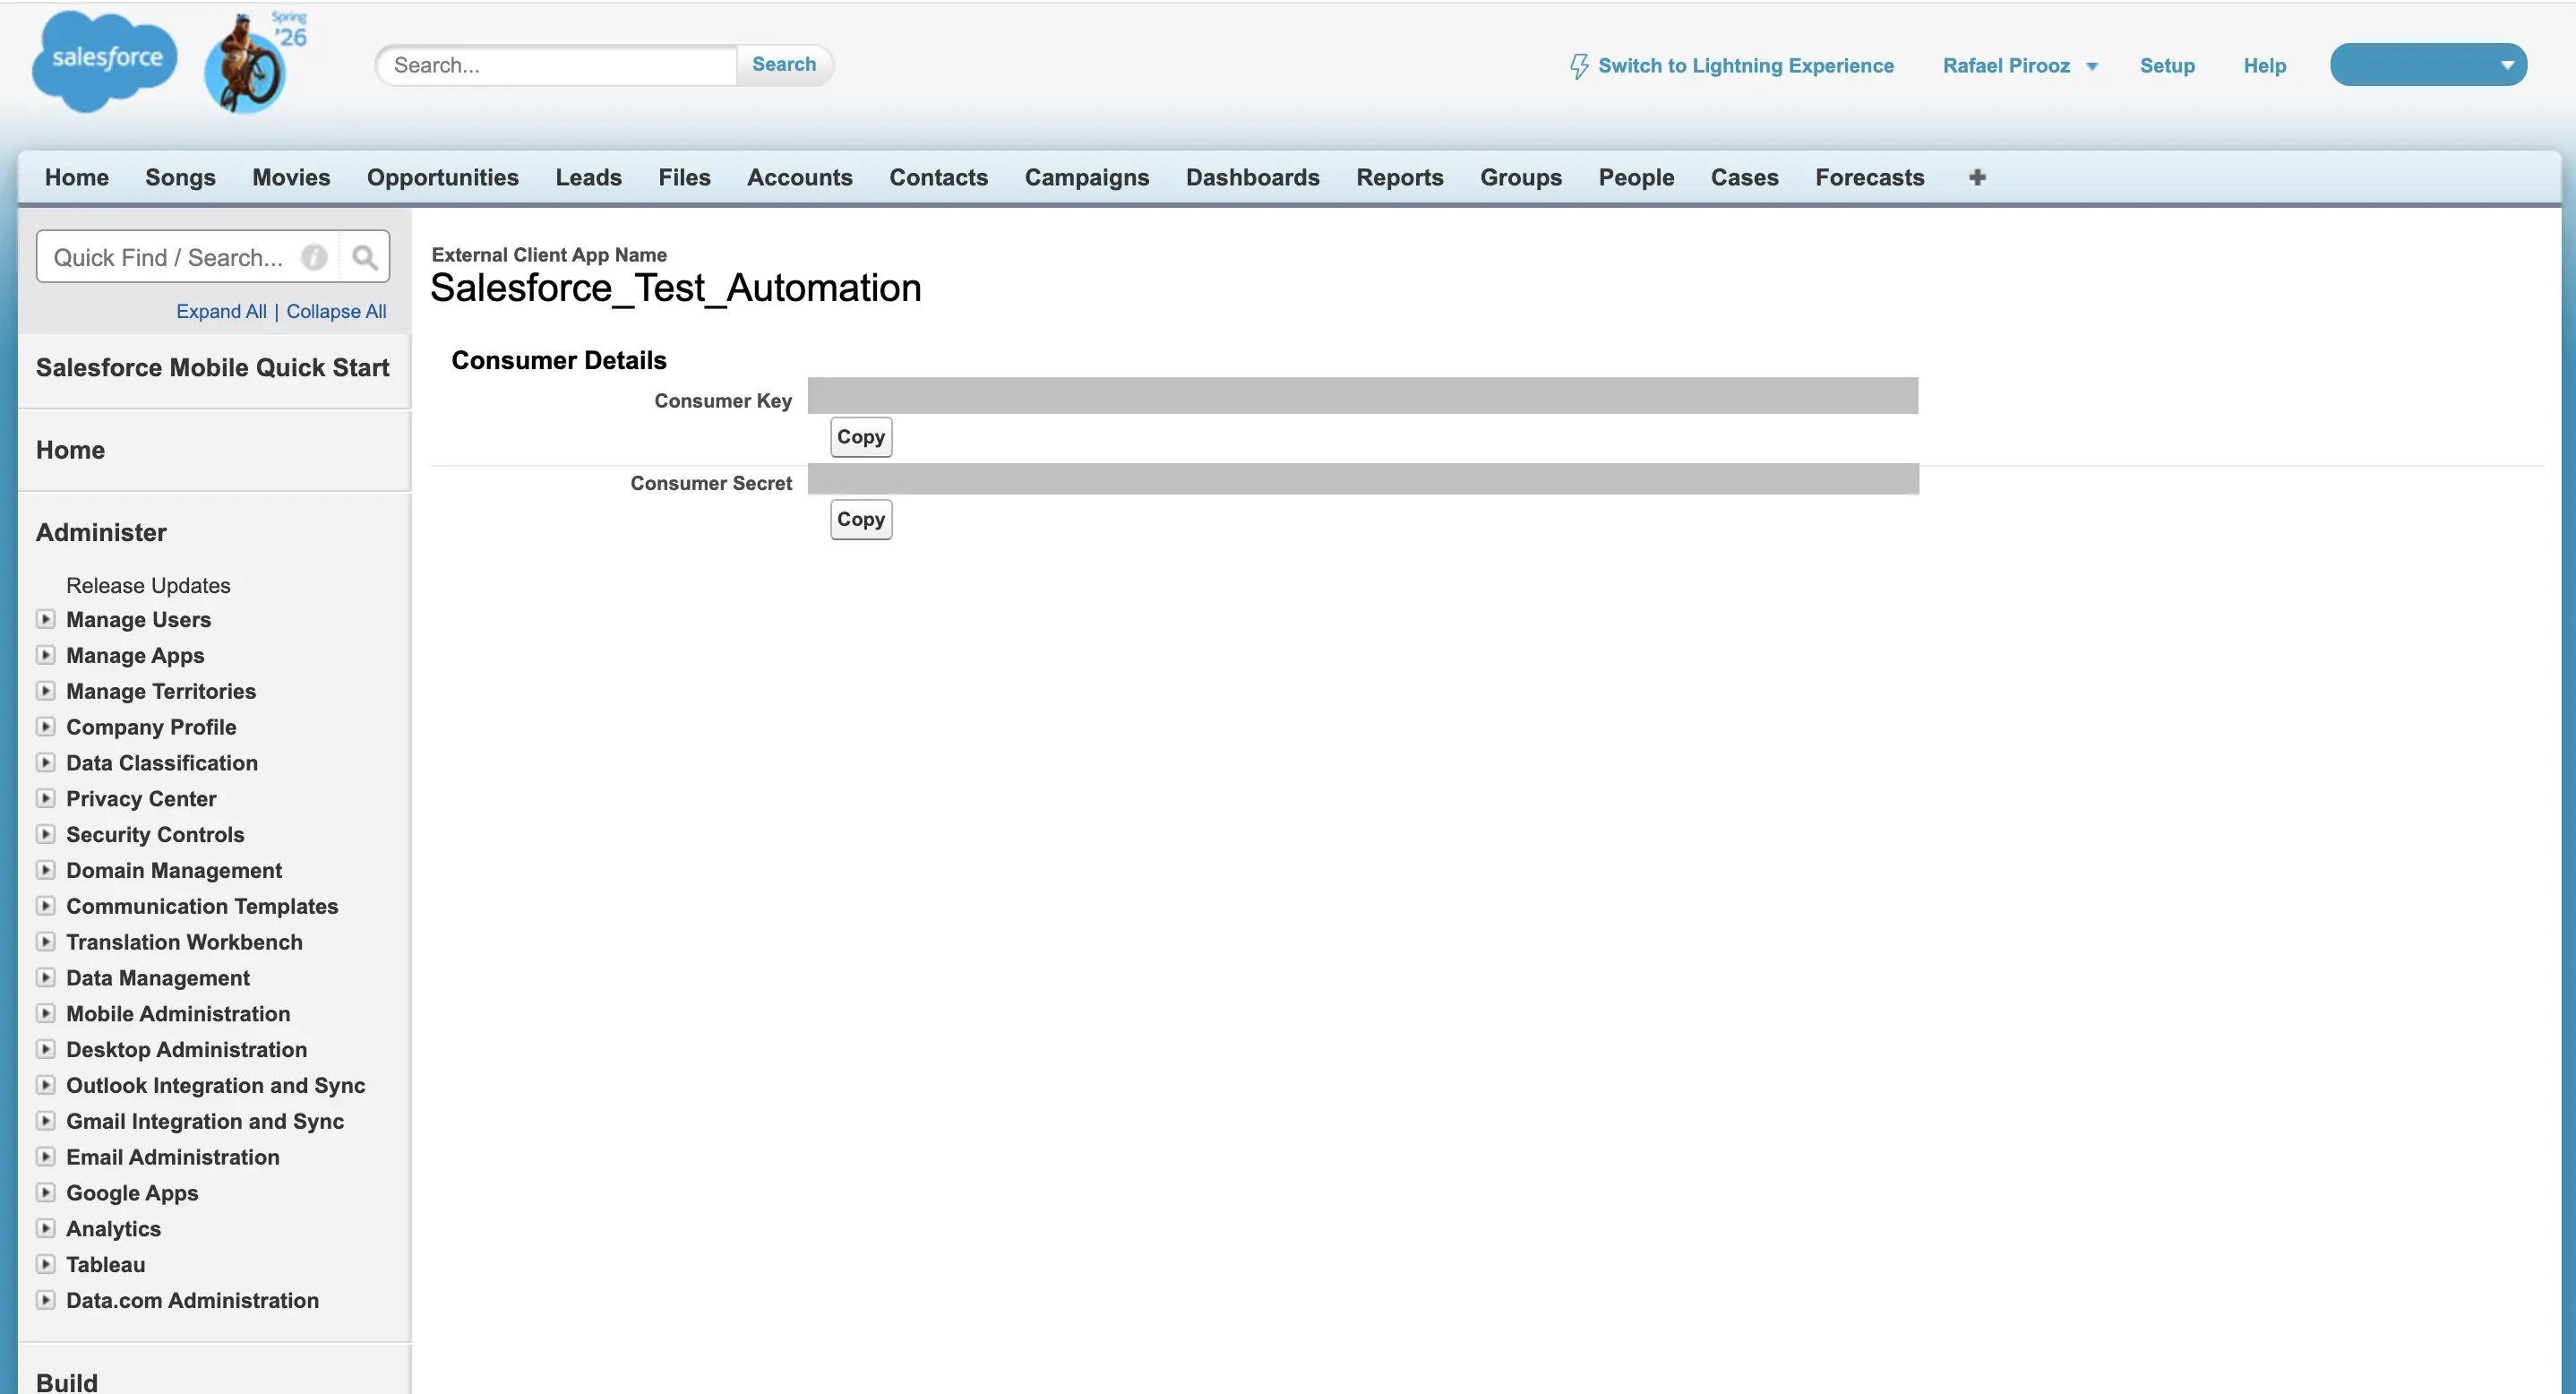
- Once verified, you see your Consumer Key (Client ID) and Consumer Secret (Client Secret).
-
Click Copy next to both values and save them securely. Keep this tab open, as you need these values in the next step.
Step 4: Connect your org in BrowserStack
Now that you have your Client ID and Client Secret, you can complete the connection in BrowserStack Low Code Automation.
To connect your Salesforce org:
- In BrowserStack Low Code Automation, go to App connections > Salesforce setup and click + New Organisation.
-
In the Connect Salesforce (Use Admin Account) dialog, select Connected App as the authentication method.
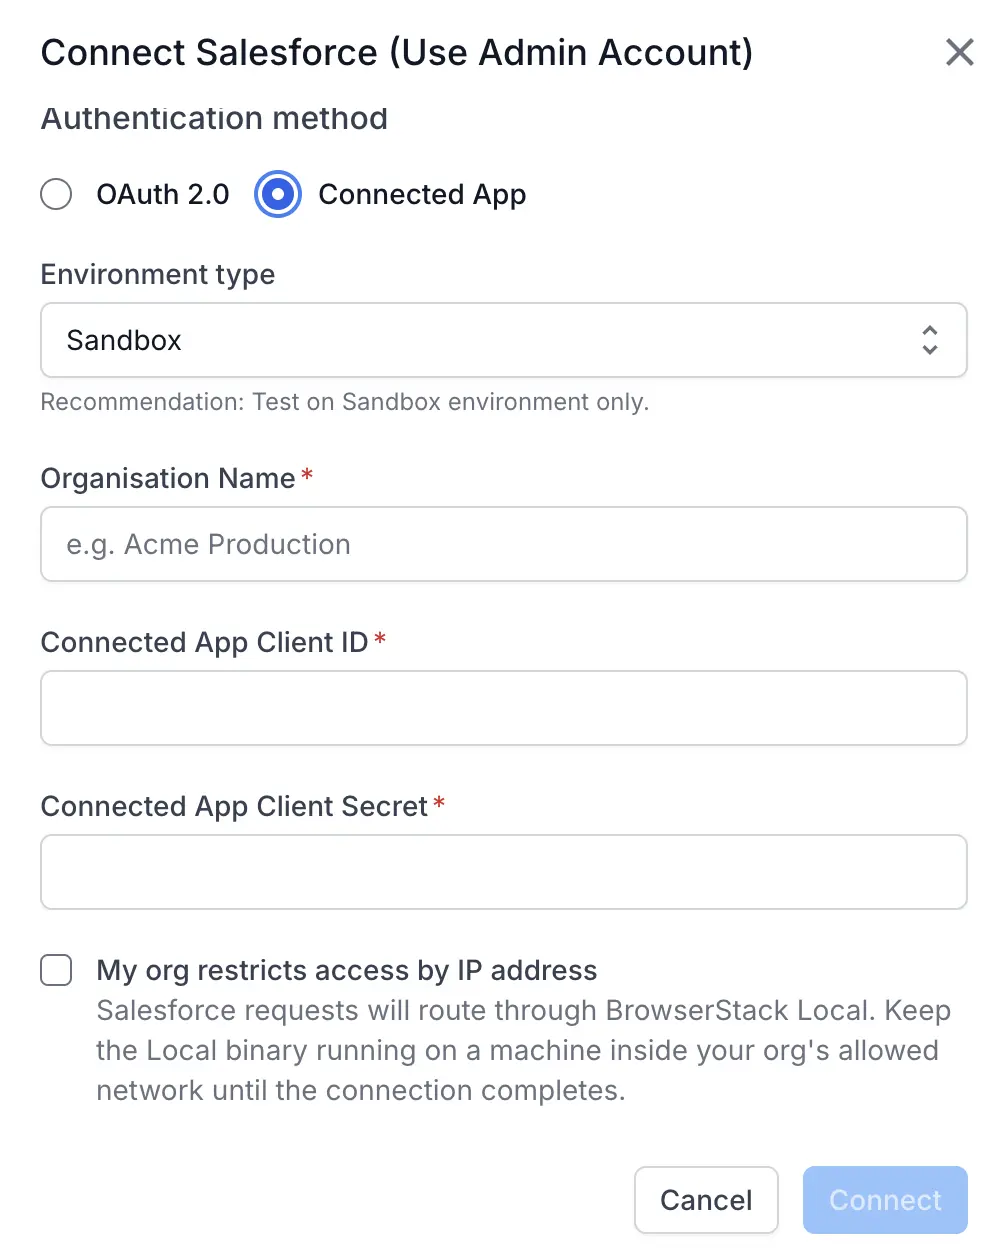
- Fill in the following details:
- Environment type: Select whether this is a Sandbox or Production org. Always test on a Sandbox environment first before connecting to Production.
-
Organisation Name: Enter a user-friendly name to identify your org, for example,
BrowserStack Sandbox. - Connected App Client ID: Paste the Consumer Key you copied from Step 3.
- Connected App Client Secret: Paste the Consumer Secret you copied from Step 3.
- Click Connect.
- In the Salesforce OAuth page that opens, enter your Salesforce credentials and log in. The connection is established, and you are redirected back to BrowserStack Low Code Automation.
Your Salesforce org is now securely connected, and you are ready to start building and running automated tests.
Troubleshooting
If you encounter issues during the connection process:
- Error: “Invalid client credentials”: Verify that you copied the correct Client ID and Client Secret from Salesforce. Ensure there are no extra spaces or characters.
-
Error: “Callback URL mismatch”: Confirm the callback URL in your connected app exactly matches
https://elca-api.browserstack.com/api/v1/sfdc-auth/callback. - Error: “Insufficient privileges”: Ensure the user account has all four required permissions listed in the Prerequisites section.
- Connection times out: Wait 5 to 10 minutes after creating the connected app in Salesforce before you attempt to connect. The app takes time to propagate across Salesforce servers.
Next steps
We're sorry to hear that. Please share your feedback so we can do better
Contact our Support team for immediate help while we work on improving our docs.
We're continuously improving our docs. We'd love to know what you liked
We're sorry to hear that. Please share your feedback so we can do better
Contact our Support team for immediate help while we work on improving our docs.
We're continuously improving our docs. We'd love to know what you liked
Thank you for your valuable feedback!