AI-powered automated test generation
Learn how to automate tests from well-written test cases directly, using AI.
In Low Code Automation, while you can manually record test steps with ease by performing actions on the browser, AI-powered test generation simplifies the process even further. Testers can automate well-written test cases directly without manual recording. This makes test creation faster, increases productivity, and helps teams improve their automation no matter their experience level.
- AI-powered automated test generation is available only in the Low Code Automation Pro and above plan. For more details, contact us.
- Currently, AI-powered automated test generation is in the Beta phase.
It provides the following benefits:
- Testers can automate test cases quickly, reducing manual work.
- Teams can automate more tests faster, enabling them to scale quickly.
- Testing can start earlier in development, finding problems sooner and improving quality.
This guide covers two primary ways AI can streamline your testing process:
- Automate test cases using AI in Low Code Automation: Easily create and execute tests with AI in Low Code Automation without the need for manual recording.
- Automate test cases using AI from Test Management: Easily automate manual test cases using AI from BrowserStack Test Management.
Prerequisites
Ensure that BrowserStack AI has been enabled for your account. For more information, refer to Activate BrowserStack AI.
Automate tests using AI in Low Code Automation
-
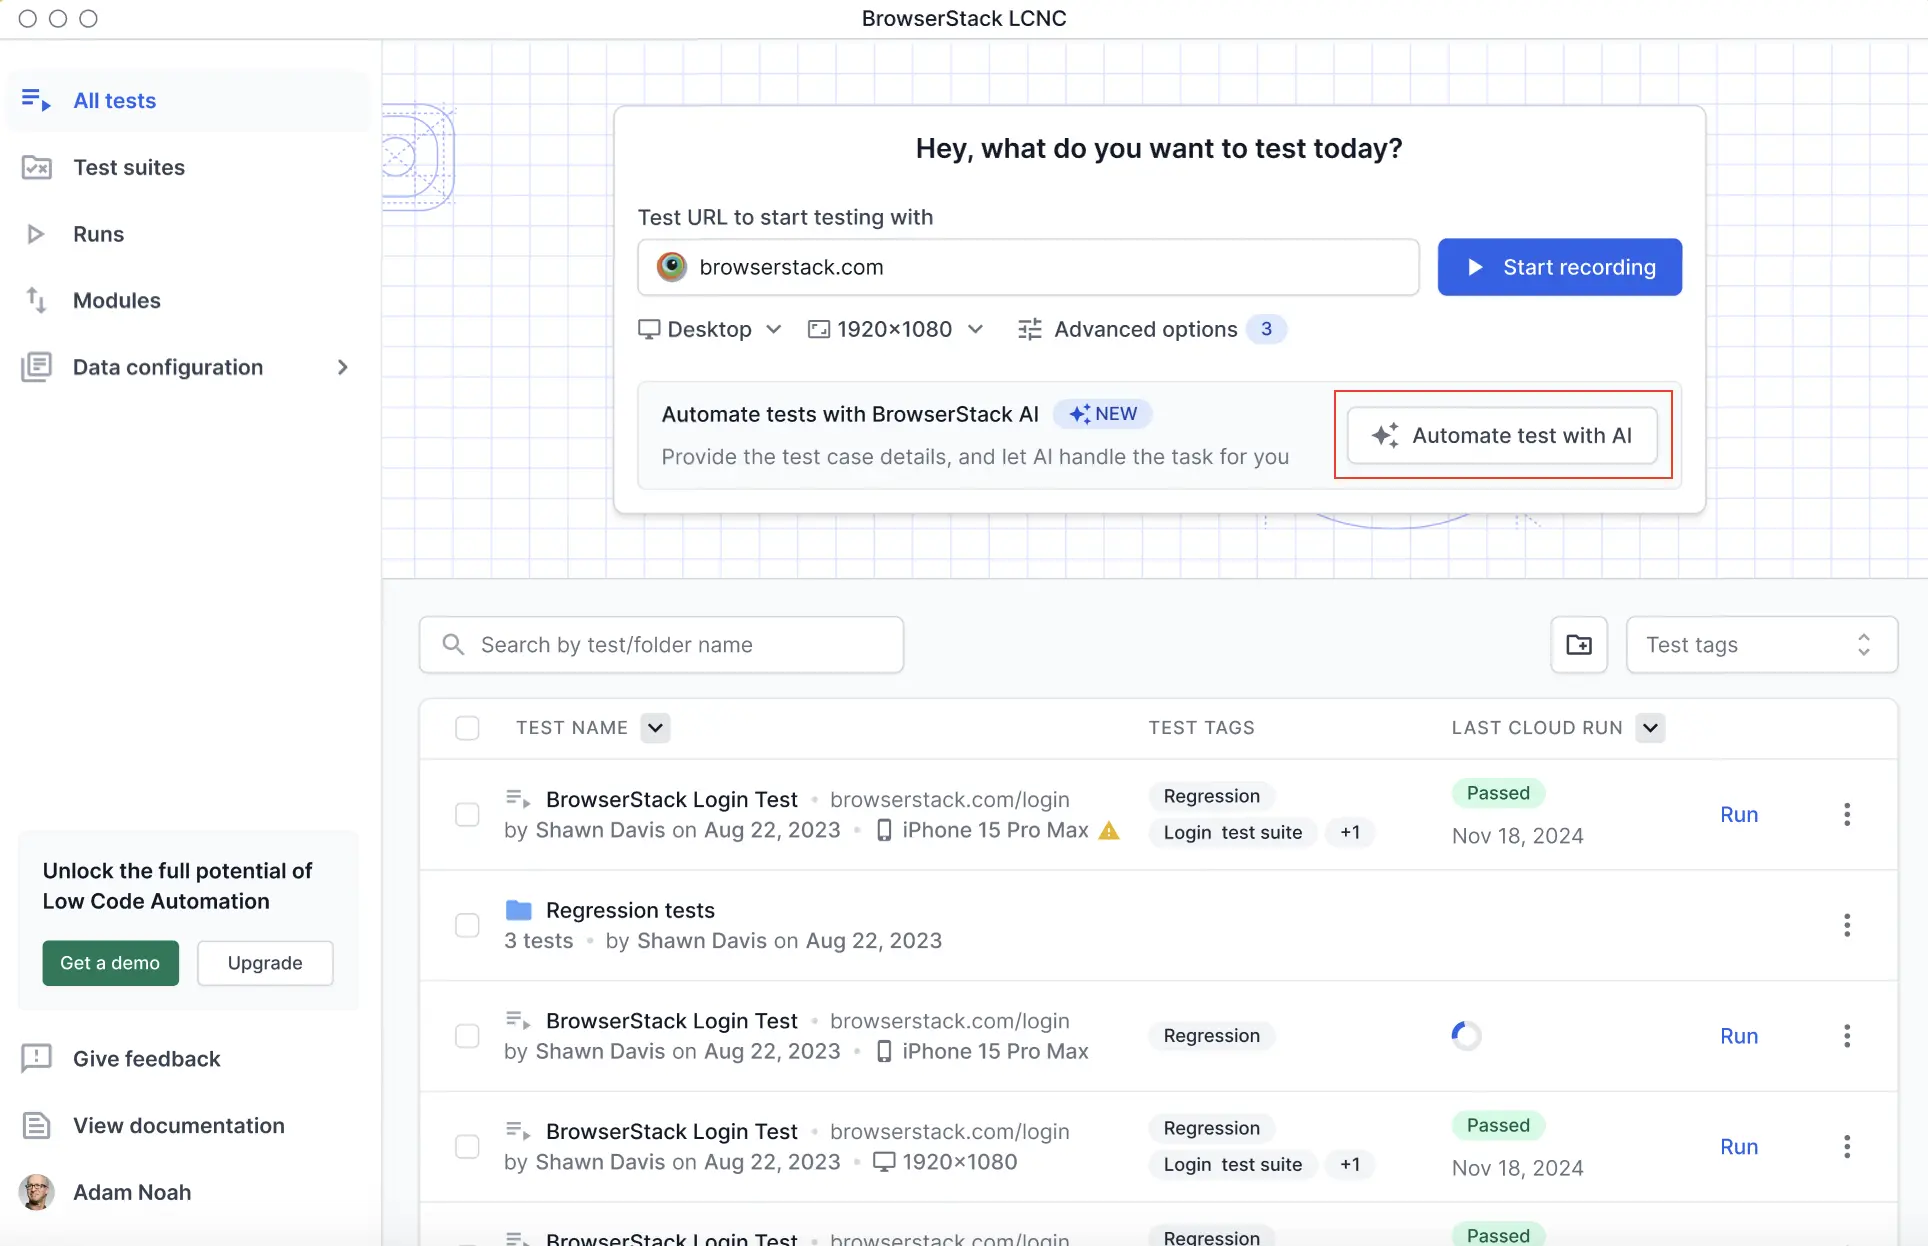
On Low Code Automation, enter the web app URL, select a device profile and resolution, then click Automate Test with AI.
-
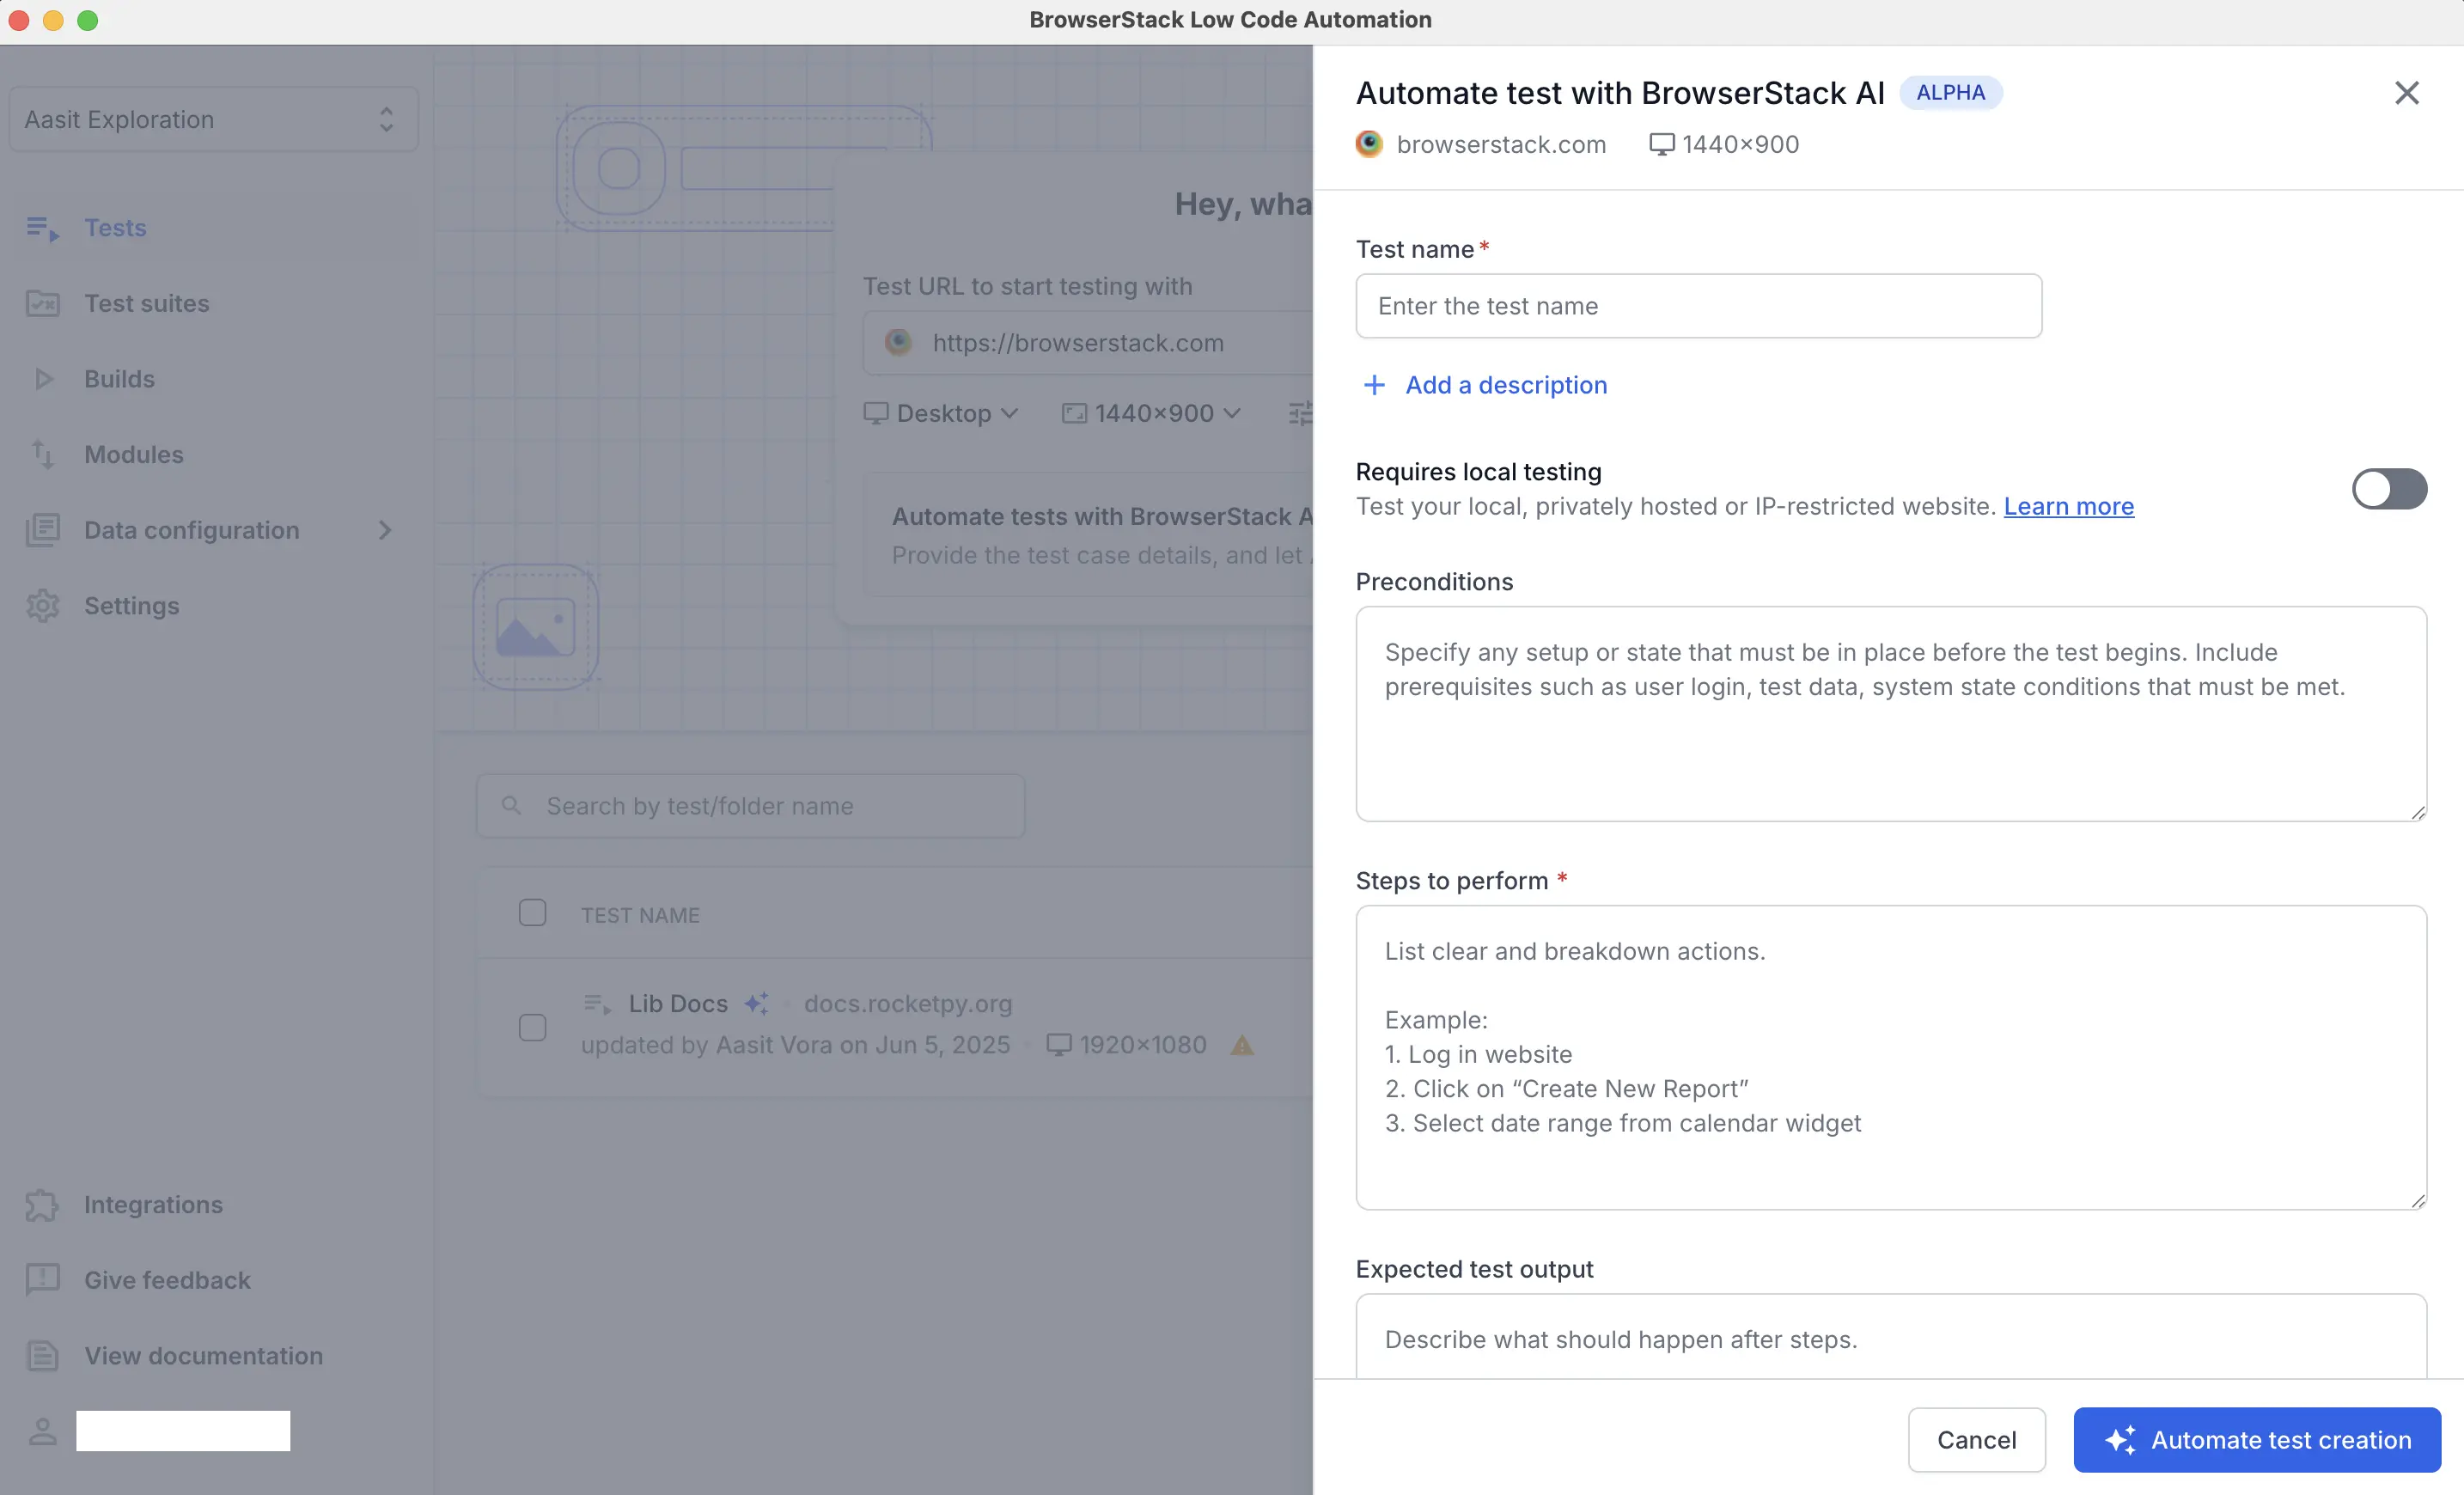
Enter the required details in the BrowserStack AI window:
-
Test name: Give a unique test name. For example,
Validate user is able to successfully login with valid credentials. - Enable local testing: Enable this option to test your locally or privately hosted websites. For more information, refer to the Test on internal network document
- Preconditions: Define setup conditions. For example: The user is logged in, and test data is loaded.
-
Steps to perform: Break the steps into small and clear actions.
Example (Sign in and checkout a product):- Navigate to the application URL.
- Log in to the website using username and password.
- Add iPhone 16 device to cart and proceed to checkout.
- Enter the address and credit card details, then complete the payment.
- Validate product is successfully purchased and a message is shown for the same.
-
Expected output: Describe the goal of what needs to be validated in the test case. For example:
- Validate that the user is successfully logged in and the product logo is displayed on the home page.
- Validate that a successful purchase message is displayed once the payment is complete.
-
Test name: Give a unique test name. For example,
-
Click Automate test creation.
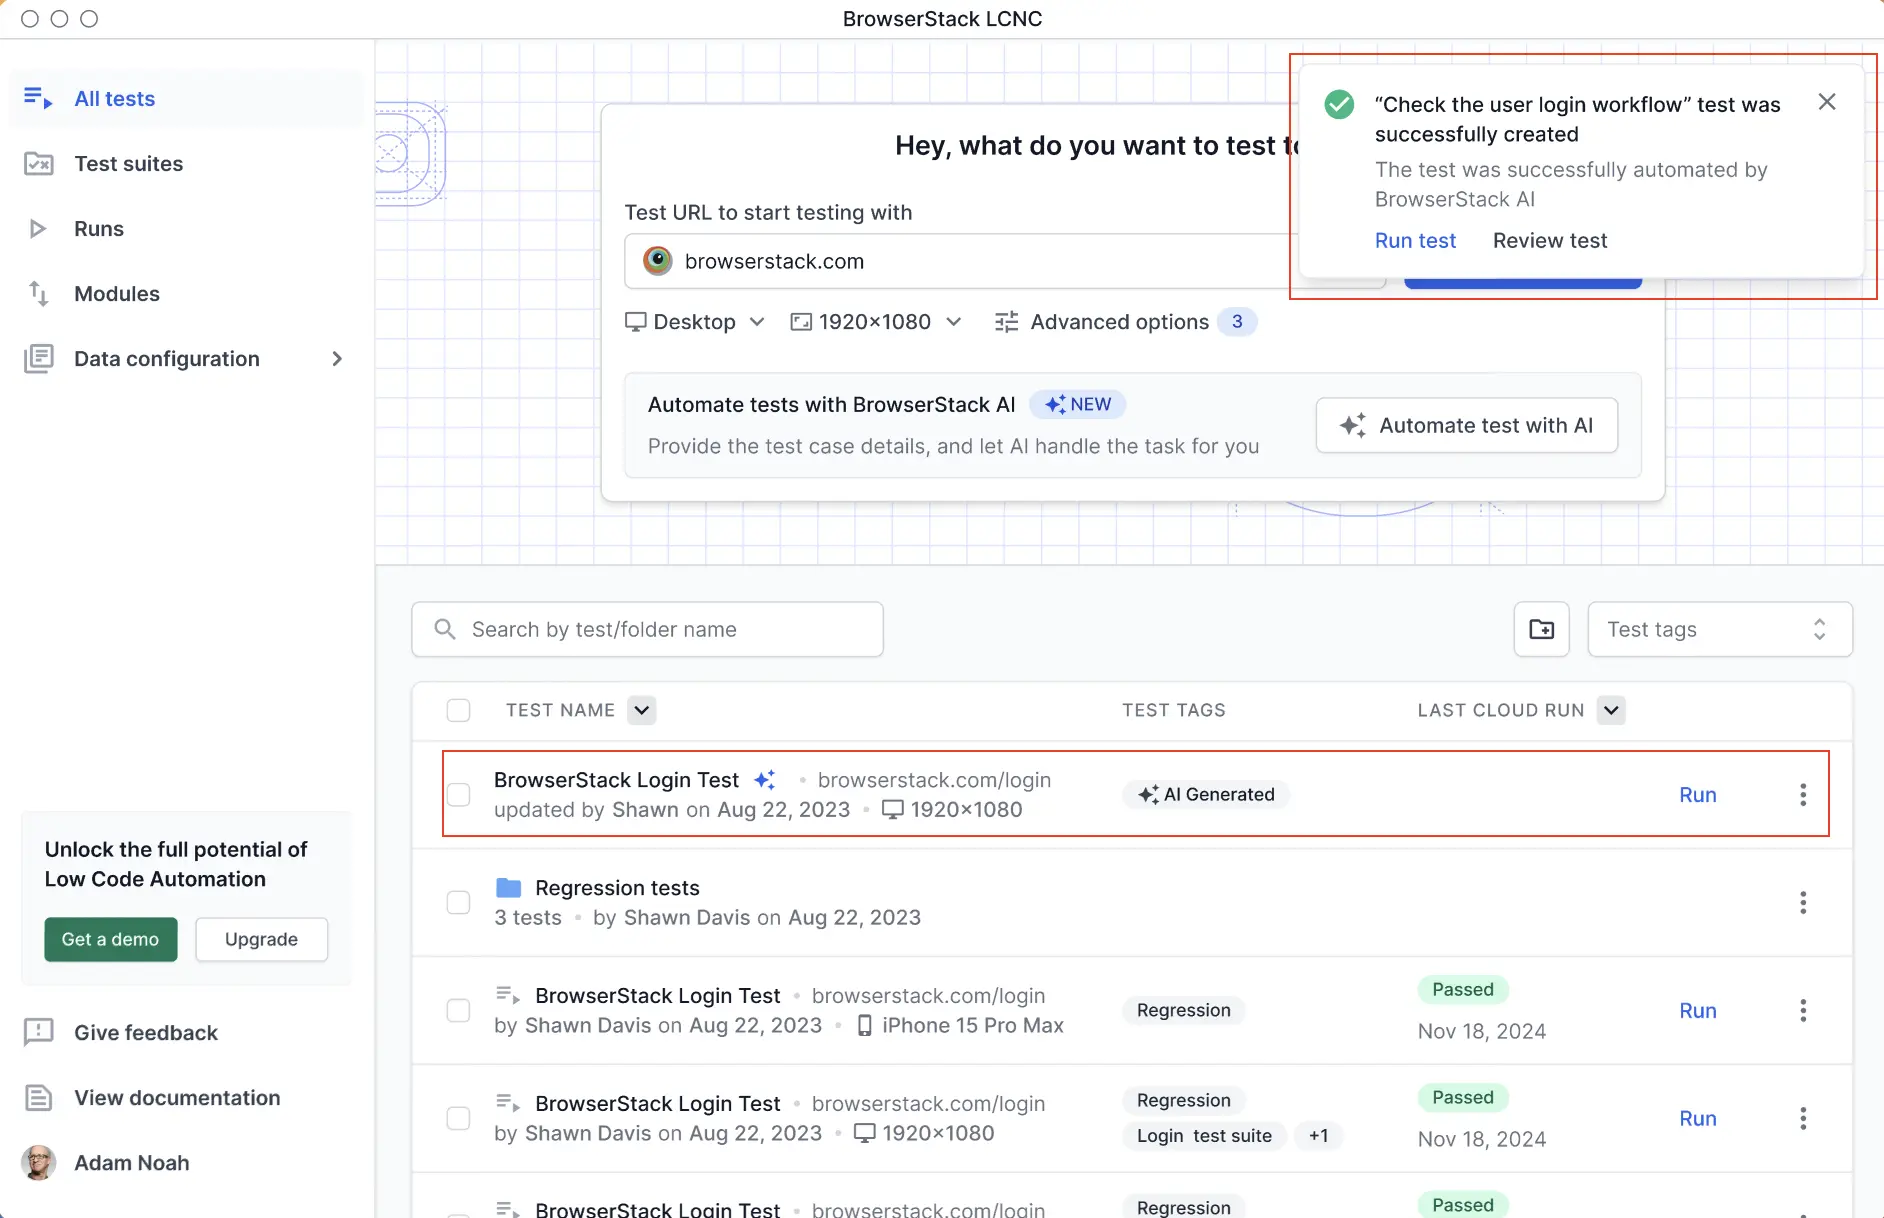
The automated test is created and a success message appears at the top.
Supported actions for AI-powered automated tests
AI-powered automated test generation supports the following types of user actions:
- Visual validation
- Text validation
- Element presence validation
- Type input
- Click
- Hover
Automate test cases using AI in Test Management
-
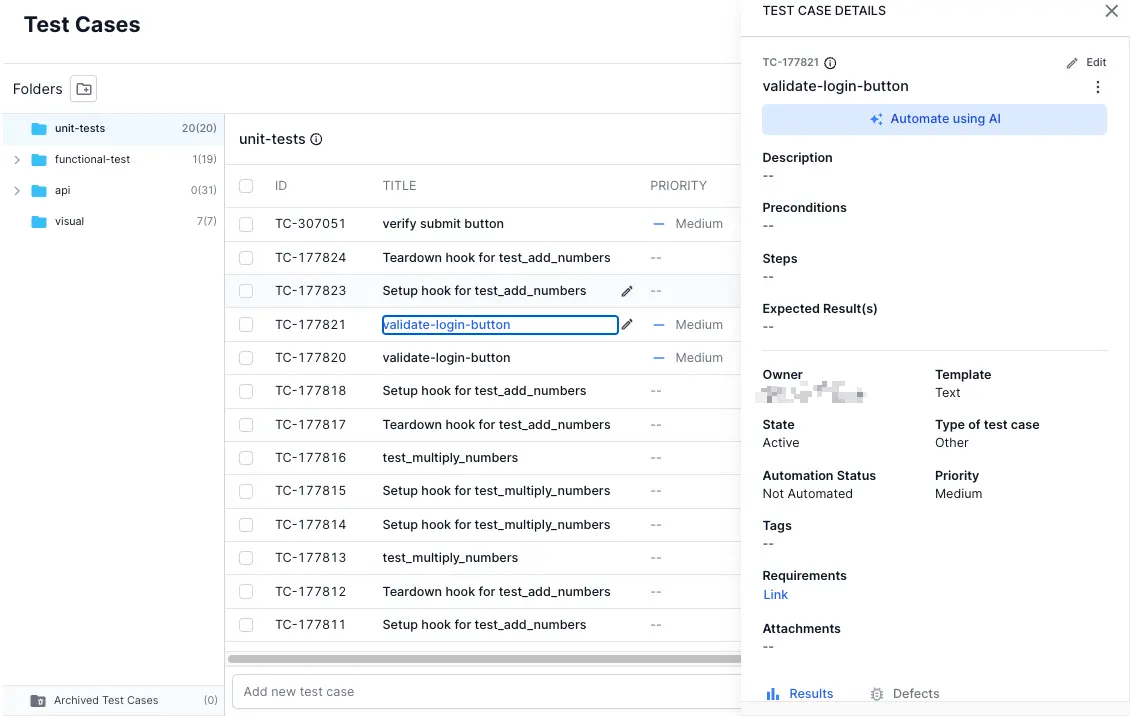
Open the detailed view of the test case you want to automate within your Test Management project.
-
Click the Automate using AI button.
This action opens the Creating Low Code Automation Test dialog box. -
Enter the mandatory URL field and at least one Test Step.
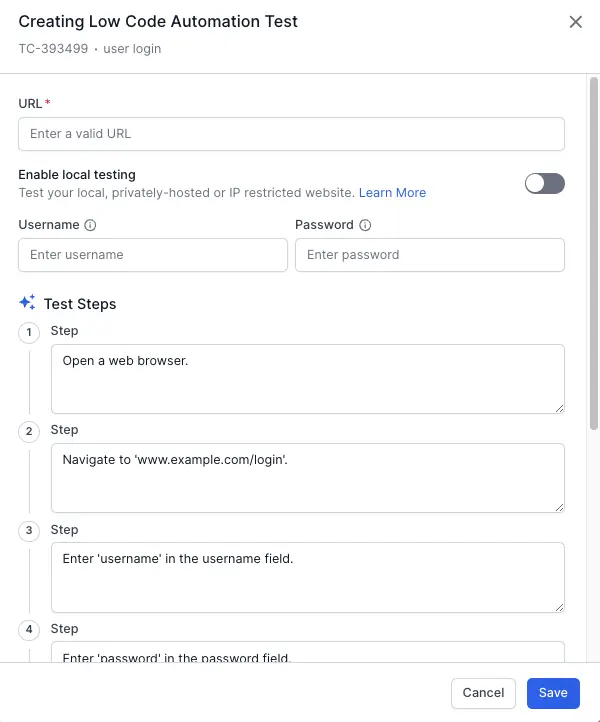
If the website requires a login, enter your username and password. If you are testing a local or private website, turn on the Enable local testing toggle.
-
Review the AI-populated fields based on the test case details.
If the AI cannot retrieve the necessary information, some or all fields may be left blank. -
Click Save to start the automation process.
After your test steps are run and recorded in the Low Code Automation platform, a notification appears informing you that Low Code Automation is complete. Clicking View Test will take you to the Low Code Automation dashboard.
After the test generation completes, the test will be available in the Low Code Automation test listing page. You can then customize it further by adding more steps or validations.
For more information, refer to the Low Code Authoring Agent page.
Need more help?
If you need any additional help, feel free to contact us.
We're sorry to hear that. Please share your feedback so we can do better
Contact our Support team for immediate help while we work on improving our docs.
We're continuously improving our docs. We'd love to know what you liked
We're sorry to hear that. Please share your feedback so we can do better
Contact our Support team for immediate help while we work on improving our docs.
We're continuously improving our docs. We'd love to know what you liked
Thank you for your valuable feedback!