
 Join our Discord
Editing a test
Learn how to edit a test any time in Low Code Automation, whenever the requirement changes
In Low Code Automation, tests are designed to be robust and adaptable. The tool intelligently handles changes to element attributes (e.g., updates to IDs, classes, or structure), ensuring that your tests remain functional without manual intervention. This reduces the need for frequent edits, even when there are minor updates in the application.
However, there are scenarios where editing a test becomes necessary. For eg:
- When application requirements change significantly, such as new workflows, modified features, or additional validations.
- To incorporate new use cases or validations based on updated business needs.
- To optimize or customize tests for better performance or clarity.
BrowserStack Low Code Automation enables you to edit a test seamlessly at any time, with or without launching the recorder.
Edit a test without the recorder
You can quickly edit an existing test without launching the recorder. This option is useful for making changes that don’t require browser interaction, such as updating wait timeouts, modifying URL links, editing or replacing custom locators, reordering steps, converting steps into modules, and more.
To add new steps, you’ll need to use the recorder, as it requires interacting with the browser.
To edit a test quickly without using the recorder:
- Open Low Code Automation and click Tests in the left pane.
- Select the test you want to edit. You can click on the following tabs to edit the test and click Save changes:
-
Test steps: Click the desired step to edit the following values:
- Modifying the URL
- Converting/Importing variables & functions
- Visual threshold configuration
- Custom locator
- Failure logic
- Create modules: You can also select steps and convert them into modules.

- Delete steps: Select one or more test steps and click the delete icon.

-
Configurations: Click this tab to edit test details, advanced options, variables, and test dataset. The Used in field under Test Details also shows the test suites that the test belongs to. For more information, see View the test suites a test belongs to.
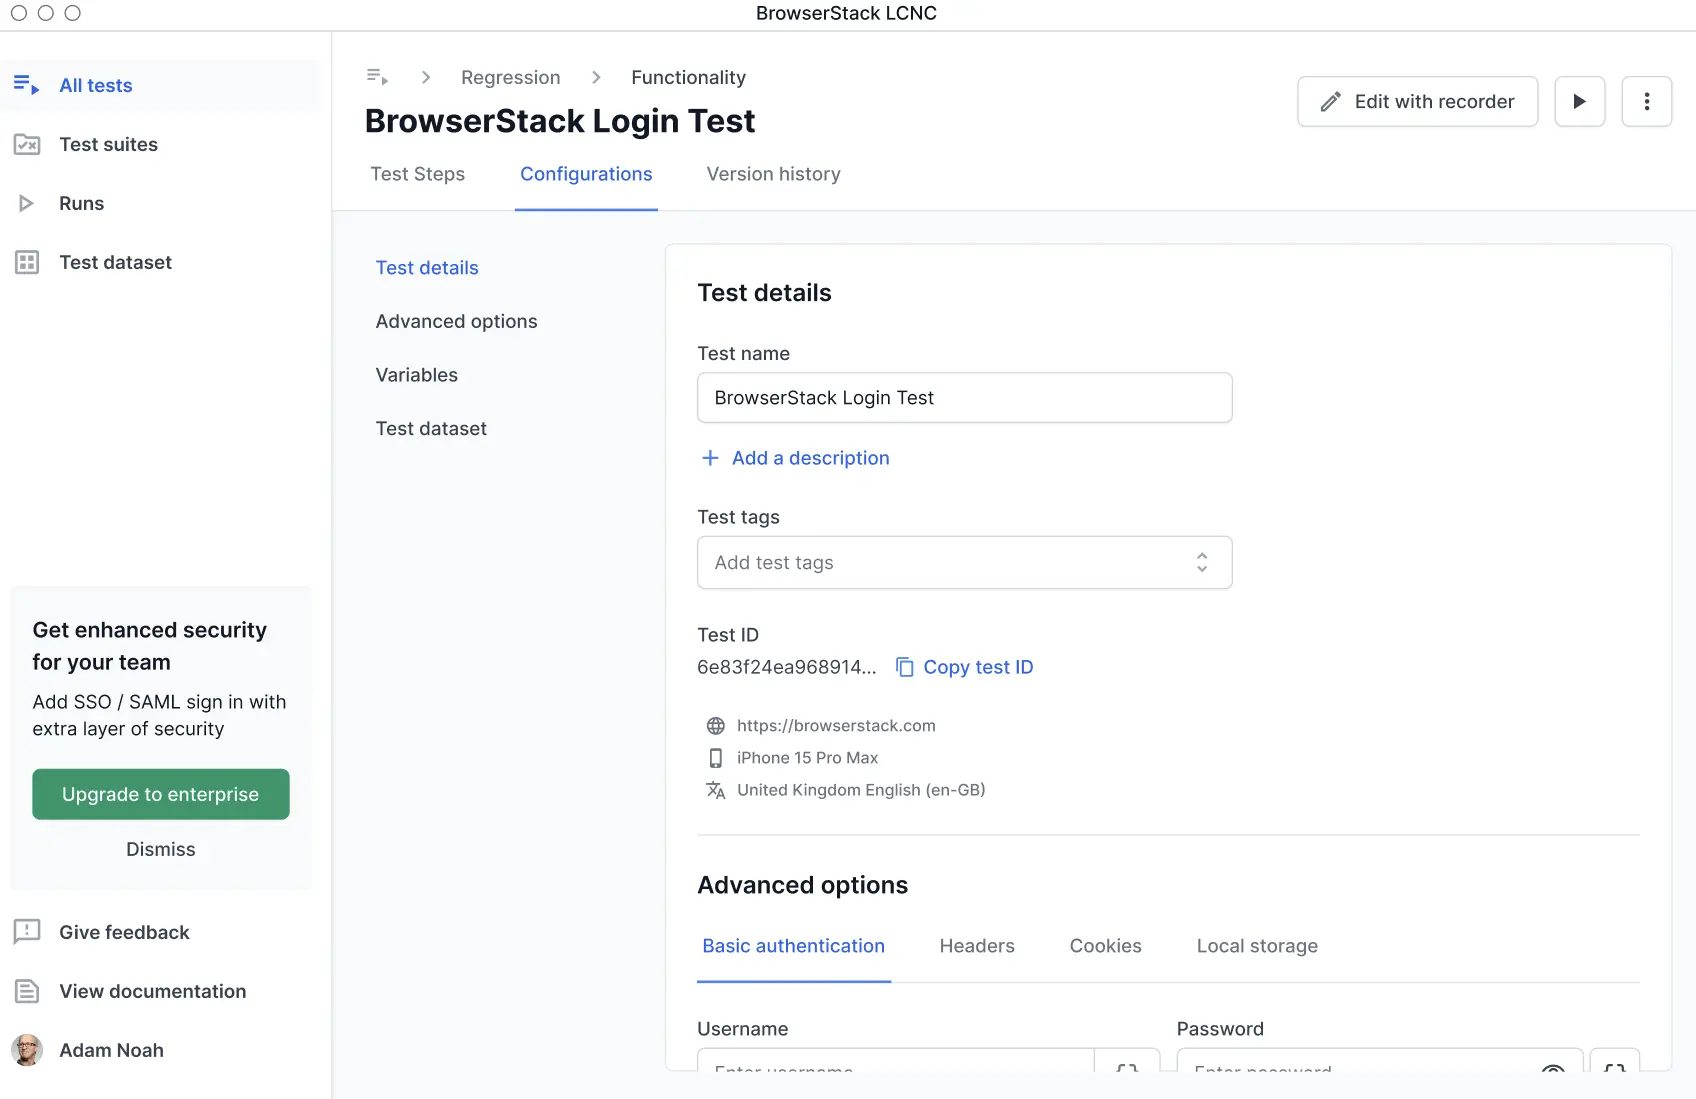
-
Version history: Choose the version you want to restore and click Restore this version. This reverts the test to the selected version and discard any changes you made. For more information, refer to Test version history.
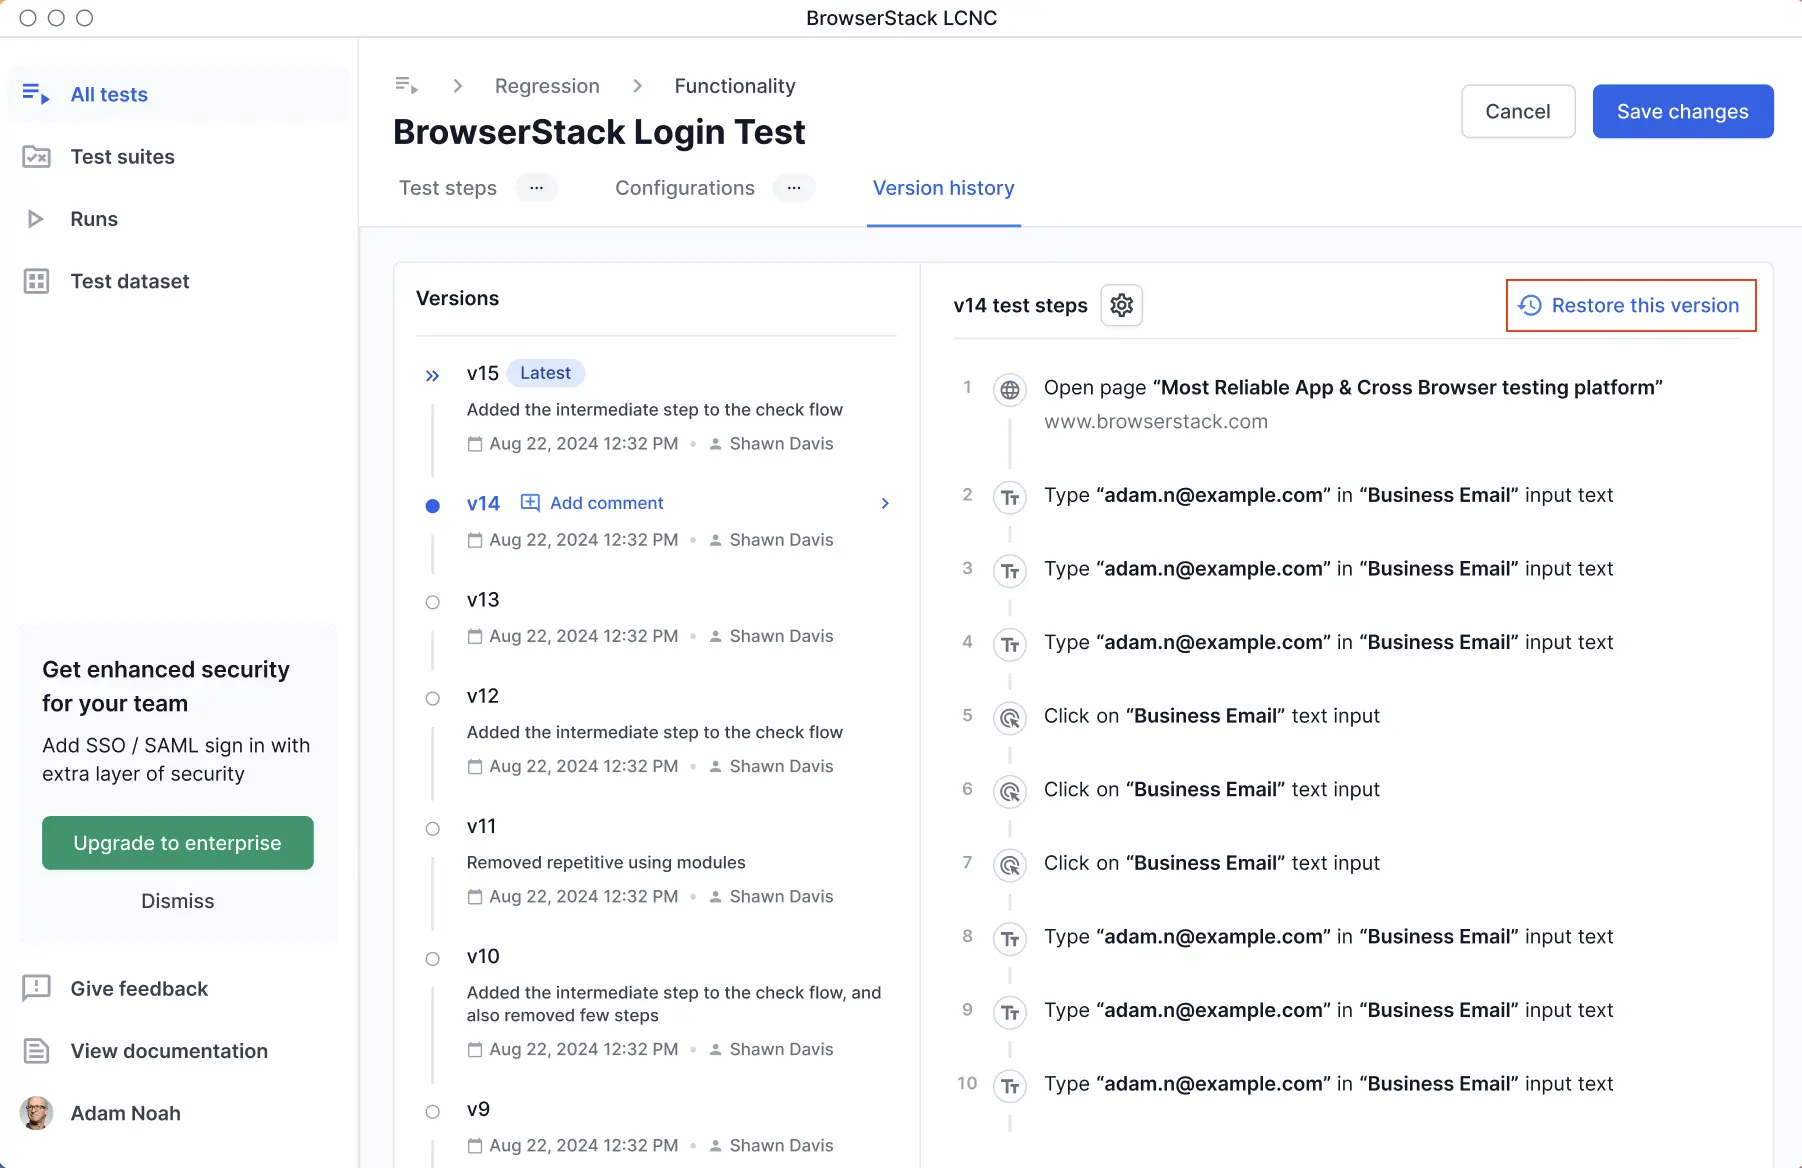
-
Test steps: Click the desired step to edit the following values:
- Click Save changes.
Edit a test with the recorder
With this option, you can edit a test that requires launching the browser. This enables you to capture new actions directly in the browser. You can add, remove, or modify steps in real time.
To edit a test using the recorder:
- Open Low Code Automation and click Tests in the left pane.

- Click the three dots icon next to the required test and select Edit with recorder. The recorder pane will open and the browser will launch.
- Record and edit the required steps. You can modify the following:
- Record new steps in between your existing steps
- Update screenshots for visual validations
- Delete existing steps
- When adding a new step to your test, ensure that you are on the correct webpage or at the appropriate stage of the task. You have two ways to do this:
- Manually pause the recorder: Pause the recording, navigate to the relevant webpage or state, start the recorder and then add the new step.
- Auto-execute the test: Run the existing steps automatically to reach the required page or state. Once the page loads, you can proceed to record the new step. For more information, see Add or execute steps at a position.
- Click Save and run.
Add or execute steps at a position
In the recorder, a blue line marks the position where new steps are added. Use it to run or add steps at that position.
To add or execute steps at a position:
Drag the handle on the left end of the blue line and drop it between the required steps. Alternatively, select the Move step here option to move the blue line to any position.
To add a step, click the + icon on the blue line and select one of the following options:
- AI Step: Adds an AI step at the selected position. For more information, see Automate dynamic workflows with AI steps.
-
Import a module: Adds a module, a set of steps shared across tests, at the selected position. For more information, see Import a module.
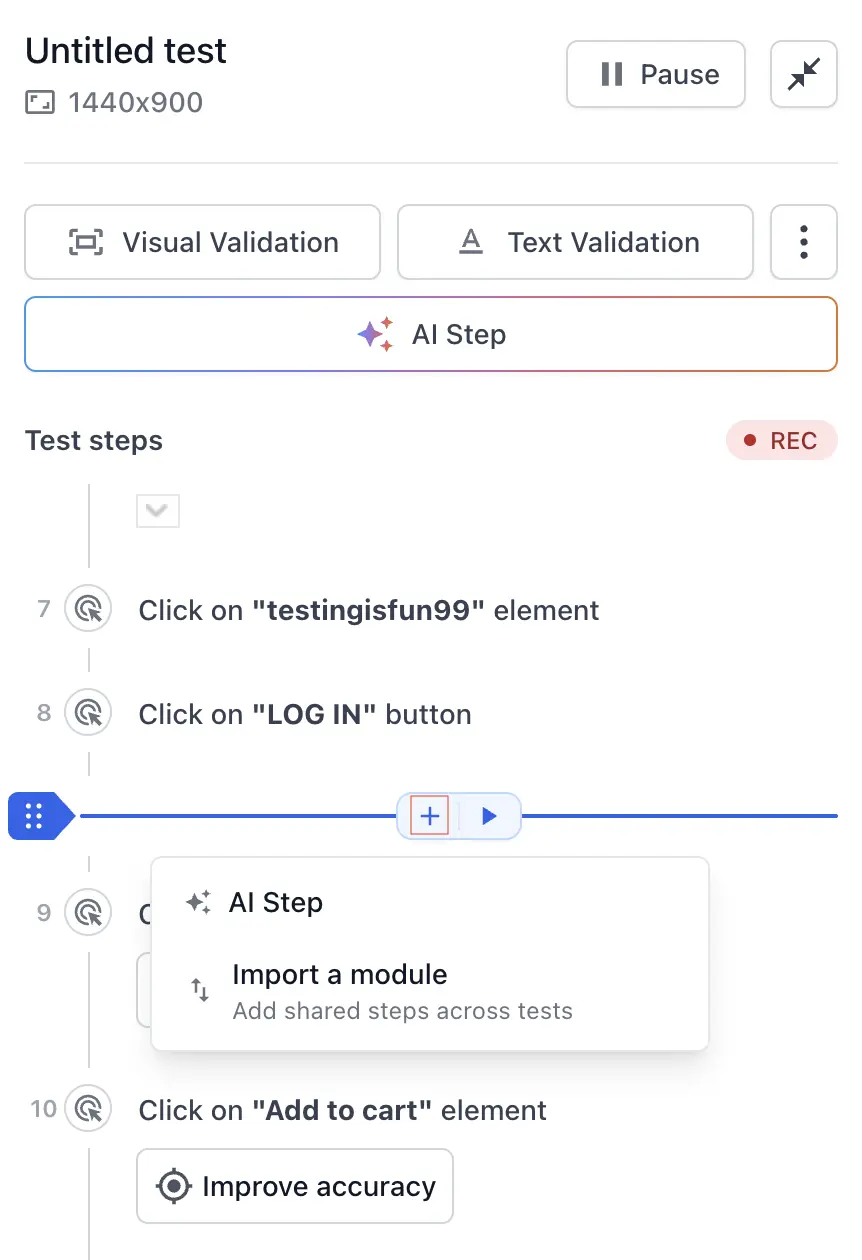
To execute steps, click the play icon on the blue line. The EXECUTE RANGE menu appears, and each option shows the step numbers that it runs. Select one of the following options:
- Execute next step: Runs only the step that follows the selected position.
- Execute from start till here: Runs all steps from the first step up to the selected position.
- Execute from here till end: Runs all steps from the selected position to the last step of the test.
-
Custom range: Enter the first and last step numbers in the From and To fields, and click Execute to run only that range of steps.
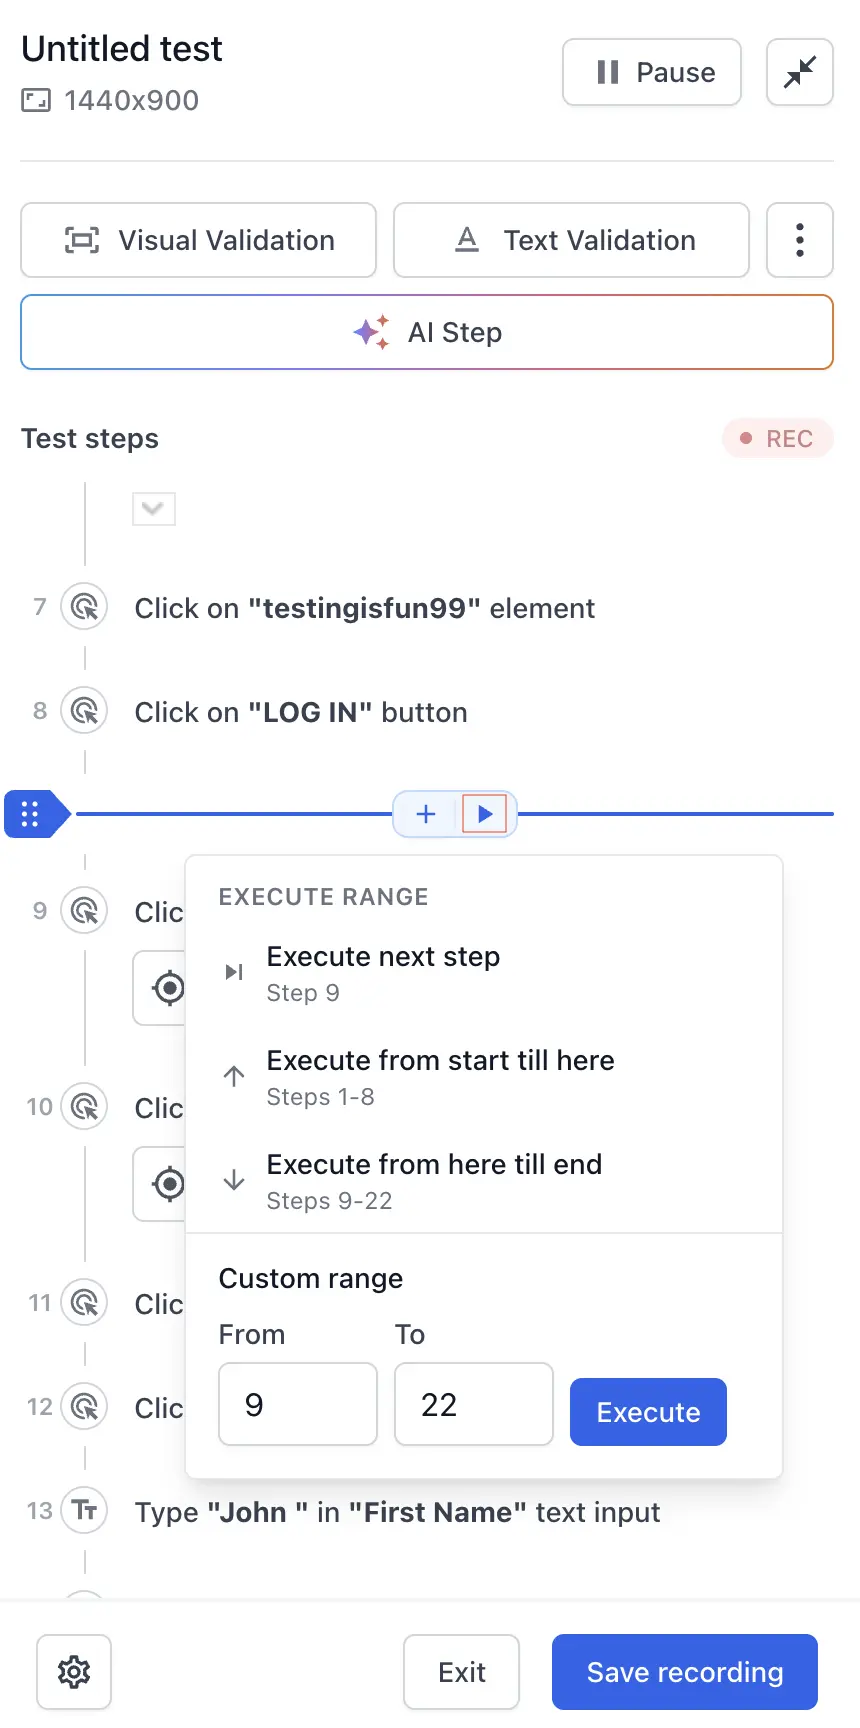
Before you execute a step, make sure the browser shows the page that the step runs on. If the browser is on a different page, the step fails.
Run and debug a test in the recorder
When you click Save and run, the test runs in the browser that is already open. The recorder doesn’t close and relaunch the browser, so you can debug the test faster and the browser keeps its session state. If you change any Advanced options of the test, the test runs in a fresh browser instead.
After the run completes, the recorder switches to edit mode. You can fix failed steps in the recorder itself, without reopening the test with Edit with recorder.
To debug a failed step, follow these steps:
- Click the failed step to open its details.
- Update the step values, such as the expected value of a validation.
- Execute the next step or a range of steps from the blue line. For more information, see Add or execute steps at a position.
Points to remember
- When you execute steps that start after the first step, they run on the browser in its current state. The browser isn’t reset, so anything that earlier executions left behind, such as a logged-in session or a partly filled form, stays in place.
- When you execute steps from the first step, the browser data, such as cookies and storage, is cleared. This is similar to a browser restart.
- If a step uses a variable that’s created in a step you haven’t executed in the current session, the variable has no value and the step can fail. In this case, the following message appears:
This variable does not have a value because the step was never executed. - Variable values persist across executions in the same session. If a variable gets a new value, later steps use the latest value.
- If you execute up to a step inside a loop, only the first iteration of the loop runs. If you execute up to a step after the loop, all iterations of the loop run.
- Executing steps doesn’t create a new test version. A new version is created only when you save the test.
Reorder test steps
You can also reorder the steps in a test by hovering over the step. A 6-dot reorder icon will appear. Drag and drop the step using this icon. It helps you adjust the sequence of steps to match the correct test flow, without the need to delete and re-record steps.
- The following video demonstrates how to reorder a step using the recorder:
- The following video demonstrates how to reorder a step without using the recorder:
Points to remember
- You cannot move the first step, Open URL. It always remains as the first step.
- You can only move one step at a time.
- Ensure that even after moving steps, a variable is still created before it’s used in any subsequent step.
- A new test version is generated when you change the step order and save the test.
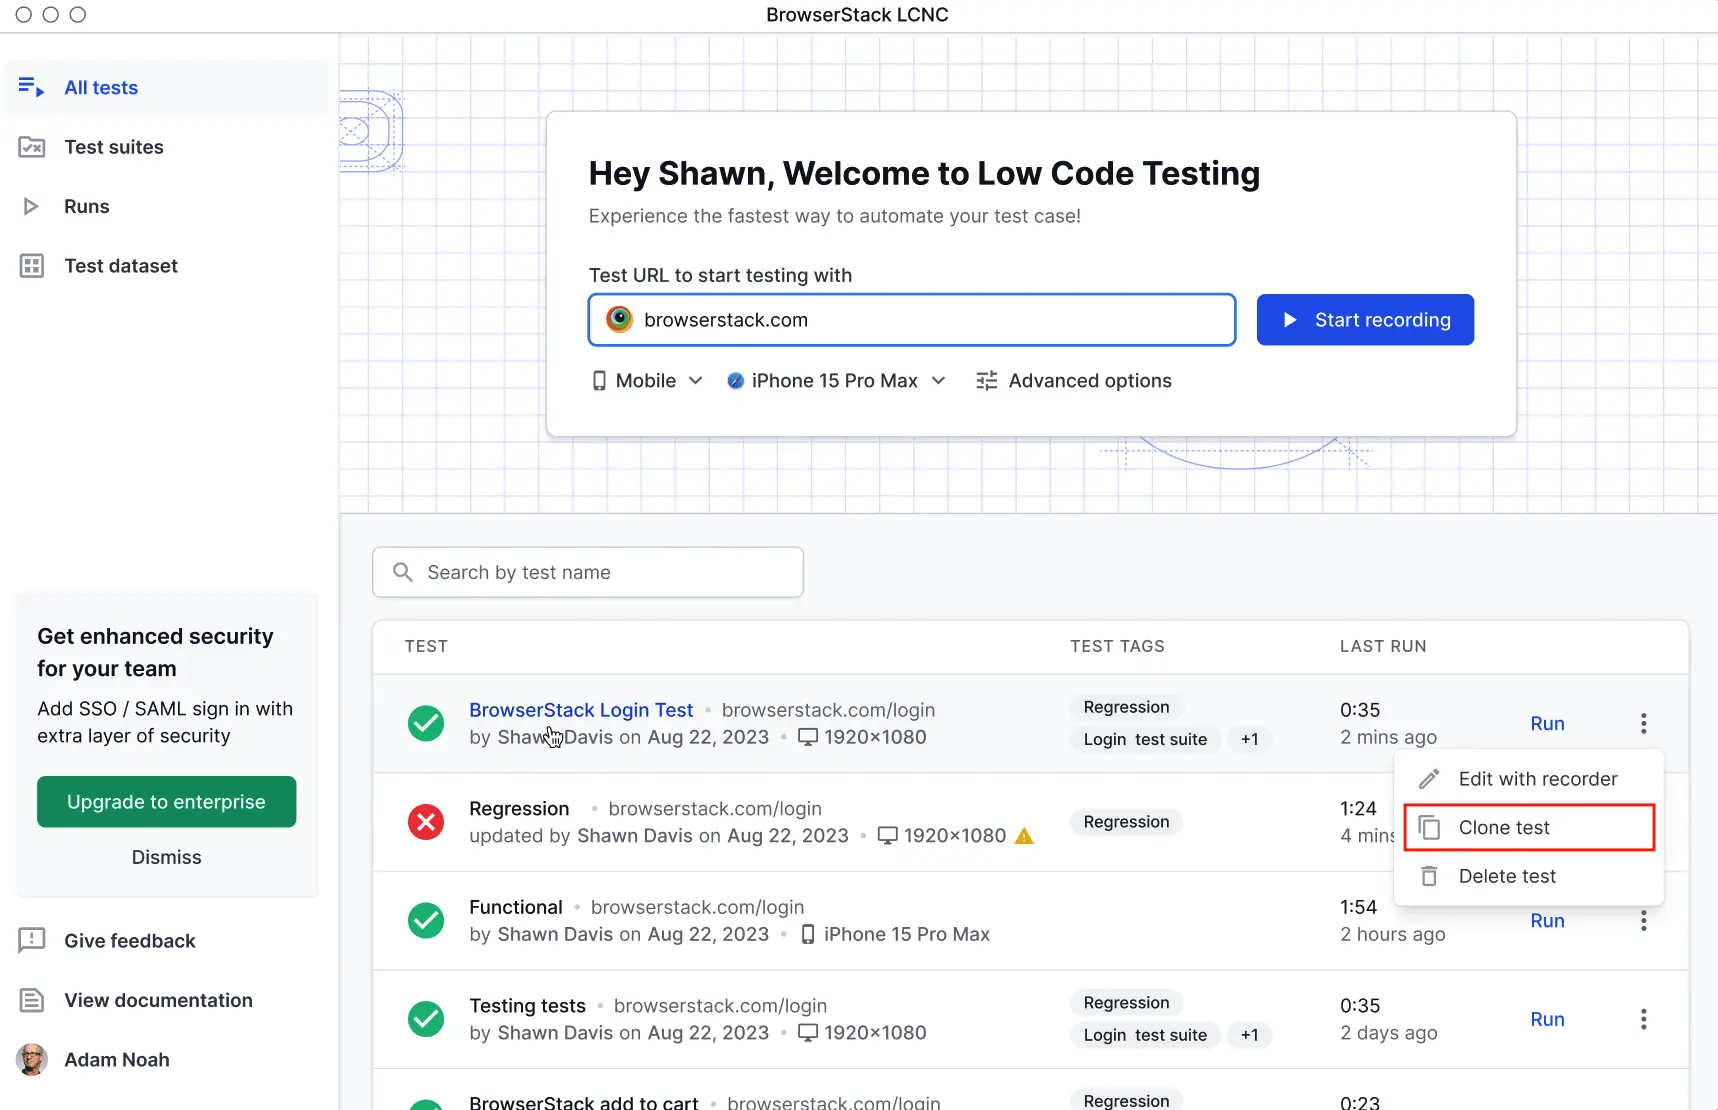
Clone a test
Cloning a test allows you to create an exact copy of an existing test. You can then modify the test for different scenarios.
To clone a test:
-
Open Low Code Automation and click All tests in the left pane.
-
Click the three dots icon next to the required test and select Clone test. A new copy of the existing test will be created and the following message appears.

We're sorry to hear that. Please share your feedback so we can do better
Contact our Support team for immediate help while we work on improving our docs.
We're continuously improving our docs. We'd love to know what you liked
We're sorry to hear that. Please share your feedback so we can do better
Contact our Support team for immediate help while we work on improving our docs.
We're continuously improving our docs. We'd love to know what you liked
Thank you for your valuable feedback!