Modules
Reuse common steps across multiple tests
The Module feature addresses the challenge of repetitive creation of common steps across multiple tests. By introducing Modules, users can create named groups of steps that are reusable across tests, reducing redundancy and streamlining test maintenance.
Few examples that demonstrate the diverse applications of the Module feature
- Common Login Module:
- Open the application, enter credentials, and click Login.
- Import into tests that require login to maintain consistent authentication.
- User Registration Module:
- Open registration page, fill user details, submit, and validate registration.
- Standardizes user registration across multiple tests.
- API Testing Module:
- Make API calls with specified parameters, validate the response.
- Ensures reusability and consistency in backend validation across tests.
- Navigation Module:
- Navigate to the dashboard, access a specific module, go to the target page.
- Simplifies common navigation steps across multiple tests targeting a specific page.
You can create, edit, and import modules, ensuring that changes made to a module are reflected across all tests where the module is used.
Create a Module
You can select a continuous set of steps and create a module with a unique and meaningful name.
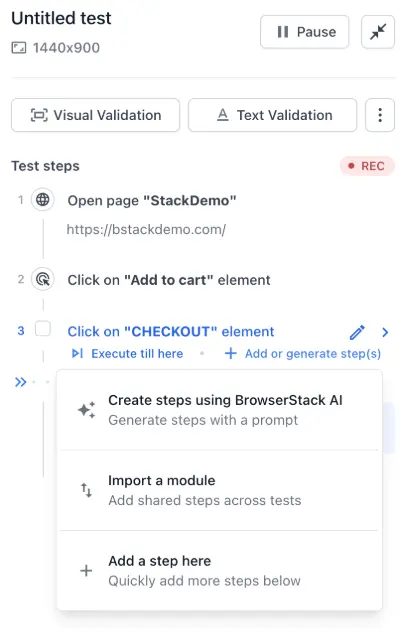
Import a Module
You can easily import any module by navigating to the step where you want to import, click the Add step option and click Import a module.
- If the steps within a module were originally recorded on a different browser tab, Low Code Automation will execute those module steps on the currently focused tab that was active just before module execution starts.
- To ensure the steps run on the intended tab, add a navigation or validation step to bring the expected tab into focus before the module is executed.
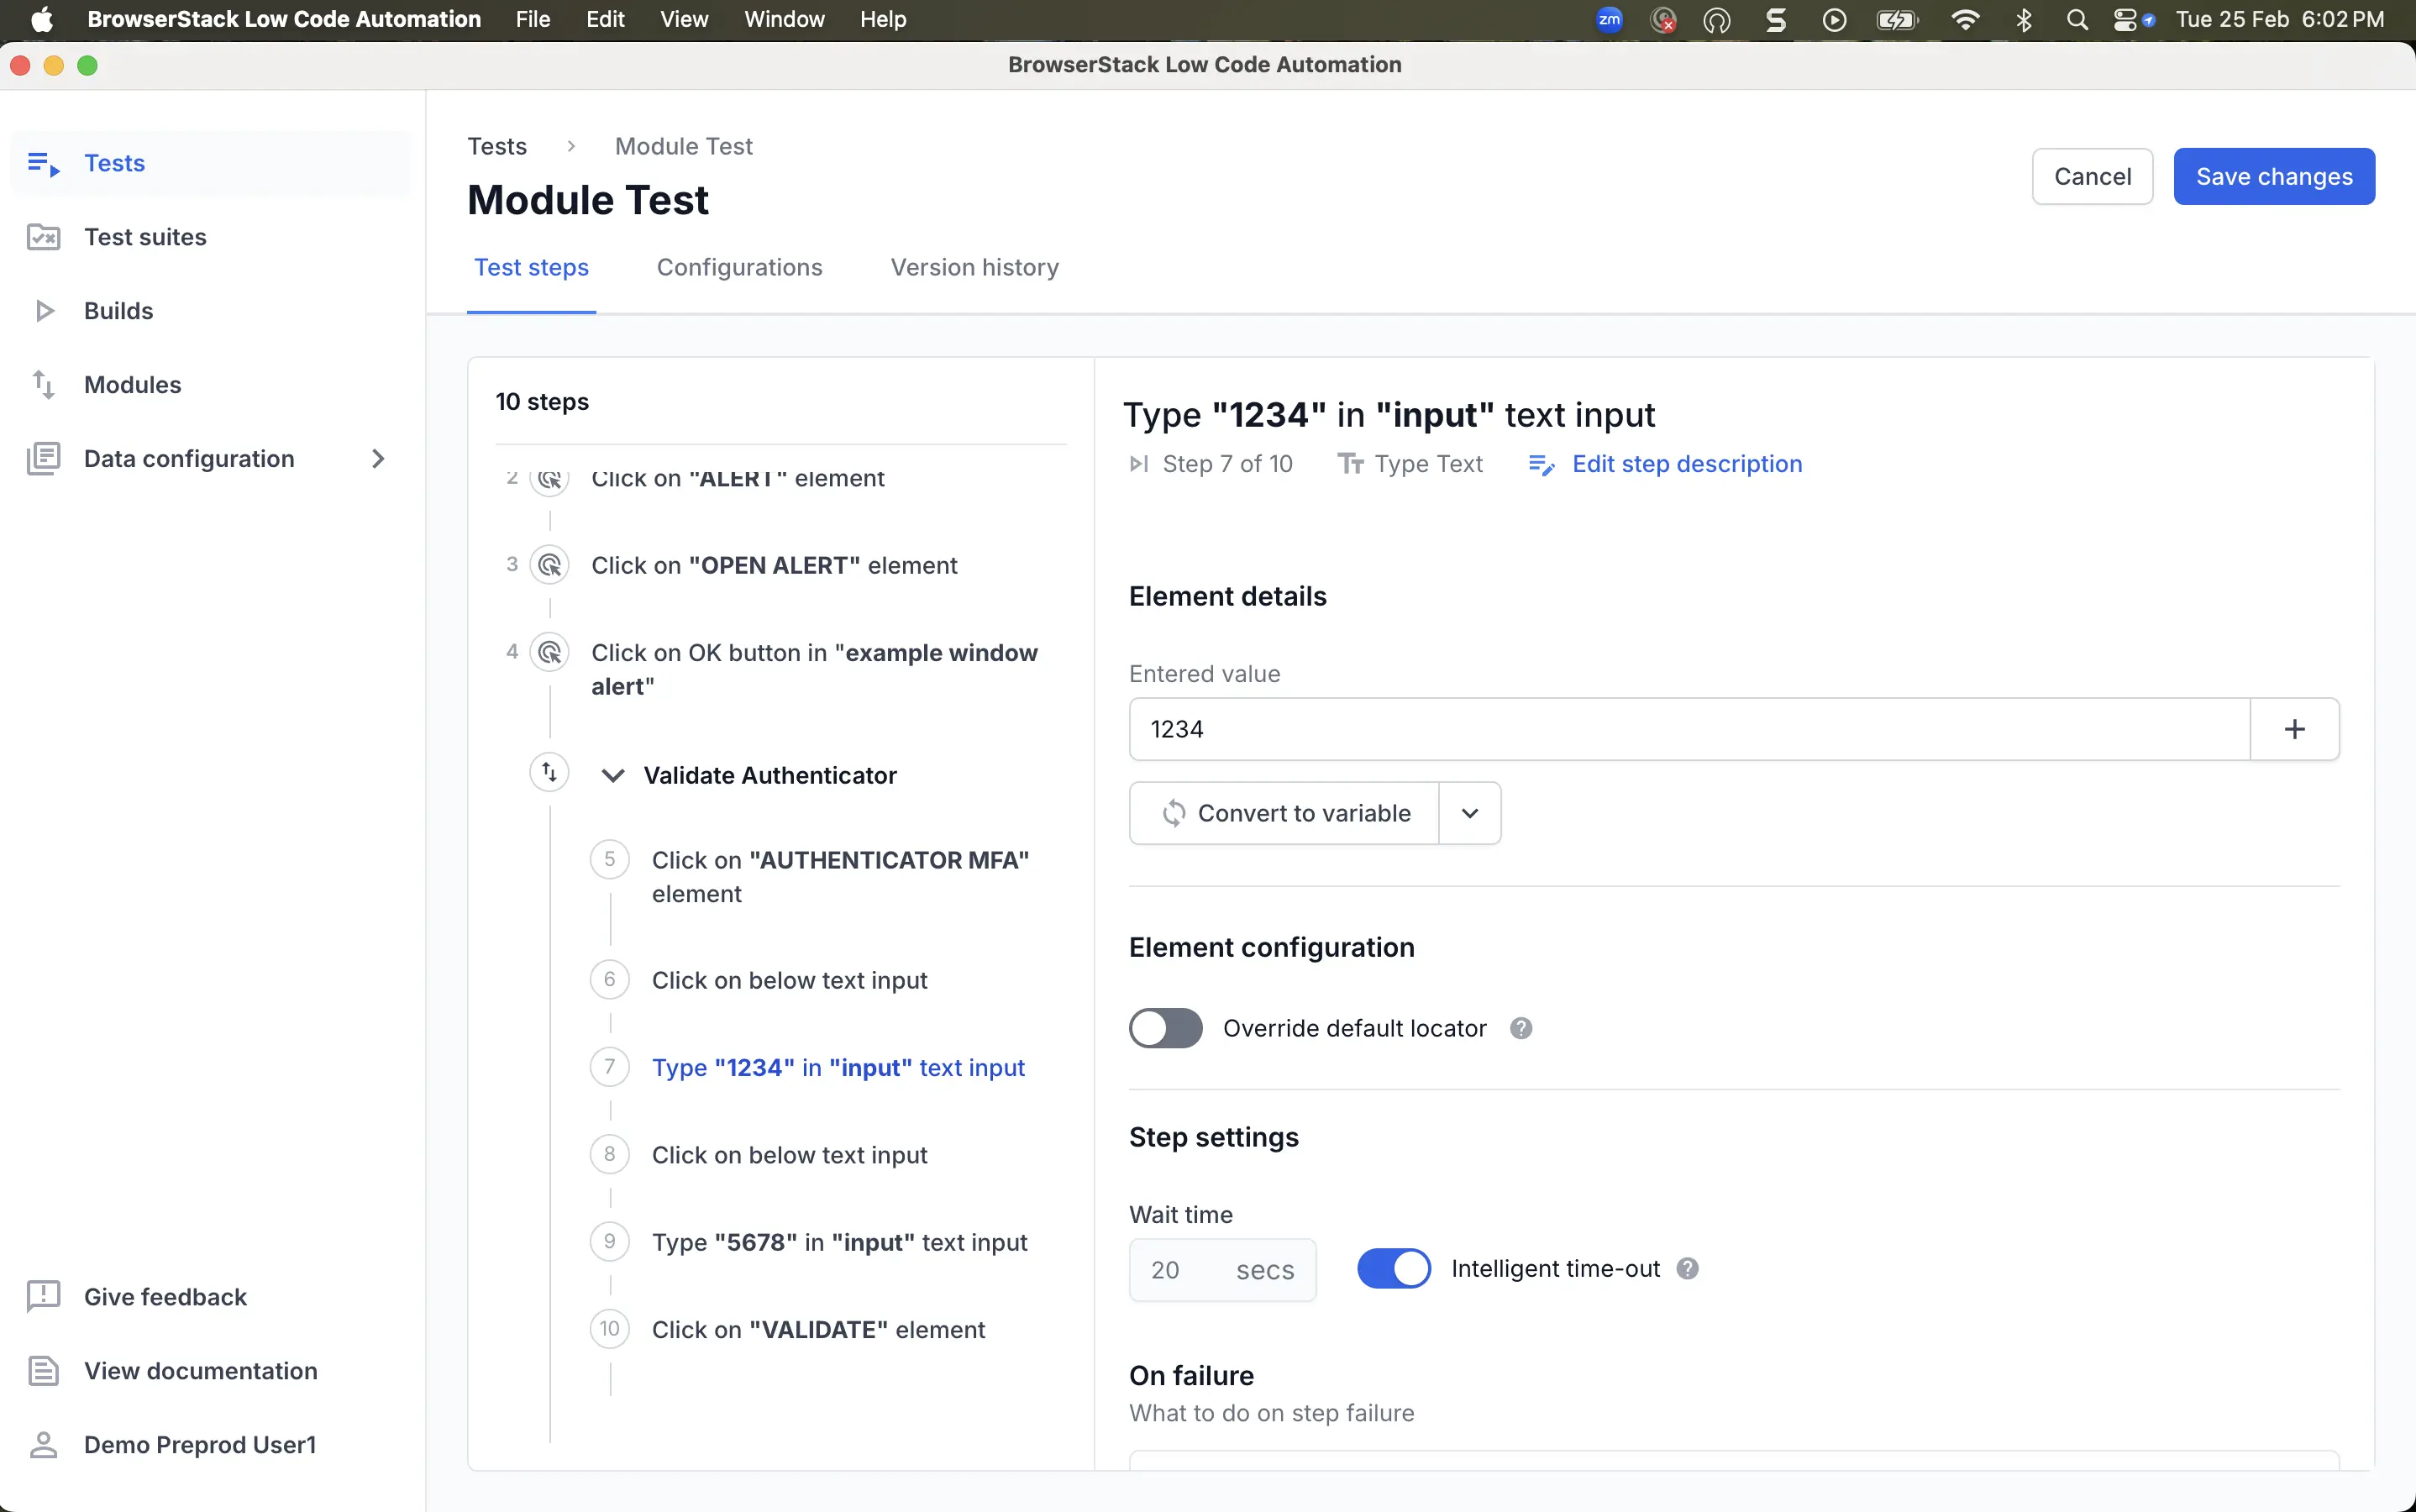
Edit a Module
Any edits made to the module are reflected across all tests where the module is used. You can add, modify, or remove a step in a module.
- Open Low Code Automation and select Tests from the left panel.
- Choose the desired test and perform the following actions:
- Add a step: To add a new step to the module, click Edit with recorder. You can auto-execute or manually pause the recorder to add a new step to the module. For more information, refer to the Edit a test with the recorder page.
-
Edit a step: Under the Test steps tab, modify other configurations, such as URLs and timeouts, without using the recorder. For more information, refer to the Edit a test without the recorder page.
-
Delete a step: To remove a step or module, select the desired step(s) or module, then click the Delete icon at the top.

- Click Save changes.
- Modules cannot be nested.
- The Extract Value, Custom Variable and API Step variables can be used inside the module only if they are created within the module.
Ungroup a Module
Ungrouping a module breaks down grouped steps into independent steps. This feature is helpful when reverting a module without deleting it and re-recording individual steps.
-
Ungroup a module with the recorder: While recording, hover over the module and click the Ungroup icon.
-
Ungroup a module without the recorder: In the Test steps section, hover over the module and click the Ungroup icon on the right.
- Ungrouping a module converts all its variables into test variables. If the module’s variables were overridden, the new test variables keeps the overridden values.
- Ungrouping a module does not impact other instances where the module is used, whether in the same test or in different tests.
Override module variables
You can override module variables to customize their values for each module instance. This feature helps you adapt modules while adapting them to different test scenarios, without changing the module itself.
When you import a module into a test, all variables defined in that module appear in the test steps. By default, each variable retains the value originally assigned in that module. However, you can override these values within the current module instance. This reduces module duplication, makes modules usable across specific contexts without edits, supports module instance-specific use of local and other variables.
Example use cases:
- Run a login module with different credentials for each test.
- Use a registration module with unique user data per test.
- Change API endpoints or payloads for different environments.
When you override module variables, only the current module instance uses the new values. Other instances of the module in the same or different tests remain unaffected.
- Overriding module variables is available on the Pro plan and above.
- You can only override variables that were created inside the module. You cannot override Global variables, Shared variables, Secret variables, or other types, even if they are used within the module.
- Dynamic variables created from steps like extract value, API step, custom action, database call cannot be overriden because their value is derived dynamically during runtime.
To override module variables in a test:
- Go to the step where you want to use the module, click Add step, and select Import a module.
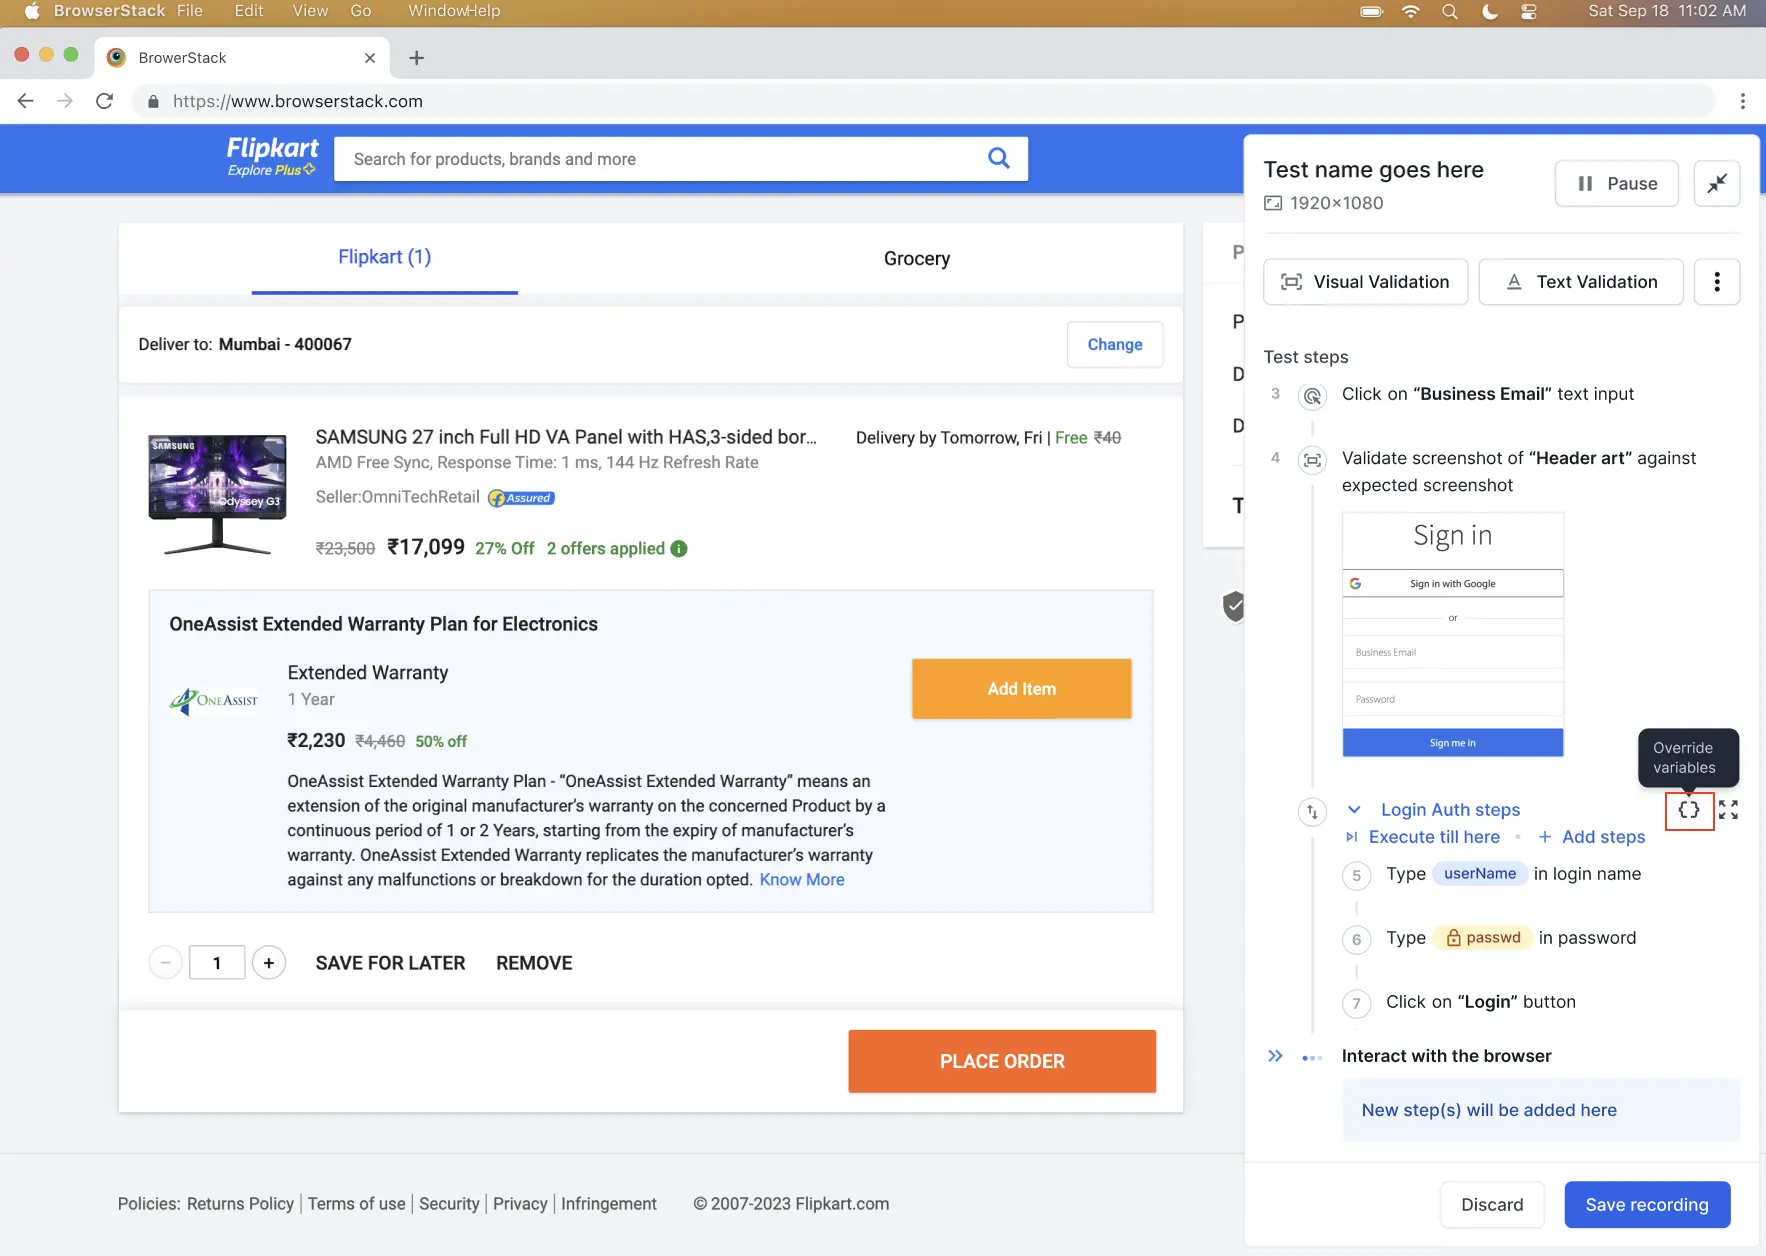
- After importing, locate the module in the test steps panel. The module displays all the variables in it, such as
userNameandpasswd. - Click the Override icon at the top of the module to open the Override module variables pane.
- You can override any variable that is already used inside your module. The override pane automatically shows you a list of all eligible variables from that module. For each variable, click the Override icon and enter a new value in the field.
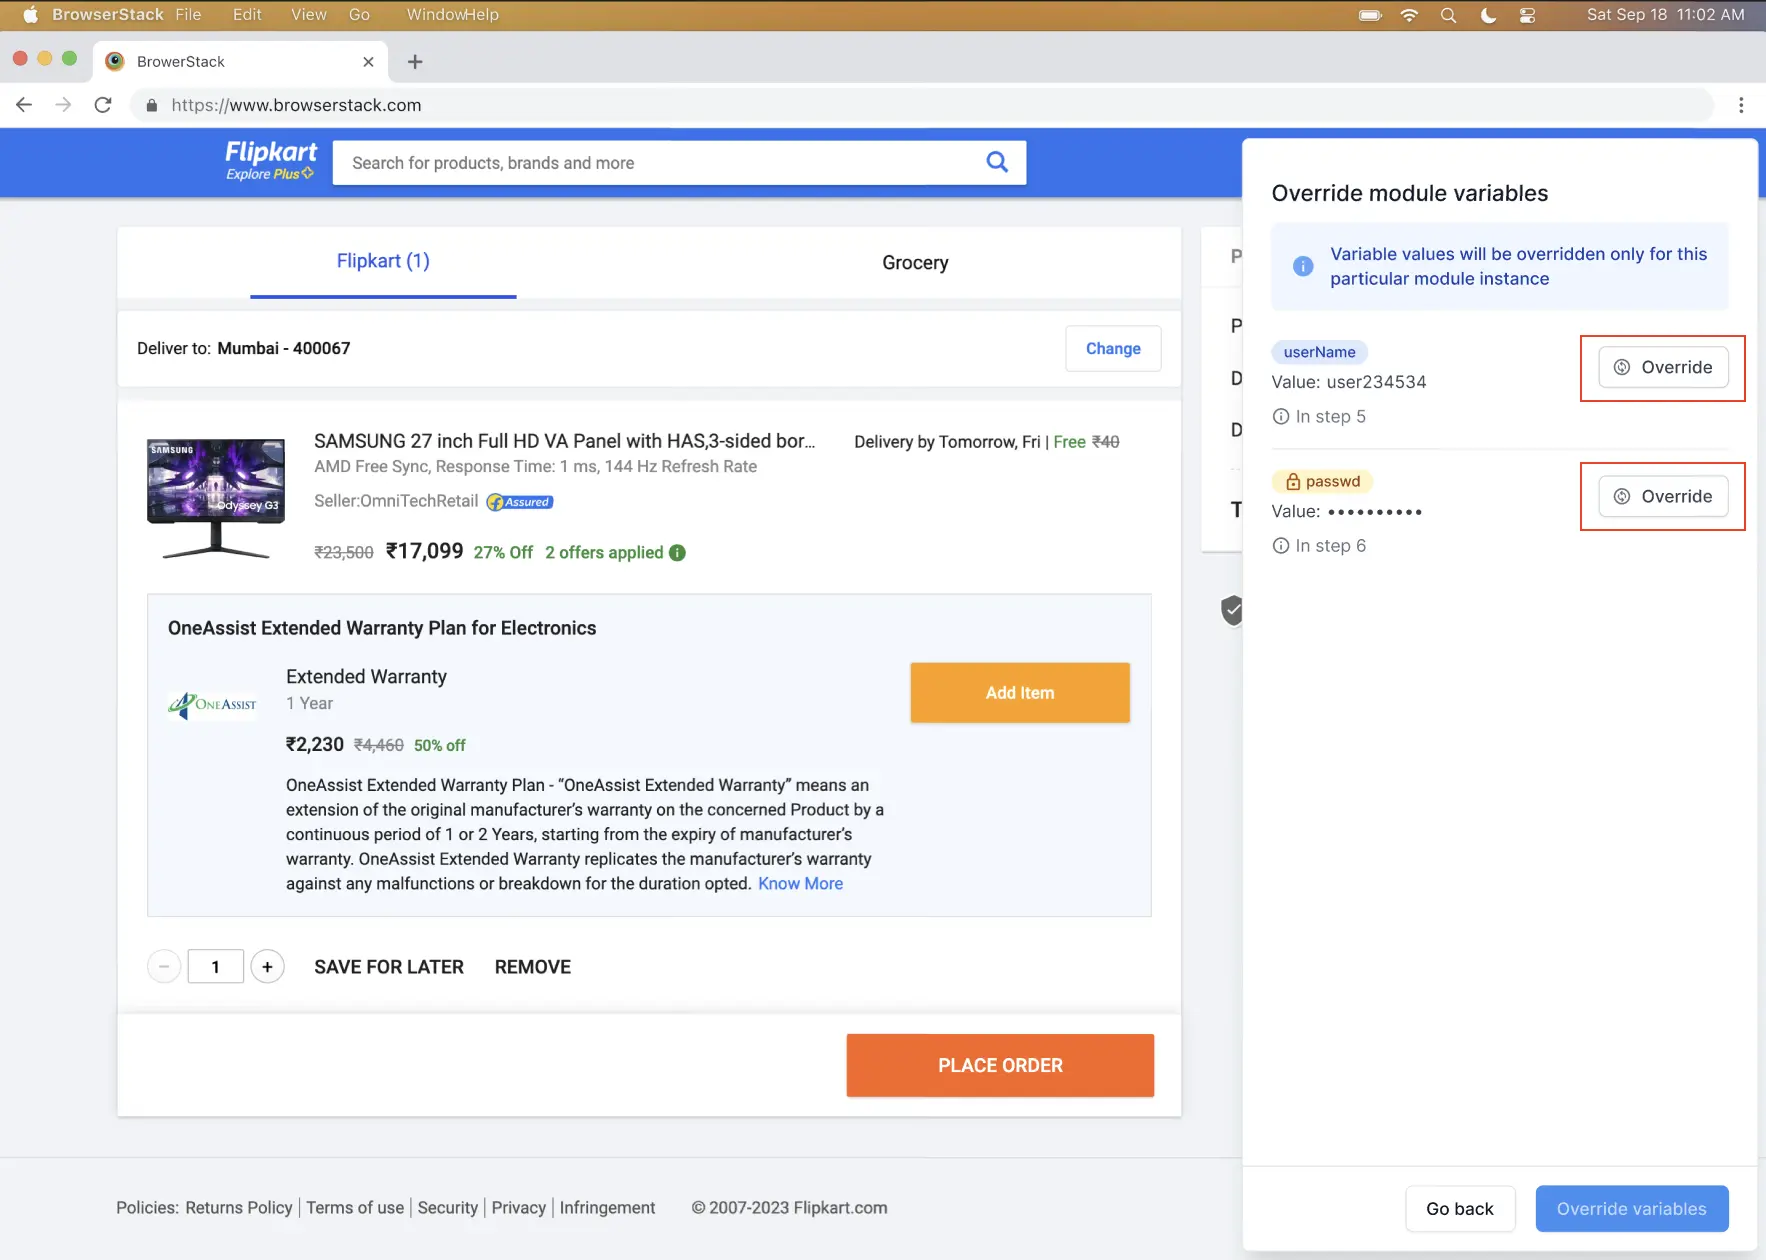
- To override with a new variable, click the + icon and import the desired variable.
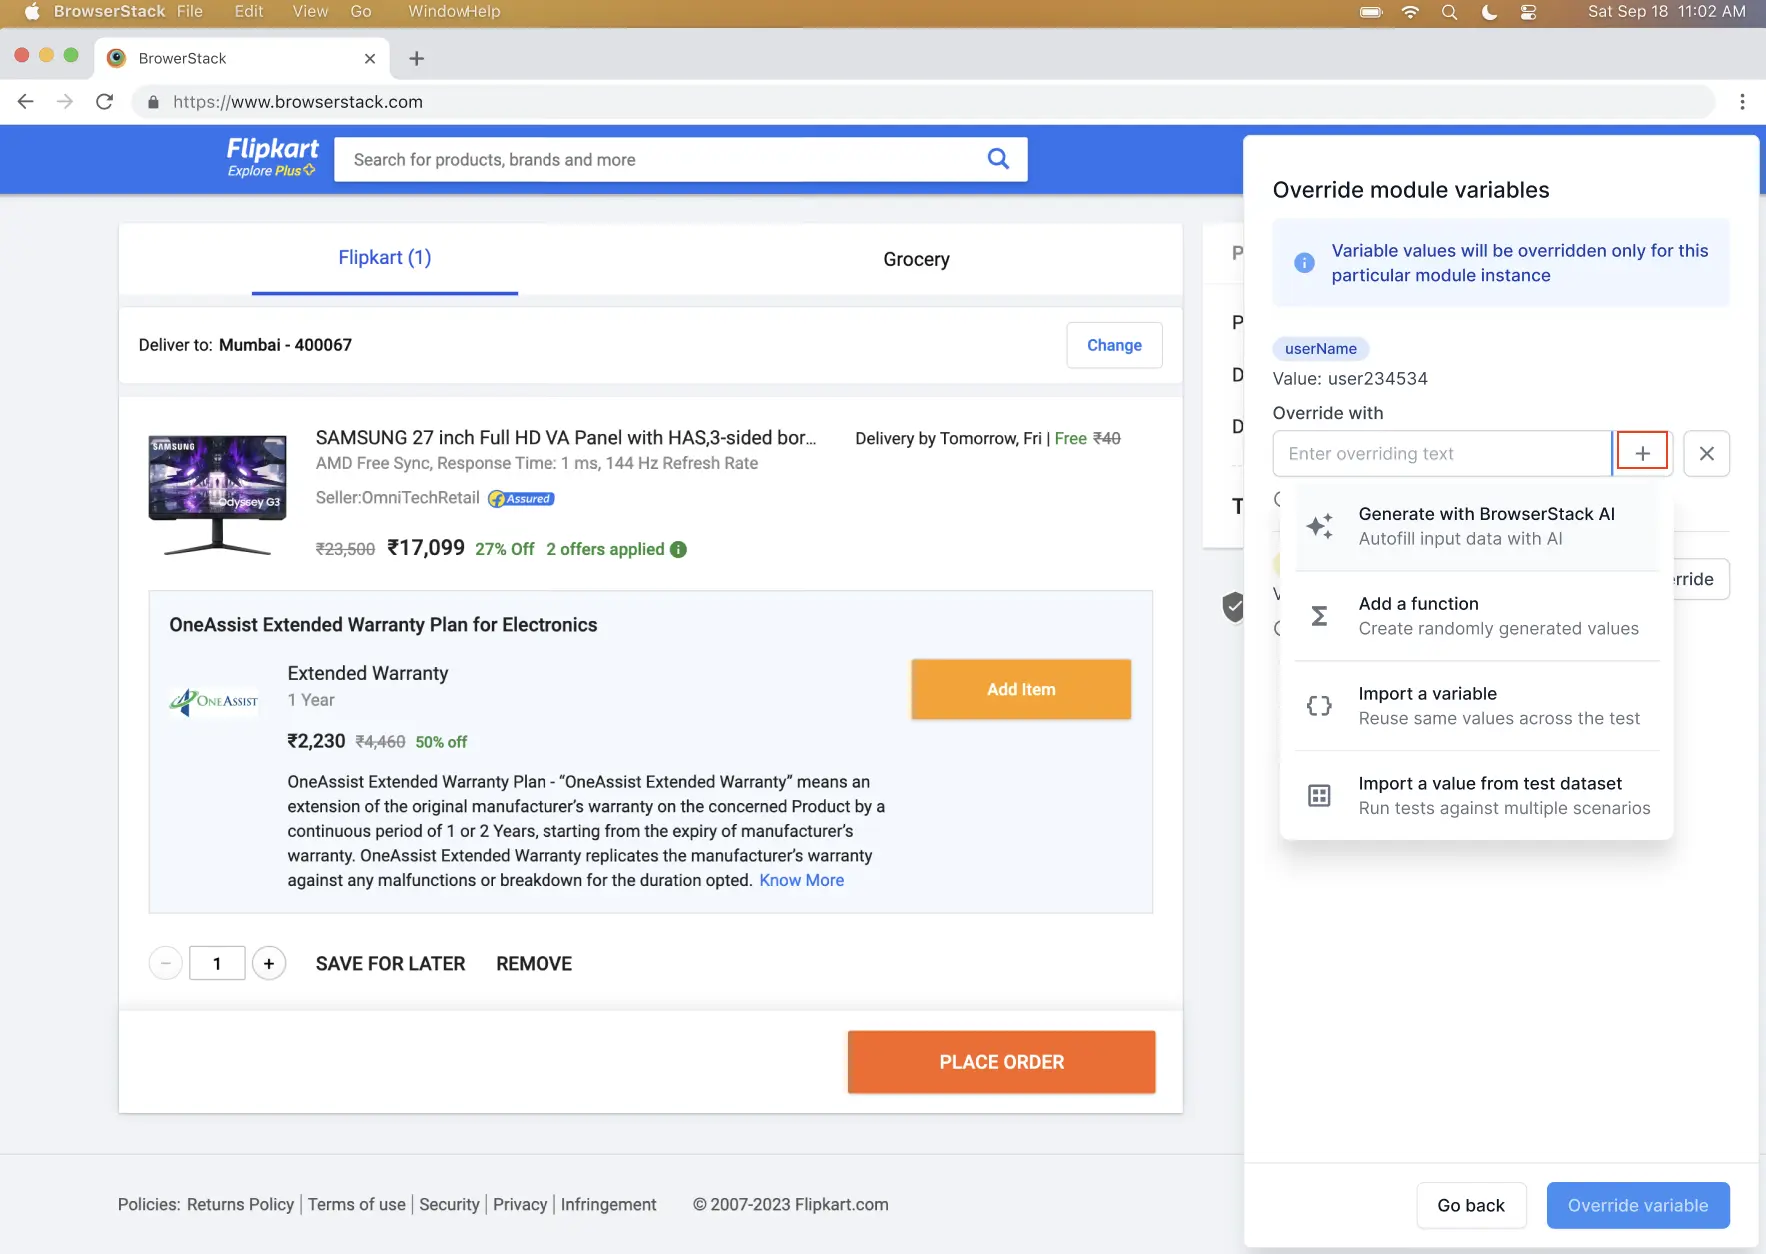
- Click Override variable, then click Override again to confirm.
The test steps panel now shows the overridden values. These changes only affect the current test and do not impact other tests using the same module.
Variables in Modules
- Variables used within a module have a module namespace, similar to dataset variables.
- Variables from the module can be used outside the module in other steps within the test.
- Variables from outside the module cannot be used inside the module during import. This is enforced during module creation. However, you can override a module variable with a variable from outside the module.
We're sorry to hear that. Please share your feedback so we can do better
Contact our Support team for immediate help while we work on improving our docs.
We're continuously improving our docs. We'd love to know what you liked
We're sorry to hear that. Please share your feedback so we can do better
Contact our Support team for immediate help while we work on improving our docs.
We're continuously improving our docs. We'd love to know what you liked
Thank you for your valuable feedback!