
 Join our Discord
Set up workspaces in Test Companion Cloud
Save your test repository, branch, website URL or app, and connected tools in a Test Companion Cloud workspace, then start every task from it.
- Availability: Test Companion Cloud is in beta and is not available to every account yet. It is available on request. To have it enabled for your account, contact BrowserStack support.
- IDE: Test Companion Cloud works in Visual Studio Code only.
In Test Companion Cloud, a workspace is the saved setup that a task starts from. It tells Test Companion Cloud the following:
- Which GitHub repository and branch to work on, and which folders hold your tests.
- Which website URL or mobile app to test.
- Where to read and sync test cases, where to read test results, and where to file bugs.
- How to reach apps that run on your computer or your private network.
You create a workspace once. After that, you pick it above the message box, and every task you send uses it. You can save one workspace for each project or environment, such as Checkout web and Checkout app.
Workspaces are saved to your BrowserStack account, so they are available on every computer where you sign in. A proxy password you enter in a workspace is the exception. It stays on your computer and is never sent to the cloud.
Create a workspace
To create a workspace, follow these steps:
- Switch the Test Companion panel to Cloud mode.
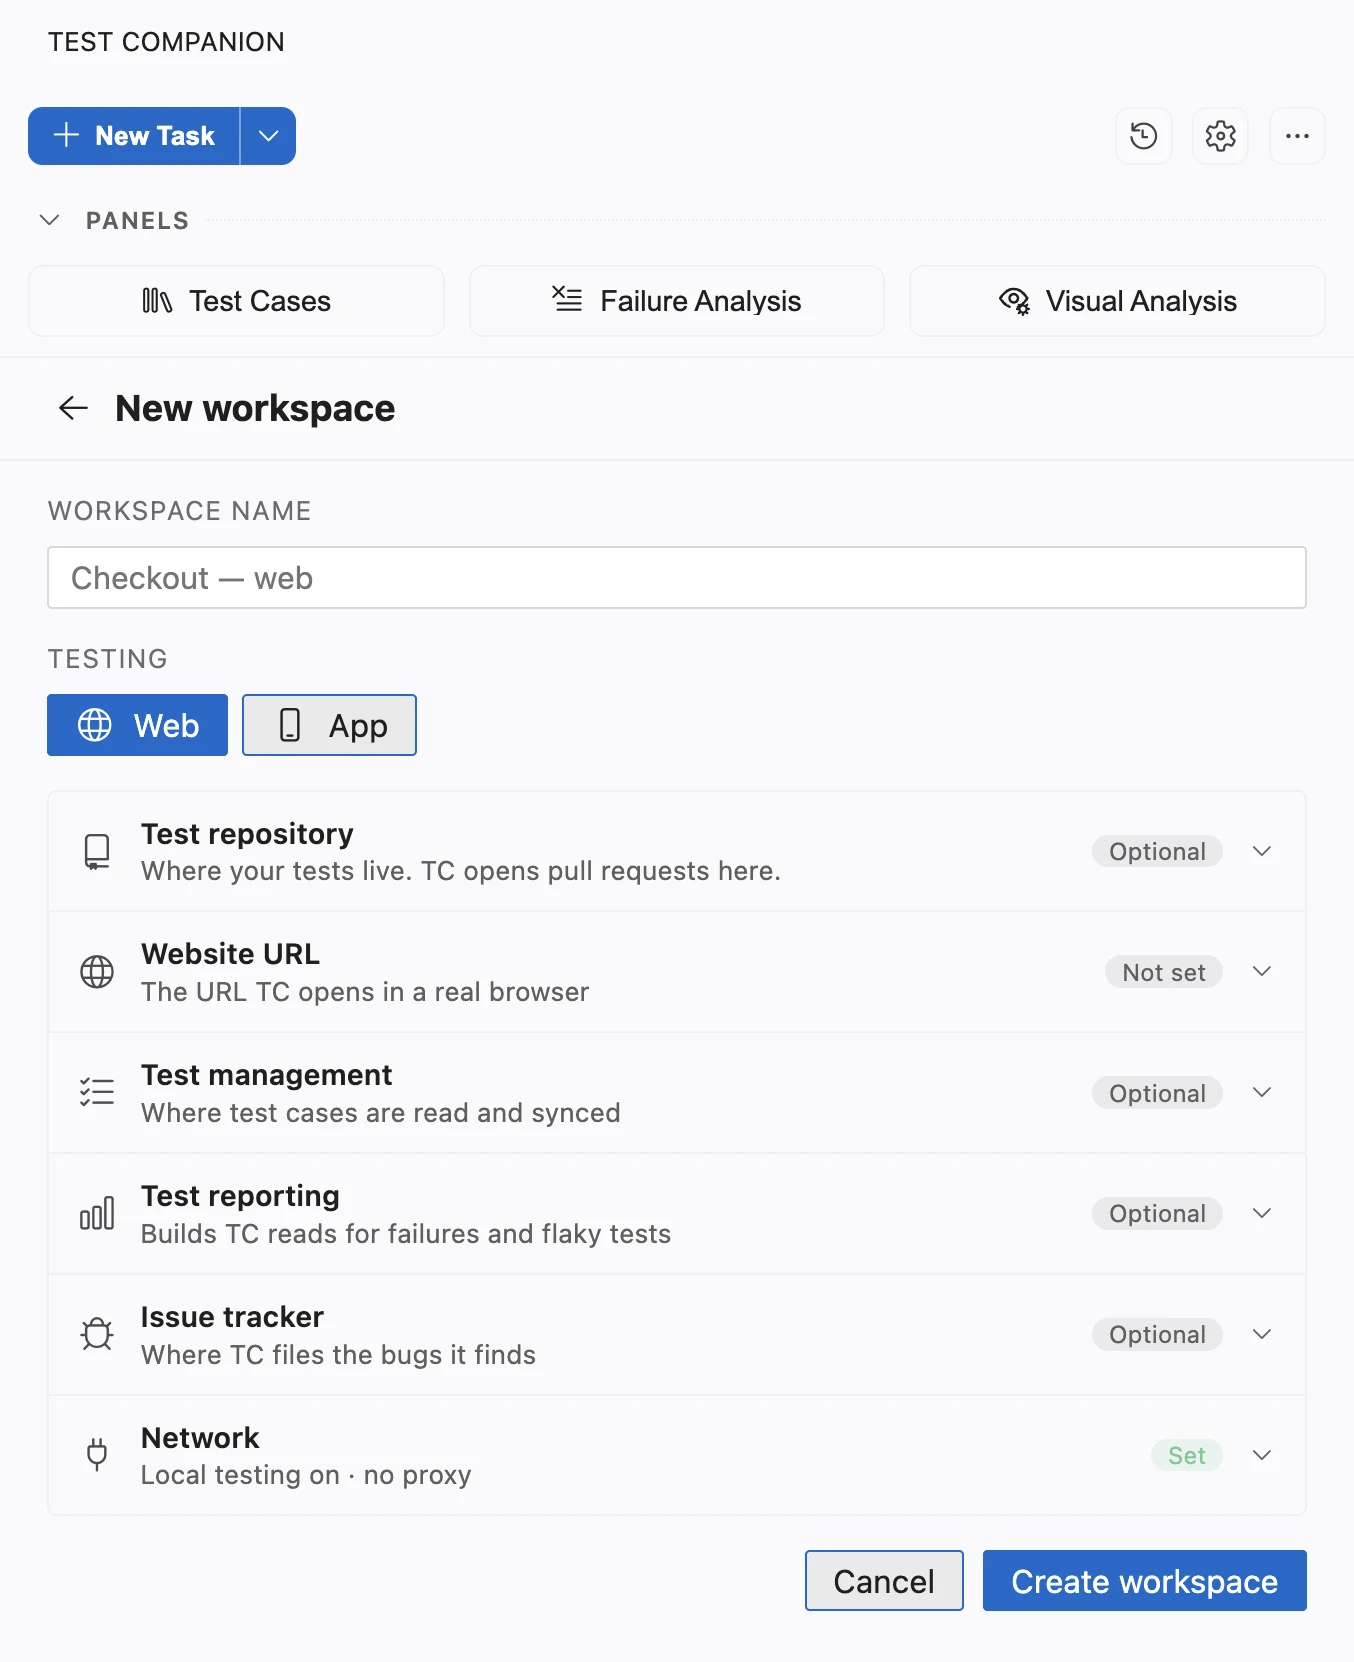
- Above the message box, click the workspace picker, then click New workspace. If you have no workspaces yet, click Set up a workspace.
- In Workspace name, enter a name, such as
Checkout web. - Under Testing, choose Web to test a website, or App to test a native mobile app.
-
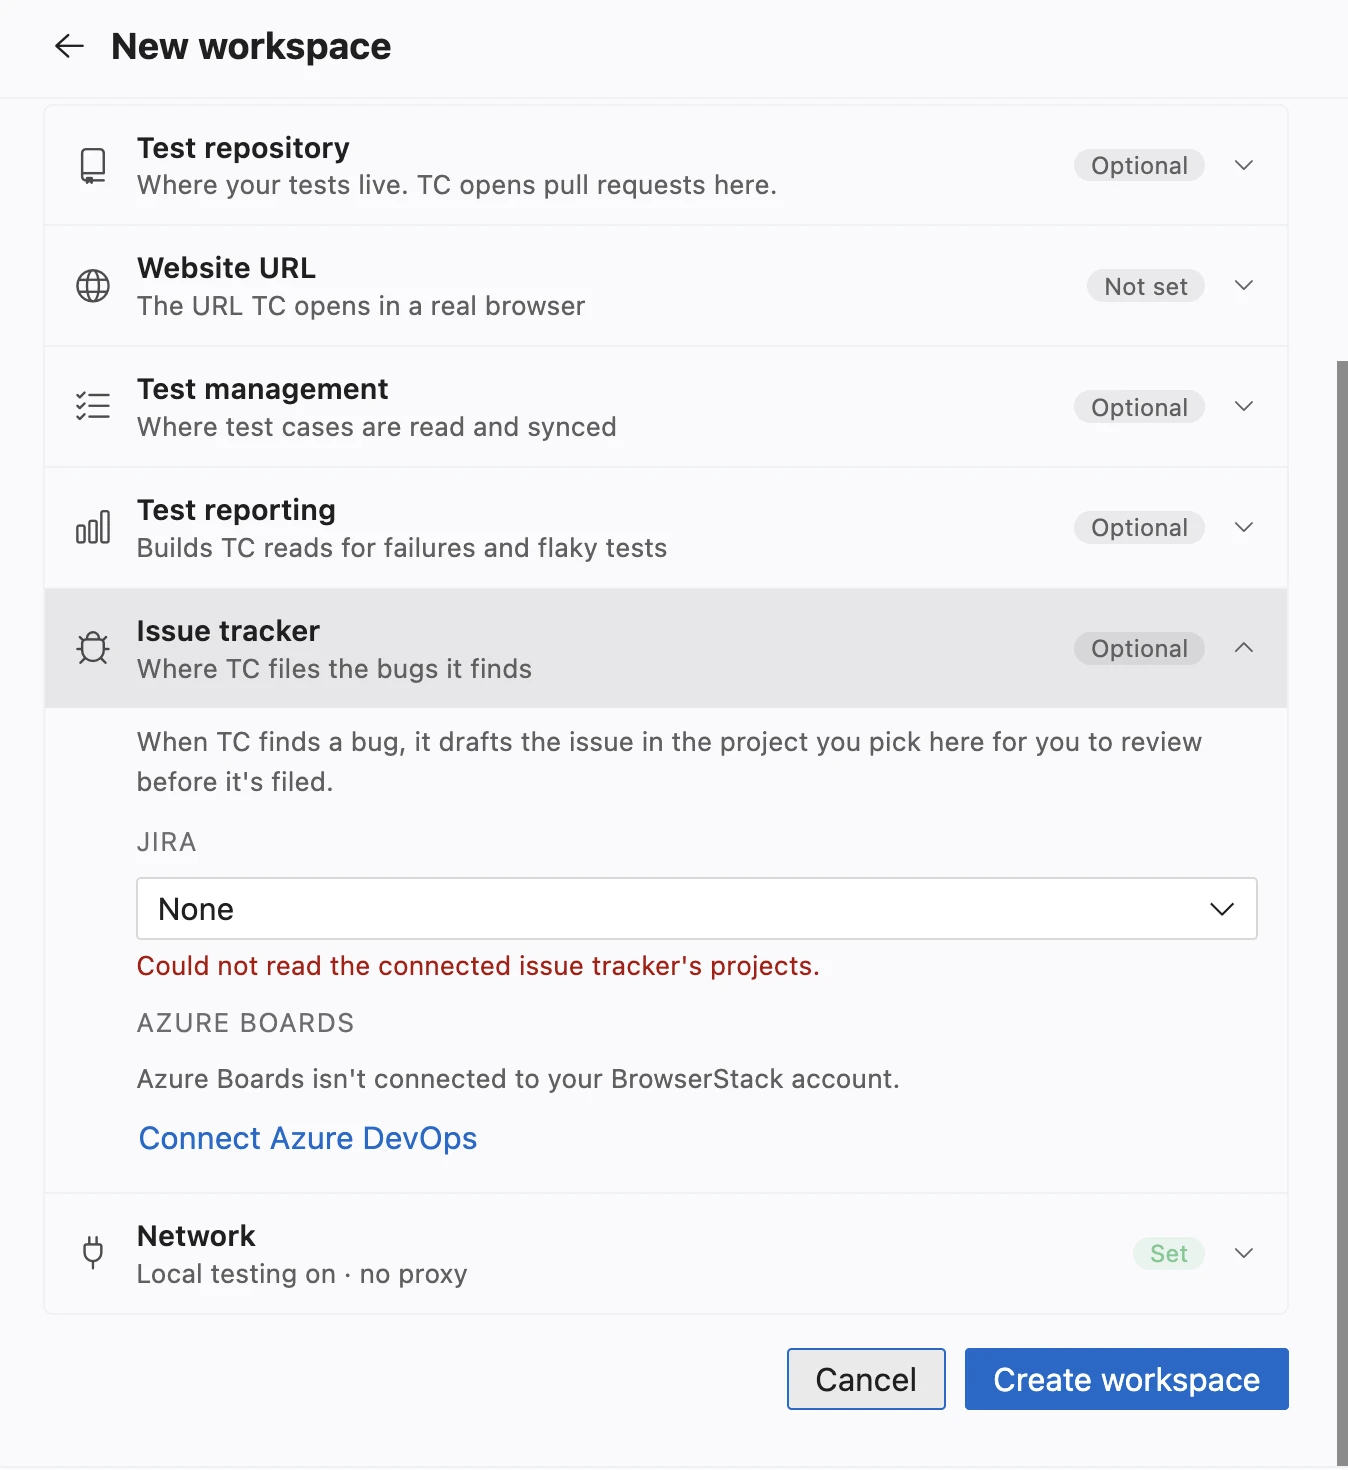
Fill in the sections you need. A section shows Set when it is filled in, and Optional or Not set when it is not.
- Click Create workspace.
The new workspace is selected right away. Your next task uses it.
Each workspace needs at least one of these: a test repository, a website URL for Web, or an app for App. The other sections are optional. The following table describes each section:
| Section | Details | Required |
|---|---|---|
| Test repository | The GitHub repository, the branch Test Companion Cloud starts from, and the folders that hold your tests. | Yes, unless you add a website URL or an app. |
| Website URL | For Web workspaces. The URLs Test Companion Cloud explores and tests, one for each environment, and the other services your website calls. | Yes, unless you add a test repository. |
| Select app | For App workspaces. The mobile app Test Companion Cloud installs on a real device. | Yes, unless you add a test repository. |
| Test management | The tool, project, and folder where Test Companion Cloud reads and syncs test cases. | No |
| Test reporting | The Test Reporting & Analytics project Test Companion Cloud reads failed and flaky tests from. | No |
| Issue tracker | The Jira or Azure Boards project where Test Companion Cloud drafts the bugs it finds. | No |
| Network | Whether Test Companion Cloud can reach apps on your computer or private network, and your office proxy. | No. Reaching your computer is on by default. |
Connect the test repository
The Test repository section tells Test Companion Cloud where to clone your code and where to open pull requests. To set it up, follow these steps:
-
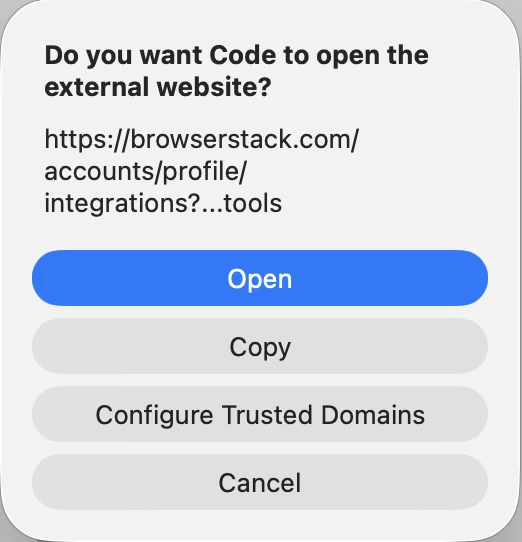
If GitHub is not connected, click Connect GitHub. Visual Studio Code might ask whether to open the external website. Click Open.
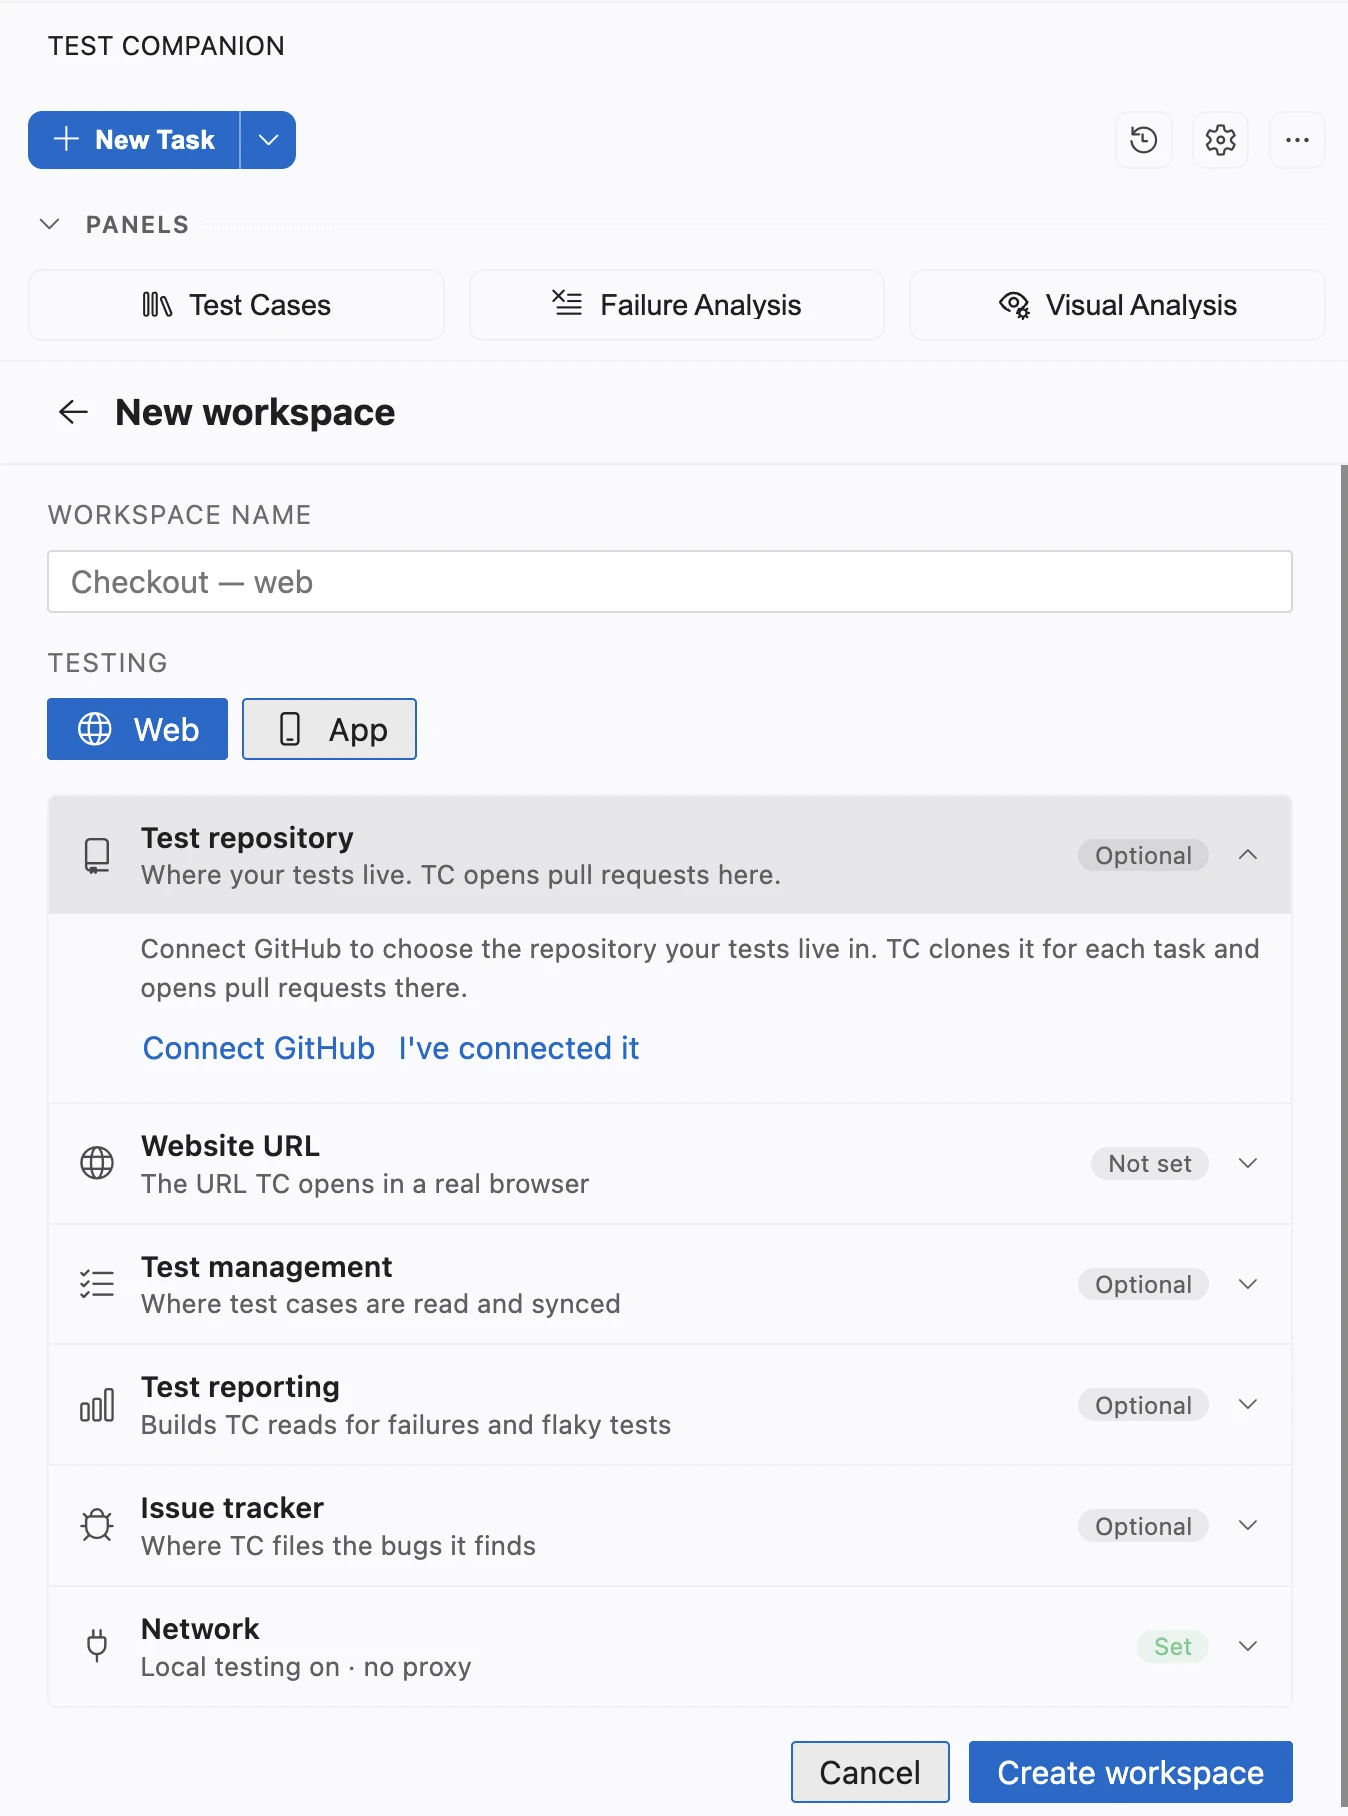
- On the BrowserStack Integrations page, connect your GitHub account and give it access to your repository. Then return to Visual Studio Code and click I’ve connected it.
- Select your repository. If it does not appear, click Manage repository access, allow access to the repository, then click Refresh.
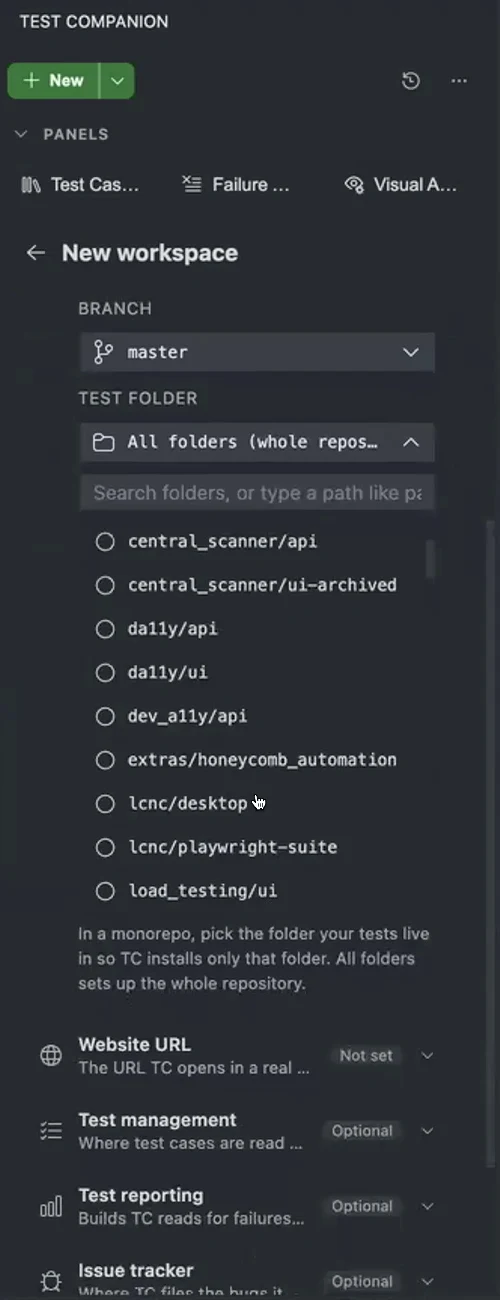
- In Branch, select the base branch. Test Companion Cloud creates its own branch from the base branch and opens the pull request against it. The name of the new branch is
tc-auto-followed by the first eight characters of the task ID. To find a branch that is not listed, type its name in Search branches. -
In Test folder, select the folders that hold your tests, or keep All folders (whole repository). In a monorepo, Test Companion Cloud then installs only the folders you selected. You can select up to 20 folders.
Add website URLs
For a Web workspace, add the URL that Test Companion Cloud explores and writes tests against, such as https://staging.example.com. Test Companion Cloud does not build or start your app. Add the URL of an environment that is already running, such as staging, or of an app on your computer. To add a URL, follow these steps:
- In Website URL, enter the full URL, including
https://orhttp://. - Click Add.
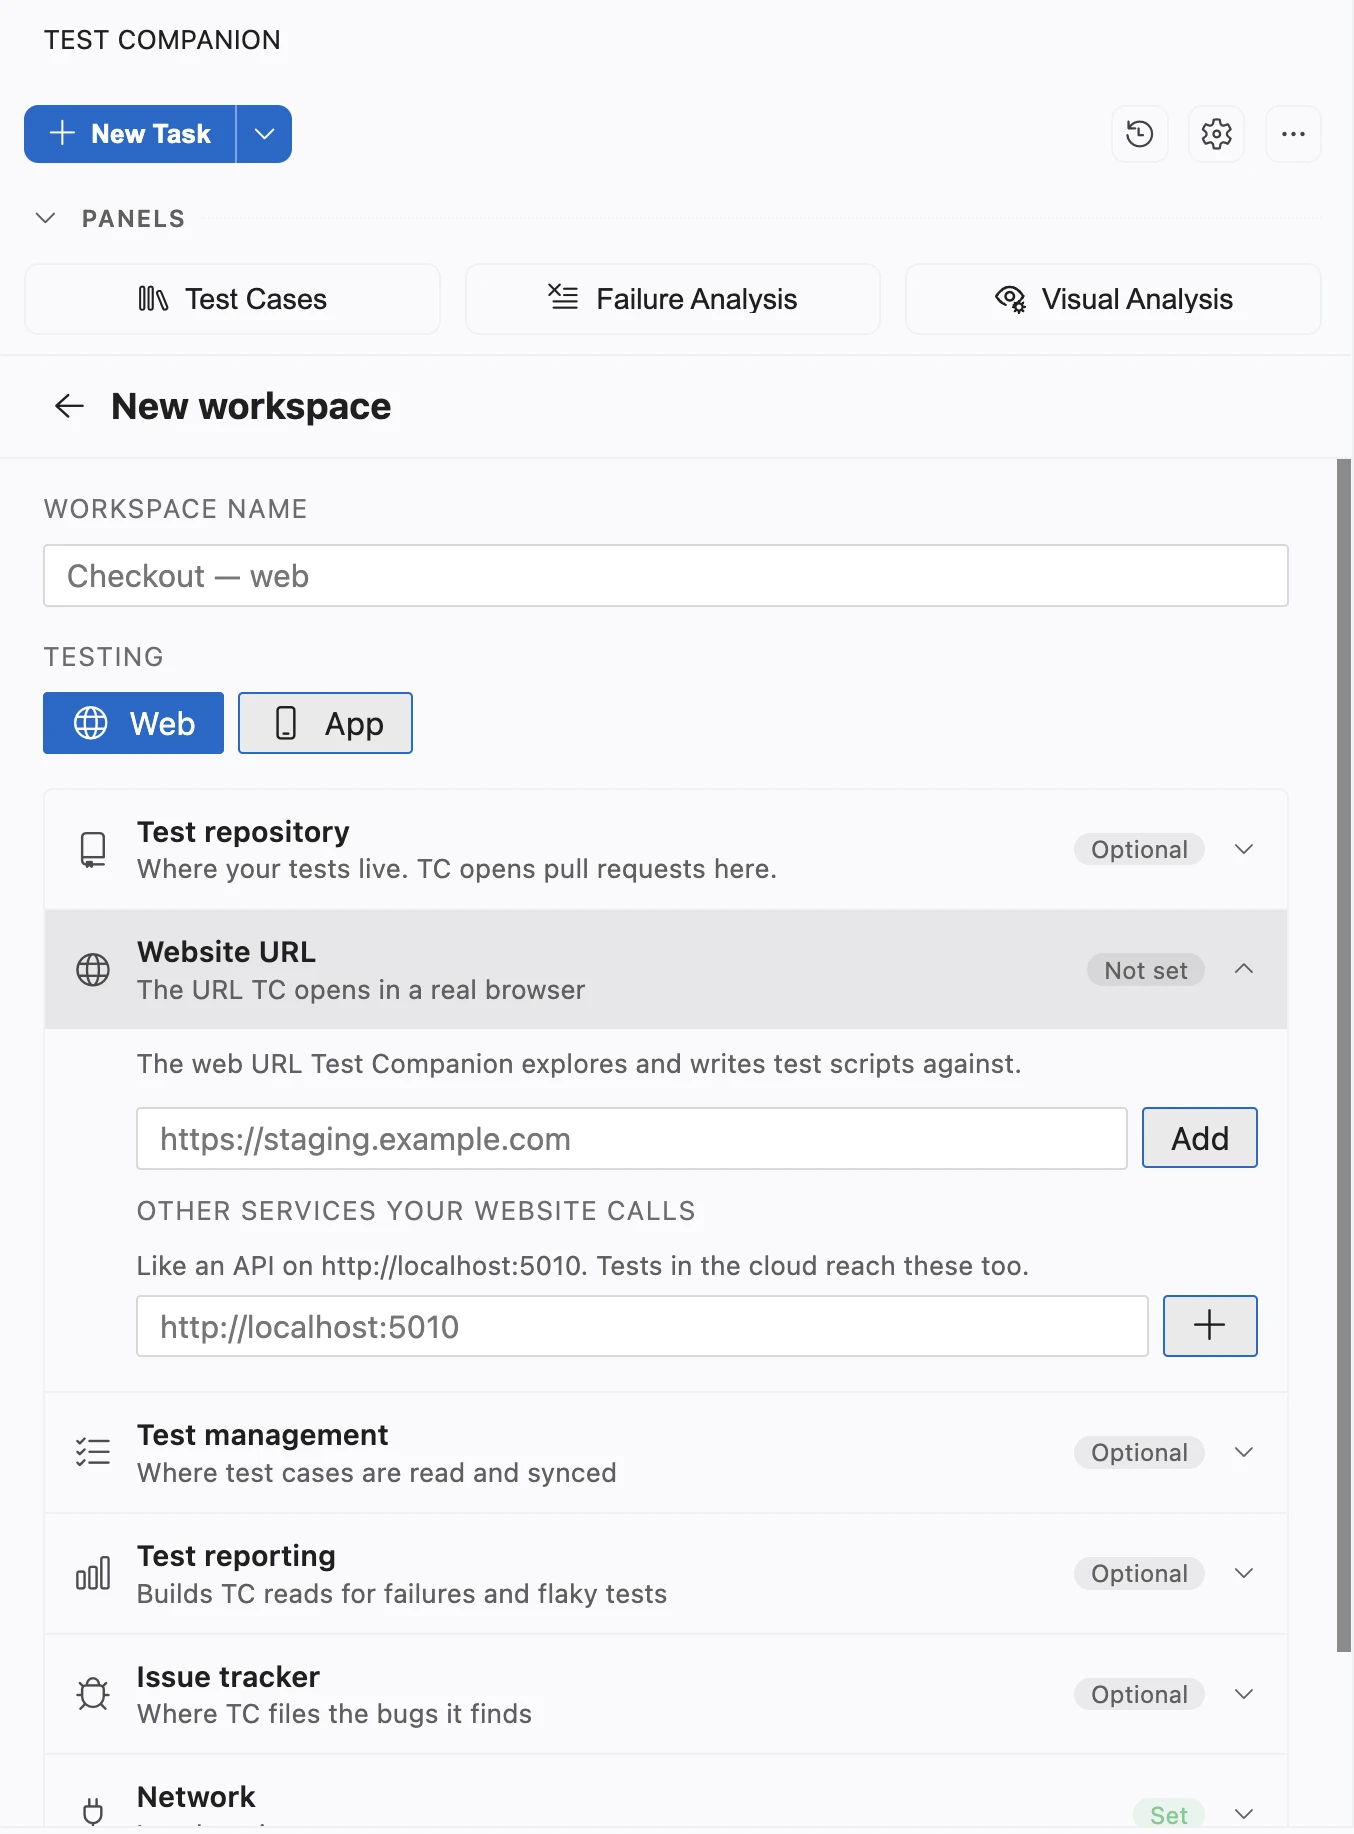
You can add one URL for each environment, such as staging and preview. Click Make default next to the URL that tasks use by default. When you start a task, you can pick another URL in Environment for this task.
When you add a URL, Test Companion checks how the cloud machine can reach it. It then shows one of the following results. To run the check again, click Check under the URL:
| Result | Meaning |
|---|---|
| Public · opened directly | Test Companion Cloud reaches the URL over the internet. Nothing else is needed. |
| Through your machine | Only your computer or network can reach the URL. Test Companion Cloud reaches it through your computer while a task runs. Keep Visual Studio Code open during the task. |
| This machine can’t reach it either. Check the URL or the proxy. | Neither Test Companion Cloud nor your computer can open the URL. Check the URL, or your proxy settings in the Network section. |
If your website calls other services, such as an API on http://localhost:5010, add them in Other services your website calls. Tests that run in Cloud mode reach these services too. You can add up to 10 services.
For a URL that only your network can reach, see Test local and private apps from Test Companion Cloud.
Select the app
For an App workspace, click Select app. Choose a recent upload, or upload a new .apk, .aab, .xapk, or .ipa file. Test Companion Cloud installs this app on a real BrowserStack device for each task. You can still change the app for a single task in the message box. To set the device and the session capabilities, click the sliders icon next to the app.
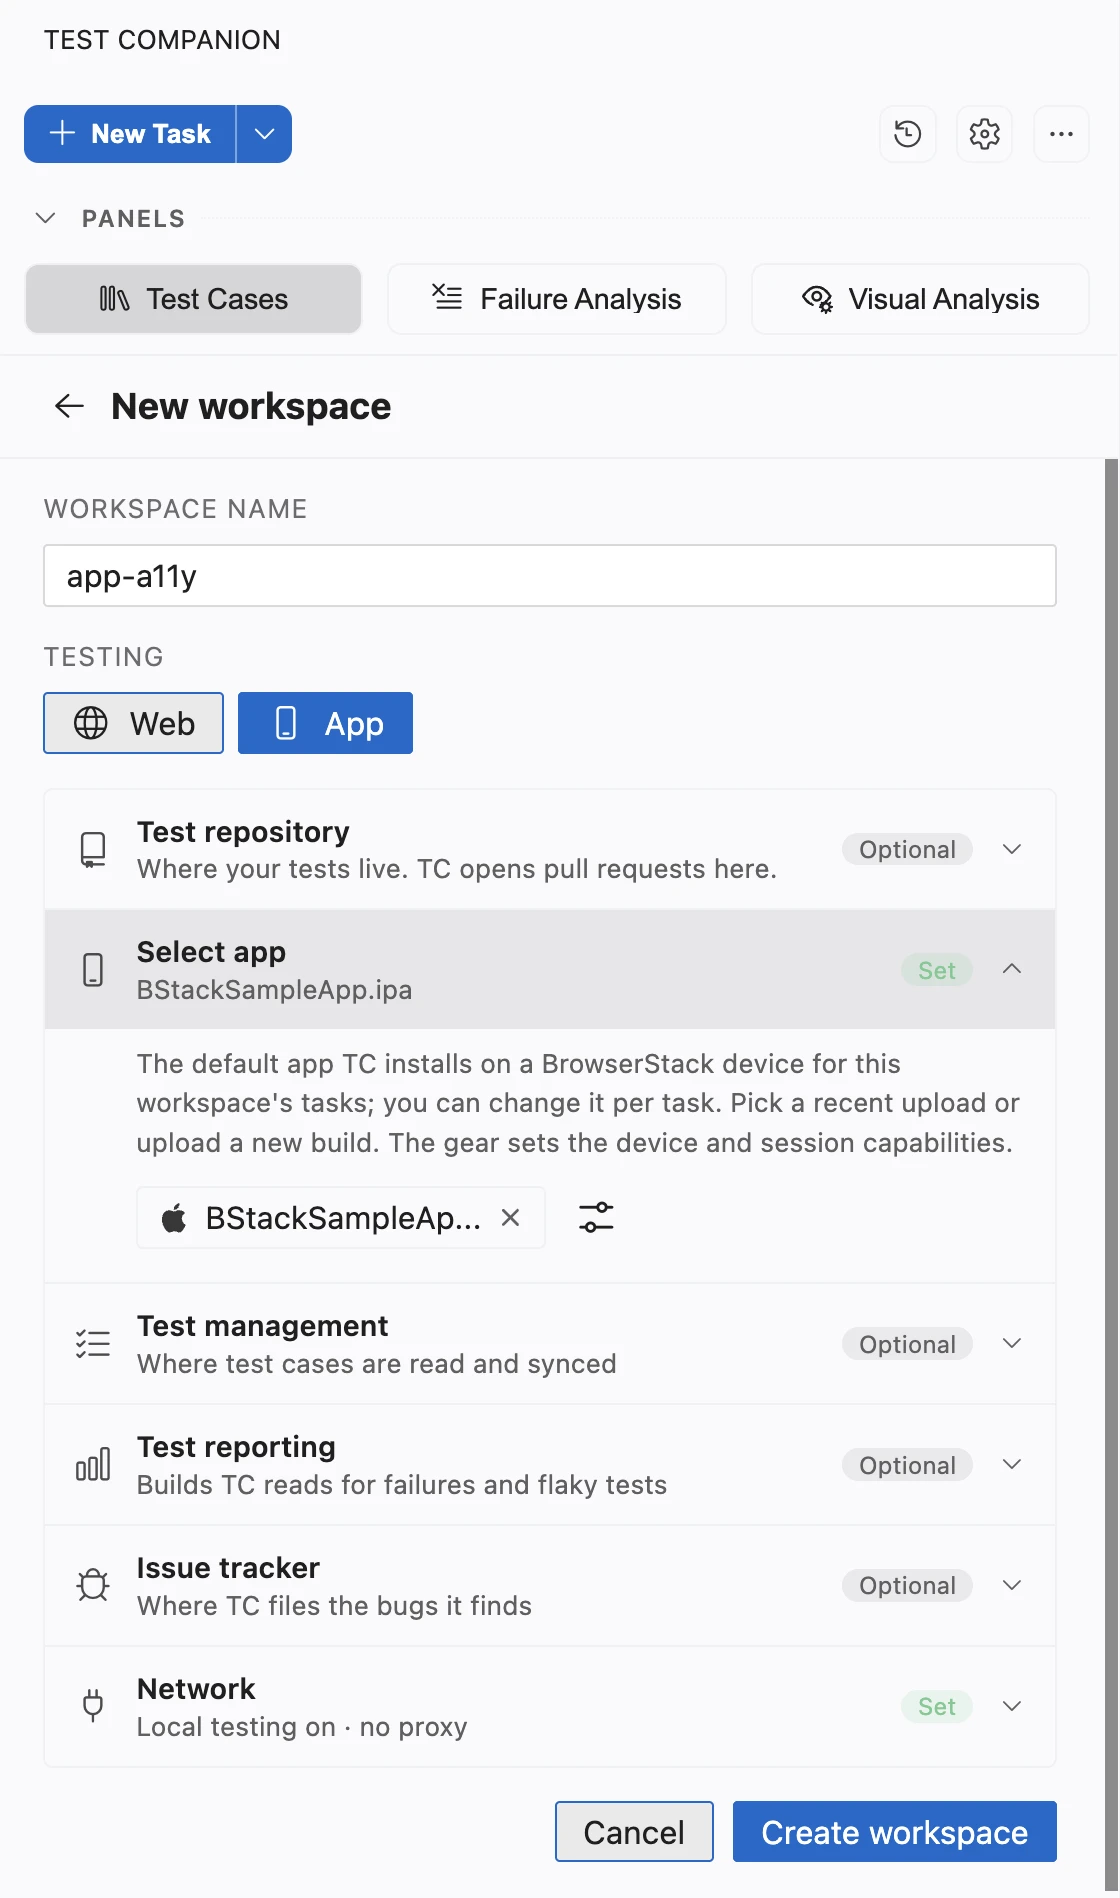
App tasks run on real devices under your BrowserStack App Automate plan.
Connect your tools
The remaining sections connect the workspace to the tools you use. Connect each tool to your BrowserStack account on the Integrations page first. The sections are the following:
-
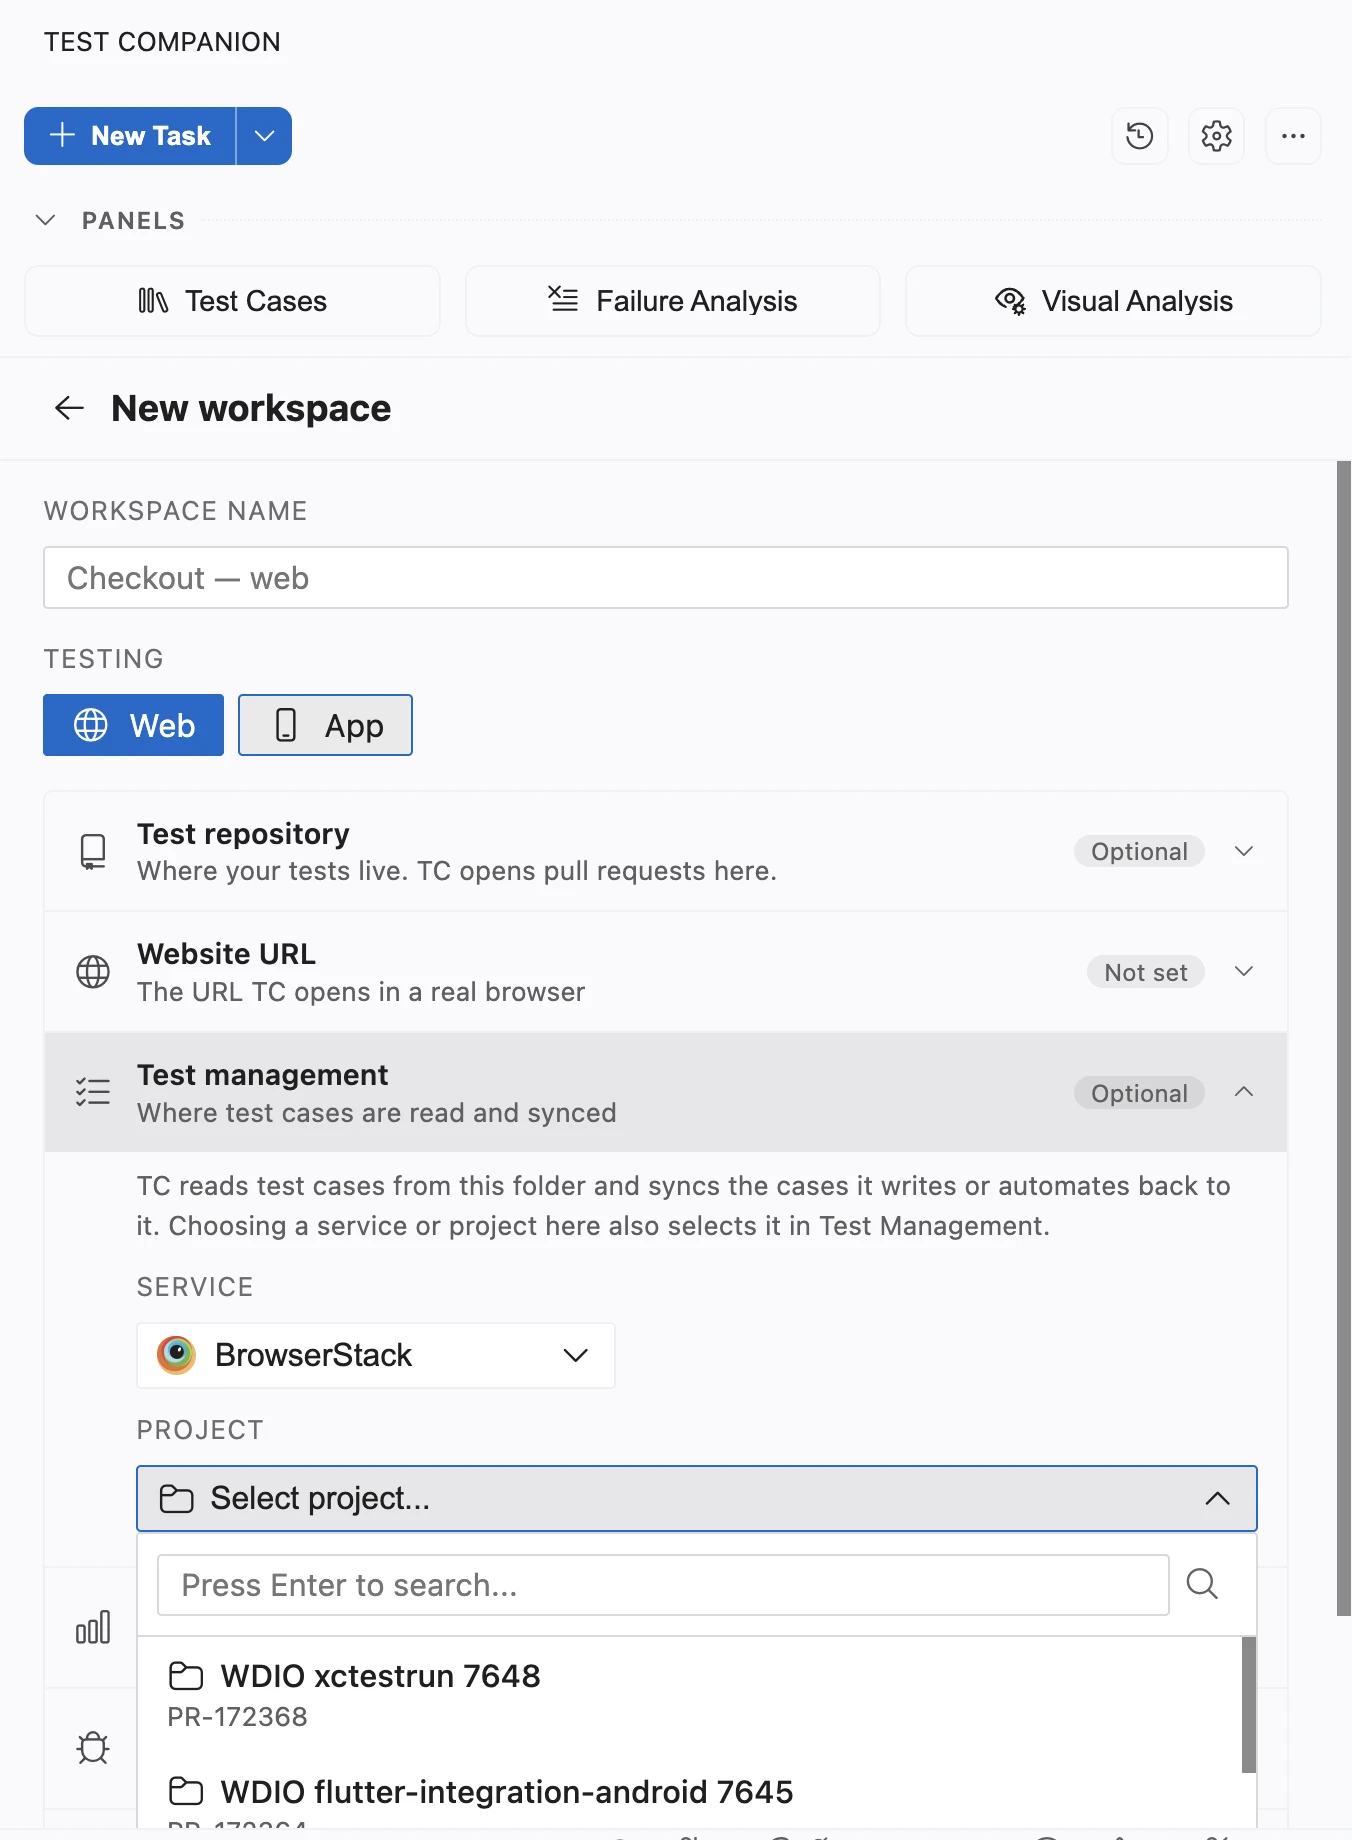
Test management: Choose the Service, the Project, and a Folder if you want one. Test Companion Cloud reads test cases from this project and syncs new test cases to the folder. While the workspace is in use, the project and folder in the Test Cases panel are locked to the workspace. To pick another folder for one task, click the lock icon next to Project.
-
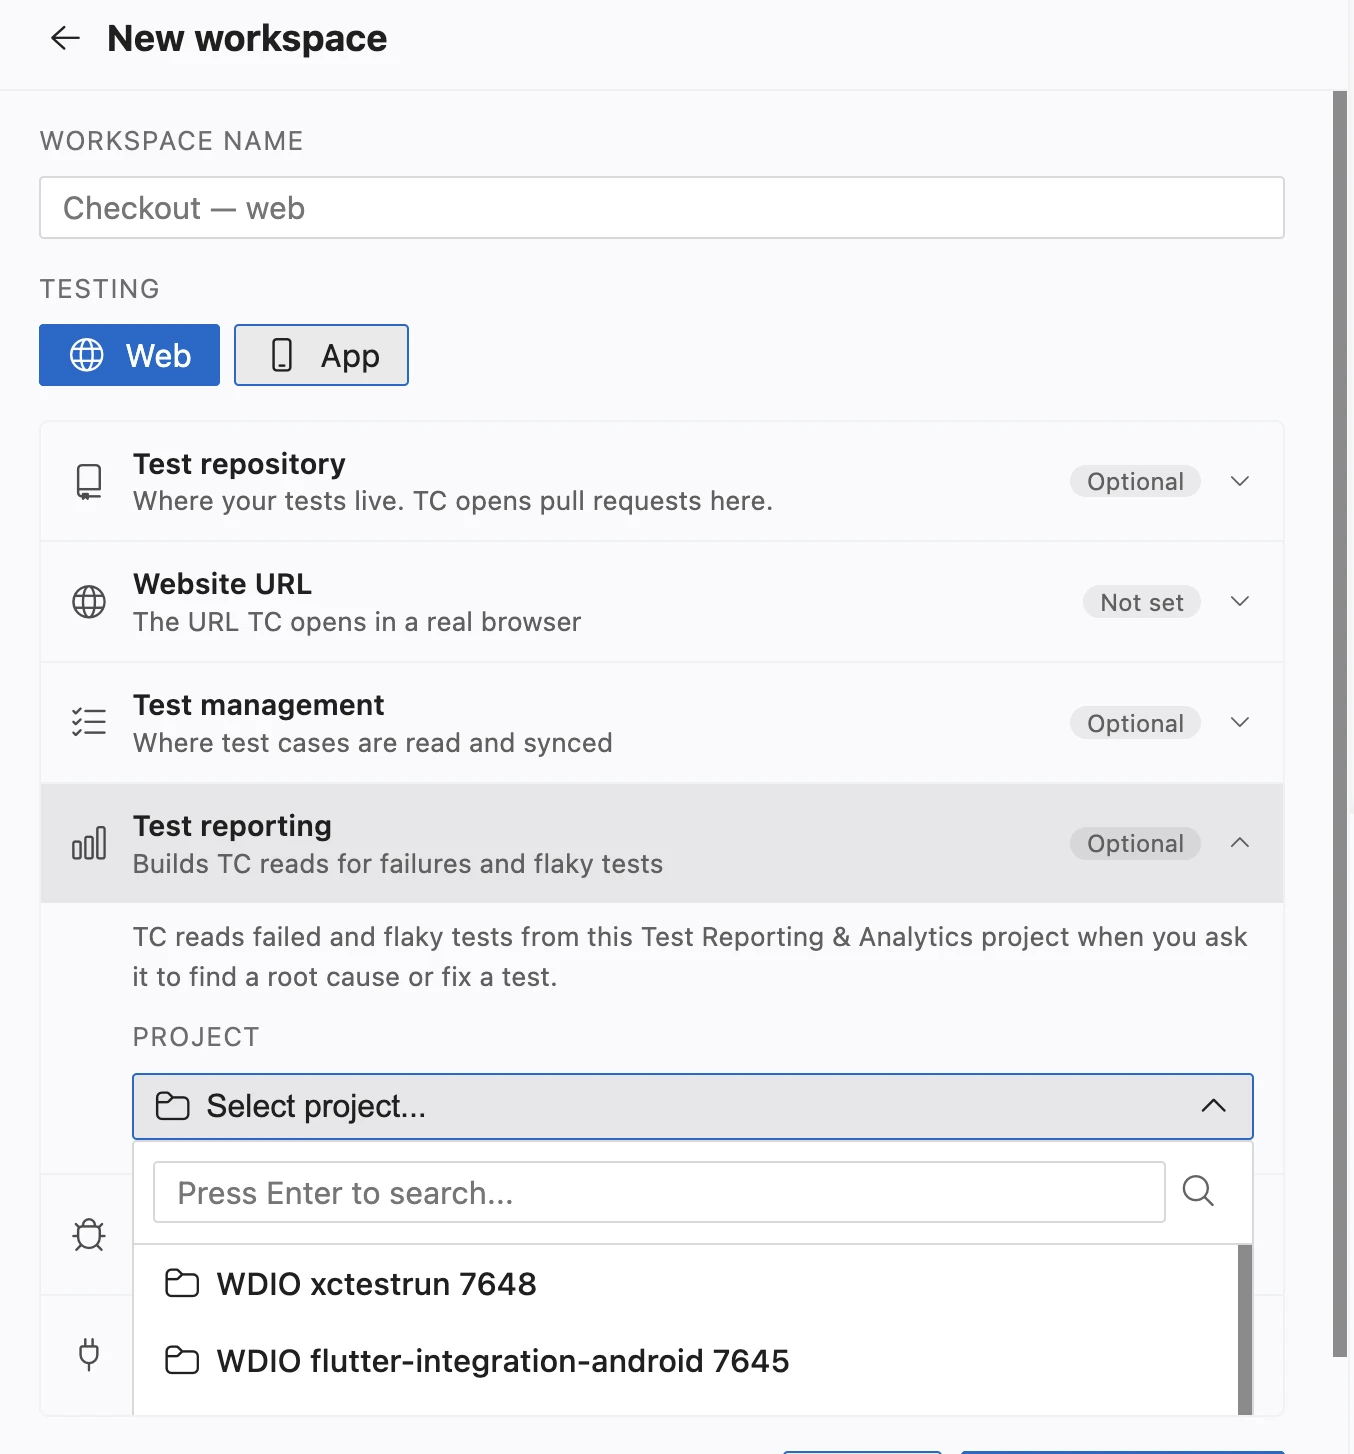
Test reporting: Choose the Test Reporting & Analytics project whose builds Test Companion Cloud reads to fix failed and flaky tests.
-
Issue tracker: Choose a Jira project, or an Azure Boards organization and project. When Test Companion Cloud finds a bug in your app, it drafts the issue in this project. You review each draft before it is filed.
Switch, edit, or delete a workspace
To switch workspaces, click the workspace picker above the message box and select another workspace. The next task uses it. A task that is already running keeps the workspace it started with.
To edit a workspace, click the workspace picker, then Manage workspaces. Click the workspace, change it, and click Save changes.
To delete a workspace, open it from Manage workspaces and click Delete, then Delete workspace. Tasks you already ran keep their history.
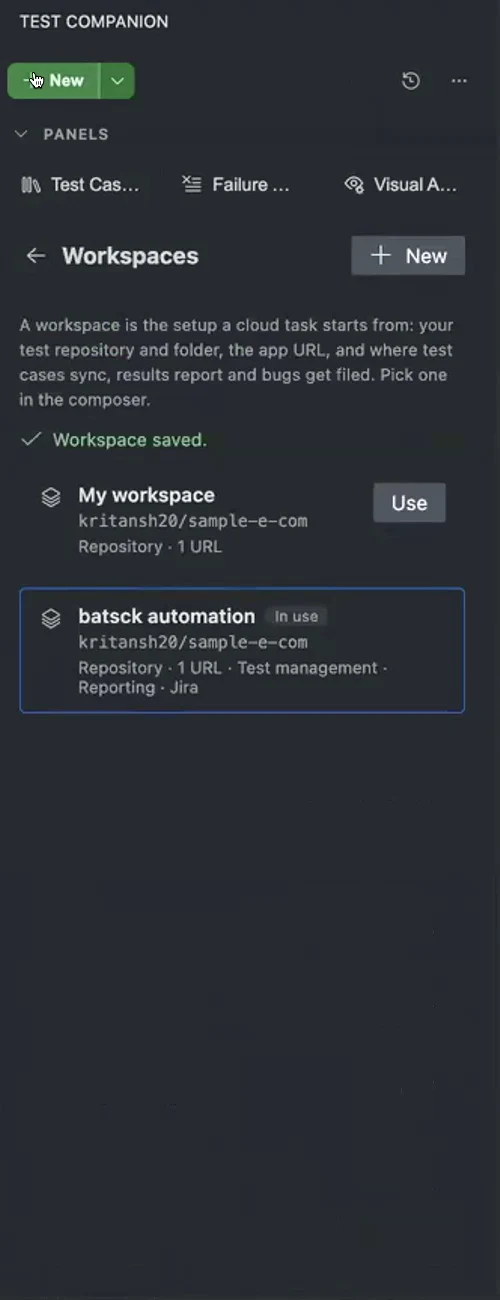
In Manage workspaces, the workspace in use shows an In use label. To use another one, click Use on its card.
Next steps
- Run a task in Test Companion Cloud: Send your first task with the new workspace.
- Test local and private apps from Test Companion Cloud: Set up the Network section of a workspace.
We're sorry to hear that. Please share your feedback so we can do better
Contact our Support team for immediate help while we work on improving our docs.
We're continuously improving our docs. We'd love to know what you liked
We're sorry to hear that. Please share your feedback so we can do better
Contact our Support team for immediate help while we work on improving our docs.
We're continuously improving our docs. We'd love to know what you liked
Thank you for your valuable feedback!