
 Join our Discord
Run a task in Test Companion Cloud
Switch Test Companion to Cloud mode, send a task, approve the plan, and collect the pull request and reports when the task is done.
If you have not used Test Companion Cloud before, read Test Companion Cloud first.
- Availability: Test Companion Cloud is in beta and is not available to every account yet. It is available on request. To have it enabled for your account, contact BrowserStack support.
- IDE: Test Companion Cloud works in Visual Studio Code only.
Before you start
Make sure you have the following:
- The Test Companion extension for Visual Studio Code, signed in to your BrowserStack account.
- A GitHub account connected to BrowserStack, if you want Test Companion Cloud to change code. It opens pull requests on github.com repositories only.
- A workspace for your project. You can also create one while you follow these steps.
Test Companion Cloud works on the code that is on GitHub. It does not see your unpushed commits or unsaved edits. Push the code you want to test before you start. If you start without a repository and the task needs code changes, Test Companion asks you for one.
Switch to Cloud mode
The mode switch is at the top of the Test Companion panel, to the right of New Task. It shows a monitor icon for local mode and a cloud icon for Cloud mode. In a wide panel, the icons carry the labels Local and Cloud. Hover over an icon to see what the mode is for.
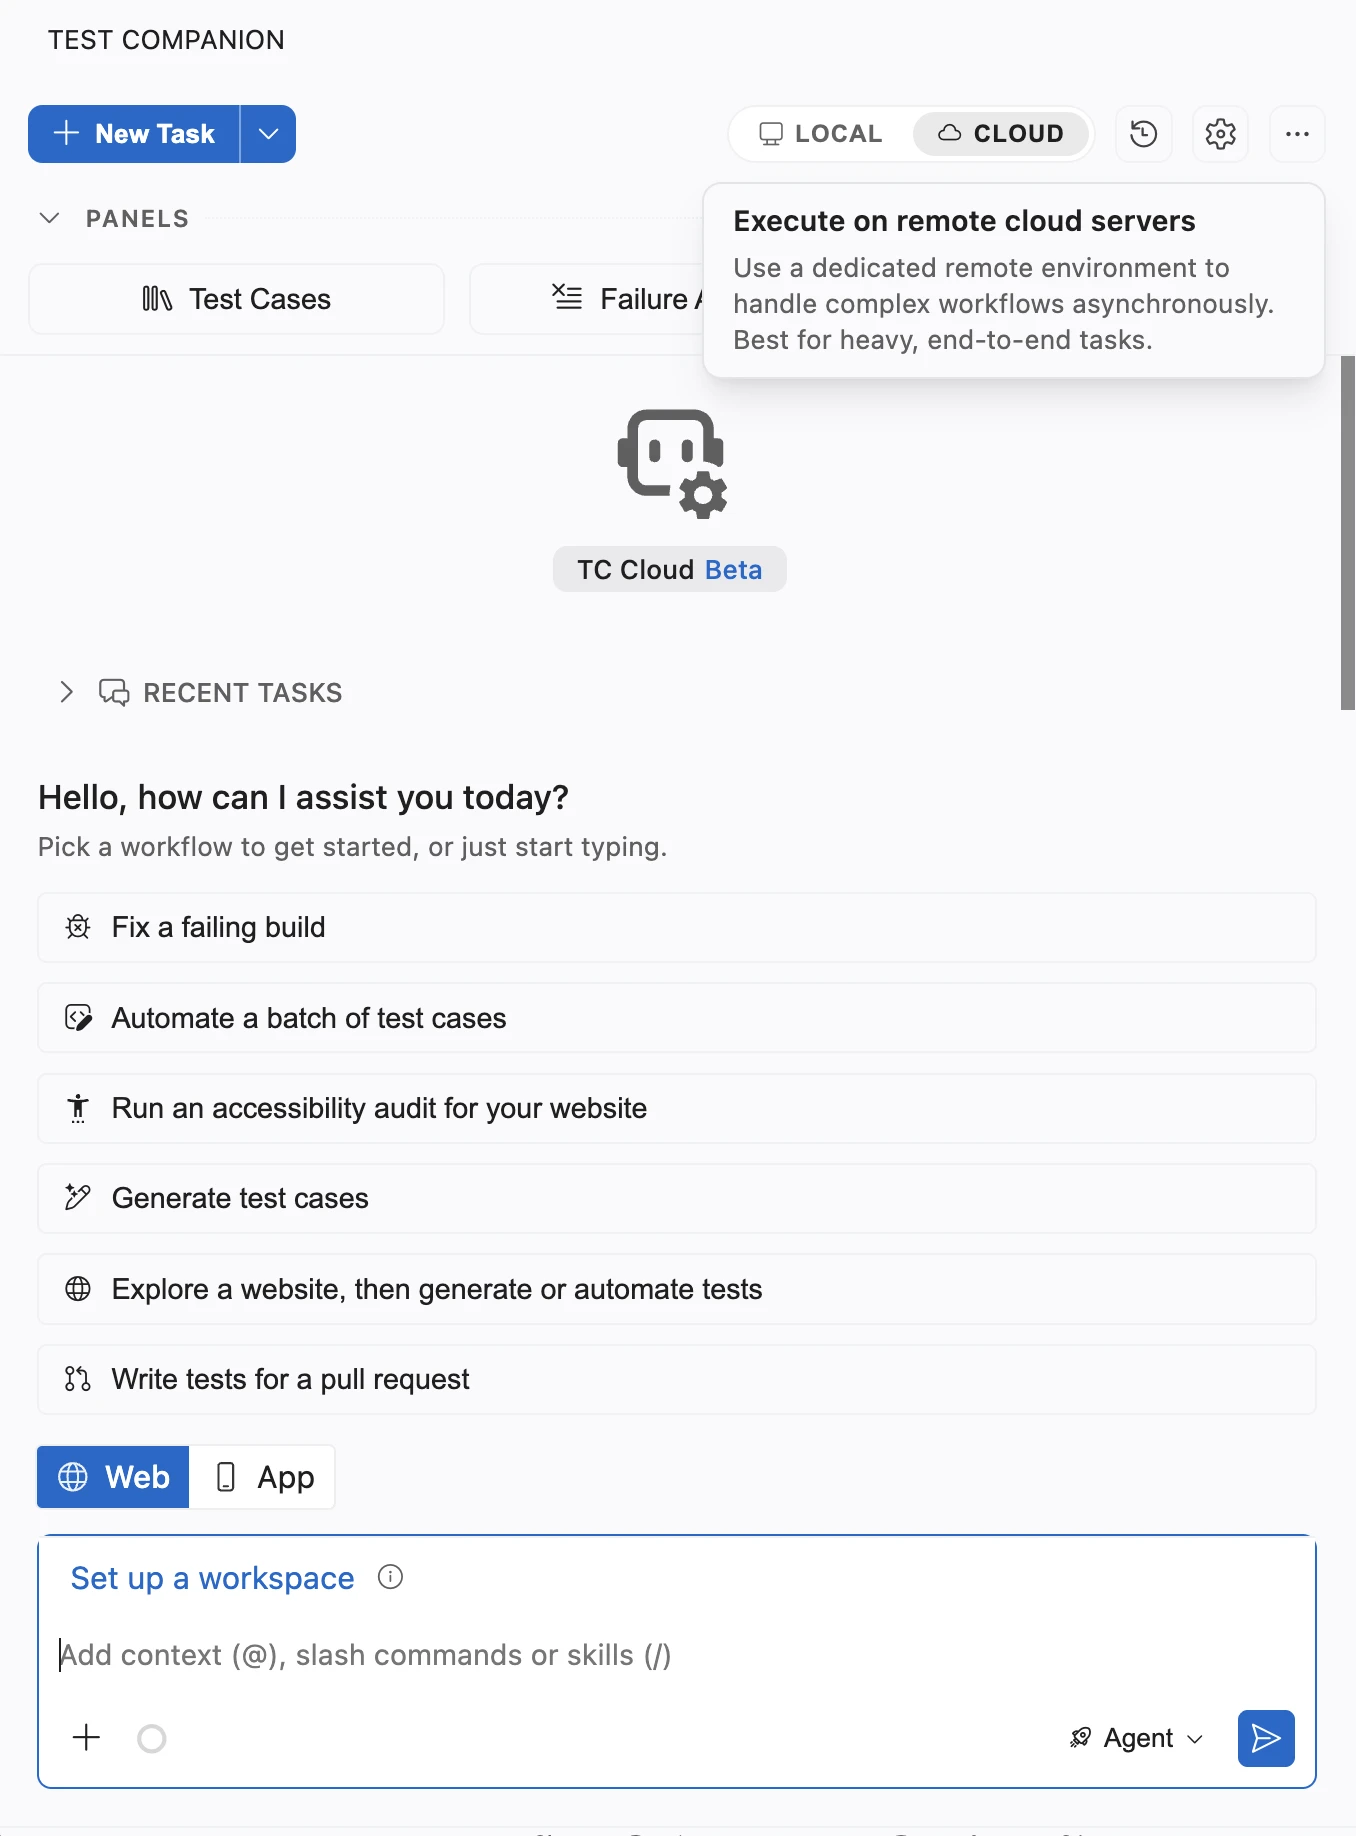
To switch, click the cloud icon. The home screen shows the TC Cloud Beta badge and the Cloud mode workflow tiles. Your choice is saved for the folder or project that is open in Visual Studio Code. To go back, click the monitor icon. A task in Cloud mode that is already running keeps running when you switch.
If the mode switch does not appear, Test Companion Cloud is not enabled for your account. To have it enabled, contact BrowserStack support.
Start a task
To start a task in Cloud mode, follow these steps:
-
Above the message box, click the workspace picker and select a workspace. If you have none, click Set up a workspace. For the steps, see Set up workspaces in Test Companion Cloud.
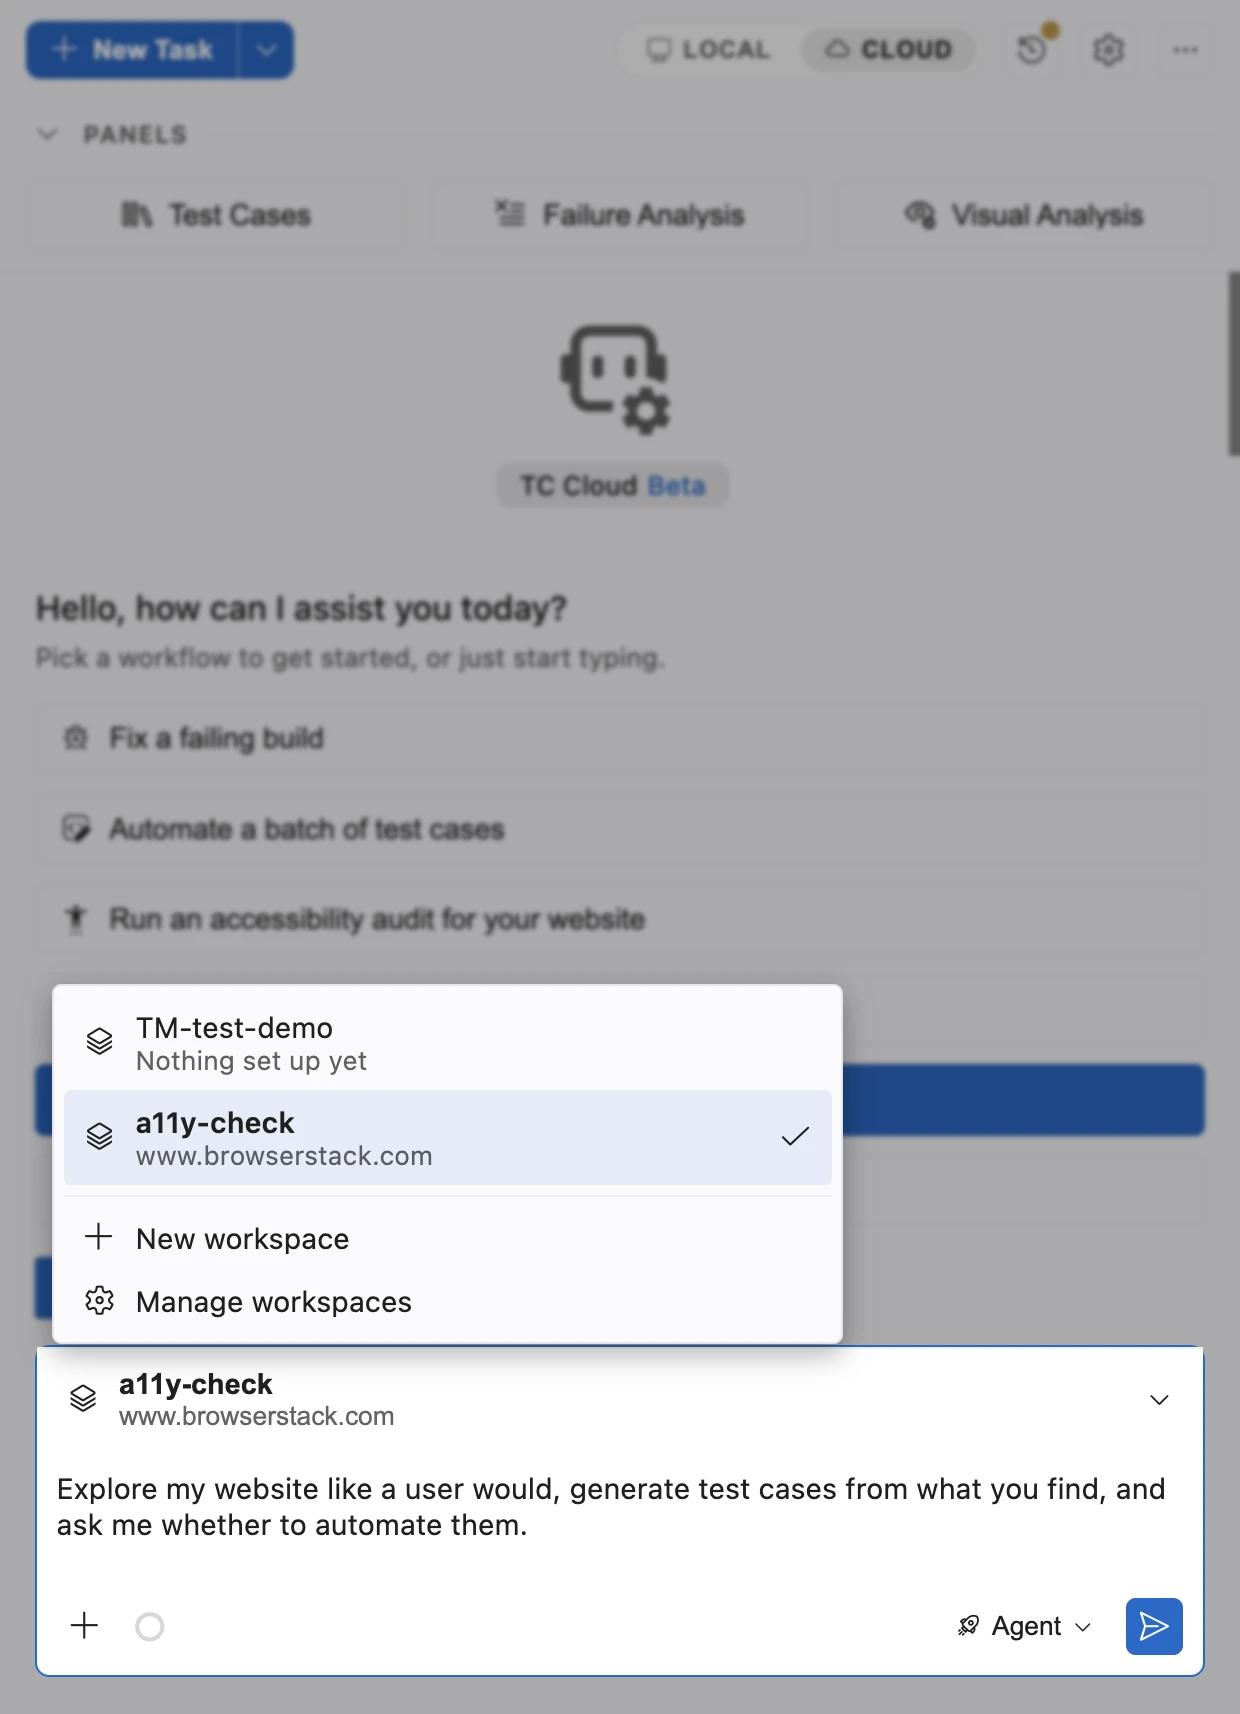
- If the workspace has more than one website URL, choose the URL for this task in Environment for this task.
- Click a workflow tile on the home screen, or type your own prompt. A tile fills in a starter prompt that you can edit. For the list of tiles, see Workflows in Test Companion Cloud.
- Attach files if the task needs them, such as a requirements document or a screenshot. For the file limits, see Attachments.
- Send the message.
The chat shows Cloud agent is working while Test Companion Cloud starts a machine. The first output appears after about 30 seconds.
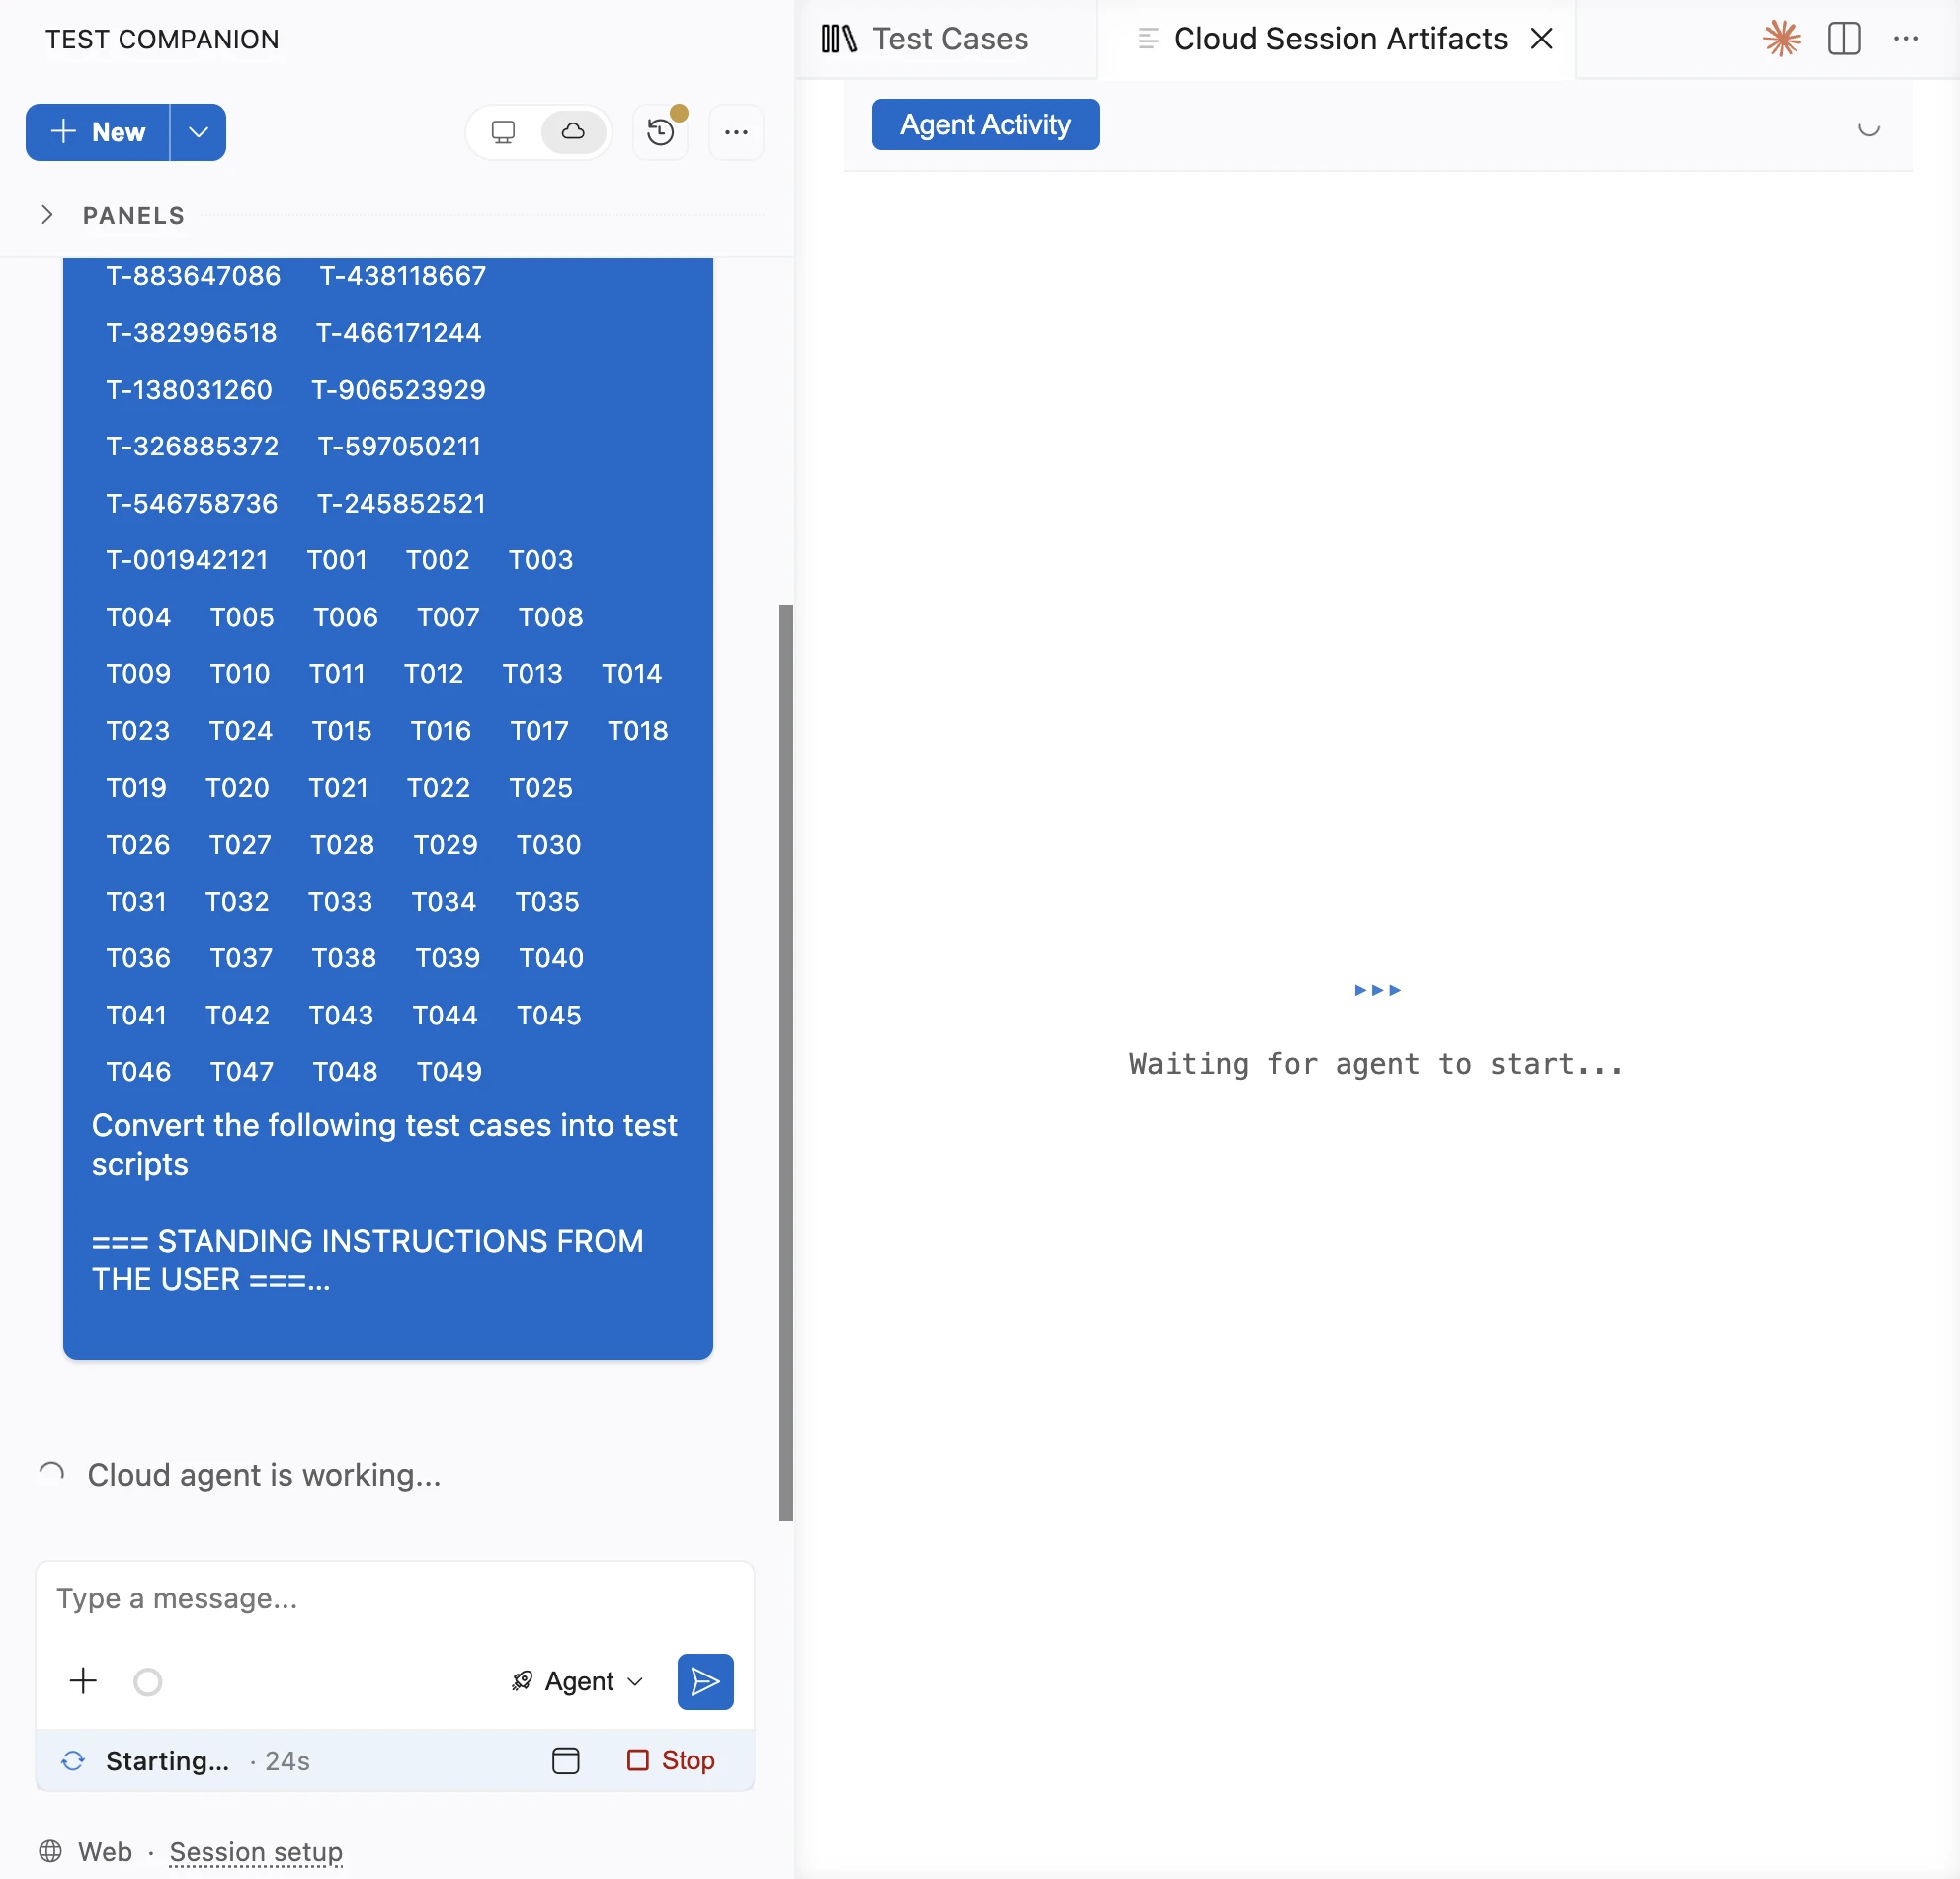
The first stage card, Setup, then lists its steps as they complete. The steps are Preparing the repository, Cloning the repository, Activating the repository toolchain, Installing dependencies, and Provisioning the browser.
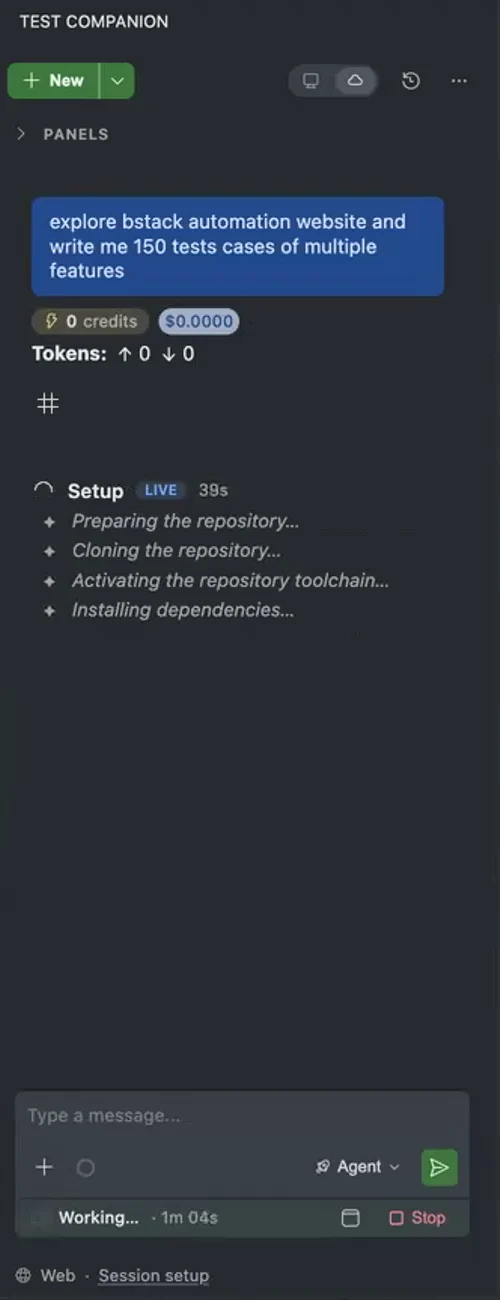
Give Test Companion everything it needs in the first message. Include the URL to test, a test account to sign in with, and the scope of the work. A task that has all the details up front does not have to stop and ask you. Use a test account, not your personal account.
Review the plan
After Test Companion explores your code and your app, it shows the plan in a card titled Approve plan. Click View plan to read it in full. Then choose one of the following:
- Approve & run: Test Companion starts the work.
- Suggest Changes: Write what you want changed, then click Send feedback. Test Companion sends back a new version of the plan.
To comment on one part of the plan, open View plan and select the text. Type your comment and click Add comment. Click Send feedback when you are done.
Read the plan before you approve it. Correcting the plan is faster than correcting the pull request later.
Follow the task
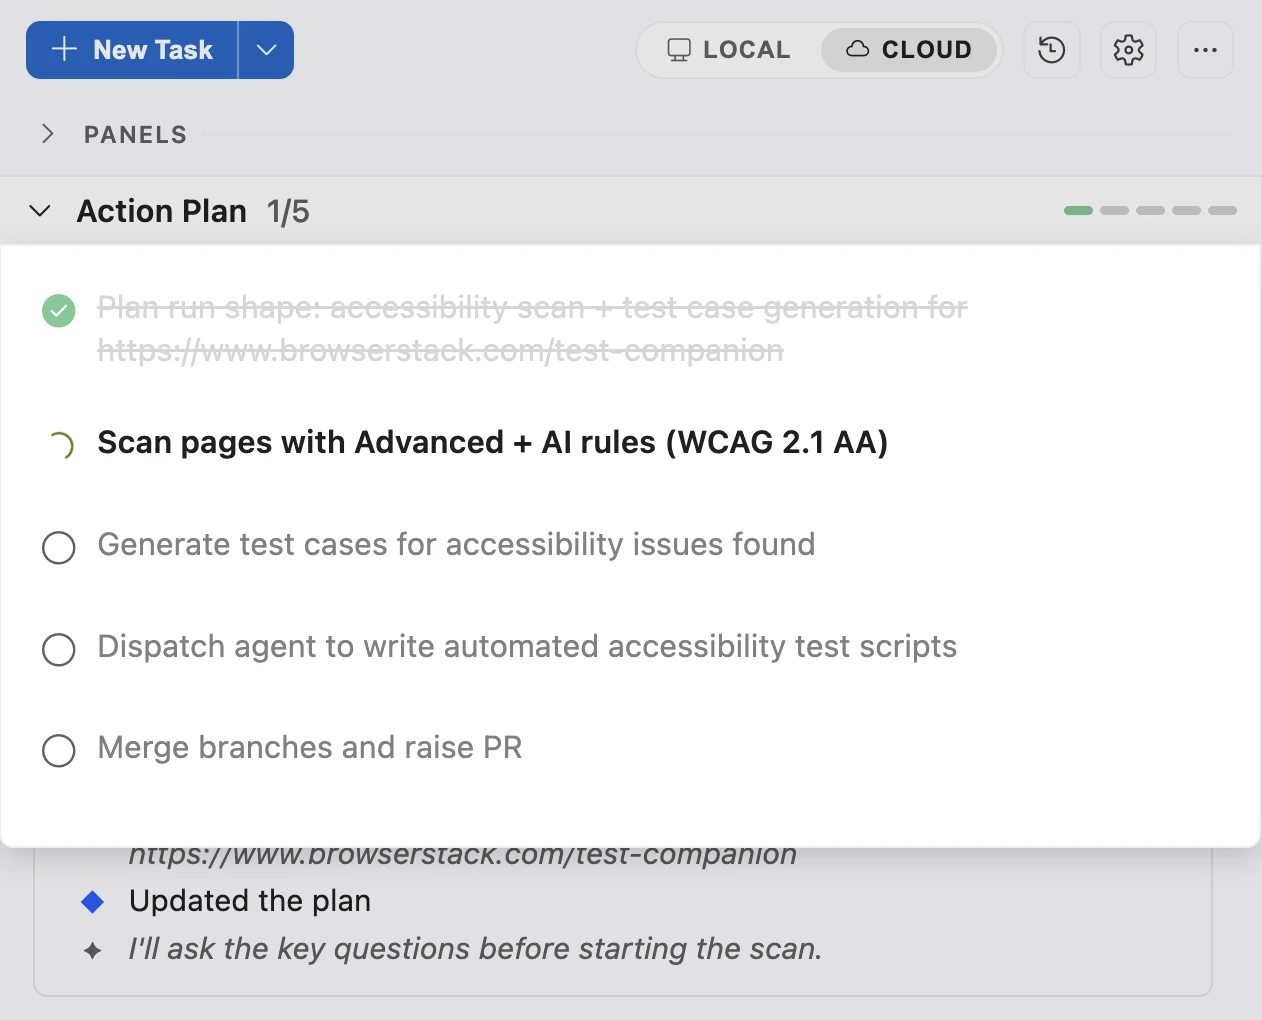
While the task runs, the chat shows a card for each stage, such as Setup, Exploring, Working, and Done. The stage in progress carries a LIVE badge. The Action Plan bar at the top of the chat shows how many steps of the plan are complete. Expand it to read the steps.
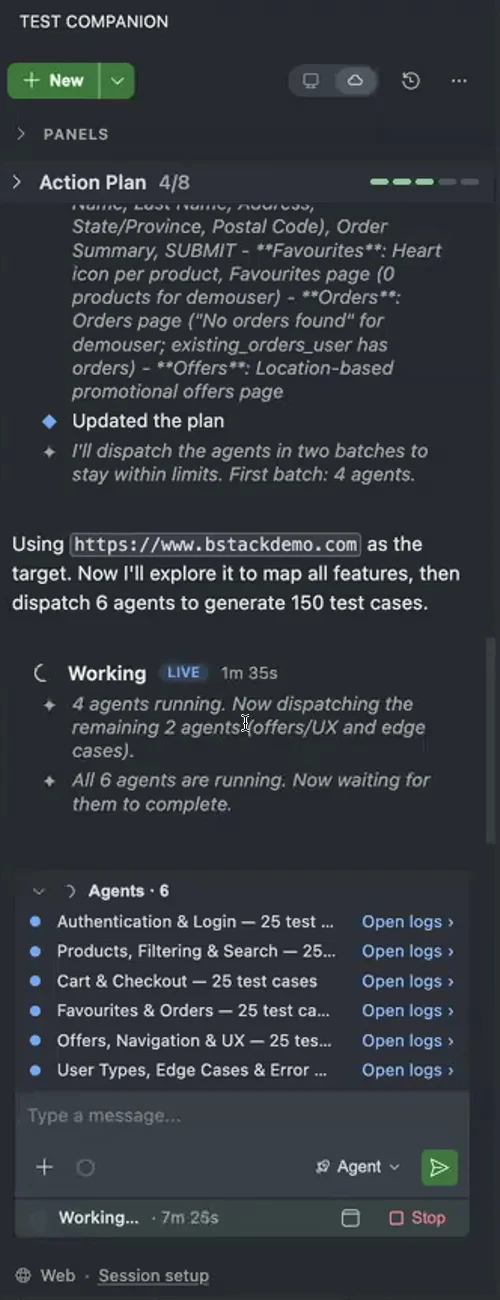
For a large task, Test Companion splits the work into subtasks that run at the same time. The Agents strip above the message box lists each subtask. Click Open logs next to a subtask to see what it did. A task runs up to eight subtasks. When fewer slots are free in your organization, Test Companion Cloud splits the work across the subtasks it can start.
You can do the following while the task runs:
- Steer the task: Type a message and send it. Test Companion reads it at its next step.
- See every step: Click the Open session logs icon in the status bar above the message box. The Agent Activity tab lists each command Test Companion ran and each file it changed.
- Stop the task: Click Stop. The task and all its subtasks stop at once, without a confirmation step.
You can close Visual Studio Code. The task keeps running in the cloud. To open it again, click History.
Answer questions from Test Companion
When Test Companion needs a decision from you, the chat shows a card. The card is titled Asking a question or Test Companion needs your input. The status bar reads Awaiting your input. Click an option on the card, or type your answer in Something else or in the message box. When Test Companion asks several questions at once, the card shows one tab for each question. Answer them all, then click Submit.
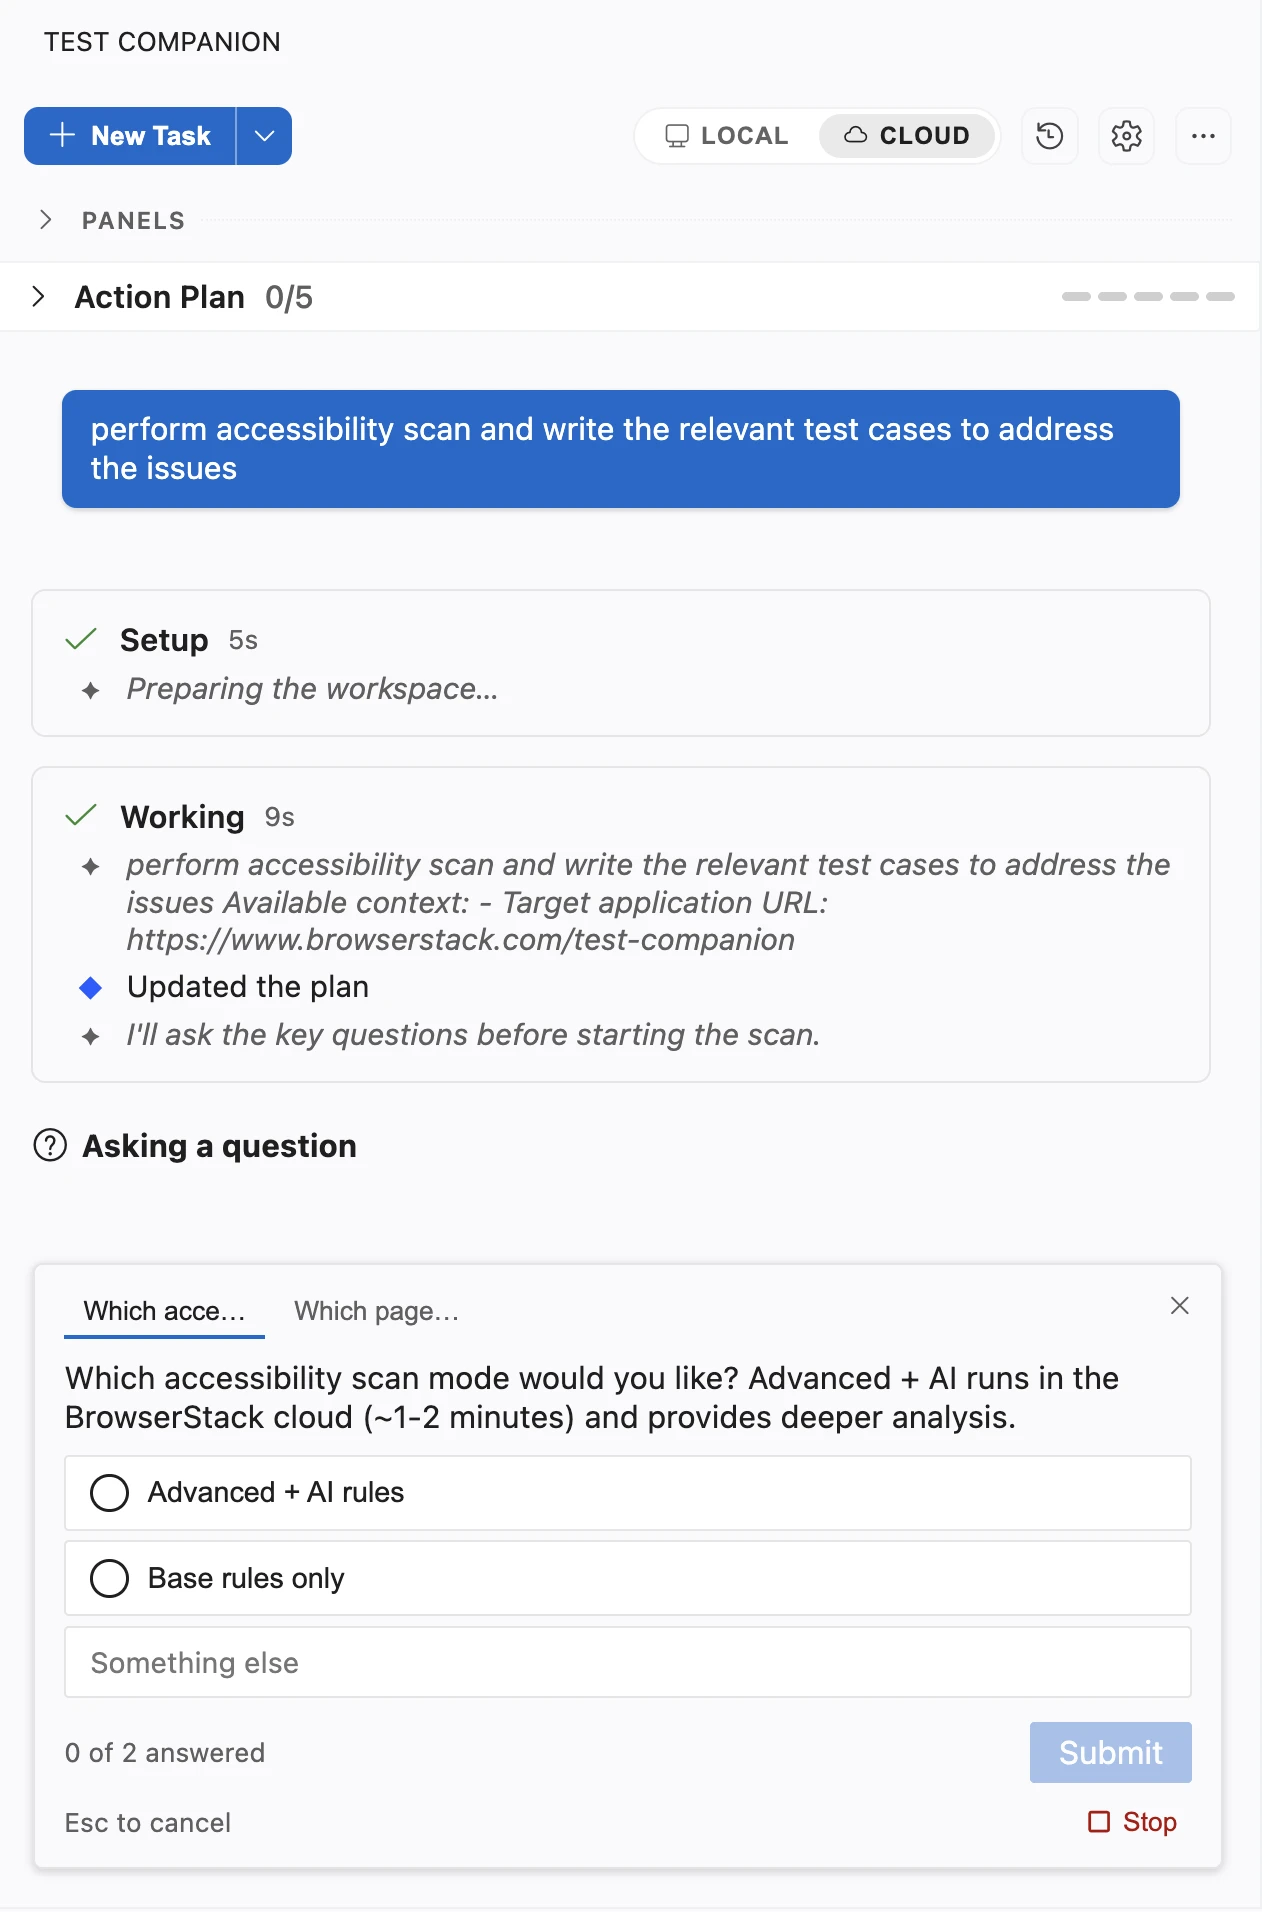
If you do not answer a question within 20 minutes, the task ends. To continue it, send a message in the same chat. Stay with the task until you approve the plan and answer the first questions.
Review the result
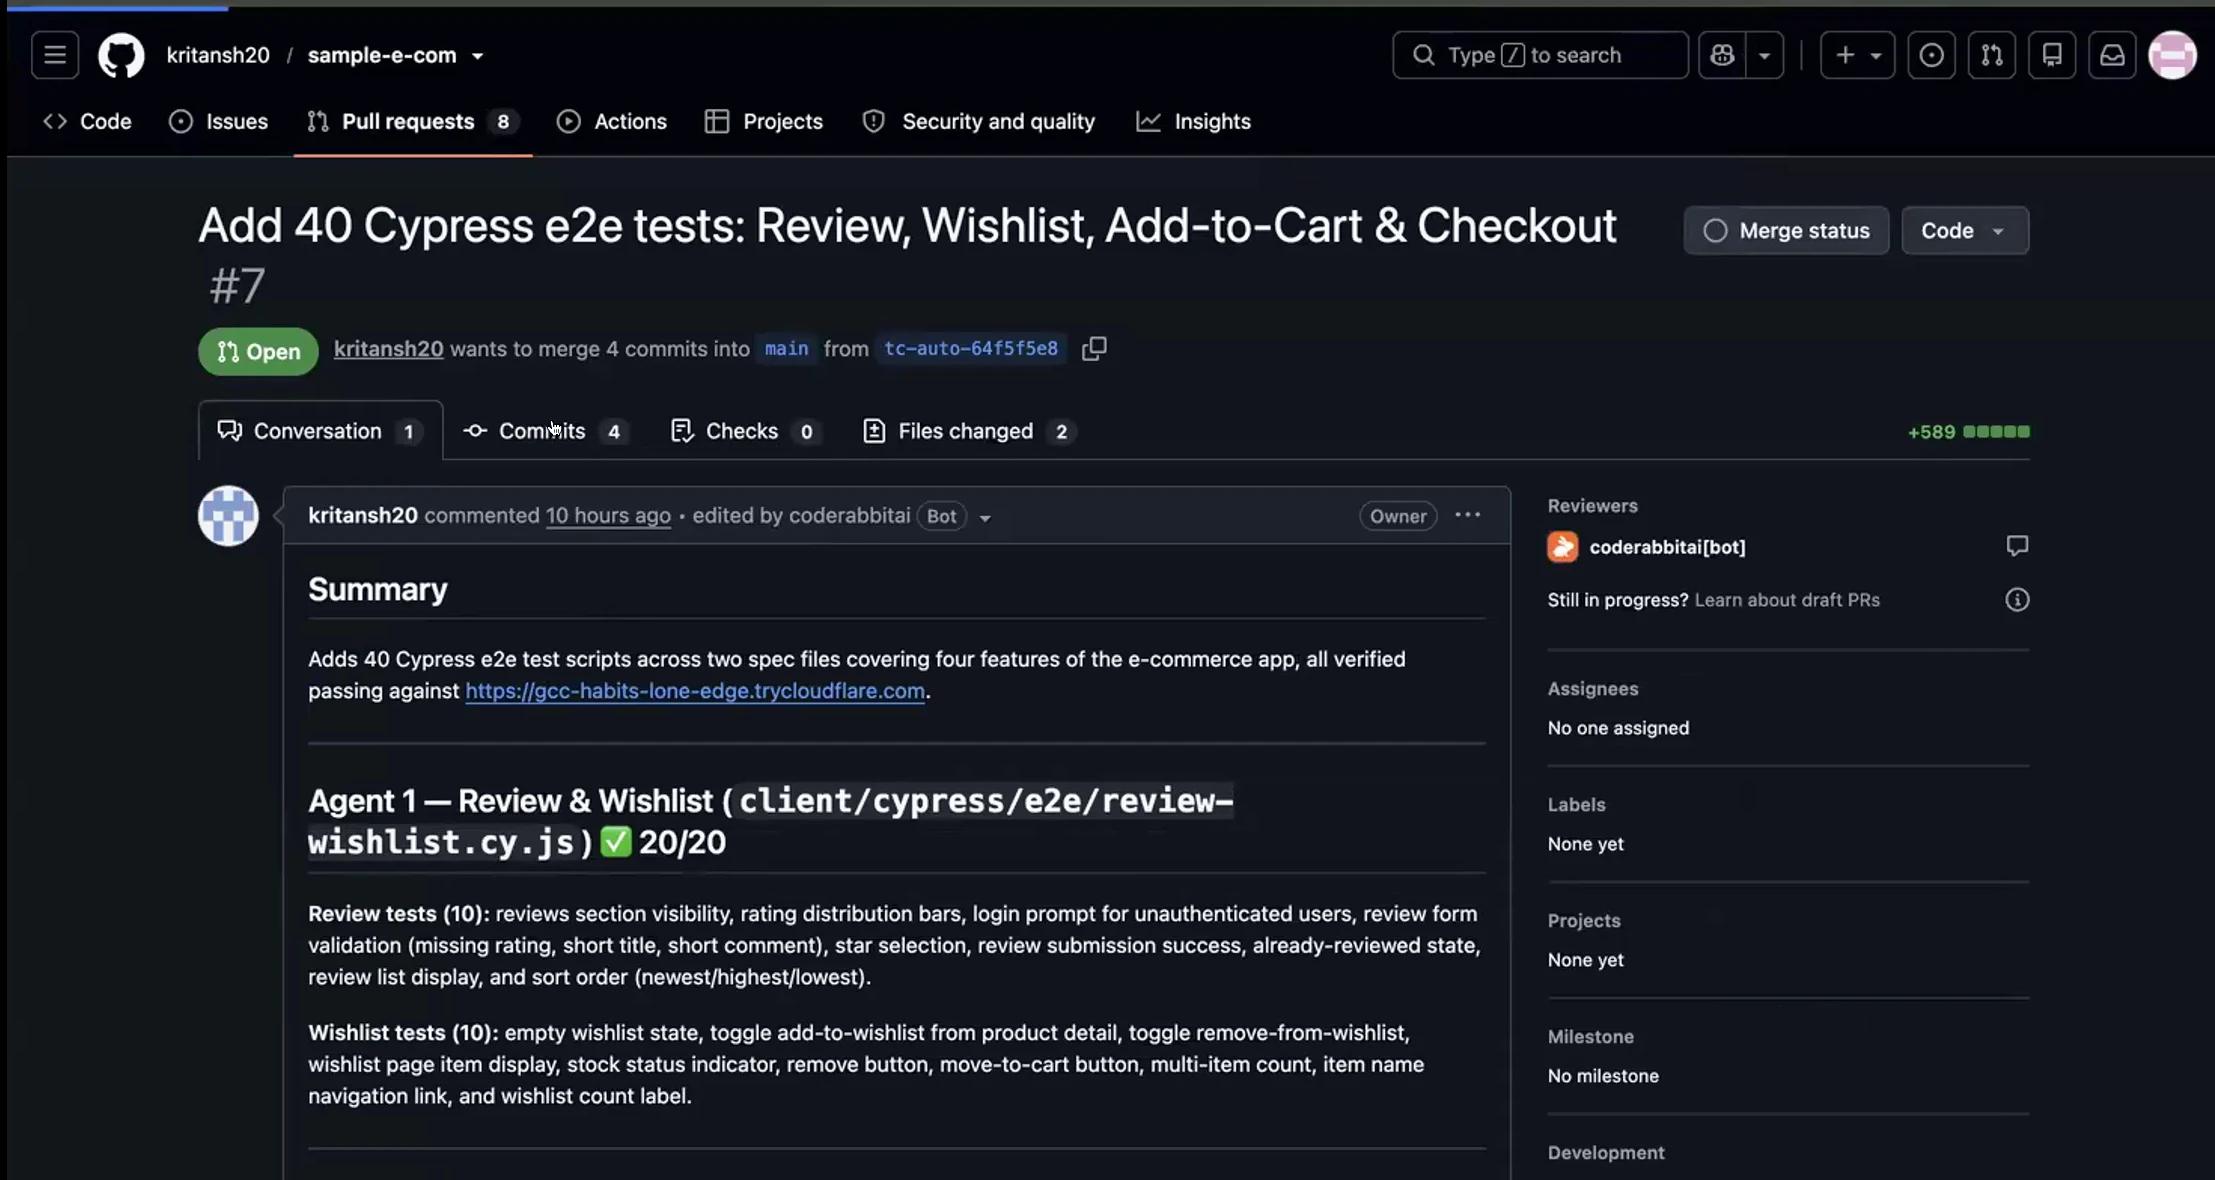
When the task finishes, the Done card shows the outcome and a short summary. It links to the pull request when there is one.
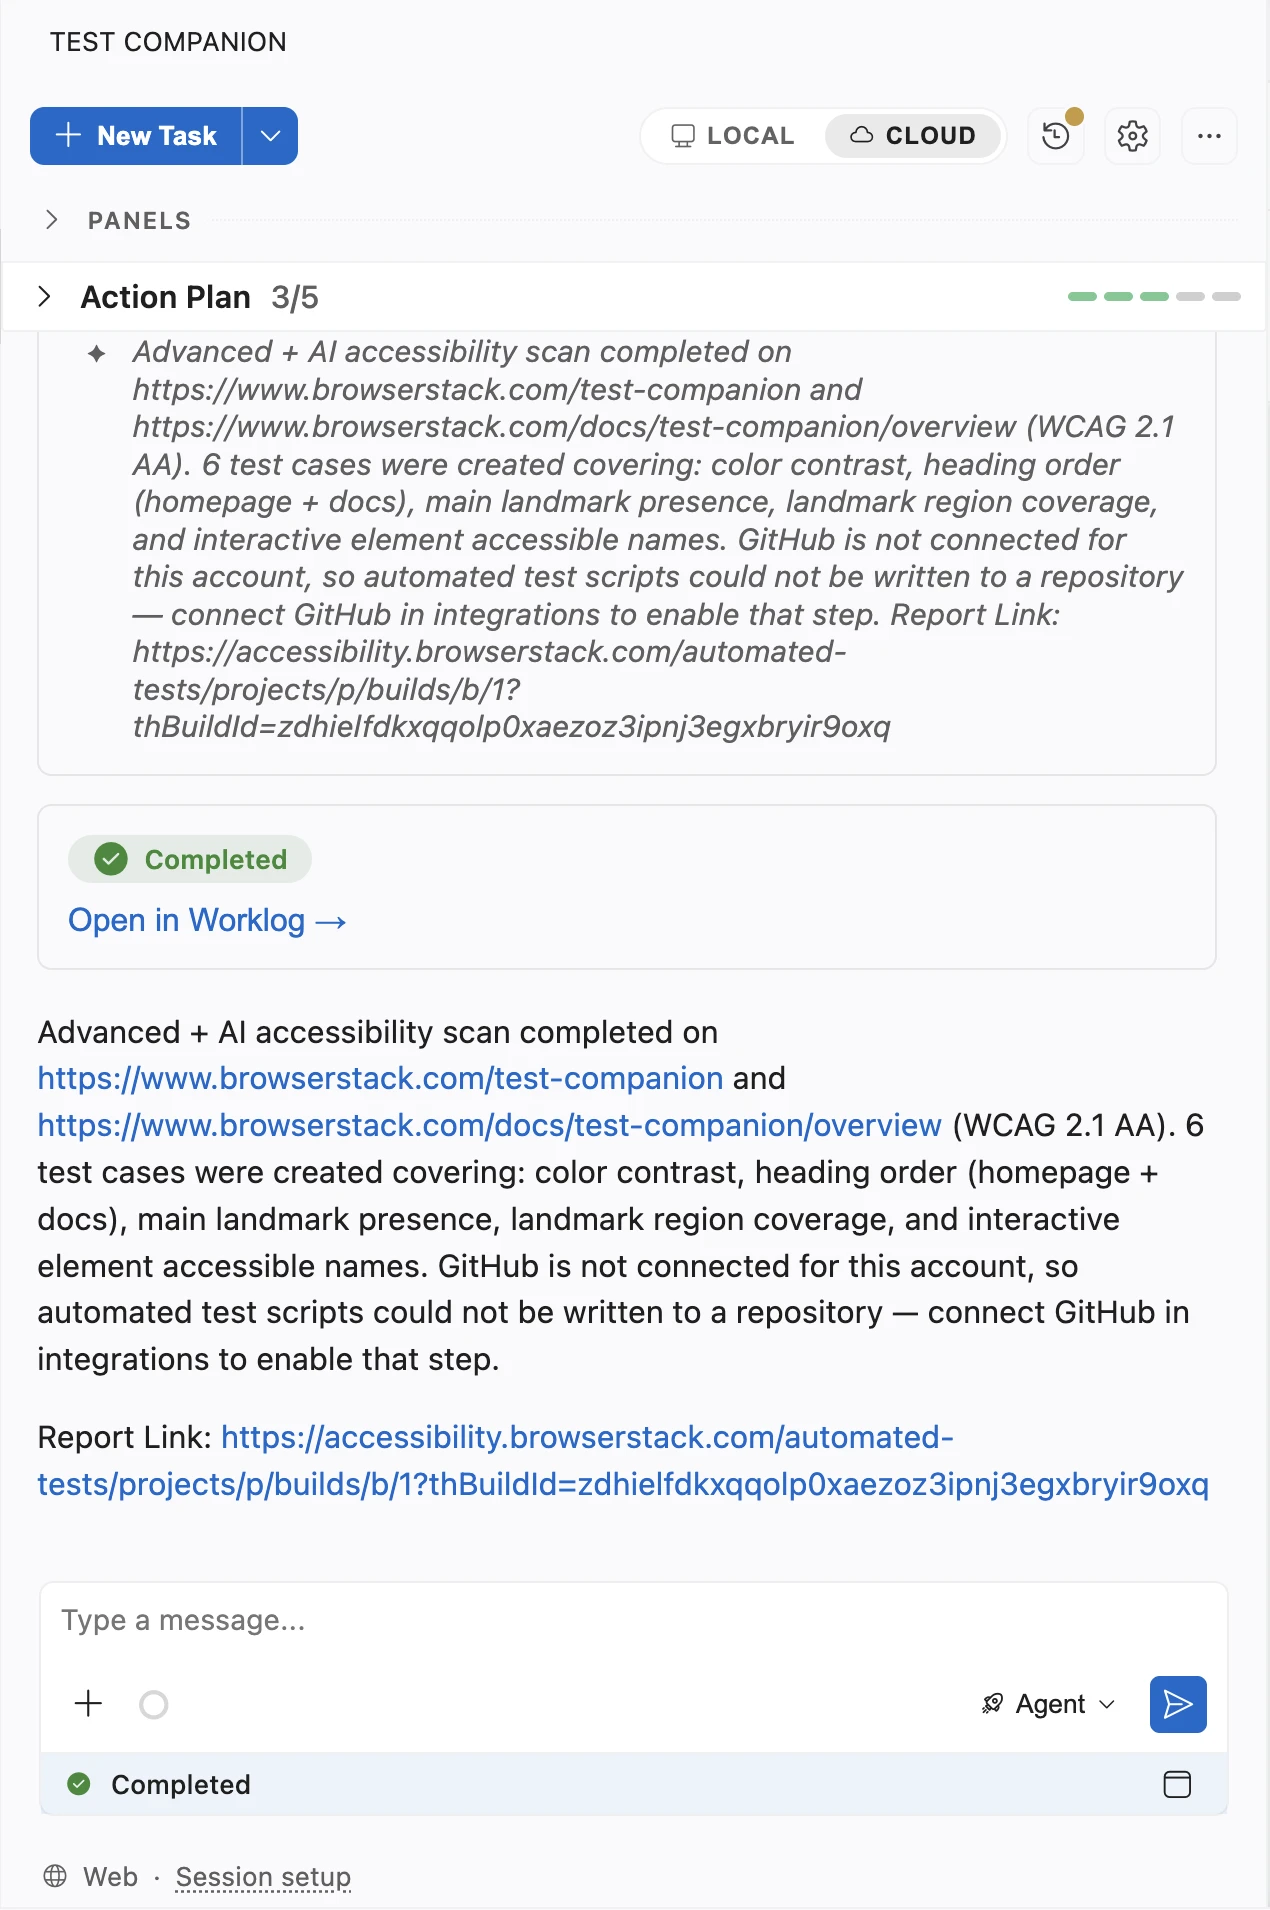
Results appear in the following places:
| Result | Location |
|---|---|
| Code changes, such as new or fixed tests | A pull request on your GitHub repository. Click the link on the Done card. |
| Test cases that Test Companion generated | The Review generated tests panel. Keep the Cloud source filter selected to see test cases from tasks in Cloud mode. |
| Accessibility issues | The Accessibility tab of the task. |
| Test results | The Report tab of the task. |
| Percy visual changes | The Visual Analysis panel, which opens on the Percy build. |
| Bugs found in your app | A card in the chat, where you approve each bug report before it is filed. |
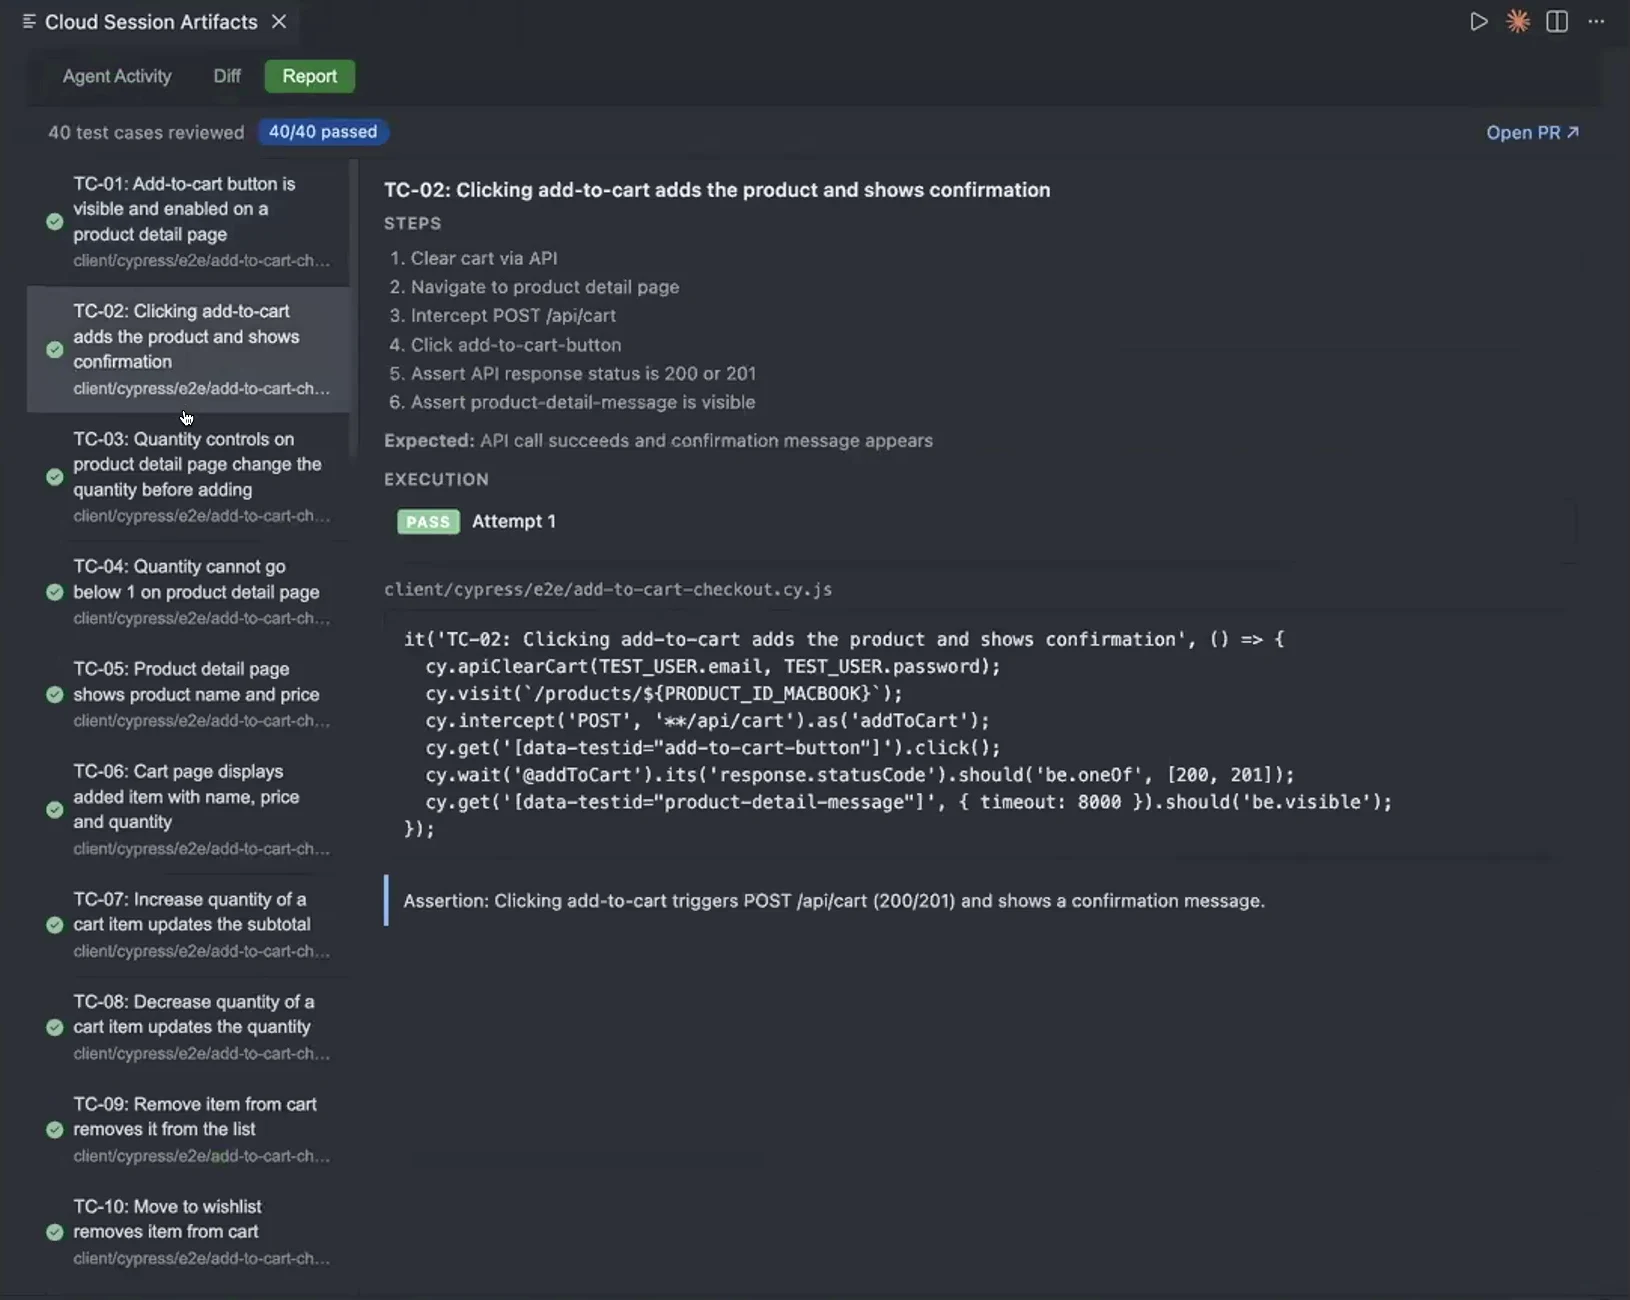
Click Open in Worklog on the Done card to open the Cloud Session Artifacts tab in the editor. A tab appears only when the task produced that result. It holds the following tabs:
| Tab | Contents |
|---|---|
| Agent Activity | Every step Test Companion and its subtasks took, including the commands they ran and their output. |
| Plan | The approved plan. A plan that changed shows its version, such as Plan v2. |
| Test Cases | The test cases that Test Companion generated. |
| Diff | The code changes in the pull request. |
| Report | The tests that Test Companion ran, how many passed, and a link to the pull request. |
| Accessibility | The accessibility issues found, sorted by severity. |
| Device | The live stream and the recordings of the real mobile devices, for app tasks. |
The pull request lists the work of each subtask and the tests that passed.
File bugs that Test Companion found
When Test Companion finds a bug in your app, it drafts a bug report. It does not change the code of your app. After the task ends, a card in the chat lists the drafts. For each draft, review the title, project, type, and priority. Then approve the draft to file it in Jira or Azure Boards, or reject it. Nothing is filed until you approve it.
Send a follow-up
To change something after the task finishes, send a message in the same chat. Test Companion continues with the full history of the task. Code changes from a follow-up go to the same pull request.
A follow-up sent within five minutes after the task finishes starts right away. After that, Test Companion Cloud first restores the task, which takes longer.
Find past tasks
Click History while the panel is in Cloud mode. The list shows only your tasks from Cloud mode. A task that is waiting for your answer shows a Needs input badge. A running task shows a Running badge. Select a task to open it where it left off.
Test Companion Cloud does not send a notification when a task finishes. Check History.
Attachments
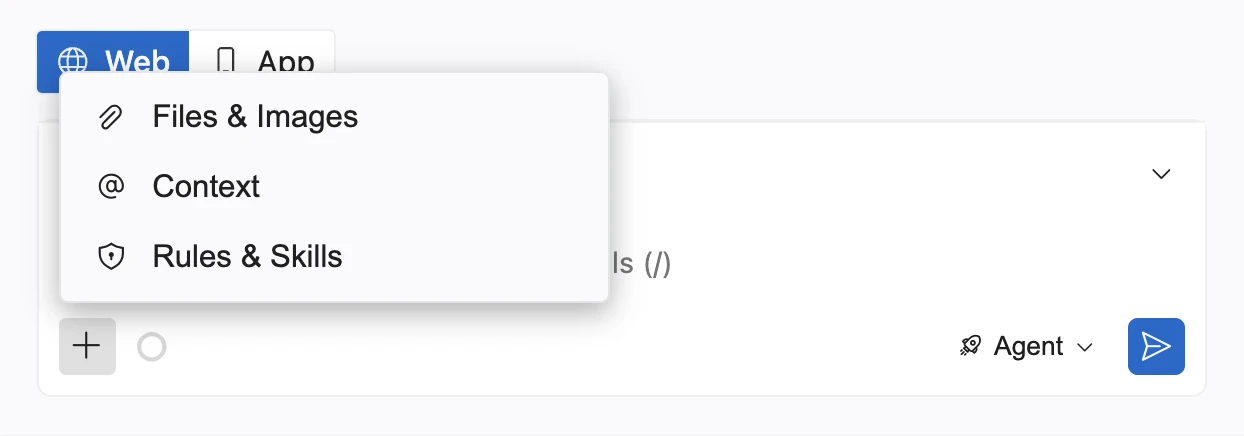
You can attach files to any message. Test Companion reads them as context. Click the + icon in the message box, then Files & Images.
| Item | Limit |
|---|---|
| Files per message | 20 |
| Total size per message | 100 MB |
| Size per file | 20 MB. Excel files: 1 MB. PowerPoint files: 5 MB. |
| Document types | PDF, DOCX, DOC, XLSX, XLS, PPTX, IPYNB, CSV, JSON, XML, HTML, HTM, MD, YML, YAML, TXT, LOG |
| Image types | PNG, JPG, JPEG, WEBP, GIF |
Next steps
- Set up workspaces in Test Companion Cloud: Save your repository, URLs, and tools for every task.
- Workflows in Test Companion Cloud: See what each workflow does and how to start it.
- Supported features and limits in Test Companion Cloud: Check time limits, subtask limits, and supported tools.
We're sorry to hear that. Please share your feedback so we can do better
Contact our Support team for immediate help while we work on improving our docs.
We're continuously improving our docs. We'd love to know what you liked
We're sorry to hear that. Please share your feedback so we can do better
Contact our Support team for immediate help while we work on improving our docs.
We're continuously improving our docs. We'd love to know what you liked
Thank you for your valuable feedback!