Connect Jira to Test Companion
Connect Jira to Test Companion to bring ticket context into chat, and to raise Jira issues for the bugs you find, without leaving your IDE.
Your Jira tickets already hold the acceptance criteria, edge cases, and issue details you need to test. When you connect Jira to Test Companion, you share a ticket in chat and Test Companion reads that ticket for you. You do not copy anything by hand.
The connection works in both directions. When you hit a bug, or when Test Companion finds one while it runs a task, it drafts a Jira issue for you to review.
Test Companion works with Jira Cloud and with self-hosted Jira, including Server, Data Center, and on-premise instances.
After you connect Jira, Test Companion does the following:
- Generates test cases from a user story, a bug, or any other issue type that you share in chat.
- Turns ticket-driven scenarios into automation code in your framework.
- Raises a Jira issue for a bug you hit or one it finds, without leaving your IDE.
Your Jira permissions still apply. Test Companion reads only the tickets your Jira account has access to. It files issues only in the projects where you have permission to create them.
Prerequisites
Ensure you have the following:
- Test Companion is installed in your IDE and you are signed in.
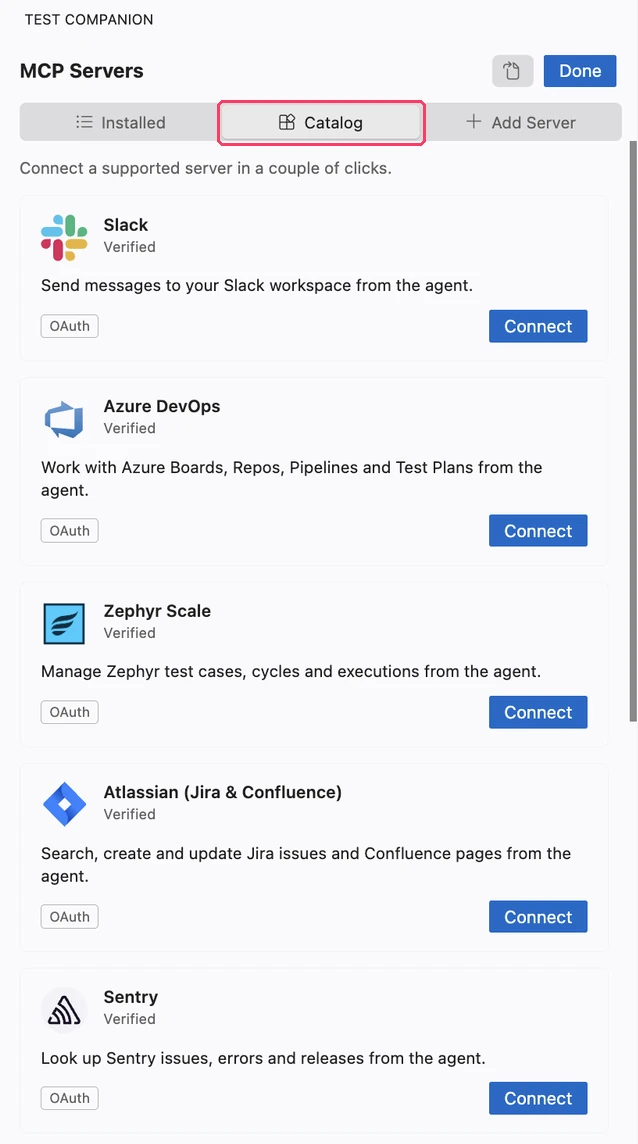
- Your Jira account is connected through the Jira integration flow.
- You have access to the Jira ticket in your browser.
Use Jira ticket links in Test Companion chat
Test Companion reads the issue title and description from each linked ticket and uses them as context for your request. It supports any Jira issue type, including Stories, Bugs, Tasks, Epics, and custom issue types.
After you connect Jira, use Jira links directly in the Test Companion chat.
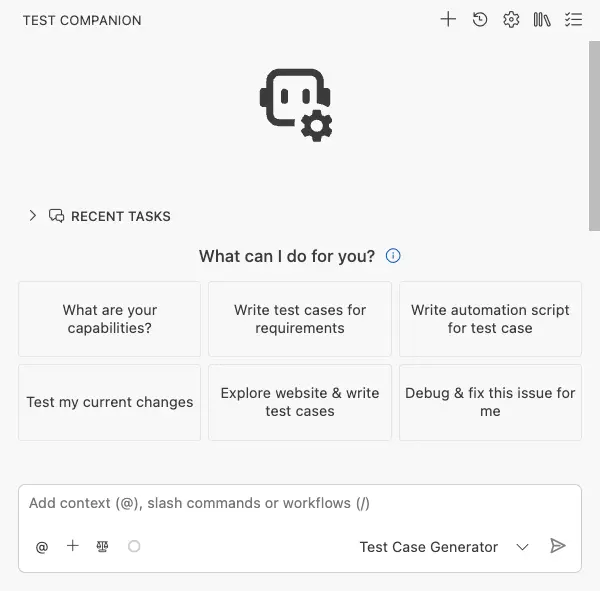
- Open Test Companion in your IDE.
-
Paste one or more Jira ticket links in the chat message.

-
Enter your prompt, and state what you want Test Companion to do with the tickets.
For tips on writing an effective prompt, see the Prompt guide.
- Click Send message (➤).
If the task stopped because Jira was not connected, complete the Jira integration flow and send the same prompt again.
Fields Test Companion reads from Jira
Share a ticket by pasting its link in the chat, or by typing its issue key. Test Companion then reads these fields:
| Field | Description |
|---|---|
| Issue Key | Unique identifier for the ticket. |
| Summary | Title of the ticket. |
| Description | Full description, including acceptance criteria. |
| Issue Type | Story, Bug, Task, Epic, or any custom type. |
| Status | Current workflow status of the ticket. |
| Priority | Priority level assigned to the ticket. |
| Custom fields | Fields you select for the project, such as requirements or acceptance criteria kept outside the description. |
Custom fields
Test Companion reads the standard fields on every ticket. It also reads the custom fields you select. Custom fields matter when the user story, the acceptance criteria, or the scope sits in a custom field and the standard Description is empty. The Jira Key details panel holds fields like these.
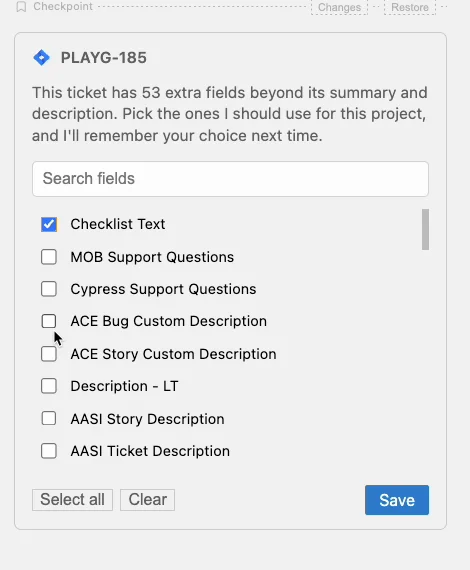
Test Companion asks which fields to include and remembers your choice for that project.
- Share a ticket in the chat and send your prompt.
-
In the card that appears, select each field you want Test Companion to read.
To find a field by name, enter the name in the Search fields box. Click Select all to select every field, or Clear to start again.

- Click Save.
Test Companion confirms your choice in the chat, such as 4 of 53 fields added, and then continues with your prompt. The next ticket from that project uses the same fields, so the card does not appear again.
Test Companion does not read ticket comments or attachments. Keep the detail it needs in the ticket description, or in a custom field you select.
Auto-link requirements to generated test cases
Share a requirement ticket, such as a User Story or an Epic, and generate test cases from it. Test Companion then fills the Requirement field in Test Management with the ticket link. You get traceability from the requirement to the test case without any extra step.
Raise Jira issues from Test Companion
When you find a bug, turn it into a Jira issue without leaving your IDE. Test Companion writes the draft from the details it already has, so the card opens with the title, the description, and the priority filled in. You review that draft. Test Companion then files the issue in the project you choose. Nothing reaches Jira until you confirm.
Raising issues needs write access to Jira. If you connected Jira only to read ticket context, Test Companion asks you to authorize it again on the card. If Jira is not connected, connect it on the integrations page. Test Companion then resumes where it stopped.
Start a draft
There are two ways to start:
-
Ask in the chat. Describe the bug and ask Test Companion to file it, for example,
Raise a Jira issue for this failure. Ask for more than one issue in the same message when you need to. - Accept the offer. Test Companion tracks the defects it finds while it runs a task, such as failure analysis, exploratory testing, or an accessibility scan. When the task finishes, it offers to raise those findings.
Either way, you get the same review card.
Review and file the issue
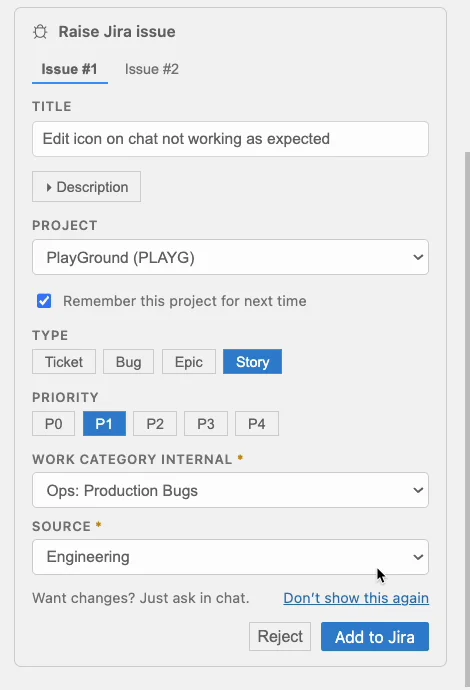
Test Companion shows a Raise Jira issue card with a drafted issue on each tab, such as Issue #1 and Issue #2.

Open a tab and check the Title. Edit the drafted text in place.
Click Description to expand the drafted description, then edit it.
Select the Project to file into. Keep Remember this project for next time selected to reuse it.
Select the issue Type, such as Ticket, Bug, Epic, or Story.
Set the Priority, from P0 to P4.
Set a value for every field your Jira project marks as required. These fields show an asterisk.
Click Add to Jira to file the issue, or click Reject to discard the draft.
Open the next tab and repeat. A check mark on a tab means that issue is filed.
To change a draft without editing the card, ask for the change in the chat.
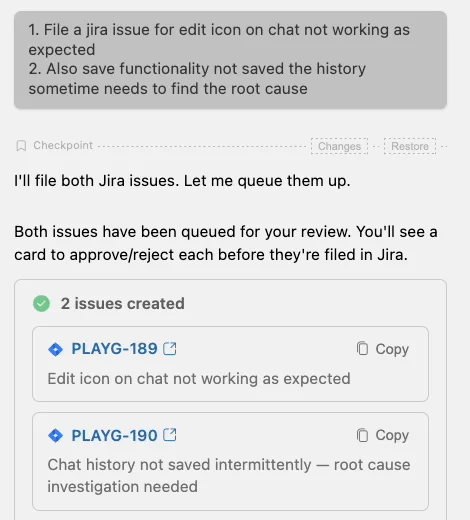
After the last tab, Test Companion lists every issue it created. Each entry shows the issue key, a link that opens the issue in Jira, and a Copy button.

Fields the project requires
Some projects mark extra fields as mandatory, including custom fields such as Severity, Components, or Sprint. Test Companion fills in the values it already has and asks you for the rest. Where a field has fixed choices, you select from the allowed values instead of typing.
Test Companion checks these fields before it files the issue. That way you do not hit a missing-field error after you submit. If your account lacks permission to create issues in that project, Test Companion tells you on the card.
Details in the filed issue
Test Companion fills the standard Jira fields and puts the rest of the context in the description:
| Content | Jira field |
|---|---|
| Short title for the finding | Summary |
| What was tested, the expected and actual behavior, the steps to reproduce, and the environment, such as browser, OS, or device | Description |
| BrowserStack session link, which holds the screenshots, video, and logs, with the main log excerpts | Description |
| Priority you set on the card | Priority |
| Issue type Test Companion suggests, such as Bug | Issue Type |
| Values you set for the fields your project requires | Severity, Components, Sprint, or another required field |
Turn off the offer to raise issues
To stop the offer when a task finishes, click Don’t show this again on the card. To raise an issue after that, ask for one in the chat. Asking turns the offer back on.
Next steps
- Generate test cases: Learn how to generate test cases from requirements, documents, or URLs.
- Automate tests: Convert manual test cases into automation scripts.
We're sorry to hear that. Please share your feedback so we can do better
Contact our Support team for immediate help while we work on improving our docs.
We're continuously improving our docs. We'd love to know what you liked
We're sorry to hear that. Please share your feedback so we can do better
Contact our Support team for immediate help while we work on improving our docs.
We're continuously improving our docs. We'd love to know what you liked
Thank you for your valuable feedback!